
I remember the exact second it clicked, the needle gliding across a wrist and the tiny lightning bolt finally reading like an idea rather than a doodle. The artist adjusted scale by millimeters, stepped back, and suddenly the tiny Zeus symbol read clean from three feet away. That small tweak taught me to stop asking for "as small as possible" and start asking for scale that actually holds up.
I picked these small Zeus ideas for people who want mythic energy without a whole-sleeve commitment, for wallets that prefer one session over many, and for first-timers testing visibility rules at work. These are mostly low- to medium-pain, coverable options that work on small canvases like wrists, behind the ear, ankles, and fingers. I learned across five shops I have visited that placement and scale make the design read like art, not regret.
1. Micro Lightning Bolt
A single angled lightning bolt is the quickest way to get Zeus energy without a portrait. Visually it works because the negative space around the bolt gives the eye a break, which is why I scale this to about 2.5 to 3.5 centimeters across the forearm. It reads modern and slightly aggressive, good for someone wanting a work-visible piece. Skill level is beginner for both artist and client, which keeps session time under one hour and budget modest. I use a fine-line stencil for placement and an aftercare balm after the session, like a fragrance-free tattoo balm to keep the color crisp.
Mistake to Avoid: Asking for "tiny" without specifying millimeters, which often results in a blobby dot instead of a crisp bolt.
Style/Technique: Minimal Linework
Pain Level: 3/10
Session Time: 20 to 45 minutes
Best For: Forearm, wrist, or ankle, anyone wanting visible small work
2. Tiny Profile Bust

A small classical bust silhouette gives mythic reference without full realism. What makes it work is the high-contrast outline, so keep the face detail to a few well-placed dots and a single hairline. The result feels antique and thoughtful, like a tiny charm. This suits someone who wants coverability under collars or a necklace. Budgetwise it is a medium session because of fine detail. I recommend a thin stencil transfer and a tiny needle group, and I often link clients to a gentle fragrance-free soap for healing.
Mistake to Avoid: Requesting full facial features at micro scale, which blurs into an unrecognizable smudge.
Style/Technique: Micro Classic Silhouette
Pain Level: 4/10
Session Time: 30 to 60 minutes
Best For: Clavicle, upper chest, or behind the ear, people wanting subtle mythology
3. Wrist Minimal Icon
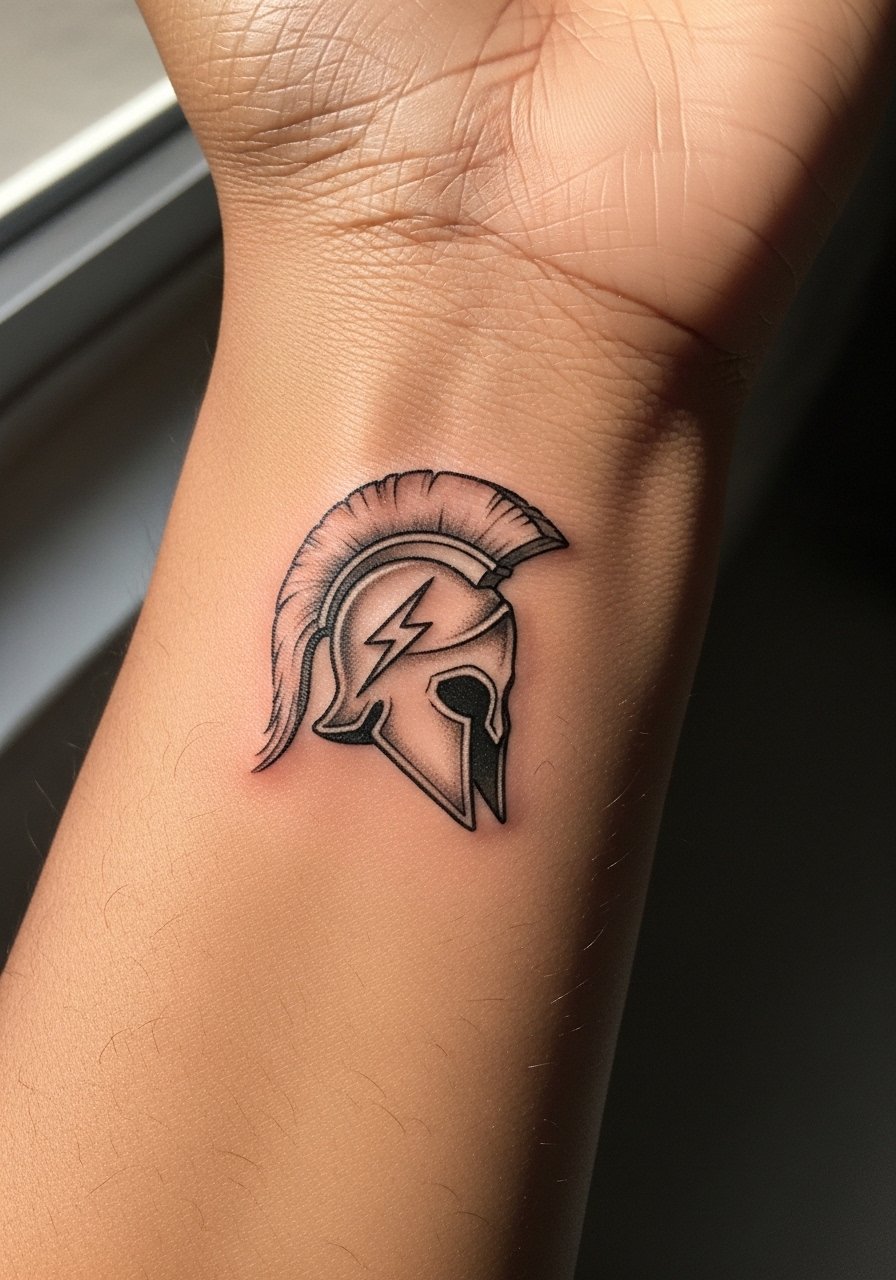
A tiny helmet or laurel icon reads as intentionally classical in a sporty, wearable way. It works because the helmet silhouette balances a finger-width gap when tattooed on the wrist. The feeling is discreetly proud and the style pairs well with watches or bracelets. I tell clients to expect quick sessions and budget-friendly pricing. For home reference, a small stencil kit helps try placement before inking and I often recommend a fine-line stencil paper pack if they want to test by wearing a temporary transfer.
Mistake to Avoid: Placing the icon too close to the wrist crease, which compresses the design when you move.
Style/Technique: Minimal Iconography
Pain Level: 3/10
Session Time: 15 to 30 minutes
Best For: Inner wrist, work-visible but easily covered with a watch or sleeve
4. Single-Line Face
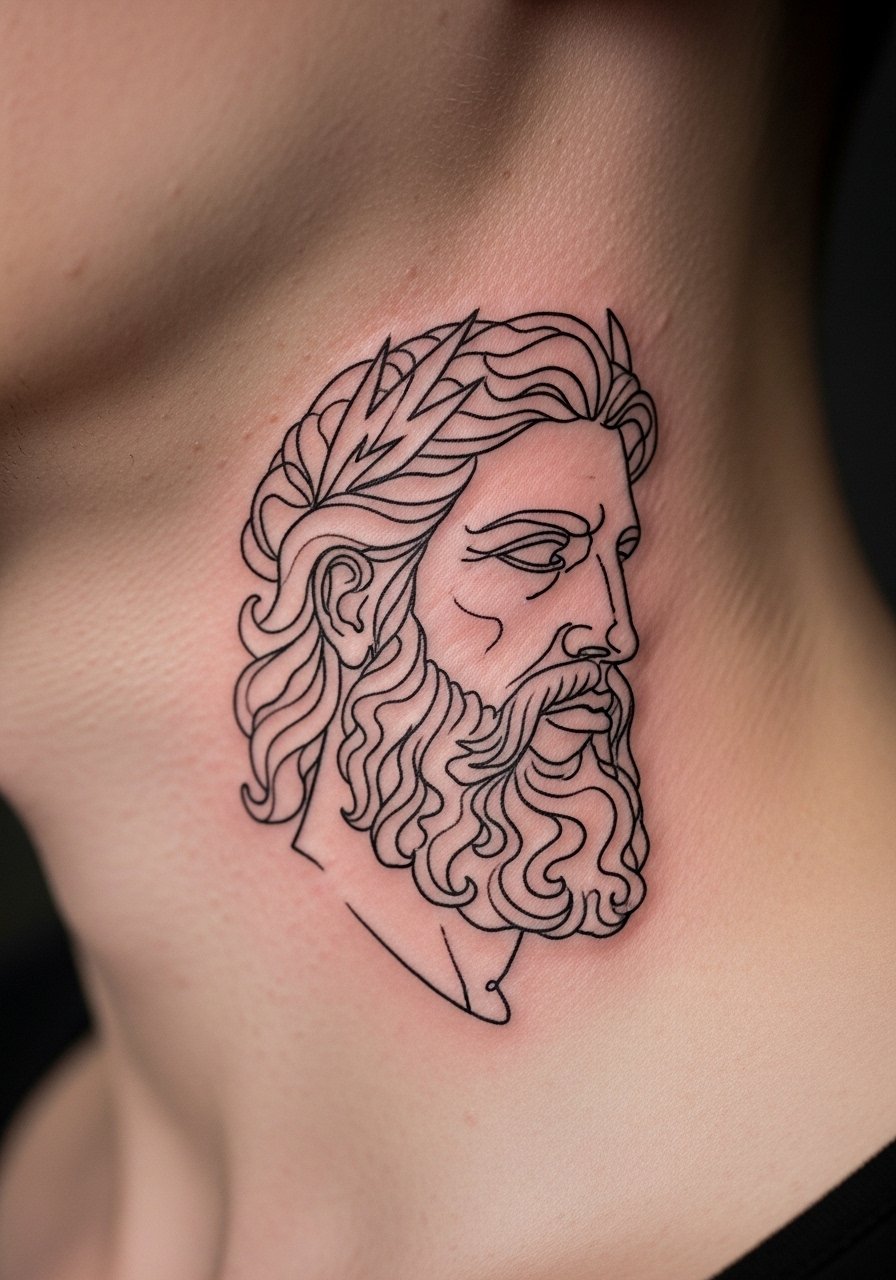
This is a one-stroke single-line face, abstracted but unmistakably Grecian with a curled beard line. It works because you let the brain fill in the gaps. The result feels modern and a little cheeky, good for someone who wants art-forward minimalism. Placement on the neck or behind the ear creates movement as you turn. For technique, request a single continuous stroke and an artist comfortable with freehand. I link a portable healing ointment I often see clients use, like a small tube of tattoo aftercare balm.
Mistake to Avoid: Asking for two separate single-line elements that were meant to connect, which breaks the intended flow.
Style/Technique: Continuous Line
Pain Level: 5/10
Session Time: 20 to 40 minutes
Best For: Behind the ear, neck, or temple, people who like contemporary minimalism
5. Mini Grecian Relief
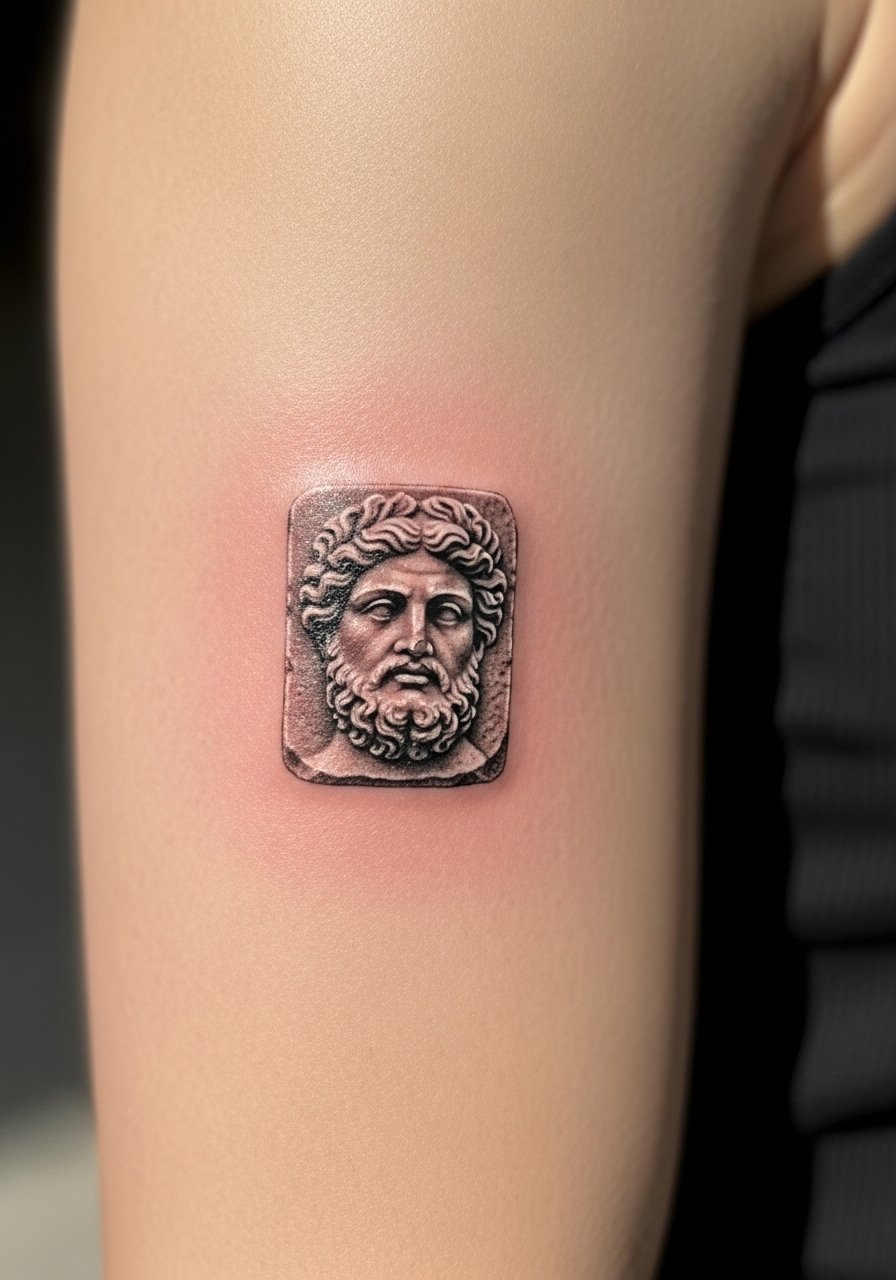
Think of a micro relief carved into skin, with soft dot shading and short hatch marks for depth. What makes it work visually is keeping the contrast low and the highlights tiny, which ages better than heavy black fills. The feeling is antique and calm. This is a slightly more advanced piece, so budget for an artist experienced in micro shading. I recommend a low-odor disinfectant and a mild moisturizer like a tattoo-safe moisturizer during the healing window.
Mistake to Avoid: Overloading with dark shading to force depth, which tends to spread on small pieces.
Style/Technique: Micro Shading
Pain Level: 4/10
Session Time: 45 minutes to 1.5 hours
Best For: Upper arm, inner biceps, people wanting small classical texture
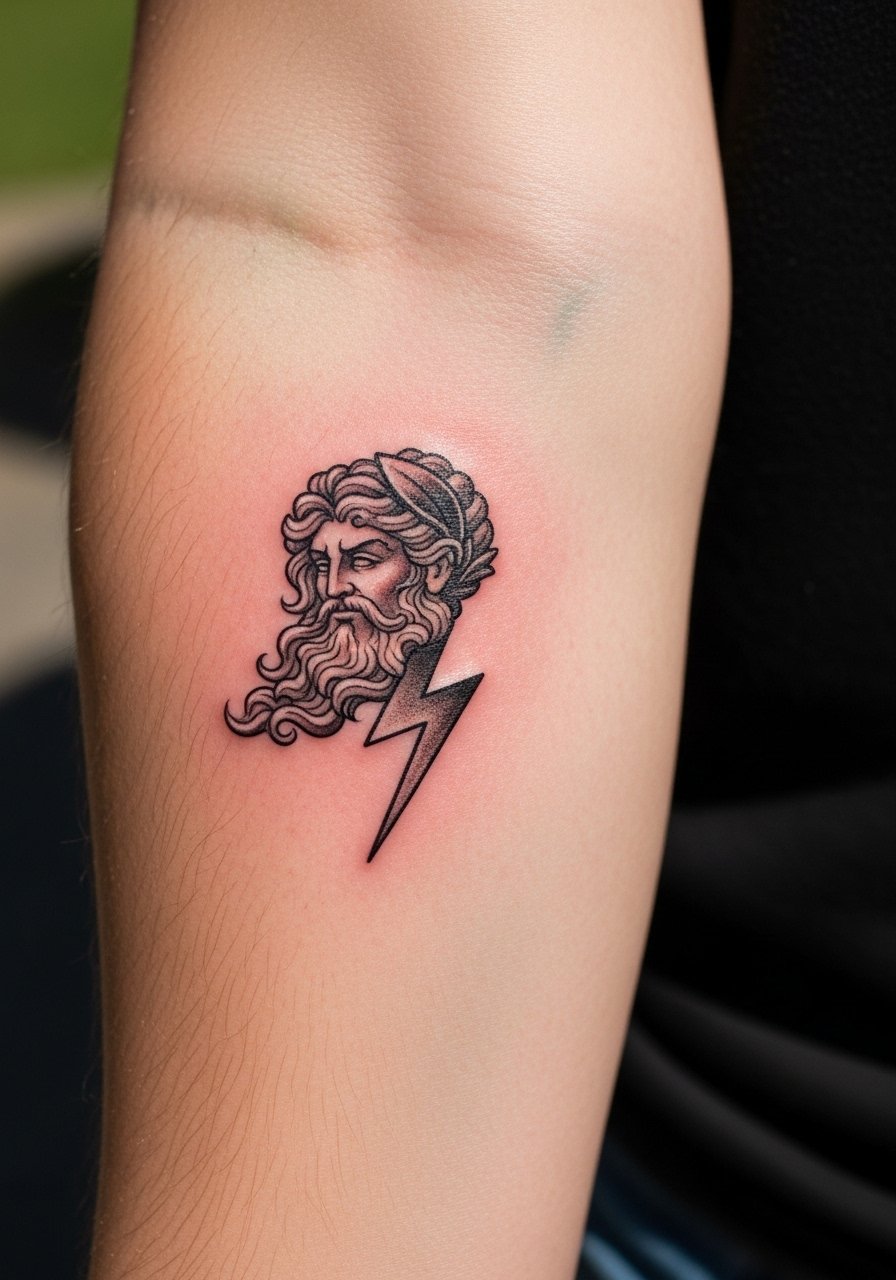
6. Lightning Bolt with Olive Branch
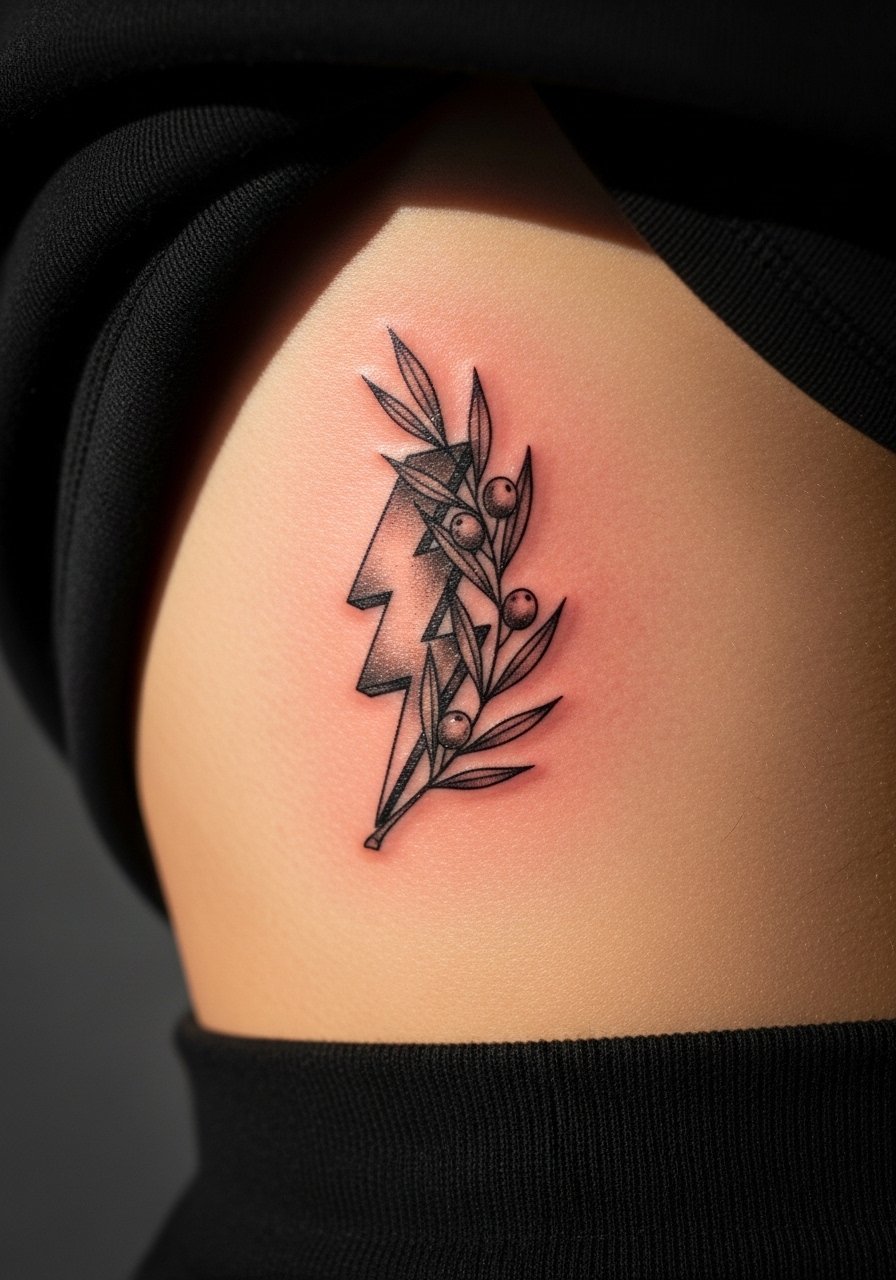
Pairing a tiny olive branch with a bolt softens the motif and adds meaning, signaling peace and power at once. The trick is to keep the branch thinner than the bolt so it does not compete. The result is balanced and wearable on the ribs or upper thigh. This one benefits from a two-pass session for crisp linework and I often recommend an extra brief touch-up appointment. For at-home care, a mild saline spray and a simple unscented healing spray help manage swelling.
Mistake to Avoid: Making the branch as bold as the bolt, which muddles the hierarchy.
Style/Technique: Symbol Pairing
Pain Level: 5/10
Session Time: 30 to 60 minutes
Best For: Ribs, thigh, or upper back, anyone wanting a symbolic combo
7. Tiny Helmet Emblem
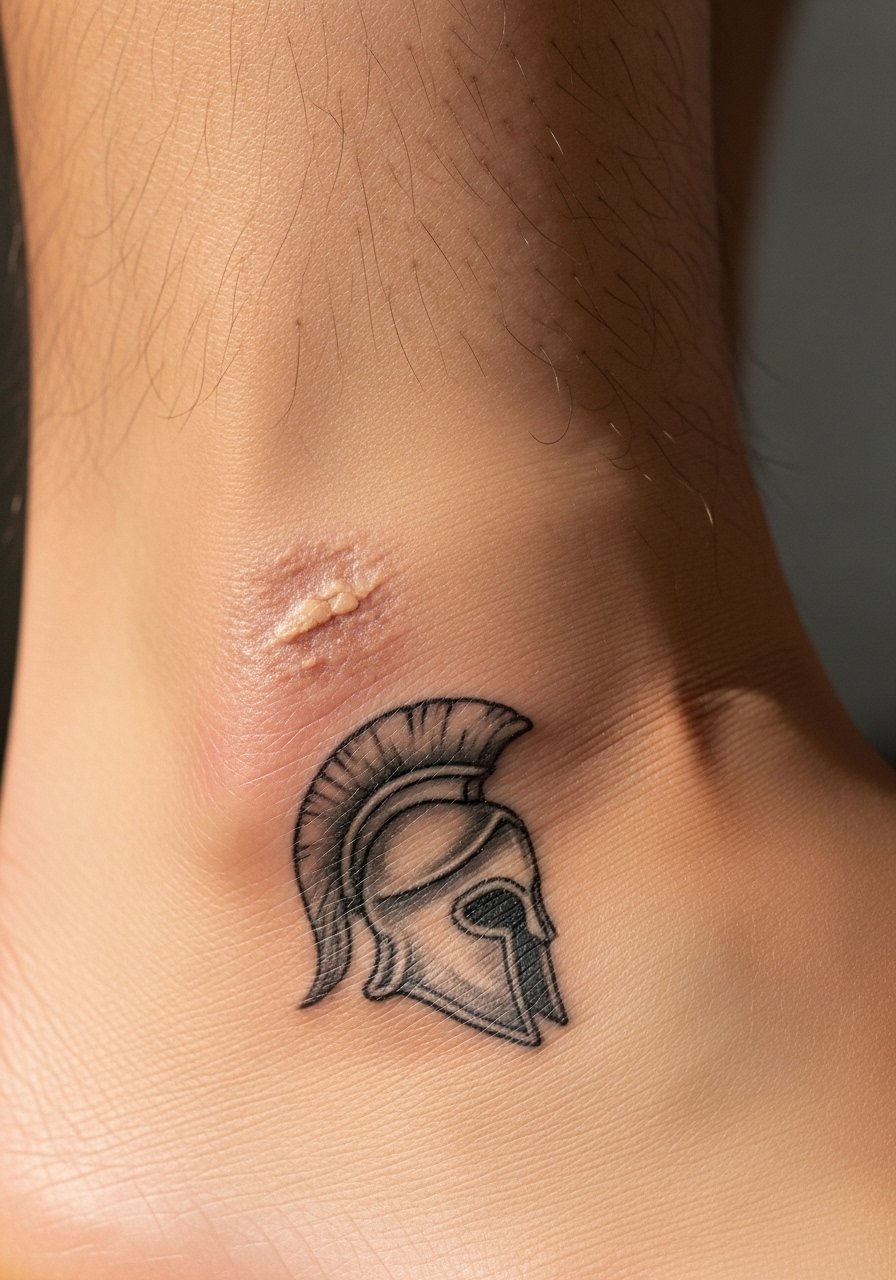
A small helmet emblem reads like a secret crest when placed on the ankle or foot. It works because of its compact silhouette, which looks deliberate even at three centimeters. The feeling leans a little warrior and a little refined. This is beginner-friendly for the client but requires clean linework. If you have sensitive skin in that area, budget a longer healing window. I commonly suggest a breathable bandage and a trusted non-stick wound dressing for the first couple of days.
Mistake to Avoid: Choosing the foot if you plan heavy hiking right after, which can ruin the healing.
Style/Technique: Tiny Emblem
Pain Level: 4/10
Session Time: 20 to 40 minutes
Best For: Ankle, foot, or behind the calf, people who want a low-profile emblem
If any of these have you ready to actually try one, here are the tools and products I keep reaching for.
Tattoo Prep And Aftercare Kit For Small Zeus Pieces
Stenciling & Transfer:
- fine-line-stencil-paper (~$8-15), for testing placement at home.
- artist-grade-stencil-thermal-paper (~$10-20), for clearer studio transfers.
Aftercare Basics:
- fragrance-free-tattoo-balm (~$6-12), gentle daily moisturizer.
- unscented-healing-spray (~$8-16), to reduce crusting.
- non-stick-wound-dressing (~$6-14), short-term protection.
Tools I Recommend:
- tattoo-aftercare-soap (~$5-10), gentle cleansing during first week.
- portable-healing-ointment-tube (~$5-10), handy for travel.
Tiny Zeus Tattoo Care Habits
Keep clothing loose over fresh ink. Tight fabrics rub the scab and cause spotty healing, especially on ankles and ribs. A loose cotton tee or slip-on shoes for a few days prevents friction. I use a soft cotton tee when I want minimal irritation.
Start topical care with a thin layer of balm. Thick layers trap moisture and invite bacteria. A small tube of fragrance-free tattoo balm does the job and it is easier to apply precisely.
Test placement with a temporary stencil. Wear it for a day to see how it sits during real life. A pack of transfer stencil paper costs little and saves regrets.
If you work somewhere with strict visibility rules, plan the placement accordingly. Tiny pieces behind the ear or on the ribs are easy to keep private. Consider a small adhesive cover patch for the first week if needed.
Mistake to Avoid: Picking at scabs to speed up peeling, which causes ink loss and uneven lines.
