
My Pinterest board had neat little frames at perfectly even intervals. My apartment gave me dead space, a crooked nail, and one frame that refused to stay level. After the ninth rehang I stopped copying photos and started using rules that work in actual rooms, not staged shoots.
These ideas are not about buying a whole matching set. They are about small moves that change how a wall reads, whether you rent or own, and mostly under $150. I tested several in three rentals to make sure the methods survive movers, patchy plaster, and impatient roommates. Expect a mix of renter-friendly, low-skill installs and a few slightly more involved upgrades for someone with basic tools.
1. Mixed-Frame Gallery With a Focal Piece

Start with one dominant piece roughly two to three times larger than the rest, hang its center at 57 inches, then arrange smaller frames around it with 2 to 3 inches between edges. That ratio keeps the eye anchored and makes the cluster read intentional instead of cluttered. Use a lightweight picture frame hanging kit for drywall and a set of matte black frames for the smaller pieces. The result feels curated and modern, and it works in narrow hallways as well as living rooms.
Mistake to Avoid: Hanging frames at random heights without a clear center makes the whole group look accidental.
2. Woven Basket Cluster for Texture
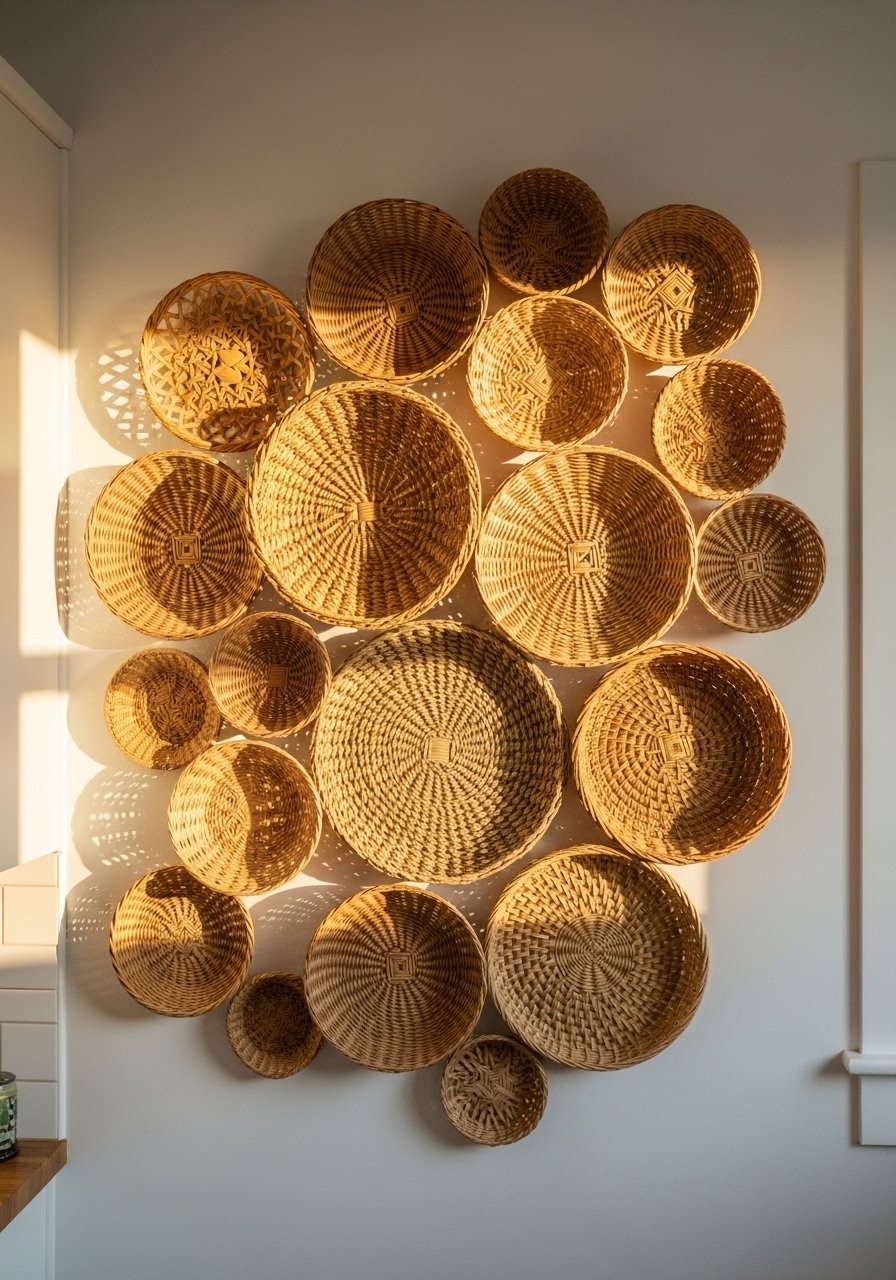
Baskets add warmth, scale, and a bit of craft to a plain wall. Mix round and oval shapes and stagger them so their centers form a loose diagonal line. Use small picture-hanger nails and masking tape to mock up the arrangement first. I like a layered look with one or two framed photos mixed in. Pair the cluster with a simple seagrass wall basket and a natural rattan tray. This is low cost and renter friendly.
Mistake to Avoid: Nailing each basket without testing the layout first, which leads to extra holes and uneven spacing.
3. Oversize Textile as Art

A single large textile reads like a gallery piece and doubles as sound dampening. Use a wooden rod or a low-profile clamp rail so you do not need many anchors. The visual payoff is big for little money. I used a 60 by 80 inch cotton piece on a rental wall with anchors rated for 25 pounds and it held fine. For a cleaner finish try a wood curtain rod and a neutral handwoven wall hanging. It gives a room a soft, lived-in feeling.
Mistake to Avoid: Using ordinary thumbtacks for heavy textiles, which will sag and leave visible marks.
4. Floating Shelf Vignette With Negative Space

A single floating shelf changes the vertical rhythm of a wall. Keep the shelf no more than 8 to 10 inches deep so it does not protrude into traffic zones. Style in odd-number groupings and leave at least one third of the shelf empty for breathing room. I use a floating shelf bracket set and a solid wood shelf for a cleaner look. This is a quick install that reads custom in any living room or entryway.
Mistake to Avoid: Filling the entire shelf with objects, which makes it look crowded and kitchy.
5. Peel-and-Stick Wood Slat Accent Wall

Peel-and-stick slats give texture without demolition. Start with a panel test area of about 2 feet by 3 feet to confirm color match and adhesive. Linear slats read taller when installed vertically, which is useful in low-ceiling rooms. Use a cutting tool and a peel-and-stick wood slat kit. It is a mid-budget option that looks high end if you butt seams tightly and stagger end joints by about 6 inches for stability.
Mistake to Avoid: Not sealing the ends near windows, which leads to lifting from humidity changes.
6. Mirror Mix to Bounce Light

Mirrors expand a room visually and add light. Use one large mirror plus small accent mirrors placed so reflections capture a window or lamp. Hang the largest mirror with its center at 57 inches and leave 3 inches between surrounding pieces. Lightweight framed mirrors and a command mirror hanging kit make this renter friendly. Mirrors also help a narrow dining area feel wider without painting or construction.
Mistake to Avoid: Clustering mirrors so they only reflect the opposite wall, which makes the arrangement redundant.
7. Modular Pegboard Art System
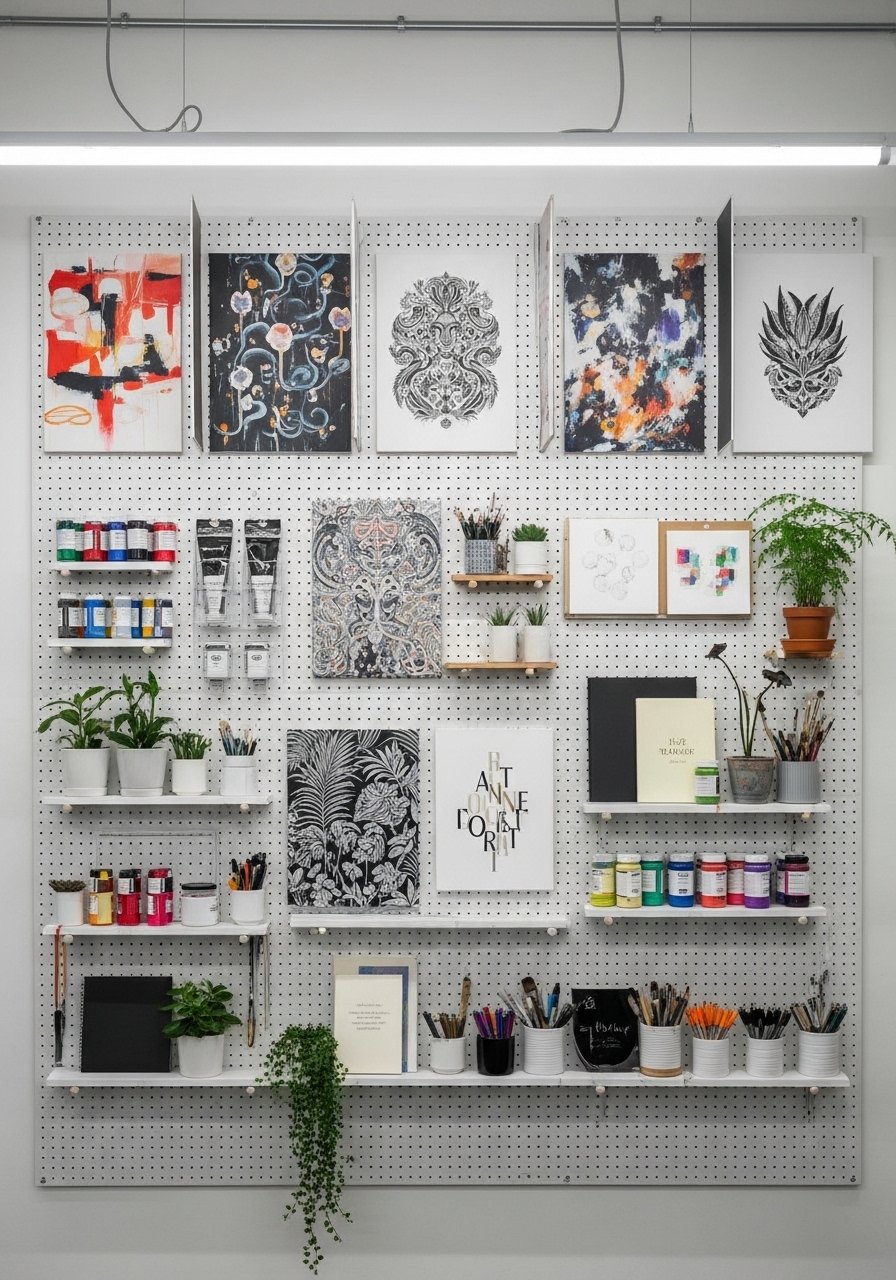
A painted pegboard lets you swap art frequently. Paint the board the wall color for a seamless look or pick a contrast at 20 percent saturation for definition. Use removable pegs and small rails to hold frames and small sculptures. I keep a few pegboard hooks and shelves on hand so rotating pieces takes under five minutes. This is great for makers, renters, or anyone who likes changing displays seasonally.
Mistake to Avoid: Mounting heavy framed pieces directly on thin pegboard without reinforcing the backing.
If any of these have you ready to shop, here are the specific tools and pieces I actually use.
Wall Styling Essentials
Hardware:
- picture frame hanging kit (~$12-20). Reliable anchors for drywall.
- floating-shelf-bracket-set (~$18-30). For clean shelf installs.
- command-mirror-hanging-kit (~$10-15). Damage-free mirror hanging.
Wall Art & Textiles:
- handwoven-wall-hanging (~$35-90). Big visual payoff.
- seagrass-wall-basket (~$12-30). Texture without expense.
- peel-and-stick-wood-slats (~$45-120). Instant accent surface.
Studio & Flex:
- pegboard-hooks-and-shelves (~$15-40). For a modular display.
- solid-wood-shelf (~$25-60). Cleaner finish than MDF.
8. Sound-Absorbing Fabric Panels as Art
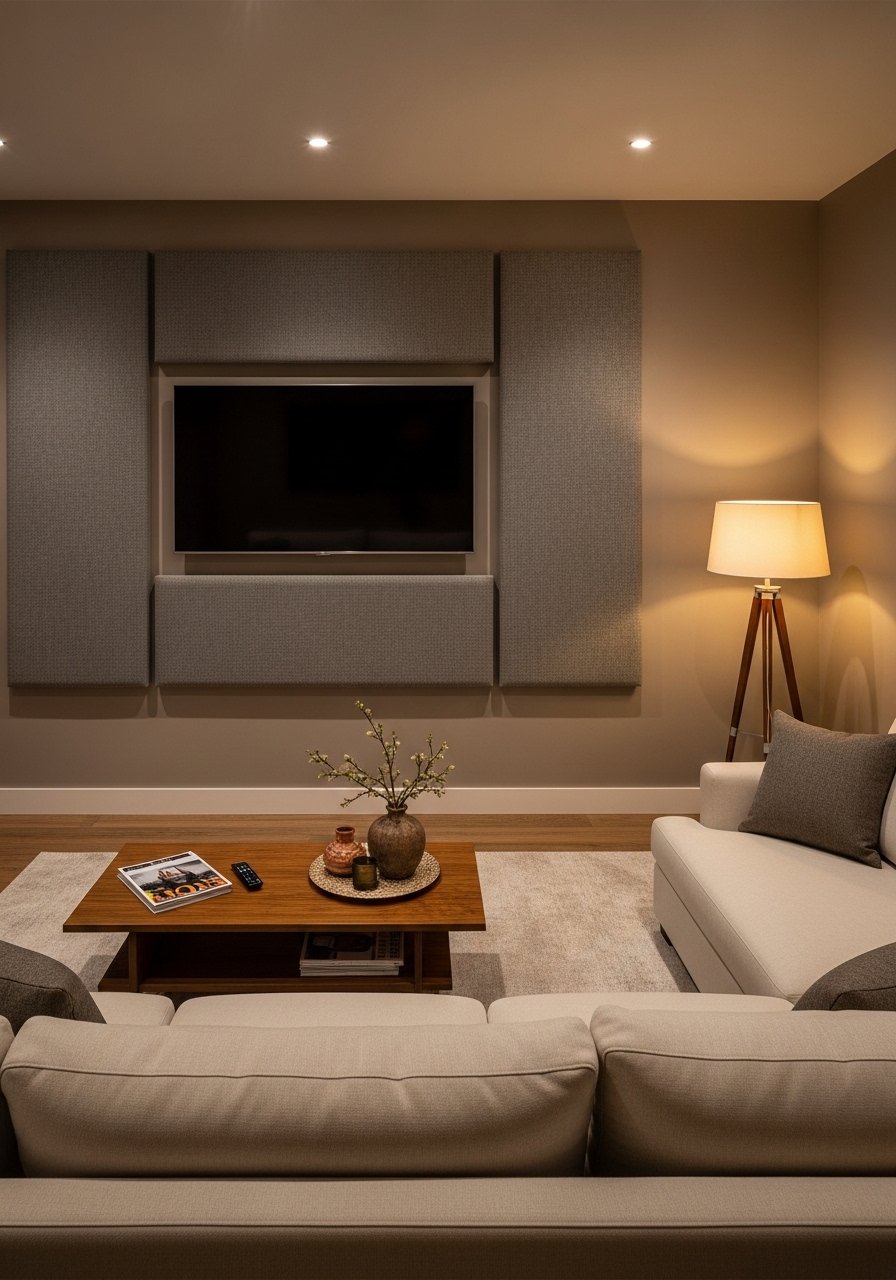
Acoustic panels can be both functional and beautiful. Choose panels wrapped in linen tones to warm a room and reduce echo. Mount them with french cleats to keep installation simple. The panels I used were 24 by 48 inches and cut the midrange echo noticeably in a medium living room. Try a set of acoustic fabric panels that come in neutral colors. They work especially well in high ceilings or rooms with a TV where sound clarity matters.
Mistake to Avoid: Pushing panels too high near the ceiling, which reduces their effectiveness and visibility.
9. Botanical Pressed Frames Group

Pressed botanicals give a collected feel and are cheap to DIY. Use archival tissue and glass with a thin mat to prevent a glare-heavy look. Arrange frames in a loose grid with 1.5 to 2 inches between each to maintain rhythm. I keep a small botanical press kit and a set of slim black frames for quick swaps. The result reads calm and editorial, and it scales from a bathroom to a full hallway.
Mistake to Avoid: Using cheap glass that traps moisture and ruins the pressed plants over time.
10. Magnetic Poster Rails for Renters

Magnetic rails clamp posters and prints without nails. Hang the top rail at eye level and leave about 2 inches between frames when grouping. Rails are discreet and make swapping art painless for renters or anyone who likes to change things often. I keep a couple of magnetic poster rails for rotating prints seasonally. It is a small spend that keeps walls interesting and damage free.
Mistake to Avoid: Using adhesive that peels paint when you remove a poster, instead of rails that clamp.
11. Leaning Gallery Ledge for Layered Styling

A leaning ledge lets you layer art without measuring a grid. Use a 6 to 8 inch deep ledge, place heavier frames at the back, and lighter objects in front. The casual overlap creates depth and can be swapped in minutes. I buy a gallery picture ledge and prop a few frames with removable rubber bumpers so glass does not rattle. This approach suits renters and families because it avoids a lot of wall holes.
Mistake to Avoid: Leaning very heavy frames without securing the ledge to studs, which risks tipping.
12. Wall-Mounted Planter Grid

A planted wall adds life and fragrance. Use individual planters with drainage trays and place them so the overall grid reads balanced. Spacing at 3 to 4 inches between pots keeps the installation airy. Try a set of wall planters with trays and a small succulent soil mix. This is perfect for sunny kitchens and narrow balconies where floor space is limited.
Mistake to Avoid: Hanging planters without drip trays directly over wood surfaces, which causes staining.
13. Vintage Finds Mosaic
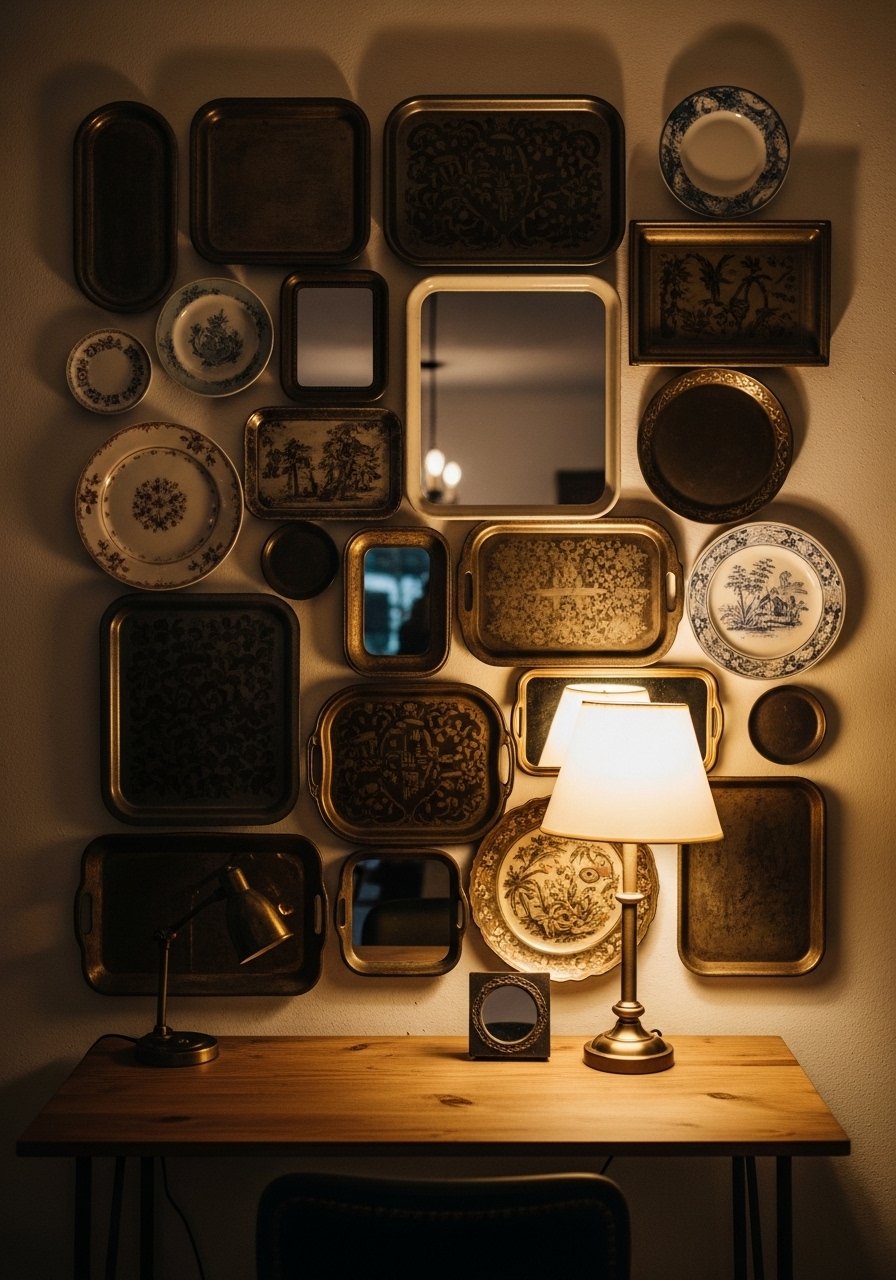
Mixing vintage pieces gives a wall character you cannot buy in a set. Aim for a dominant tone, such as brass or warm wood, and work pieces around that anchor. I shop flea markets and then photograph items against the floor to plan spacing before committing to nails. For finishing touches, a small set of plate hangers and brass picture hooks keep everything secure. This approach rewards time hunting and is great for a study or dining room wall.
Mistake to Avoid: Randomly mixing metals and finishes without an anchor color, which makes the display feel messy.
Hanging Habits That Stick
Thin nails and test anchors work better than heavy duty guesses. Use a mini stud finder to locate solid points before drilling. A small correction now avoids patch jobs later.
Grab painter's tape and outline frames on the wall first. Taping shapes at true size saves time and shows whether the composition feels balanced from the couch.
Most people hang art too high. Aim to set the center at 57 inches for mixed seating rooms, and lower it just 2 to 3 inches if the room has low ceilings.
Swap photos seasonally with a magnetic poster rail rather than rehanging nails, and the wall will feel fresh without new holes.
