
My first try at a spring mani was a row of tiny pastel triangles that, on my short nails, read like stickers from a kid's sticker book. The Pinterest version had long caramely tips and negative space that breathed. After a few ruined cuticles and one too-many chips, I learned which small moves actually lengthen and flatter short nails without more length or a salon appointment.
These picks are for people who keep their nails short by choice or necessity, want a fresh spring look on a weekday budget, and do not want complicated salon-only steps. Most ideas are beginner friendly and need one or two tools at most. Expect quick dry times for regular polish, LED cure times for gel notes where mentioned, and easy-at-home finishes that still read intentional and polished.
1. Pastel Sheer Squoval

Style/Vibe: Sheer spring pastels
Best For: Short nails / everyday wear
Skill: Beginner
A soft, translucent pastel wash makes short squoval nails appear tidier and slightly longer because the color blends into the tip instead of cutting it off. Work in thin coats, about three very light layers, waiting 8 to 12 seconds between coats so each layer levels instead of pooling at the cuticle. Use a rounded-edge file to keep the squoval shape; that small curve at the corner reduces snagging. I like topping with a fast-dry top coat for glossy spring shine and a long-wear gel top coat if you plan to garden or cook a lot. Pair a drugstore sheer polish with a lightweight base coat.
Sheer base coat and fast-dry top coat are my go-tos.
Mistake to Avoid: Slapping on one thick coat to save time, which causes bubbling and uneven opacity.
2. Micro French With Negative Space
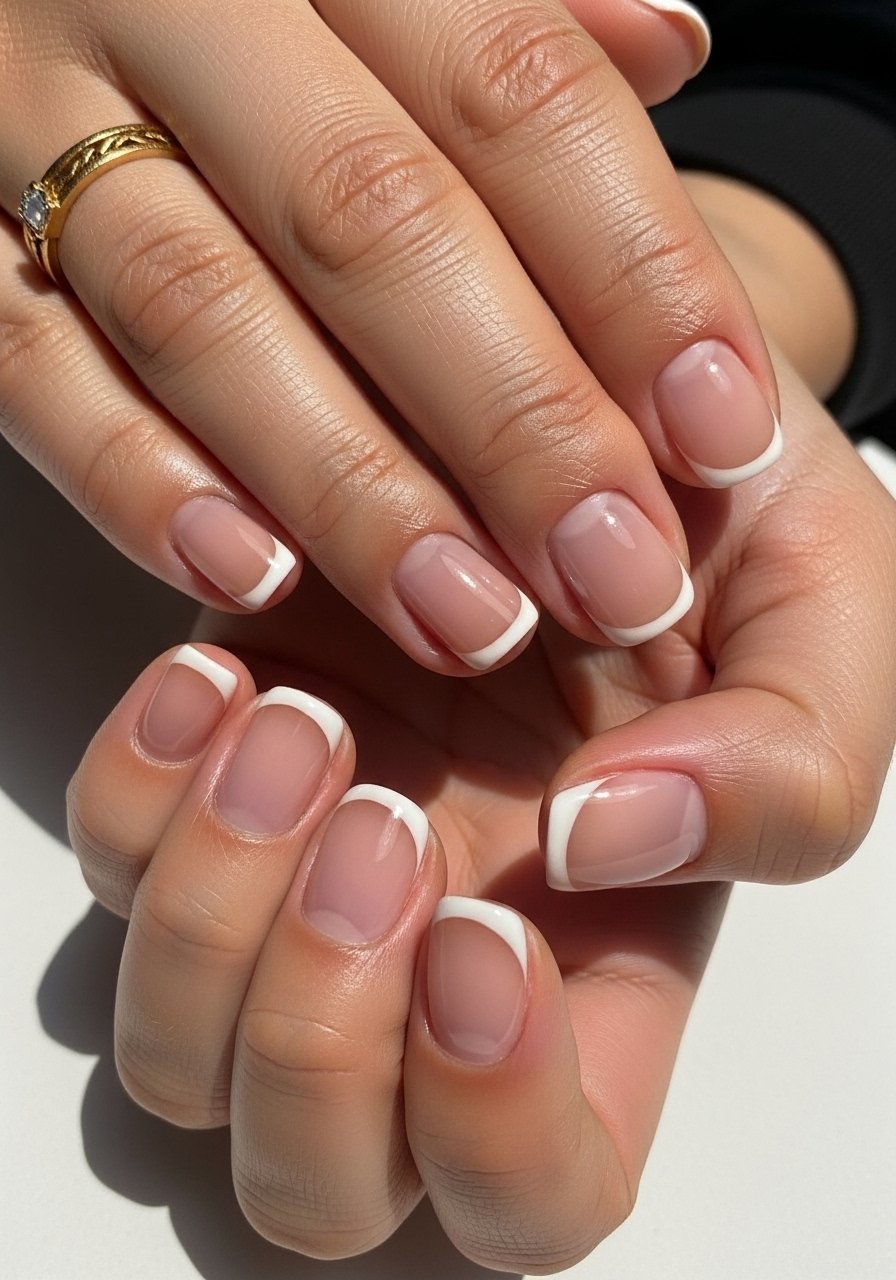
Style/Vibe: Modern mini French
Best For: Office and weekends / short natural nails
Skill: Intermediate
A micro French line, a 1 to 1.5 millimeter stroke at the tip, gives the impression of length without added nail. The trick is painting the tip first, then wiping the brush and using a hair-thin line brush to refine. Negative space near the cuticle opens the nail visually. This is a technique other articles skip because it looks delicate in photos but is forgiving in reality. Use a gel polish cured 30 seconds per thin coat under an LED lamp for longer wear, or a crisp white striping polish for an at-home option. I learned this from a tech who works at a salon downtown, she recommended holding the hand at a 45 degree angle while painting the tip.
White striping polish and a thin detail brush speed this up.
Mistake to Avoid: Painting thick tips that hide the negative space and make short nails look crowded.
3. Single-Accent Petal Stamp

Style/Vibe: Minimal floral accent
Best For: Short almond or rounded nails / spring events
Skill: Beginner
If full floral across every nail overwhelms short nails, pick one accent finger. A small petal stamp placed off-center near the cuticle looks deliberate and allows the other nails to feel clean. Use a stamping plate with 1.5 to 2.5 millimeter patterns meant for short nails. A one-pass stamping tool prevents the double-image smudge that beginners often make. I recommend a neutral base and a slightly deeper petal color so the design reads on camera and in person. Finish with a thin glossy top coat to keep the stamp crisp.
Mini nail stamper kit and neutral cream polish are good starter picks.
Mistake to Avoid: Overfilling the stamp with polish so the design blurs when transferred.
4. Matte Pastel With Glitter Tip

Style/Vibe: Soft matte with sparkle
Best For: Casual weekends / short square nails
Skill: Intermediate
Matte finishes reduce shine and make tiny nail canvases look chic. Add a 2 millimeter glitter edge to just the tip for a spring nod without being flashy. Apply a matte top coat first, then press a thin strip of glitter at the tip using a small brush dampened with clear polish. Seal with a gel top coat on the glitter only to keep the sparkle in place while preserving the matte elsewhere. The tactile contrast reads modern and keeps the eye moving up and out, which helps short nails feel longer.
A matte top coat and fine nail glitter make this easy.
Mistake to Avoid: Applying glitter over the entire nail, which flattens the matte effect.
5. Tiny Polka Dot Play

Style/Vibe: Playful dotted accents
Best For: Short round nails / casual and fun looks
Skill: Beginner
Small dots can make a nail feel deliberate and artsy. Use a toothpick or a 0.5 millimeter dotting tool to place 3 to 5 dots in an irregular cluster at the tip or offset toward one side. Contrast a soft base with a slightly darker dot color to keep the motif visible. This approach solves the frustration of busy designs that look cramped on short nails because it leaves surface area breathing. Two thin top coats keep the dots flush so they do not catch on fabric.
A dotting tool set and long-wear top coat are handy.
Mistake to Avoid: Placing dots in a rigid grid, which reads amateur and shrinks the nail visually.
6. Satin Pearl Nude
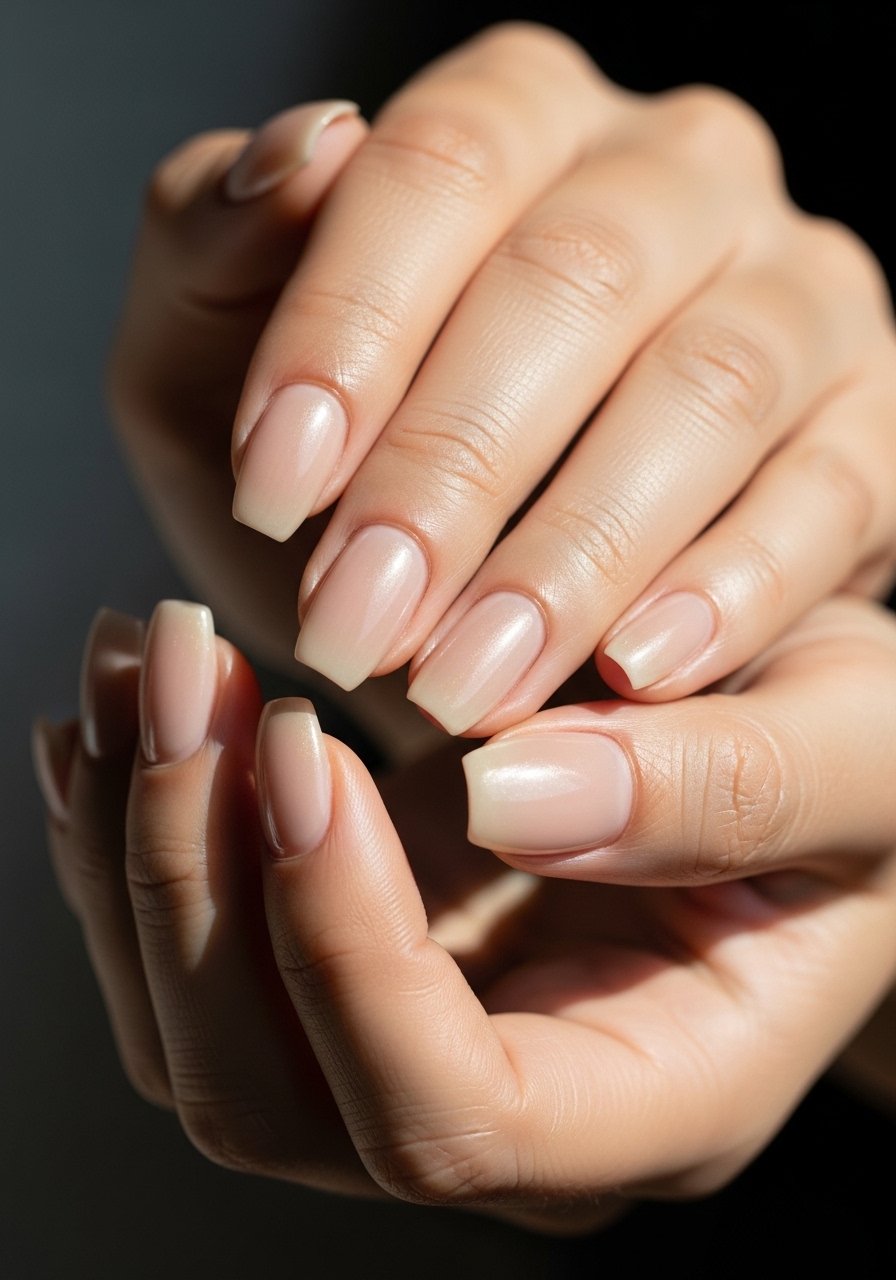
Style/Vibe: Satin sheen nude
Best For: Work and special occasions / short coffin nails
Skill: Beginner
A satin or pearl finish gives depth without high shine. On short nails, a slightly warmer nude that matches the skin tone elongates the appearance. Apply two thin coats of pearly polish, then buff the top slightly with a soft buffer to reduce gloss and create that satin look. This finish hides tiny ridges that regular gloss highlights, which is great if you get quick chips or surface wear. If you prefer gel, cure for 30 to 45 seconds per thin layer.
Peel-off base for quick changes is useful when trying new finishes.
Mistake to Avoid: Choosing a harshly pale nude that creates a stark tip line, which shortens visually.
7. Creamy Ombre Fade

Style/Vibe: Soft creamy gradient
Best For: Short rounded nails / bridesmaid or spring brunch
Skill: Intermediate
A soft ombre that fades from a warm cream at the base to a sheer tip visually extends the nail. Use a makeup sponge to lightly dab two to three ultra-thin layers, working horizontally so the color moves outward. Keep each dab light; the depth signal here is three passes maximum per nail, pressing lightly to avoid texture. Finish with a thin glossy top coat to melt the layers together. This technique hides chips better than solid color because the gradient masks regrowth.
A makeup sponge for ombre and creamy warm polish help create the fade.
Mistake to Avoid: Using a dense sponge and heavy pressure, which leaves pockmarks in the finish.
Before the rest of the list, these are the products doing most of the work when you try any of these looks.
Spring Short Nail Essentials To Shop
Tools:
- Nail buffer block (~$6-12), for smoothing ridges before polish.
- Fine detail brush set (~$7-15), for micro French lines and cuticle work.
Polish & Finish:
- Fast-dry top coat (~$8-14), for quick weekday manis.
- Matte top coat (~$8-13), to switch finishes without repainting.
- Peel-off base coat (~$10-18), if you like frequent color changes.
Extras:
- Mini nail stamper kit (~$9-20) for tiny accents.
Spring Short Nail Habits I Use
Thin coats beat one thick coat every time. Three sheer layers of a sheer base coat look smoother and dry faster than attempting full opacity in one swipe.
Grab a thin detail brush and practice tiny strokes. Short nails reward tidy, confident lines more than fussy designs.
Cuticle oil used nightly keeps short nails from lifting. A jojoba cuticle oil costs under $12 and helps polish stay put for days.
Most people layer polish while doing dishes, which is a fast path to smudges. Let each thin coat set 10 to 15 minutes, or use a quick-dry top coat if you are in a rush.
If you get chips at the tips often, keep a small bottle of your base shade on hand for touch ups. Neutral cream polish works for most spring looks.
