
I kept picking the prettiest flash sheets and pointing at the one that looked best on the wall, then walking out with a tattoo that vanished into the collarbone crease when I moved. After the third redo I learned to think in curves and negative space, not single images. That change made the tattoos read from across a room and survive years of sun and gym time.
These picks are for people who want visible chest work that still looks deliberate in a T-shirt, not for someone chasing tiny, hidden symbols. Most designs here are beginner-friendly for clients and mid-level for artists, budget ranges from quick single-session pieces to multi-session chest panels. I pulled these from my notes across five shops I have visited, and I wrote notes on healing, coverability, and sizing so you can tell what fits your life.
1. Floral Wrap Flowing Over Clavicle

This classic works because the vine follows muscle movement, so the image reads when you lift your arm. It feels soft and deliberate, good for someone who wants something romantic but still visible at work. For scale plan a 3 to 4 inch sweep toward the clavicle, and ask for slightly lighter outer petals so the piece settles without a heavy edge. I used a fragrance-free aftercare ointment after my session and it kept scabbing minimal.
Style/Technique: Realism floral
Pain Level: 3/10
Session Time: 1 to 2 hours
Best For: visible chest work, first-time chest tattoos
Mistake to Avoid: Choosing a dense, dark outline that makes the flower read as a blob once it sits in the collarbone shadow.
2. Fine-Line Constellation Across Cap And Sternum
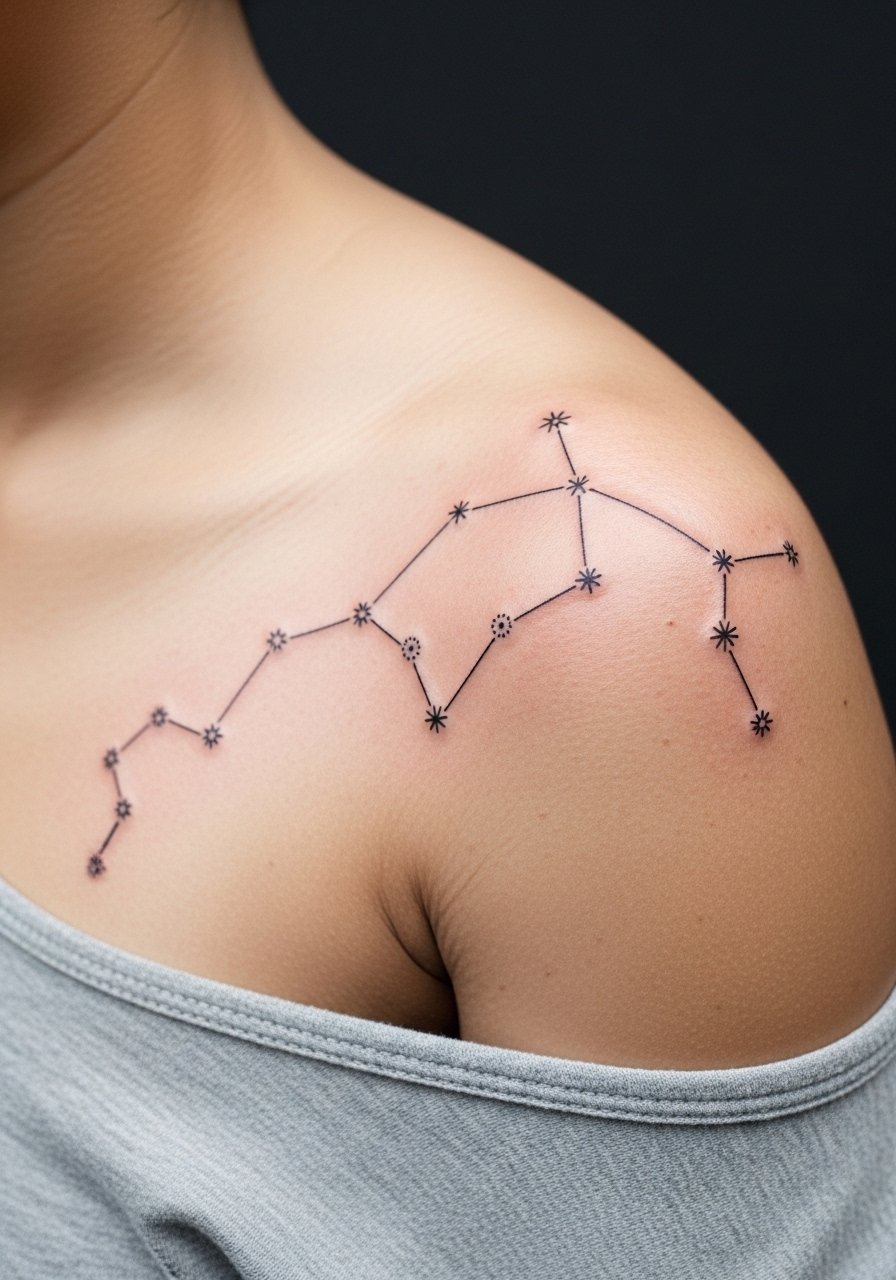
Start with spaced dots and micro-lines that curve with the clavicle to keep the composition legible at different angles. The feeling is discreet and personal, ideal for someone who wants something delicate but visible. Ask for single-needle line weights and a light touch at joins, because 0.3 to 0.5 line consistency matters for longevity. I paired it with a light sunscreen stick for chest sun days, like this broad-spectrum stick.
Style/Technique: Fine-line dotwork
Pain Level: 2/10
Session Time: 30 minutes to 1 hour
Best For: petite designs, discrete visibility
Mistake to Avoid: Asking for denser stars that blur together after a year of sun exposure.
3. Curvature-Aware Geometric Band
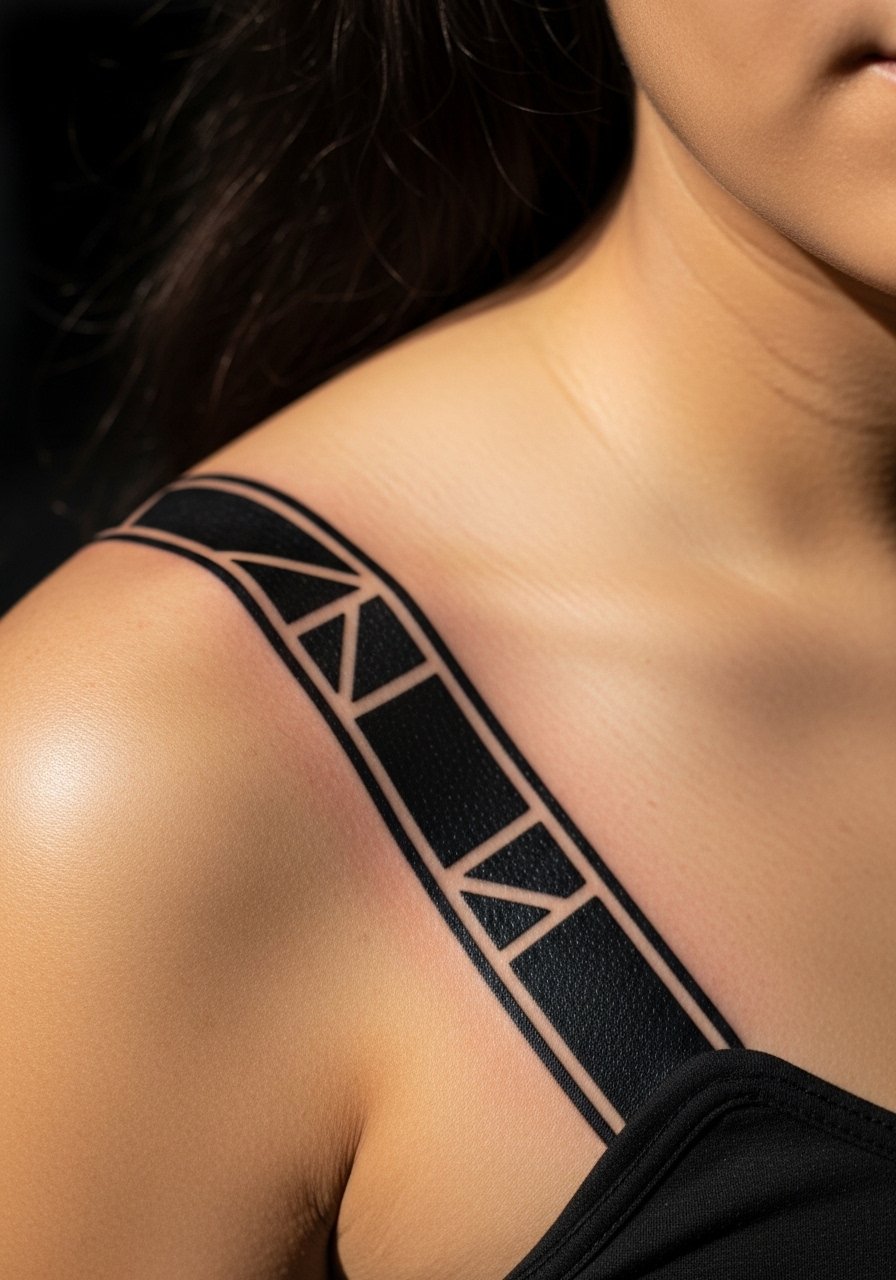
This is one of the spots competitors miss, a band designed to curve with the muscle so the geometry never looks warped. The result is architectural and clean, good for someone who wants modern lines that still read when you move. Specify where the lines meet the clavicle at a 45-degree sweep so negative space breathes. For reference bring a printed photo scaled to your body and a stencil transfer paper for the artist to tweak placement.
Style/Technique: Geometric flow
Pain Level: 4/10
Session Time: 1 to 1.5 hours
Best For: people who want clean, modern chest accents
Mistake to Avoid: Picking a flat, straight band that fights the shoulder curve and looks off when you raise your arm.
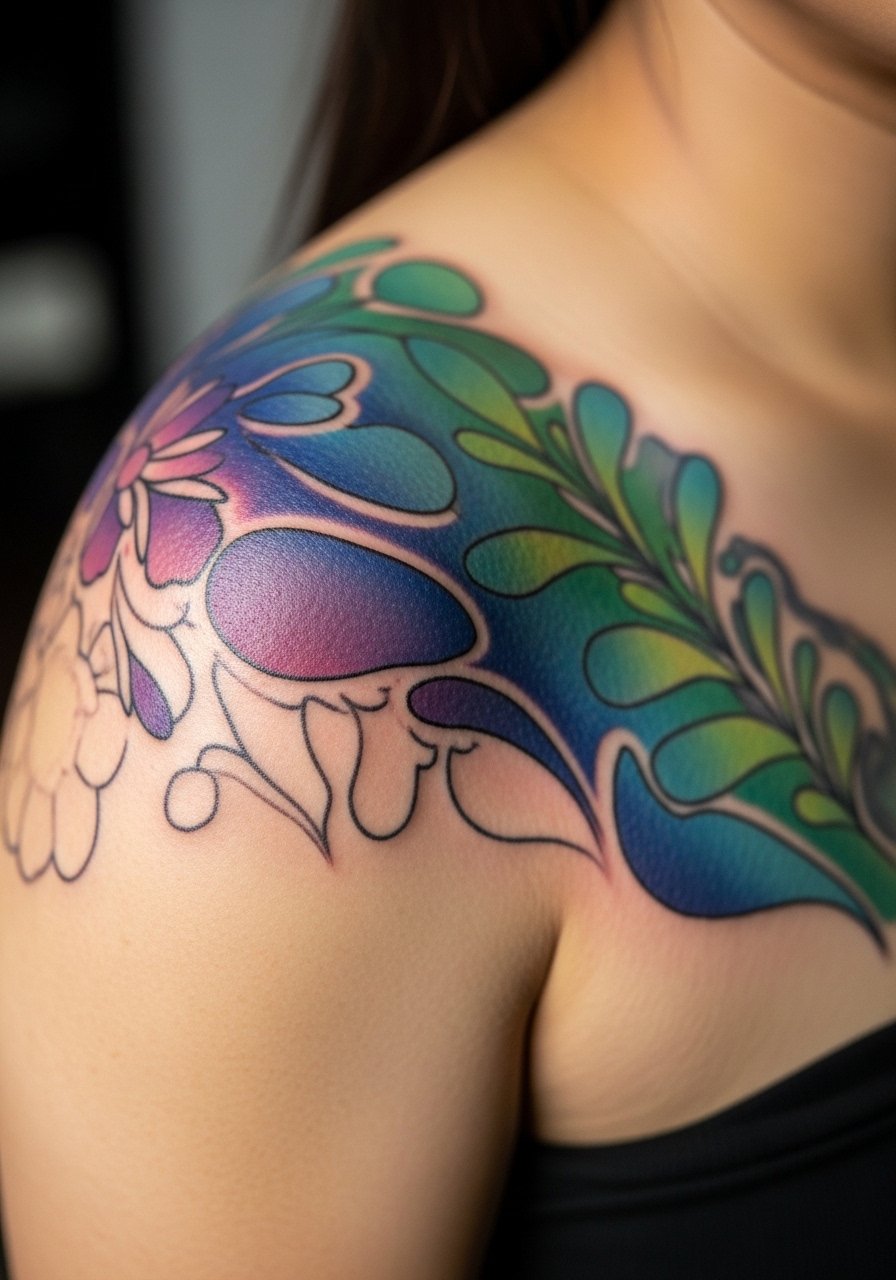
4. Watercolor Splash With Negative Space

Watercolor feels painterly and alive on the chest because it uses skin as part of the palette, but it needs planned negative space to avoid bleeding into a blob. The vibe is artistic and warm, best for someone who likes color but not heavy outlines. Ask for layered washes rather than one saturated pass, and consider a short touch-up window at three months. I kept a small jar of fragrance-free healing balm for the first week.
Style/Technique: Watercolor wash
Pain Level: 3/10
Session Time: 1 to 2 hours
Best For: color lovers, less formal workplaces
Mistake to Avoid: Requesting full saturation in one pass, which tends to spread and lose the watercolor look.
5. Ornamental Filigree That Frames The Sternum

Think of this as jewelry that lives on your body. Filigree uses negative space to frame the chest, so it reads like an intentional piece rather than random ink. The feeling is elegant and grounded, ideal for someone wanting chest work that pairs with necklaces. Ask the artist to keep central line weight lighter and outer lines slightly thicker for a soft halo. If you want a subtle sheen during healing try a small tube of tattoo-safe balm.
Style/Technique: Ornamental linework
Pain Level: 4/10
Session Time: 1.5 to 3 hours
Best For: people who want a jewelry-like chest piece
Mistake to Avoid: Crowding the center with tiny details that disappear once the skin swells.
6. Neo-Traditional Animal Half-Panel

A bold animal head sitting on the cap reads like a shoulder guard and then softens as it moves onto the chest. The result is playful but deliberate, good for someone who wants personality and color. Neo-traditional uses solid color blocks and a clear silhouette, which helps in sun-prone areas. I recommend a touch-up check at six months and a broad-spectrum sunscreen stick for daily protection.
Style/Technique: Neo-traditional
Pain Level: 5/10
Session Time: 2 to 3 hours
Best For: visible personality pieces, colorful work
Mistake to Avoid: Requesting tiny details inside the face that flatten as color settles.
7. Minimal Single-Line Face Accent
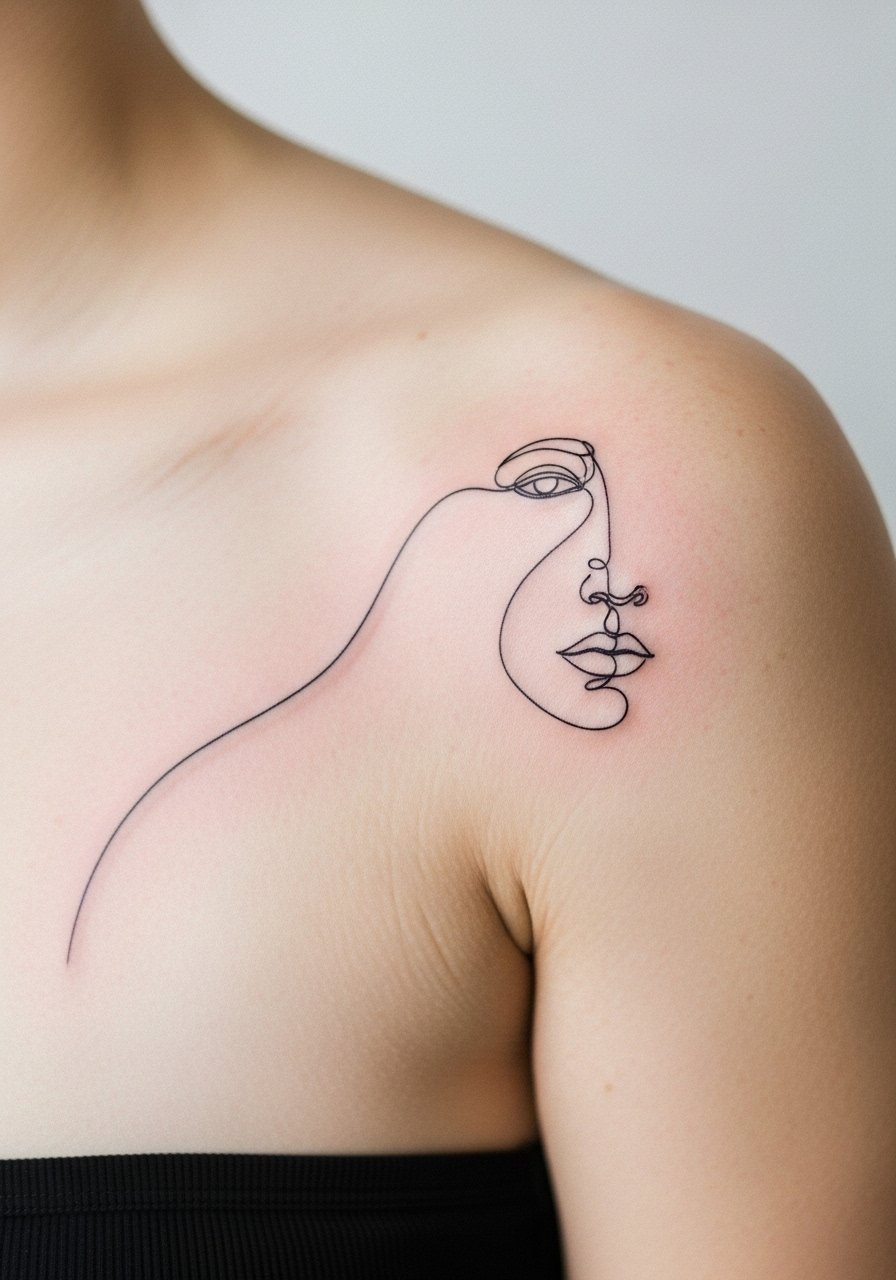
This minimal piece is about negative space and placement rather than complex shading. It creates an intimate, modern look for someone who likes quiet statements. Keep the line continuous and plan the curve so the jawline aligns with your collarbone. For at-home cover days I used a lightweight tattoo cover concealer that layers without rubbing the ink.
Style/Technique: Minimal one-line
Pain Level: 2/10
Session Time: 30 to 60 minutes
Best For: subtle visibility, first-timers
Mistake to Avoid: Choosing a disconnected line that reads as unrelated marks when you move.
If any of these ideas have you ready to actually try something, here are the things I keep reaching for when planning chest and cap work.
Chest And Cap Tattoo Essentials
Aftercare & Protection:
- Fragrance-free aftercare ointment (~$8-15), reliable first-week healing
- Broad-spectrum sunscreen stick (~$10-18), for daily chest protection
Placement & Prep:
- Stencil transfer paper (~$6-12), good for getting placement exact
- Medical-grade cling film roll (~$7-15), for short-term waterproof cover after sessions
Touch-Ups & Camouflage:
- Tattoo cover concealer (~$12-20), for work-visible days
- Fragrance-free healing balm (~$8-16), for longer-term skin health
Comfort Aids:
- Disposable numbing cream (~$10-20), if you discuss it with your artist
- Soft cotton tee shirts (~$12-25), easy first-week clothing
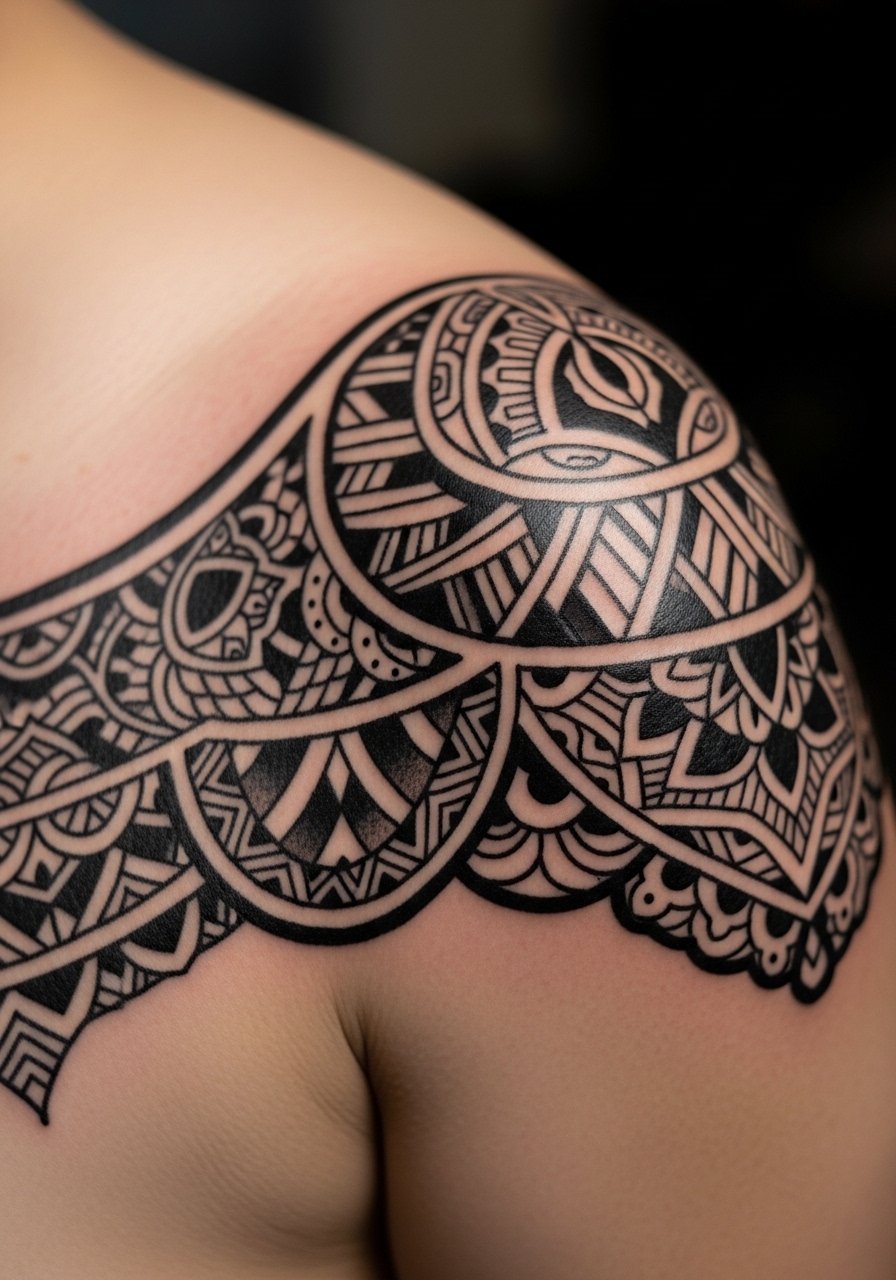
8. Mandala Shoulder Cap Bloom
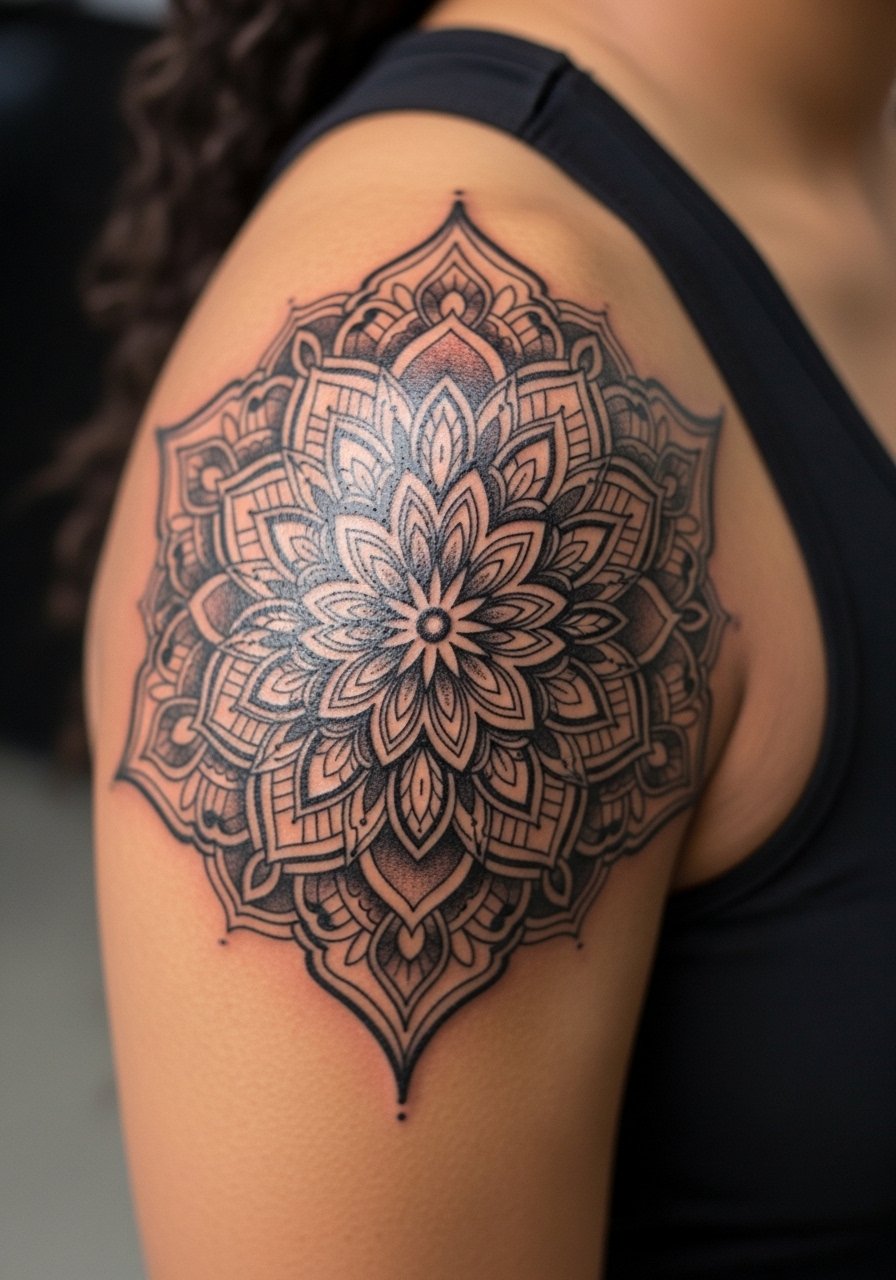
Mandala patterns are symmetrical and can be dialed into the chest's natural axis so they center over the sternum nicely. The feeling is meditative and balanced, a good fit for someone who wants structure and detail. For scale ask for a staged build with the center slightly above the clavicle, so the outer petals sit over the shoulder cap. I had my artist use a superfine shader and later applied a gentle healing balm to keep crisp edges.
Style/Technique: Mandala dotwork
Pain Level: 4/10
Session Time: 1.5 to 3 hours
Best For: symmetrical chest panels
Mistake to Avoid: Centering the mandala too low so it looks off-balance when you raise your arms.
9. Workplace-Friendly Hidden Panel

This is one of the gaps many lists skip, a design intentionally placed to be coverable by shirt collars. The goal is visibility in casual wear with easy cover for formal settings. Keep darker elements on the cap and lighter, smaller pieces on the chest so a collared shirt conceals the chest portion. I bookmarked a tattoo cover concealer option for days I need it.
Style/Technique: Concealable placement
Pain Level: 3/10
Session Time: 45 minutes to 1.5 hours
Best For: careers needing occasional concealment
Mistake to Avoid: Asking for an all-over dark piece that cannot be hidden by a collar.
10. Bold Blackwork Cap With Chest Fade
Blackwork reads strongly from afar, and when it fades into negative space on the chest the transition looks intentional, not abrupt. The visual result is dramatic and modern, suitable for someone who wants a statement piece. Request heavy blocking on the cap with a controlled 30 to 40 percent fade toward the sternum to avoid a hard edge. Keep a simple fragrance-free lotion on hand once healed.
Style/Technique: Blackwork block
Pain Level: 6/10
Session Time: 2 to 4 hours
Best For: bold statement pieces, modern lines
Mistake to Avoid: Demanding a full blackout on thin skin areas where touch-ups will be constant.
11. Tiny Script That Follows The Collarbone

Words that follow the collarbone create a readable arc, giving the phrase body and motion. The feeling is intimate, good for a personal quote or date. Ask for slightly spaced letters, and avoid ultra-thin cursive that will blur over time. Keep a tube of lightweight aftercare balm ready for the first week.
Style/Technique: Micro-script
Pain Level: 2/10
Session Time: 30 to 60 minutes
Best For: personal text, subtle visibility
Mistake to Avoid: Choosing decorative fonts that are too compact for the skin to hold long term.
12. 3D Pocket Watch Peeking From Cap
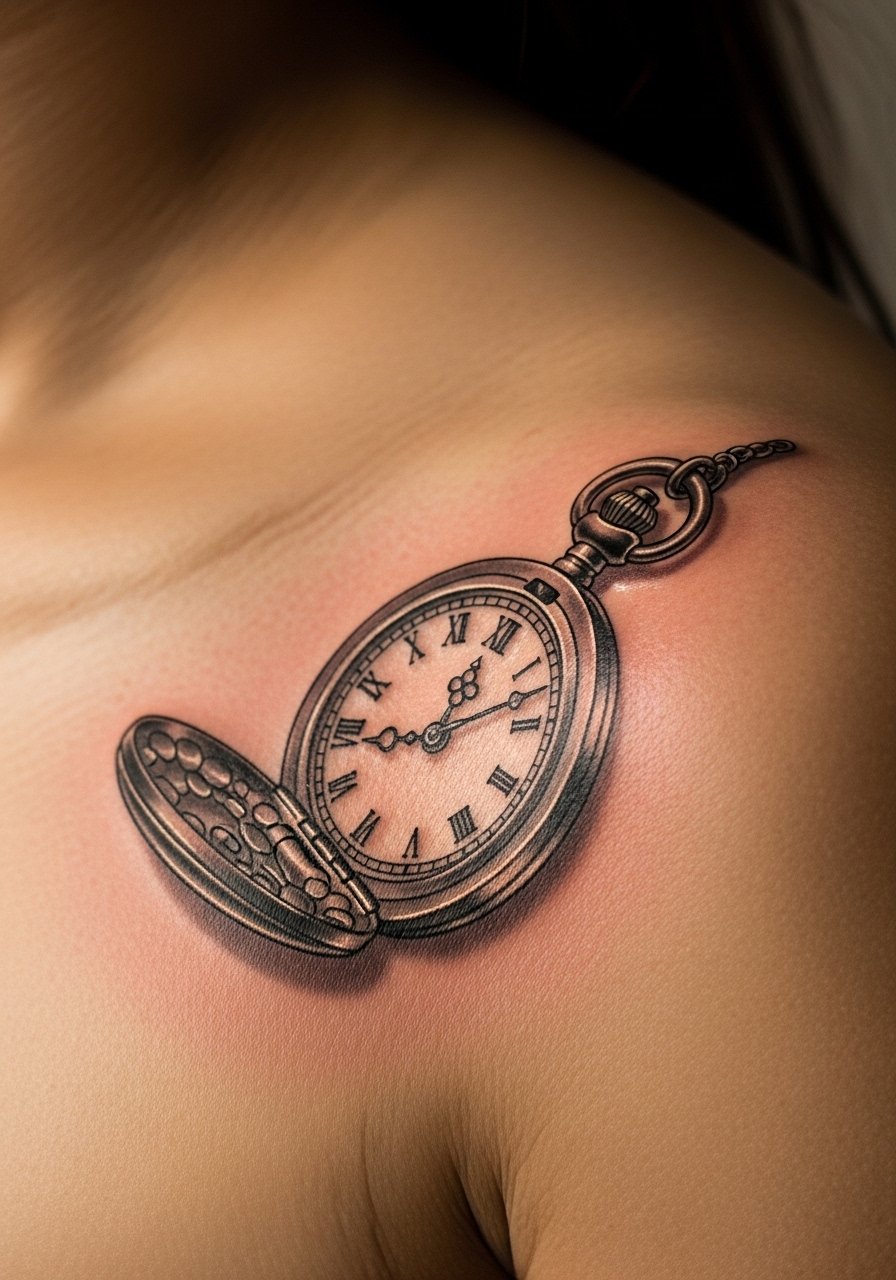
A small 3D object that peeks from the cap creates depth without a full chest panel. It gives a tactile, vintage feeling and works for someone who wants an object with meaning. Ask for shadow placement that follows the clavicle so the watch looks to sit on the skin. I used a broad-spectrum sunscreen stick after it healed to protect the shading.
Style/Technique: 3D realism
Pain Level: 5/10
Session Time: 1 to 2 hours
Best For: symbolic small objects, vintage feel
Mistake to Avoid: Placing the main shadow in a crease so the 3D effect disappears when you move.
13. Map Linework From Shoulder To Chest

A linear map or route works because it reads as a continuous line that honors the body's curves. The feeling is personal and travel-worn, fit for someone with a story to mark. Keep line weight consistent and plan anchor points where the body naturally turns. For drawing reference I kept a small set of scaled photos and a stencil transfer paper handy.
Style/Technique: Linework mapping
Pain Level: 3/10
Session Time: 45 minutes to 1.5 hours
Best For: travelers, story tattoos
Mistake to Avoid: Adding tiny place names that will blur and become illegible.
14. Rib-Peek With Subtle Chest Tie-In

This gives you the option to reveal or hide based on clothing, and the chest tie-in makes it look intentional. It feels layered and personal, for someone who wants a hint of narrative without a full chest commitment. Ask your artist to sketch the connection so the lower piece and chest touch appear part of the same composition. Keep a soft healing balm through the first month.
Style/Technique: Placement bridging
Pain Level: 4/10
Session Time: 1 to 2 hours
Best For: subtle multi-location pieces
Mistake to Avoid: Leaving the bridge too thin so it reads as an accidental mark.
15. Coverup-Friendly Gradient Blend
This is a practical option that competitors often skip, planning a gradient blend that steers old ink toward a new, cohesive chest panel. The result feels intentional and wise for anyone with prior work they want integrated. The technique uses layered shading and deliberate negative space to obscure old lines. I recommend discussing multiple short sessions and keeping a fragrance-free aftercare ointment for reworks.
Style/Technique: Gradient coverup
Pain Level: 6/10
Session Time: multiple sessions, 1 to 3 hours each
Best For: people reworking older chest or shoulder ink
Mistake to Avoid: Expecting a one-session magic fix for heavily saturated old tattoos.
Chest Tattoo Habits That Actually Help
Pick an artist with portfolio photos showing movement. Look for healed shots that show how the piece reads when the subject turns. If a healed portfolio is missing, ask for healed images or to speak with past clients, and bring your own reference photo.
Grab stencil transfer paper and ask your artist to test placement on your body. The stencil check is the best time to move a design up or down five to ten millimeters.
Thin coats of balm beat heavy slathering. A thin layer of fragrance-free aftercare ointment keeps scabs thin and reduces itch without suffocating the skin.
Most people forget chest sunscreen. Keep a broad-spectrum sunscreen stick by the mirror and apply daily after the first month of healing.
If you need short-term concealment, test a tattoo cover concealer at home first so you know the application steps and removal method.
