
I pinned that edgy cropped bob three times before I actually cut my hair, and the photo always looked cooler than me. The reality was a limp fringe and a stubborn cowlick until I learned small, repeatable moves that make short hair read sharp in real life, not just on-screen. This list is the stuff I kept returning to.
These styles are not salon-only looks or expensive color projects. They are quick, deliberately messy, slightly rebellious cuts and finishes you can recreate at home or ask for at the chair. They work across straight, wavy, and fine hair. After styling across four hair textures I have styled, I focused on easy steps, one or two affordable products per look, and heat-free options where possible.
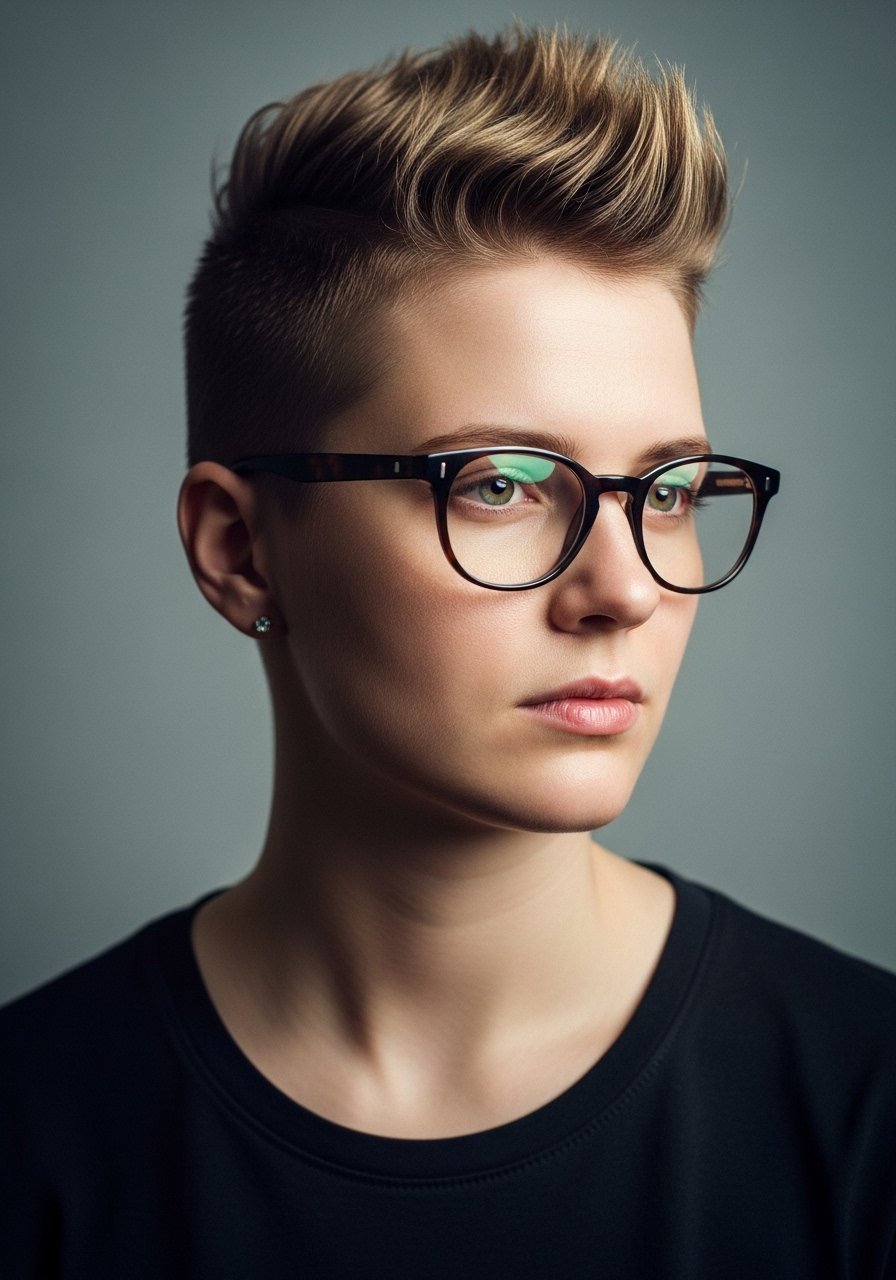
1. Textured Pixie With Piecey Top
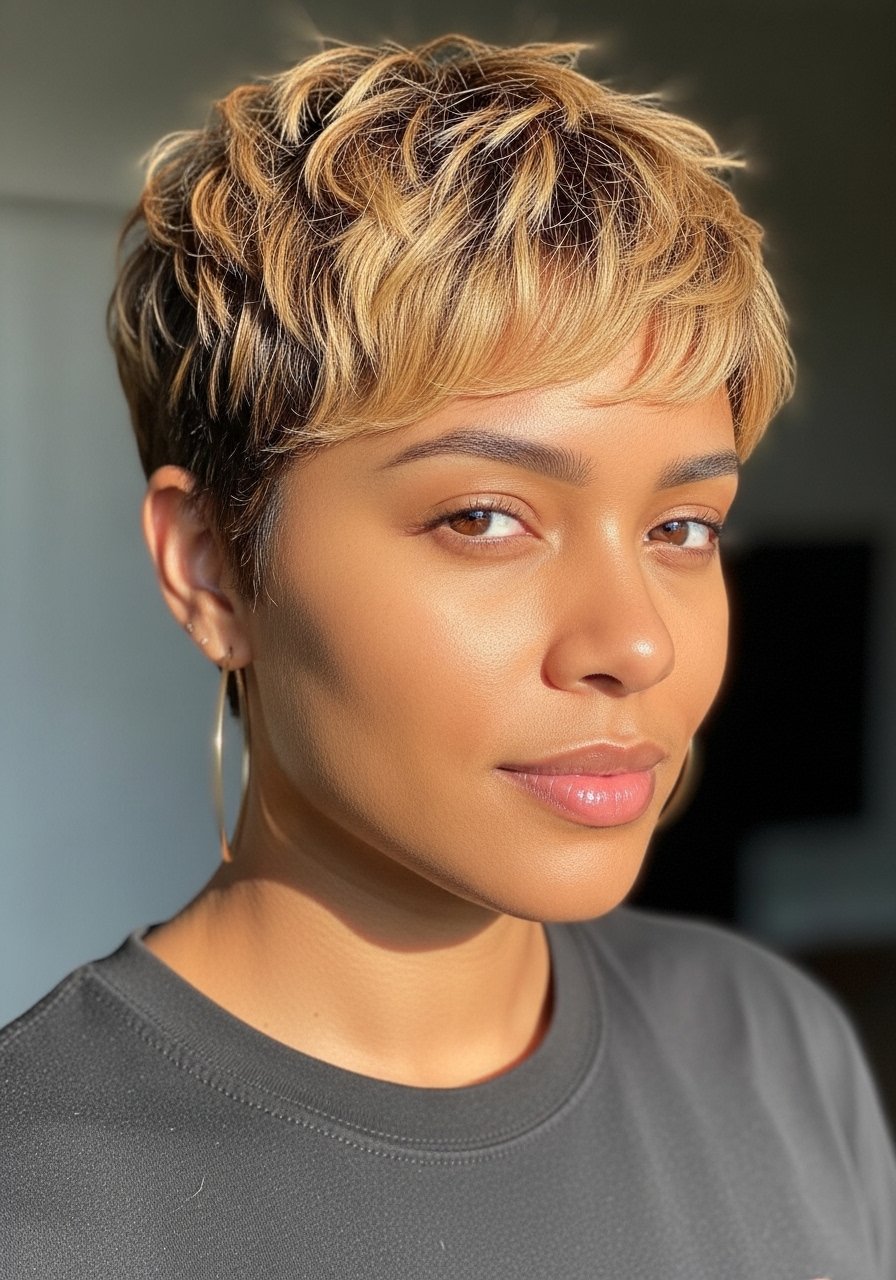
This is the fastest way to read edgy without a full shave, because the short, choppy top creates motion and contrast with cropped sides. Workability is the secret: rub a pea-size amount of clay or matte paste between fingers and tousle from crown to fringe, lifting strands to build texture. It gives a lived-in finish that suits thin to medium hair and takes five minutes to shape. For budget picks try a small tub of matte hair clay (~$10-20) or a travel-size texturizing spray for extra grit.
Mistake to Avoid: Rubbing product into roots and flattening the crown, which kills the lift this cut needs.
2. Shaved Undercut Pixie
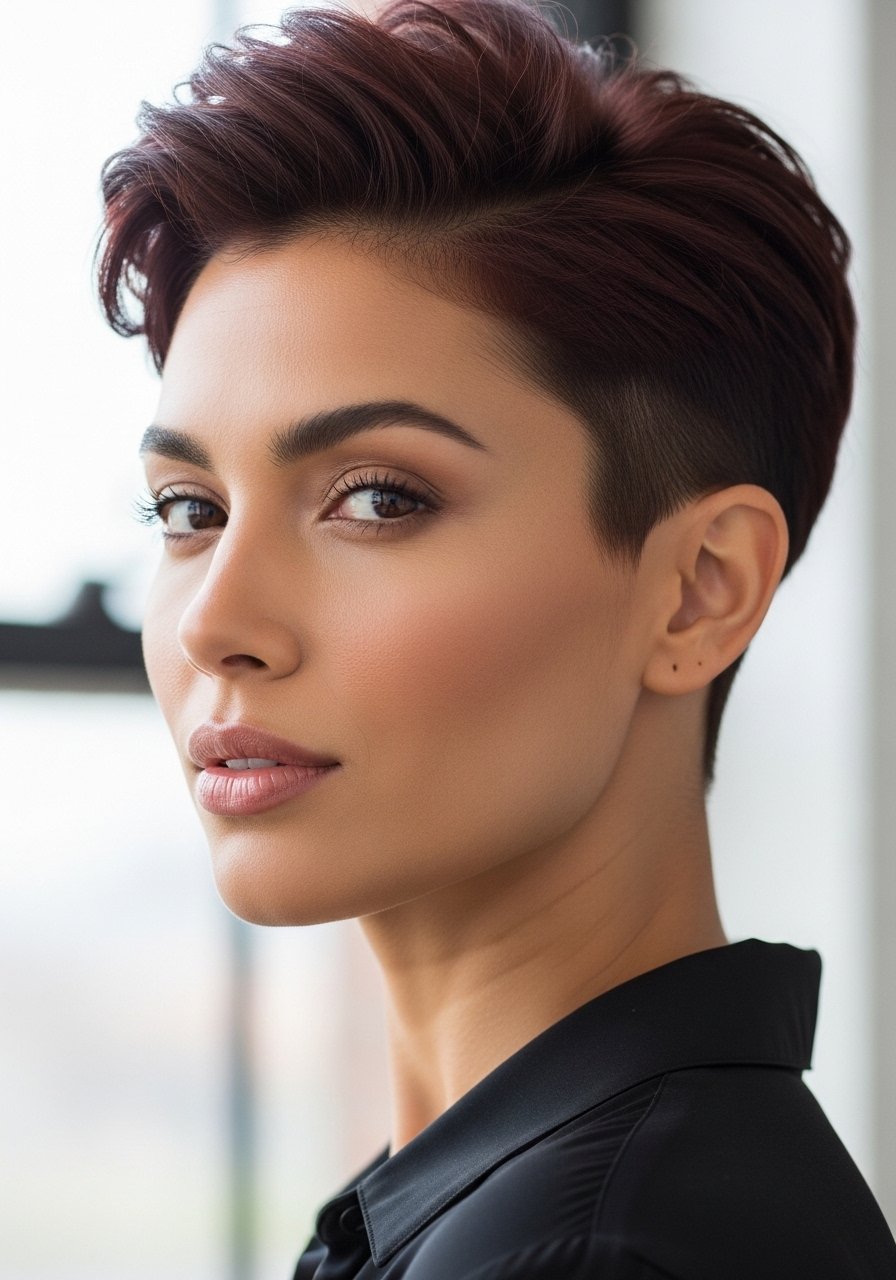
The undercut gives an instant edge by removing bulk and emphasizing the top shape. It works best on straight to wavy hair and is low maintenance once the undercut grows to the right length. Use a light pomade to slick the top back for polish or a dry texturizer to mess it up. If you want to do touchups between barber visits, a short trimmer (~$25-50) and a small barber comb help. Ask your stylist to show the exact clipper length so you can maintain it at home.
Mistake to Avoid: Overloading product on the shaved area, which creates a greasy contrast and makes the top look heavy.
3. Asymmetrical Bob With Long Side Sweep

An asymmetrical bob reads modern and slightly provocative because one side falls longer, creating a deliberate imbalance. It flatters round and square faces because the long sweep creates diagonal lines. To style, blow-dry the longer side forward then finish with a round brush or smooth straightener on low heat. A few sprays of shine serum (~$8-20) on the long side and a dab of light-hold hairspray keep it in place without stiffness. This look takes about 10 minutes once you get the parting right.
Mistake to Avoid: Cutting the angle too steep, which makes styling awkward and the longer side hard to settle.
4. Choppy Blunt Bob With Razor Ends

Blunt lengths give weight, while razor-cut tips add grit. This combo reads edgy because it contrasts a clean silhouette with intentionally raw edges. It suits medium to thick hair best because the blunt line holds. Use a sea salt spray or a small amount of texturizing paste to separate the razor tips. When asking a stylist, request "blunt with point cutting through the ends" so you get the look without losing shape. Quick touchups with thinning shears at home are possible if you know where to soften.
Mistake to Avoid: Texturizing the ends too aggressively, which can make the bob look wispy instead of purposefully rough.
5. Razor-Cut Mini Shag
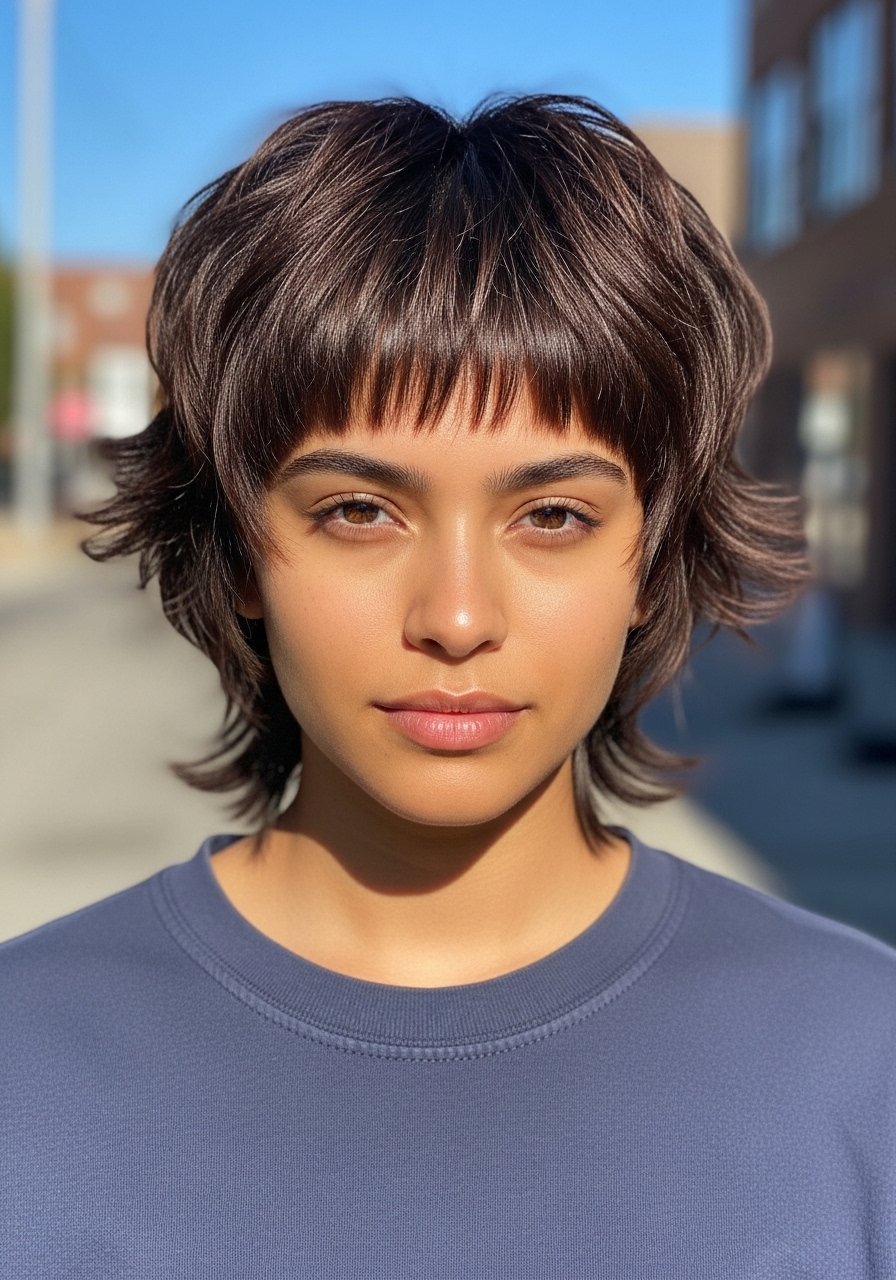
The mini shag keeps volume at the crown and softens the face with short layers, making it playful and punk-leaning. It works on wavy and fine hair because the layers create body without weight. A couple spritzes of sea salt spray then scrunching with fingers gives that undone texture. For fine hair, add a half pump of lightweight mousse at roots before drying to boost lift. This is a go-to for people who want movement and a shortcut to second-day hair.
Mistake to Avoid: Over-brushing the shag after styling, which smooths the layers into a flat shape.
6. Piecey Bob With Curtain Bangs

Curtain bangs soften an otherwise hard edge while piecey layers make the bob feel lived-in. Cut the bangs slightly longer than you think, then style them parted in the middle and blow-dried with a round brush for a soft curve. Use a tiny amount of lightweight styling cream to keep pieces separated. This suits most face shapes and feels modern without being severe. If you have thick hair, ask for internal thinning to avoid a helmet look.
Mistake to Avoid: Snipping bangs too short in the salon; you lose the soft swing that saves the style.
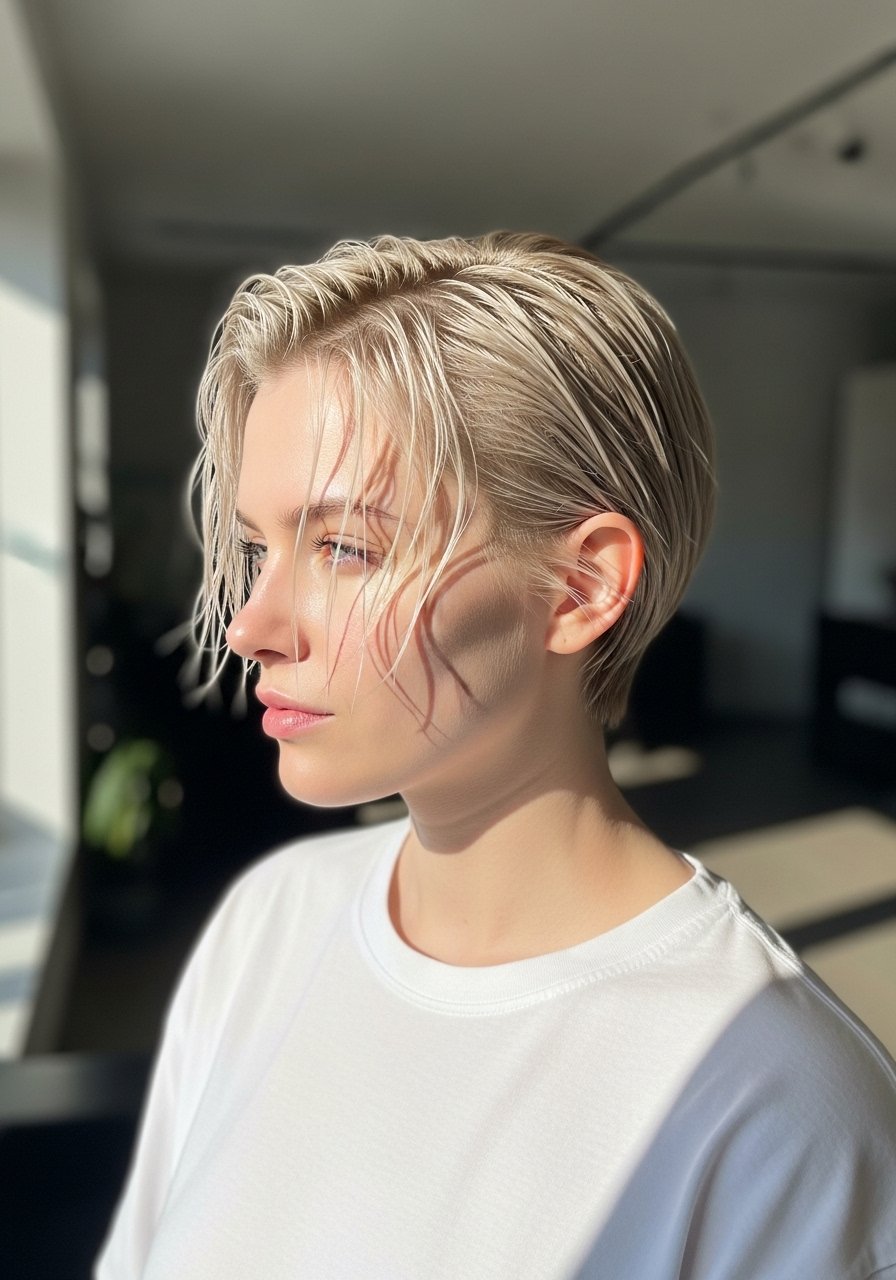
7. Slicked-Back Crop With Wet Finish

The wet look is simple and striking because it removes fuss and highlights facial bone structure. Use a medium-hold gel applied in small dime-size amounts to damp hair, combing back for a smooth finish. If you prefer less shine, try a glossing cream applied sparingly. This style is quick, takes under five minutes, and is great for formal events or when you want a deliberate, sharp silhouette. It tolerates humidity poorly, so bring a travel-size gel for touchups.
Mistake to Avoid: Using too much gel, which weighs hair down and makes the scalp look oily rather than styled.
If you want to shop the small things that turn these looks from good to kept, here are the essentials I reach for.
Edge Styling Essentials
Styling Tools:
- texturizing-spray (~$10-20) for instant grit
- matte-hair-clay (~$12-25) for hold without shine
Finishes & Care:
- sea-salt-hair-spray (~$8-18) for mini shags and waves
- shine-serum (~$8-20) to smooth and define
At-Home Maintenance:
- short-hair-trimmer (~$30-60) to maintain undercuts between cuts
- barber-comb (~$6-12) for precise parting and slick backs
8. Mullet-Inspired Crop With Tapered Nape
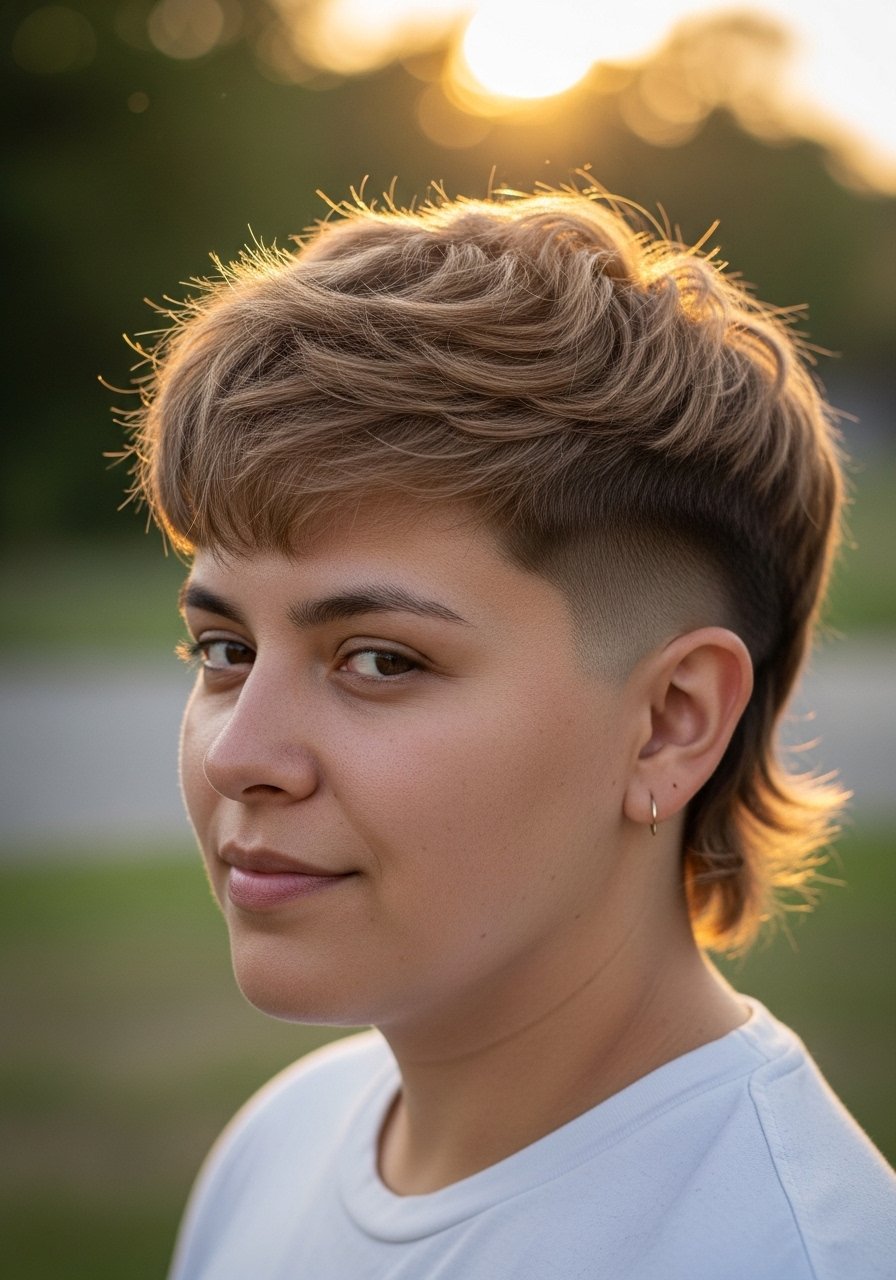
The modern mullet keeps length at the back for movement while the tapered nape keeps it neat, making it unexpectedly wearable. It suits thick or coarse hair because the length at the back smooths bulk. Apply a small amount of styling paste to the longer top pieces and twist a few strands to create separation. A quick technique: dampen only the back when towel-drying to keep contrast between top and nape. This keeps the look intentional and easy to manage.
Mistake to Avoid: Letting the back grow out unevenly without periodic shaping, which loses the deliberate contrast that makes the cut edgy.
9. Faux Hawk Crop For Height
The faux hawk is a great way to get drama without shaving the sides. Use a hair dryer and round brush to lift from the roots, then define with a small amount of strong-hold paste for vertical hold. This style looks intentional on oval and heart-shaped faces and gives the wearer a confident stance. For a heat-free option, rough-dry with fingers and set with air-dry cream overnight.
Mistake to Avoid: Pulling the sides too short, which can turn the faux hawk into a hard military crop rather than a fashion-forward lift.
10. Wet-Textured Pixie With Side Part
A controlled wet texture plus a deep side part reads chic and sharp. Apply a small coin-size of gel to damp hair and comb the part through, then use fingers to push pieces for texture while it sets. This works well on straighter hair and requires minimal drying time. If you want softer texture, swap gel for a lightweight mousse. The result feels polished but with a rebellious edge.
Mistake to Avoid: Brushing the texture out after it dries, which removes the defined separation the style needs.
11. Micro Bob With Deep Side Part

The micro bob is short enough to be bold but long enough to tuck behind an ear when needed. The deep side part creates asymmetry that reads sharp and intentional. Blow-dry with a flat brush and finish by pressing the longer side behind the ear with a tiny dab of light-hold wax. It is a low-time, high-style option that fits busy mornings. For fine hair, lift at the root with a teaspoon of volumizing powder before styling.
Mistake to Avoid: Cutting the length too short at the jawline, which removes the micro bob’s flattering tuck option.
Short Cut Survival Tips
Damp drying trick first: Dry hair to damp, not bone dry, before applying product. A microfiber-hair-turban (~$12) removes excess water and speeds styling without frizz.
Grab travel-size styling tubs for the products you use daily. They fit in your bag and keep touchups simple when you are out.
People often overuse product at the roots. A pea-size amount of paste or clay spread thin between fingers goes further and keeps crowns from looking greasy, especially on fine hair. Try a small styling-clay sample to find the right amount.
Night prep saves mornings: Sleep on a silk pillowcase and loosely braid or pin long top pieces to preserve shape. A silk-pillowcase (~$20-40) reduces friction and keeps short styles smoother for day two.
