
I kept booking fills every two weeks thinking shorter nails meant boring, until one tech pointed out I was layering product like a pancake and hiding the shape. The moment I stopped overbuilding the apex and let the short shape breathe, my mani lasted longer and actually looked intentional.
These ideas are for people who prefer practical, wearable mani looks, are short on time, and want salon results without a full day appointment. Most looks are beginner friendly and under an hour at home or quick for a tech, with budget picks and one-salon upgrades sprinkled through.
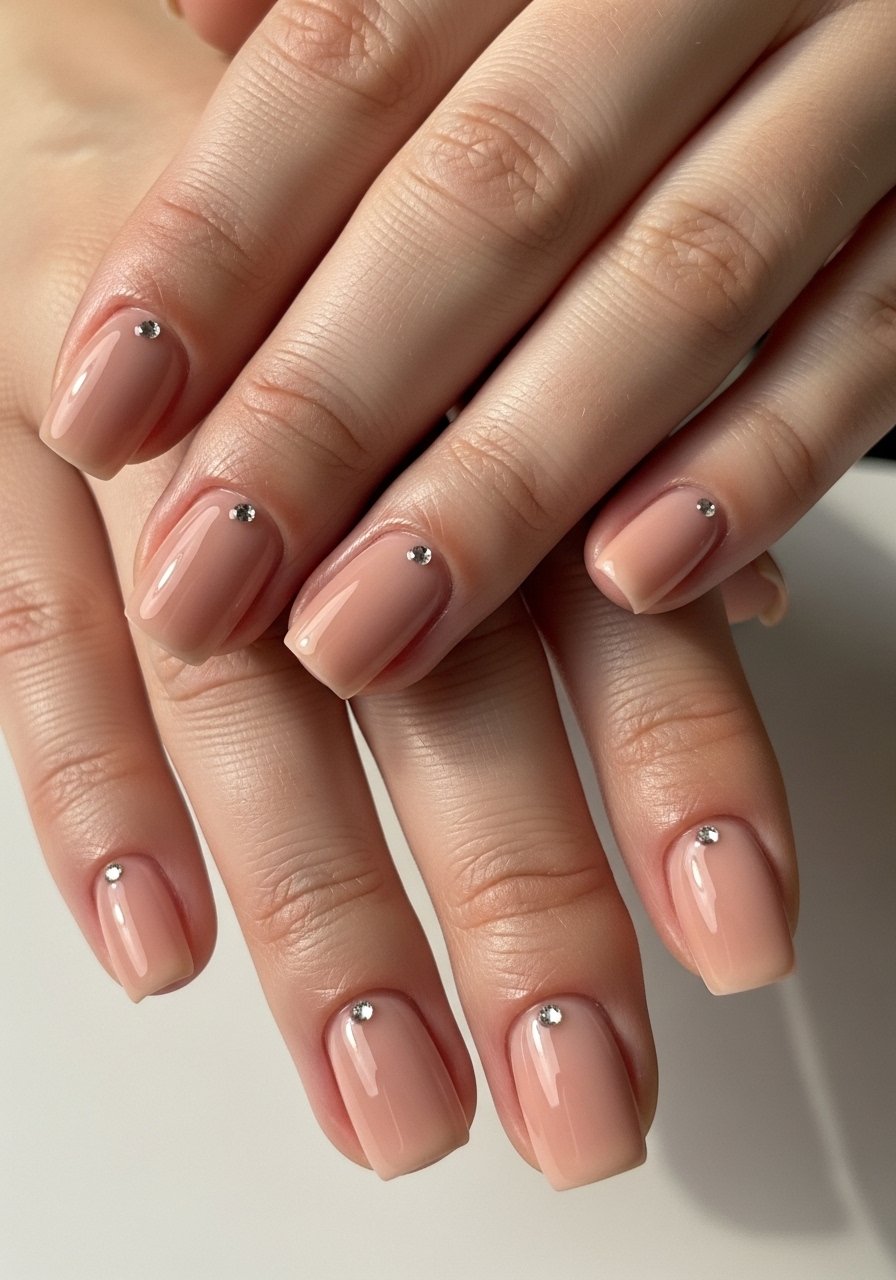
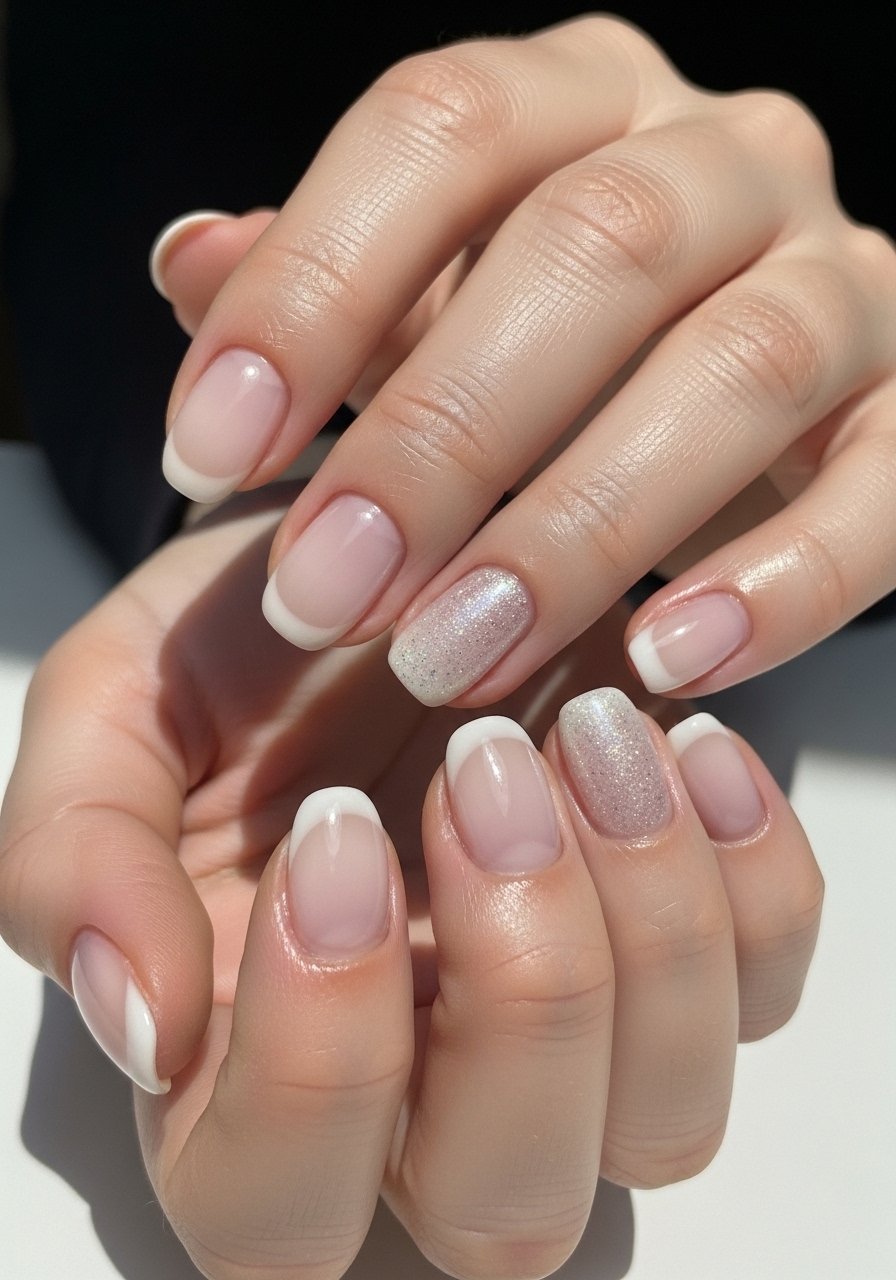
1. Short Square Nude With Tiny Rhinestones
Style/Vibe: Subtle glam
Best For: Short nails / everyday wear
Skill: Beginner
A sheer nude base with a single rhinestone on the ring finger reads clean and polished. What makes it work is the tiny accent, placed near the cuticle so the nail still reads short and wearable. For home, use a builder gel thin layer to create a low apex and a glossy top coat for shine. Try a nude builder gel and a pack of tiny rhinestones. Aim for a front-to-back apex ratio that keeps the profile low but strong.
Mistake to Avoid: Piling product at the free edge, which makes short nails look bulky instead of neat.
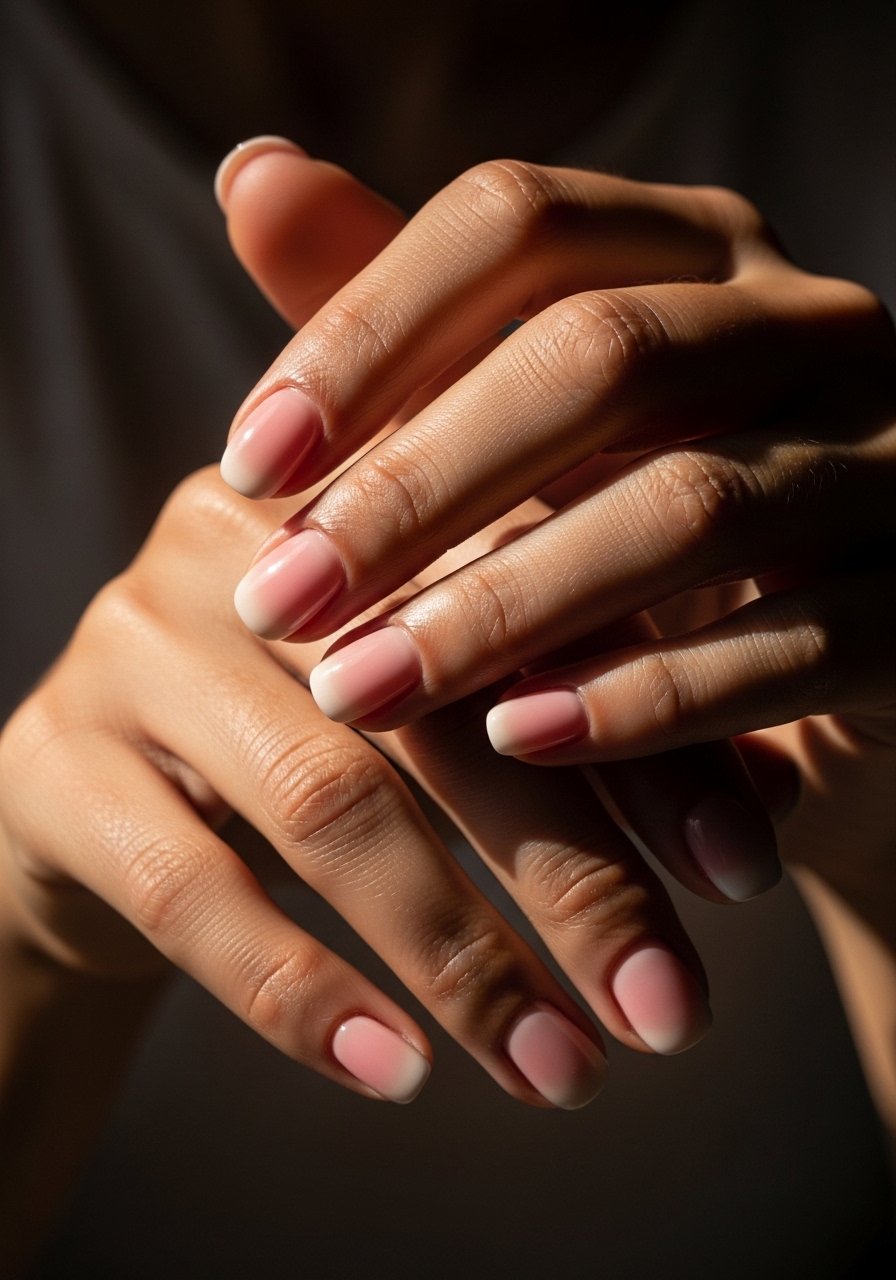
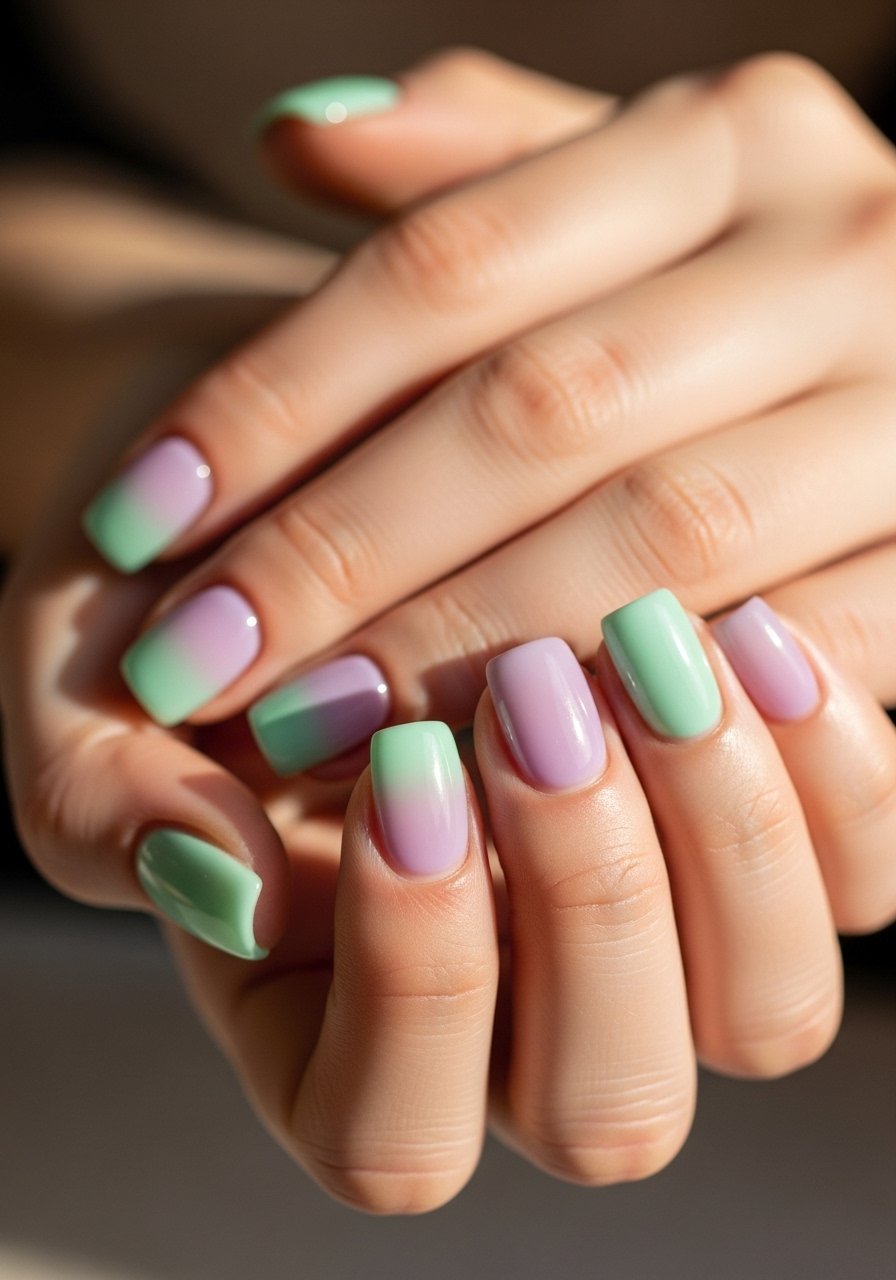
2. Soft Almond Short Ombre
Style/Vibe: Soft gradient
Best For: Short to medium / special occasions
Skill: Intermediate
A soft ombre on short almond shapes stretches the nail visually while staying office-appropriate. The trick is a thin gradient layer with a sheer base, cured in thin passes so the fade stays smooth. Use a sponge or a tiny brush and a gel polish like a sheer pink and cream combo. I tested this at home twice to dial the cure time so it did not pool. Try a sheer pink gel polish and a micro-blending brush.
Mistake to Avoid: Applying one thick gradient layer and curing once, which creates visible rings and pooling.
3. Micro French With Negative Space

Style/Vibe: Modern classic
Best For: Short nails / minimalist looks
Skill: Beginner
Micro French tips paired with negative space at the cuticle feel fresh and tailored for short nails. The thin white tip should be no more than 1.5 to 2 millimeters, so the white reads delicate rather than chunky. Use micro French tip guides or a fine brush, and finish with a thin soak-off gel top coat. A tiny change like leaving a crescent of natural nail near the cuticle keeps the design airy. Grab micro French tip guides and a sheer base gel.
Mistake to Avoid: Painting thick white tips that overwhelm a short nail, making it look shorter and squashed.
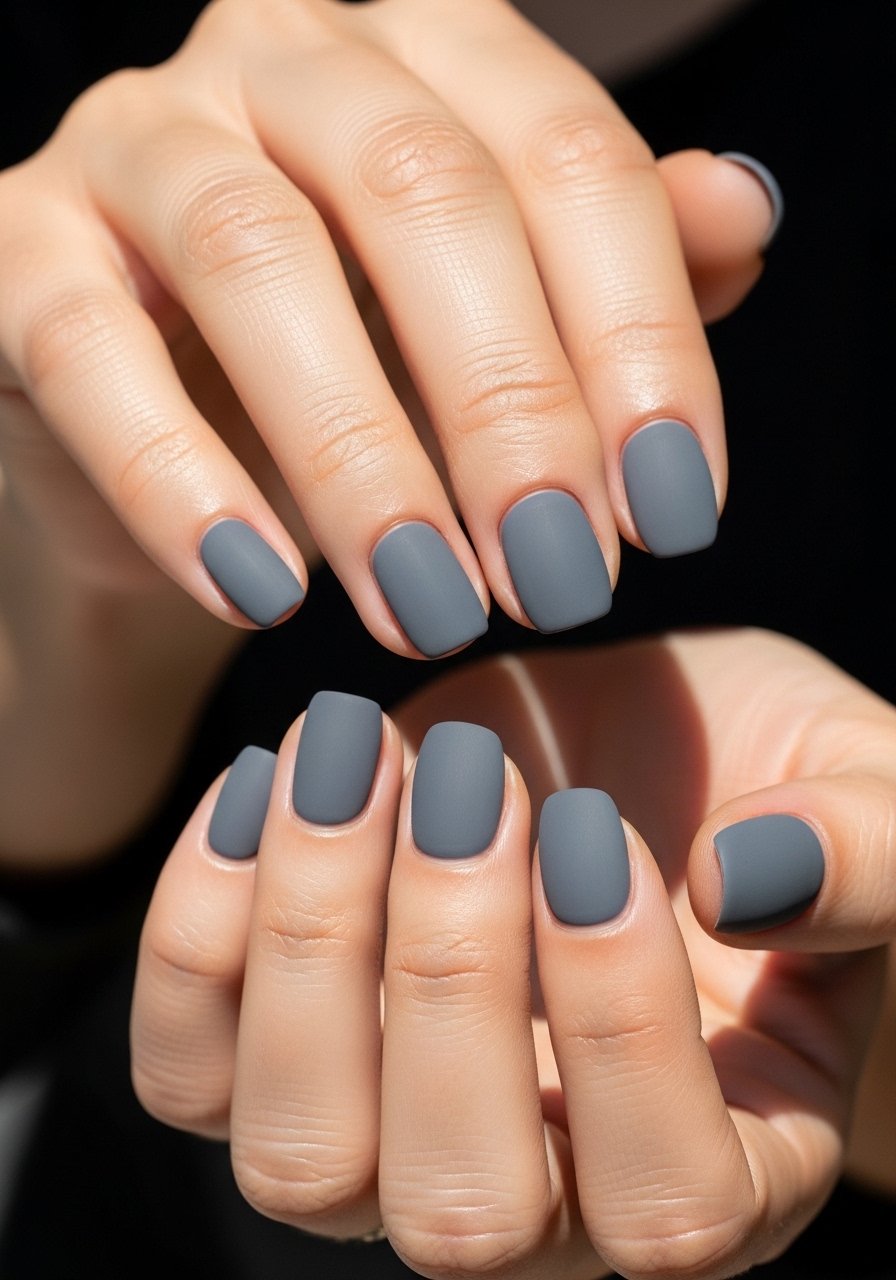
4. Textured Matte Suede Finish
Style/Vibe: Low-shine texture
Best For: Short nails / fall or muted palettes
Skill: Beginner
A matte suede finish adds tactile interest without extra length. Apply a satin-matte top coat over a single thin color, then lightly buff the surface with a superfine buffer to knock the shine before sealing. For a true suede effect, a matte top coat over a slightly stippled polish layer gives depth. Try a matte top coat and a micro nail buffer. This look is forgiving on short nails because texture distracts from length.
Mistake to Avoid: Over-buffing to the natural nail, which thins and weakens the nail plate.
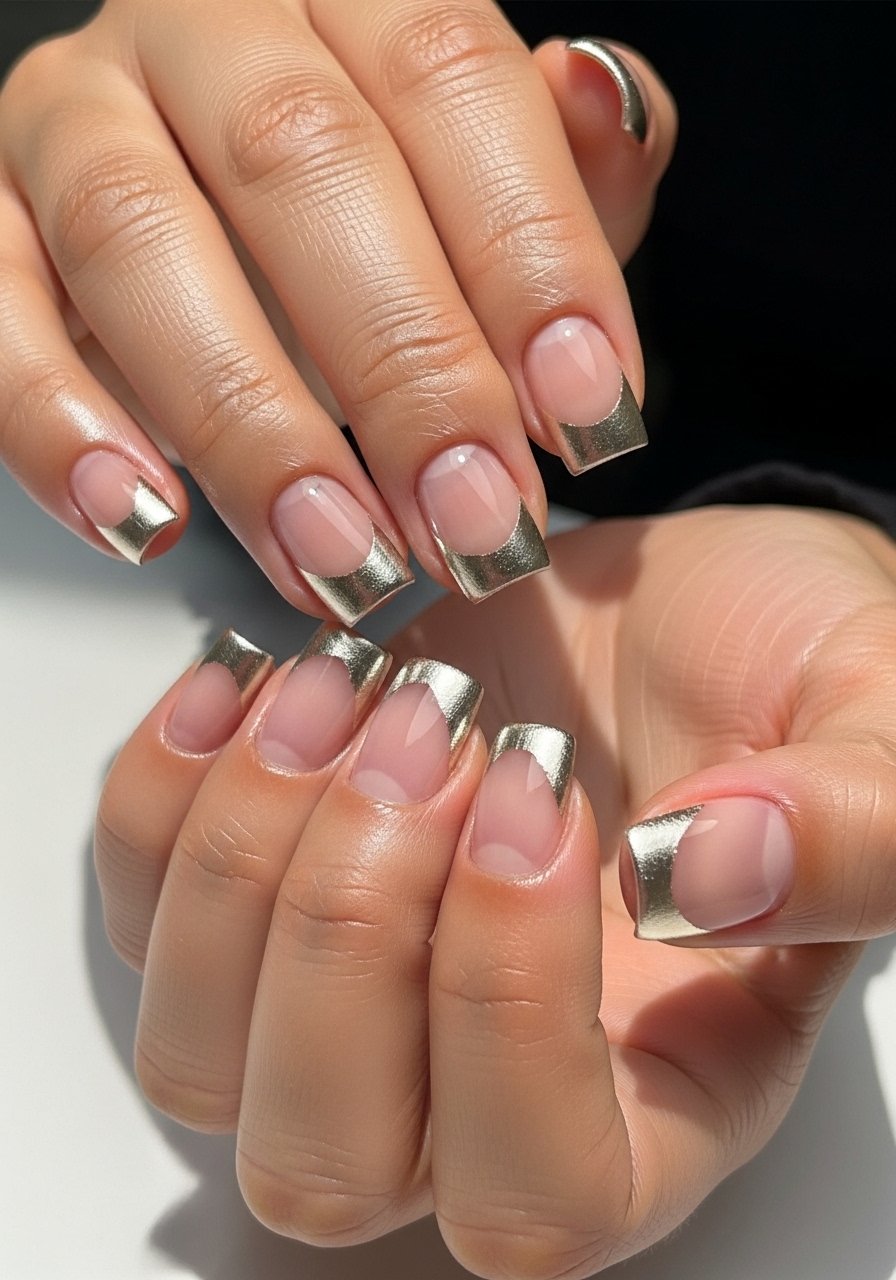
5. Accent Metallic Foil Tips
Style/Vibe: Tiny luxe accents
Best For: Short nails / nights out or weddings
Skill: Intermediate
A hairline metallic tip adds sophistication without length. Use a thin foil adhesive along the tip, press on a metallic foil, then seal with a thin layer of top coat. Pressure and rolling out air pockets matters here. The narrow foil reads delicate on short nails. I like pairing a neutral base with a gold nail foil and a non-yellowing foil adhesive. Keep layers thin so the foil sits flat.
Mistake to Avoid: Using too much adhesive, which leaves raised edges and peels quickly.
6. Short Coffin Press-Ons For Busy Weeks

Style/Vibe: Fast salon look
Best For: Short-term wear / travel or events
Skill: Beginner
Press-ons are a great short-acrylic shortcut when time is tight. Choose a short coffin shape with a low profile and use dual tabs for an easy temporary wear or gel glue for longer wear. The right fit matters more than size; file edges lightly for perfect alignment. For low-commitment glam, try a set of short coffin press-on nails and dual-sided nail tabs. These are a beginner-friendly way to test a shape before committing to full acrylic.
Mistake to Avoid: Picking press-ons that extend beyond the fingertip, which looks fake and snags easily.
7. Mini 3D Bead Cluster Accent
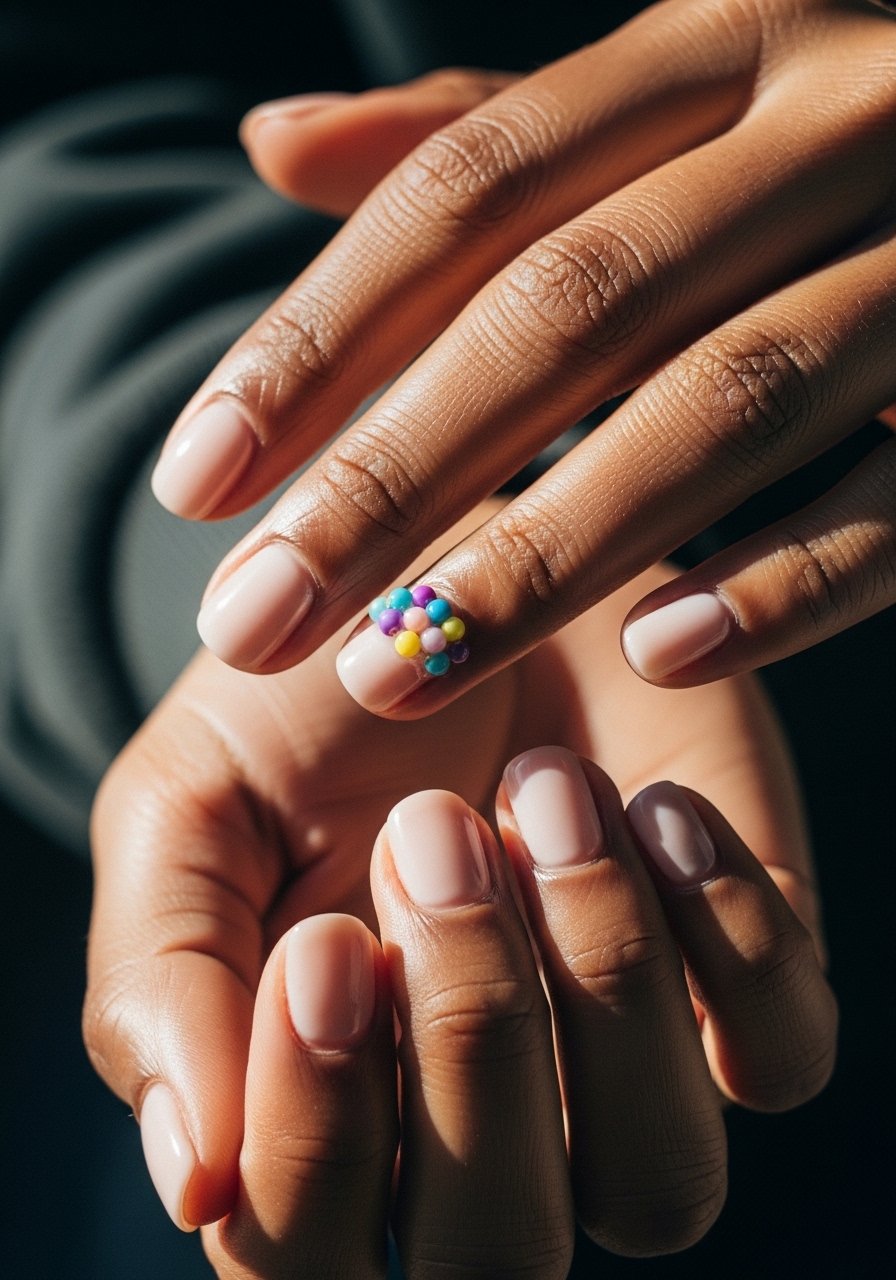
Style/Vibe: Tiny tactile focal point
Best For: Short nails / statement accent
Skill: Intermediate
A small bead cluster near the cuticle reads luxe without dominating when kept to one finger. Use micro beads and a dab of builder gel to secure them, then cure. Size and placement are everything here. A tech who works at a salon downtown showed me how tiny clusters last better when the base layer is slightly domed and the beads are seated into the gel. Try a pack of micro nail beads and precision nail tweezers.
Mistake to Avoid: Pasting large clusters onto a flat base, which lifts and catches on fabric.
If you want to try one of these looks this weekend, pick up a handful of basics first.
Short Acrylic Starter Picks
Basics:
- Nude builder gel (~$12-25). Good thin-layer option for added strength.
- Sheer base gel (~$10-18). Keeps short looks natural.
Tools:
- Micro nail art brush set (~$8-15). For thin lines and ombre blending.
- Precision nail tweezers (~$6-12).
Finishes:
- Matte top coat (~$7-15). For suede or soft-matte looks.
- Gloss top coat gel (~$10-20).
Extras:
- Tiny rhinestones pack (~$5-12).
- Gold nail foil (~$6-14).
8. Sheer Jelly Pastel Squares
Style/Vibe: Playful translucence
Best For: Short nails / spring and summer
Skill: Beginner
Jelly polish gives a translucent, stained-glass effect that is flattering on short nails because it adds color without a solid block. Apply two thin coats of jelly polish, cure, then a glossy top coat. Thinner coats preserve translucency. For a quick at-home version, layer a tinted sheer polish over a clear base to get that jelly depth. Try a jelly polish set and a fast-dry gloss top coat.
Mistake to Avoid: Painting a thick jelly layer that looks opaque instead of luminous.
9. Micro Marble Accent
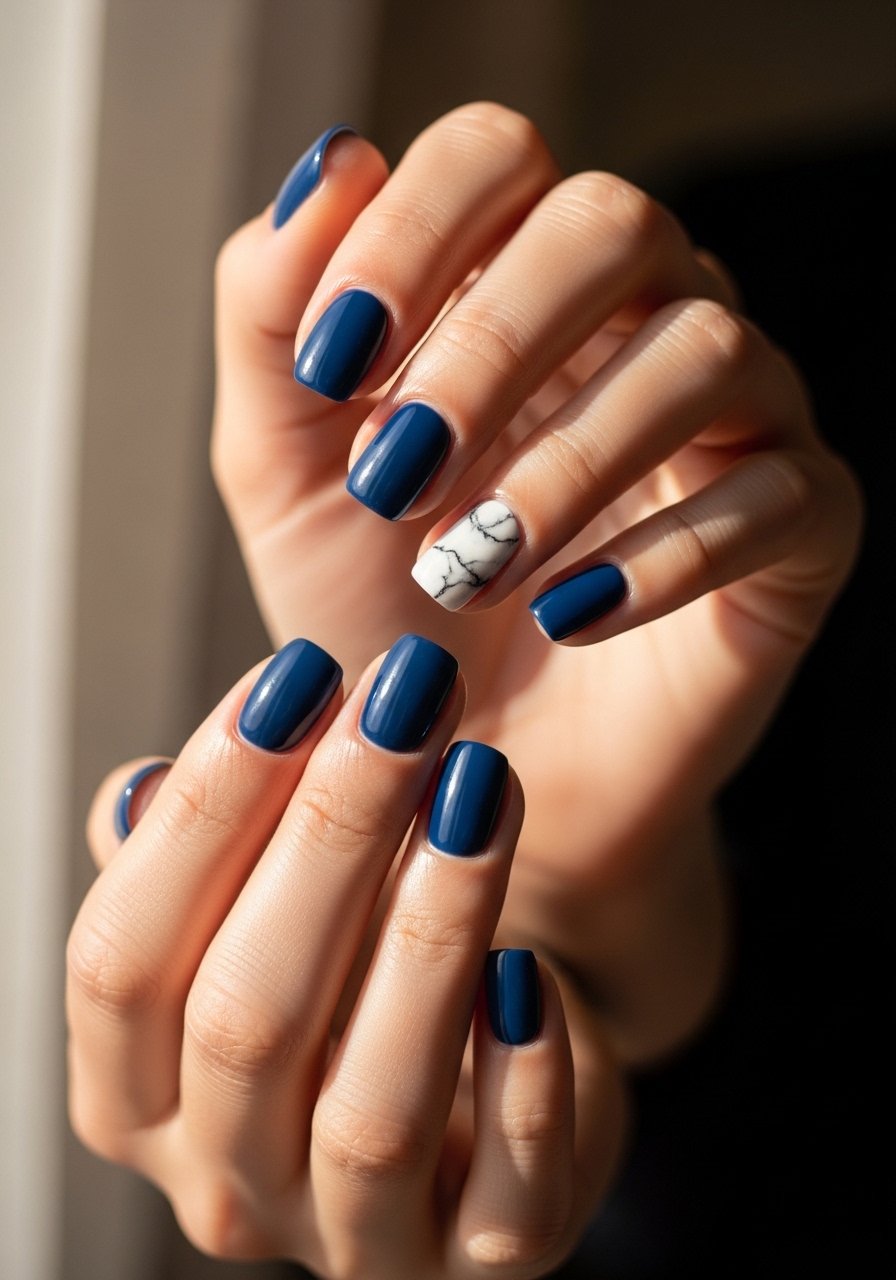
Style/Vibe: Artistic minimalism
Best For: Short nails / weekend art
Skill: Intermediate
Micro marble uses tiny veins of color for an organic look. Work with a nearly dry brush and tiny dots of pigment, then drag lightly to create one or two veins. Keep the marble as an accent to avoid overwhelming short nails. A thin layer of builder gel under the marble helps the design sit smooth. Use a thin nail art brush and a gray pigment polish. The key detail is tiny, controlled veining rather than full-cover marble.
Mistake to Avoid: Overworking the marble so it reads muddy instead of veined.
10. Minimalist Line Art Over Clear Base
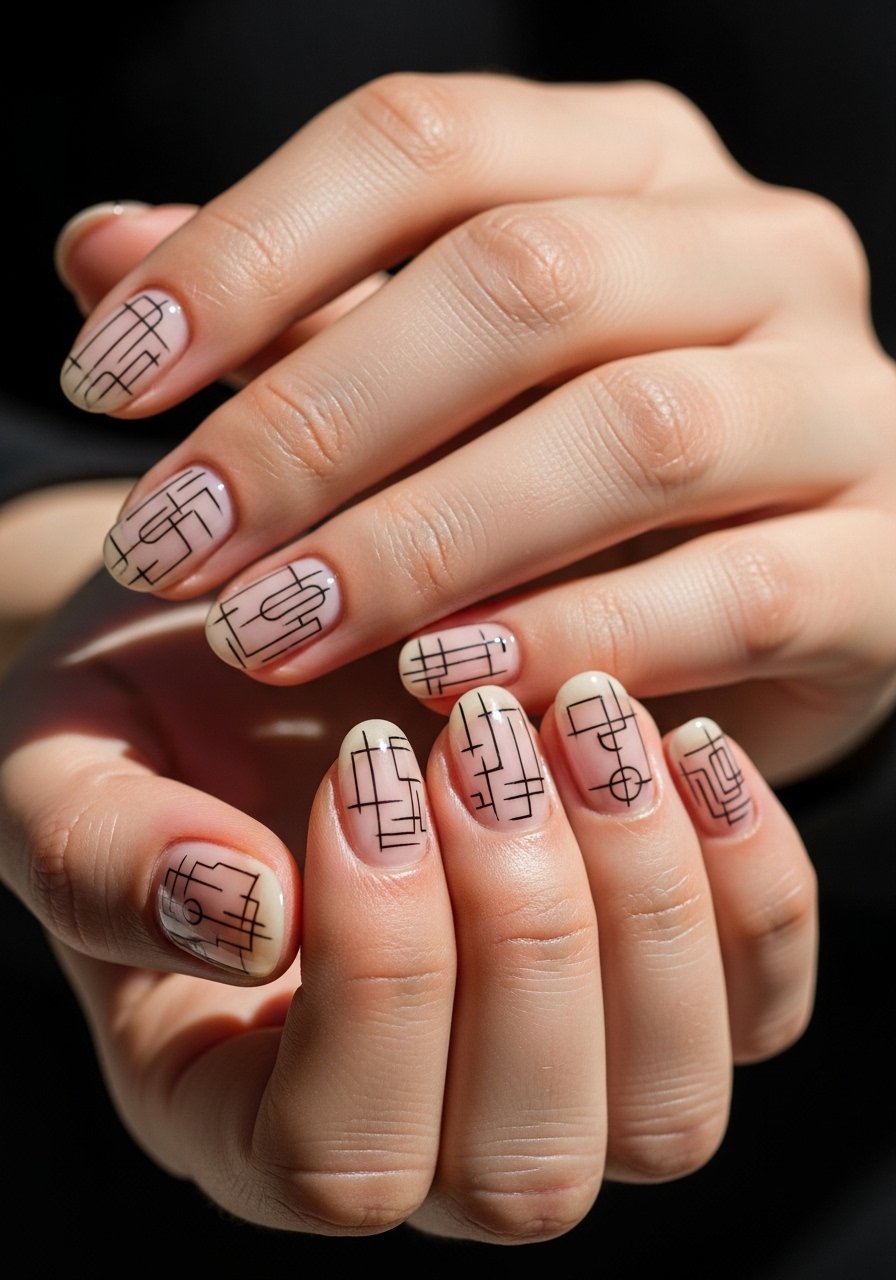
Style/Vibe: Graphic and wearable
Best For: Short nails / modern minimalists
Skill: Beginner
One or two thin abstract lines on a clear base feel modern and keep the nail visually open. Use a thin striping brush or a fine-tip pen to draw single-stroke lines. Less is more here. Because the base is clear, short nails do not feel chopped off. Seal with a glossy top coat that does not blur the lines. Try a fine striping brush and a black nail art pen.
Mistake to Avoid: Drawing complex doodles on a tiny canvas, which reads cluttered on short nails.
11. Short Sculpted Almond With Soft Apex

Style/Vibe: Natural lift
Best For: Short nails / those who want subtle lift
Skill: Intermediate
Sculpting a soft apex gives the illusion of strength and elongation without adding visible length. The apex should be slightly forward of center, low in profile so the silhouette remains short. Use a silk or fibreglass overlay or a thin builder gel to shape the apex, then file to a soft almond. For home sculpting, use short nail forms and a reliable builder gel. A consistent apex placement is the small detail pros never skip.
Mistake to Avoid: Placing the apex too close to the cuticle, which makes the nail look domed and unnatural.
12. Pearlescent Baby Boomer Fade
Style/Vibe: Soft glam fade
Best For: Short nails / bridal and office-friendly looks
Skill: Intermediate
A baby boomer fade with a pearlescent finish updates the classic French. Blend a pearly white into a soft blush with feathered strokes and finish with a thin layer of chrome or pearl powder for shimmer. Keep the fade soft so the tip does not eat into nail length. Use a pearl chrome powder and a sheer pink gel polish. The shimmer makes the short nail appear luminous rather than short.
Mistake to Avoid: Applying heavy chrome over thin polish, which shows streaks and texture.
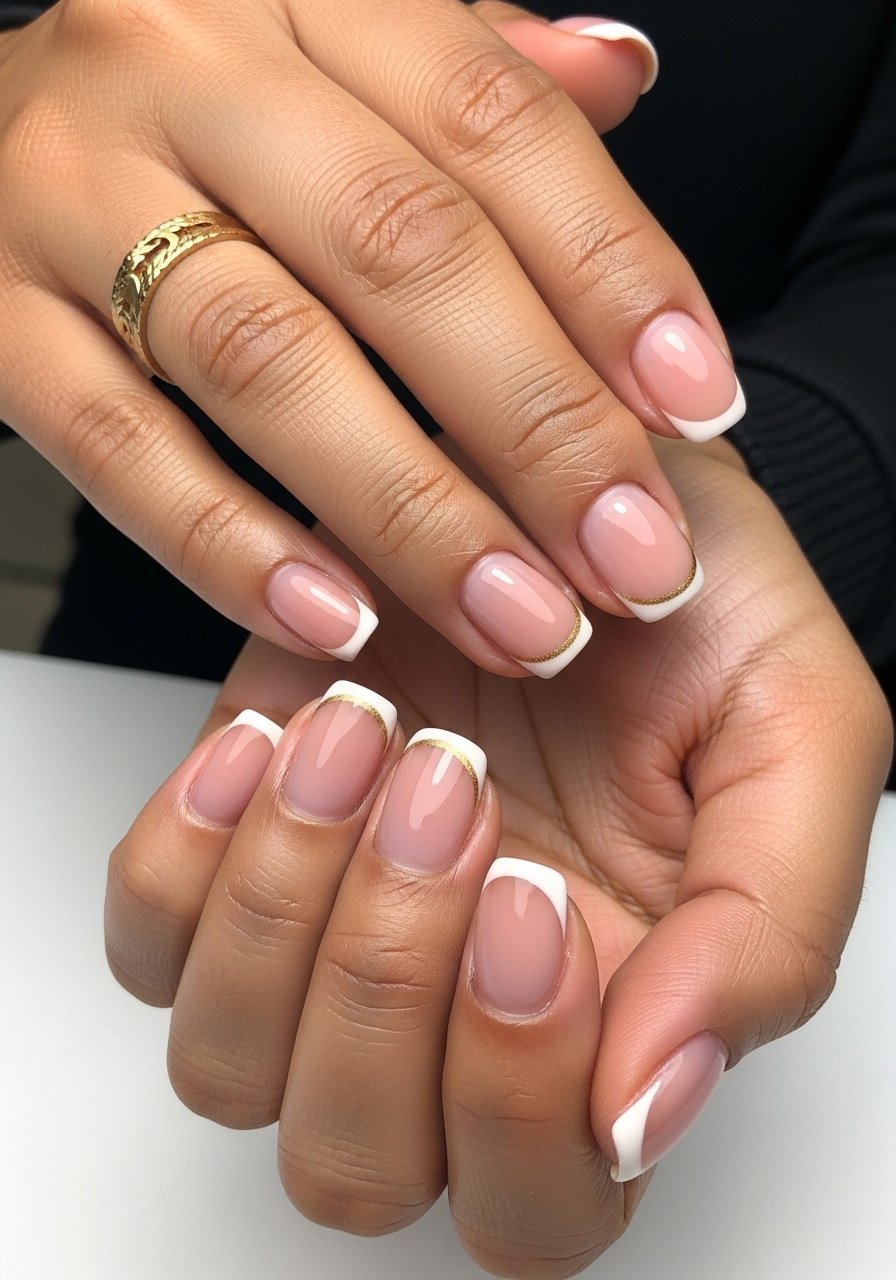
13. Soft Matte French With Thin Gold Edge
Style/Vibe: Refined edge
Best For: Short nails / weekday polish upgrade
Skill: Intermediate
A soft matte French finished with a whisper-thin gold edge is subtle but refined. Paint a matte neutral tip, then add a fine gold line at the smile line and seal with a matte top coat. Thin gold looks best when applied with a steady-handed striping brush. After asking three salon techs I learned the gold must be one hairline pass to read delicate on short nails. Try gold striping polish and a matte top coat.
Mistake to Avoid: Overdrawing the gold line so it reads heavy and boxes in the tip.
Short Acrylic Mani Habits
Thin coats beat one thick coat every time. Three thin layers of a fast-cure builder gel look smoother and last longer than one thick gloopy layer.
Grab a good 48W LED lamp. Proper cure time makes the difference between a mani that chips at day three and one that holds for two weeks.
Start with clean, dehydrated nails, not shiny natural plates. A gentle nail dehydrator costs a few dollars and helps adhesion.
Curved smiles need tiny corrections. Use thin striping tape to steady a shaky hand when painting French lines.
Everyone files from side to center when shaping. Try filing in one direction only with a 180-grit file to avoid jagged edges and peeling.
