
My second session, the artist paused and said, "Make the line breathe, not shout," then tapered the last letter and everything about the script finally read like me. I had been asking for big, bold quotes and ending up with blocky handwriting that wore like a poster. That tiny change, one final stroke, made the phrase feel like a quiet rule I could carry every day.
These ideas are for people who want subtle reminders, not billboard slogans. Most designs here are small to medium, budget friendly, and doable in one to two sessions with an intermediate artist. I picked pieces that work in visible jobs and that you can cover when needed. I learned across five shops I have visited which placements hold up to sun, sleeves, and the test of time, and I mention a practical aftercare product in most items so you know what to buy.
1. Narrow Cursive Inner Wrist Script

A thin cursive script on the inner wrist reads like a note you wrote to yourself. The narrow line work keeps it classy and less intrusive at work. It ages well because the needle is shallow and the session is short, about 30 to 45 minutes. For placement pick the non-dominant wrist if you type a lot. I used a fine liner stencil and a small aftercare balm like fragrance-free tattoo ointment to avoid scabbing. Budget under $80 including tip.
Mistake to Avoid: Choosing a thick block font for a tiny wrist space, which blurs as it heals.
Style/Technique: Fine Line Script
Pain Level: 3/10
Session Time: 30 to 45 minutes
Best For: Inner wrist, people who want a work-coverable reminder
2. Single Word Bold Collarbone

A single strong word across the collarbone reads like a personal motto without spelling out everything. The collarbone adds a slight natural curve so pick a word with balanced letters. It looks intentional with clean black ink and simple spacing. This is a one-session idea, about 45 minutes, and pairs well with a light setting spray for sessions where you sweat. I link to a simple aftercare balm that helped my edges stay crisp.
Mistake to Avoid: Picking a long sentence for the collarbone, which crowds the bone and shifts during movement.
Style/Technique: Bold Single-Word
Pain Level: 5/10
Session Time: 30 to 60 minutes
Best For: Collarbone, visible but easy to dress over
3. Morse Code Line Behind Ear

Morse code is a quiet way to carry a message that reads personal, not public. Tiny dots and short lines behind the ear sit in an intimate spot that is easily hidden by hair. It is low cost and low time, usually 20 to 30 minutes. Use a clean, single-needle approach for crisp dots. I used a small travel-size antiseptic wipe pack during healing when I was commuting to work.
Mistake to Avoid: Asking for thick dots, which bleed into blobs as the skin heals.
Style/Technique: Micro Morse Code
Pain Level: 2/10
Session Time: 20 to 30 minutes
Best For: Behind the ear, coverable by hair, subtle messaging
4. Coordinates On the Rib Cage
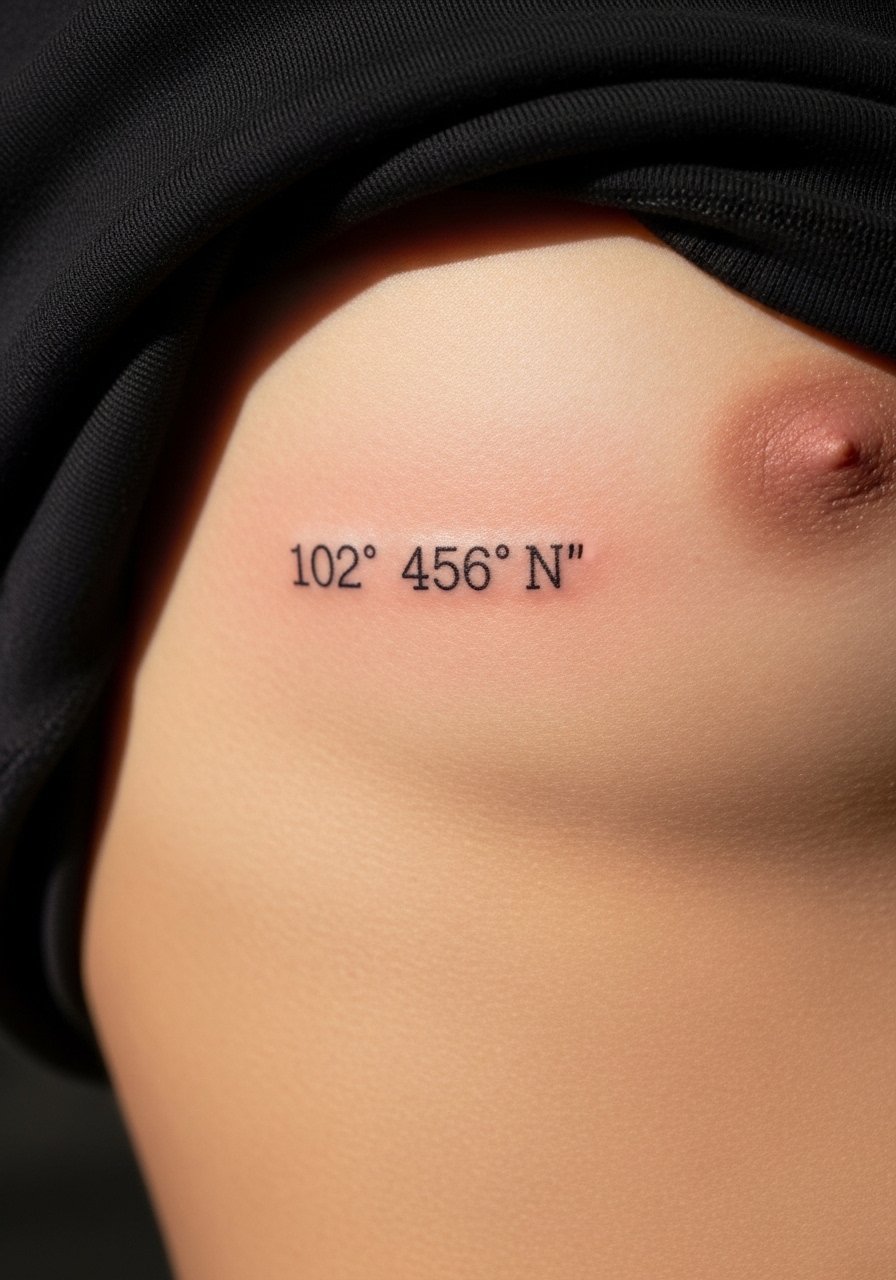
Coordinates of a meaningful place are less literal than text and age predictably. Ribs hold crisp lines but take more time and pain, so expect 45 to 90 minutes. The visual result is clean numeric columns that feel intentional. This fits someone who wants a private reminder tied to a location. I recommend a thin stencil and a gentle aftercare cream like scent-free healing ointment for minimal scabbing.
Mistake to Avoid: Overly ornate fonts for numbers, which distort at small sizes.
Style/Technique: Numeric Coordinates
Pain Level: 7/10
Session Time: 45 to 90 minutes
Best For: Rib cage, private placement, people comfortable with longer sessions
5. Tiny Phoenix Behind the Ear
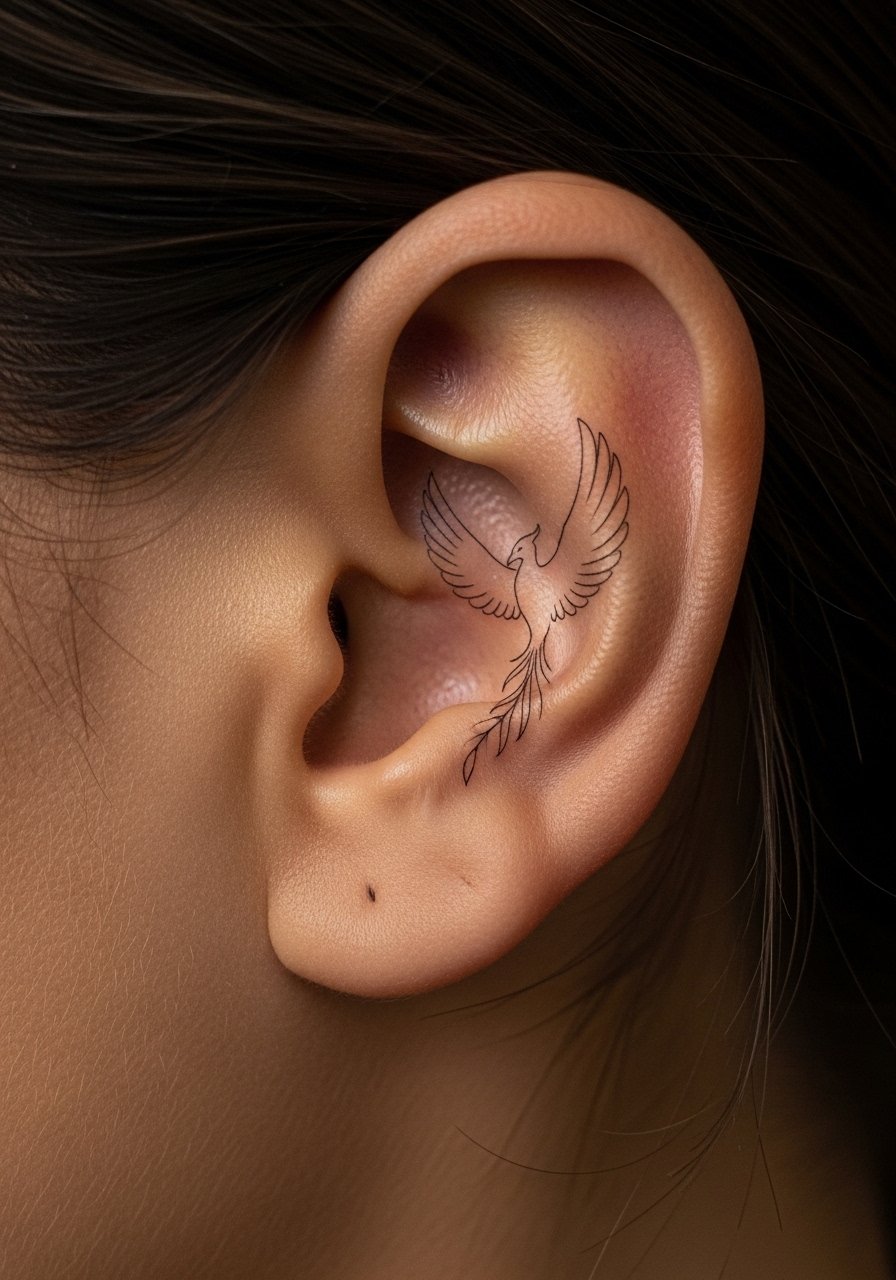
A micro phoenix is a visual shorthand for rising again without saying it outright. Line work with minimal shading keeps the icon crisp as it ages. Behind the ear it sits close to idea 3, but the small illustration reads more symbolic. It works for someone who wants imagery rather than words and takes about 30 minutes. I paired mine with an aftercare unscented lotion during the later healing days.
Mistake to Avoid: Over-detailing a tiny bird, which turns into a dark smudge after months.
Style/Technique: Micro Symbol Line Work
Pain Level: 2/10
Session Time: 20 to 35 minutes
Best For: Behind the ear, symbolic reminder, subtle imagery
6. Clean Semicolon With Watercolor Accent
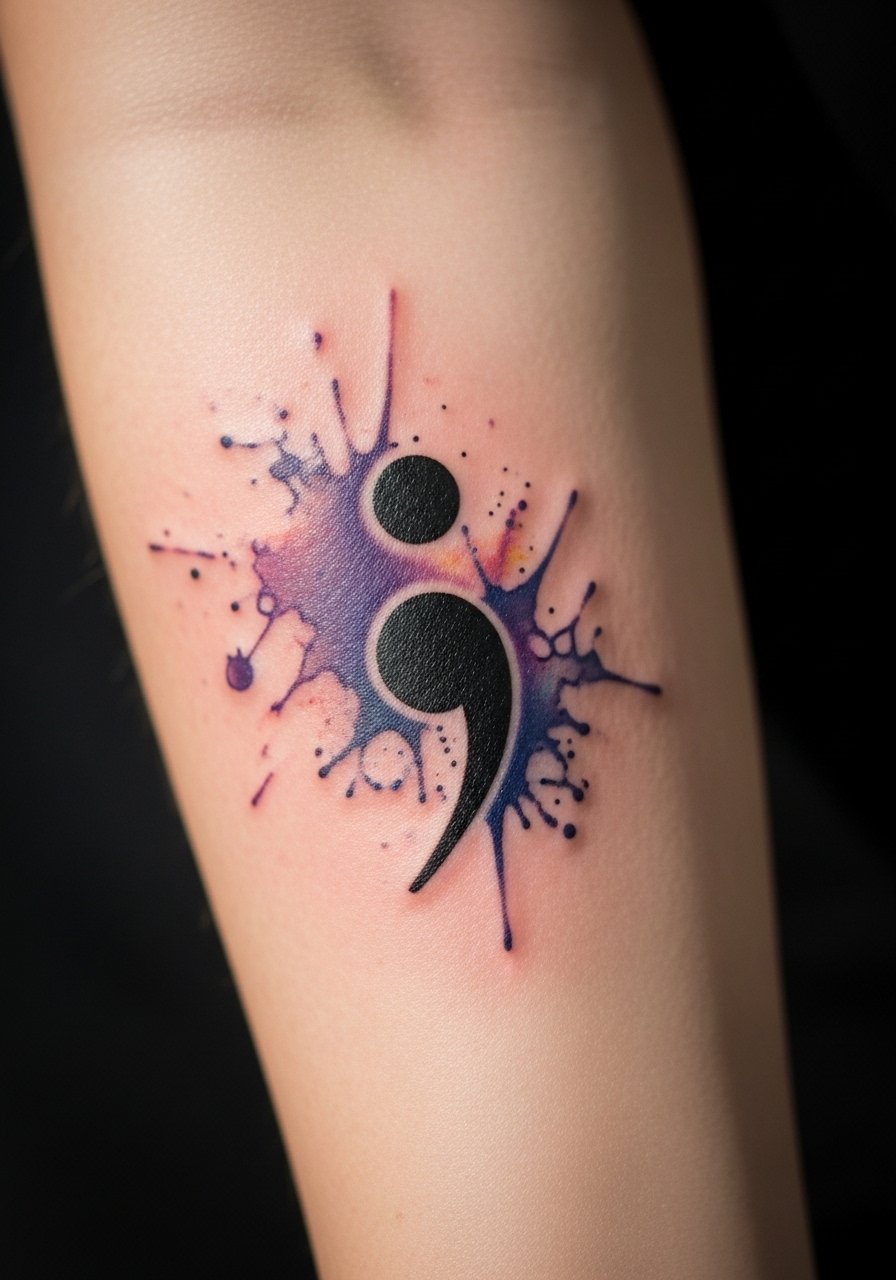
The semicolon is a well-known resilience mark, and adding a soft watercolor splash keeps it personal without shouting. Use a healed-stage-friendly palette and expect about 30 to 50 minutes. Watercolor areas fade differently, so pick pigments with known longevity. I used a lightweight spf-friendly moisturizer after the initial healing to protect the color.
Mistake to Avoid: Asking for saturated watercolor in a tiny patch, which fades unevenly and can look patchy.
Style/Technique: Symbol With Watercolor
Pain Level: 3/10
Session Time: 30 to 50 minutes
Best For: Inner forearm, expressive but coverable
7. Subtle Script Along the Foot Arch

A script along the foot arch stays private and wears differently because of friction from shoes. Pick a short phrase and a fine-line style. The result feels intimate and personal, and healing needs closing-toe shoes for a week. Session time is about 30 to 40 minutes. I recommend breathable adhesive bandages for the first two days to keep the area clean.
Mistake to Avoid: Choosing a long sentence for the arch, which stretches and becomes hard to read.
Style/Technique: Curved Foot Script
Pain Level: 4/10
Session Time: 30 to 40 minutes
Best For: Foot arch, private placement, people who can rest shoes briefly
If this is getting you ready to actually shop, here are the core supplies I reach for when planning small truth reminders.
Essential Supplies For Resilience Tattoos
Tools & Aftercare:
- Fragrance-free tattoo ointment (~$8-12), keeps thin lines from scabbing heavily.
- Scent-free healing ointment (~$12-18), great for the second week.
- Breathable adhesive bandages (~$6-10), for foot and wrist placements.
Prep & Protection:
- Antiseptic wipes travel pack (~$5-9), for studio travel.
- SPF body moisturizer (~$10-18), for long-term color protection.
- Fine-line stencil transfer paper (~$7-15), if you like to bring reference placement examples.
Studio Comfort:
- Disposable gloves (~$10-20).
- Small soft pillow (~$12-25), to prop limbs during sessions.
- Unscented lotion (~$6-12), for later healing days.
8. Tiny Lock On the Collarbone
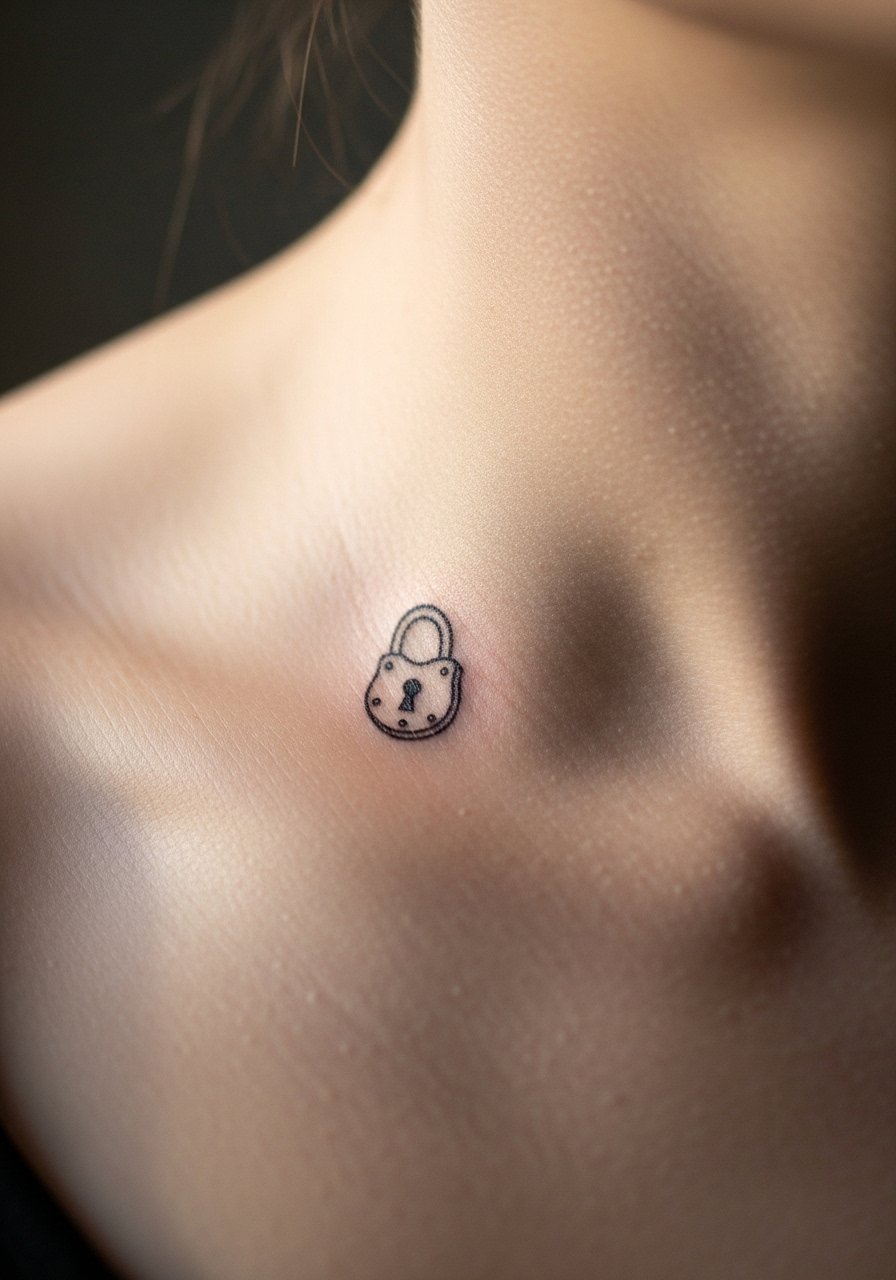
A small lock symbol on the collarbone reads as keeping hold of hope. Outline-only tattoos hold detail well with minimal ink saturation. It is a gentle visual cue that pairs with a word on the opposite side if you want a set. Session time is 20 to 35 minutes. I used a mild aftercare balm in the first week to avoid heavy crusting.
Mistake to Avoid: Requesting heavy filling in a tiny icon, which increases scabbing and long-term blurring.
Style/Technique: Micro Outline Icon
Pain Level: 4/10
Session Time: 20 to 35 minutes
Best For: Collarbone, visible but elegant
9. Tiny Matching Finger Bands
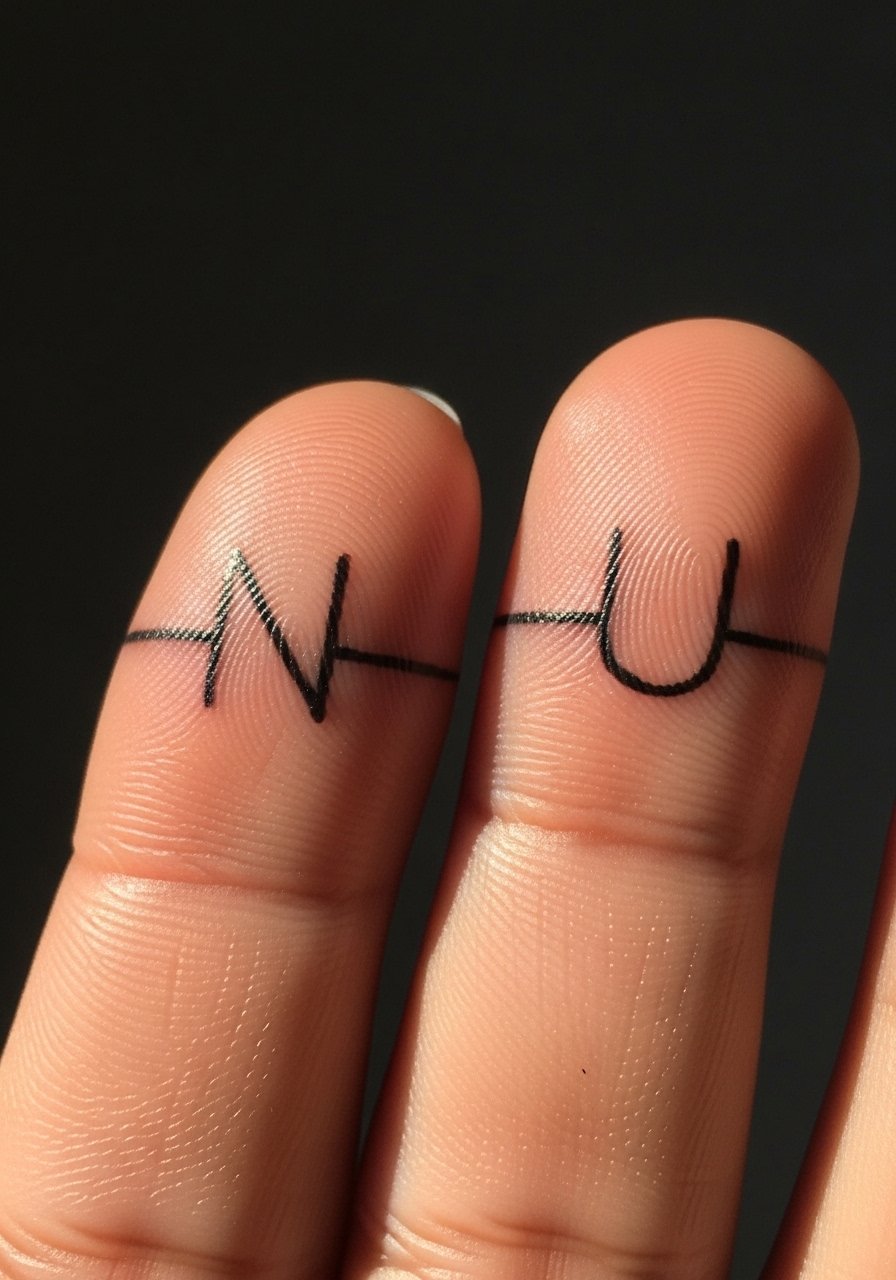
Small matching letters or tiny bands on fingers make a discreet promise you can see at a glance. Fingers fade faster from hand use, so expect touch-ups within a year. Each letter or band takes about 10 to 20 minutes. I carry a small spf stick for sun protection when they are exposed.
Mistake to Avoid: Choosing dense black fill for finger pieces, which fades into a blur quickly.
Style/Technique: Micro Lettering Bands
Pain Level: 3/10
Session Time: 10 to 20 minutes per finger
Best For: Fingers, constant visual reminder, people okay with yearly touch-ups
10. Heartbeat Line Across the Sternum
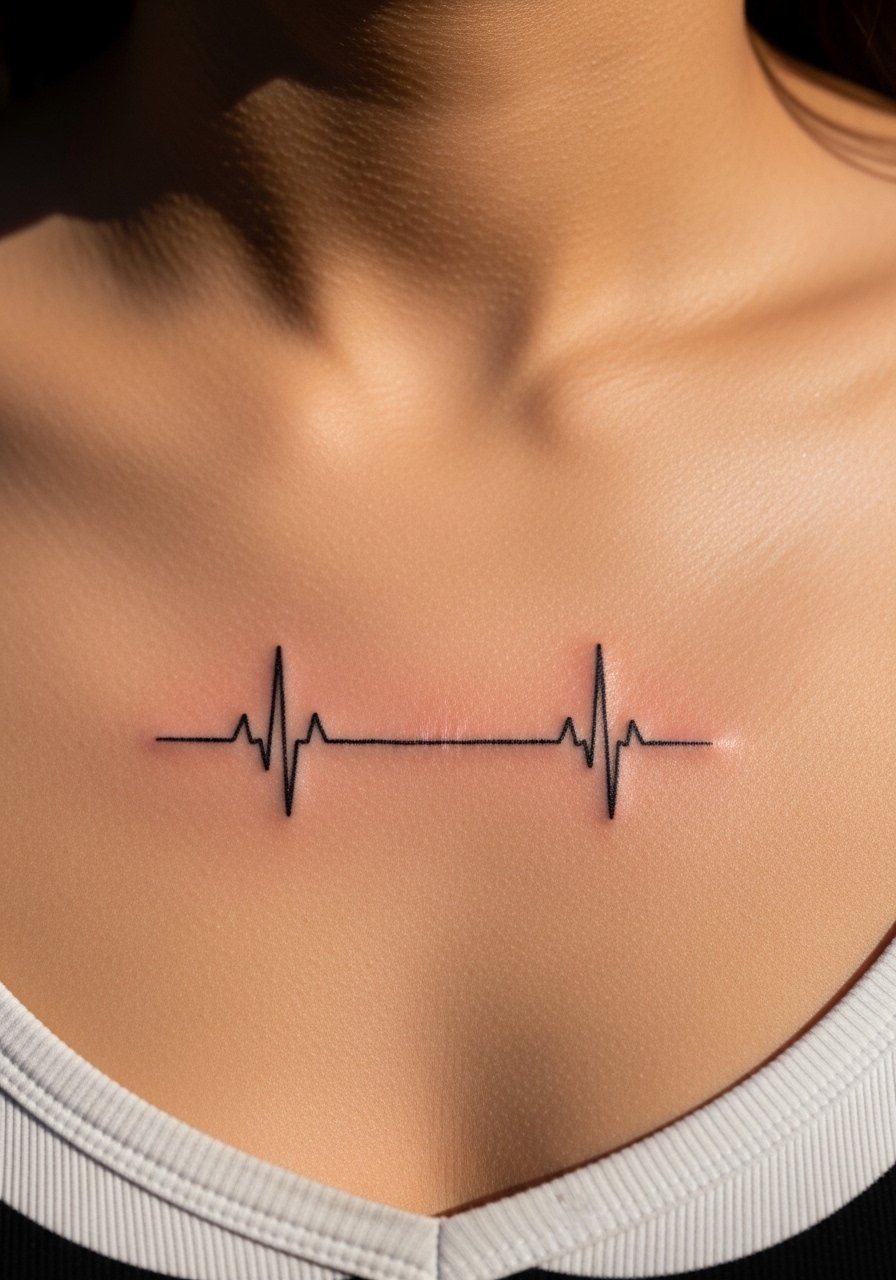
A small heartbeat line across the sternum reads as proof you kept going. Thin line work across bone holds clean with modest shading. This area can be sensitive, so sessions of 30 to 50 minutes are typical. It pairs well with a short date or initial. I used a gentle fragrance-free lotion after the initial peeling phase.
Mistake to Avoid: Adding lots of heavy shading in a narrow band, which can make the design lose its line quality.
Style/Technique: Minimal Line Work
Pain Level: 6/10
Session Time: 30 to 50 minutes
Best For: Sternum, central statement, people ready for medium pain
11. Sanskrit One-Word With Cultural Note
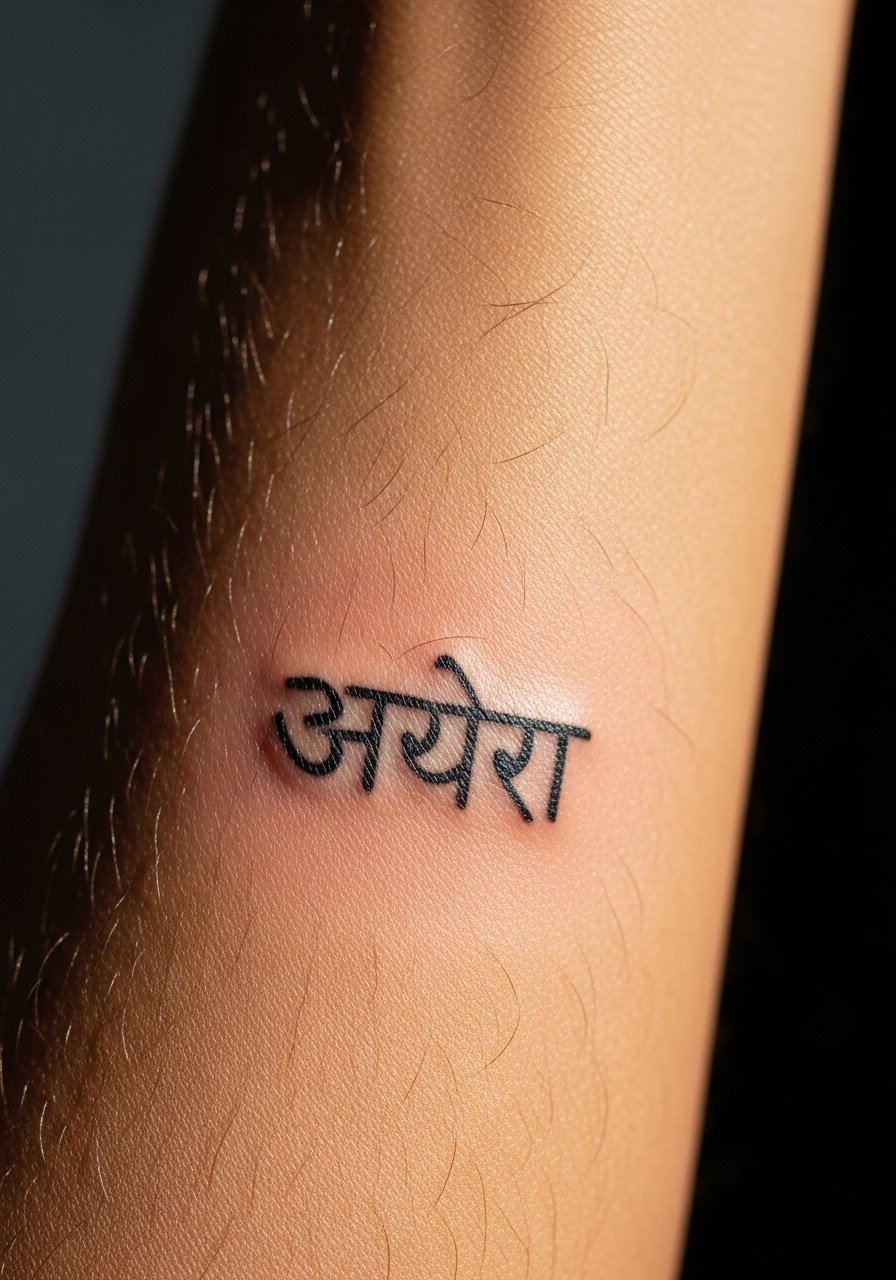
Using a Sanskrit or other language word can be beautiful, but be sure you understand the meaning and cultural context. Pick a short, clearly translated term and discuss authenticity with your artist. This is typically a one-session piece, 30 to 45 minutes. I recommend researching the phrase and asking for a native speaker confirmation before inking. For ink care try a gentle healing ointment.
Mistake to Avoid: Using machine-translated phrases without cultural consultation, which can lead to unintended meanings.
Style/Technique: Foreign Script
Pain Level: 3/10
Session Time: 30 to 45 minutes
Best For: Inner forearm, people wanting language-based reminders
12. White Ink Subtle Scar-Friendly Mark
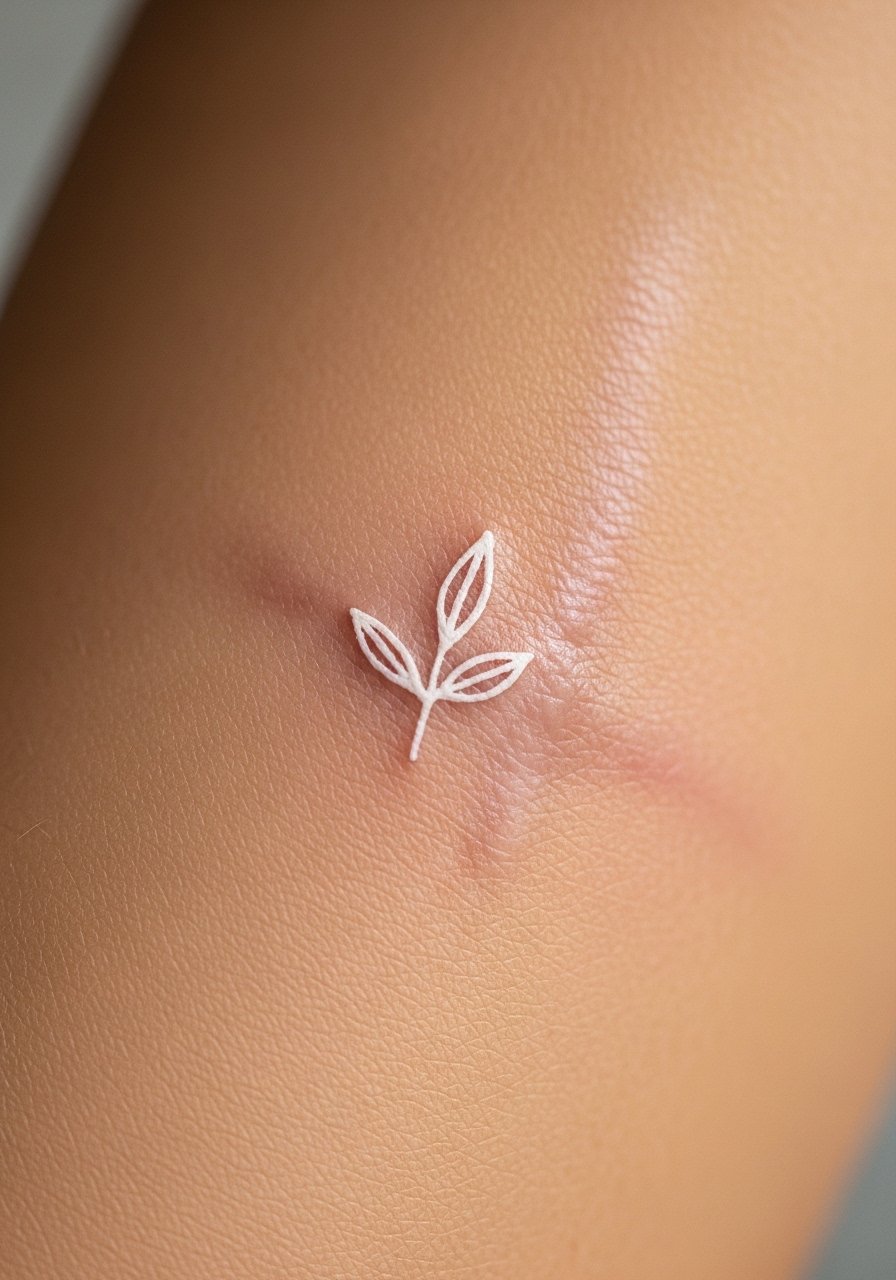
White ink can be a soft way to mark survival near a scar, but it behaves differently across skin tones and may lighten over time. This idea is about texture, not contrast, so pick a design that complements scar lines. Sessions are 30 to 60 minutes depending on touch-up needs. I advise a consult about scar tissue and testing a tiny dot first. I used a healing silicone gel sheet for scar management before inking.
Mistake to Avoid: Expecting white ink to read bright and opaque on all skin tones immediately.
Style/Technique: White Ink Scar-Friendly
Pain Level: 5/10
Session Time: 30 to 60 minutes
Best For: Near scars, people seeking subtle texture work
13. Coordinate And Micro Script Combo
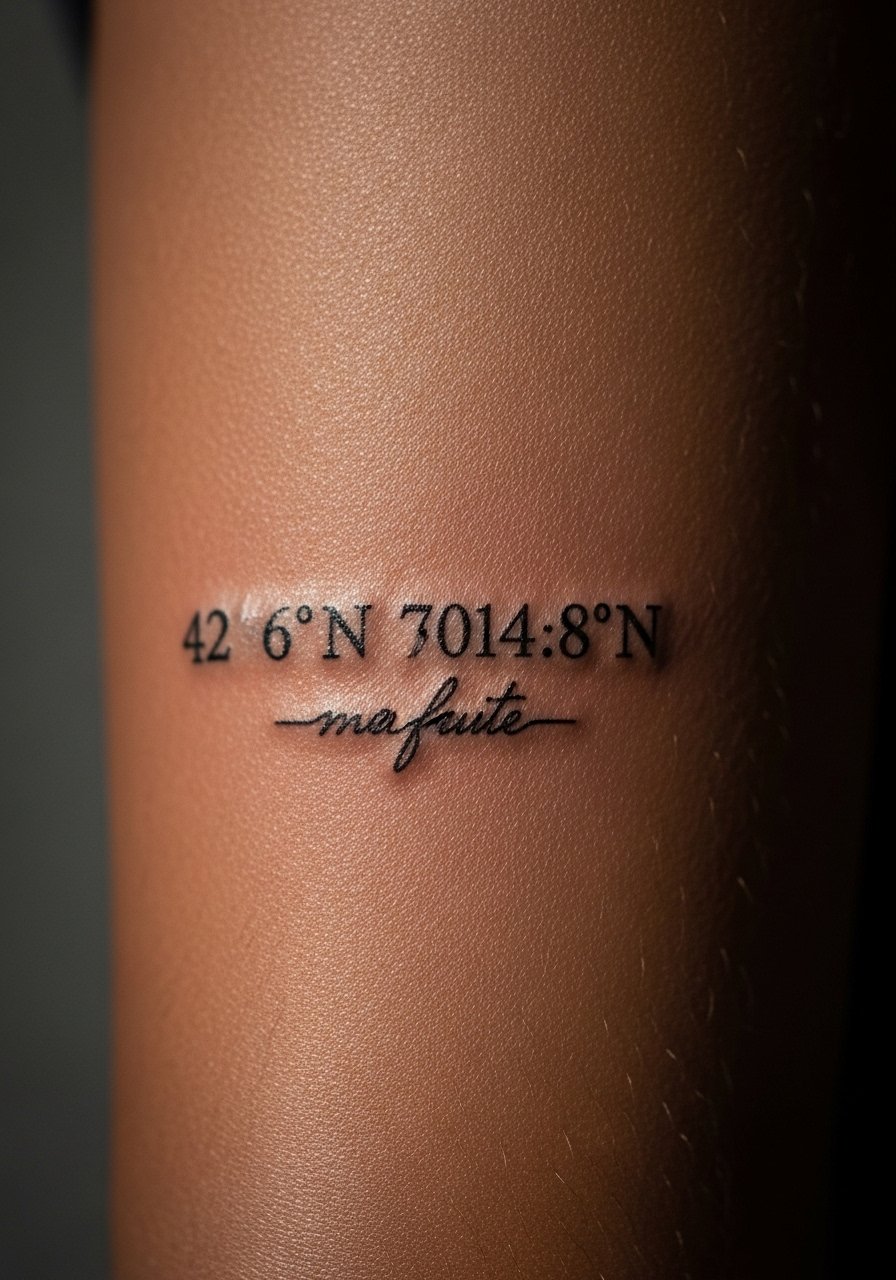
Combine coordinates with a tiny script underneath for a two-layer reminder that reads private and intentional. The coordinates anchor the piece visually and the script gives context only you know. This typically takes 40 to 70 minutes depending on spacing. I recommend a thin-lined font and a light aftercare balm like unscented healing cream to avoid heavy scabs.
Mistake to Avoid: Crowding the two elements too close, which makes both harder to read as they age.
Style/Technique: Mixed Micro Elements
Pain Level: 4/10
Session Time: 40 to 70 minutes
Best For: Inner arm, layered meaning, people who want private context
Day-To-Day Healing Moves
Start with the obvious: wash and pat. Clean the area twice a day with mild soap and let it air for a few minutes, then apply a thin layer of fragrance-free ointment. Thick layers trap bacteria and cause scabbing.
Grab breathable bandages if your placement rubs clothing in the first 48 hours. They keep the area clean while you sleep or commute.
Avoid over-scrubbing. Let flakes come off naturally and use a soft cotton tee instead of tight fabrics. A gentle unscented lotion helps the later stages of healing.
Check sun exposure with a pocket SPF like spf stick after the first month. UV light fades thin lines faster than thick ones.
