
The first time I tried a navy mani from a viral pin, my hands looked moody but sloppy, the polish pooled at the cuticles and the shine was flat. After three disasters and one conversation with a tech who works at a salon downtown, I learned to think about navy like a small outfit, not a single coat of paint. These nine ideas are what actually survived real life.
If you wear polish to work, weekends out, or just like a darker neutral, these looks are budget friendly and mostly beginner friendly. Expect a few salon-level steps in the more detailed ideas, tips on short versus long nails, and quick swaps if you prefer regular polish, gel, or acrylic.
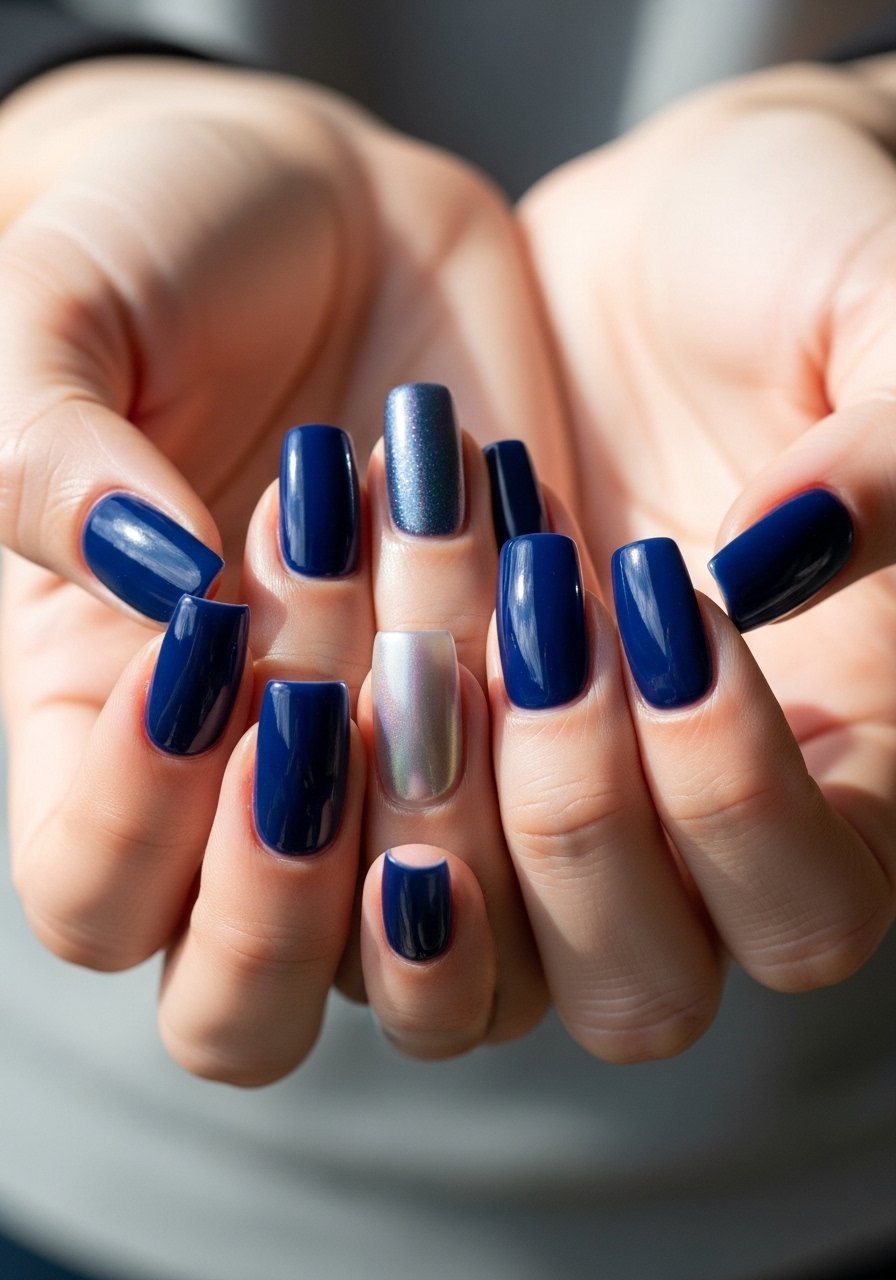
1. High-Gloss Navy Classic
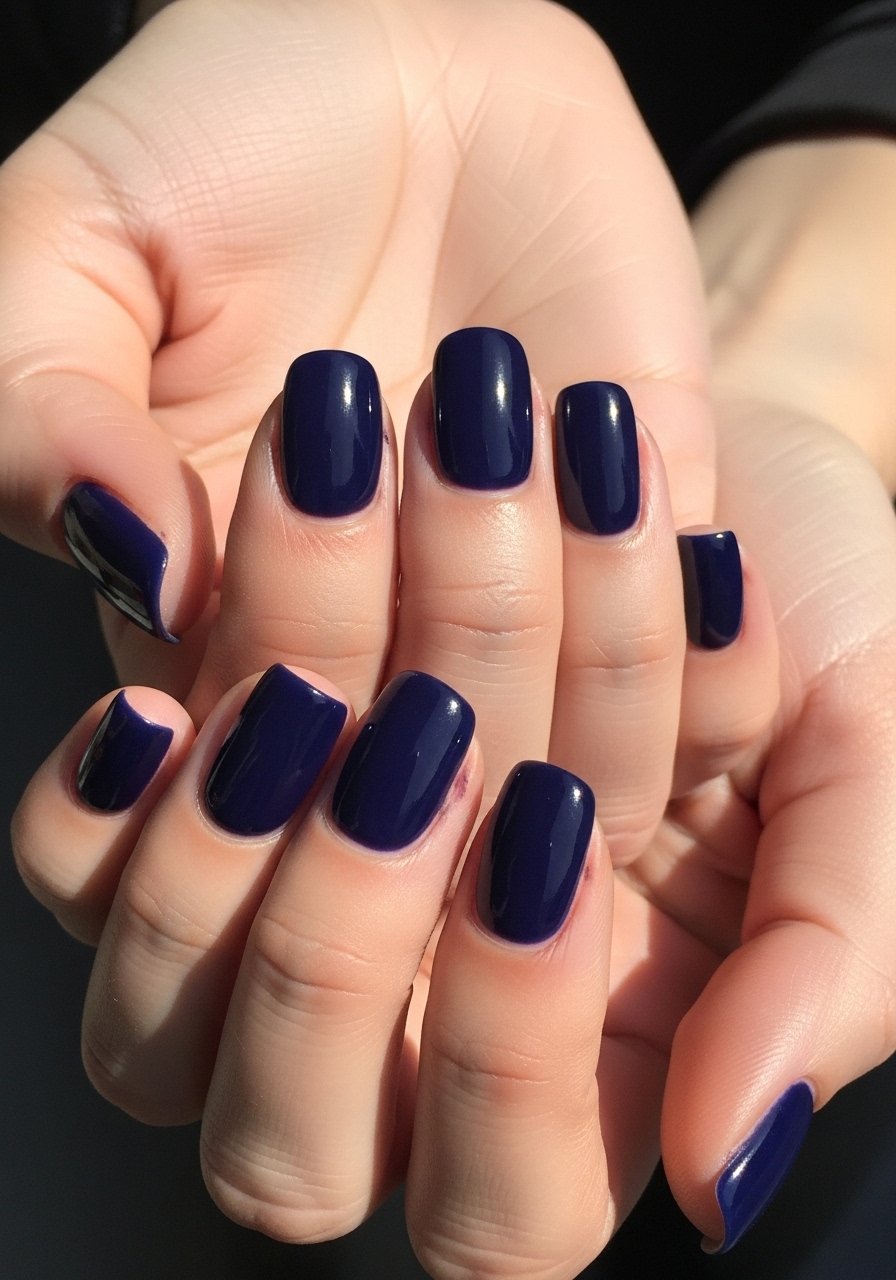
A true glossy navy is the easiest place to start, visually clean and seasonless. What makes it work is two thin coats applied in one swipe per nail, each coat drying fully before the next. For gel, flash-cure for 10 to 15 seconds between thin layers to avoid ridges. I like pairing a creamy navy gel like navy gel polish with a fast dry top coat such as quick-dry top coat for mirror shine. This suits short to medium nails and fits a weekday or interview look on a budget.
Style/Vibe: Classic Gloss
Best For: Short to medium nails, everyday wear
Skill: Beginner
Mistake to Avoid: Applying thick coats and rushing the dry time so polish pools near the cuticle.
2. Silver-Lined Navy French
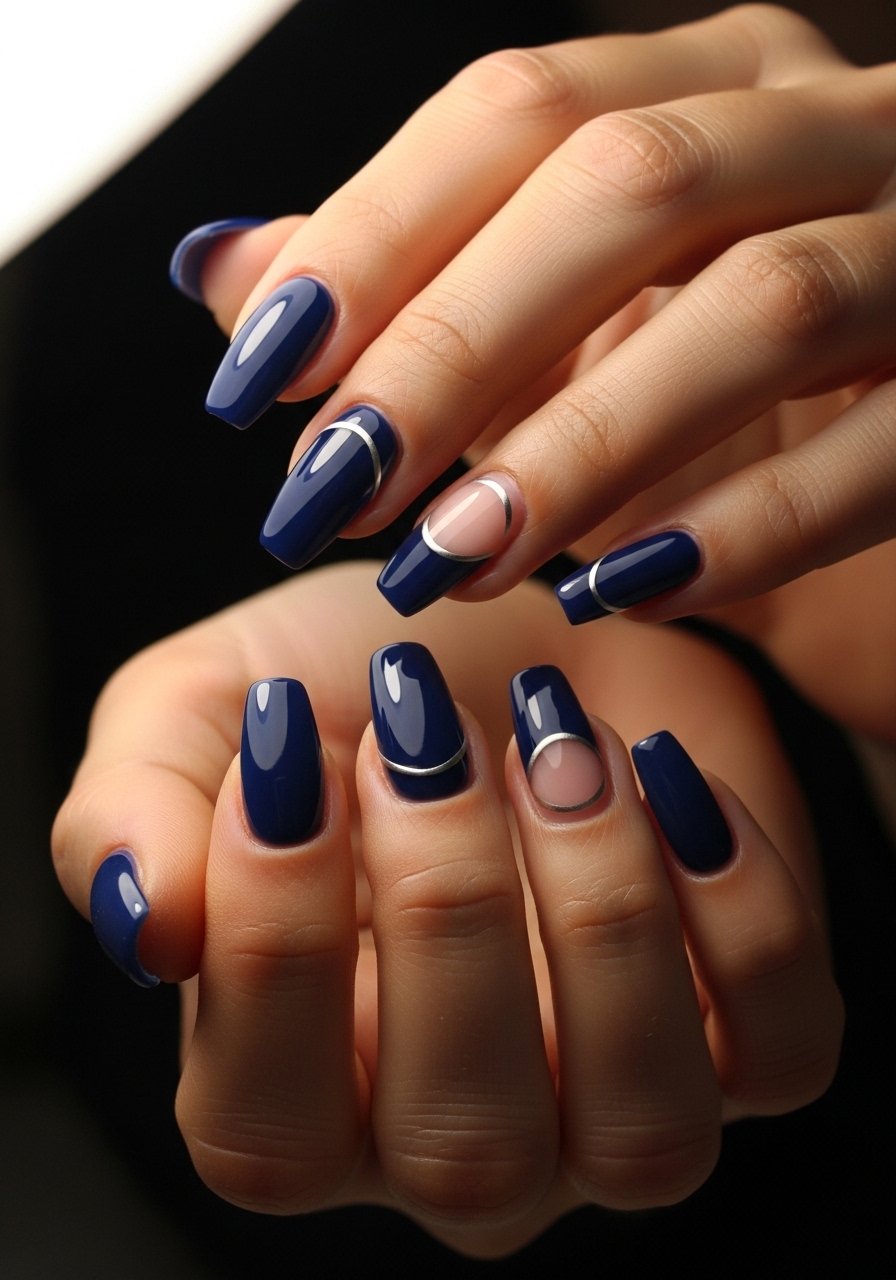
Swap the white tip for a navy base with a micro silver line along the smile. The trick is a 0.5 millimeter striping brush for that clean metallic edge. Paint two thin navy coats, let them set, then steady your hand and draw one gentle silver pass. I usually use striping brush set and a metallic polish like silver nail polish. This feels elevated but still office-friendly, and it is forgiving on medium lengths.
Style/Vibe: Modern French
Best For: Medium nails, work events
Skill: Intermediate
Mistake to Avoid: Trying to draw the line with a thick brush and overworking the metallic, which makes it jagged.
3. Matte Navy With Satin Accent
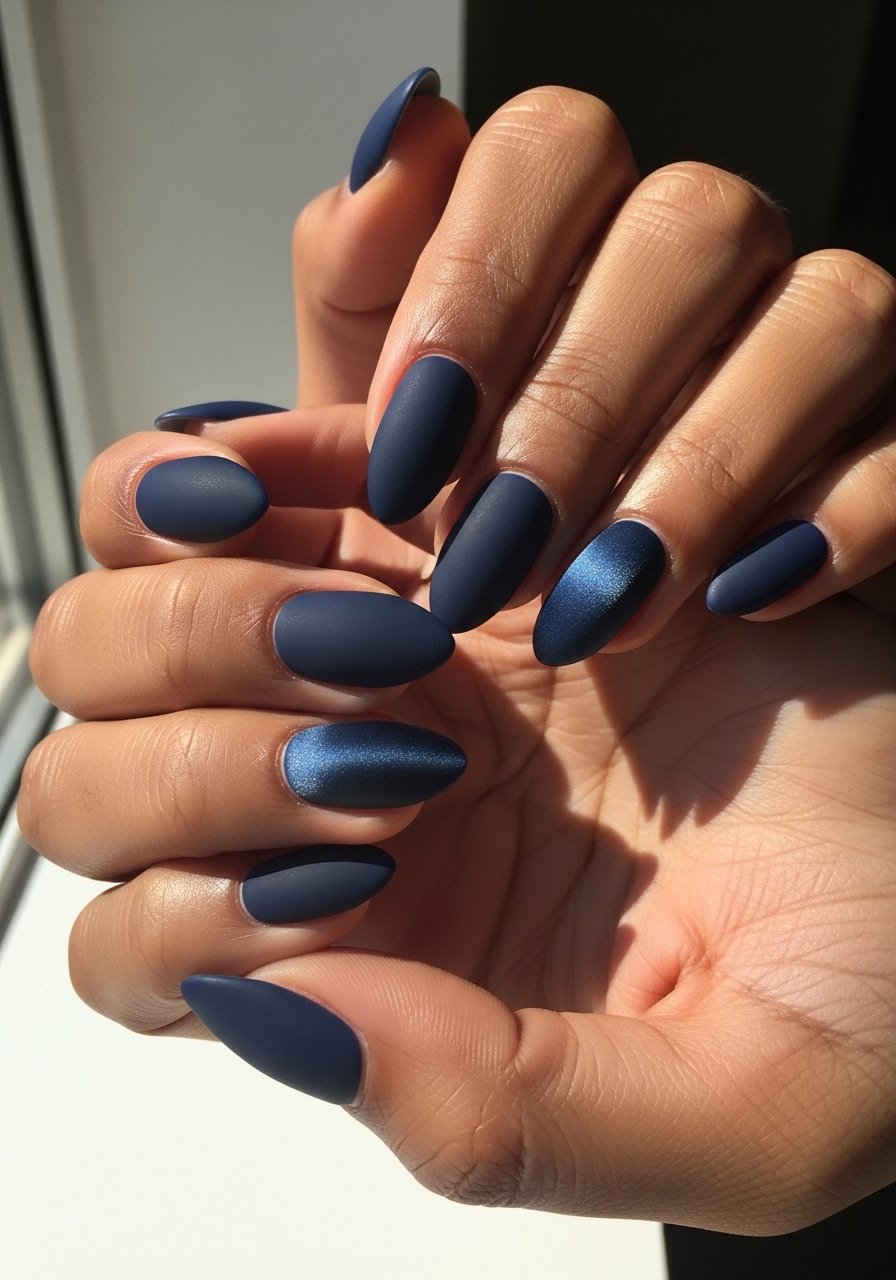
Matte navy reads cleaner than glossy for someone who prefers low-reflective finishes. Use a no-wipe matte top coat over glossy navy and pick one nail for a satin or glossy counterpoint for contrast. I like using no-wipe matte top coat and a satin sheen product like satin top coat for a single accent nail. This works well on medium almond or long shapes and feels modern without extra fuss. It pairs well with minimal jewelry and a sweater.
Style/Vibe: Low-Reflect Navy
Best For: Medium to long nails, minimal looks
Skill: Beginner
Mistake to Avoid: Applying matte over tacky polish, which traps shiny spots and looks patchy.
4. Navy Marble With Gold Flakes
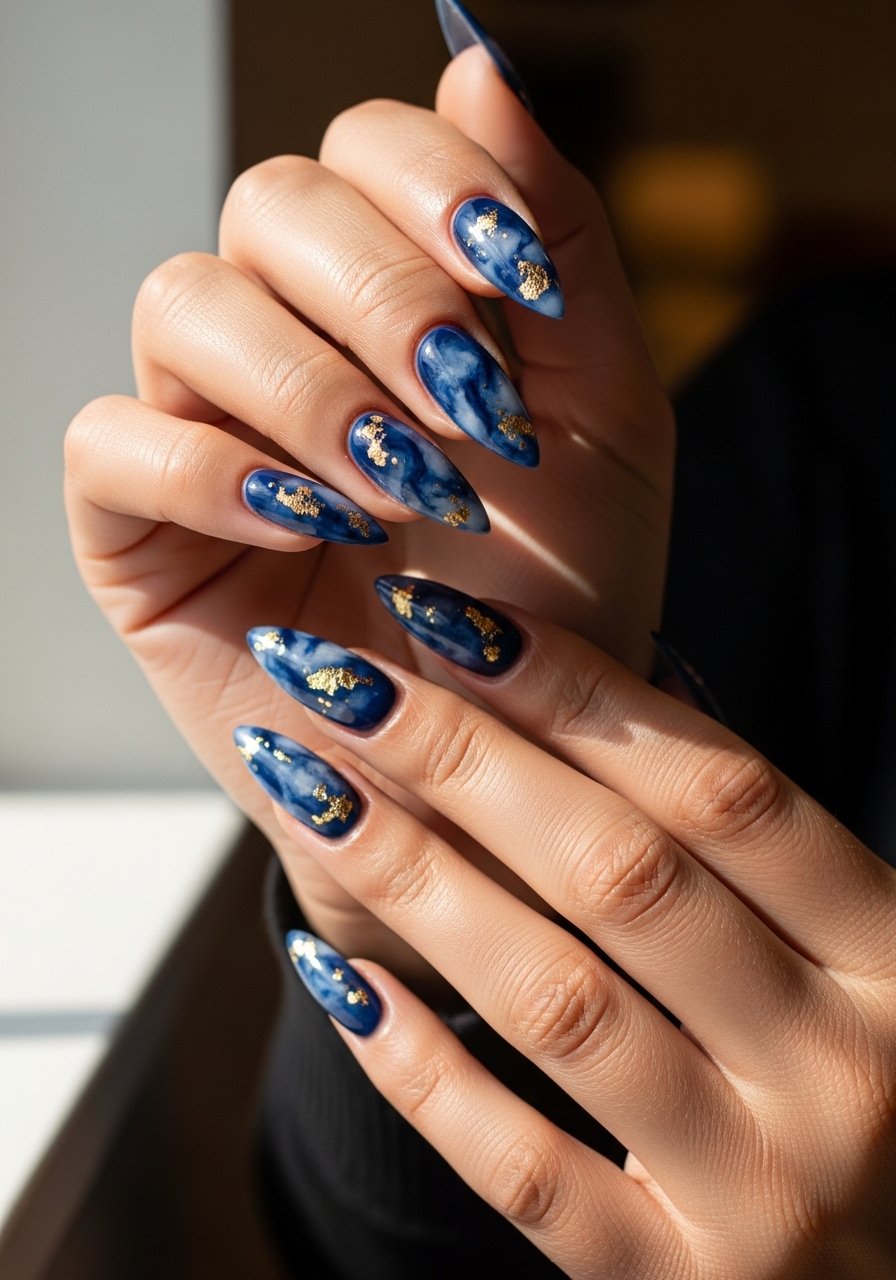
Marble keeps navy from feeling heavy. Drop a rice-grain size bead of a slightly lighter blue into a navy puddle and drag once with a thin brush to create veins. Add sparse gold leaf for a luxe edge. I usually use gold leaf flakes and a small detail brush like nail art detail brush. This look is best for medium to long nails and for nights out. It takes patience but photographs beautifully when you keep the veins thin and sparse.
Style/Vibe: Luxe Marble
Best For: Medium to long nails, special occasions
Skill: Advanced
Mistake to Avoid: Overworking the marble and ending up with a muddled blob instead of distinct veins.
5. Negative Space Navy Cutouts
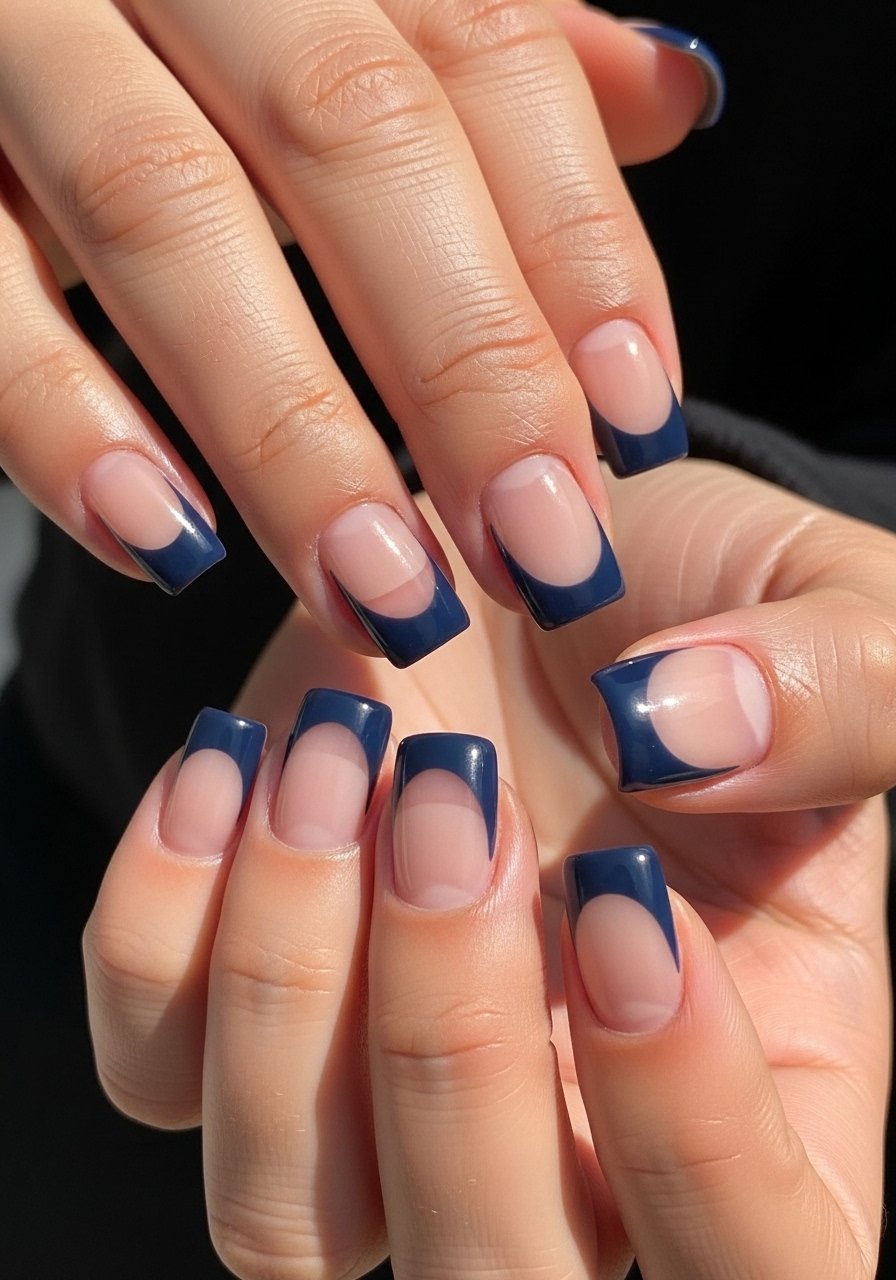
Negative space makes navy feel modern and wearable for short nails. Use thin strips of nail tape to mask off crescent or diagonal shapes, paint two thin navy coats, then remove tape before fully dry for crisp edges. Pair with a sheer nude base if you want softer contrast. I keep a roll of nail striping tape and sheer nude polish on hand. This approach reads polished for meetings and is beginner friendly with a little patience.
Style/Vibe: Modern Minimal
Best For: Short nails, office-friendly looks
Skill: Beginner
Mistake to Avoid: Pulling tape off too late so dried polish chips the edge instead of a clean line.
6. Navy Ombre Glitter Accent
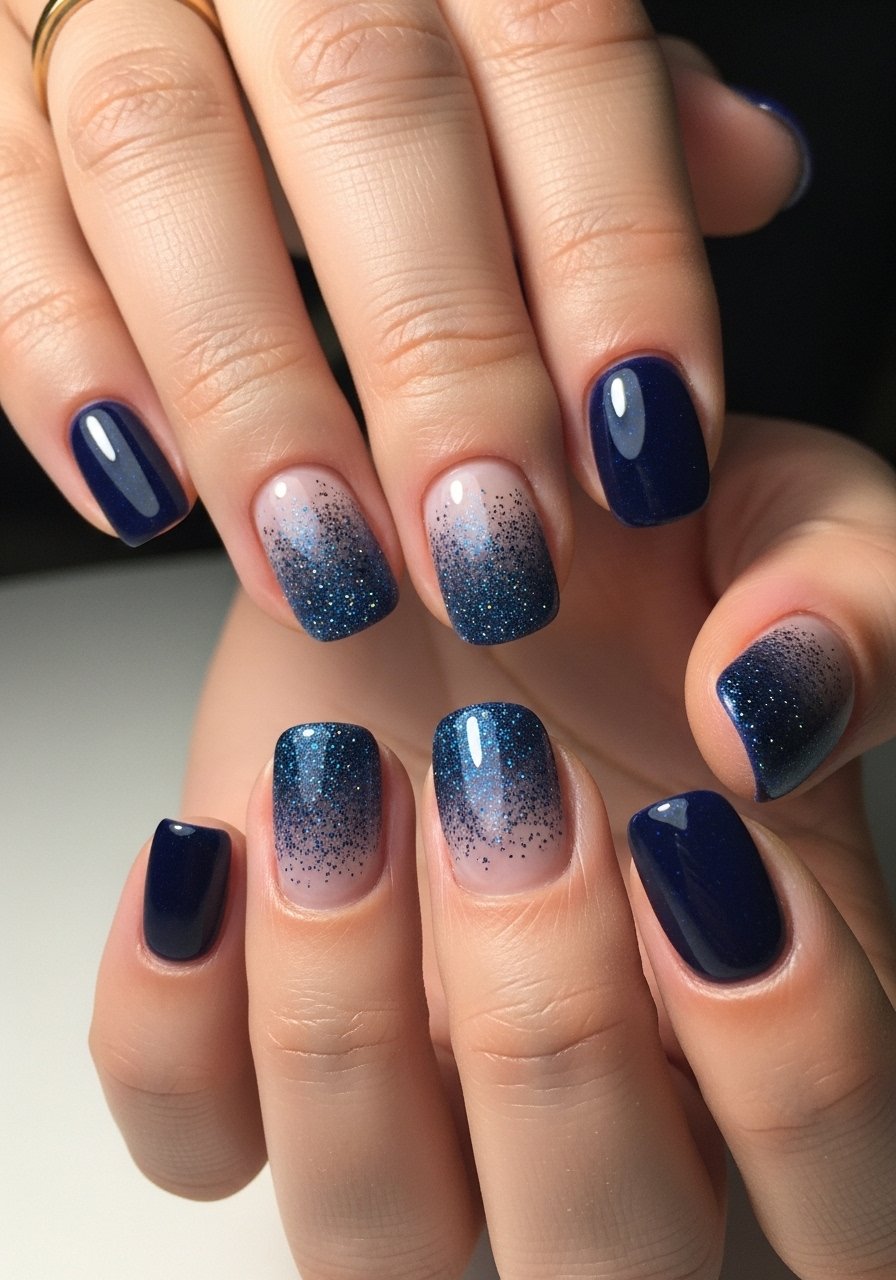
A glitter gradient lifts navy into party territory without covering every nail. Dab a fine cosmetic sponge with glitter polish in three light passes, heavier at the tip and fading toward the center. I do exactly three dabs, each slightly higher on the nail than the last, which prevents hard lines. Use navy glitter polish and a disposable sponge like makeup sponge wedges to blend. This suits medium nails and is forgiving for at-home mani nights.
Style/Vibe: Party Gradient
Best For: Medium nails, weekend looks
Skill: Intermediate
Mistake to Avoid: Loading the sponge with too much product so the glitter clumps instead of fading smoothly.
7. Midnight Chrome Tips
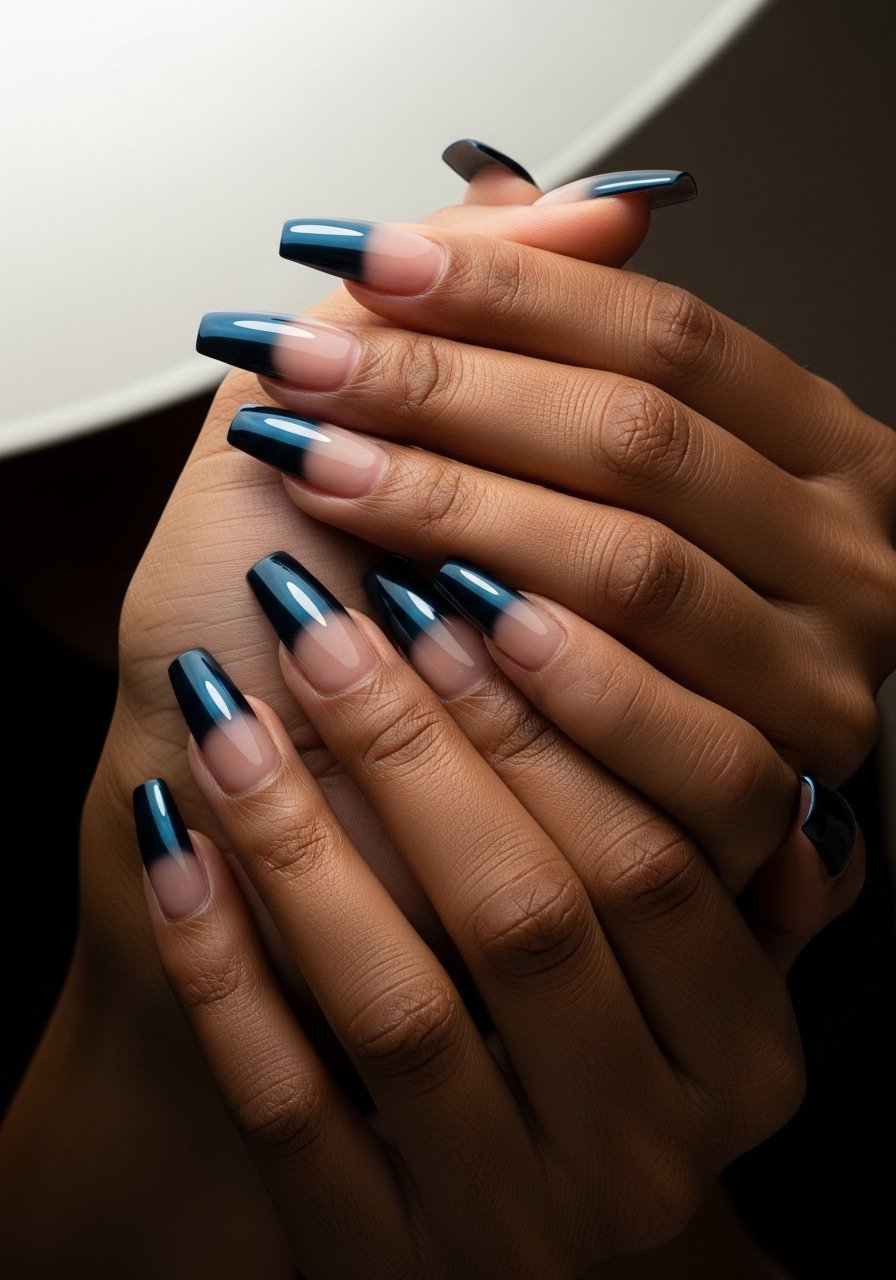
Chrome powder makes navy futuristic. Apply a no-wipe base, cure, then rub in chrome powder on the tip and seal with a no-wipe top coat. A little powder goes a long way. My salon tech showed me to buff the tip area gently before application for better adhesion. I reach for navy chrome powder and no-wipe top coat. This is advanced but creates a lasting, camera-ready finish for nights out.
Style/Vibe: Futuristic Tip
Best For: Long nails, evening looks
Skill: Advanced
Mistake to Avoid: Trying to rub in too much powder and creating streaks instead of a mirror finish.
If you want to try any of these looks at home, these are the basics I reach for before deciding which design to do next.
Navy Mani Starter Kit
Polishes & Finishes:
- navy gel polish (~$10-20), a true deep base for most looks
- sheer nude polish (~$6-12), for negative space and soft bases
- quick-dry top coat (~$8-16), for glossy finishes
Tools & Extras:
- LED nail lamp (~$25-50), important for gel curing at home
- striping brush set (~$6-12), for fine lines and marbling
- gold leaf flakes (~$6-15), for luxe accents
- nail striping tape (~$4-8), for crisp negative space shapes
Navy Wear-and-Care Moves
Wearable navy means thinking about care as you paint. For longer wear, add a hydrating base coat that prevents staining and a thin builder layer if you are prone to chips. I apply a cuticle oil nightly and a thin maintenance top coat every three days. Products I use include hydrating base coat and cuticle oil. This approach keeps navy looking intentional on short and medium nails, and is the gap many tutorials miss when they focus only on design.
Style/Vibe: Durable Navy
Best For: All nail lengths, extended wear
Skill: Beginner
Mistake to Avoid: Skipping a barrier base coat and assuming navy will not stain the nail plate.
8. Navy Two-Tone Retro Blocks
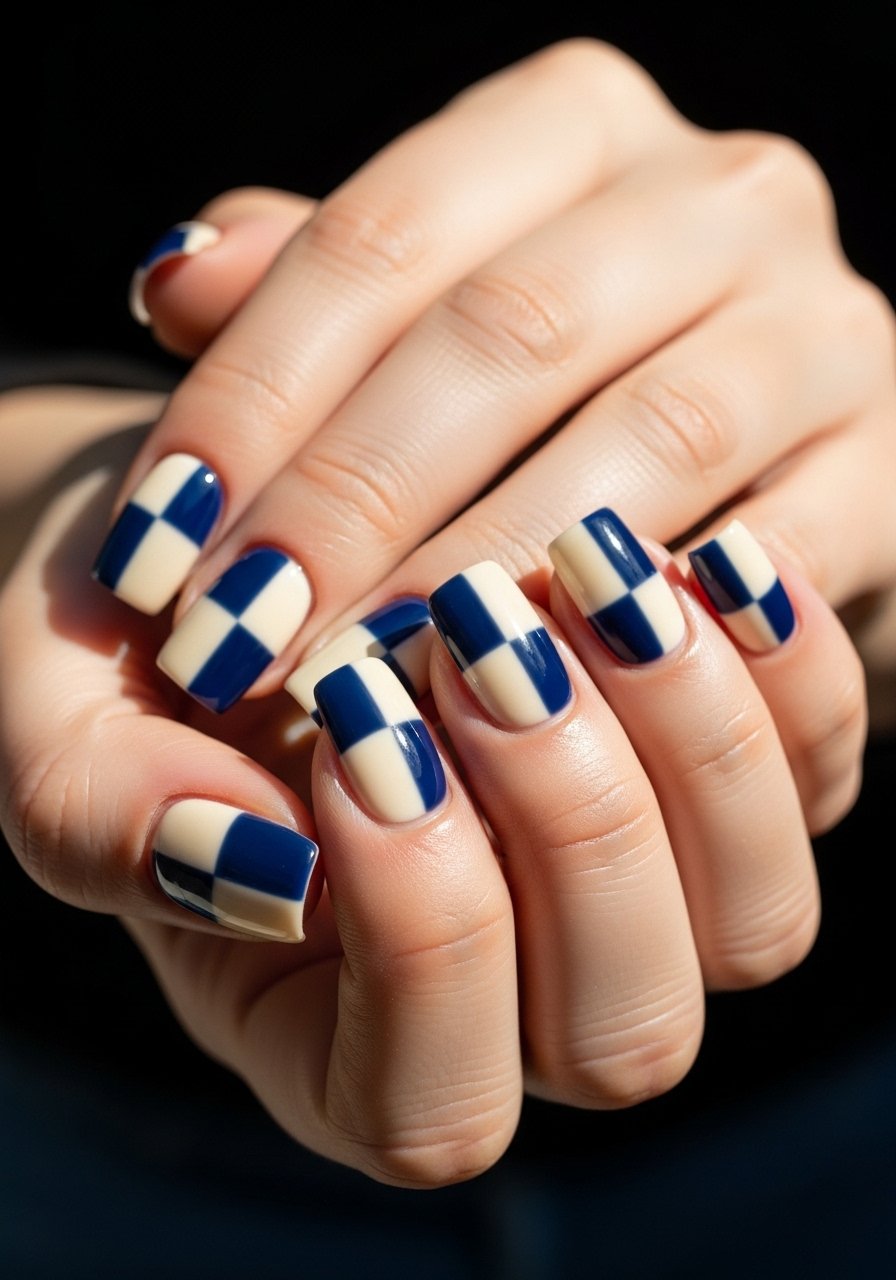
Retro color blocking softens navy with a cream or beige partner. Block off square zones with tape, paint navy and cream in separate passes, then finish with a glossy top coat. The look reads vintage and is great for those who want a patterned mani without frenetic detail. I like cream nail polish and a steady small brush like nail art detail brush. This works on medium nails and photographs cleanly.
Style/Vibe: Retro Block
Best For: Medium nails, creative office or weekends
Skill: Intermediate
Mistake to Avoid: Painting both colors wet and allowing them to bleed into one another instead of letting the first dry.
9. Suede Texture Navy Finish
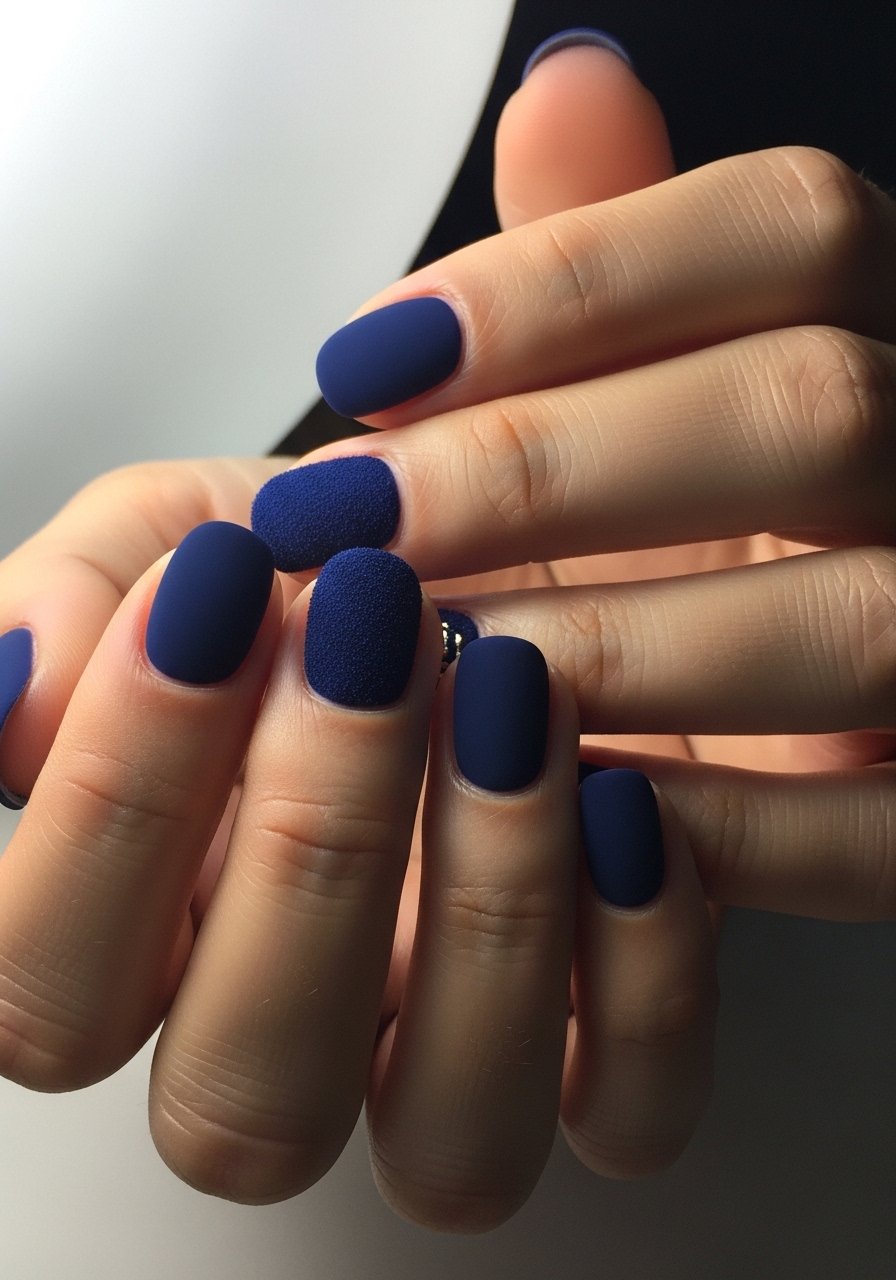
Flocking or suede powder adds tactile interest to navy without extra shine. Apply a matte base, press in a tiny amount of flocking powder with a clean brush, and seal with a matte top coat if needed. Use flock sparingly to keep the texture subtle. I use suede flocking powder and a matte top coat for balance. This is ideal for short to medium nails and for anyone who likes textured details that do not require jewels.
Style/Vibe: Textured Suede
Best For: Short to medium nails, tactile looks
Skill: Intermediate
Mistake to Avoid: Using too much flocking powder so nails feel heavy and collect lint.
Navy Mani Shortcuts I Use
Thin coats beat one thick coat every time. Three thin layers of quick-dry top coat look smoother and last longer than one gloopy layer.
Grab cuticle oil and use it nightly. A 5-dollar bottle softens the skin and makes a week-old mani look deliberate instead of ragged.
If you are trying chrome, wipe the cured layer with isopropyl alcohol first, then buff, then apply navy chrome powder. That little prep step cuts down streaking.
Most people file in one direction until the edge is uneven. File gently in small strokes and finish with a fine buffer. A nail file set makes this feel faster and more consistent.
