
I used to save every perfect pin and then try to copy it at home, only to end up with thick blobs and a shape that looked nothing like the photo. The year I finally booked a consult with a salon tech I trust, she told me to stop chasing the exact picture and start noting three things instead: length, apex height, and where the light hits the nail. After that one change, my acrylics stopped looking staged and started looking like my hands.
These ideas are for anyone who wears acrylics, whether you get regular fills or try them at home, and they lean practical over perfect. Expect approachable techniques, from short-shape-friendly looks to longer sculpted styles, with time and budget notes so you can pick what fits your schedule and skill. A tech who works at a salon downtown showed me a few of these tweaks and they make the biggest difference.
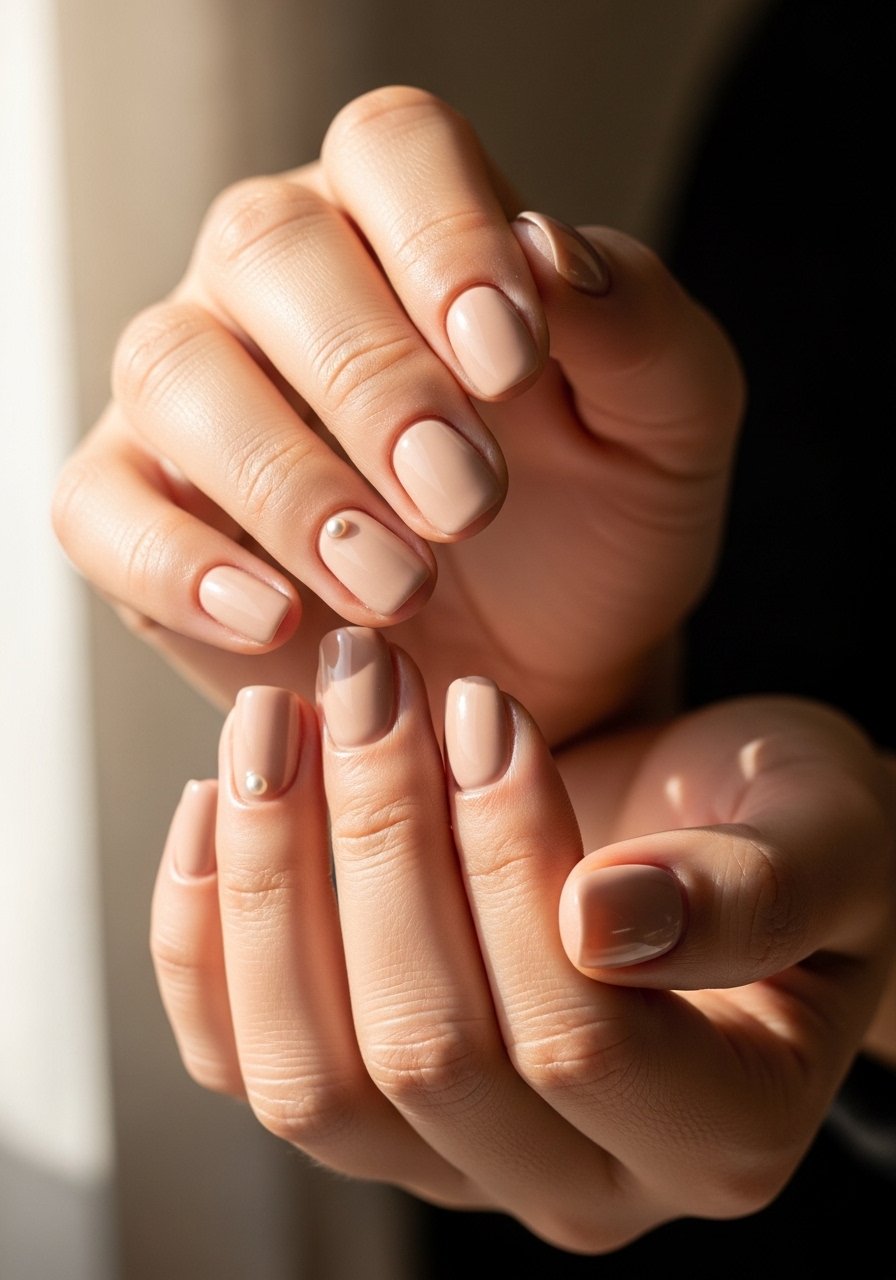
1. Short Squoval Nude Canvas
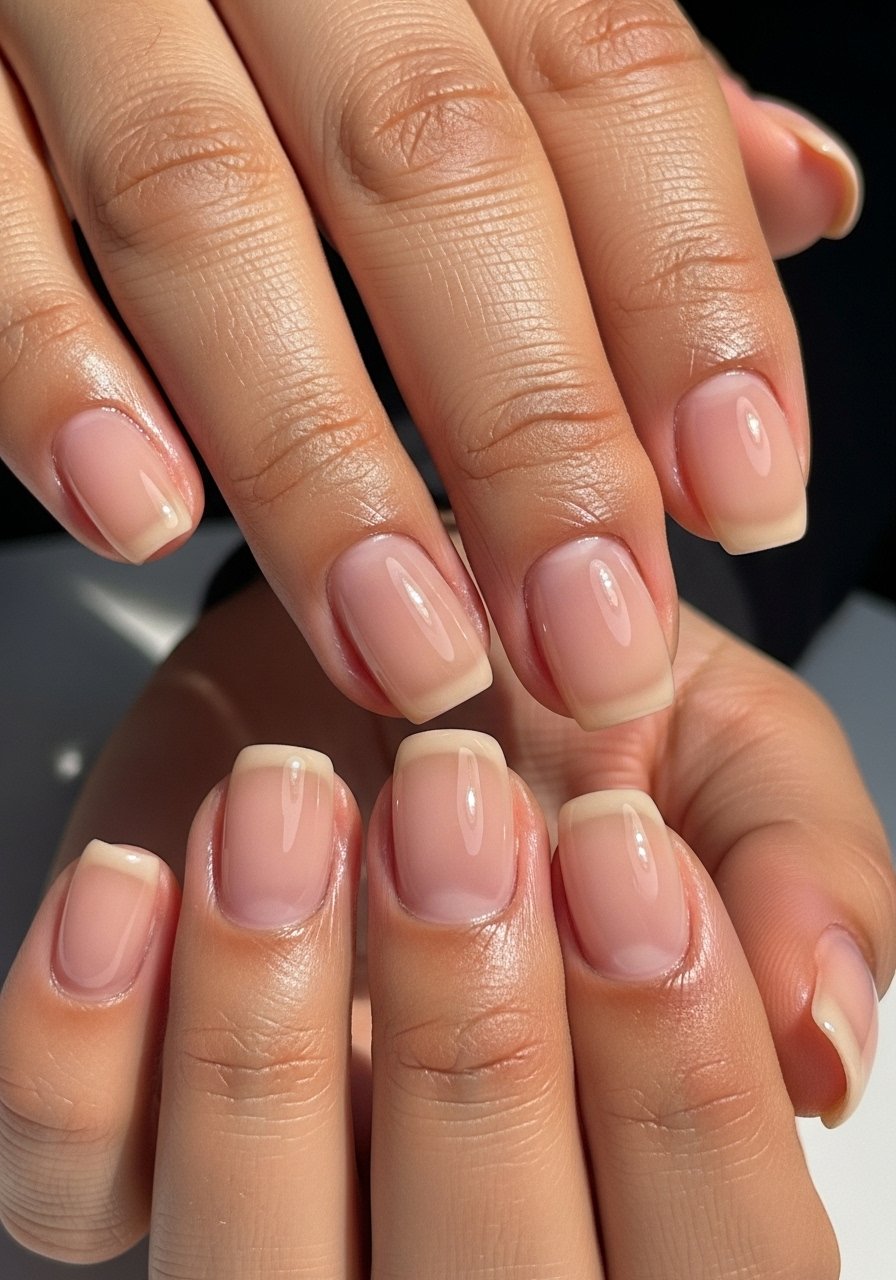
Short nails keep coming back because they read polished without fuss. This squoval base works by keeping the apex around 0.5 mm so the nail reads natural, then layering a semi-sheer nude in two thin coats for translucency. It suits beginners and people who type all day. For at-home touchups try a flexible brush like the nail art detail brush and a sheer nude such as natural sheer polish. The second product helps keep builder gel from looking heavy when topped on acrylic.
Style/Vibe: Clean Everyday
Best For: Short nails / office or low-key weekends
Skill: Beginner
Mistake to Avoid: Applying one thick builder layer to hide bumps instead of filing to a smooth 0.5 mm apex first.
2. Sculpted Square With Micro-Glitter Accent
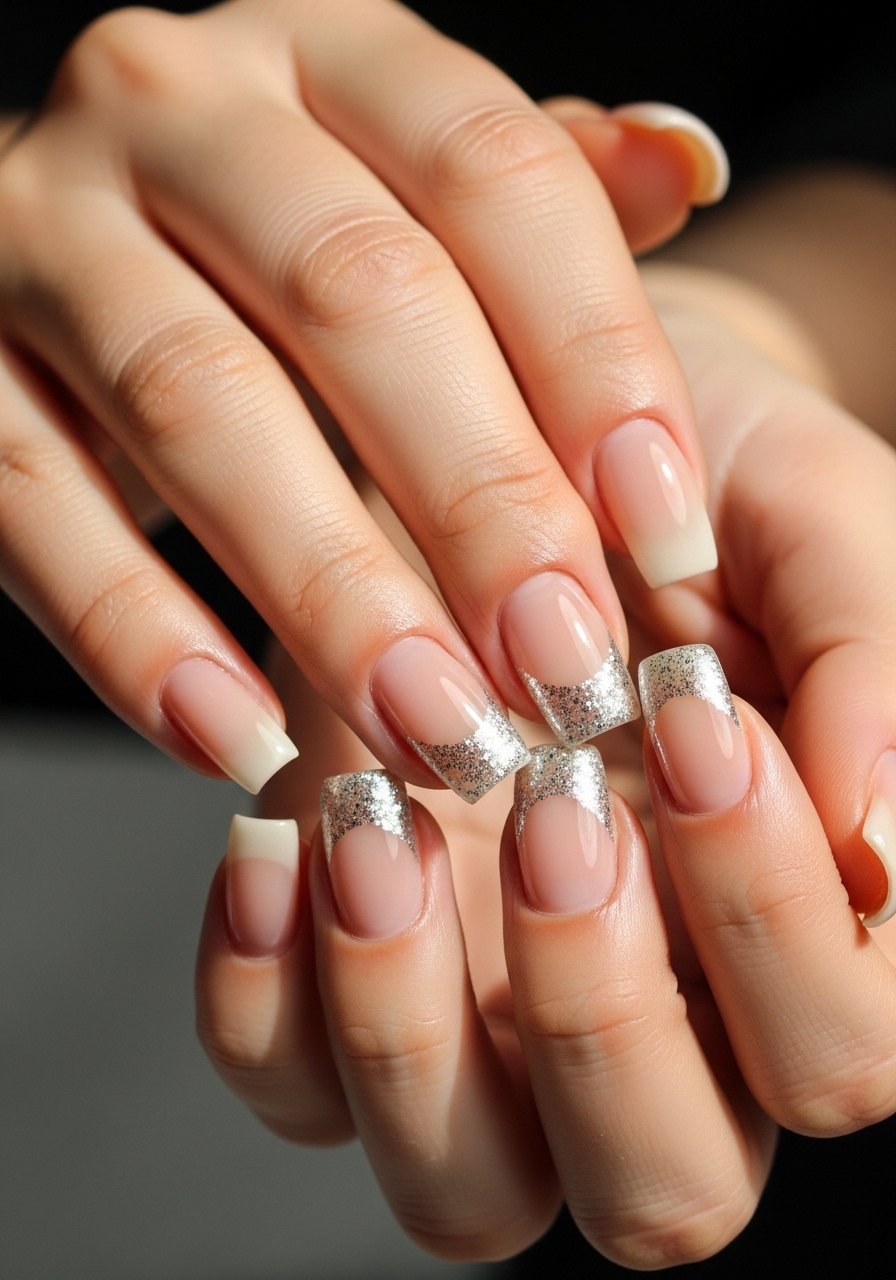
A tiny glitter crescent near the cuticle reads modern without screaming for attention. The trick is to sculpt the square shape with a slightly higher apex, about 0.6 to 0.8 mm, so the glitter sits flat and doesn’t catch. This look takes around 10 extra minutes at the salon but is simple to do at home with a thin clear builder and a dusting of fine cosmetic glitter. Use a gel top coat like fast cure top coat to seal without fogging.
Style/Vibe: Subtle Night Out
Best For: Medium to long square nails / events
Skill: Intermediate
Mistake to Avoid: Piling glitter on wet polish so it flakes off; instead press glitter into tacky layer then cure.
3. Sheer Negative Space Stripes

Negative space keeps designs airy and modern. The striped look uses a 60/40 rule, where pigment covers roughly 60 percent of the nail and 40 percent is clear. That ratio keeps the design visible in photos but wearable in real life. Masking tape helps for crisp lines. I like pairing a sheer base like clear builder gel with a tinted lacquer such as sheer pink polish. It is quick and beginner friendly.
Style/Vibe: Minimal Modern
Best For: Medium nails / everyday wear
Skill: Beginner
Mistake to Avoid: Using wide striping tape that eats half the design; use thin tape for delicate stripes.
4. Reverse French with Diagonal Tips
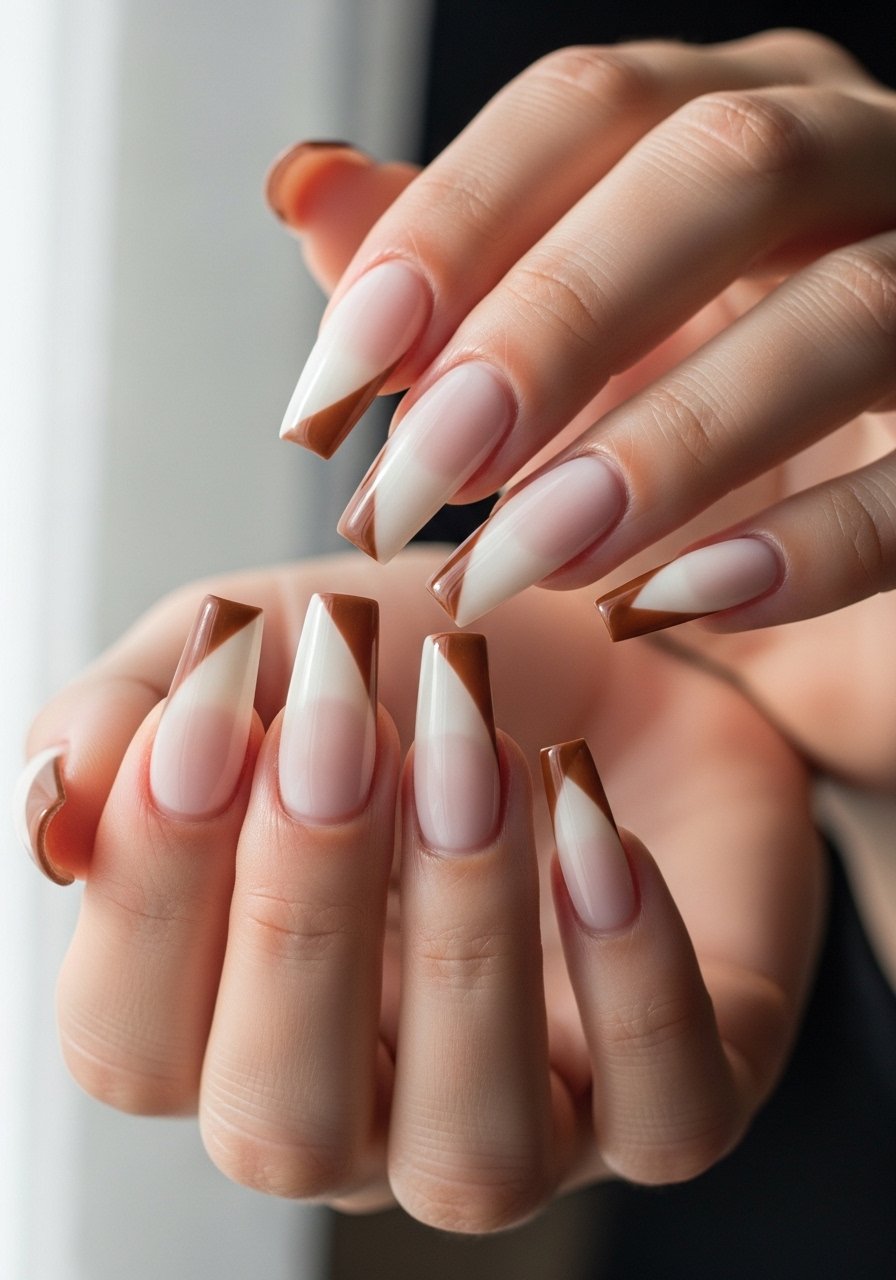
The reverse French flips focus to the cuticle area and lengthens the fingers visually. For diagonal tips keep the free edge extension to about 1.5 mm beyond the smile line so the angle reads clean in photos. This works best on medium to long lengths and suits someone comfortable with salon upkeep. Try a cream creme like soft cream polish and a darker contrast such as warm brown polish.
Style/Vibe: Retro-Modern
Best For: Medium to long nails / statement looks
Skill: Intermediate
Mistake to Avoid: Making the reverse tip too thick; keep that cuticle crescent thin for a refined look.
5. Matte Satin Hybrid
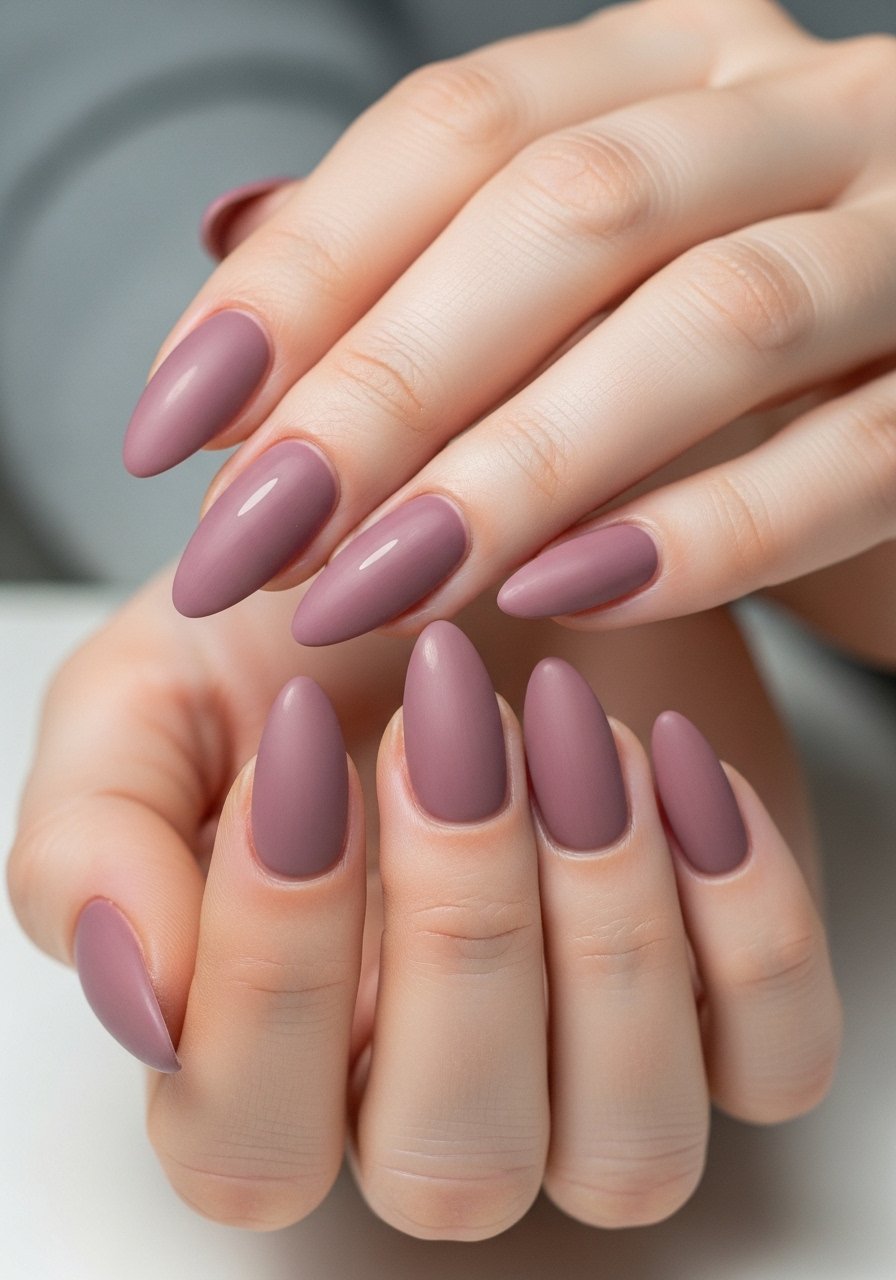
Matte finishes have a new satin moment where the surface is soft but not flat. Two thin coats of color then one very light matte top coat gives that cloth-like finish. It hides tiny texture but shows shape cleanly. For a budget option try mattifying top coat with a pigmented base like dusty mauve polish. This is low maintenance for people who dislike high shine.
Style/Vibe: Soft Minimal
Best For: Medium length / daytime or work
Skill: Beginner
Mistake to Avoid: Overbuffing to create matte; that thins acrylic and shortens wear time.
6. Tiny 3D Pearls and Micro Beads
3D accents are getting scaled down. One small pearl or a micro-bead cluster is enough. Use a dab of builder gel to anchor each piece and cure for 30 to 60 seconds depending on your lamp. A little goes a long way, especially on short nails. I use a precision tweezer set and tiny pearls for nails so placement is exact.
Style/Vibe: Delicate Detail
Best For: Short to medium nails / weddings or dates
Skill: Intermediate
Mistake to Avoid: Gluing pearls with superglue that discolors; use builder gel or resin for long wear.
7. Pastel Ombre Melt
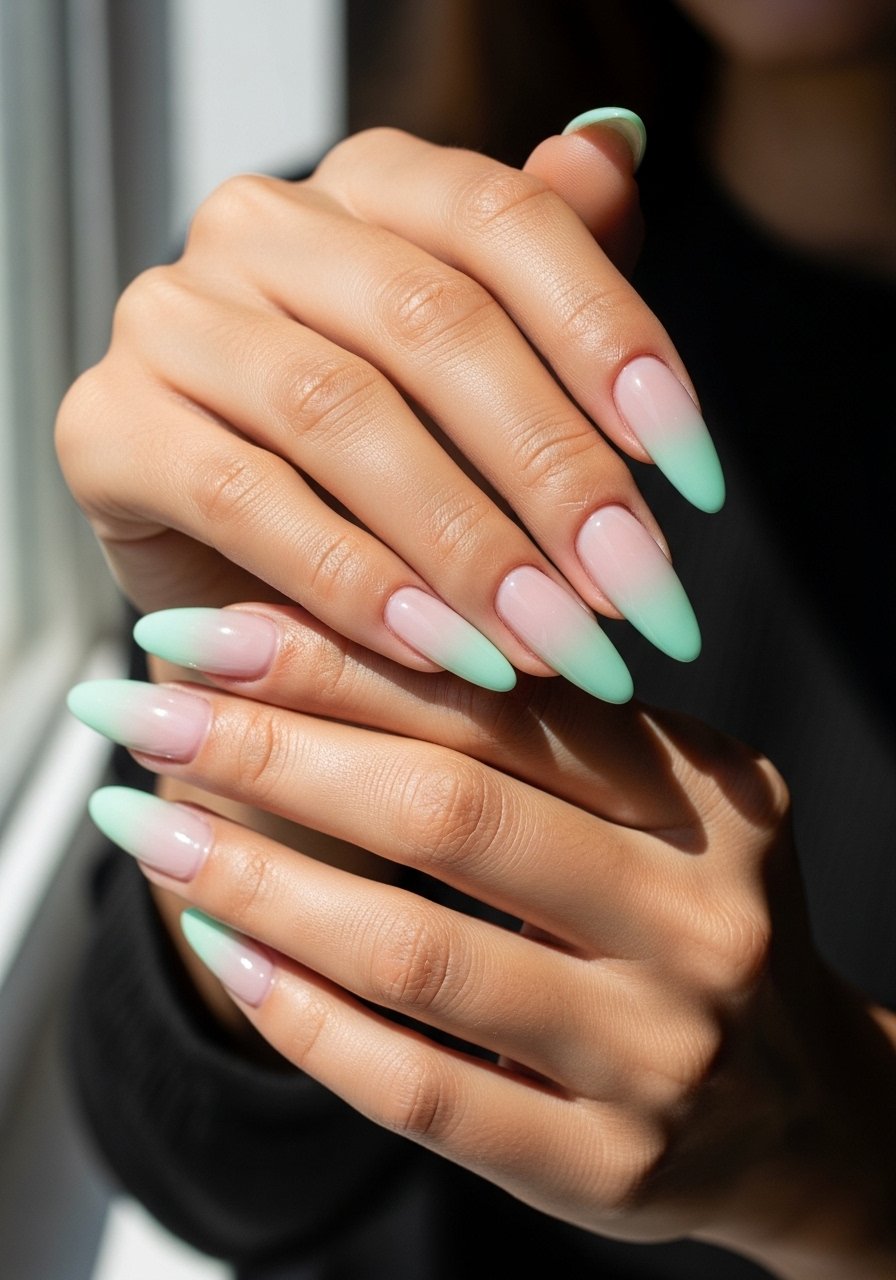
Ombre melts are softer this year, leaning pastel and blended with a buffing motion instead of harsh bands. Use two colors and a 3:1 mix ratio of clear to pigment for the initial layer, then drag the pigments with a soft brush to fade. This is a salon-level technique but doable at home with patience. Try soft blending brush and pastel polish set.
Style/Vibe: Airy Gradient
Best For: Medium to long nails / spring and summer
Skill: Advanced
Mistake to Avoid: Applying full-strength pigment at the start, which prevents a seamless fade.
If any of these ideas have you ready to actually try something, here are the products I reach for most.
Tools and Polishes Powering 2025 Looks
Basics and Prep:
- Cuticle pusher (~$6-12). A curved stainless tool is faster and safer than a cheap stick.
- Electric nail file (~$45-90). Saves time on shaping and refining apex.
Polish & Gels:
- Clear builder gel (~$12-25). Use this for anchoring pearls and smoothing the surface.
- Mattifying top coat (~$8-15). For the satin finish idea.
Art & Detail:
- Fine striping tape (~$4-8). Essential for negative space stripes.
- Precision tweezers (~$7-14). Tiny bead placement becomes painless.
Extras:
- Micro glitter mix (~$6-12). For subtle crescent accents.
- Pastel polish set (~$15-30). Good value if you want several colors to experiment with.
8. Smoked Chrome Edge
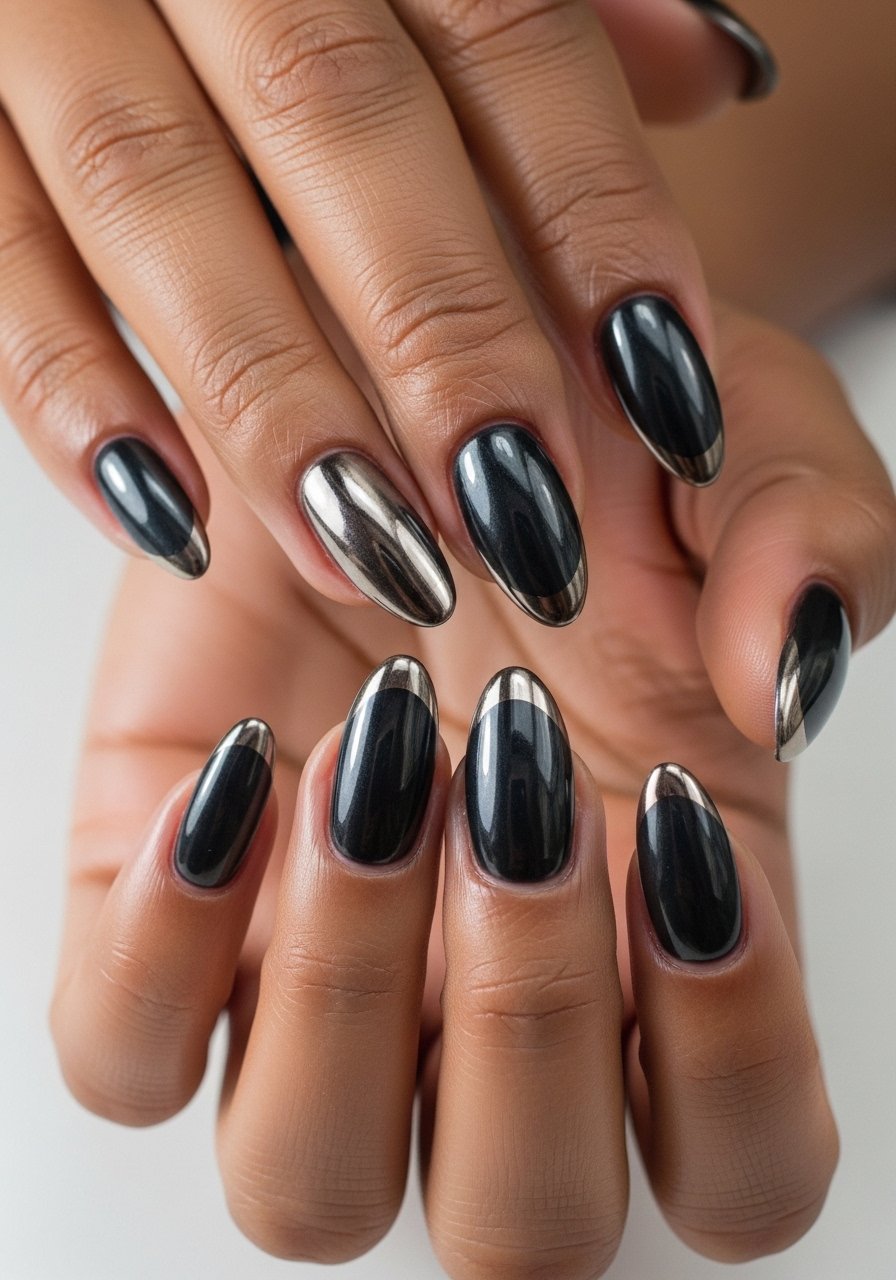
Chrome edges are replacing full chrome because they hint at reflectivity without the full mirror finish. Apply a dark, almost-black base then press chrome pigment along the free edge and buff gently for a smoked look. Expect about 2 to 3 minutes extra per nail for careful application. A small jar of chrome powder and a smudging brush do the job.
Style/Vibe: Soft Edge Shine
Best For: Medium nails / night out and editorials
Skill: Intermediate
Mistake to Avoid: Rubbing chrome into the entire nail, which makes it hard to seal cleanly.
9. Jelly Tips With a Clear Window
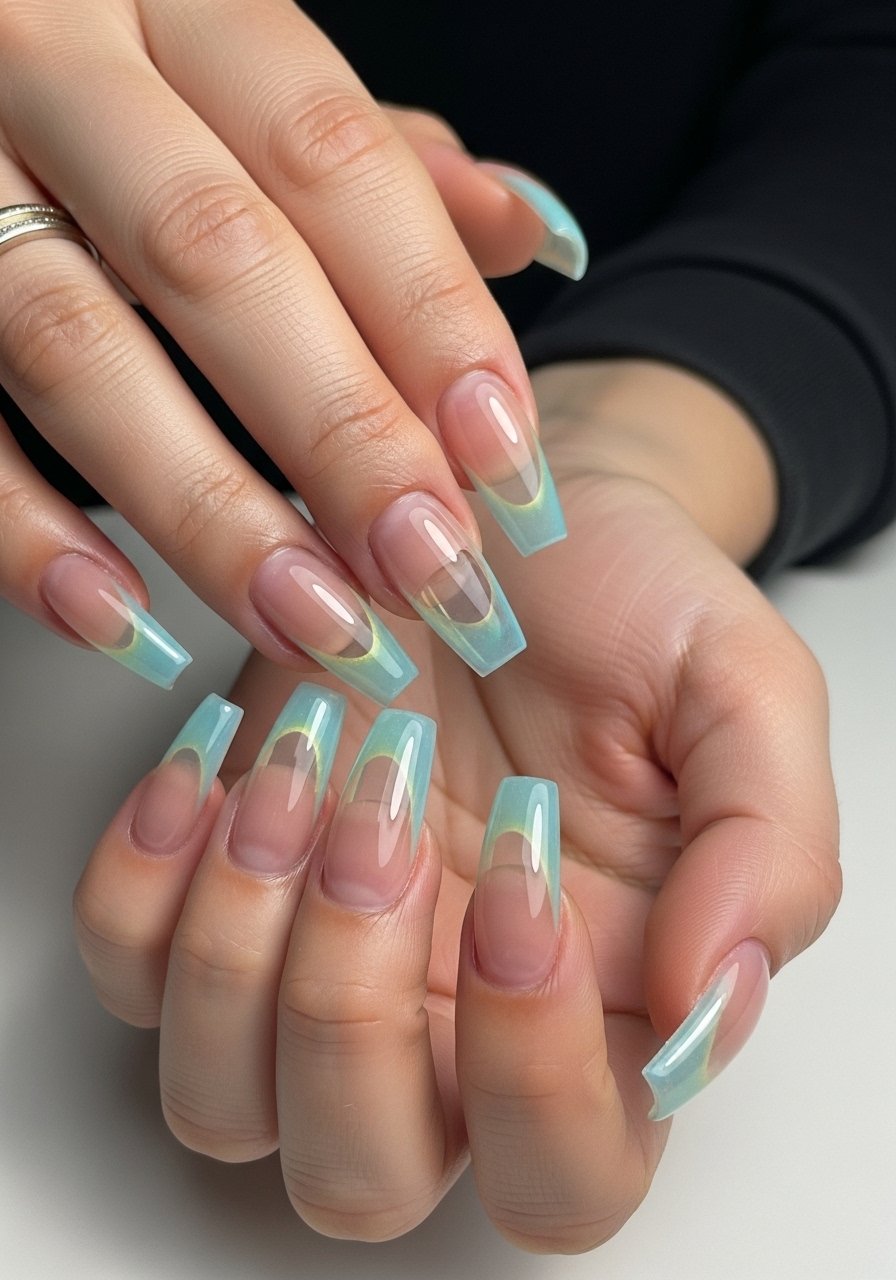
Jelly tips are back but smaller and more deliberate. Keep the translucent tip to the outer third of the nail, leaving a clear center window for a modern twist. Use a sheer pigmented builder in one thin coat, then a clear overlay to protect. I like the look on longer shapes. Use jelly gel color and clear overlay gel.
Style/Vibe: Playful Classic
Best For: Long nails / weekend or vacation
Skill: Intermediate
Mistake to Avoid: Making the jelly too pigmented so it reads opaque instead of translucent.
10. Marble Slab Encapsulation
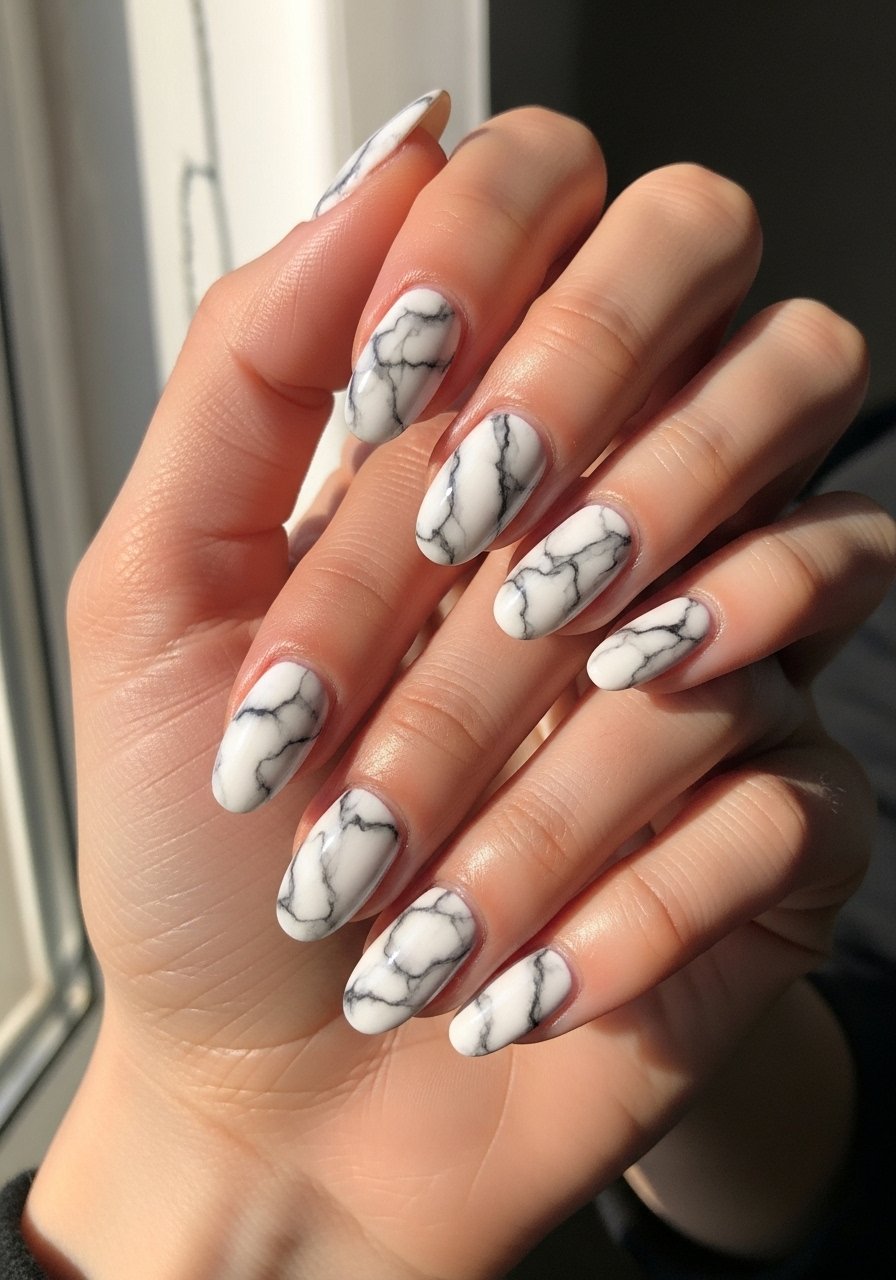
Encapsulated marble looks sculptural because the veins sit under a clear layer, not on top. Create the veins with a 0.5 mm fine brush and dilute the pigment with rubbing alcohol for softer edges. Encapsulate with 1 to 1.5 mm of clear acrylic so the marble sits like a slab. For home kits use thin acrylic monomer liquid and marble pigment set.
Style/Vibe: Sculpted Stone
Best For: Medium nails / gallery and editorial
Skill: Advanced
Mistake to Avoid: Skipping the thin clear lid over the marble, which causes the design to chip or dull quickly.
11. Pressed Flora Encapsulated

Pressed flora is delicate and wearable when the pieces are tiny and sparse. Use tiny dried petals, press them flat on a tacky layer, then encapsulate with clear builder. Keep flowers to a single one or two per nail to avoid bulk. I store a small kit of mini pressed flowers and clear encapsulation gel.
Style/Vibe: Botanical Minimal
Best For: Long nails / spring and special occasions
Skill: Intermediate
Mistake to Avoid: Using fresh flowers that trap moisture and discolor; always use fully dried pressed pieces.
12. Mismatched Jewel Tones
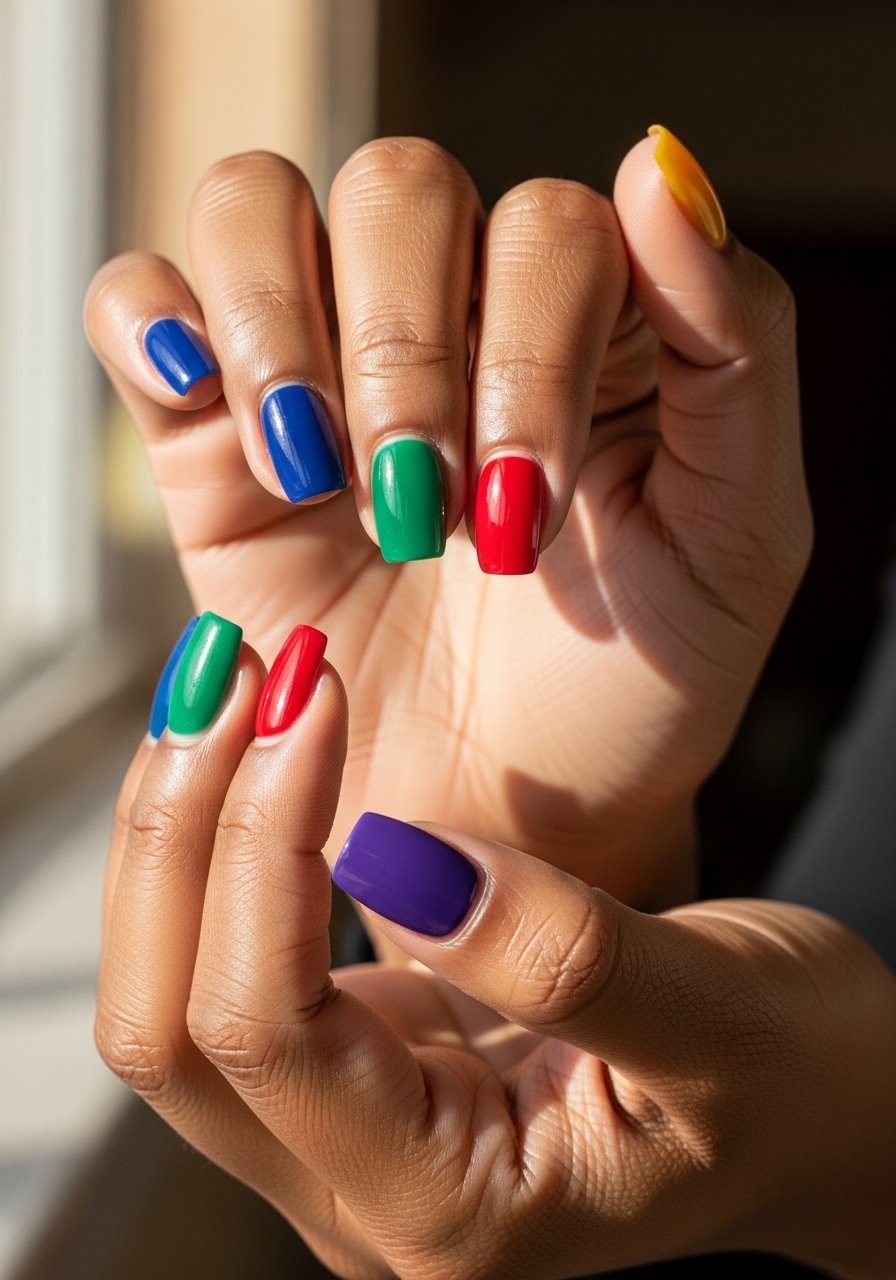
A mismatched palette feels curated when the tones share one undertone, like warm or cool. Pick five jewel tones with the same undertone and alternate. Keep application consistent with two thin coats for color balance. This is great for someone who changes polish often because it hides chips. Grab a jewel tone polish set for variety.
Style/Vibe: Eclectic Cohesive
Best For: Medium nails / daily color play
Skill: Beginner
Mistake to Avoid: Choosing colors that clash undertones, which reads accidental instead of intentional.
13. Short Stacked French Tip
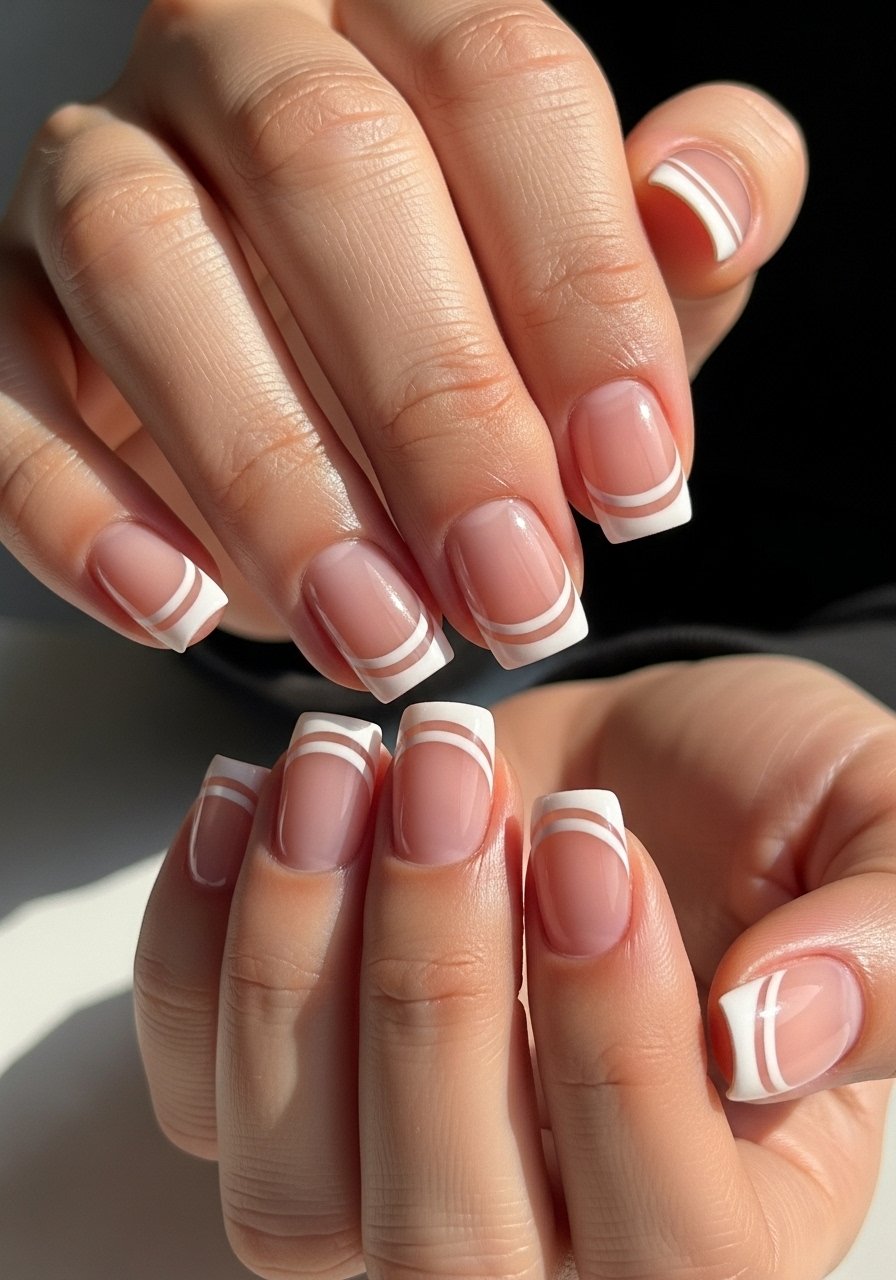
Short, stacked French tips update the classic without adding length. Two thin white lines separated by a 1.5 mm gap give structure while keeping the nail practical. This works on short and medium lengths and takes about five extra minutes per hand. Use a thin striping brush and a reliable white such as opaque white polish.
Style/Vibe: Clean Graphic
Best For: Short nails / neat everyday polish
Skill: Beginner
Mistake to Avoid: Making the gap too wide so the lines read separate designs instead of a stacked tip.
Acrylic Mani Care Habits to Keep
Thin coats beat one thick coat every time. Three thin layers of fast-cure top coat look smoother and last longer than one gloopy layer.
Grab cuticle oil pens for about $6 each. Daily oiling around fills keeps the skin around the nail flexible and reduces lifting.
Most people getting their nails done these days are asking for gel, not acrylic. If you prefer acrylic, tell your tech about your daily routine and how often you type. It changes how they shape the apex and recommend a thickness.
Start nails with clean natural nail prep, not scraped rough. A soft buff with 180 grit and a swipe of alcohol costs less time than fixing lifting later. Use nail prep wipe after filing to remove dust and oils.
If you travel or sweat a lot, choose a stronger adhesive base. Bonding primer often saves one extra fill and prevents water creeping under the free edge.
