
I kept choosing sky blue shades that read chalky on camera, then blamed the polish. After one mani that chipped in two days I stopped guessing and started testing. What I learned is specific: undertone, opacity, and a final thin top coat matter more than the brand name. These are the edits that made light blue on almond nails look deliberate, not accidental.
These looks are for anyone who likes a soft color with clean edges, from at-home polishers to salon regulars. Expect mostly easy, salon-adjacent techniques that take 20 to 40 minutes, budget options under $10 and a couple splurges worth it for longevity. If you prefer gel or acrylic notes appear where relevant, and I flag which styles work on short, medium, or long almond nails.
1. Sheer Porcelain Blue

Style/Vibe: Soft translucent wash
Best For: Short to medium almond nails / everyday wear
Skill: Beginner
A sheer wash is how I learned a light blue could look modern without reading baby-pastel. Two thin coats of a jelly formula, each wiped after 30 seconds if it pools near the cuticle, gives a glassy depth that photos pick up. Use a ridge-filling base so the color does not look streaky. Try light blue nail polish and build in three thin layers when needed for opacity.
Mistake to Avoid: Slapping on one thick coat and expecting it to dry evenly.
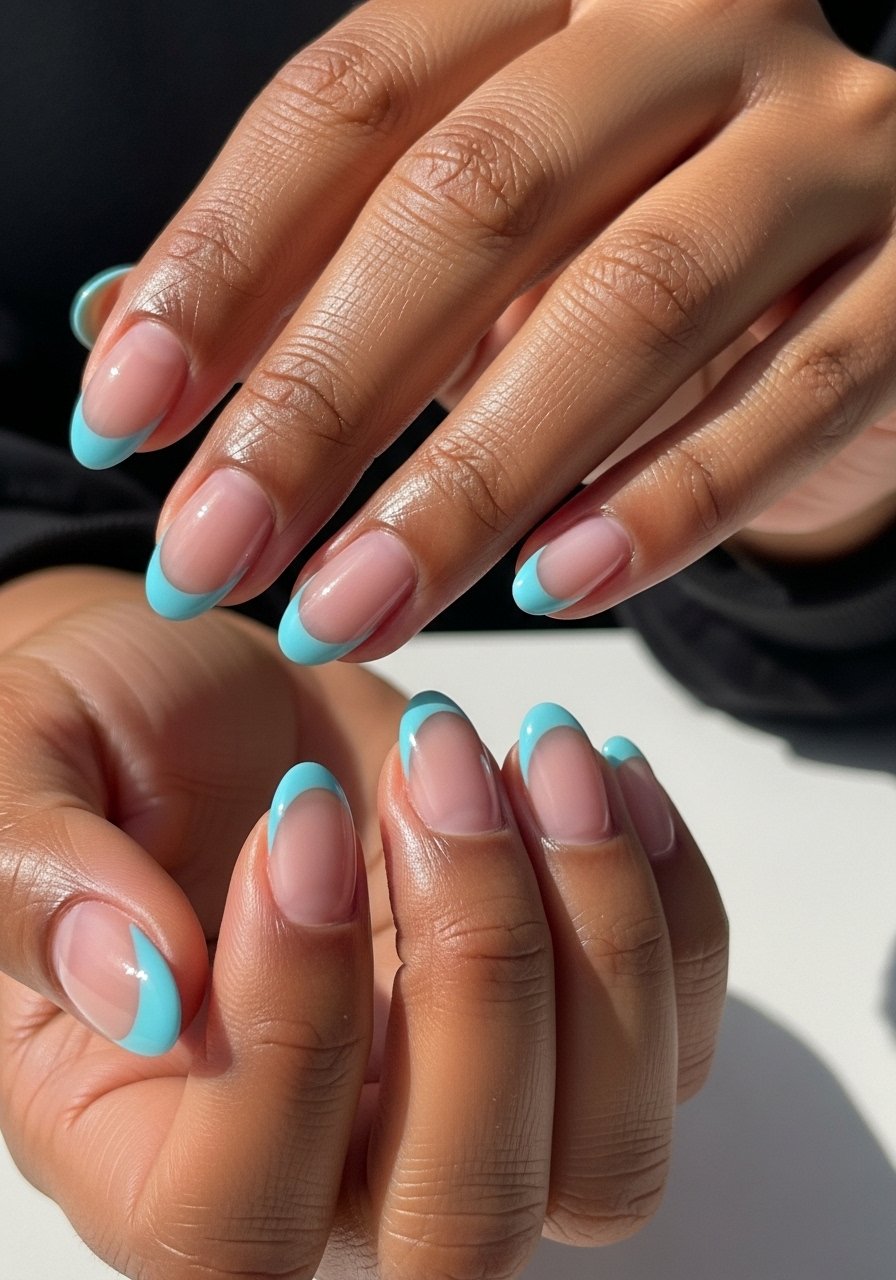
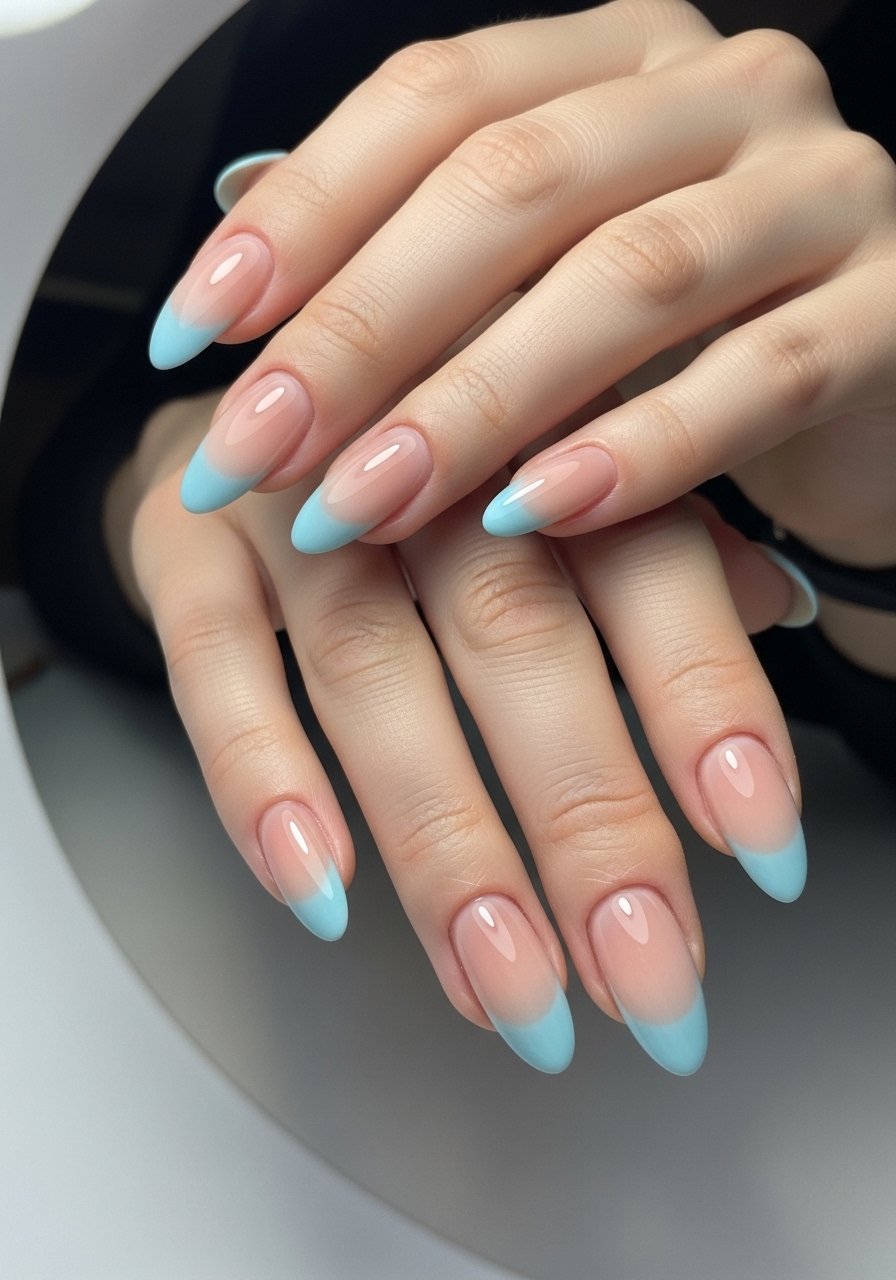
2. Milky French Almond Tip

Style/Vibe: Modern French with a hint of color
Best For: Medium almond nails / office and weekend
Skill: Intermediate
I swap the classic white for a milky tip when I want subtlety. Paint the base in a semi-sheer light blue, let it tack for 60 seconds, then use a thin striping brush to add a curved milky tip. Press a small strip of tape as a guide if your freehand wobbles. The effect feels neat and grown-up. Pair with a quick-dry top coat for a glossy finish. I started doing this after a tech who works at a salon downtown showed me the tape trick.
Mistake to Avoid: Trying a fat smile line with a brush meant for wide swipes.
3. Satin Matte Sky
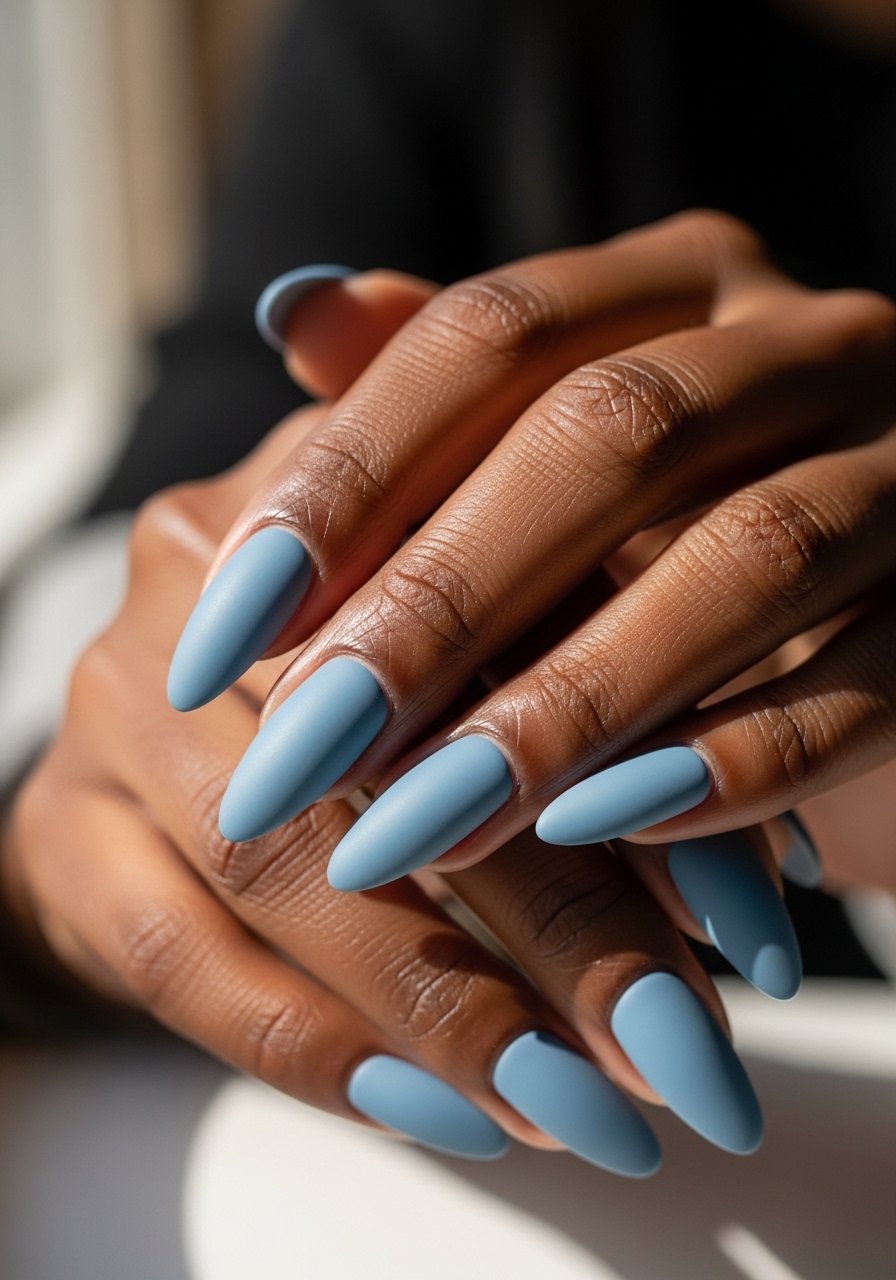
Style/Vibe: Soft satin matte
Best For: Long almond nails / low-shine lovers
Skill: Beginner
Matte turns a glossy pastel into something editorial. Apply two even coats of light blue, cure or dry fully, then finish with a matte top coat for that soft fabric look. Matte hides tiny imperfections so it is forgiving for at-home manis. I use a spray-on tack-removal trick between layers to avoid lint pickup. For contrast, add one glossy accent nail over the matte after a day if you want evening wear.
Mistake to Avoid: Applying matte top coat while the base is still tacky and trapping brush hairs.
4. Cloud Ombre With Tiny Sparkle
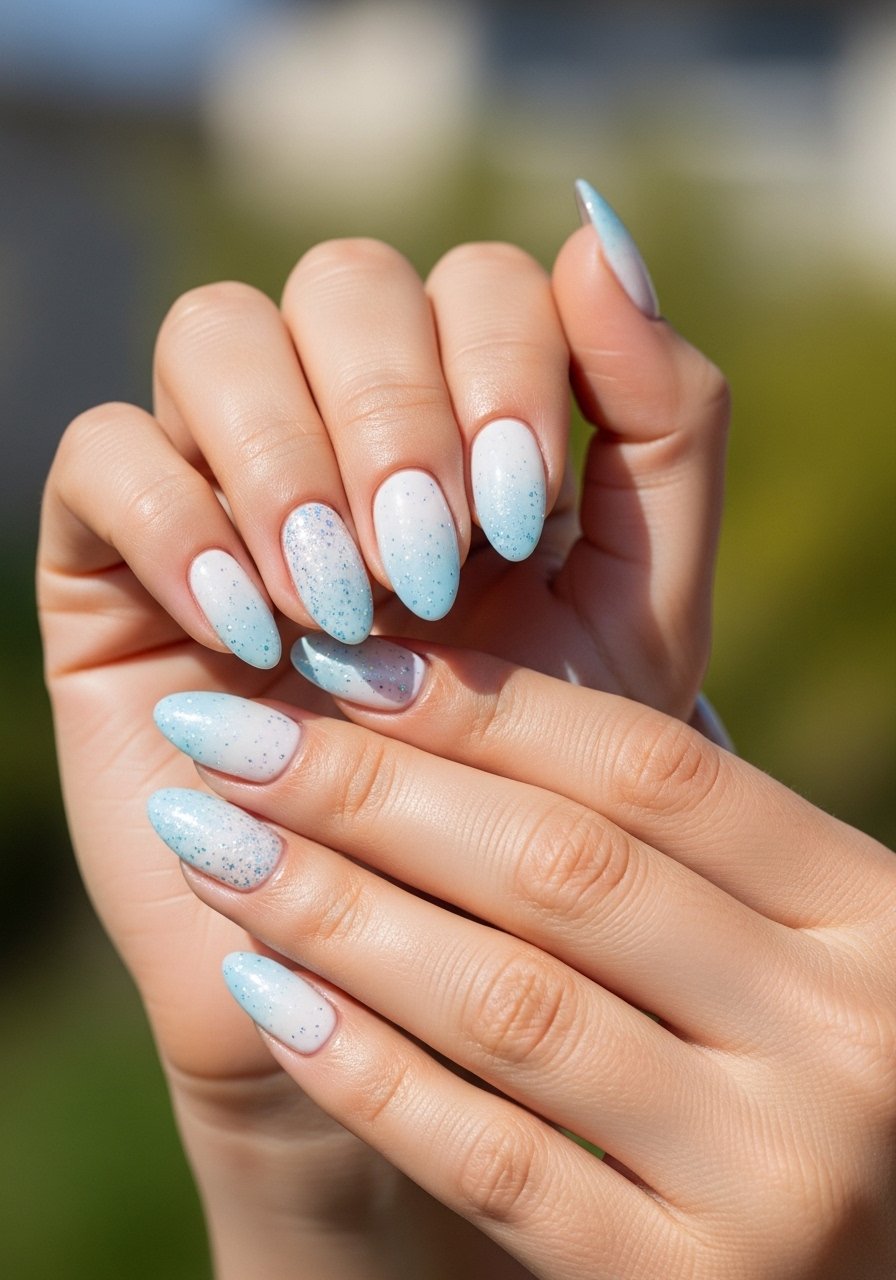
Style/Vibe: Soft gradient with sparkle
Best For: Medium almond nails / weekend events
Skill: Intermediate
A quick sponge ombre takes this from simple to special. I blend a white and pale blue on a makeup sponge, press it onto the nail in light taps, then shear in micro-glitter only at the apex for controlled shine. The trick is 80 percent paint on the sponge, 20 percent sponge pressure. Seal with a thin glossy top coat. This reads delicate in photos but still lasts when you use a bond-promoting base.
Mistake to Avoid: Overloading the sponge so the gradient looks blotchy.
5. Chrome Accent Over Baby Blue
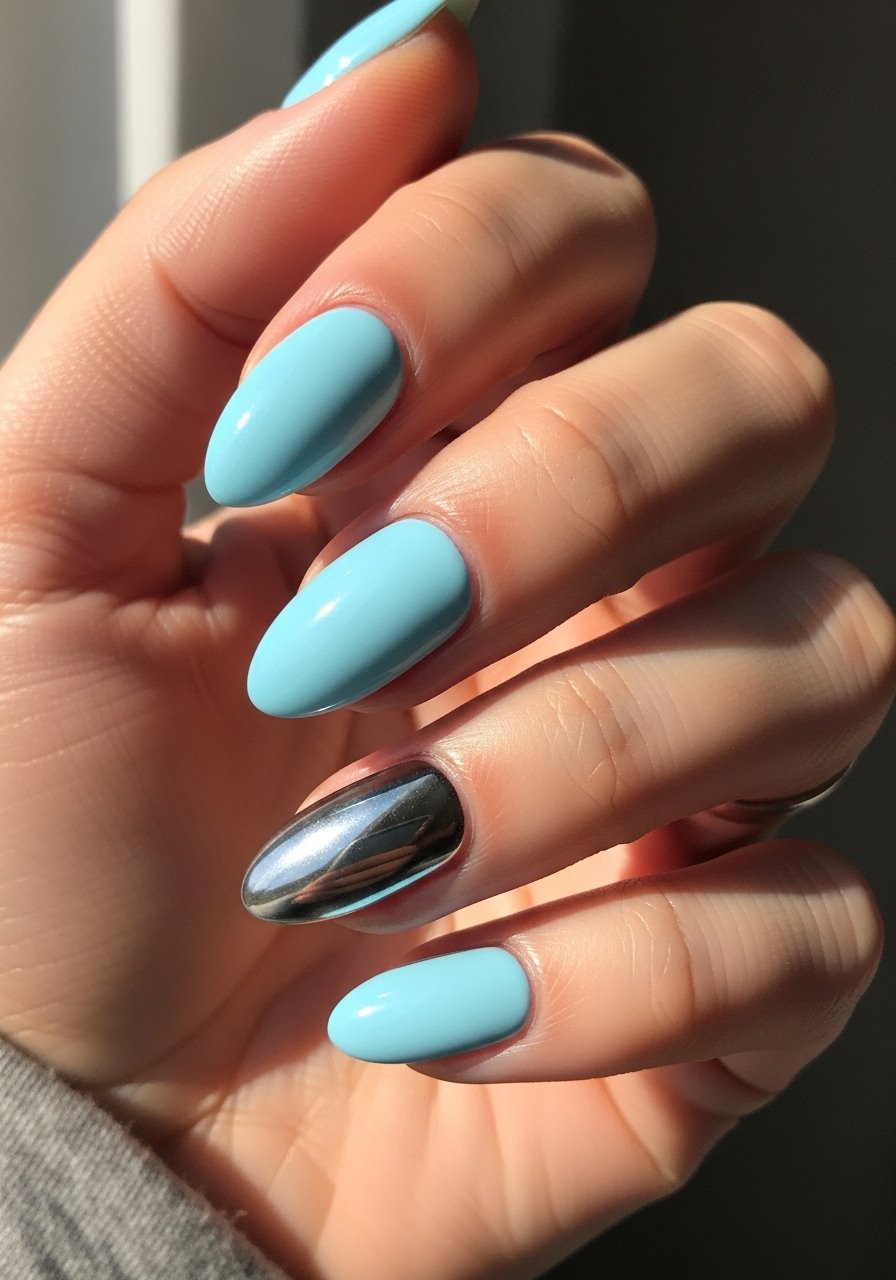
Style/Vibe: Modern chrome accent
Best For: Medium almond nails / nights out
Skill: Intermediate
Chrome over light blue gives a clean, reflective pop that feels unexpected. Paint two coats of opaque baby blue, cure, then press chrome powder onto one nail using a silicone applicator. Finish with a gel top coat if you want mirror shine that lasts. I reserve this on one or two nails so the chrome feels like punctuation, not the whole sentence.
Mistake to Avoid: Rubbing chrome powder into a still-wet polish and smearing the base.
6. Negative Space Crescent

Style/Vibe: Fresh negative space
Best For: Short almond nails / minimalist tastes
Skill: Intermediate
Leaving a crescent of natural nail near the cuticle lightens a bold color and suits short almond shapes. I paint around a small washable sticker placed under the cuticle, two thin coats of light blue, peel sticker, then clean edges with a tiny brush. It wears well because the natural base grows out less visibly than full coverage. This is also quick to touch up at home.
Mistake to Avoid: Using stickers that lift from the cuticle side and create uneven edges.
7. Marbled Cloud Accent
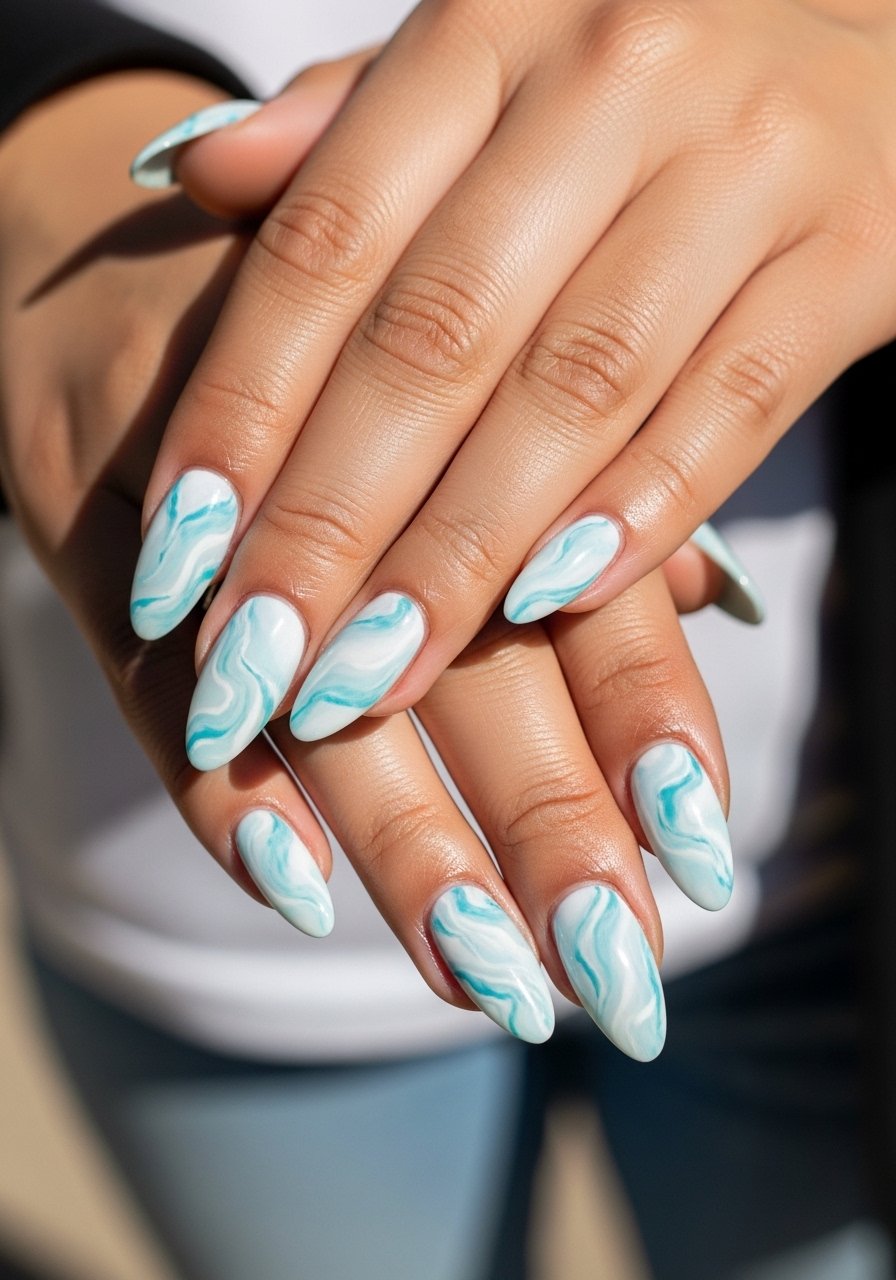
Style/Vibe: Soft marble accent
Best For: Long almond nails / creative mani lovers
Skill: Advanced
A little water marbling or dry brush marble elevates one nail without being over the top. Use diluted polish drops, swirl with a toothpick, and lift the pattern onto the nail. Keep the veins thin for a cloudy look. This takes practice, but the payoff is a polished, editorial finish. I do one accent nail per hand so the rest remain wearable.
Mistake to Avoid: Stirring the pool too vigorously and ending with full-color blobs.
If any of these looks have you ready to shop, these are the products doing most of the work.
Light Blue Almond Essentials
Bases & Primers:
- peel-off base coat (~$8-12). Great for temporary mani experiments.
- ridge-filling base coat (~$10-15). Smooths ridges for sheer washes.
Polishes & Color:
- light blue nail polish (~$6-14). Pick one with cool undertones for crisp photos.
- milky white polish (~$6-12). For soft French tips and ombres.
Finishers & Powders:
- matte top coat (~$6-10). Use for satin looks.
- quick-dry glossy top coat (~$8-14). Thin layers give durable shine.
Tools & Brushes:
- thin nail art brush (~$5-10). Essential for tips and moons.
- silicone chrome applicator (~$6-9). For mirror accents.
8. Baby Blue With Tiny White Dots
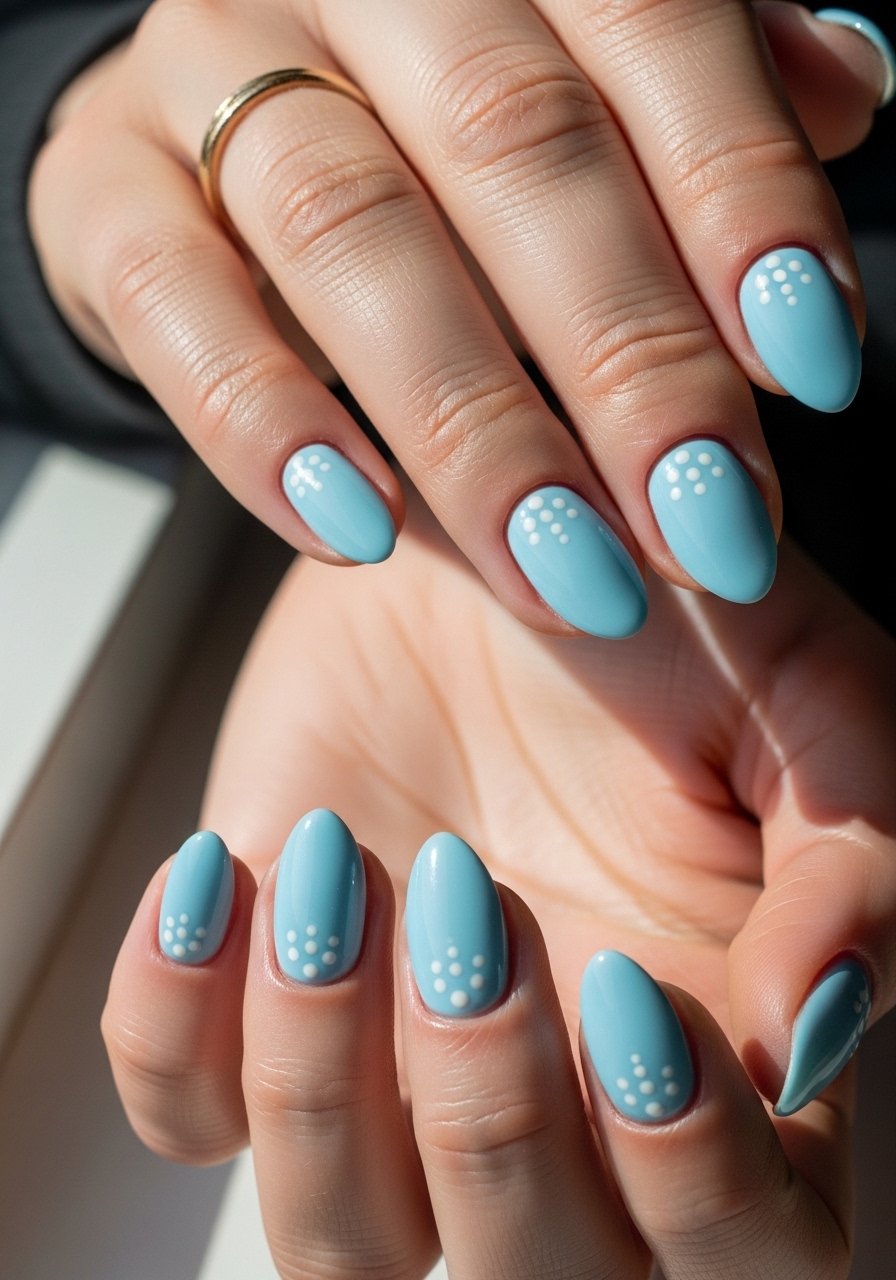
Style/Vibe: Playful micro-dot details
Best For: Short almond nails / casual people
Skill: Beginner
Dots are the easiest way to make a pale blue look intentional. Use a dotting tool or the tip of a toothpick to add evenly spaced white dots after the base dries. Keep dots small, about 1.5 millimeters, and finish with a glossy top coat. It reads handcrafted and takes five extra minutes but makes the mani feel considered.
Mistake to Avoid: Pressing too hard with the dotting tool and flattening the dot into a mess.
9. Sheer Blue With Gold Foil Flakes

Style/Vibe: Delicate foil accents
Best For: Medium almond nails / dressy days
Skill: Intermediate
Gold foil over a translucent blue looks like a sunlit sky with flecks. Press tiny foil pieces into tacky polish with tweezers, then seal immediately. Less is more here, one or two flakes per nail reads elegant. I use foil on alternate nails so removal is quicker and the mani stays light.
Mistake to Avoid: Overloading flakes so the nail feels puffy and lifts the top coat.
10. Two-Tone Vertical Split

Style/Vibe: Graphic two-tone split
Best For: Long almond nails / bold minimalist
Skill: Intermediate
A vertical split looks crisp on almond shapes because the curve elongates the finger. Use a fine striping tape down the middle, paint each side a slightly different blue, remove tape and top coat. Keep one tone slightly darker to create depth. This is surprisingly chic and lasts when layers are thin and fully dry.
Mistake to Avoid: Removing tape too late and lifting wet polish.
11. Translucent Pearl Sheen
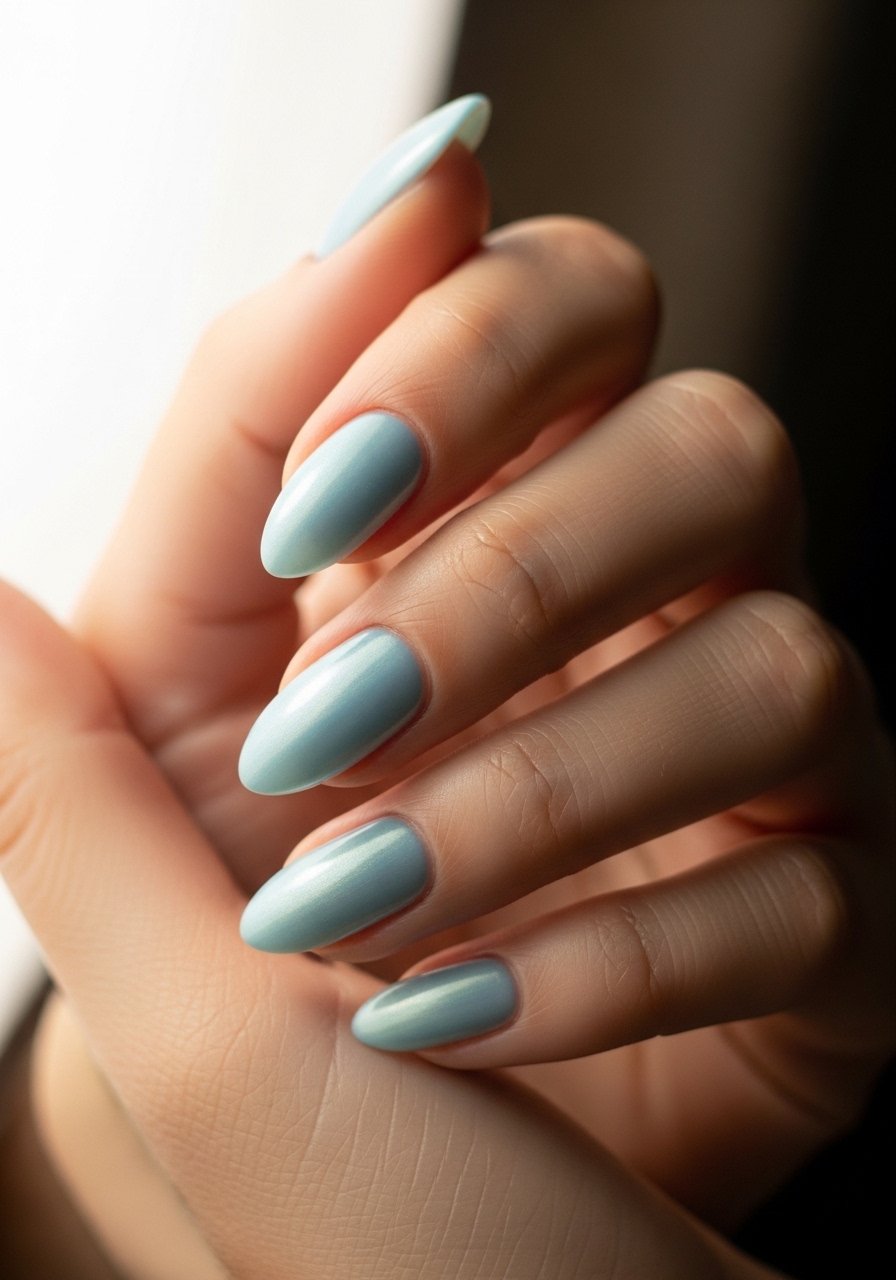
Style/Vibe: Pearly glow finish
Best For: Medium almond nails / daytime events
Skill: Beginner
A pearl top coat over a sheer blue creates a soft shimmer that photographs well. Apply one thin coat of pearl over the base once dry, then a quick top coat. The result reads expensive without extra tools. I reach for this when I want daytime sparkle that is not glittery.
Mistake to Avoid: Applying pearl over still-wet polish and causing streaks.
12. Micro French With Pastel Liner
Style/Vibe: Tiny French with contrast liner
Best For: Short almond nails / neat minimalists
Skill: Intermediate
A micro French tip plus a darker blue liner frames the smile line and keeps the manicure from reading too soft. The liner should be about 0.5 millimeters wide. Use a steady hand and a brush with a fine point. It makes short almond nails look elongated and intentional, perfect if you hate full-coverage polish.
Mistake to Avoid: Making the liner thicker than the tip, which looks top-heavy.
13. Gel Powder Ombre
Style/Vibe: Durable gel powder ombre
Best For: Long almond nails / busy hands
Skill: Advanced
For longevity I switched to gel powder ombre for hands that type or wash dishes often. Apply a gel base, dip in pigmented powder for the ombre, and cure each layer under LED for 60 seconds. The bond base and thin layers prevent lifting. It is more of a salon process, but the hold is superior and the finish smooths any growth lines.
Mistake to Avoid: Applying too-thick layers between dips and creating a bulky apex.
Light Blue Mani Habits
Thin coats beat one thick coat every time. Three thin layers of quick-dry top coat look smoother and last longer than one gloopy layer.
Grab cuticle oil. Rubbing it into the cuticles daily keeps the edge of a light color from looking ragged and makes the mani last.
If your polish flakes within two days, file the free edge to a soft arc before painting. A glass nail file costs little and reduces snags.
Most people skip the thin seal line at the tip. Run a top coat brush along the free edge for a 50 percent longevity boost, then cure or dry as directed.
When testing a new shade, try it on one nail first. Use nail swatch wheels to see how the blue reads next to your skin tone before committing to a full mani.
