
I kept picking leg pieces that looked perfect on the shop wall and then, halfway through healing, they read like separate stickers on my calf. The recurring mistake was trusting a single photo instead of watching how a design moved with a step, a bend, and a sock line. The day an artist sketched a flow that wrapped the knee and hit the ankle at a natural break, I stopped having tattoos that disappeared when I sat down.
These ideas lean practical, wearable, and a mix of coverable or boldly visible sleeves, for someone who wants structure more than a one-off flash. Expect a range from inexpensive stencil-friendly designs to multi-session custom pieces, and most of these will need between two and five sessions depending on placement and shading. I learned this across five shops I have visited, so I wrote these for people who want sleeves that work while wearing jeans, skirts, or boots.
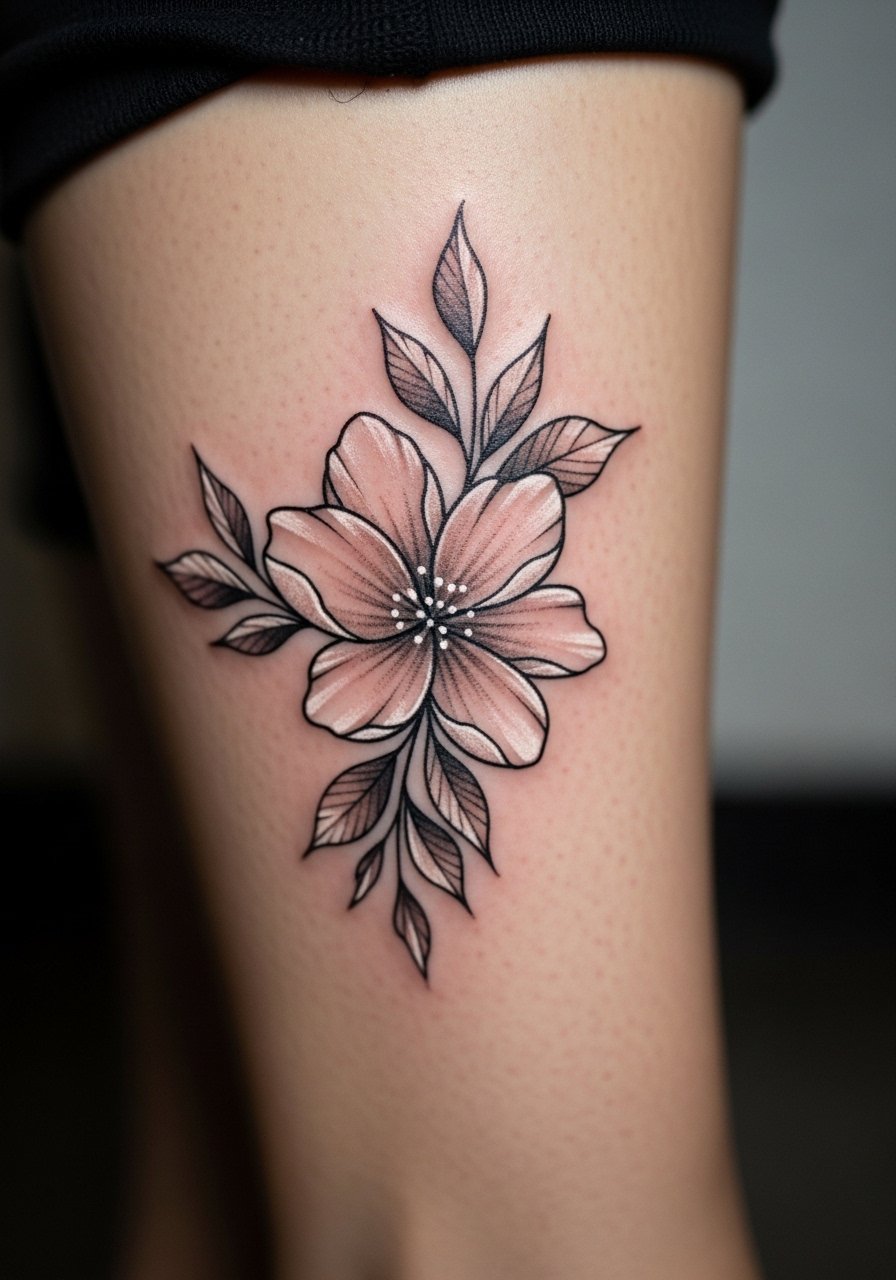
1. Botanical Wrap That Follows Muscle Flow
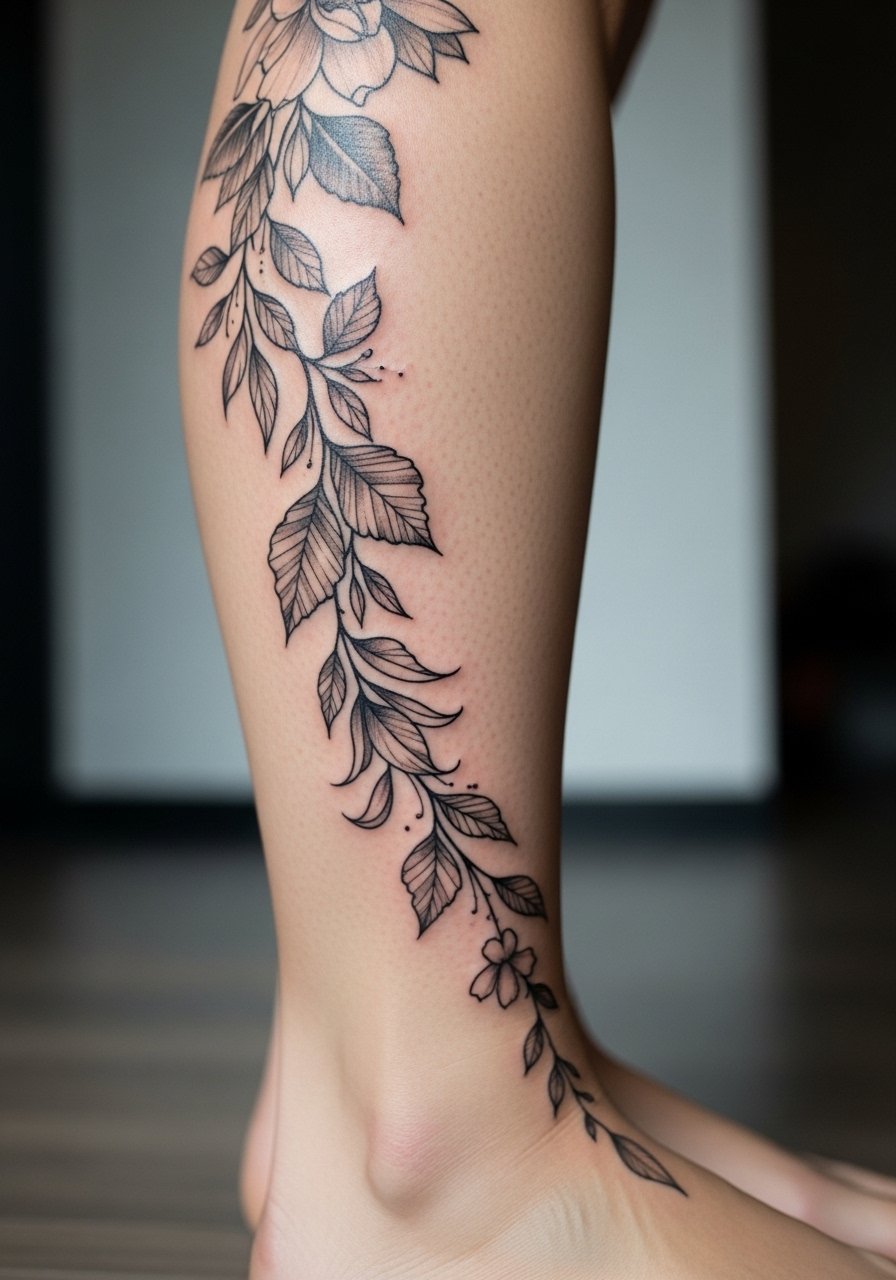
Style/Technique: Botanical realism with flow lines
Pain Level: 4/10
Session Time: 1.5 to 3 hours
Best For: Visible work that moves with the leg
Place stems and leaves so they sit parallel to muscle lines, about a 3:1 height-to-width ratio so petals do not look squat on the calf. It reads like a continuous band when you walk, which gives the sleeve a calm, wearable feeling. For aftercare I use unscented-hypoallergenic-soap for gentle wash and a light, fragrance-free balm like fragrance-free-tattoo-balm on healed skin. If you want subtle texture, ask for stippling at a 70/30 dot-to-skin ratio so the piece keeps contrast without heavy black.
Mistake to Avoid: Centering large flowers over the widest part of the calf so they look squashed when you flex.
2. Blackwork Panel With Negative Space Bands
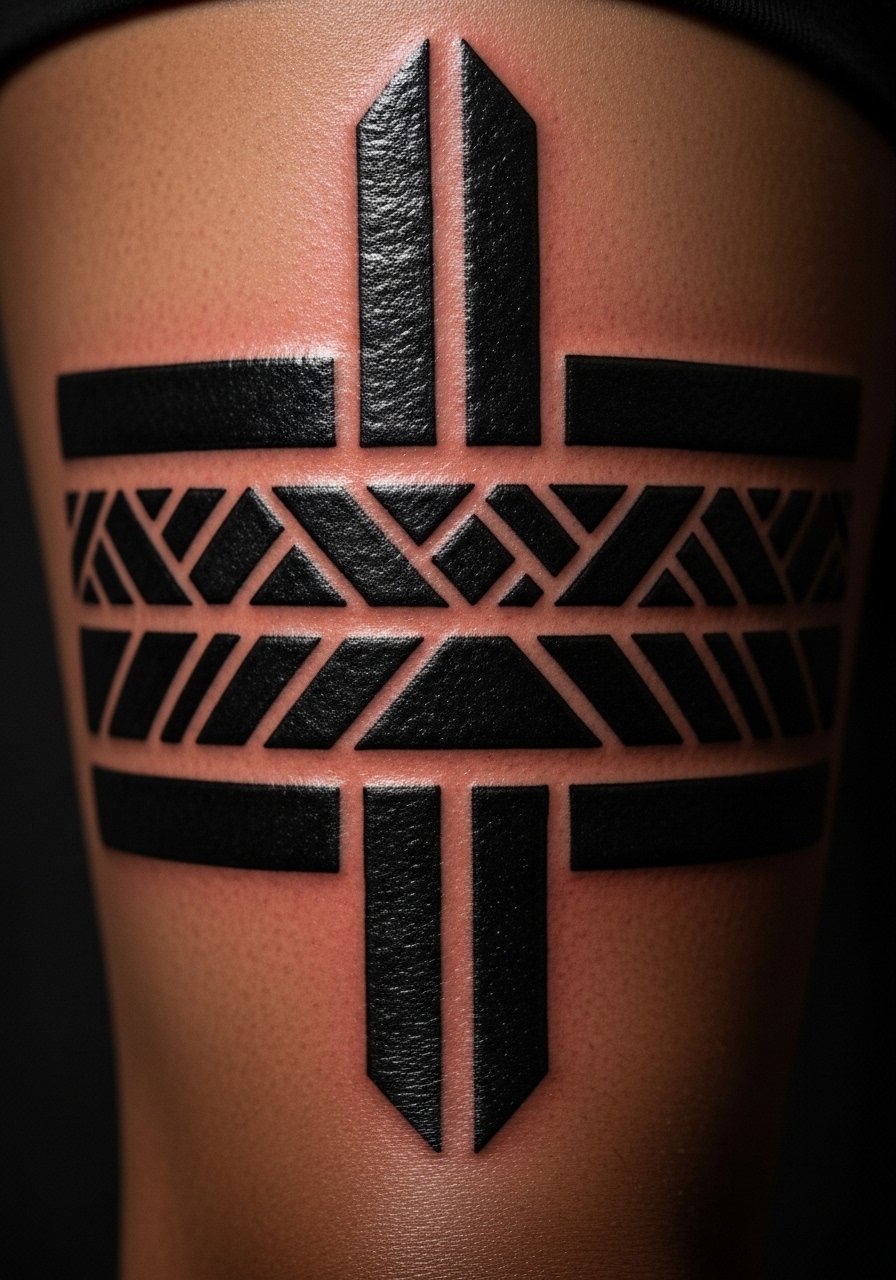
Style/Technique: Solid blackwork with negative space
Pain Level: 5/10
Session Time: 2 to 4 hours per panel
Best For: Strong coverable sleeves, bold style
This works visually because the negative space acts like a rest for the eye and creates a modern, architectural feeling. It is a good pick if you want something coverable for work visible only when you choose. Budget wise, solid black fills are efficient in sessions, but ask your artist about tapering the black at knees to avoid heavy ink in creases. I alternate a breathable bandage for the first 24 hours and follow with tattoo-healing-salve to prevent scabbing lines.
Mistake to Avoid: Filling every gap with black on the first pass and creating a flat, heavy block that ages poorly.
3. Textured Textile Sleeve That Reads Like Fabric

Style/Technique: Hyper-real textile mimicry, fine-line crosshatch
Pain Level: 6/10
Session Time: 3 to 5 hours total
Best For: People who want a patterned sleeve that blends with clothing
This is one of the gaps I noticed other galleries skip. Instead of repeating florals, ask for fine crosshatch shading to mimic linen or denim, scaled so the pattern repeats every 2.5 to 3 inches. It gives the impression of a printed pant or sock from a distance, which keeps a sleeve discreet under clothes. For touch-ups later, a tiny 0.3 mm line weight helps keep the weave crisp. I recommend keeping a small tube of long-lasting-tattoo-moisturizer on hand for the first year.
Mistake to Avoid: Asking for textile detail that is too small, which melts together after healing.
4. Fine-Line Portrait Band Around the Calf

Style/Technique: Fine-line portrait banding
Pain Level: 5/10
Session Time: 2 to 3 hours
Best For: People wanting sentimental pieces that stay subtle
Portraits on legs work when they follow circumference rather than sitting flat on one plane. Have the artist plan the focal at the front of the calf so it reads while standing. Use low-contrast graywash for a lived-in look; it ages nicely and keeps the face readable longer. For protection, a tattoo sunscreen like tattoo-sunscreen-spf50 is worth using after full healing.
Mistake to Avoid: Placing a portrait on the inner calf crease where movement blurs facial detail.
5. Geometric Panels That Accent the Knee
Style/Technique: Geometric negative space with knee accenting
Pain Level: 6/10
Session Time: 2 to 4 hours
Best For: People who like crisp, modern sleeves
Geometric work should respect the knee as a hinge. Place the largest intersection points at the kneecap or slightly above so the pattern does not split when you bend. Use a 2:1 ratio of line spacing to keep shapes from merging during healing. A thin protective sleeve while sleeping prevents sheet friction for the first week. For touch-ups, a precision-ink-pen-care style balm keeps line edges sharp.
Mistake to Avoid: Centering a focal point directly in the knee crease so the design pinches and distorts.
6. Script and Dates Wrapped Like a Cuff

Style/Technique: Custom script cuff, single-line flow
Pain Level: 3/10
Session Time: 1 to 2 hours
Best For: Minimalists, coverable pieces
A cuff of script looks intentional when the lettering follows the natural curve of the leg and maintains consistent letter height. Ask for letters around 6 to 8 mm tall for readability on the ankle area. This is low-cost and usually done in one short session. If you want it to age softer, request gray ink or a 60/40 black-to-gray wash. Keep a small tube of gentle-scent-free-balm for daily moisturization after healing.
Mistake to Avoid: Picking tiny micro-script that becomes illegible a year later.
7. Map-Style Linework With Tiny Landmarks

Style/Technique: Micro-line cartography with pinpoint landmarks
Pain Level: 4/10
Session Time: 2 to 3 hours
Best For: Travel lovers, narrative sleeves
This is another angle most round-ups miss. A map sleeve reads like a personal story, with thin lines connecting small icons at a 1:15 scale for clarity. Place landmarks where the leg naturally expands so each icon has breathing room. Use a dot-cluster shading technique at a 70 percent opacity for distance effects. For first-aid after the shop, a pack of sterile breathable bandages like breathable-bandage-waterproof keeps friction down in shoes.
Mistake to Avoid: Crowding icons together and losing the map’s narrative when the leg moves.
If any of these ideas have you ready to actually stock up on the basics, here are the supplies I return to most.
Leg Sleeve Essentials To Buy
Aftercare Basics:
- unscented-hypoallergenic-soap (~$6-12), gentle daily wash.
- fragrance-free-tattoo-balm (~$8-16), light moisturizer for healed skin.
- tattoo-healing-salve (~$10-18), for the critical first week.
Protection & Tools:
- breathable-bandage-waterproof (~$8-15), for the ride home and first day.
- tattoo-sunscreen-spf50 (~$12-20), daily protection after healing.
- precision-moisturizer-tube (~$7-14), for targeted spots that dry faster.
Extras Worth Having:
- tattoo-stencil-paper (~$10-20), handy if you and your artist plan multiple panels.
- compression-sleeve-leg (~$12-25), for travel days or late-session swelling.
8. Japanese-Style Panel With Flowing Waves
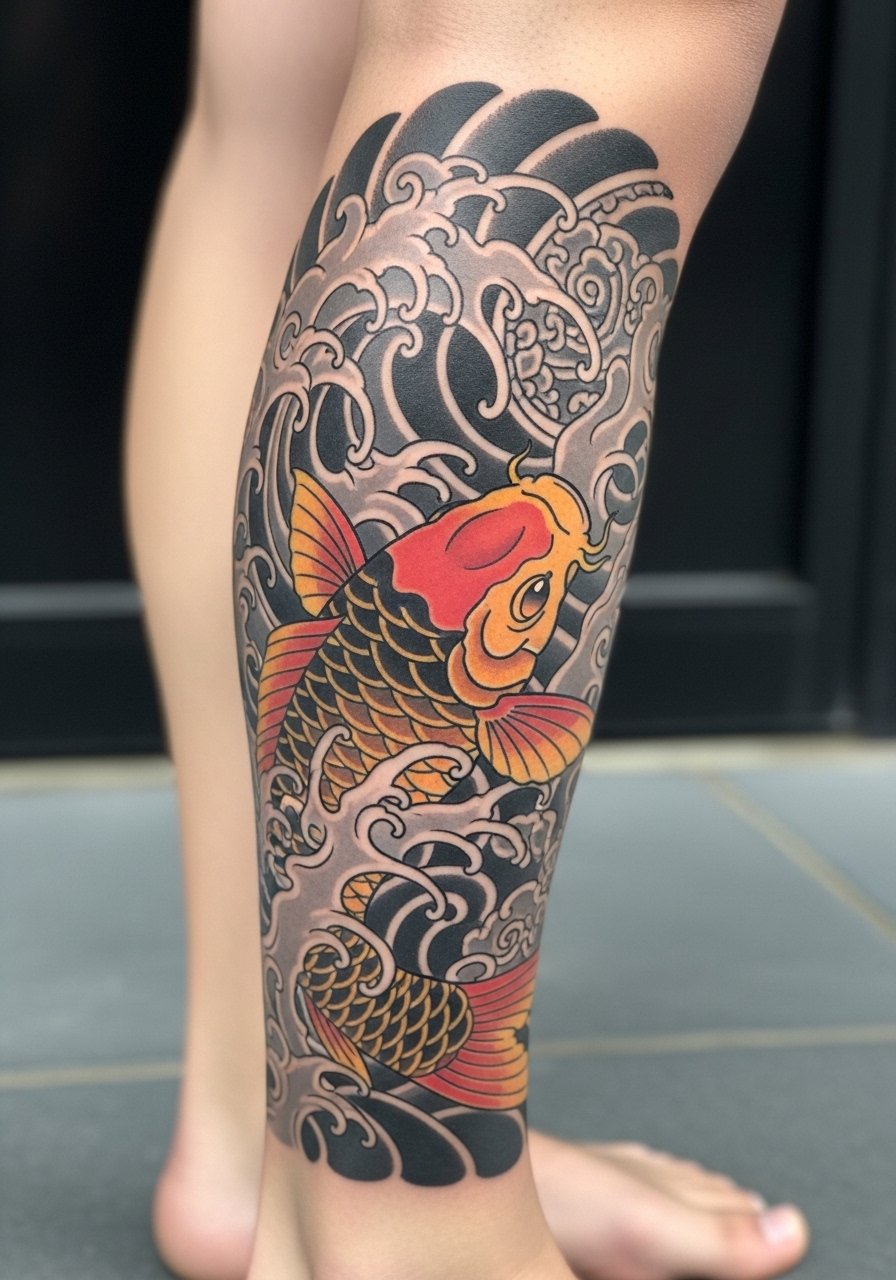
Style/Technique: Traditional Japanese with wave fill
Pain Level: 6/10
Session Time: 3 to 6 hours per panel
Best For: Bold color sleeves that tolerate sun exposure
Japanese sleeves succeed when motifs anchor around the knee and ankle as natural focal points. Use wave fills with a 60/40 contrast between highlights and shadows so color holds up. Color saturation needs touch-ups more often near ankles because of sock friction. I had my own koi re-saturated at year two, after three sessions initially, so plan for future touch-ups. A tube of long-lasting-tattoo-moisturizer helps color stay lively.
Mistake to Avoid: Packing color too close to the sock line, which leads to premature fading.
9. White-Ink Highlighted Motifs for Subtle Contrast
Style/Technique: White ink accents over graywash
Pain Level: 4/10
Session Time: 1 to 2 hours
Best For: Subtle shine on healed work, not for heavy coverage
White ink is a trickier, underused option that competitors rarely expand on. Use small doses as highlights instead of full coverage because white fades faster. Place white at top layers over shaded areas so it reads as pop when healed. If you want longevity, ask for white diluted to 30 to 50 percent opacity and expect touch-ups. Keep sunscreen handy for protection.
Mistake to Avoid: Asking for full white coverage thinking it will read like solid white fabric after a year.
10. Neo-Traditional Animal Sleeve With Movement

Style/Technique: Neo-traditional animal portrait with flowing mane
Pain Level: 5/10
Session Time: 2 to 4 hours
Best For: Statement sleeves that still read from a distance
Animals work when their bodies follow limb lines. Place a face or focal on flatter areas and let fur or mane wrap around. Use a combo of line weights, 0.25 mm for detail and 0.6 mm for anchor lines. For at-home care, a gentle, unscented soap and light moisturizing balm are enough after the first week. I sat through three sessions for my own thigh piece and found layering smaller sessions better for detail.
Mistake to Avoid: Trying to cram a full animal figure onto a tiny strip of shin so it loses anatomy.
11. Botanical and Script Mix for Memory Bands

Style/Technique: Mixed botanical with cursive inscription
Pain Level: 3/10
Session Time: 1 to 3 hours
Best For: Sentimental sleeves and subtle memorials
Pairing script with small botanical elements creates rhythm, and placing the script along a natural tension line keeps it readable. Use letter spacing of about 1.5 times the stroke width to avoid crowding. For a budget-friendly option, get the script and a few botanical anchors in one sitting, then add more elements later. A precision moisturizer tube keeps fine lines visible through the first year.
Mistake to Avoid: Using blocky fonts that fight the plant shapes and make the cuff read heavy.
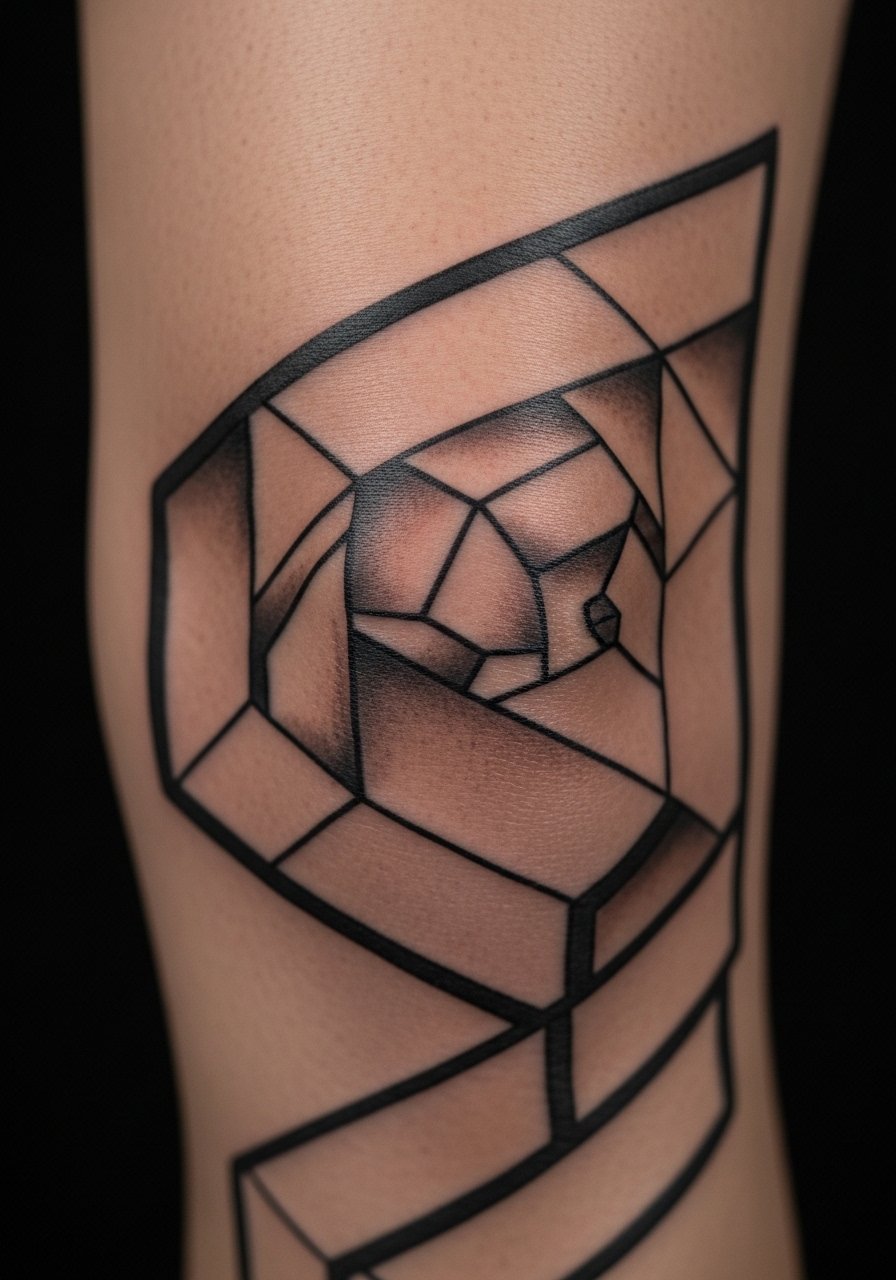
12. Optical Illusion Sleeve That Changes With Angle

Style/Technique: Op art and trompe-l’œil shading
Pain Level: 5/10
Session Time: 2 to 4 hours
Best For: People who like playful sleeves that reveal on movement
This is a unique angle many artist lists miss. Use careful shading gradients at 25 to 35 percent opacity shifts so the illusion resolves at different angles. It creates a lively feeling when you move and is great under trousers because it peeks through. Keep a matte moisturizer to stop shine from flattening the effect on camera.
Mistake to Avoid: Over-contrasting black edges which breaks the illusion and reads flat.
13. Patchwork Sleeve Built Over Time
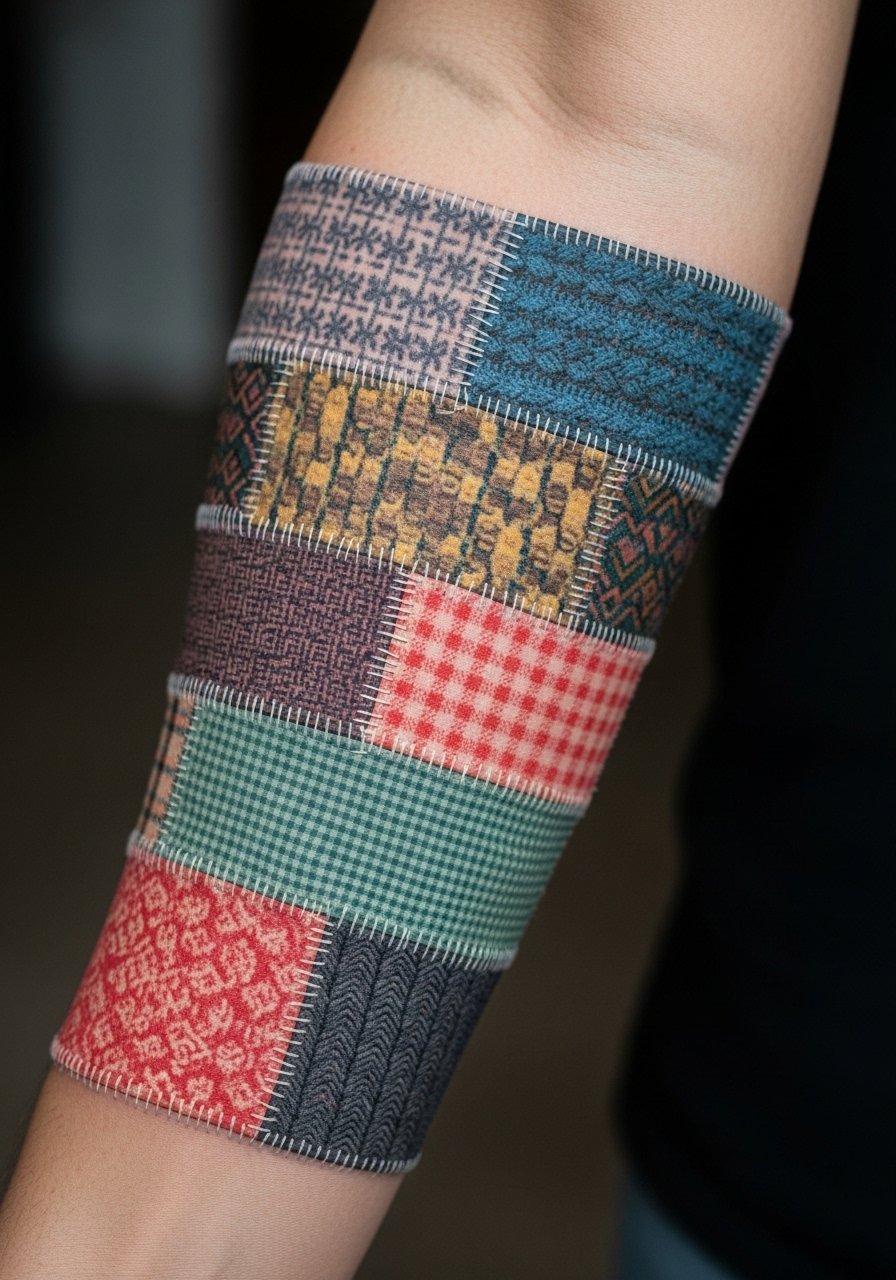
Style/Technique: Curated patchwork with transition bands
Pain Level: 4/10
Session Time: Multiple short sessions over months
Best For: Collectors who add pieces gradually
If you collect tattoos slowly, plan seams and transitions instead of adding random patches. Use thin connector lines or small background fills at a 40 percent density to tie panels together. This approach is budget-friendly because you can spread sessions and still end with a cohesive sleeve. Keep precision-moisturizer-tube near your bedside during the first month after each session.
Mistake to Avoid: Treating each patch as a silo piece and not planning how panels will touch when you sit or cross your leg.
Leg Sleeve Care Shortcuts
Thin layers are your friend. A light swipe of fragrance-free-tattoo-balm keeps skin supple without clogging pores. Apply thinly three times a day for the first two weeks.
Grab breathable-bandage-waterproof for the trip home. It protects the area from rubbing in transit and lowers chance of infection.
Avoid tight socks for a full two weeks after lower-leg work. Swap them for low socks and protect healed ink with tattoo-sunscreen-spf50 when exposed.
Most touch-ups are small. Bring reference photos and mark any areas that lose density so your artist can touch specific spots faster, not redo the whole panel.
If you travel after a session, keep a small tube of unscented-hypoallergenic-soap and a balm in your carry-on to handle unexpected scabbing or dryness.
