
I kept pinning perfect sleeve photos and then sat in a chair watching the stencil stretch across my calf like a warped map, and that was the moment I stopped copying whole images and started planning placement first. Once I learned to think in joint-friendly pieces, the same motifs looked intentional on both forearm and leg, not like two separate tattoos that happened to be on the same person.
These ideas are not all tiny filler bits or full matching halves. They are a mix of coverable work-friendly pieces and bolder statement placements, aimed at people who want cohesion between arm and leg without paying for full sleeves. Most designs are doable in one to three sessions, budget-friendly when you choose line weight and color, and simple enough for a first-time sitter who wants something that ages gracefully. I pulled these after visiting five shops and making mistakes so you do not have to.
1. Paired Fine-Line Botanicals
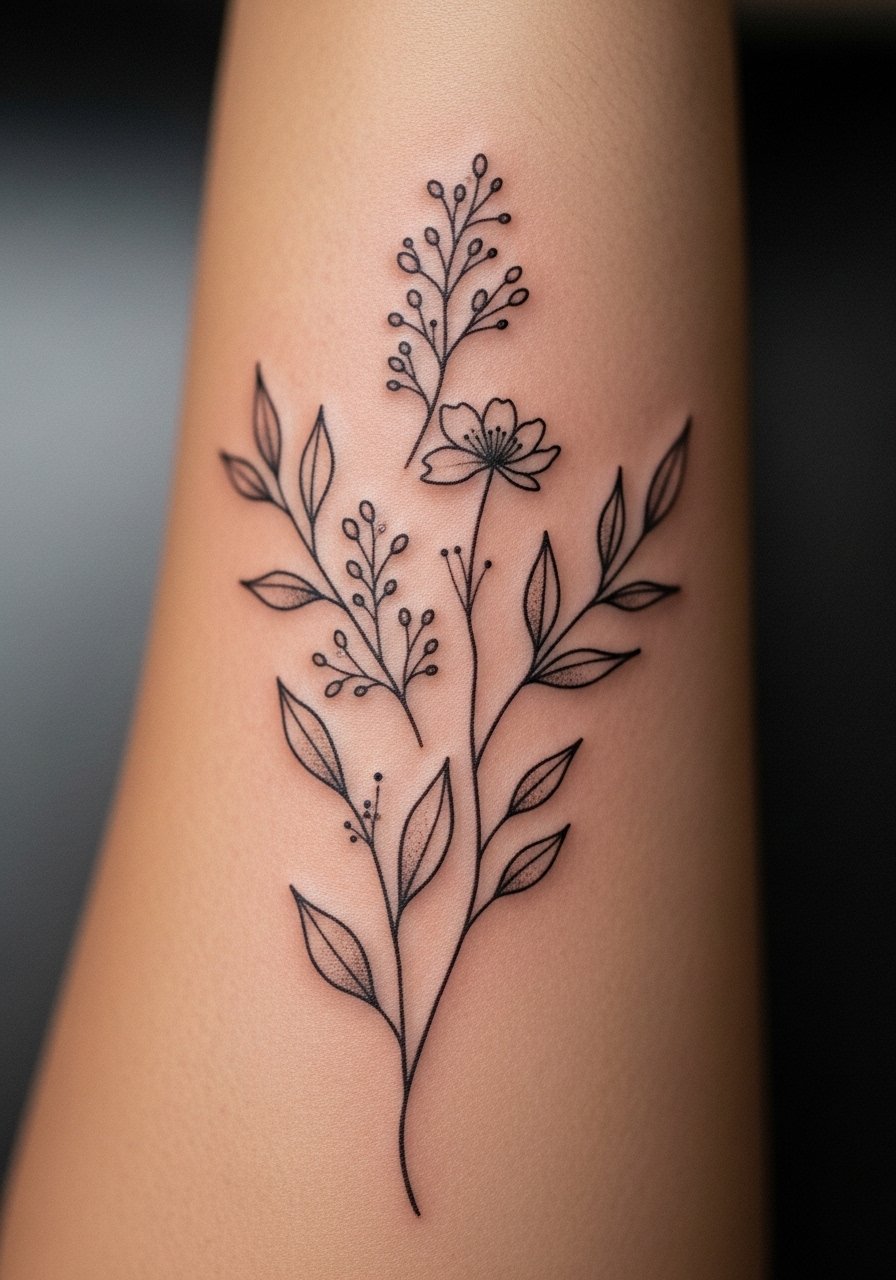
Drawn in 0.3 to 0.5 millimeter lines, matching botanicals on forearm and shin read like relatives rather than twins. The trick is to scale the forearm piece roughly 60 percent of the leg piece so the eye reads hierarchy, and to place stems along natural muscle lines so movement does not distort petals. This style suits someone who wants low-visibility work options, because thin black ink heals into soft gray over time. I used a fragrance-free aftercare balm in recovery and recommend tattoo-aftercare-balm for the first two weeks.
Style/Technique: Fine-Line Botanical
Pain Level: 3/10
Session Time: 1 to 2 hours
Best For: Outer forearm, shin, low-visibility workplaces
Mistake to Avoid: Scaling the forearm design to match the leg exactly, which makes the arm look crowded.
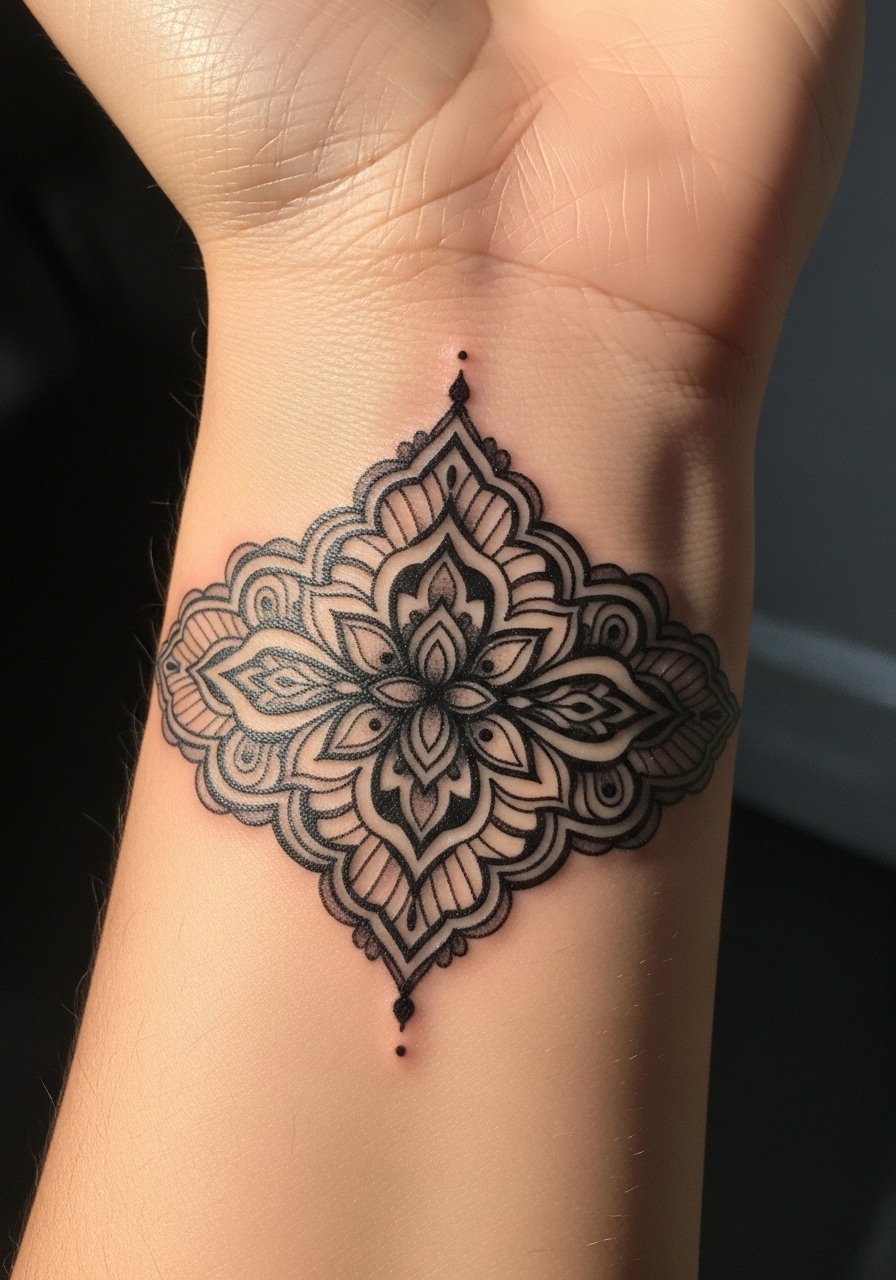
2. Minimal Geometric Anchors

Simple triangles, dots, and arcs are easy to map across joints and they hold up well when shaded sparingly. Place a 1.5-inch geometric mark on the inner forearm and repeat a 2.5-inch version on the calf, spaced so the negative space between forms is about one finger width. This works for people who want modern minimal without long sessions. For crisp lines, a stencil printed at 75 percent of the arm measurement often avoids wrap issues. I numbed a tiny zone during a cold morning session and finished in under an hour with a sensitive-skin numbing cream.
Style/Technique: Minimal Geometry
Pain Level: 2/10
Session Time: 30 minutes to 1 hour
Best For: Inner forearm, calf, first-timers
Mistake to Avoid: Asking for thick fills that make geometric lines blur after healing.
3. Matching Script Phrases

Script needs rhythm and breath. Use the forearm for a short phrase, and repeat a second complementary word or date on the ankle or outer calf so the two read as a sentence when you glance from arm to leg. Ask your artist to map letters to the limb curve and to keep letterforms open, about 3 to 4 millimeters stroke width, so they do not clog. For stencil transfers that stay put, bring a stencil spray and I recommend carrying a gentle transfer spray like stencil-transfer-spray.
Style/Technique: Script / Lettering
Pain Level: 3/10
Session Time: 30 minutes to 1.5 hours
Best For: Forearm script, ankle or inner calf pairing
Mistake to Avoid: Choosing ultra-tight script that becomes unreadable as the ink blurs.
4. Wraparound Anklet and Wrist Bands
Bands read as jewelry and are excellent for visibility control. A thinner forearm band at 8 to 12 millimeters pairs well with a wider ankle wrap of 20 to 30 millimeters. Texture matters here, so mix dotwork with a single fine-line braid to keep sessions under two hours. These are perfect if your workplace limits visible arm ink because bands can be partially covered by sleeves. I bring a breathable compression sleeve for the ankle after heavy sessions, and the cotton-compression-sleeve helped reduce swelling during healing.
Style/Technique: Ornamental Band
Pain Level: 4/10
Session Time: 45 minutes to 2 hours
Best For: Wrist wrap, ankle band, people who want jewelry-like ink
Mistake to Avoid: Letting the band sit across a joint crease without adjusting size, which causes cracking and poor healing.
5. Matching Blackwork Silhouettes
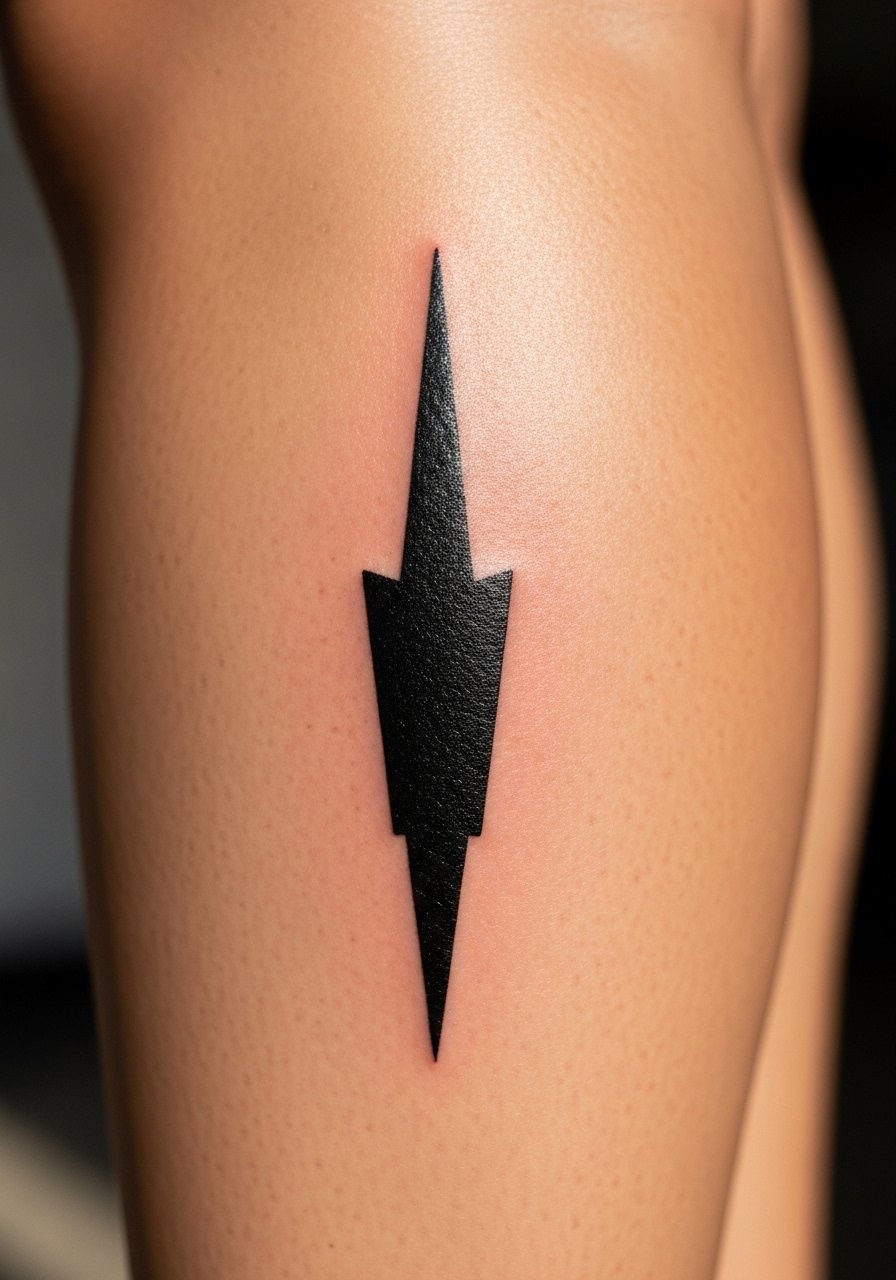
Solid black silhouettes on the leg balance lighter blackwork motifs on the forearm. Use the leg for negative-space cutouts so the silhouette reads even from a distance. Bold pieces can be done in one session but demand deliberate aftercare since dense black fills tend to scab more. For coverage planning, expect the artist to block-fill in 30 to 45 minute passes. I learned across five shops that a dedicated black ink aftercare balm prevents excessive scabbing, so I bring black-ink-safe balm to sessions.
Style/Technique: Blackwork Silhouette
Pain Level: 5/10
Session Time: 1 to 3 hours
Best For: Outer calf, forearm accents, bold visible pieces
Mistake to Avoid: Skipping extra touch-up passes for saturation, leading to patchy black areas.
6. Watercolor Wash Accent
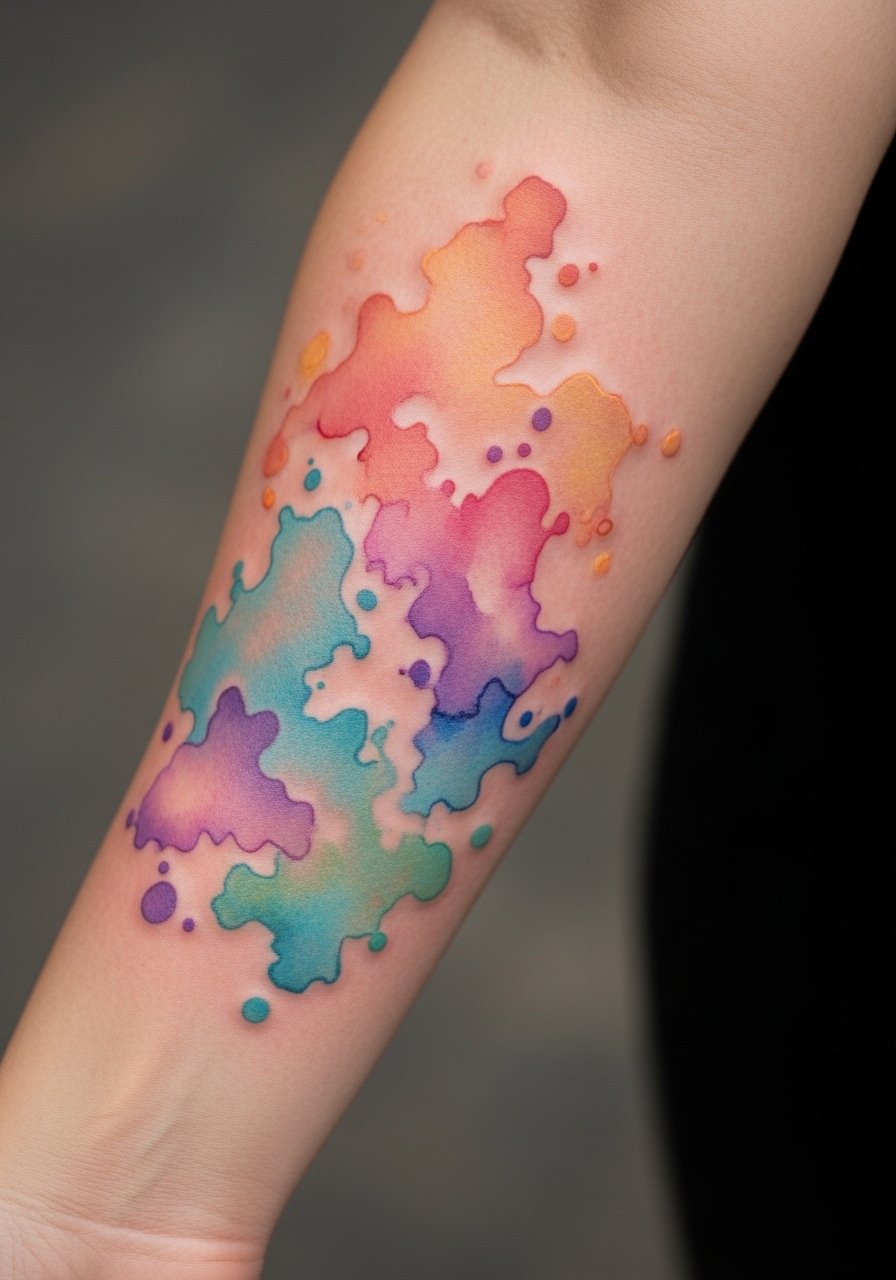
Watercolor accents paired with crisp black outlines on the leg create contrast that stays readable. Keep color washes to 30 percent opacity and anchor them with a 1.0 to 1.5 millimeter outline to prevent feathering. This is higher maintenance because vibrant pigments fade faster on sun-exposed forearms. I advise a lightweight SPF and a plan for touch-ups every few years. For pigment-friendly care, I use an unscented lotion like scent-free-moisturizer during the long healing window.
Style/Technique: Watercolor Accent
Pain Level: 4/10
Session Time: 1 to 2 hours
Best For: Forearm wash, thigh or calf anchor
Mistake to Avoid: Asking for saturated watercolor fills that the skin cannot hold over time.
7. Dotwork Maps And Constellations

Dotwork is forgiving on both curved forearms and rounded calves because texture, not line, creates the image. Use clusters with 2 to 3 millimeter spacing between dots for midtone, and tighten to 1 millimeter for highlights. Constellation pieces age well since dots blur into soft shading, not blobs. This suits someone who wants low-contrast design that still reads from a distance. For precise dotwork, I carry a small antibiotic-free cleansing soap like gentle-tattoo-soap.
Style/Technique: Dotwork / Pointillism
Pain Level: 3/10
Session Time: 1 to 2 hours
Best For: Forearm clusters, calf fields, texture lovers
Mistake to Avoid: Compressing dots too close, which makes the area heal into a single dark patch.
If any of these ideas have you ready to shop for sessions or aftercare, here are the essentials I actually use.
Ink Care And Tools
Aftercare & Healing:
- tattoo-aftercare-balm (~$10-18) A fragrance-free balm for days 3 to 14.
- gentle-tattoo-soap (~$6-12) Mild cleanser for the shower.
- tattoo-sunscreen-spf30 (~$8-15) Protects forearm color from fading.
Comfort & Prep:
- cotton-compression-sleeve (~$12-20) Helps reduce swelling on the lower leg.
- stencil-transfer-spray (~$7-14) Keeps complex stencils in place.
- nitrile-gloves (~$10-18) For clean touch-ups between sessions.
Session Extras:
- sensitive-skin-numbing-cream (~$12-20) Useful for small, painful spots.
- black-ink-safe-balm (~$8-15) For dense fills during healing.
- scent-free-moisturizer (~$6-14) Daily lotion to keep color lively after healing.
Keeping Ink Crisp
Start thin and build. Three thin outline passes hold detail far better than one heavy pass. Grab stencil-transfer-spray and ask your artist to check placement with you before any needles touch skin.
Use SPF regularly. Daylight fades color. tattoo-sunscreen-spf30 on forearm ink keeps washes brighter between touch-ups.
Let scabs fall naturally. Picking interrupts pigment and causes white spots. Keep a thin layer of tattoo-aftercare-balm on for the first two weeks.
Plan placement for movement. Areas that fold need at least 30 percent more negative space. Compression sleeves like cotton-compression-sleeve help during the first three nights.
Don’t rush touch-ups. Wait at least eight weeks for skin to settle before asking for saturation tweaks. I learned this after three sessions where early touch-ups only made textures muddy.
Ask about cultural sensitivity. If a design borrows from a tradition, ask your artist about context and appropriate tweaks. A small change maintains respect and prevents accidental appropriation.
