
I kept asking artists to "make it small" and walked out with a crowded sleeve that read like a story I did not tell. The moment it clicked was when one artist sketched a three centimeter koi, two clean lines and a dot of red, and the piece read across my arm like punctuation. That one tiny change taught me how minimal and traditional Japanese elements can breathe when you give them space and scale.
These ideas are for the person who wants a nod to Japanese tradition without the visual weight of a full back piece, for budgets that range from a quick single-needle visit to a longer fine-line session. Expect easy coverability for work-visible spots, short session times, and designs that heal clean on a range of skin tones. Across five shops I have visited, artists used single-needle liners most often for this look.
1. Single‑Line Koi Silhouette

Style/Technique: Single-needle linework
Pain Level: 3/10
Session Time: 0.5 to 1 hour
Best For: Outer forearm, beginners, visible but easy to cover with long sleeves
A koi reduced to one continuous line reads like motion, even at 2.5 to 3.5 centimeters across. The trick is keeping line weight consistent, roughly a 0.35 mm single-needle feel, so the silhouette stays legible as the skin shifts. Visually it creates a calm, graphic punctuation that suits someone who wants a traditional motif but a modern edit. Budget runs small because session time is short. Pair with an unscented aftercare balm early in healing, like unscented aftercare balm (~$8-15).
Mistake to Avoid: Asking for "more detail" at the consult when you actually mean "more presence."
2. Mini Hannya Mask Outline Behind the Ear
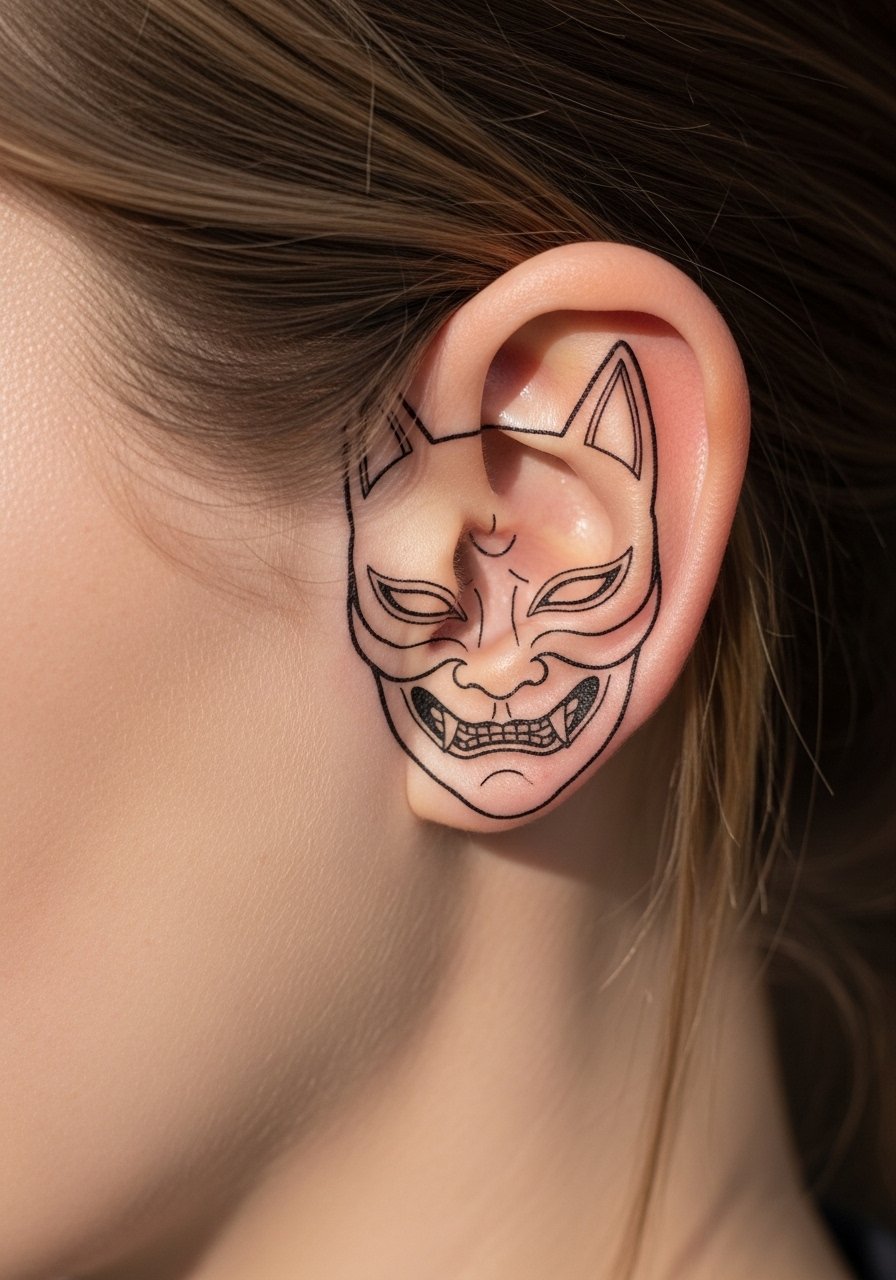
Style/Technique: Minimal traditional outline
Pain Level: 2/10
Session Time: 0.25 to 0.5 hours
Best For: Behind the ear, coverable, people who want symbolic work
A Hannya mask pared back to essential horns and eyes can be under 2 centimeters and still carry the emotional edge associated with the motif. Because placement is small and curvy, the artist often uses 3 to 4 tiny anchor points rather than long runs, which helps the skin accept ink evenly. This reads intimate and private, good for someone who wants symbolism without loud visibility. For stencil precision bring tattoo transfer paper if your artist accepts client stencils.
Mistake to Avoid: Bringing a full-size reference and expecting it to shrink without reworking composition.
3. Tiny Wave Crest at the Ankle

Style/Technique: Line and negative space
Pain Level: 2/10
Session Time: 0.25 to 0.5 hours
Best For: Ankle, small-footprint placements, people wanting seasonal concealment
A 2 to 3 centimeter wave crest using negative space gives the motion associated with ukiyo-e without heavy black fills. Scale it to the ankle curve so the crest aligns with bone contours, about a 15 to 20 degree tilt from the foot axis. The result is clean, nautical, and quiet. Use a healing barrier like petroleum-free tattoo ointment for the first week to protect line clarity on mobile spots.
Mistake to Avoid: Choosing a flat reference image without considering how the ankle's curvature will distort details.
4. Sakura Branch Along the Collarbone
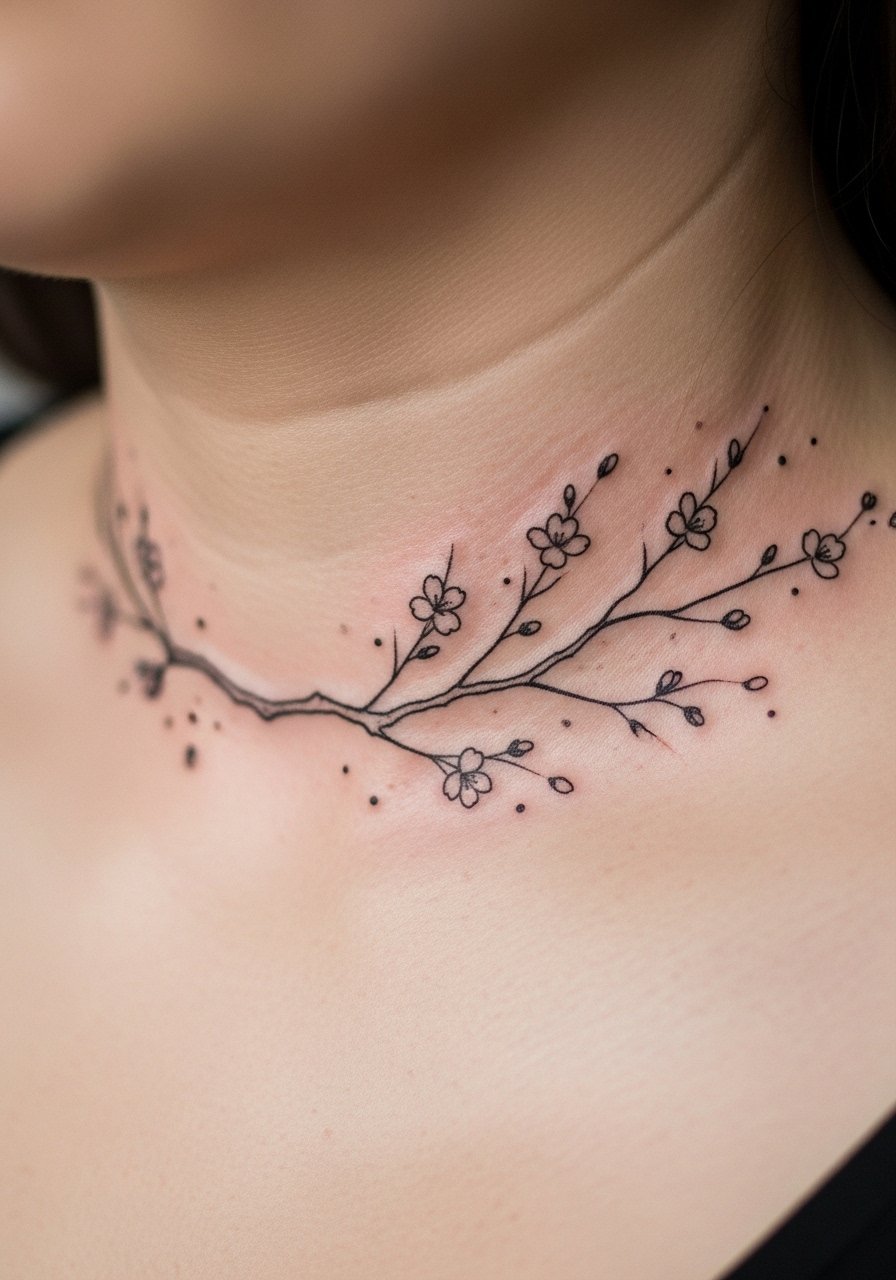
Style/Technique: Fine-line botanical
Pain Level: 3/10
Session Time: 0.5 to 1 hour
Best For: Collarbone, work-coverable with clothing, wearable feminine or neutral vibe
A narrow sakura branch, spaced so petals sit 4 to 7 millimeters apart, feels airy across the collarbone. The visual effect is a breathy, seasonal accent. It works well on medium to light skin where subtle pink or red dots can be added sparingly for a traditional hint. Plan for touch-up if you add tiny color, since red pigments can fade faster. I tested small color dots across two skin tones and kept the palette minimal to avoid a patchy heal.
Mistake to Avoid: Asking for dense petals that merge into a smudge after healing.
5. Mount Fuji Miniature on the Inner Forearm

Style/Technique: Geometric silhouette
Pain Level: 2/10
Session Time: 0.25 to 0.75 hours
Best For: Inner forearm, commuters, people who prefer iconic shapes
A tiny Mount Fuji, 2 to 3 centimeters high, uses straight lines and a small base to read from a distance. The design relies on strong negative space ratios, roughly a 1:2 base-to-height proportion, so the peak looks balanced. It gives a quiet nod to place without traditional embellishment. This fits people who travel or work in offices since it is easy to conceal. For aftercare, I recommend a fragrance-free product like gentle healing salve.
Mistake to Avoid: Compressing the mountain so it loses the triangular silhouette.
6. Single‑Needle Crane in Flight on the Shoulder Blade
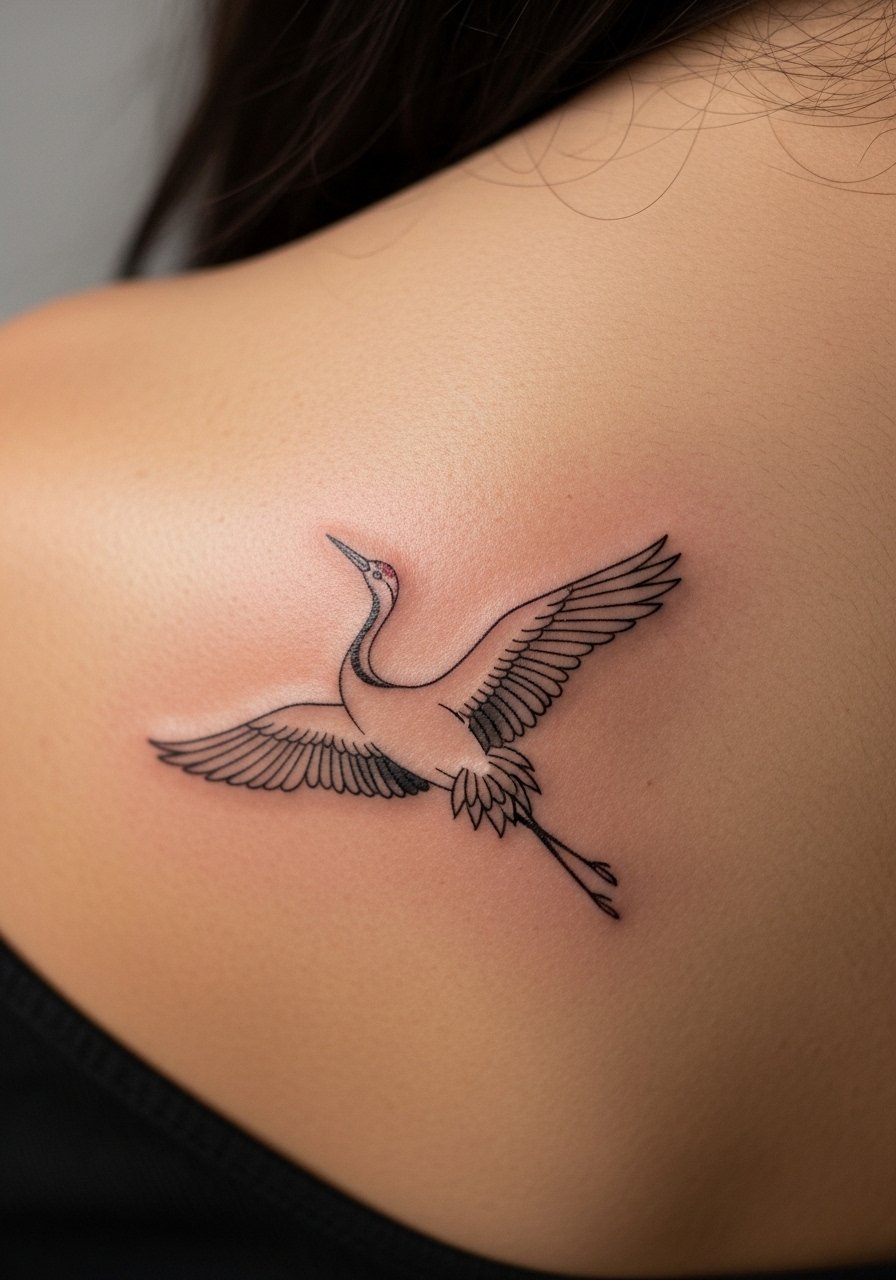
Style/Technique: Single-needle illustrative
Pain Level: 4/10
Session Time: 1 to 1.5 hours
Best For: Shoulder blade, moderate visibility, people who want a graceful motif
A crane drawn with 0.35 mm single-needle strokes across a 4 centimeter wingspan looks like movement even at rest. The shoulders accept long, airy lines well, which lets the wings stretch without crowding. This creates a graceful, elevated feel while still being minimalist. Expect slightly longer session time because of the many short stroke lifts. Bring a bandage-friendly shirt for post-session wear and use a breathable tattoo bandage if your artist recommends it.
Mistake to Avoid: Requesting heavy fill on feathers that will flatten the airy look.
7. Small Red Sun Accent With Thin Rays
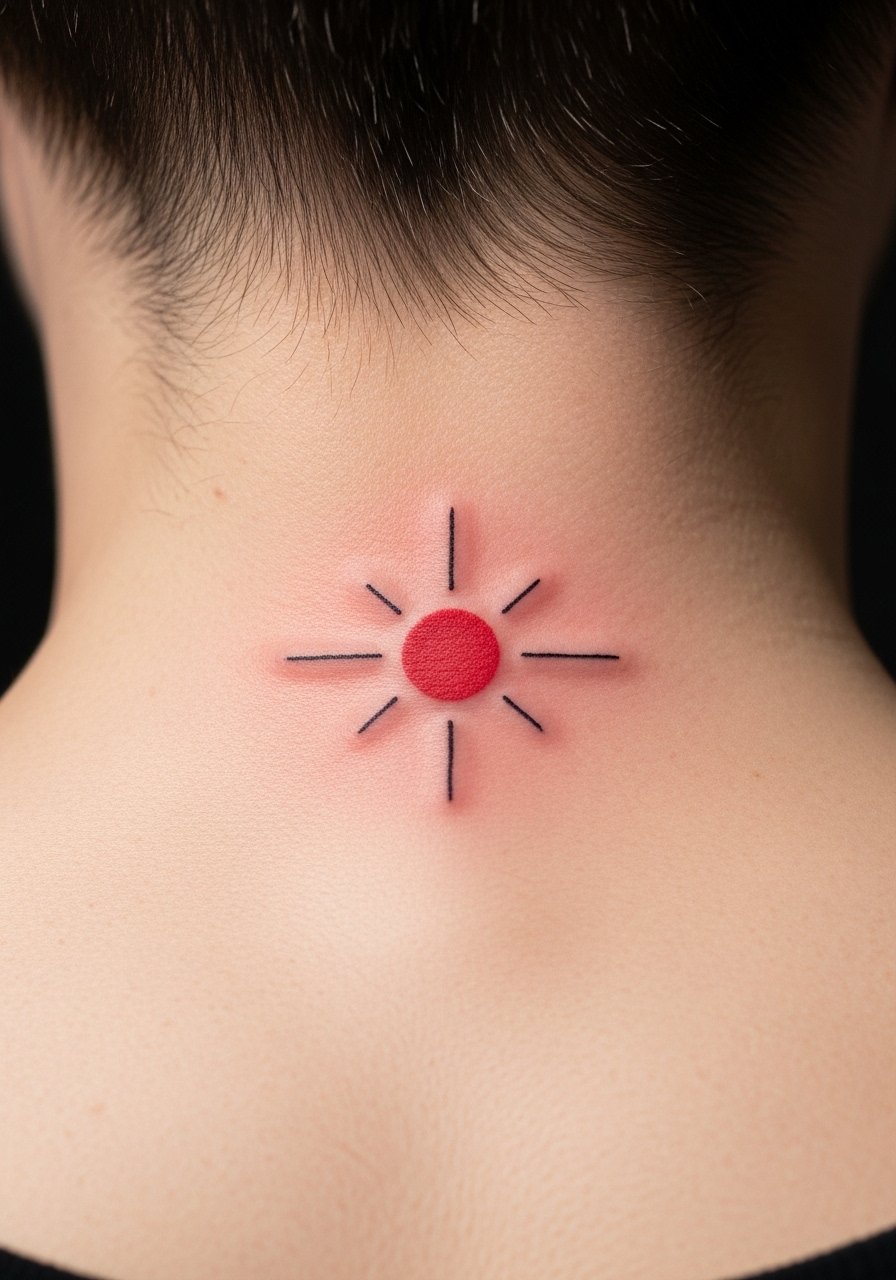
Style/Technique: Minimal color spot with fine rays
Pain Level: 3/10
Session Time: 0.25 to 0.5 hours
Best For: Back of neck, visible but easily hidden, those wanting a bold tiny color note
A tiny red sun, 6 to 8 millimeters in diameter, paired with three thin 1 mm rays balances color and line. The red dot functions as a focal point, the rays read like accents rather than separate elements. Because red pigments can react differently while healing, I suggest asking your artist about pigment choice and touch-up windows. A small sun like this is perfect for someone who wants a cultural reference without complex imagery. Protect it from direct sun after healing with tattoo sunscreen stick.
Mistake to Avoid: Adding too many rays which turns the dot into a busy sun.
If any of these ideas have you ready to actually try something, here are the essentials I reach for before a session.
Minimal Japanese Tattoo Kit
Aftercare:
- Unscented aftercare balm (~$8-15), gentle and non-greasy
- Gentle healing salve (~$10-18), good for flaky spots
Prep & Stencil:
- Tattoo transfer paper (~$12-20), for precise placement
- Disposable razors for small areas (~$4-10), shave only as advised by artist
Protection & Tools:
- Breathable tattoo bandage (~$10-22)
- Tattoo sunscreen stick (~$8-16)
Studio Comfort:
- Loose cotton tee (~$15-25), easy to remove or slip on after a shoulder or back piece
- Small cold pack (~$6-12), helps swelling immediately after
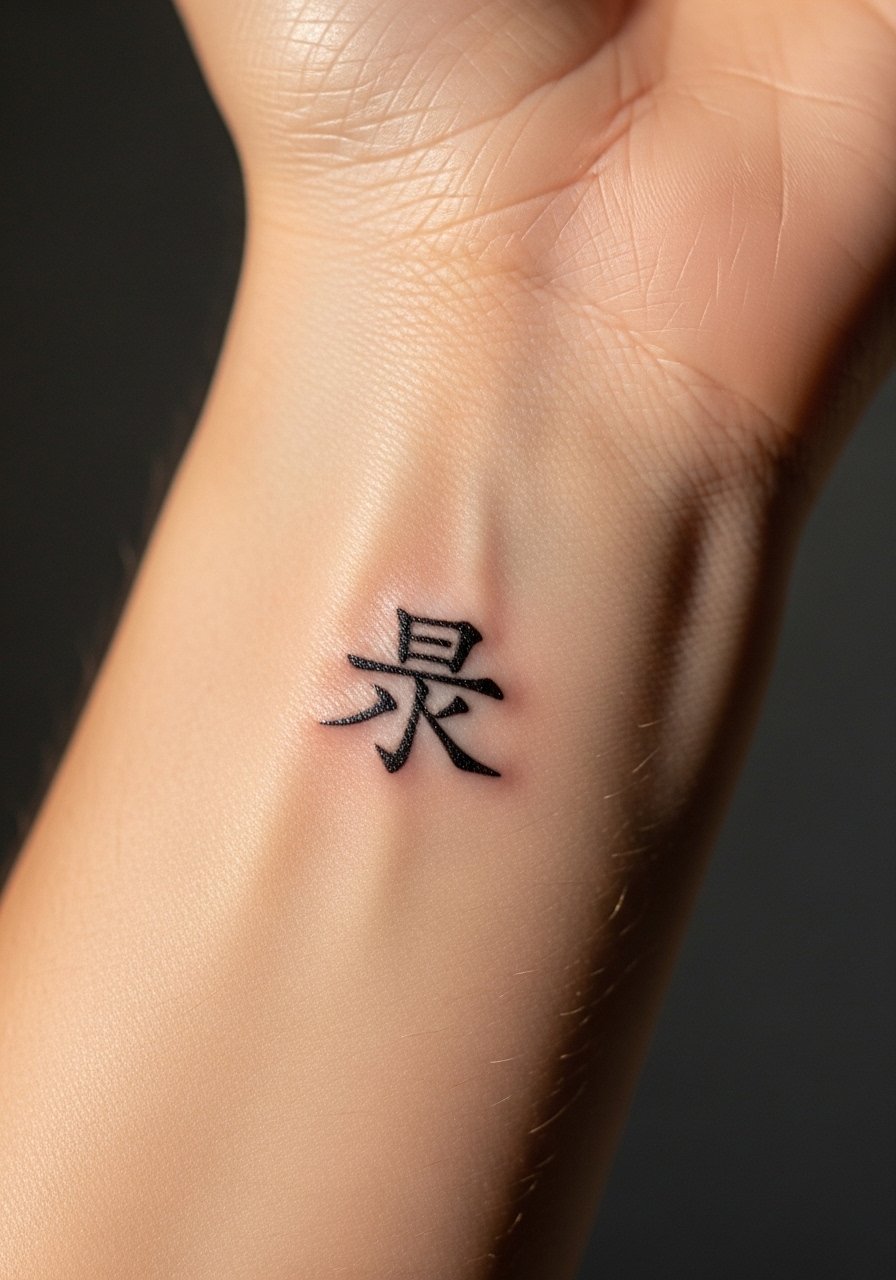
8. Tiny Kanji With Intent On The Inner Wrist
Style/Technique: Single-character minimal
Pain Level: 2/10
Session Time: 0.25 to 0.5 hours
Best For: Inner wrist, subtle statements, people mindful of meaning
A single kanji character, about 1.2 to 1.8 centimeters tall, can be elegant and powerful. The real work is in meaning verification. Always double-check with a native speaker and the artist. Culturally sensitive use matters, especially for symbols tied to religion or history. The inner wrist is high-motion, so expect slight feathering risk on very fine strokes. A light touch and slightly thicker line weight, around 0.4 mm, often yields a cleaner long-term result. For sanitizing hands use a gentle, fragrance-free cleanser like mild hand soap.
Mistake to Avoid: Assuming any translation app equals cultural fluency.
9. Minimal Komainu Silhouette On The Chest

Style/Technique: Silhouette with negative space
Pain Level: 4/10
Session Time: 0.5 to 1.25 hours
Best For: Upper chest, partly coverable, people who like mythic motifs
Komainu reduced to a compact silhouette can sit proudly on the clavicle or chest without reading heavy. Keep the creature under 4 centimeters and focus on the tooth and tail lines so it remains readable. The chest has variable tension so tell your artist about posture when designing placement photos. This idea leans traditional but simplified, so respect the cultural origin by discussing the guardian's meaning during consult. Use a breathable bandage if your clothing will rub the area.
Mistake to Avoid: Trying to cram facial detail into a silhouette that will blur.
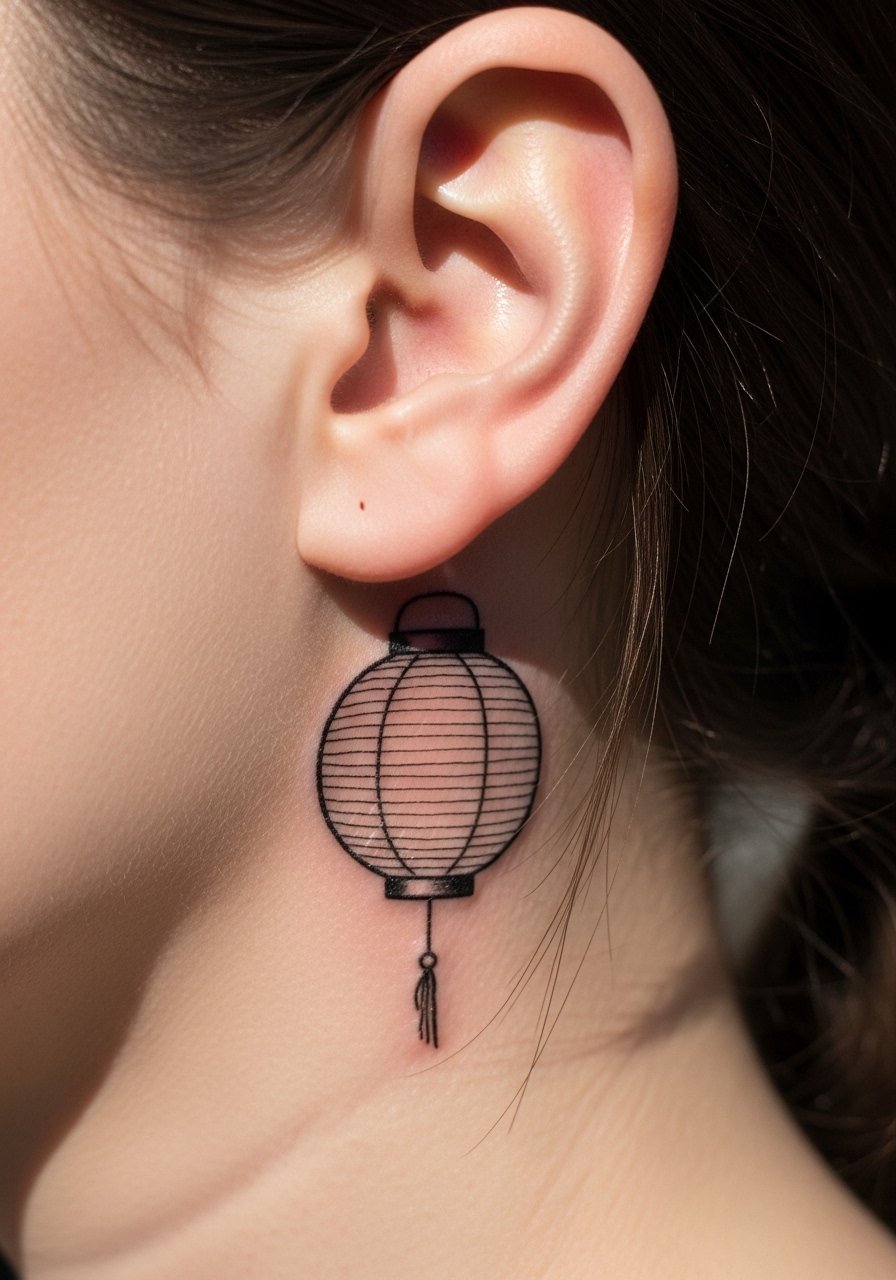
10. Tiny Lantern Outline Behind the Ear Lobe
Style/Technique: Small outline icon
Pain Level: 2/10
Session Time: 0.25 hours
Best For: Behind the earlobe, playful concealability, evening wear accent
A small lantern icon, 1.5 to 2 centimeters, reads like a charm when tucked behind the ear. Because the area is delicate, artists often use short, decisive strokes and avoid long, trembling lines. The result is an intimate, slightly mischievous accent you only show when you want. Pair with a simple aftercare salve for sensitive spots. This is a low-commitment spot for someone who wants tradition without the hours on the chair.
Mistake to Avoid: Expecting a lantern to hold tiny decorative tassels at that scale.
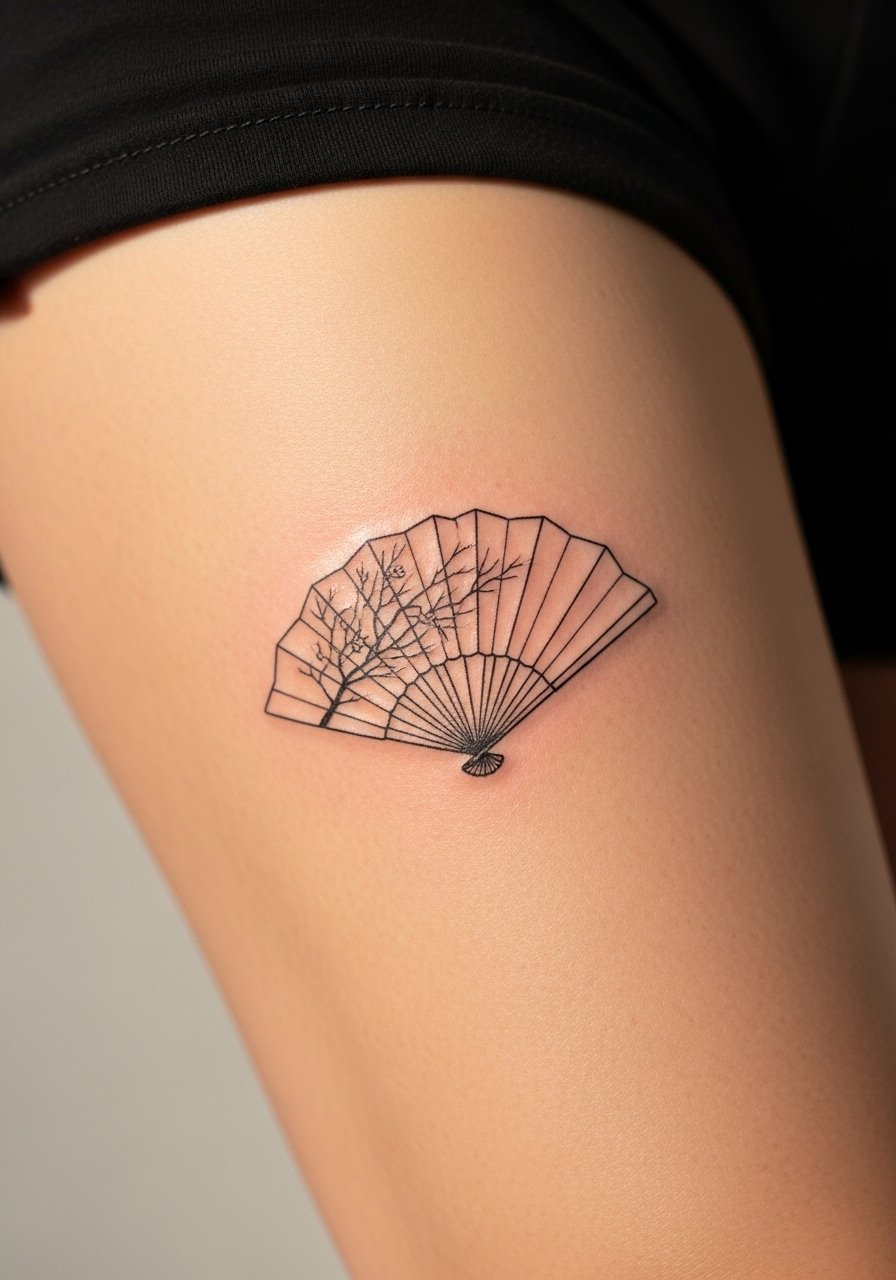
11. Minimal Fan Motif On The Thigh
Style/Technique: Graphic motif, small scale
Pain Level: 3/10
Session Time: 0.5 to 1 hour
Best For: Thigh, seasonal concealment, people wanting decorative geometry
A sensu fan can be simplified into a semi-circle with evenly spaced ribs, about 3.5 to 4 centimeters wide. Keep rib spacing at 3 to 5 millimeters so the fan reads as an object rather than a striped blob. Thigh placement provides a canvas for slightly larger minimal work and heals well if you avoid tight clothing for a week. This sits nicely on someone who wants a decorative piece that nods to traditional props without ornate scenes.
Mistake to Avoid: Compressing ribs so close they merge after healing.
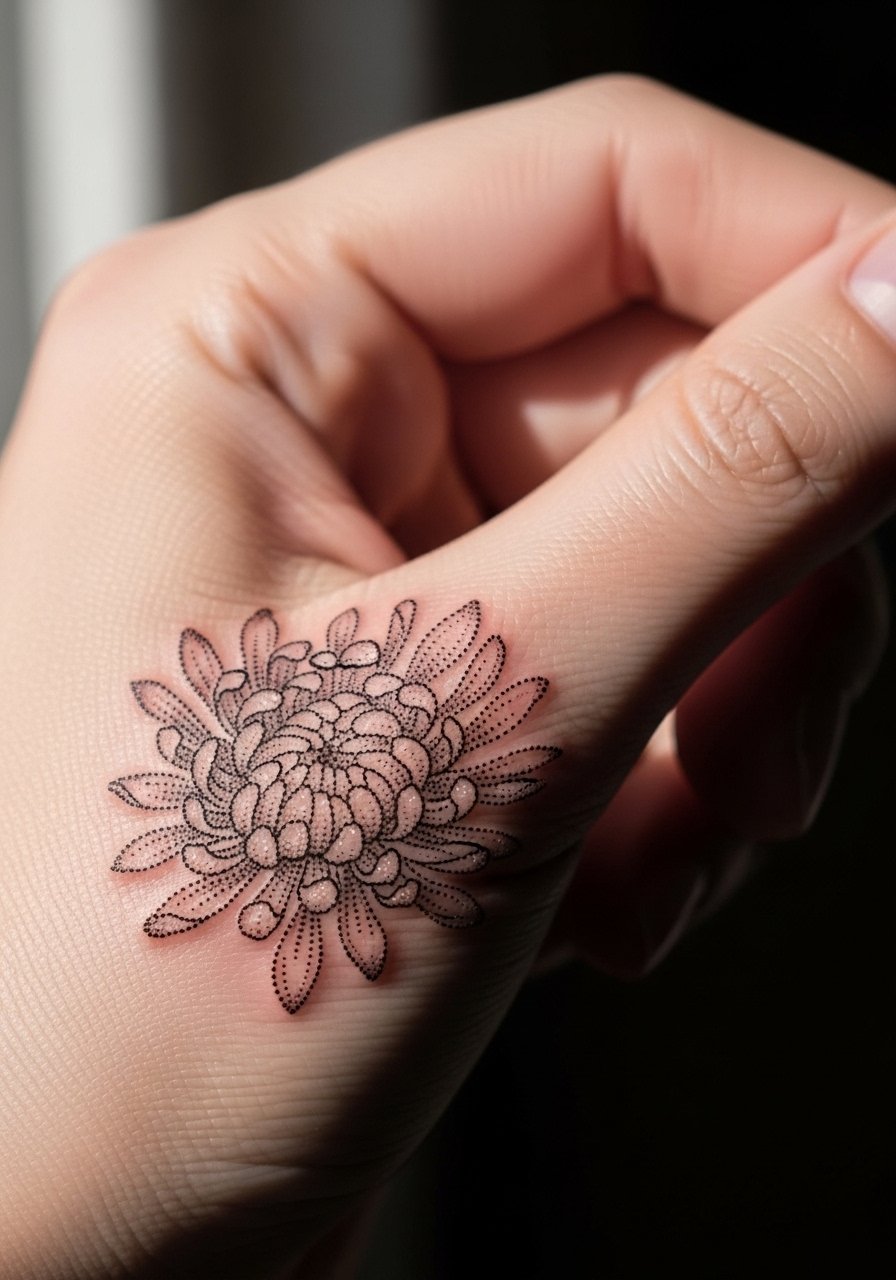
12. Micro Dot Chrysanthemum Petal Cluster on the Hand
Style/Technique: Dotwork negative space
Pain Level: 4/10
Session Time: 0.5 to 1 hour
Best For: Side hand, tactile spot, people comfortable with visible hands
A cluster of three chrysanthemum petals rendered in dotwork can create texture without heavy lines. Keep dots spaced 1.5 to 3 mm apart and scale the cluster to 2 to 3 centimeters so it reads as delicate rather than noisy. Hand placements have higher touch-up rates due to constant use and sun exposure, so budget for a possible future session. Use a lightweight salve and avoid abrasive scrubs while healing. If you have a job with strict hand policies, reconsider placement.
Mistake to Avoid: Expecting hand pieces to behave like forearm pieces without extra upkeep.
13. Negative Space Crane Wing on the Rib Cage

Style/Technique: Negative space composition
Pain Level: 5/10
Session Time: 1 to 1.5 hours
Best For: Rib cage, coverable, people who tolerate moderate pain for larger minimal forms
A wing formed by outline arcs and negative space reads like motion across the rib curve. Keep the piece three to five centimeters long and use line breaks every 8 to 12 millimeters so the air between strokes feels intentional. The rib is a higher pain area, but it allows the artist to place long, graceful lines that breathe. This is for someone who wants a statement piece that stays understated. For post-session comfort have a loose top and a cold pack on hand.
Mistake to Avoid: Asking for every feather defined, which ruins the clean negative space.
Minimal Tattoo Healing Habits
Thin layers beat thick slathering every time. Apply a pea-sized amount of unscented aftercare balm twice a day. Too much product traps moisture and softens scabs.
Grab tattoo transfer paper if you want to test placement at home. Fold a paper mockup around your arm to check how the piece sits with movement and clothing.
Most people pick overly intricate references for small spots. Ask for a scaled mockup and listen when an artist suggests removing elements to keep the silhouette readable.
Keep tattoos out of direct sun while fresh. A tattoo sunscreen stick protects color and line once healed and prevents early fading.
If you are worried about cultural use, speak up. Consult a native speaker for characters and discuss symbolism with your artist. It takes one extra conversation to avoid a lifetime of misunderstanding.
