
I spent an afternoon staring at one manicurist's Instagram and then tried to copy a tiny floral detail by hand. The first attempt looked like a toddler's craft. The third one actually read as intentional. If you want a cute Mother's Day set that reads thoughtful not fussy, this is the approach I landed on. DIY nail art takes about 20 to 45 minutes, and there are small shortcuts that save time without making the design look cheap.
This guide covers a short, wearable floral-and-heart set you can do at home, even if you have only one hand steady. Budget runs from about $15 for basics up to $50 if you add a small LED lamp and a few specialty brushes. I tested this across natural polish and gel hybrids after a month of testing this gel system, and the steps below note dry times for both. If you are short on time, skip the tiny hand-painted leaves and use stickers instead.
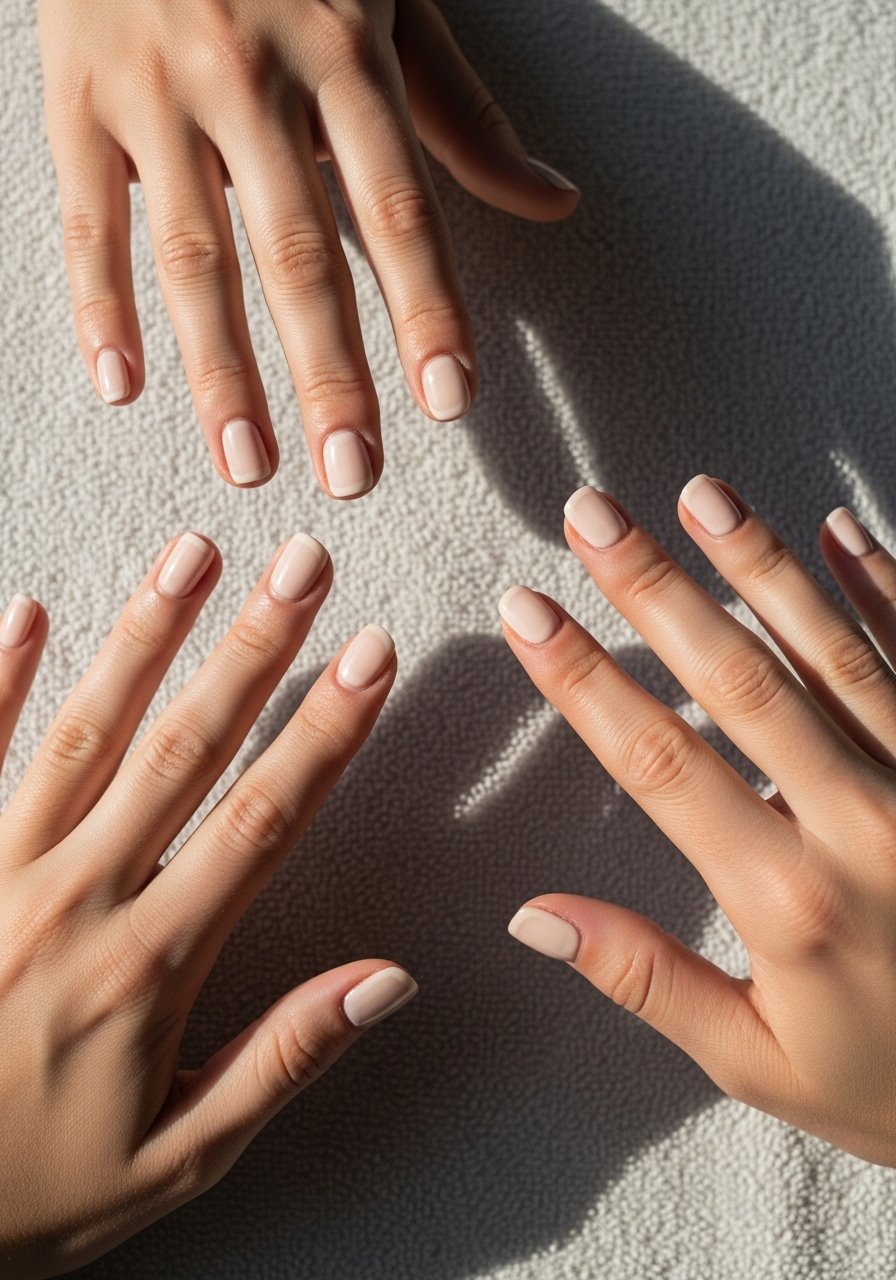
Style/Vibe: Soft pastels with tiny hand-painted flowers
Best For: Short to medium nails, special occasion
Skill: Beginner to intermediate
Time: 30 to 45 minutes
What You'll Need
Tools & Brushes:
- dotting-tool-set (~$8-12)
- nail-striping-brush (~$6-12)
- 180-240-nail-file (~$5-8)
Base & Top Coat:
- strengthening-base-coat (~$6-12)
- quick-dry-top-coat (~$8-15)
Polishes & Designs:
- soft-pastel-polish-set (~$10-20)
- micro-glitter-polish (~$6-10)
- floral-nail-stickers (~$4-8)
Finishing & Extras:
- cuticle-oil (~$5-12)
- led-nail-lamp (~$18-35)
- acetone-cleanup-brush (~$4-8)
Step 1: Remove old polish and prep the nail bed
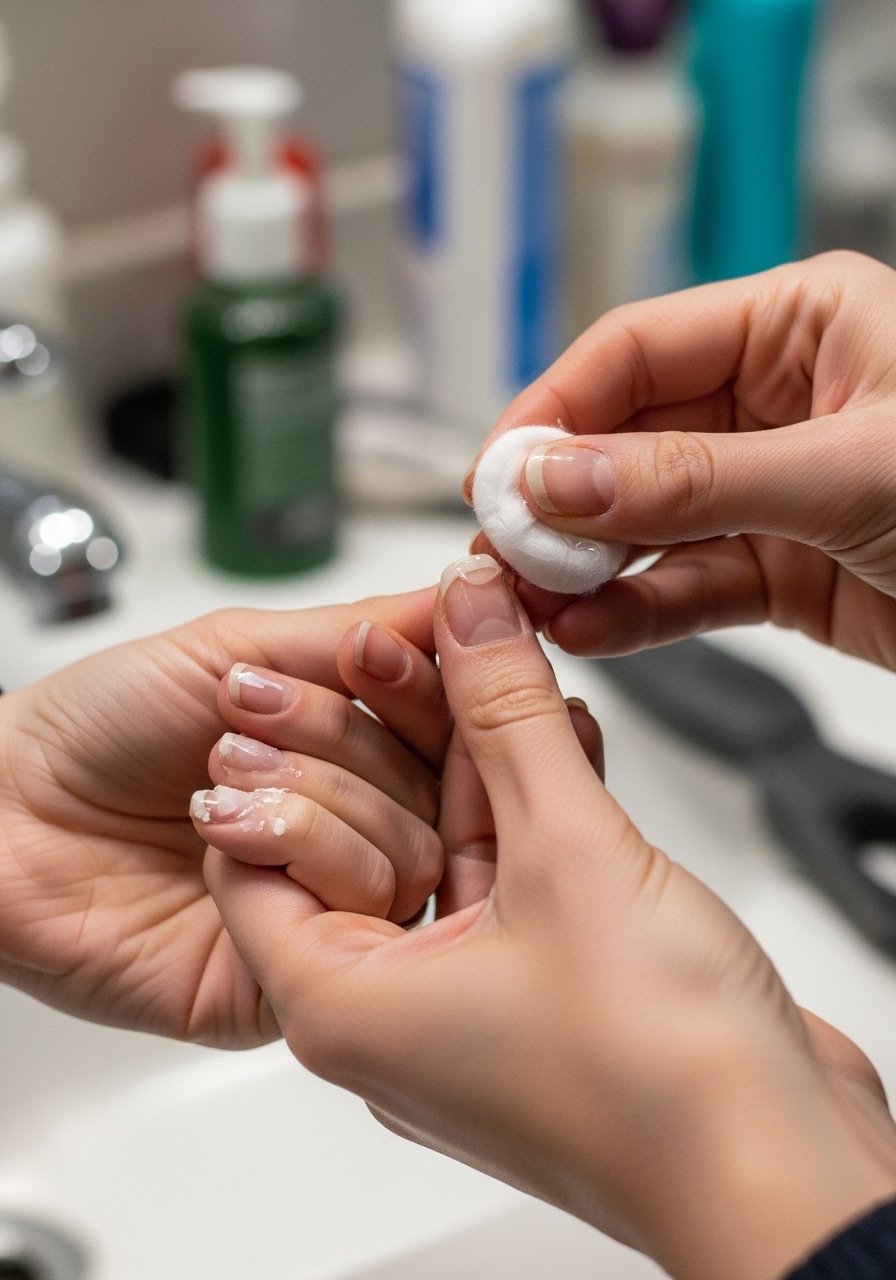
Start by stripping off old color and smoothing edges. File to a soft square or rounded shape using a 180 grit to remove length, then a 240 grit to refine the edge. Push cuticles gently with an orange stick and buff the nail surface lightly so polish adheres. The nail should feel matte and slightly grippy, not slick. A tech at a salon downtown showed me that gentle buffing makes colors sit cleaner. Wipe with acetone to remove residue so base coat actually bonds.
Mistake to Avoid: Skipping the acetone wipe leaves oil on the nail and makes polish peel within days.
Step 2: Apply base coat and thin foundation
Apply one thin layer of strengthening base coat and let it dry about 60 seconds, or cure 30 seconds under an LED lamp if you are using gel. The principle here is thin coats. Thin, even layers prevent bubbling and pooling at the cuticle. If you're doing natural polish, wait until the base coat is tack-free to the touch before the color. If you find the base catching on the brush, wipe the brush edge on the bottle rim each stroke for smoother application.
Mistake to Avoid: Applying a thick base coat thinking it will strengthen the nail, which causes lifting and long dry times.
Step 3: Paint your background in two thin coats
Pick a soft pastel as the background, such as pale pink or mint. Apply two thin coats, each about 30 to 45 seconds of brush work and let them dry 90 seconds between coats on natural polish, or cure 30 to 60 seconds per coat under LED for gel. Aim for a full but sheer finish, not thick coverage. The look reads delicate when you can still slightly see the nail line near the cuticle. If you worry about streaks, swipe the brush once across the nail without dragging back and forth.
Mistake to Avoid: Slapping on thick coats to cover imperfections, which leads to bubbling and uneven finish.
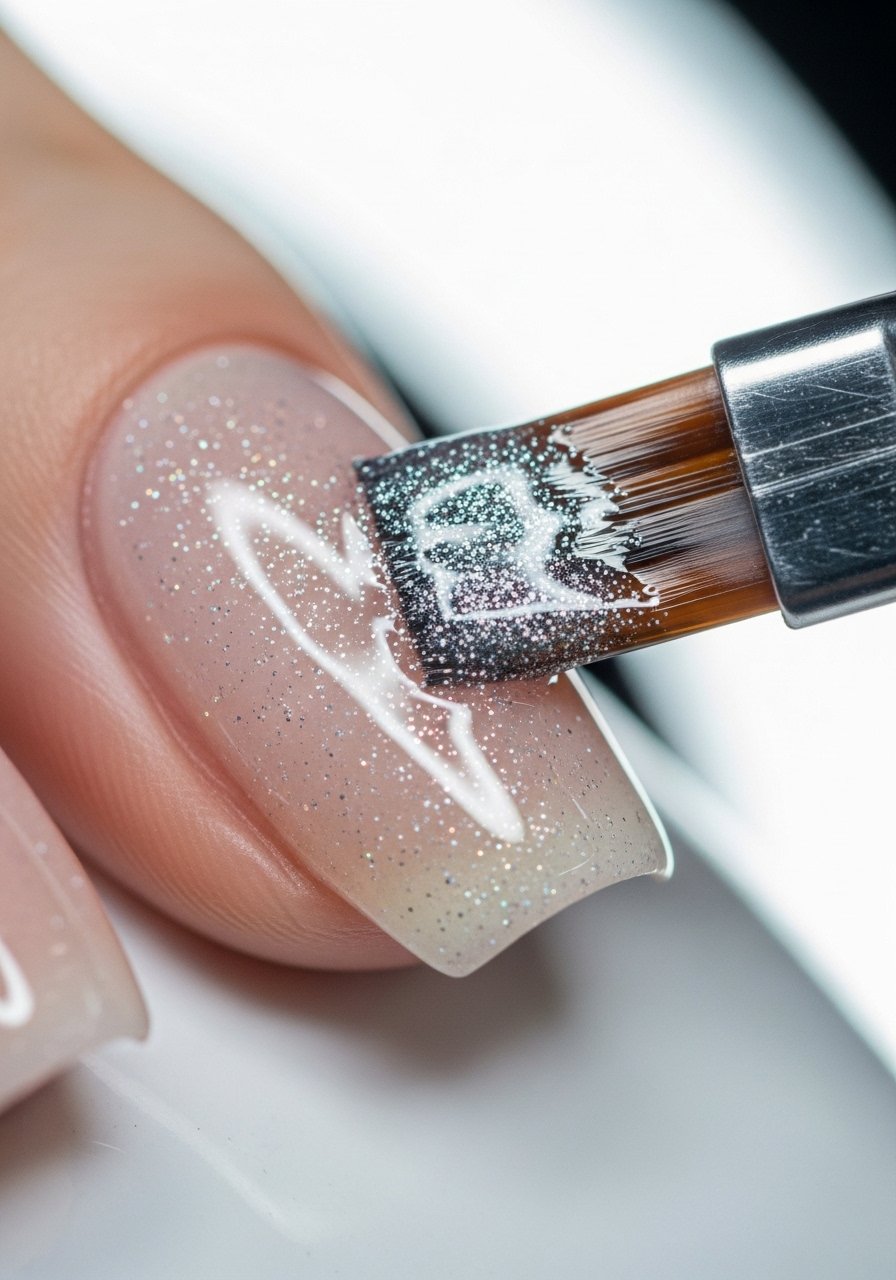
Step 4: Add tiny hand-painted flowers and hearts
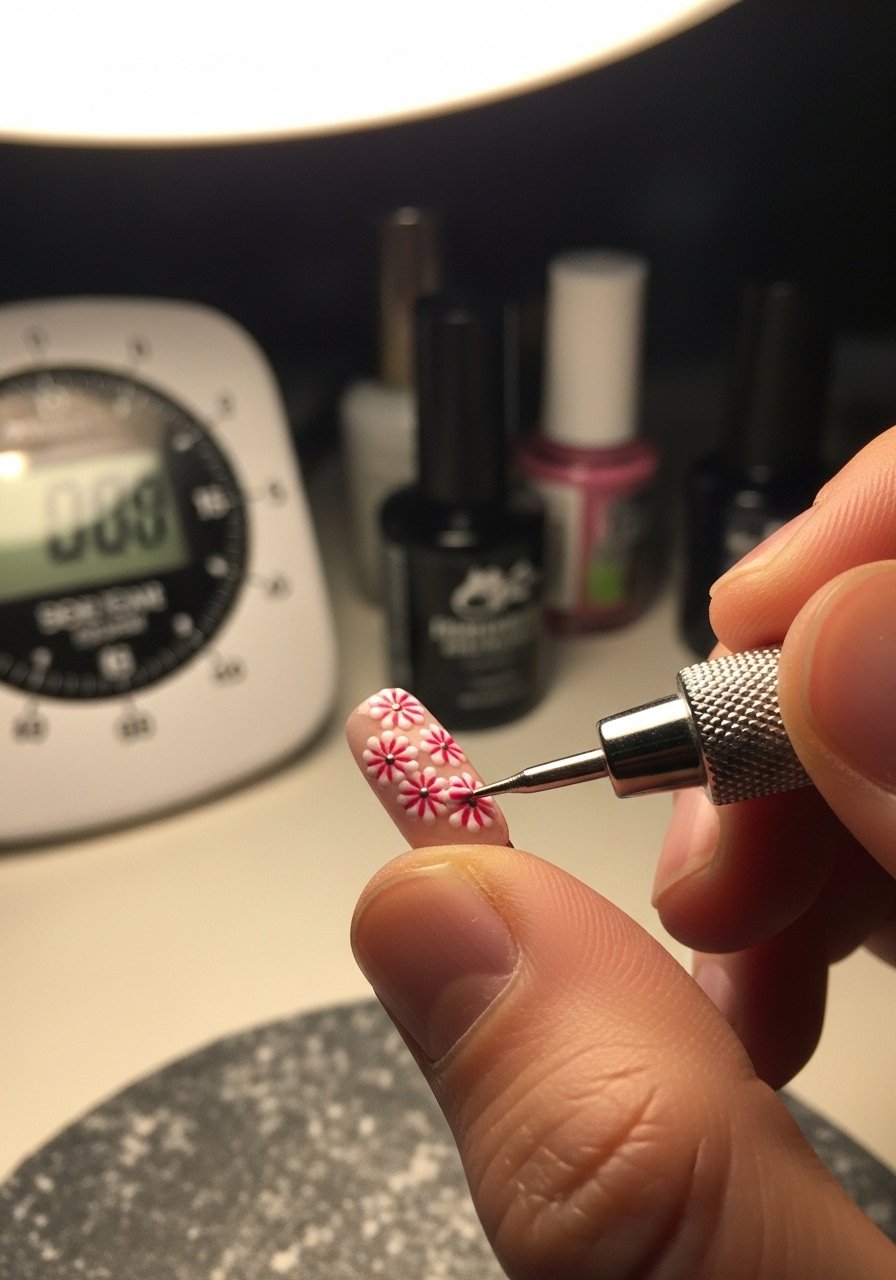
Use a dotting tool or the tip of a striping brush to place five tiny dots in a flower cluster. For petals, place four dots in a square then drag softly toward the center with the brush tip so they meet. Use a contrast color that is two to three shades darker than the base so details read from across the table. For tiny hearts, make two side-by-side dots then drag down once to form the point. Keep mixes small, like a ratio of one accent nail per hand and two micro-accents on other nails, so the design does not overwhelm.
Mistake to Avoid: Trying to paint too many flowers, which makes the set look cluttered and amateurish.
Step 5: Layer micro-glitter or decals for sparkle
If you want shine without thickness, dab micro-glitter near the cuticle or over one accent nail and then thinly drag outward, keeping most glitter at the base. Another easy route is to place a single floral sticker on a middle nail and seal it. When using glitter, mix one drop of glitter polish to about three drops of clear top coat on a palette to thin it, then apply lightly. The result reads chic if the glitter sits under a thin top coat rather than as a chunky third layer.
Mistake to Avoid: Piling glitter on thickly so the nail feels bumpy and top coat wrinkles.
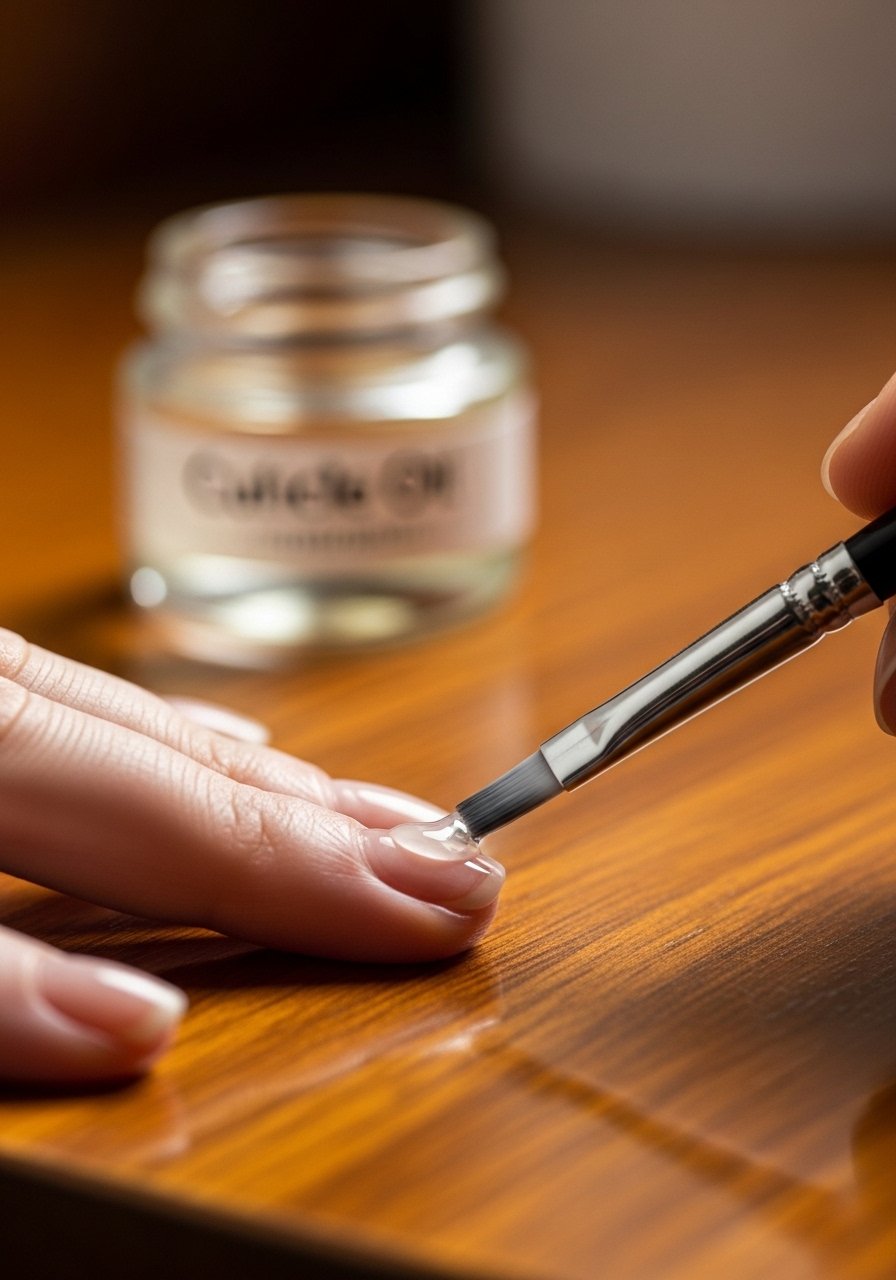
Step 6: Seal, clean edges, and finish with cuticle oil
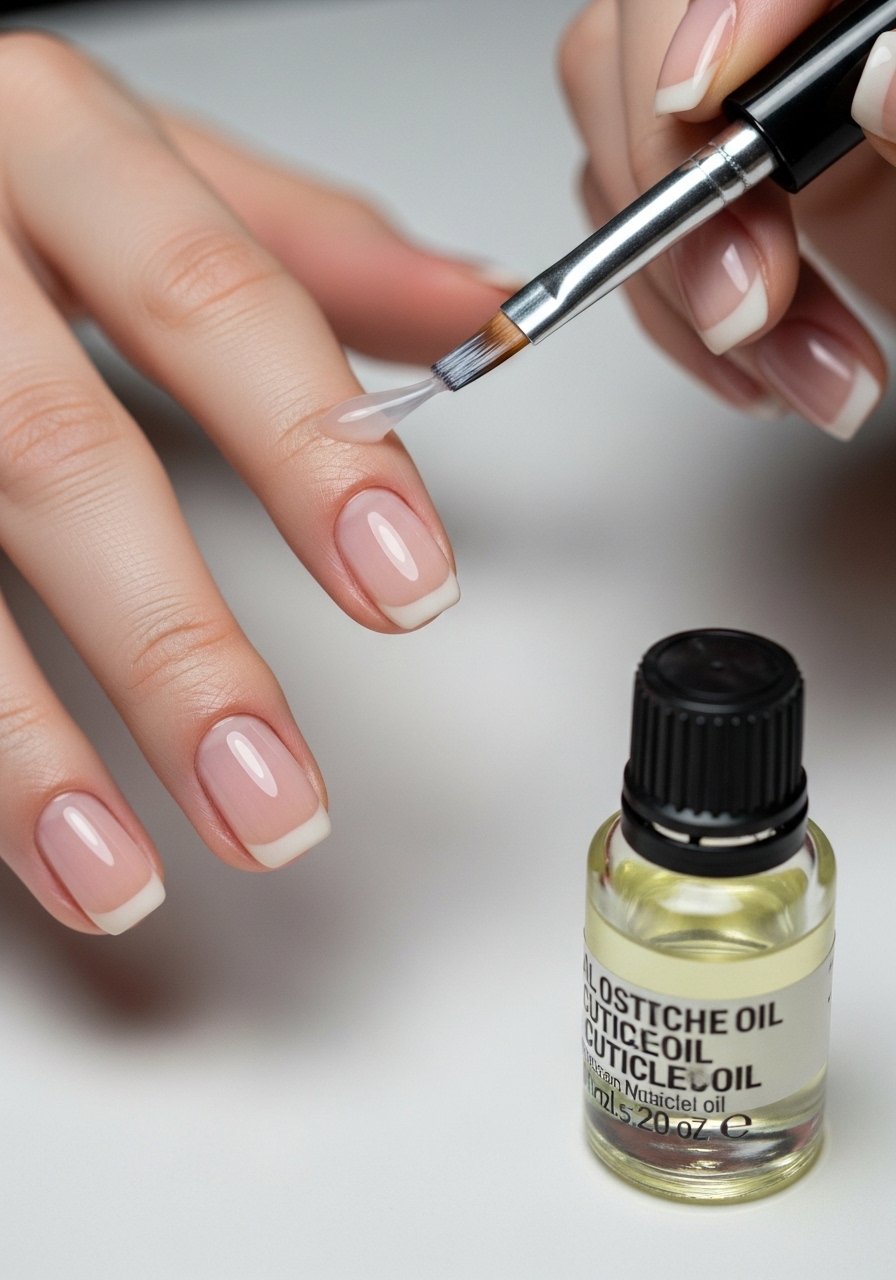
Finish with a quick-dry top coat, two thin layers if you want extra shine, letting 60 seconds dry between layers on natural polish, or curing 60 seconds under LED per layer. Run an acetone-cleanup brush around cuticles for crisp lines and then massage cuticle oil into each finger to hydrate the surrounding skin. The oil makes the manicure look intentional and polished. About 30% of at-home manicures chip within 48 hours, so this finishing routine helps longevity.
Mistake to Avoid: Skipping edge cleanup, which makes a professional-looking manicure read sloppy.
Nail Tips
Keep layers thin: Thin coats are the rule. They dry faster and feel smoother. Try the strengthening-base-coat for a reliable foundation.
Use stickers to save time: If hand painting makes you nervous, place floral-nail-stickers on one accent nail and paint the rest.
One lamp, two uses: An led-nail-lamp is handy even for gel-top coats and cured decals. It makes the set sturdy in under two minutes.
Refill your dotting tools: Replace tips when they feel dull. A fresh dot tool makes round petals easily.
Match polish to skin warmth: Warm skin tones pair well with peachy pastels. Cool tones suit mint or lavender. Trust what reads best in natural light.
File in one direction: File gently toward the center to prevent splitting and flaking at the nail edge. Use a 180-240-nail-file for control.
Pack a touch-up kit: A small bottle of your base color, a dotting tool, and top coat can save the look if a chip happens the day of gifting.
Made for Mom
This set is meant to read soft and intentional, not overworked. Practice the tiny flowers on a spare nail tip once or twice and you will see how a small confident dot changes everything. Final tip, photograph your set in natural morning light to check balance before you gift it. You will get it faster than you think, and it holds up well if you follow the thin-layer rule and the cleanup routine.
