
I almost did not try proper temperature control. I thought throwing meat on hot coals and flipping until it looked right would do it. Then one Sunday I tried low-and-slow on the side and a quick sear at the end, and everything changed. Not gonna lie, my first attempt was bad. The second was barely better. The third one clicked and now grilling feels like a reliable routine.
This guide covers the basics and the nuanced moves that make a big difference, from building a two-zone fire to resting and slicing. Budget ranges from simple tools to a midrange setup. I have tested this three times to get the timing right, and after making this for 20+ weeknights I can tell you which shortcuts are worth it. You will get clear times, temperatures, and the small sensory cues that tell you the meat is ready.
What You'll Need
Core Ingredients
- Bone-in ribeye or chuck roast (~$8-$18 per lb)
- Kosher salt and coarse black pepper (~$5-$12)
Equipment
- Weber original-kettle-grill (~$150-$300)
- Chimney starter (~$15-$30)
- Instant-read thermometer (~$15-$40)
- Long stainless tongs (~$12-$25)
- Cast-iron skillet (~$20-$60)
Optional Upgrades
- Wireless probe thermometer (~$50-$120)
- Hickory wood-chips (~$8-$15)
Step 1: Clean, oil, and preheat until the grate glows
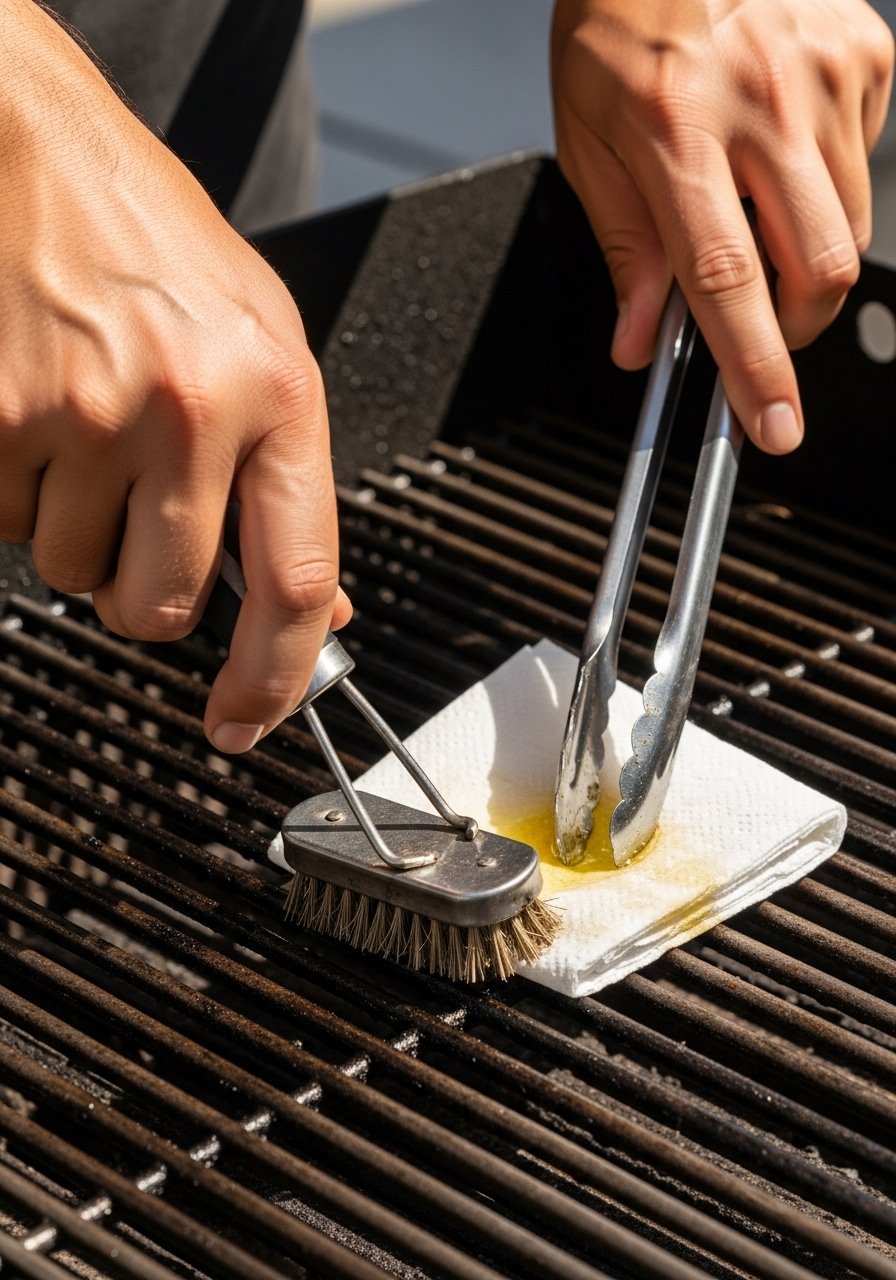
Start by giving the grate a hot scrape. Light coals in the chimney, dump them in, and close the lid for 10 to 15 minutes until the grill reads steady heat. The metal should be hot enough that a drop of water dances. Oil the grate with a paper towel held in tongs so food does not stick. This step sets the stage for a clean sear and prevents tearing that ruins texture. I am still not sure this is the best way, but it has worked every time for me.
Mistake to Avoid: Letting meat hit a cold or greasy grate so it rips when you try to flip it.
Step 2: Build a two-zone fire for control
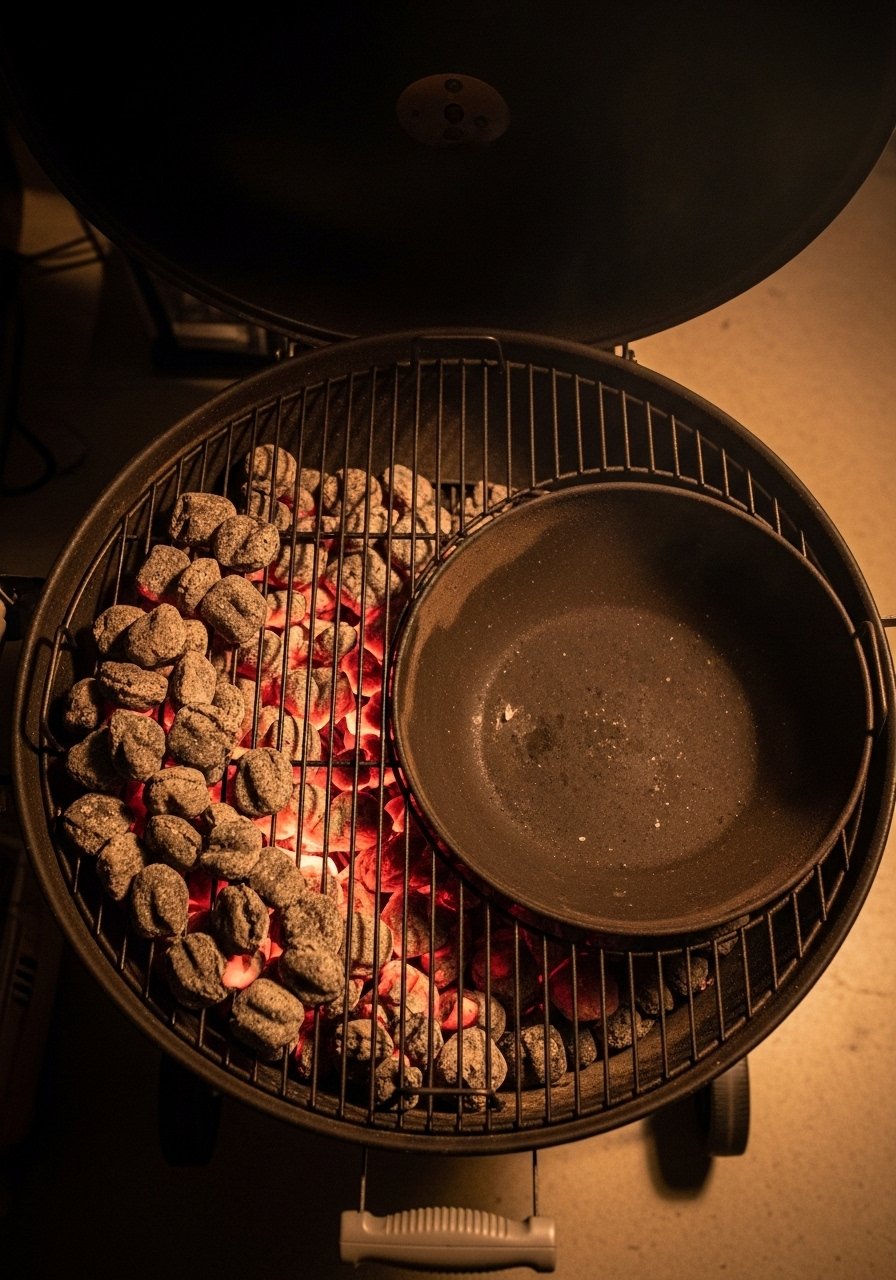
Pile coals to create direct and indirect heat. I use a 2:1 ratio of coals on the hot side to the cool side for steaks and a 3:1 for larger roasts. The two-zone principle gives you both a searing arena and a slow finish area. For gas, light one side on high and keep the other burners low or off. This is the temperature control trick that saved my early overcooked steaks. The difference is that you can sear quickly at 400 to 500°F then move the meat to 225 to 275°F to finish without burning the exterior.
Mistake to Avoid: Cooking only over direct high heat and expecting even doneness.
Step 3: Pat dry, season simply, and let it rest at room temperature
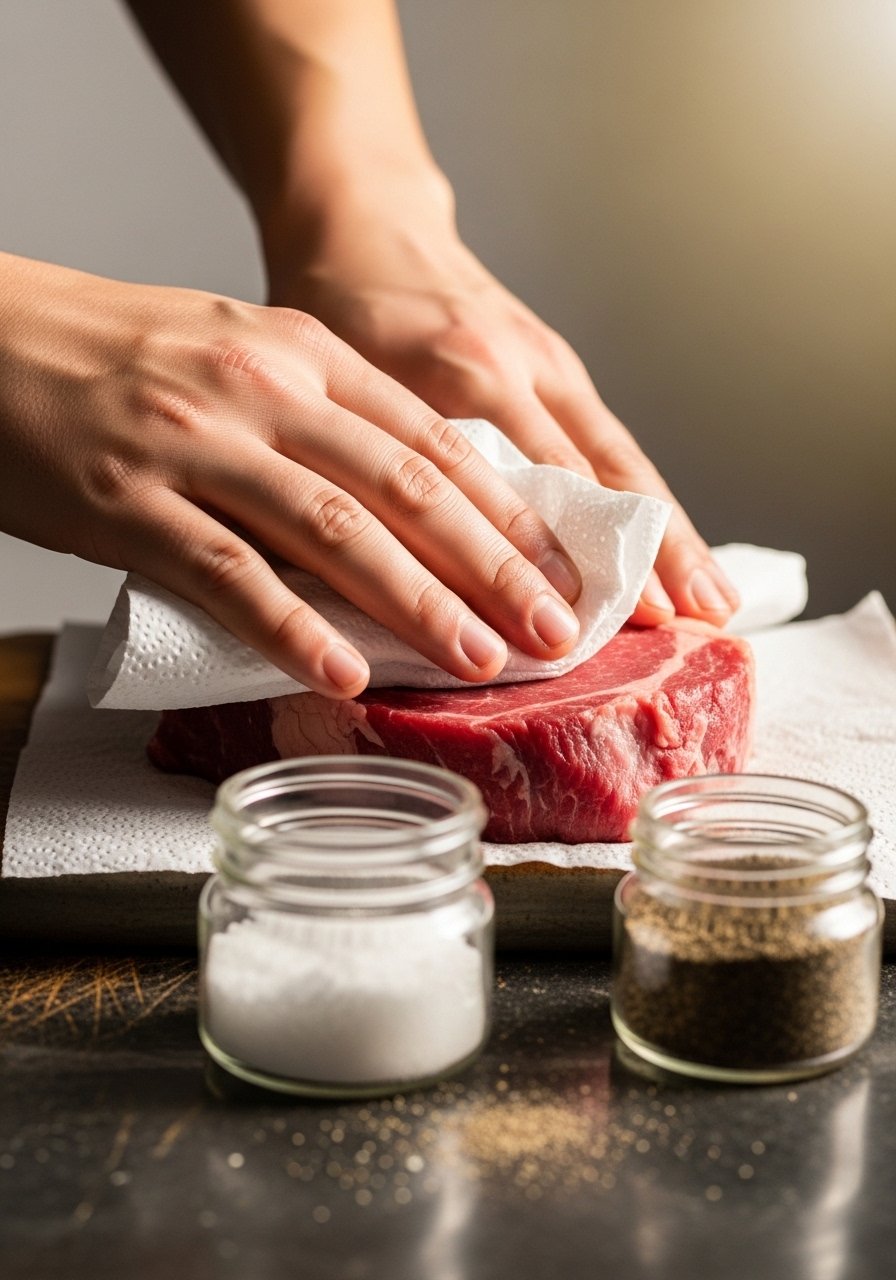
Pat the meat dry until it feels tack-free. Salt generously, about 1 teaspoon per pound for thick steaks, and let the meat sit for 30 to 60 minutes, uncovered in the fridge if you have time, or 20 minutes on the counter for quick dinners. This pulls moisture to the surface then reabsorbs it for a better crust. The smell shifts from metallic to savory as the salt works. Honestly this step frustrated me at first, but it yields the crisp, caramelized exterior I finally stopped fighting.
Mistake to Avoid: Skipping the dry pat and seasoning, which causes steaming instead of searing.
Step 4: Sear over direct heat until a deep crust forms
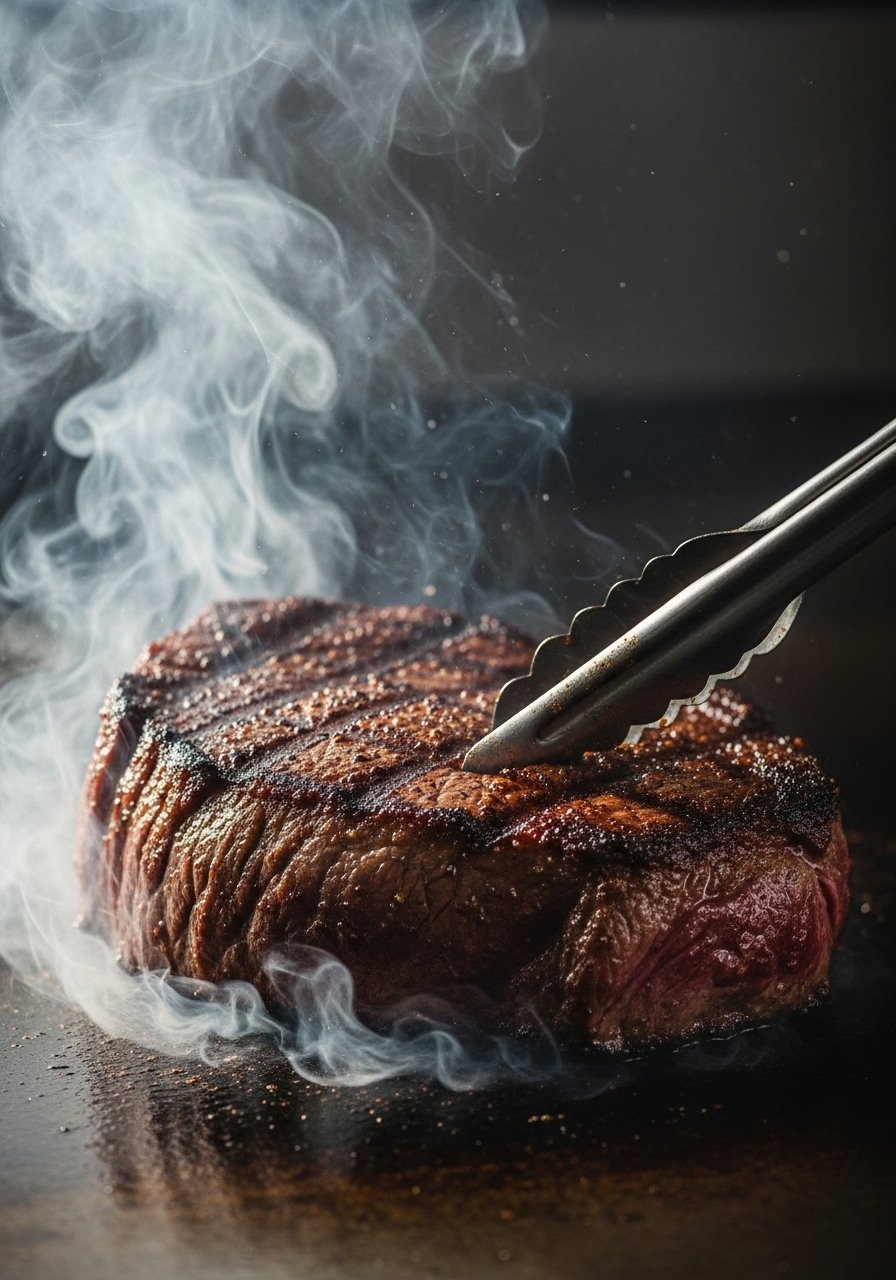
Place the meat over the hot zone and do not move it for 2 to 3 minutes per side for a steak about 1 to 1.5 inches thick. You want a hard sear and deep brown crust. Listen for the steady sizzle, not a frantic roar. For larger cuts, get a quick crust on all sides and then transfer to indirect. The sear creates flavor molecules that you cannot fake later. A cast-iron skillet placed on the grate will boost browning and feel heavy and stable under your spatula.
Mistake to Avoid: Flipping too often while trying to speed up the sear.
Step 5: Finish on indirect heat using carryover cooking
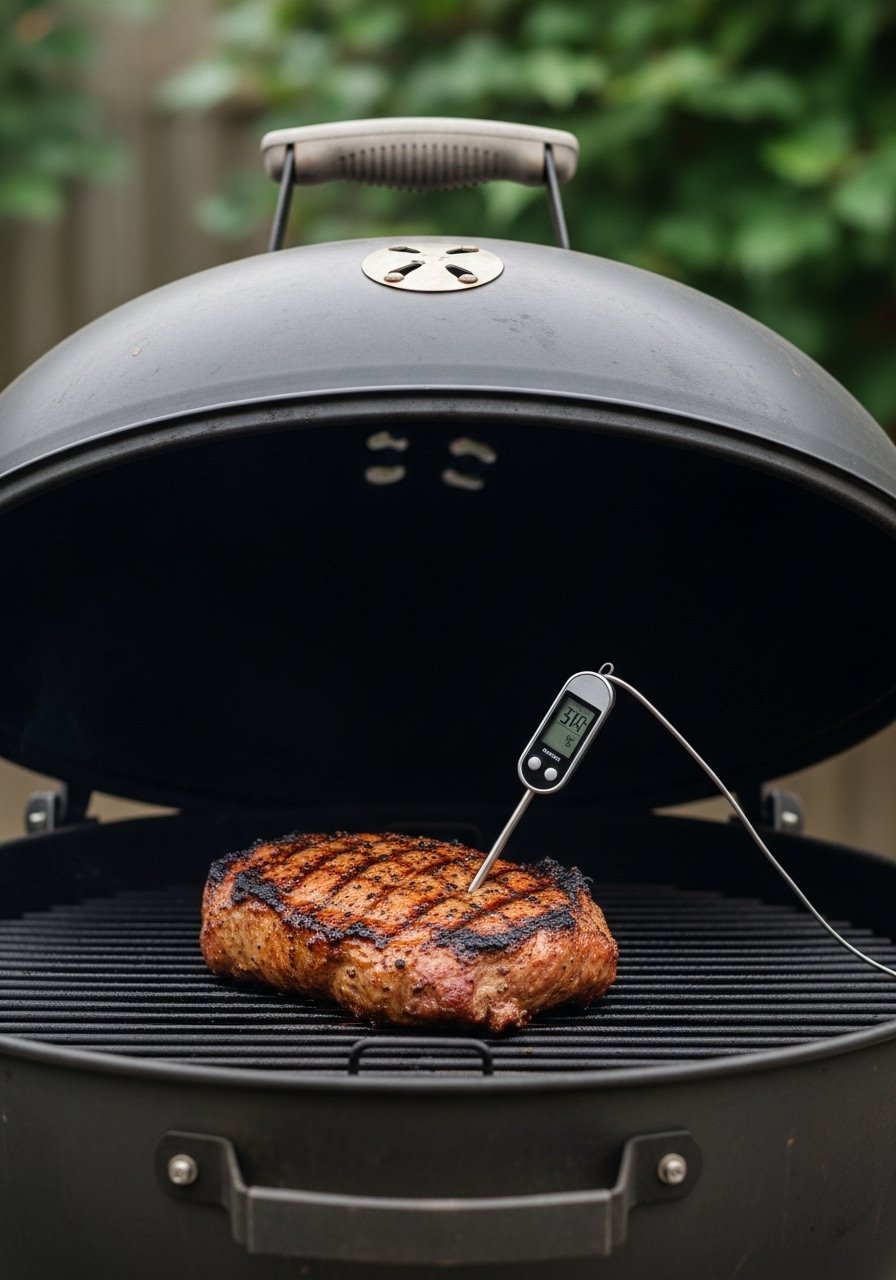
After searing, move the meat to the indirect side, close the lid, and finish to your target temperature. Use a probe or instant-read to hit 5°F below your desired final temp because carryover cooking will raise it while resting. For medium-rare aim for 125°F in the center, then expect it to climb. This two-stage approach gives you a crisp exterior and perfectly even interior. My first few attempts overshot temp by not accounting for carryover cooking. Leave even a small gap in grill vents so heat flows gently.
Mistake to Avoid: Pulling meat off too late because surfaces looked done, ignoring internal temperature.
Step 6: Rest under loose foil, then slice against the grain
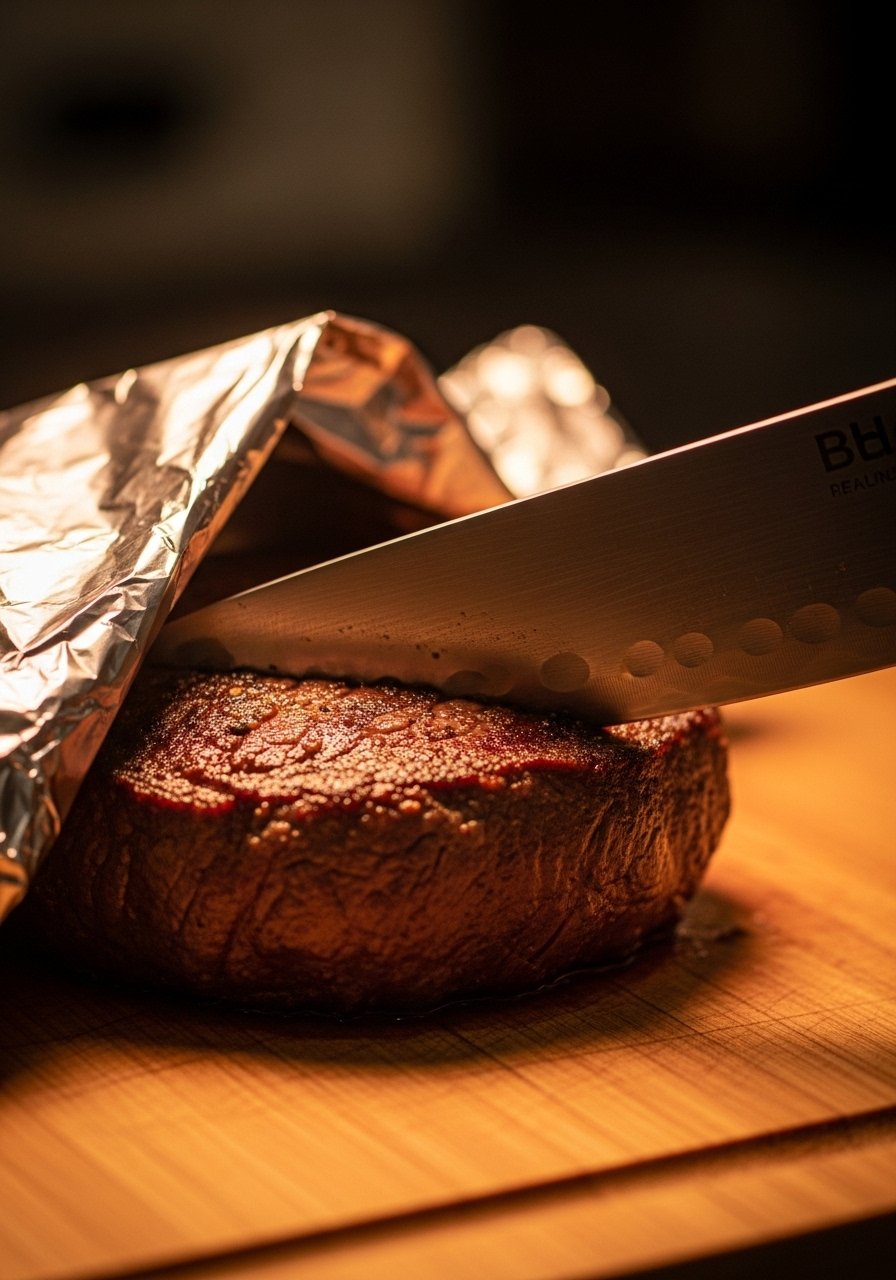
Resting for 8 to 12 minutes for steaks, and 15 to 20 minutes for larger roasts, redistributes juices and cools the surface so slicing does not flood the cutting board. Tent with foil but do not seal tightly. When slicing, cut against the grain in thin slices. The meat will feel springy and slightly warm. The sound as the knife slides through is clean if the crust is right. My sister hated the thin slicing at first. Took about a week before she admitted it made every bite more tender.
Mistake to Avoid: Cutting immediately after grilling which causes juice loss and dry slices.
Step 7: Sauce sparingly and finish with high-contrast textures
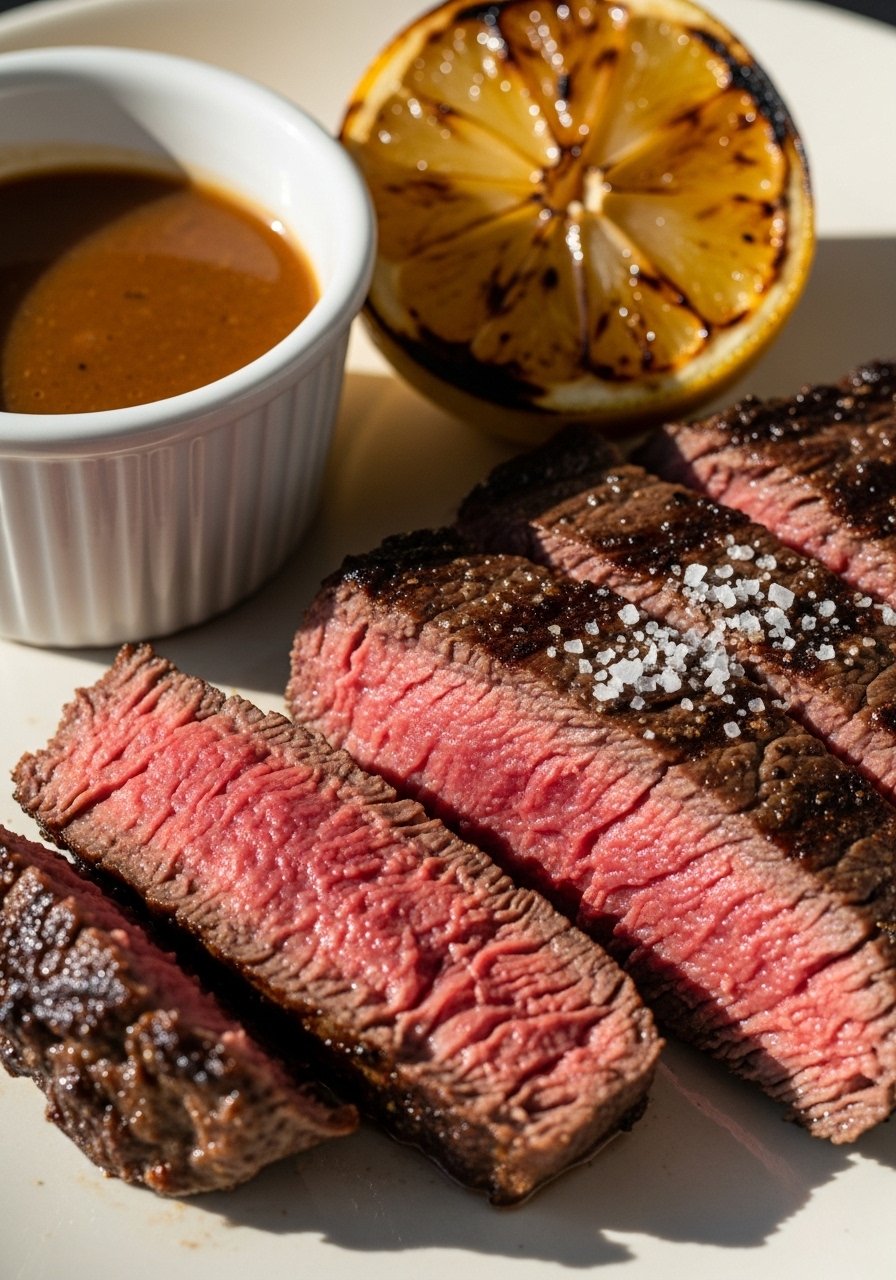
If you use a sauce, brush it on in the last 30 to 60 seconds of direct heat or apply after resting so sugars do not burn. A sprinkle of finishing salt and a quick charred lemon half adds brightness and crunch. Think contrast: silky meat, crunchy crust, bright acid. Texture is as important as flavor. For a smoky note, add a small handful of soaked wood chips to the coals when you move the meat to indirect. The aroma of smoke should be present but not overpowering.
Mistake to Avoid: Slathering on sticky sauces before the meat has finished, causing burnt coatings.
Step 8: Clean while warm and store properly
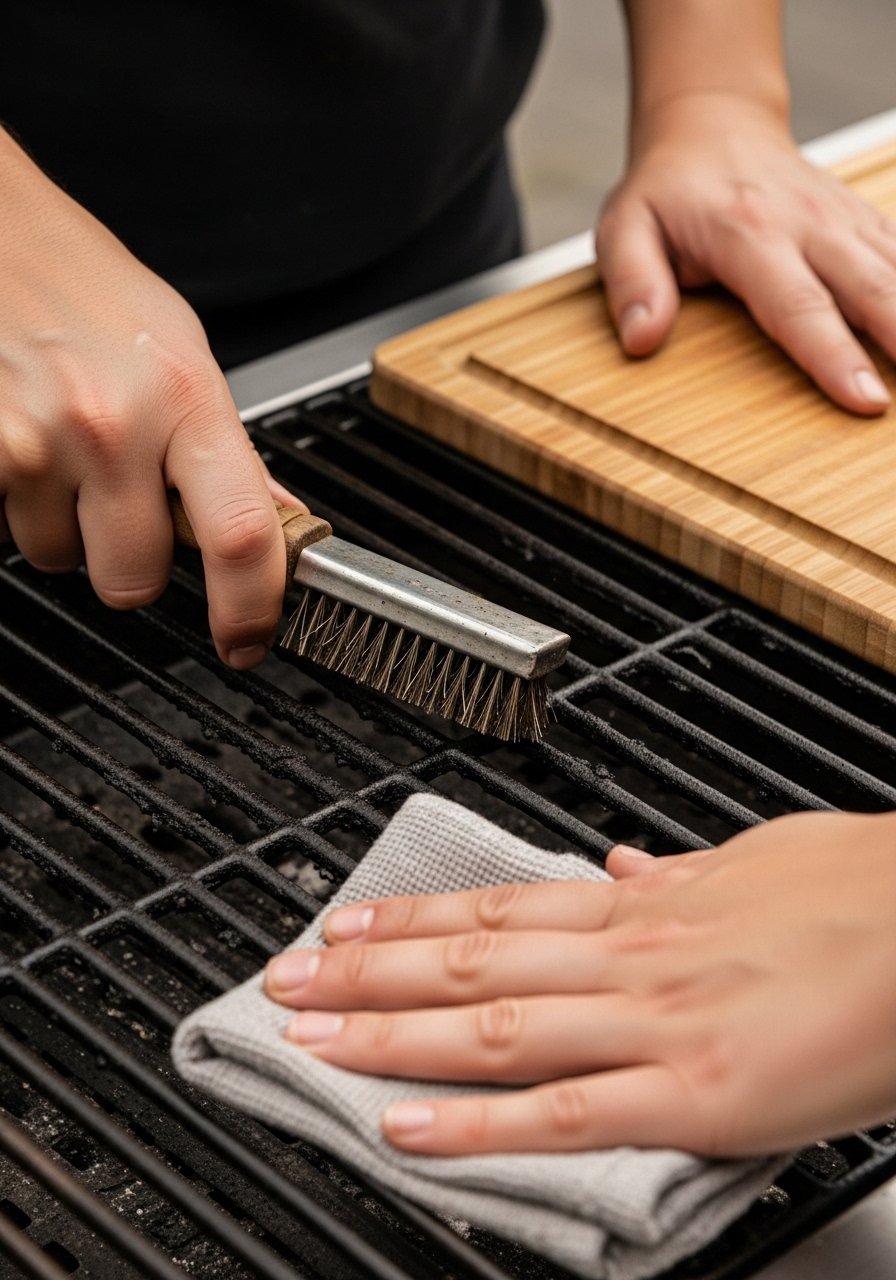
After dinner, scrape the grate while it is still warm. Wipe down tools and store probes separately. If you have leftovers, chill within two hours and slice into portions for even cooling. Reheat gently in a low oven or briefly on indirect heat to avoid re-toughening. A quick re-sear will revive crust but watch internal temp closely. The weight of a good thermometer surprised me the first time I used one. It makes accuracy feel tangible.
Mistake to Avoid: Leaving the grill dirty overnight which creates flareups and rust.
Cooking Tips
Thermometer habit: Keep an instant-read and a probe on hand. I leave a probe in during the indirect finish so I can walk away without guessing, try the wireless probe thermometer.
Salt timing: For steaks thicker than 1 inch, salt and rest 30 to 60 minutes. For thinner cuts salt right before cooking. Use kosher salt like the coarse shaker.
Charcoal flavor hack: Toss a handful of soaked hickory wood chips on coals as you move meat to indirect for a gentle smoke boost.
Use a cast-iron skillet: For small items that fall through the grate, sear in a cast-iron skillet on the grill to get a heavy, even crust.
Rest timing rule: Rest for about half the cooking time for large cuts and a fixed 8 to 12 minutes for steaks. The rest is where carryover cooking finishes things and juices settle.
Simple sauce: Make a quick pan sauce from drippings and butter in a skillet, finish with chopped herbs. A heavy stainless spatula helps scrape fond cleanly.
Small-batch test: If trying a new rub or wood chip, test on a small piece first. My first rub mix was too sweet. I adjusted the ratio and it then worked every time.
Your First Flip
Grilling gets better with a few deliberate habits, not endless gear. Start with one reliable thermometer, the two-zone setup, and the small ritual of patting, searing, finishing, and resting. My advice is to focus on temperature and texture rather than chasing complex marinades. Next time you grill, try the 2 to 3 minute sear, then finish indirectly until 5°F under your target. Keep practicing. You will get consistent results and enjoy the process as much as the meal.
