
I tried to fix a cracked nail by sawing it off in the shower. Bad idea. The nail split further, and I spent the next week hiding my hands. After three real fixes and one salon rescue I figured out a reliable sequence that works whether the break is at the edge or the middle of the nail. This guide walks you through choices, precise timings, and the small hacks that actually make a repair last.
This guide covers quick fixes and longer wear options, from an under-polish silk patch to a gel overlay. Budget range is under $25 for a basic kit and about $40 if you add a small LED lamp. It works for short to medium nails, and I note where to tweak for very short tips or gel nails. After a month of testing this gel system I trust the timings below.
What You'll Need
Tools & Brushes:
- Cuticle pusher and nail clipper set (~$8-15)
- 100/180 grit nail file (~$4-8)
Base & Top Coat:
- Strengthening base coat (~$6-12)
- Fast-dry top coat (~$7-14)
Polishes & Repair Materials:
- Nail glue clear formula (~$5-10)
- Silk nail wrap kit (~$6-12)
- Builder gel (~$12-20)
Finishing & Extras:
- LED nail lamp (~$15-30)
- Cuticle oil (~$4-10)
Step 1: Decide: trim or reinforce
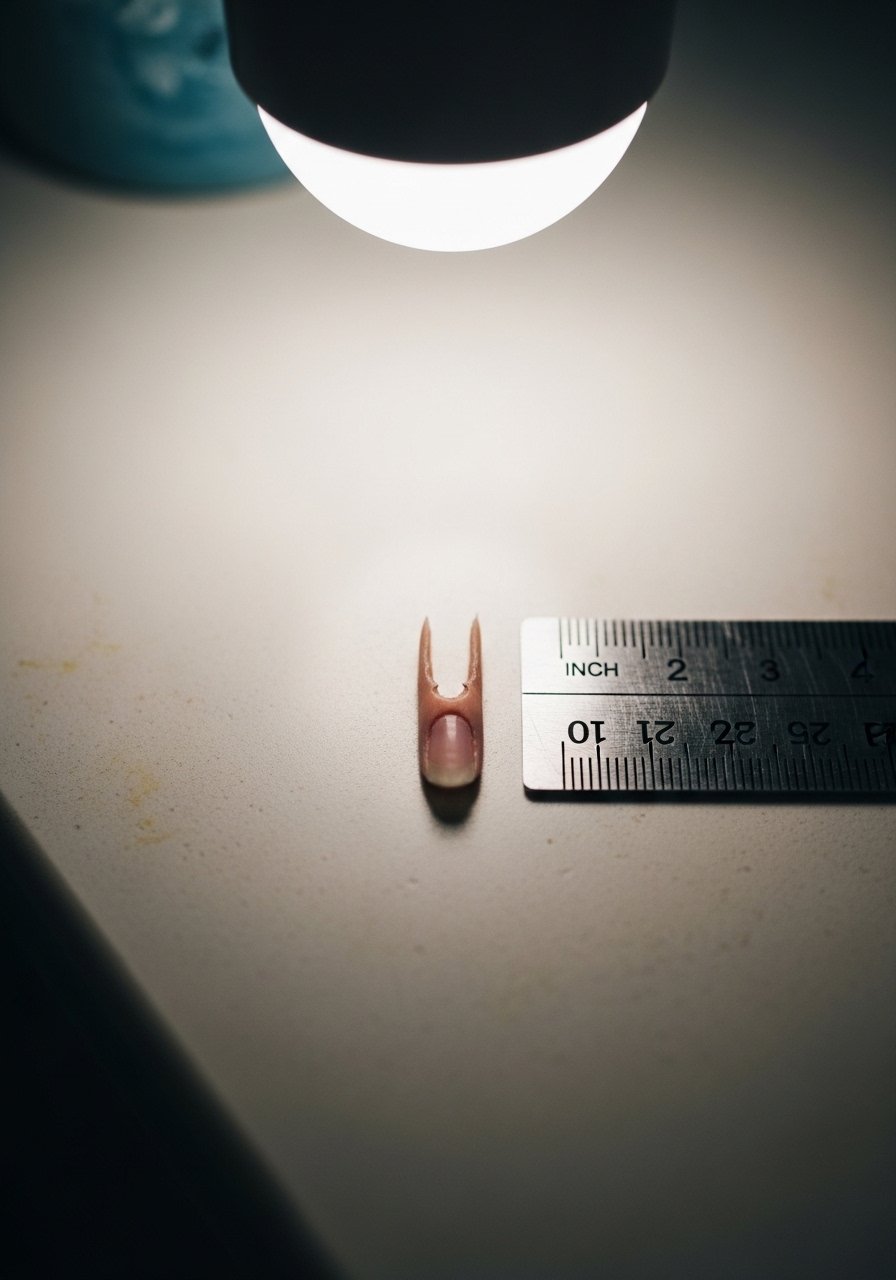
Look closely at where the break sits. If the tear is at the free edge and less than one third of the nail length, trimming and shaping will save time. If the break crosses into the nail bed or is a long tear, reinforcement is the better choice. I learned this the hard way after trimming too short and ending up with ragged edges. Keep a rice-grain sized dab of glue handy as a quick test: if that holds the split flat without puckering, reinforce. For structural repairs plan either a silk patch or a thin builder gel overlay depending on how long you want the fix to last.
Mistake to Avoid: Cutting the nail down too short will expose the tear and make reinforcement impossible without hurting the nail bed.
Step 2: Clean and prep for adhesion
Prep is everything. Remove polish, push back cuticles, and wipe the nail with a lint-free pad soaked in alcohol or remover. Lightly buff the top with a 180 grit file to remove shine, but do no more than three to five gentle strokes across the nail. The goal is a matte, slightly toothy surface. Wait about two minutes for the nail to fully dry before applying glue or wrap. I almost skipped the buff once, and the patch peeled in a day. Clean surfaces equal stronger bonds, plain and simple.
Mistake to Avoid: Skipping the light buff and alcohol wipe leaves oils that make glue and gels peel off within a day.

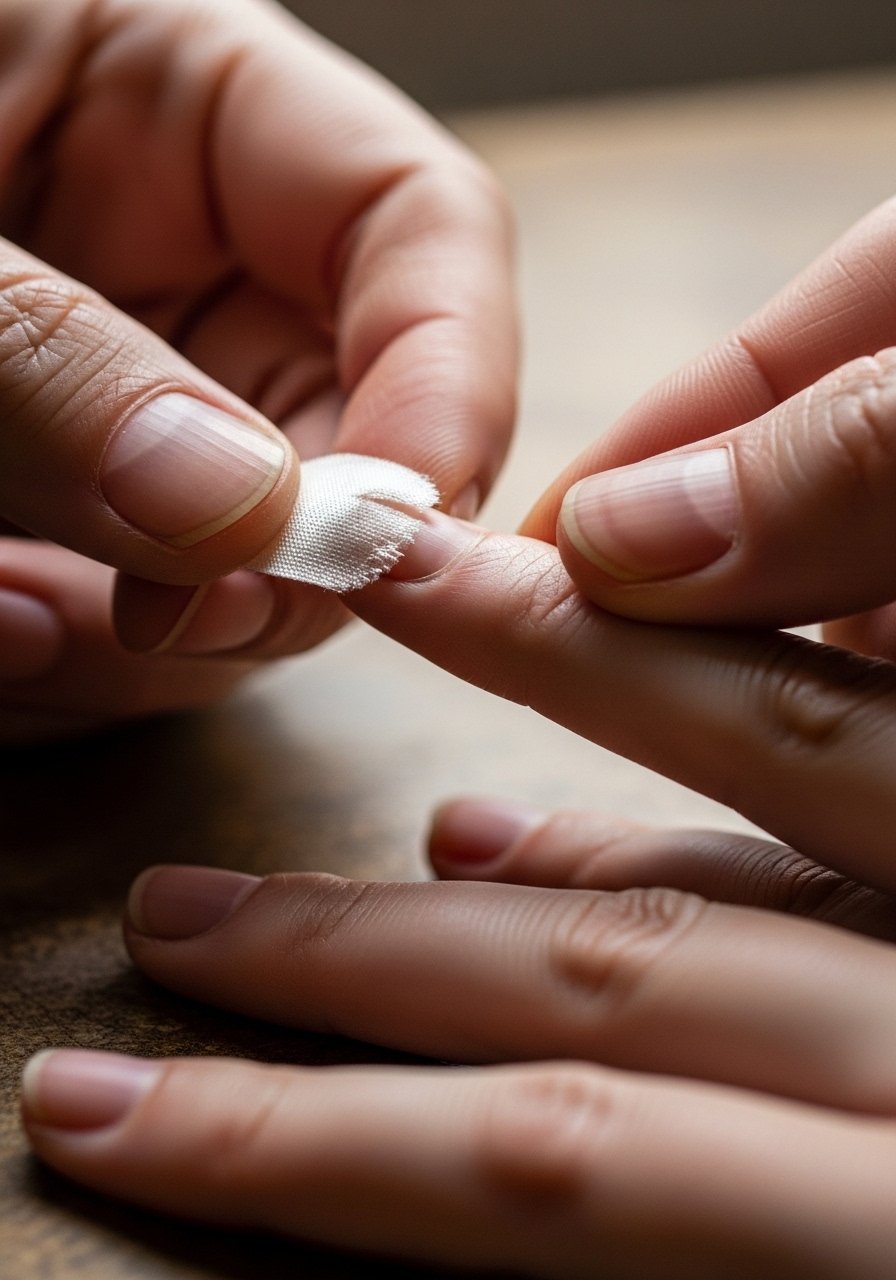
Step 3: The stealth silk patch for torn nails
For a torn tip that you want invisible under polish, use the tea-bag or silk method. Cut a small oval of silk about 3 mm beyond the tear on all sides. Apply a thin bead of nail glue over the tear, lay the silk gently, then press and smooth with a wooden stick until it feels tacky. Trim excess with small scissors, then seal with another thin glue layer. Let glue set 20 to 30 seconds. The patch feels slightly papery then smooths under the next steps. This is the step that saved three of my nails before I tried gel overlays.
Mistake to Avoid: Using a patch that is too small means the tear will reappear at the edge as the nail grows.
Step 4: Builder gel overlay for strength and wear
If you want the repair to last, apply builder gel over the patched or natural nail. Work in thin layers roughly 0.5 mm thick. Cure each layer under an LED lamp for 30 to 60 seconds. Two thin layers are better than one thick blob. The principle is thin layers cure more fully and flex less. After a month of testing this gel system I found two layers plus a top coat gave about two weeks of normal wear. The gel feels slightly warm during curing and has a tacky layer you wipe off with alcohol.
Mistake to Avoid: Applying a thick first layer thinking it will save time causes bubbling and lifting during wear.

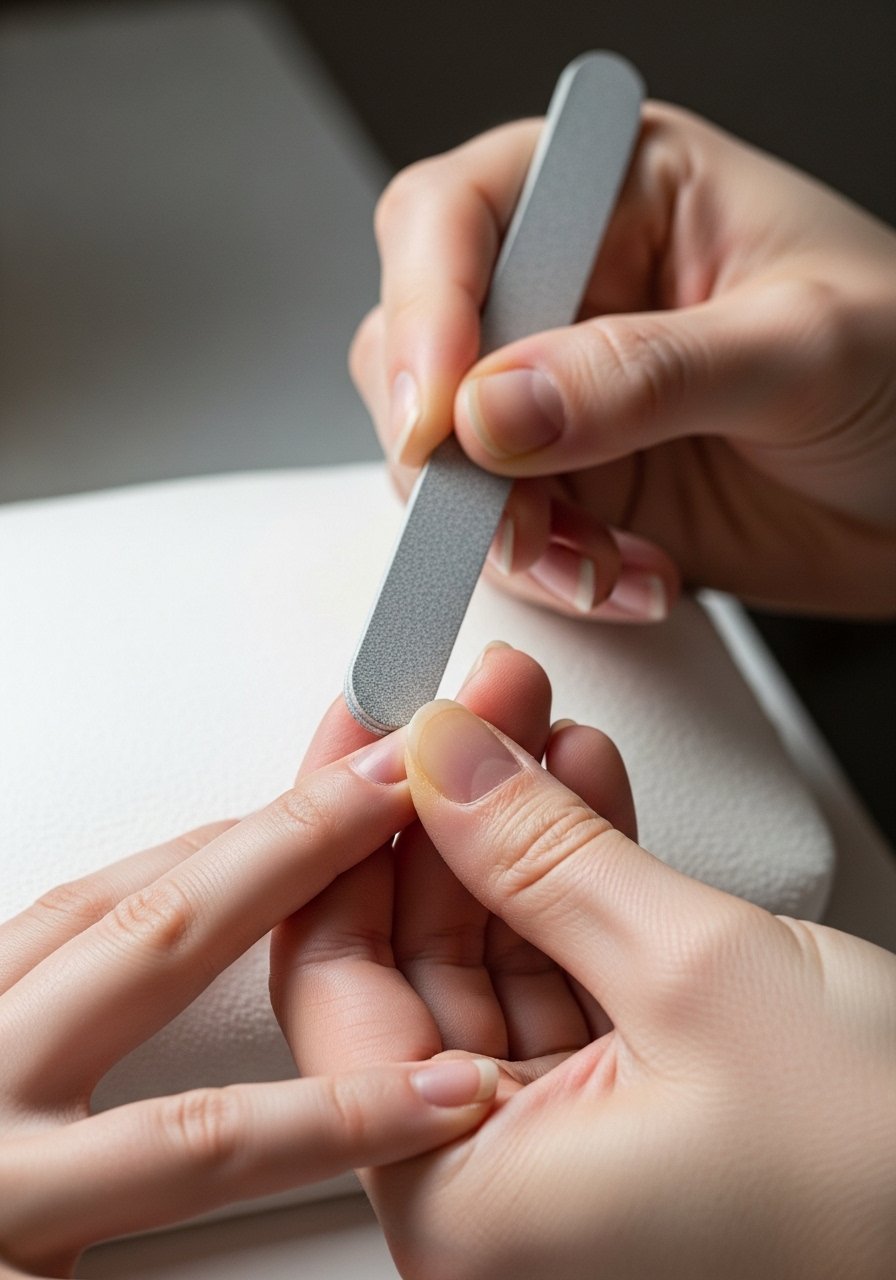
Step 5: Shape, blend, and finish the edge
Once cured, file the edge to match your other nails using 100/180 grit. File in one direction to avoid micro-tears and aim for a gentle curve that mirrors adjacent nails. Lightly buff the surface with a fine buffer until it feels smooth to the fingertip. Apply a thin base coat if you plan to polish or go straight to color. The sound of the file is a soft rasp and the surface should feel slick, not rough. I still am not sure this is the best way, but it has worked every time for me when I took the time to get the shape right.
Mistake to Avoid: Filing back and forth aggressively creates tiny splits that make the repair fail sooner.
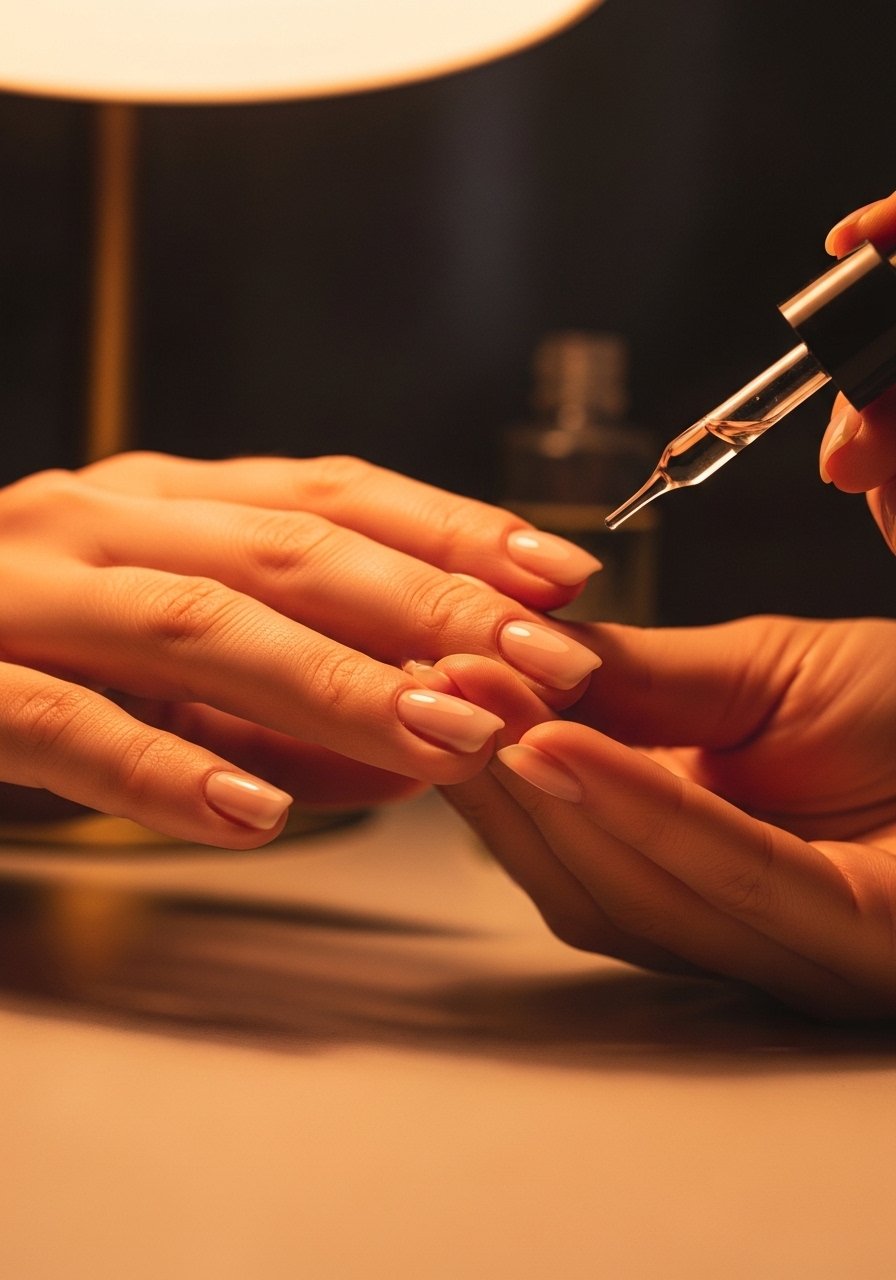
Step 6: Top coat, cure, and nourishing finish
Finish with a fast-dry top coat or a cured gel top layer. If using polish top coat, let it air dry for about two minutes between thin layers, then a final coat. If using gel top coat cure 30 to 60 seconds. After everything is set, massage cuticle oil around the nail and gently rub in for 10 to 20 seconds. The oil reduces dryness and helps the repaired area look seamless. I almost skipped the oil the first few times and the repair always showed as a dry edge in photos.
Mistake to Avoid: Rushing the top coat cure or drying step leaves tacky spots that pick up dust and peel early.
Nail Tips
Emergency kit: Keep a tiny kit with a mini nail file and nail glue in your bag for right-now fixes.
Invisible finish: Use silk under a clear polish rather than visible tips for a more natural repair, then seal with fast-dry top coat.
Short-nail tweak: For very short nails, skip the builder gel and use two silk layers stacked for strength, then buff smooth.
Heat-free option: If you do not have a lamp, use a high-quality fast-dry top coat and allow 10 minutes before light activity.
Match the curve: When shaping, check the nail against its neighbor at a 45 degree angle so the repaired tip matches naturally.
Cuticle care: Regular cuticle oil keeps the area flexible so repairs bend instead of pop off.
Salon backup: If the tear reaches the nail bed or is painful, stop and see a tech or a doctor. Do not force a DIY in that case.
Small Confident Fix
You can get very good at this with a few tries. Start with the silk patch if you want a subtle fix that hides under polish. If you want durability, add two thin builder gel layers and a good top coat. Carry the smallest kit you can tolerate and practice smoothing and filing in short bursts. A final tip, wait the full cure times I list and resist touching the nail for a minute after finishing. It makes the repair last and keeps your hands looking like you meant to do it that way.
