
I thought thicker liner would hide my shaky hand. It made everything look heavy and small. After a few ruined attempts I tried the opposite, a lighter base line and tiny flicks, and the look finally clicked. Not gonna lie, it took three tries to feel confident. This guide walks you through the same steps I learned the hard way, with small fixes that actually change how the whole eye reads.
This guide covers prep, mapping, stroke technique, cleanup, and finishing. Budget friendly options sit alongside a couple tools worth splurging on if you plan to practice. Works on hooded, monolid, and deep-set eyes with small tweaks. I tested this routine across three different eye shapes and kept the timing realistic for a quick weekday look.
What You'll Need
Skincare Prep:
- Makeup Setting Spray (~$8-20)
Base & Coverage:
- Lightweight Concealer (~$6-16)
Color & Tone:
- Neutral Eyeshadow Palette (~$10-30)
Eyes & Brows:
- Stila Stay All Day Liquid Eye Liner (~$18-24)
- Maybelline Eye Studio Gel Eyeliner (~$7-12)
Tools & Finishing:
- Angled Eyeliner Brush (~$5-12)
- Dual-Ended Q-tips (~$4-8)
- Clear Tape or Business Card (~$2-6)
- Mascara (~$6-15)
- Micellar Water (~$4-12)
Step 1: Prep the canvas and anchor the line
Pull the lid taut gently with one finger to see the full lashline. I start with a thin sweep of neutral shadow along the lashline, then apply a tiny dot of concealer under the outer corner to create a clean edge. That little canvas makes a huge difference in how crisp the wing looks. Use a small flat brush and let the concealer sit for about 30 seconds so it gets slightly tacky before lining, it helps the liner grip better. For oily lids, dust a whisper of translucent powder first.
Mistake to Avoid: Skipping the primer step makes color fade within an hour.
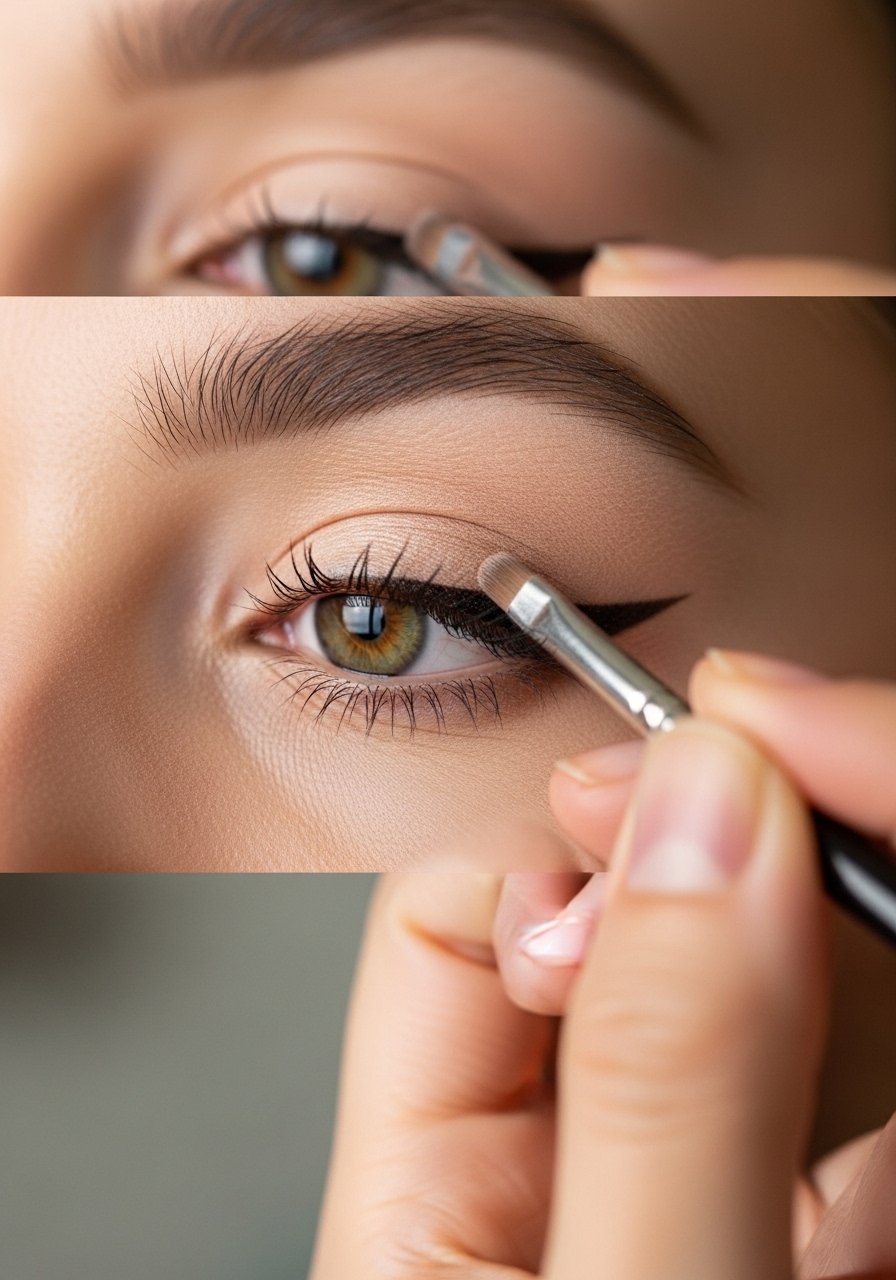
Step 2: Map the wing with a guide, tape or card
Most people start freehand and then panic. I align a business card from the outer corner toward the end of the eyebrow to map the angle. Aim for about a 45 degree angle for a classic cat eye. The card gives a straight edge so your flick is consistent on both sides. If your eyes are deep-set, point the card slightly more horizontal. Lightly press tape, do the liner, then peel slowly for a razor edge.
Mistake to Avoid: Drawing a wing at too steep an angle makes the eye look downturned.

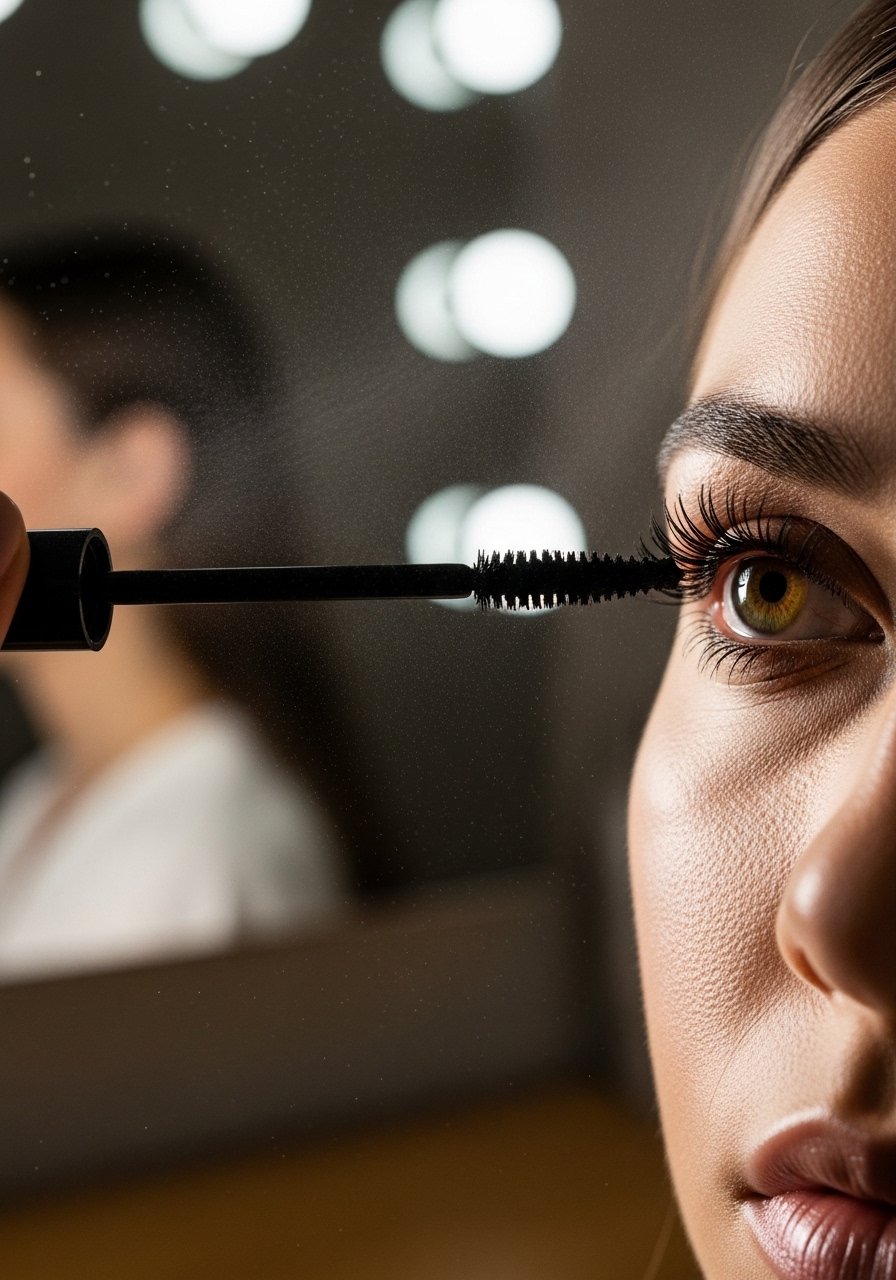
Step 3: Draw the thin base line in short strokes
This is where the whole thing starts to make sense. Use short 1 to 2 millimeter strokes along the lashline rather than attempting one long sweep. I use the gel on an angled brush near the inner third, then switch to liquid for the outer two thirds for control and shine. Build two thin coats instead of one thick coat, waiting about 10 to 15 seconds between coats so the product sets. The brush will feel tacky as you work, that tack helps you blend the line into the lashes.
Mistake to Avoid: Pressing hard and dragging creates gaps and uneven thickness.
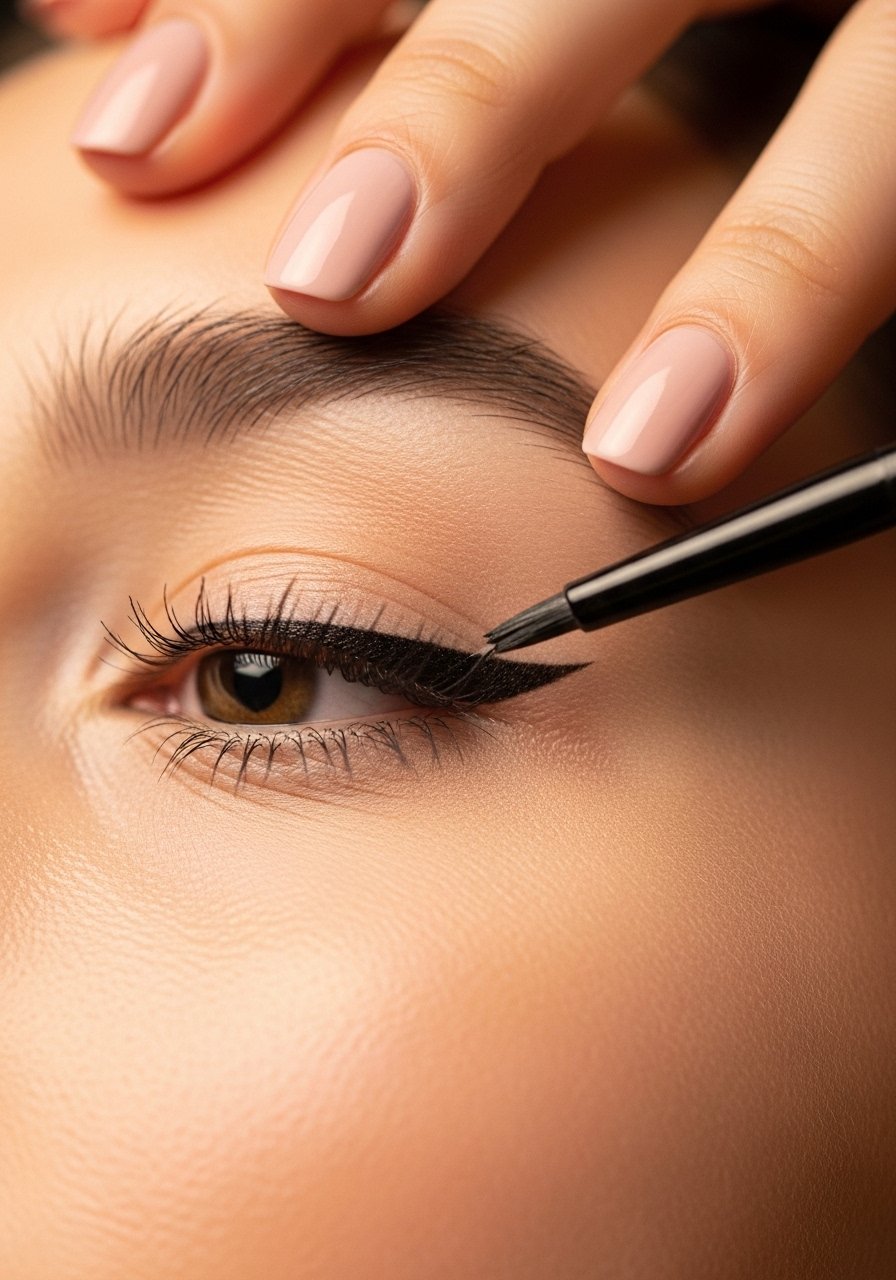
Step 4: Connect the wing with a tiny counter-stroke
I used to overdraw the wing and then try to fix it. Now I do a tiny counter-stroke from the outer flick back to the lashline, like a little bridge. That connection creates a smooth triangular shape and avoids jagged edges. If you prefer a softer finish, smudge the inner edge of that triangle with a tiny brush or the warmth of your fingertip for two seconds. For sensitive eyes, switch to a water-resistant gel and test on the inner wrist first.
Mistake to Avoid: Leaving a gap between the wing and lashline makes the look feel unfinished.
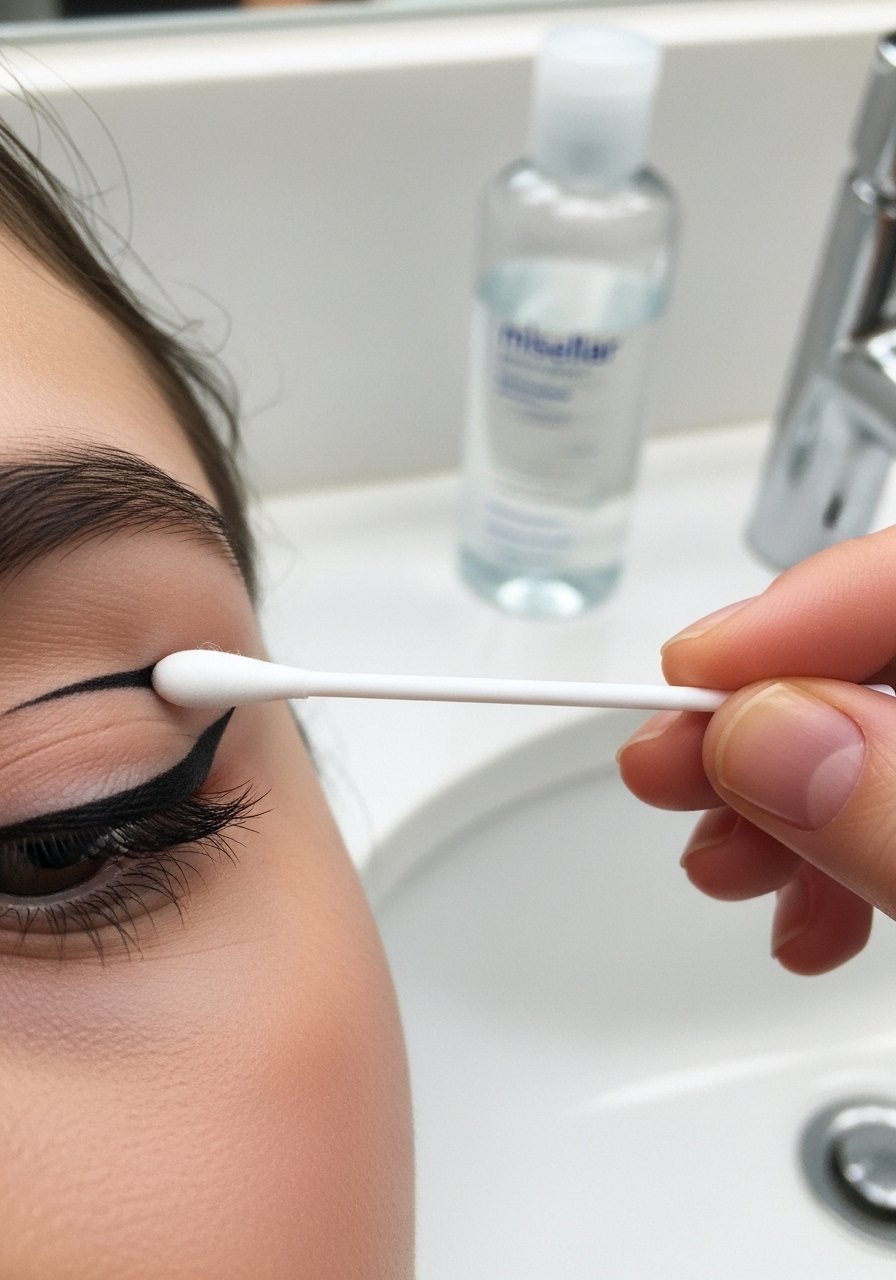
Step 5: Clean up the edge with micellar water and a q-tip
This part feels like magic when it works. Dip a q-tip in micellar water and hold it at a 30 degree angle to the wing. Swipe gently outward, the excess lifts off cleanly without smudging the rest of your eye. For a razor finish, use a dry clean q-tip to feather the very tip. If you made the wing too thick, remove the excess and redraw a thin line on top. Finish by waiting 20 to 30 seconds for everything to set before mascara so nothing transfers.
Mistake to Avoid: Rubbing the whole lid while removing mistakes smudges the whole look.
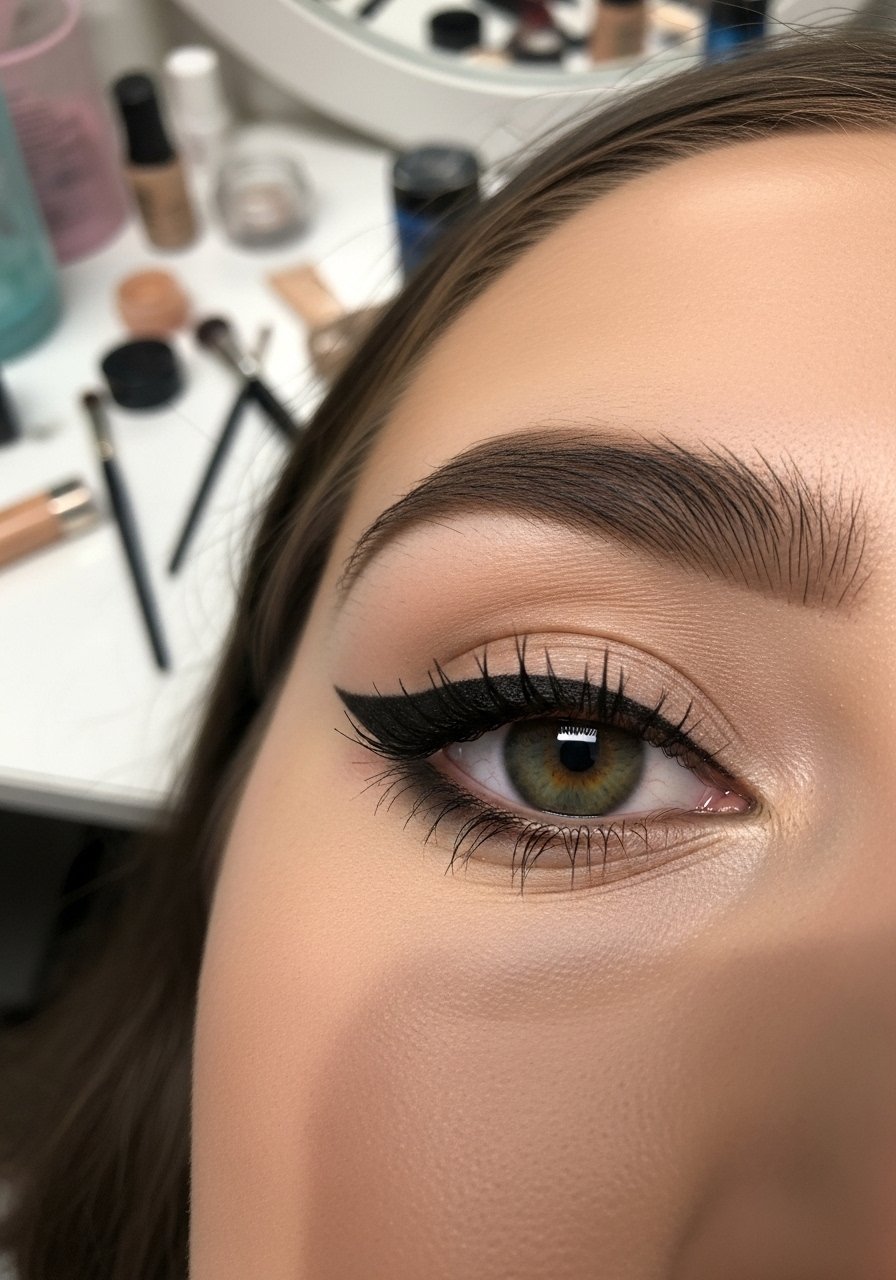
Step 6: Set, balance, and finish with mascara and subtle shadow
The final feeling is light and intentional, not heavy. Use a small swipe of neutral shadow across the crease to balance the sharp liner, and a single coat of mascara pressed at the base of lashes for lift. If your skin undertone is cool, choose a taupe shadow; if warm, reach for a soft bronze. I found after six weeks of testing this routine the eye looked cleaner and lasted longer when I added one drop of setting spray to the hairline and lashes. Small details, like pressing mascara into the roots, change the selfie result versus real life.
Mistake to Avoid: Applying multiple thick mascara coats before liner sets creates clumps and transfers.
Makeup Tips
Start thin, build slowly: If you only buy one liner, get a reliable liquid like Stila Stay All Day Liquid Eye Liner for crisp flicks.
Use tape for symmetry: Clear tape or a business card makes both wings match faster. Try clear-matte-tape for a softer edge.
Mix gel and liquid: Gel gives control, liquid gives sheen. Pair Maybelline Eye Studio Gel Eyeliner with a slim liquid for best results.
Adjust angle for eye shape: For hooded lids, angle the wing more horizontal so it remains visible when eyes are open.
Practice tiny flicks on the back of your hand: It trains pressure and speed. I did this for a week and my flicks became steadier.
Quick fix for uneven wings: Use concealer on a tiny brush to redraw the outer edge, then set with powder.
Heat-free alternative: If you avoid heat, swap curling for a lash comb and focus on tightlining with a gel brush for depth.
Make It Yours
Practice three times in a row without changing products, then take a break and come back the next day. Small patterns stick faster than a single long practice session. Final tip, keep a little kit with an angled brush, q-tips, and micellar water in your bag for on-the-go cleanups. You will get steadier and faster, and the look that felt fiddly becomes part of your regular routine. Keep practicing, and enjoy the moment when it finally feels effortless.
