
I tried wearing an electric blue lid on a Tuesday night and spent half the evening tugging at the crease because it looked muddy in the bathroom light. Then I tried again with a different base and a slimmer brush and the color popped without looking like paint. If you want the color to read as confident rather than costume, the secret is in the prep, the small ratios, and the stops where you walk away and reassess.
This guide covers how to do bold eyeshadow that looks intentional not accidental, for budgets from drugstore to mid-range. I tested this routine for six weeks across three different skin types so I could tune primers and powders. Expect 20 to 40 minutes for a first run, less once you get the layering order. If you have sensitive eyes, do a patch test with pigments first.
What You'll Need
Skincare Prep:
- Hydrating Primer (~$10-25)
Base & Coverage:
- Lightweight Concealer (~$8-20)
Color & Tone:
- Cream Eyeshadow or Colored Eye Base (~$6-24)
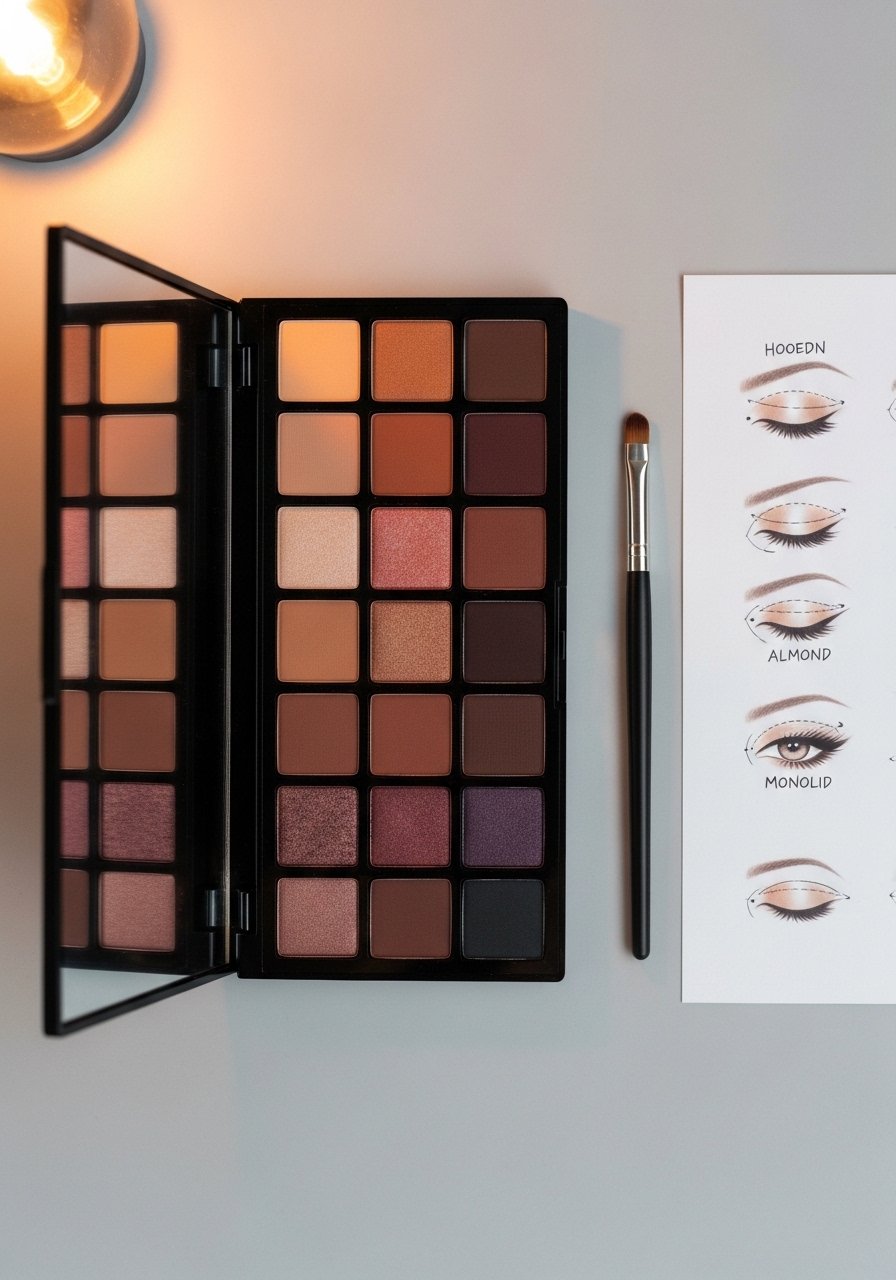
- Pressed Pigment Palette (~$12-50)
Eyes & Brows:
- Flat Shader Brush (~$6-18)
- Blending Brush (~$6-20)
Tools & Finishing:
- Setting Spray (~$8-30)
- Cream-to-Powder Converter or Mixing Medium (~$7-18)
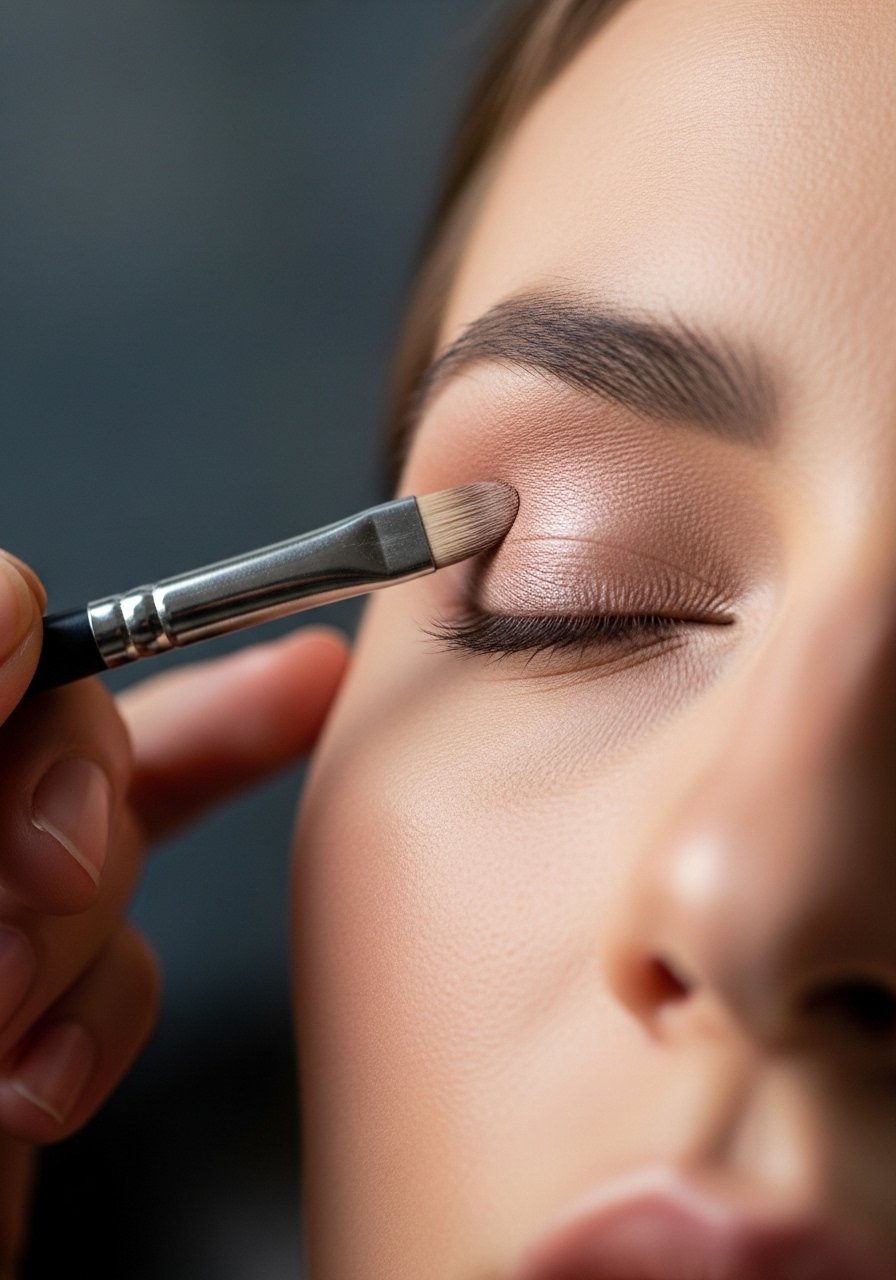
Step 1: Anchor the lid with primer and a cream base
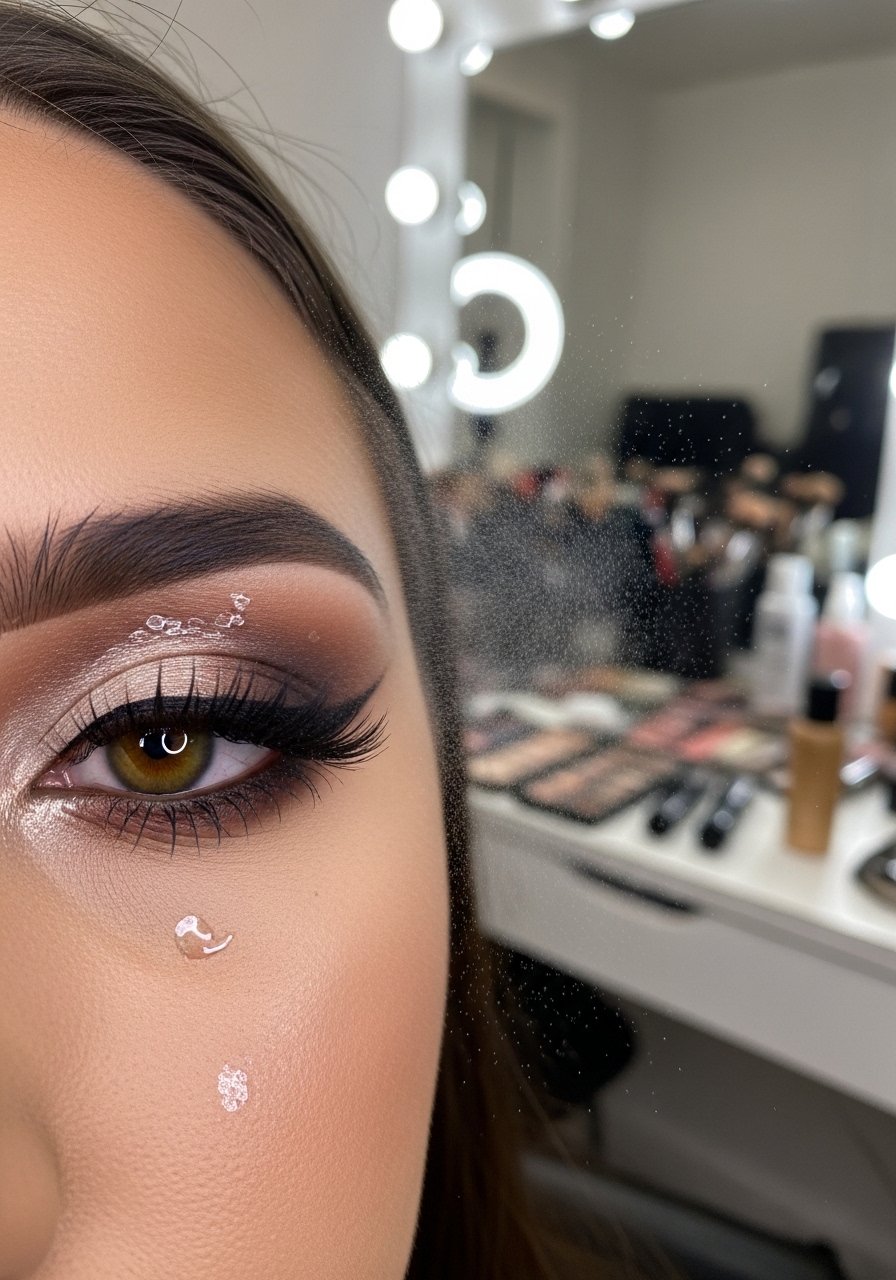
Pull everything off the eye. Yes, everything. Start with a thin layer of hydrating primer where your lid moves. If your skin is oily, use a mattifying primer on the upper T-zone and a hydrating one on the mobile lid. Tap 1 to 2 small dots of a cream color base across the lid, then pat with a flat shader brush for about 10 to 15 seconds until it feels tacky not wet. The cream base gives the pigment something to bite into and makes saturated colors read true in daylight and under lamps.
Mistake to Avoid: Skipping the primer step makes bold color blend into patchy streaks within an hour.
Step 2: Map the color placement, keep the shape simple
Most people start by throwing color everywhere. Instead, imagine a simple shape: a soft halo, a smoked-out rectangle, or a thin washed lid. Use a fine brush to draw where the pigment will sit. For a dramatic look, plan for two zones: the main lid and a slightly deeper outer third. Use a 2:1 ratio of matte to shimmer when you want depth without glitter overload. I sketched shapes lightly for three tries before finding the one that read right on camera and in person.
Mistake to Avoid: Loading the entire lid with pigment at once makes the shape unreadable and messy.
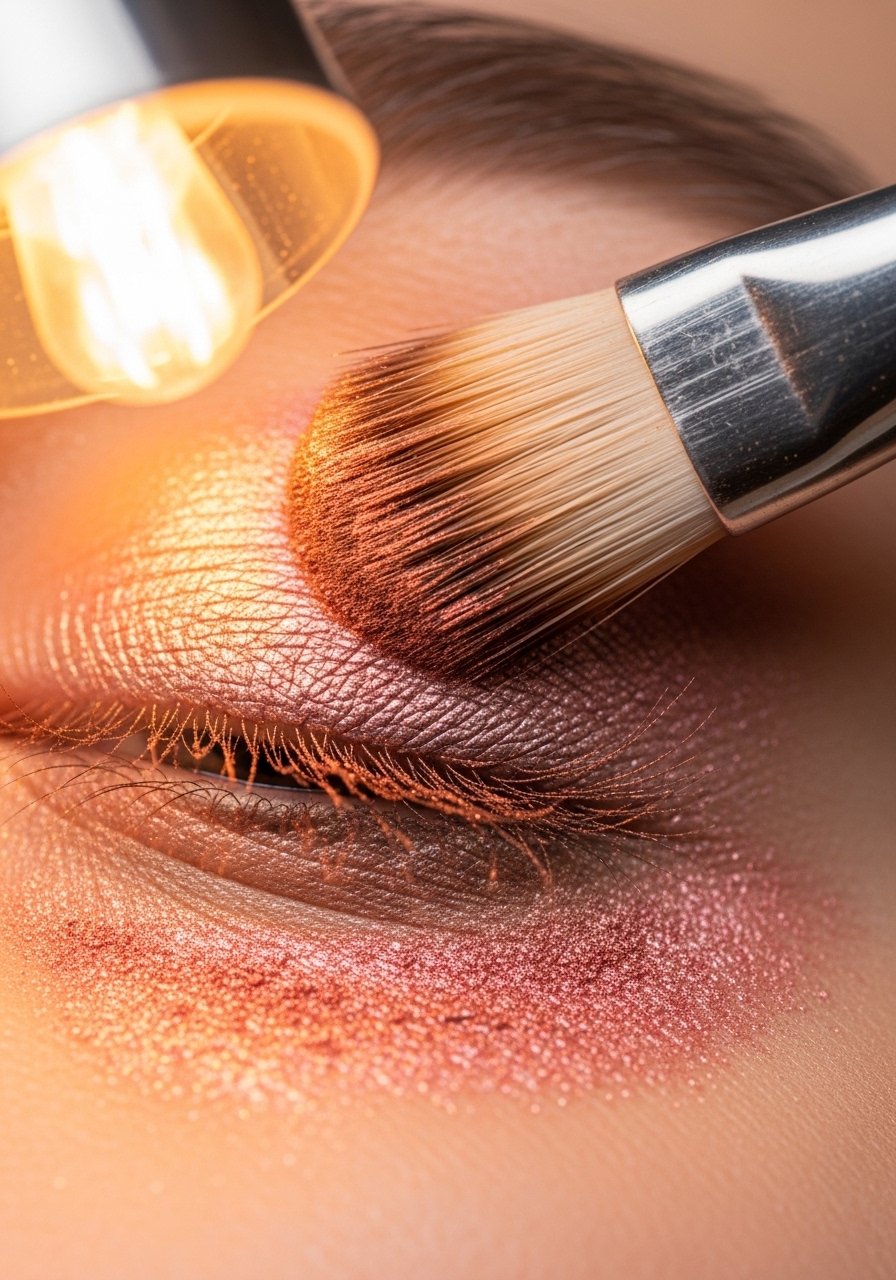
Step 3: Build color in thin layers, blend between each pass
This is where it starts to actually look styled instead of messy. Tap product onto the brush, press it onto the lid, then blend outward with small circular motions. Use 8 to 12 light taps per pass and wait 8 to 10 seconds for the pigment to settle before the next layer. For intense payoff, add a second thin layer rather than one heavy swipe. If you want a metallic finish, spray your flat brush lightly with mixing medium first, then press the shimmer onto the cream base for a foil effect. I am still not sure this is the best way, but it has worked every time for me.
Mistake to Avoid: Loading one thick swipe of pigment creates fallout and a muddy crease.
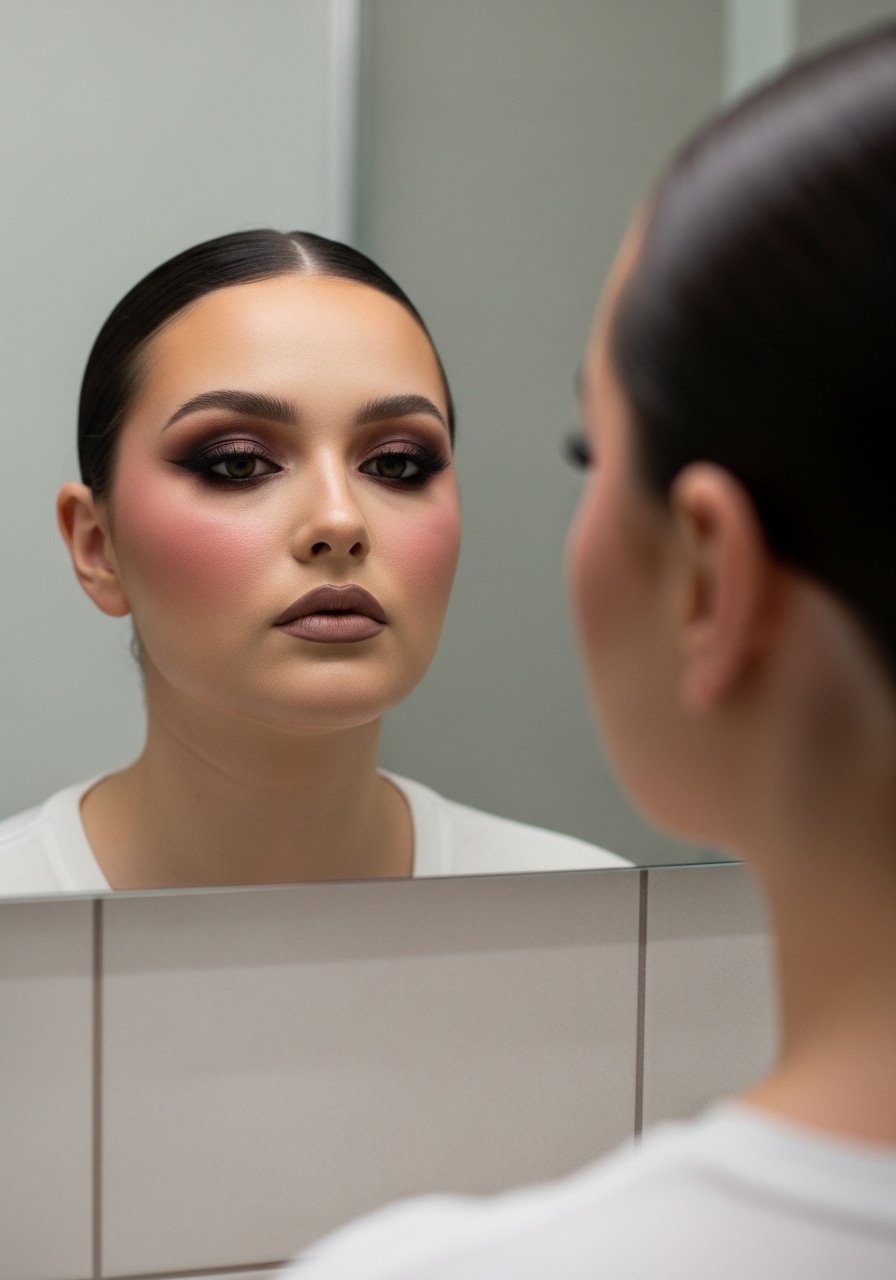
Step 4: Balance the rest of the face using the principle of visual balance
This is the part where you will want to add more. Do not. The principle from color theory is simple: if eyes are loud, keep other elements quieter. Pair bold lids with a neutral lip or a softly stained tint. For example, use a 60:40 rule, sixty percent of the visual drama on the eyes and forty percent subtle on the rest of the face. That keeps the look intentional. I tried matching a bright lip once and it felt like two headlines competing. Tone down cheek color to a soft sweep.
Mistake to Avoid: Matching a loud lip when the eyes are saturated makes the entire look feel overworked.
Step 5: Adapt for skin type and undertone
I tried this across three different skin types and changed small things each time. For oily lids, set the cream base with a neutral powder pressed into the area before applying pigment. For dry lids, use a dot more cream base to create a slightly tacky surface. For warm undertones, choose pigments with a warm base rather than pure cool blue. If you are sensitive, use mineral-based pigments and do a patch test behind the ear. Small adjustments of one drop more primer or five extra seconds between layers will save you headaches.
Mistake to Avoid: Using the same technique for oily and dry lids without adapting makes the color either slide off or cling unevenly.

Step 6: Finish with strategic setting and midday touch plan
Listen for how the powder softens into the skin. After you set the look with a light mist of setting spray, press a small clean brush into the inner corner and under the lower lash for a pulled-together finish. Pack a tiny pot of the main lid shade or a tinted balm for quick midday touch-ups. If you plan to wear bold color all day, repeat the thin layering trick mid-afternoon instead of scrubbing at it. After six weeks of testing this routine I learned that a micro touch saves the whole look.
Mistake to Avoid: Rubbing at midday smudges removes underlying base and ruins the color harmony.
Makeup Tips
Use a mixing medium for foils: Lightly spritz your flat brush with a mixing medium before picking up shimmer. It makes metallics pop without fallout. Try eyeshadow-mixing-medium.
Carry a single-dot pot: For touch-ups, press a tiny amount of cream base into a travel pot. It helps reactivate pressed pigments.
Swap glitter for micropearls: If glitter reads too costume, choose micropearl shimmers instead for a polished reflect. See pressed-pigment-palette.
Use a small concealer brush for clean edges: Instead of tape, clean the outer edge with concealer on a fine brush for a crisp line.
Try color-smoke instead of full lid: If you are nervous about bold eyeshadow, smoke the color only in the outer third and under the lower lash for instant drama.
Matte-to-shimmer ratio: Aim for a 2:1 matte to shimmer ratio when starting out. It keeps depth without glitter overload.
Patch-test intense pigments: If you have sensitive skin, apply pigment to the inner wrist and wait 24 hours before wearing near the eye.
Make It Bold
You will get better each time you try this. Practice once with a muted tone and once with something louder, then compare photos in both daylight and indoor light. Final tip, when you feel tempted to add more, step back and wait ten minutes. Often the look needs less, not more. Keep a small touch-up pot and a clean brush in your bag and you will feel ready to wear bold color with confidence.
