
I had a wall full of thumbtack holes and a framed poster hanging crooked for months. Every attempt to fix it left bigger marks or felt too permanent. I wanted a room that looked intentional, not like I was renting the space. After trying tricks that left scuffs, I found methods that keep walls intact and still let the room feel layered and lived-in.
This guide covers renter-friendly, damage-free options for living rooms, bedrooms, and small entryways. Budget varies from under $50 for a washi-tape gallery to about $200 for sturdy picture ledges, and most setups take one afternoon. I have restyled this room four times and what I teach here works across styles, from modern to cozy, with small-space adaptations where needed.
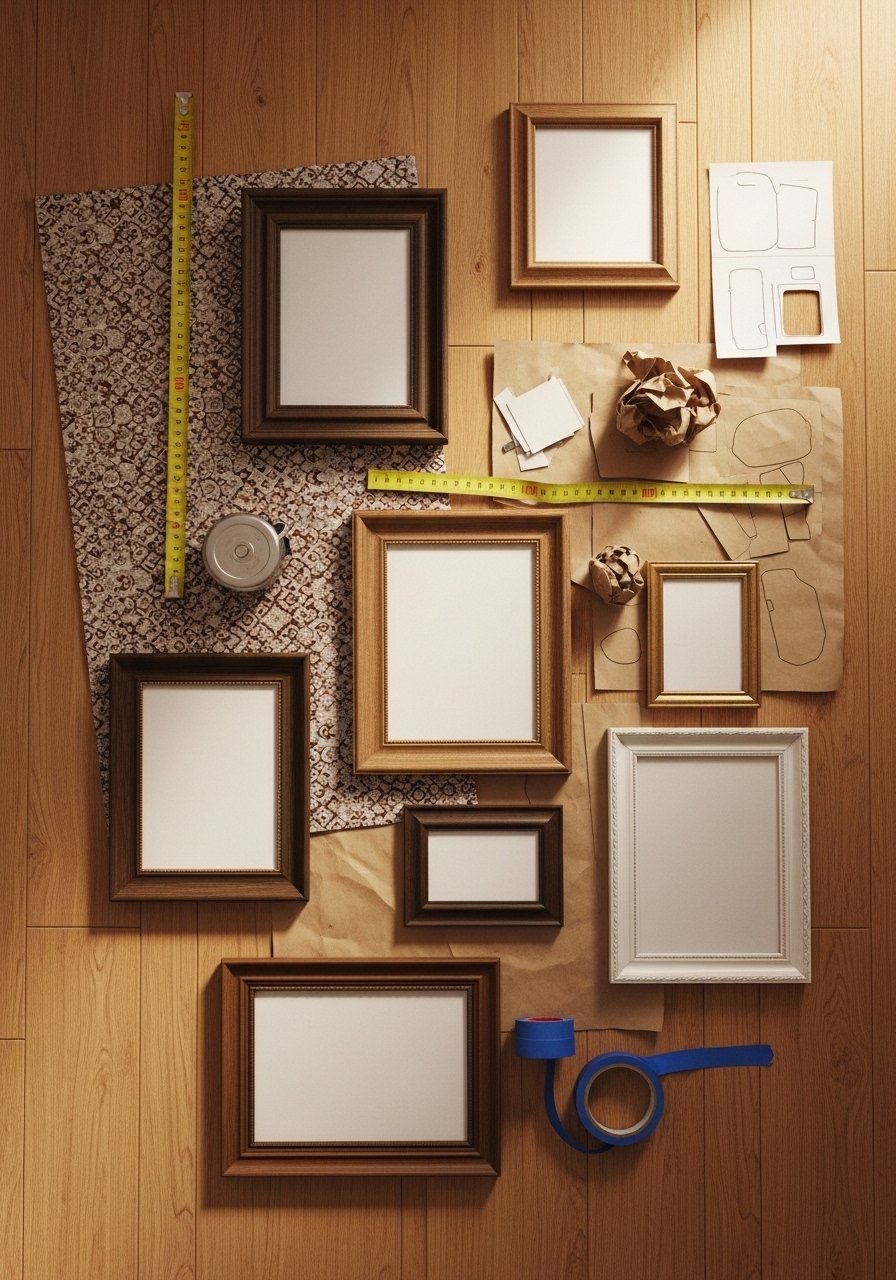
What You'll Need
Textiles & Soft Goods:
- Medium-weight cotton tapestry (~$20-40)
- Velvet cushion covers (~$15-30)
Wall Decor & Art:
- Command-picture-hanging-strips (~$7-15)
- Removable-wall-decals (~$10-25)
- Slim-picture-ledge (~$25-60)
Lighting & Accents:
- Plug-in-picture-light (~$20-50)
- Command-hook-multipack (~$8-12)
Step 1: Measure and map the layout first
Pull everything off the wall, yes everything. Lay art and textiles on the floor and play with groupings until you like the balance. I use 57 to 60 inches as the average eye-level anchor for the center of art and 2 to 3 inches spacing between frames in a tight gallery. The rule of thirds helps here, place the heaviest piece on one of the thirds not centered. Tape kraft paper templates to the wall with painter’s tape and step back. It saves so much trial-and-error and prevents extra holes.
Mistake to Avoid: Skipping the paper-template step leads to extra holes and a crooked gallery.
Step 2: Choose removable hardware that matches the weight
Most people start with the biggest hammer and then regret it. Instead, match hardware to weight. A single Command picture hanging strip can hold up to 16 pounds when used per instructions, so use strips for light-to-medium frames and Command hooks for lightweight textiles or wreaths. For heavier leaning frames, a slim picture ledge offers surface support without wall anchors. Test one anchor first, wait the recommended 60 minutes before stressing it, listen for the soft click when strips lock in place, and you will avoid surprises.

Mistake to Avoid: Using a strip without following the cure time causes the piece to fall and scuff the paint.
Step 3: Use fabric and clip systems instead of nails
This is where it starts to actually look styled instead of cluttered. A medium-weight tapestry hung from a tension rod or clipped to a slim curtain rod gives scale without holes. I clip textile tops with curtain clips and hang the rod in Command hooks, or use a compression curtain rod inside a niche. The fabric feels soft against the wall and adds tone and texture that framed art sometimes lacks. For small apartments, a large fabric panel makes the room feel taller because it draws the eye up.
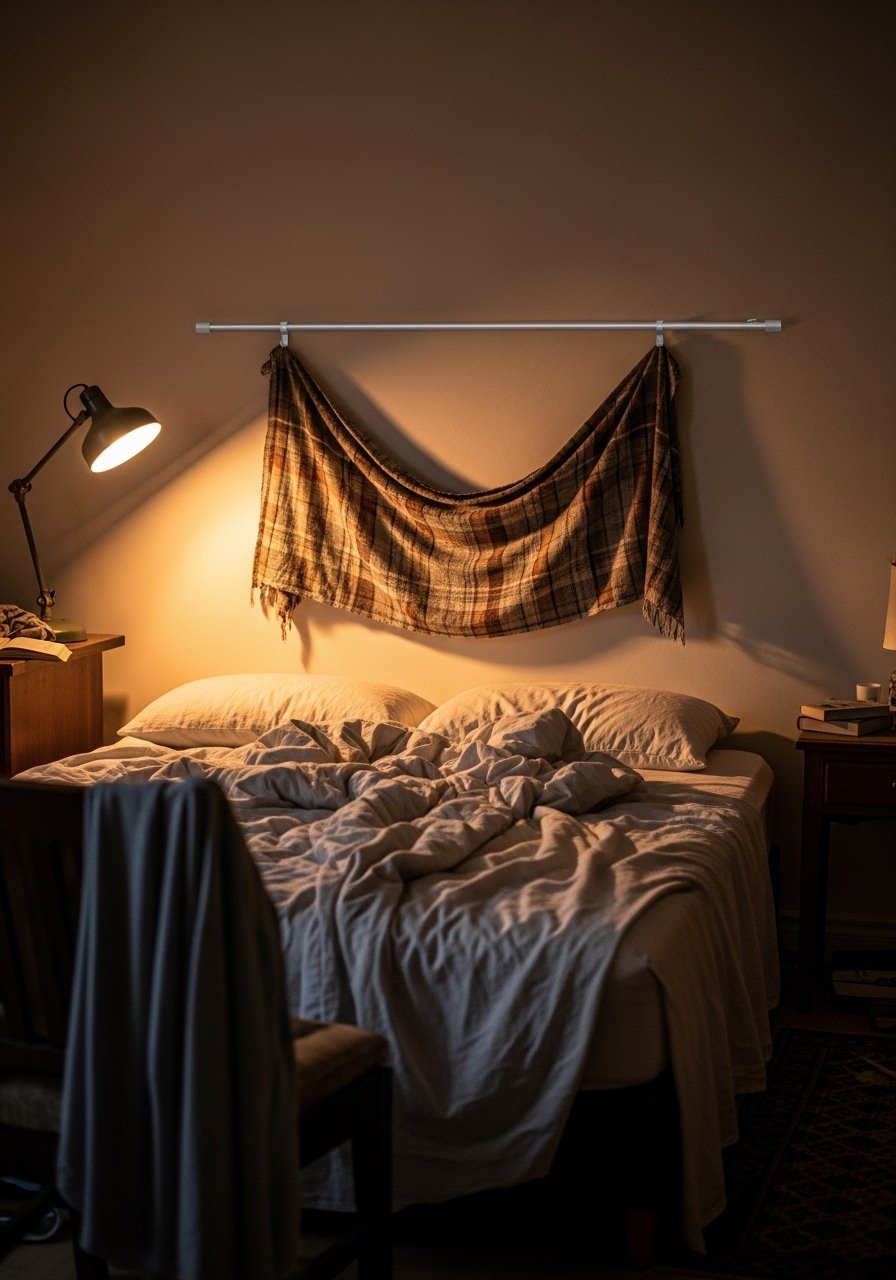
Mistake to Avoid: Hanging lightweight fabric with bare tape makes it sag and pull at the paint over time.
Step 4: Build a no-drill gallery with washi and templates
Most people think tape looks cheap. That was me. Then I tried layered washi frames and a kraft-paper mockup and it clicked. Use 1-inch washi tape to create faux frames or anchors for prints. The tape gives crisp lines and removes cleanly. Cut templates for odd-sized prints and use painter’s tape tabs to hold corners while you experiment with layouts. This method is great on textured paint because the tape grabs without penetrating and the visual result reads like a curated gallery from a distance.

Mistake to Avoid: Using cheap masking tape instead of washi leaves sticky residue and lifts paint.
Step 5: Lean art and use picture ledges for flexibility
This is where it starts to actually feel confident. A 4 to 6 inch deep picture ledge lets you lean multiple frames and swap pieces without touching the wall. The weight of a leaned frame sits against the ledge so the wall sees minimal stress. I have a shelf with a plant, a small ceramic, and two frames layered front to back. It looks deliberate and can be shifted on Tuesday night when you do not want to think. For renters, mount the ledge with adhesive hooks rated for the load or choose an over-door leaning shelf alternative.
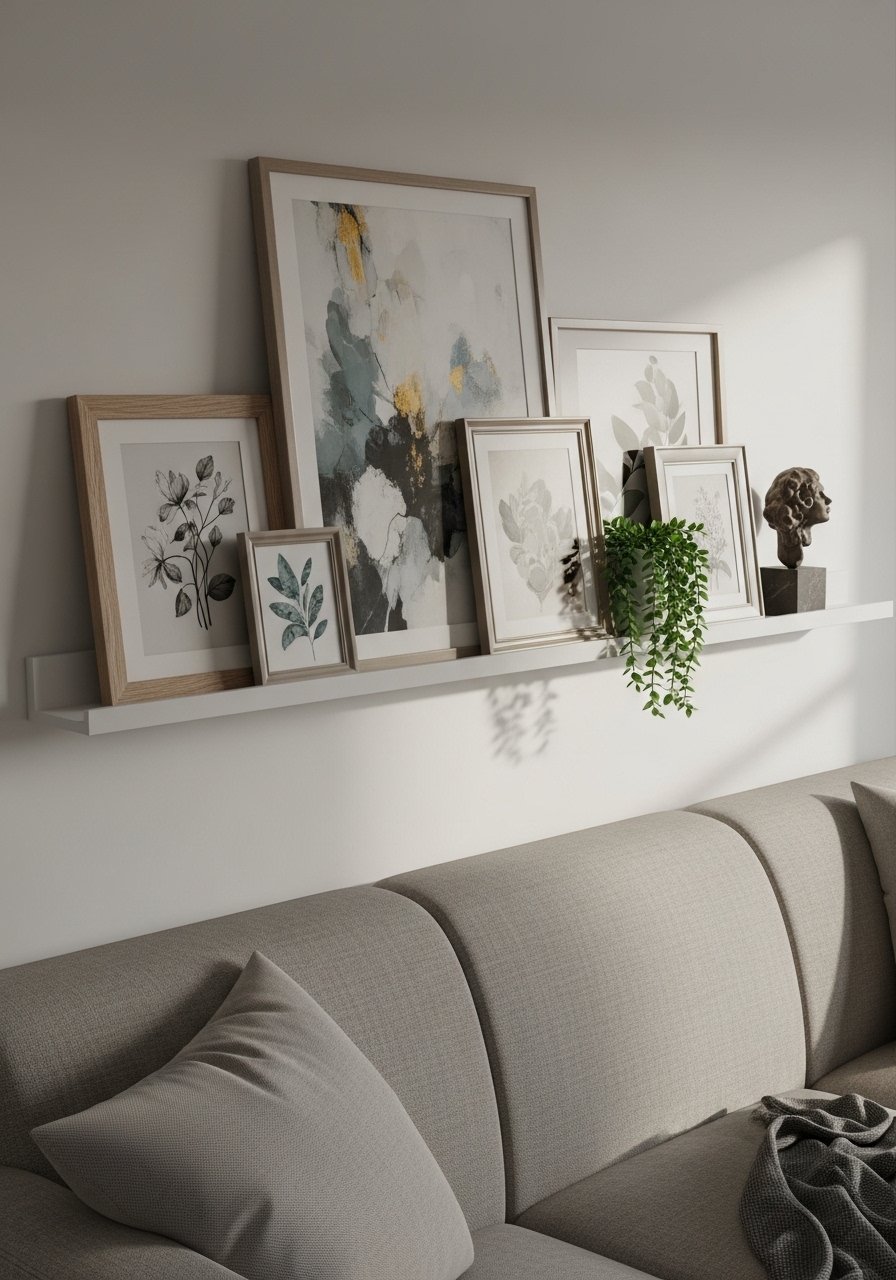
Mistake to Avoid: Tightening every frame flush on the ledge makes them unstable and increases fall risk.
Step 6: Light it gently for depth without damage
This part feels wrong while you are doing it, because adding a lamp or clip-on changes the room more than another frame. Use plug-in picture lights or clip lamps attached to shelves and run the cord along a corner secured with Command cord clips. Warm, directional light makes prints look richer and textiles reveal texture. If you want accent lighting behind a tapestry, use thin LED tape attached to the back of a ledge, not the paint. The glow should be a soft wash, not a spotlight, to keep surfaces calm.
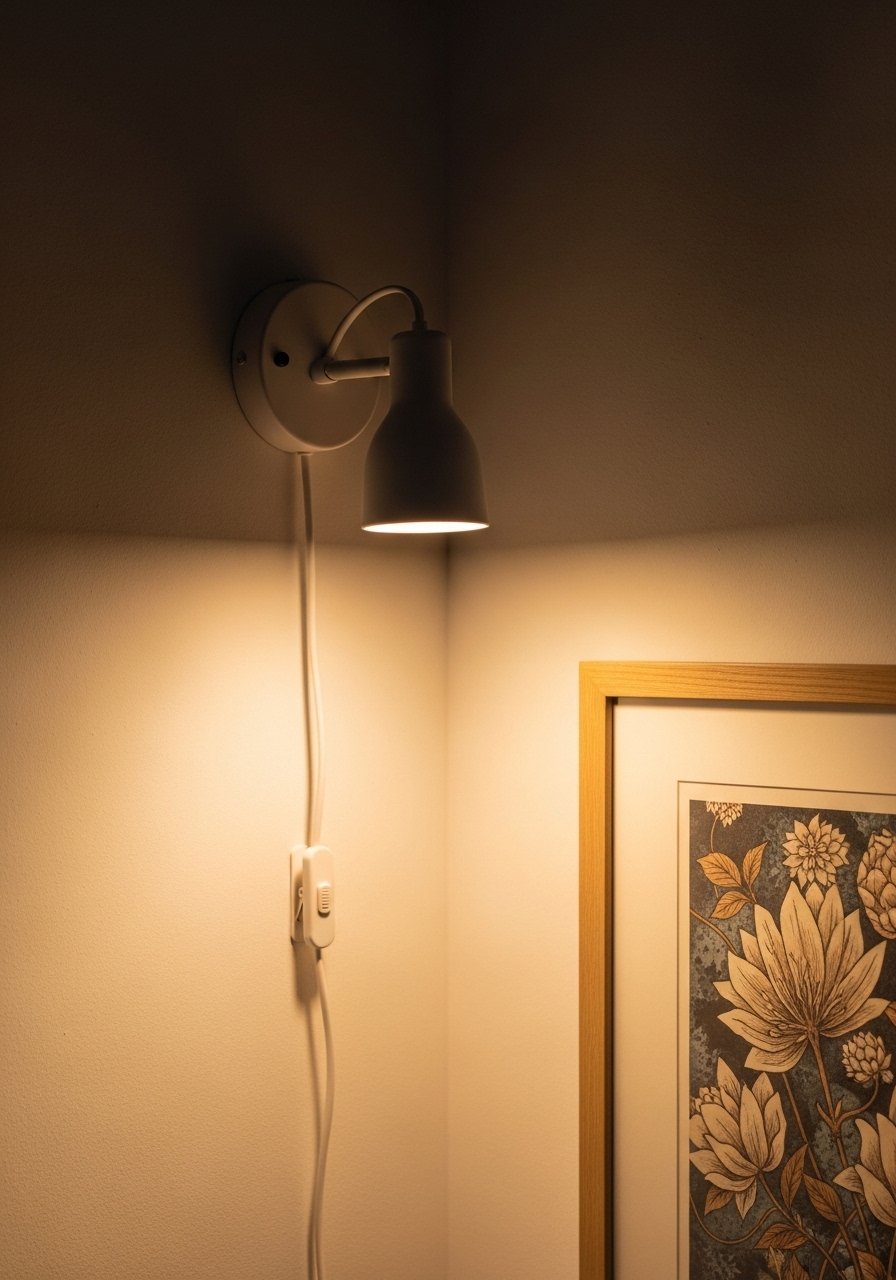
Mistake to Avoid: Hanging a hardwired fixture without landlord approval risks lease violations and unnecessary work.
Decorating Tips
Measure twice, hang once: Use a laser level or a 10-foot spirit level for long runs and a tape measure for single pieces, paired with painter’s tape for templates.
Go asymmetrical: Start with one anchor piece then balance with smaller items, not a mirror image. Add a slim-picture-ledge to let arrangements evolve.
Use negative space: Leave breathing room around clusters. A tight gallery looks busy in photos and noisy in real life.
Protect textured paint: For bumpy walls, use Command hooks or fabric hangers instead of adhesive strips directly on peaks.
Layer textures: Mix a framed print with a textile and a plant to add warmth and depth. A cotton-tapestry-wall-hanging brings a soft, nubby texture.
Test one method: Try a single strip or hook for 24 hours before committing to a whole wall. After trying this in three rentals, it saved me from redoing projects.
Cord concealment: Run cords down corners and use matching paintable cord covers or command-cord-clips to keep lines tidy.
Hang With Confidence
Most people end up spending between $500 and $800 when they finally commit to refreshing a room. Start small, pick one wall to experiment on, and keep a photo log so you can see progress. My last tip is practical: adopt one consistent hanging height and one spacing rule for your home, then switch out pieces seasonally. You will learn what scale and color make the room feel like yours without ever needing to patch a single hole, and that makes the whole process calmer and more rewarding.
