
The first time I swapped the builder-grade brass trim for a single coat of warm white, the hallway stopped looking like a leftover and started feeling like the whole apartment belonged to someone. It was one small, cheap paint decision and suddenly things lined up, the light read differently, and I stopped apologizing for the space. That one change is the through-line for the dozen other little fixes I keep coming back to.
These ideas are simple, renter-friendly, and meant for people who want a calm, intentional look without calling a contractor. Most of these projects take an afternoon or a weekend, cost under $75 in parts, and work in small apartments as well as houses. I learned these after trying them in three rentals, so there are options if you need to undo something before moving. Expect basic tools, low skill, and a handful of inexpensive bits that actually change how rooms read.
1. Paint Trim One Shade Brighter
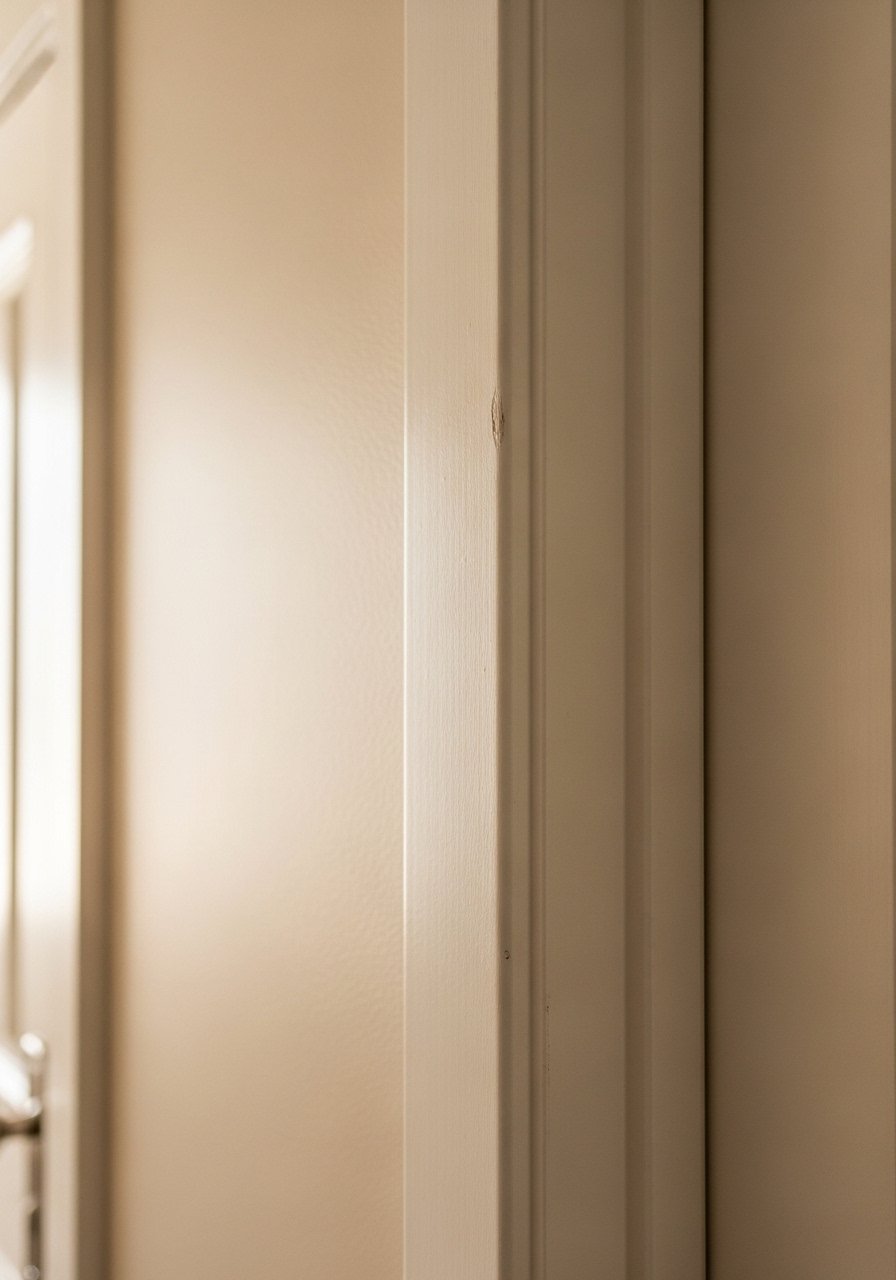
The trick is not gloss or matte, it is contrast. I paint trim one shade brighter than the wall and it creates a clean frame without shouting. Use a small angled sash brush for crisp corners, two thin coats of trim paint, and wrap edges with low-tack painter’s tape for straighter lines. This works in minimalist and cozy spaces, and it is a tiny budget upgrade that reads expensive. Try it in a rental, it is reversible with a touch-up later.
Mistake to Avoid: Applying one thick coat so brush marks show, instead of doing two thin, even coats.
2. Thrifted Frame Gallery With Uniform Mats
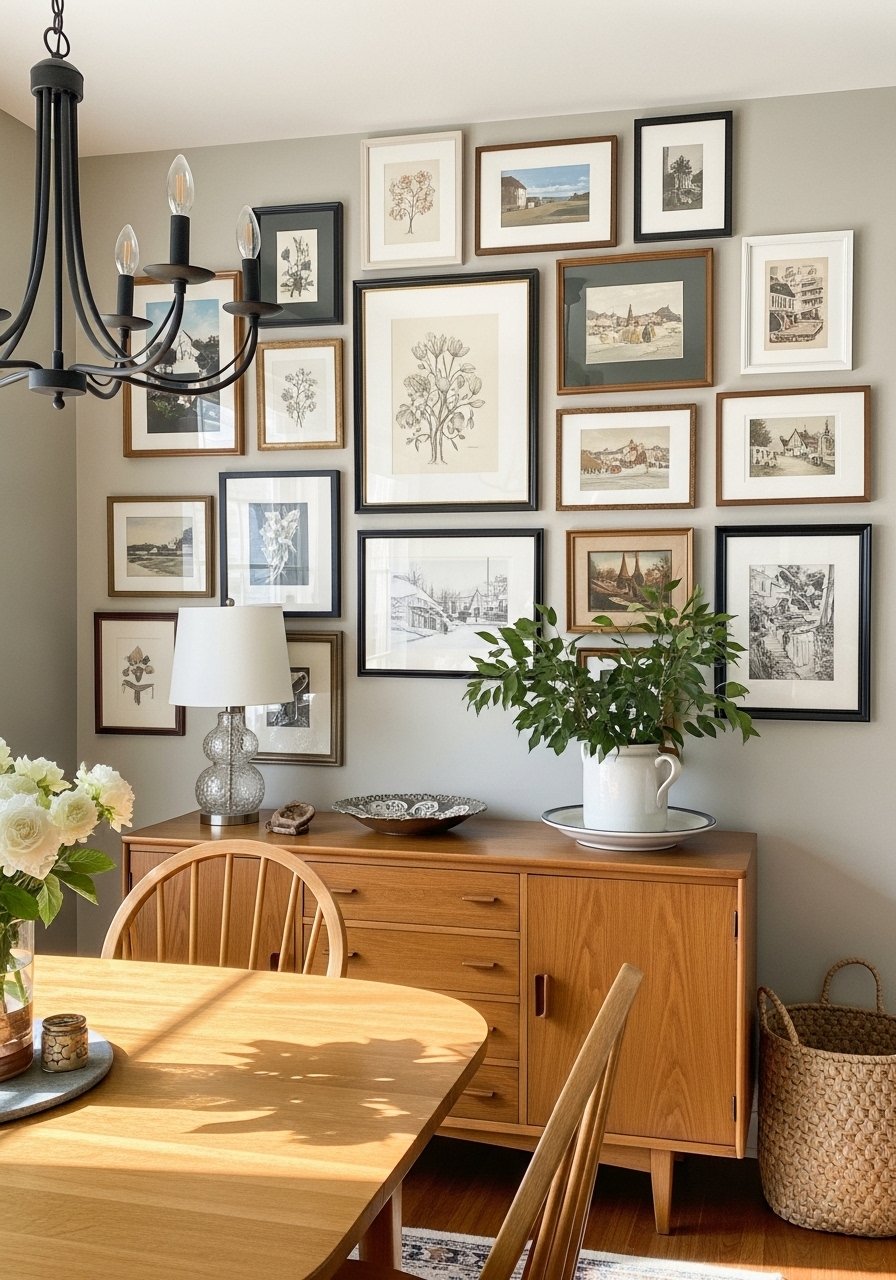
I stopped hunting for matching frames and started buying whatever was cheap, then rehabbing the interiors to match. Cut white mats to the same opening size for cohesion, spray paint mismatched frames black or cream, and hang with staggered spacing using picture hanging strips so you can level without holes. The result looks intentional, like a collected set. Budget friendly and perfect for personalities who like found objects but want a clean finish.
Mistake to Avoid: Centering everything at the same height, which makes a gallery feel flat rather than layered.
3. Plug-In Pendant From a Woven Basket
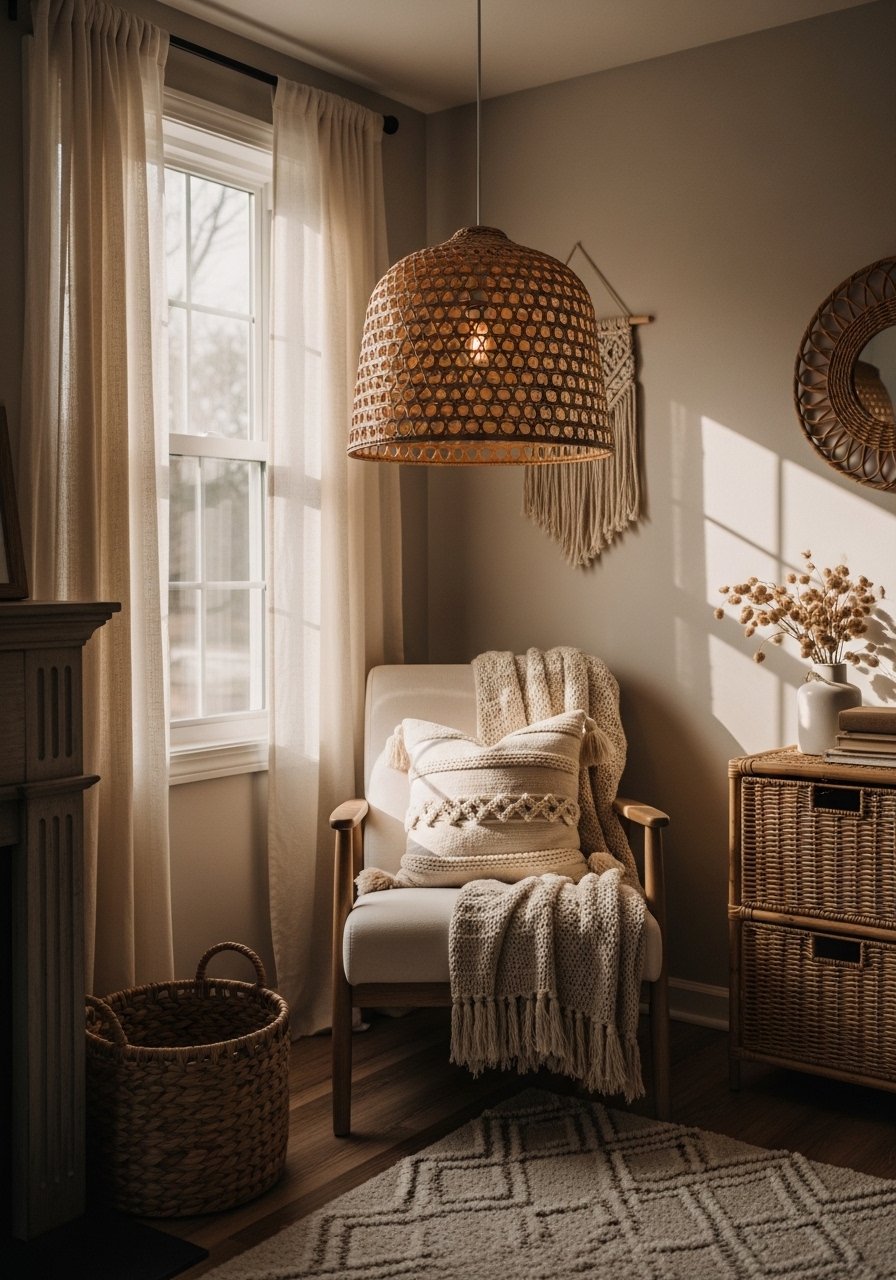
Turn a thrifted woven basket into a pendant and avoid rewiring. Fit a plug-in pendant kit and a bulb with a warm 2200K to 2700K glow, then hang from a ceiling hook. I like the shadow texture this creates over a reading nook. It reads like a studio upgrade and costs less than a store pendant. Use a plug-in pendant kit and a soft-glow LED bulb for the easiest install.
Mistake to Avoid: Using a high-heat bulb that scorches natural materials instead of a low-heat LED.
4. Floating Ledge Plant Display

A narrow floating shelf under a window gives plants a place to gather without crowding surfaces. Mount with concealed brackets and stagger pot sizes for depth. Use lighter pots toward the edge for balance and a wall shelf bracket set rated for plant weight. This feels natural in apartments with shallow sills and works for anyone who wants a green corner without a full plant stand. Wipe the shelf weekly to avoid water stains.
Mistake to Avoid: Overloading one small ledge with heavy planters that pull hardware free.
5. Sew-Around Slipcovers From Drop Cloths

Instead of expensive custom slipcovers, use prewashed drop cloths cut and hemmed to fit. The canvas texture softens with washing and looks intentional when paired with linen pillows. Measure seat depth and hem an overlap so you can remove it for laundry. Finish raw edges with a zigzag stitch for durability and anchor cushions with non-slip grips. A heavy cotton drop cloth and a basic sewing kit are all you need.
Mistake to Avoid: Cutting to exact size without an allowance, which makes the cover impossible to remove once sewn.
6. Soft Stenciled Accent Wall
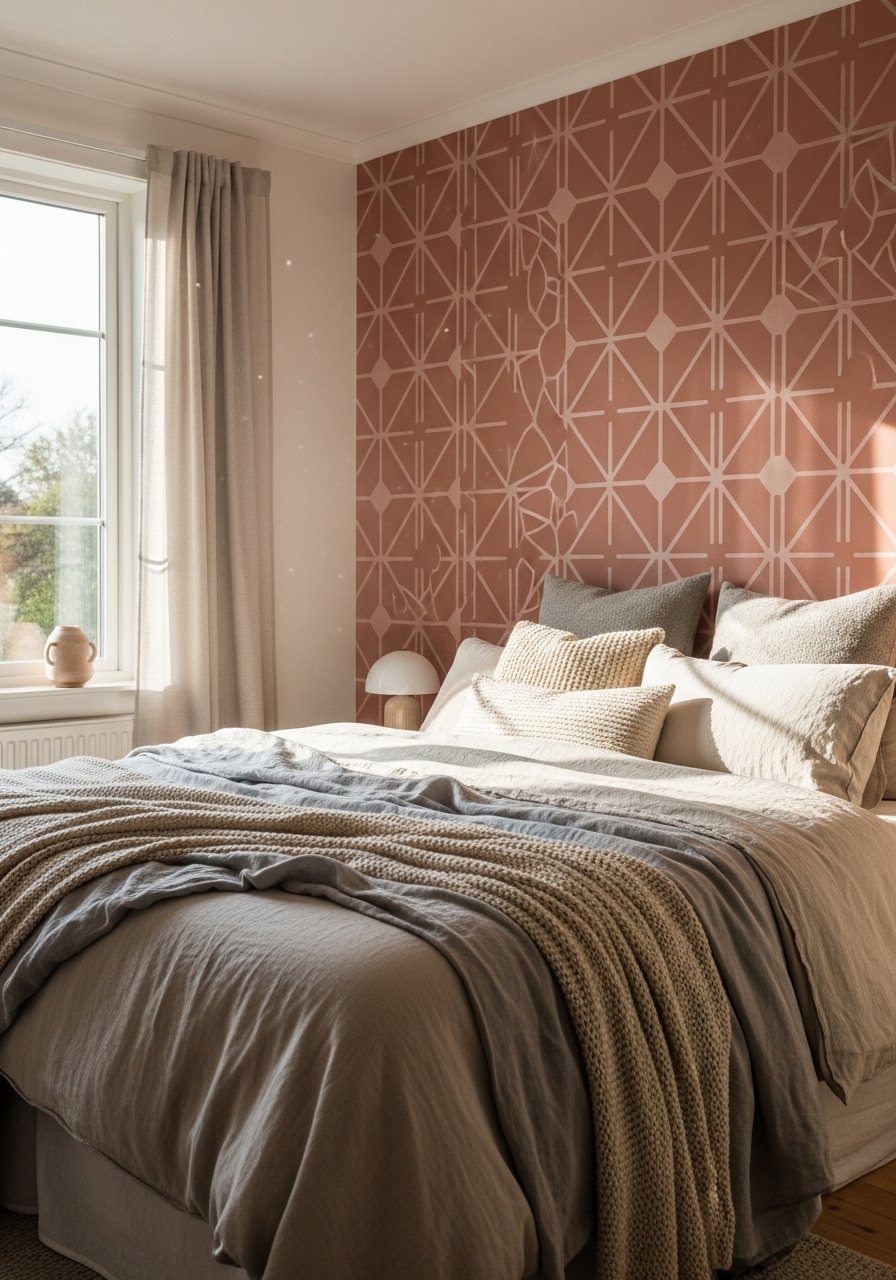
Stencils do not have to shout. Use a large repeat stencil and a slightly lighter or darker shade than the base wall, then pounce with a mini roller for a subtle texture. Work in sections and keep a damp rag for smudges. This fits renters if you use water-based paints and plan to repaint later. A reusable wall stencil and a small foam roller make the job faster than wallpaper and less permanent.
Mistake to Avoid: Pressing too hard and getting paint bleed under the stencil edges instead of building up several soft layers.
7. Peel-And-Stick Tile Backsplash
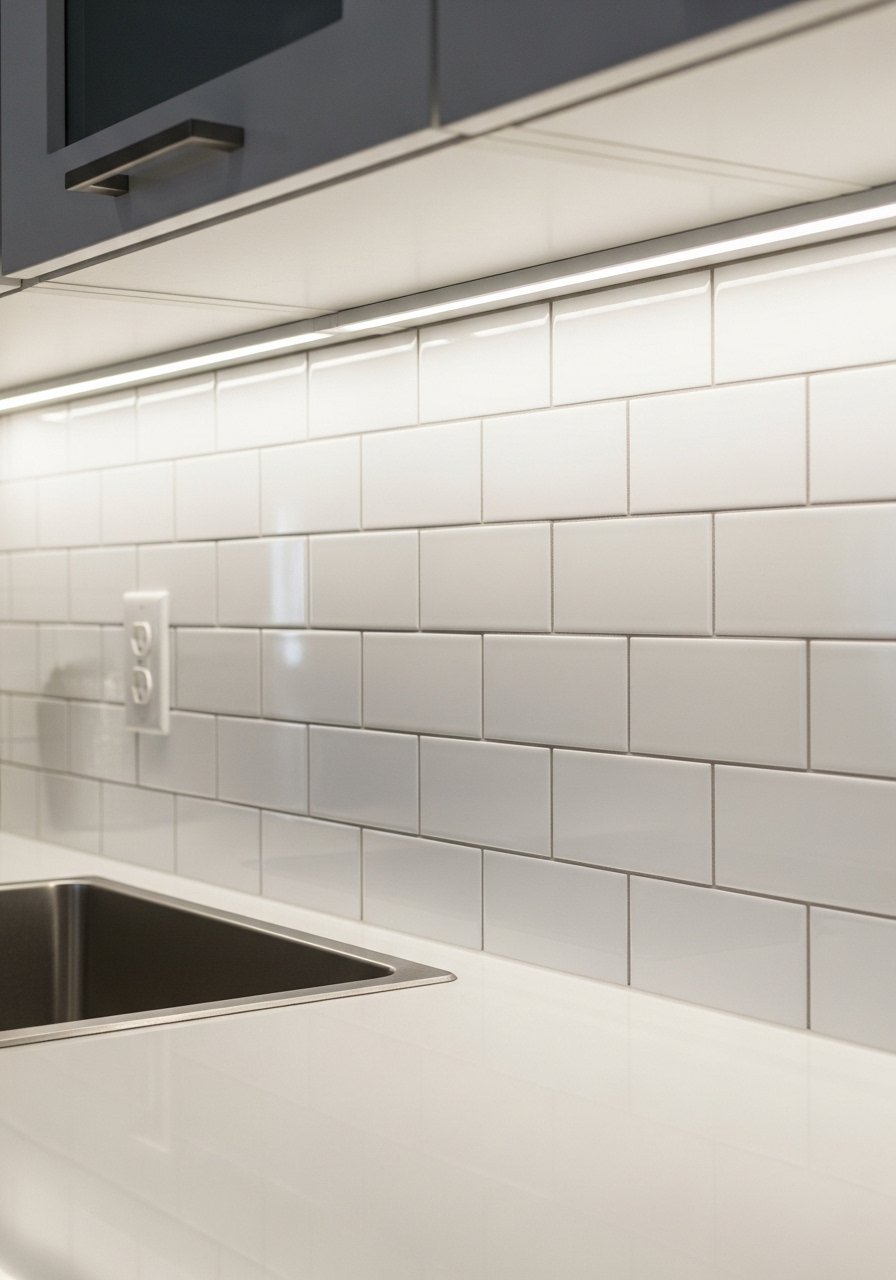
Peel-and-stick tiles give a backsplash update with almost zero skill. Clean the surface thoroughly, plan your layout, and butt seams tight for a grout-like effect. For corners, use a trim piece to finish the edge. They work in rental kitchens as long as you remove carefully and are great for adding polish without a contractor. Try a neutral tile first and add a patterned strip behind the stove for personality. A pack of peel-and-stick subway tiles is a weekend project.
Mistake to Avoid: Applying on a greasy surface so tiles do not stick properly and lift later.
If any of these have you reaching for tools, here are the things I actually keep around.
Home Aesthetic Essentials
Hardware & Hanging:
- Honestly the best quick fix for art, picture hanging strips (~$10-18).
- For shelves and ledges, a solid set of concealed wall brackets (~$12-25).
Paint & Finish:
- My go-to for trim, trim paint (~$15-30).
- For subtle stenciling, a reusable wall stencil (~$8-20).
Textiles & Soft Goods:
- For DIY slipcovers, a hardworking heavy cotton drop cloth (~$12-25).
- A pair of velvet pillow covers (~$12 each) to change seasons.
Lighting & Small Tools:
- For basket pendants, a safe plug-in pendant kit (~$18-30).
- Basic must-have, a mini foam roller set (~$8-15).
8. Trimmed Shiplap Without the Work
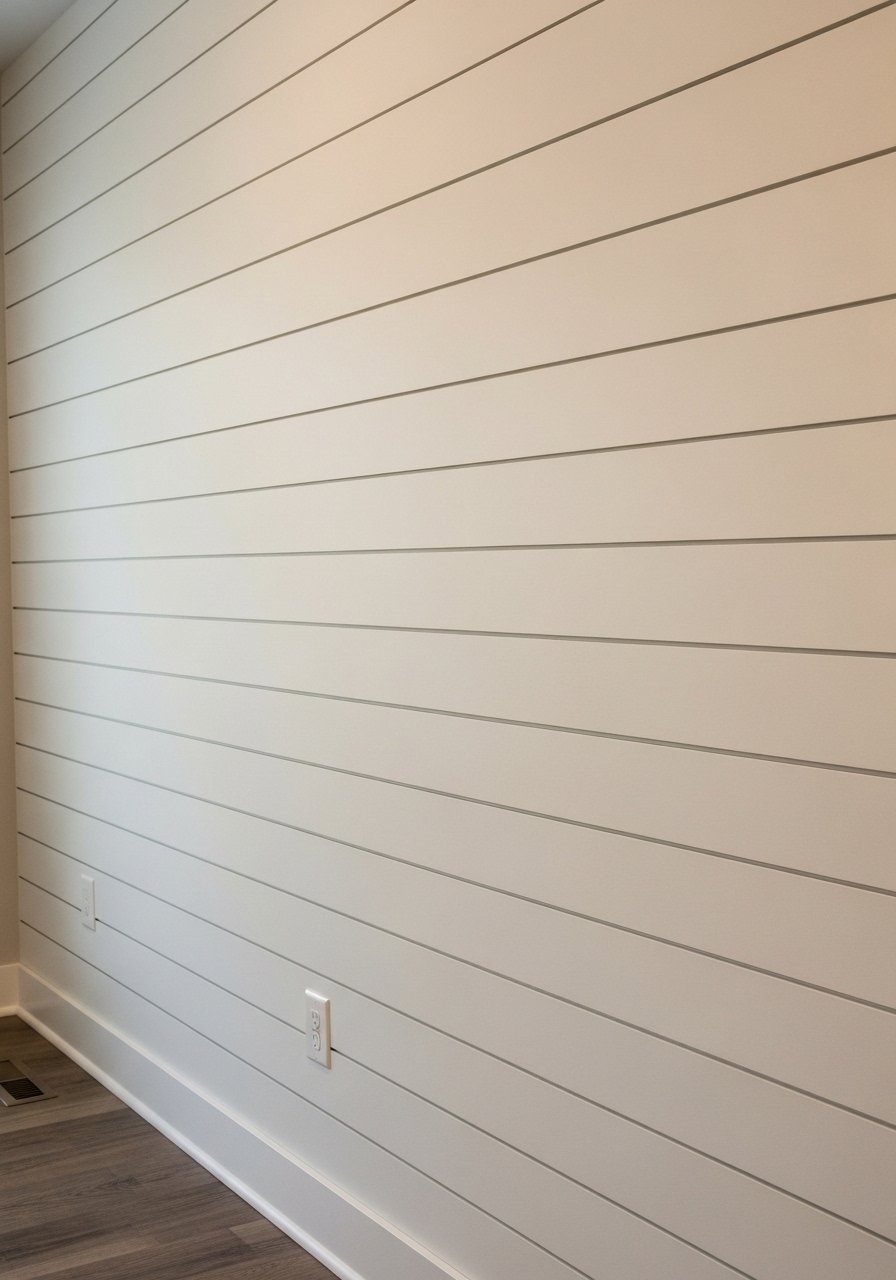
Instead of full shiplap, attach thin horizontal trim boards with equal spacing to mimic the look. Paint the boards and wall the same color for a subtle depth that reads built-in. Use a spacer block for even gaps and a finish nailer for quick installation. This is a partial commitment because it is removable and leaves small holes that are easy to patch. A painter’s spacer block helps keep lines straight and consistent.
Mistake to Avoid: Using wide boards that overwhelm a small wall instead of narrow trim that reads modern.
9. Conceal Cords With Paintable Raceways
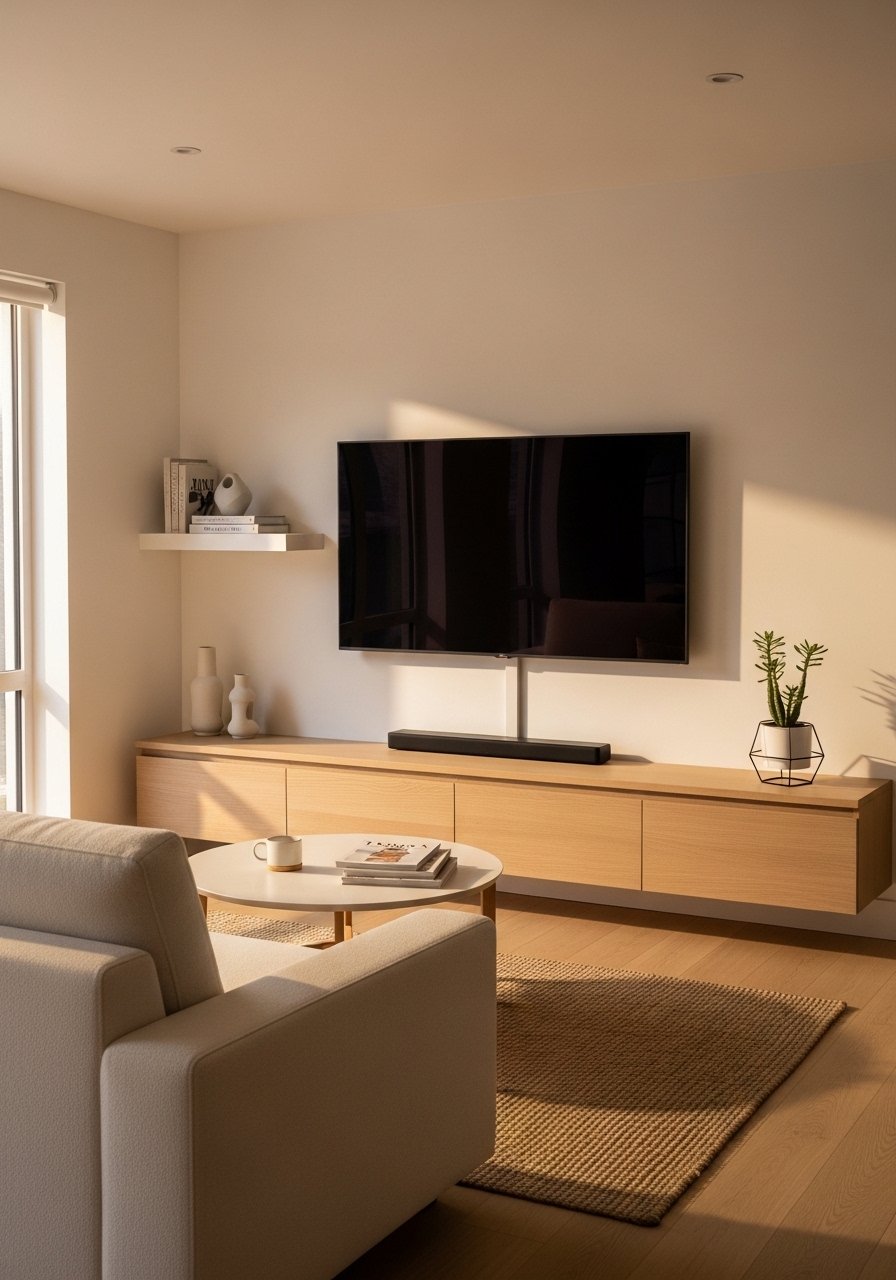
Cord raceways are worth it when you want a clean wall without rewiring. Use paintable surface channels, run the cable through, then caulk and paint to blend with the wall color. It looks bespoke and hides the tangle behind the console. This is small-space friendly and a great renter compromise. A paintable cable raceway kit is inexpensive and installs in minutes.
Mistake to Avoid: Painting before caulking so seams remain visible instead of filling first for a smooth finish.
10. DIY Drawer Sachets and Drawer Liners
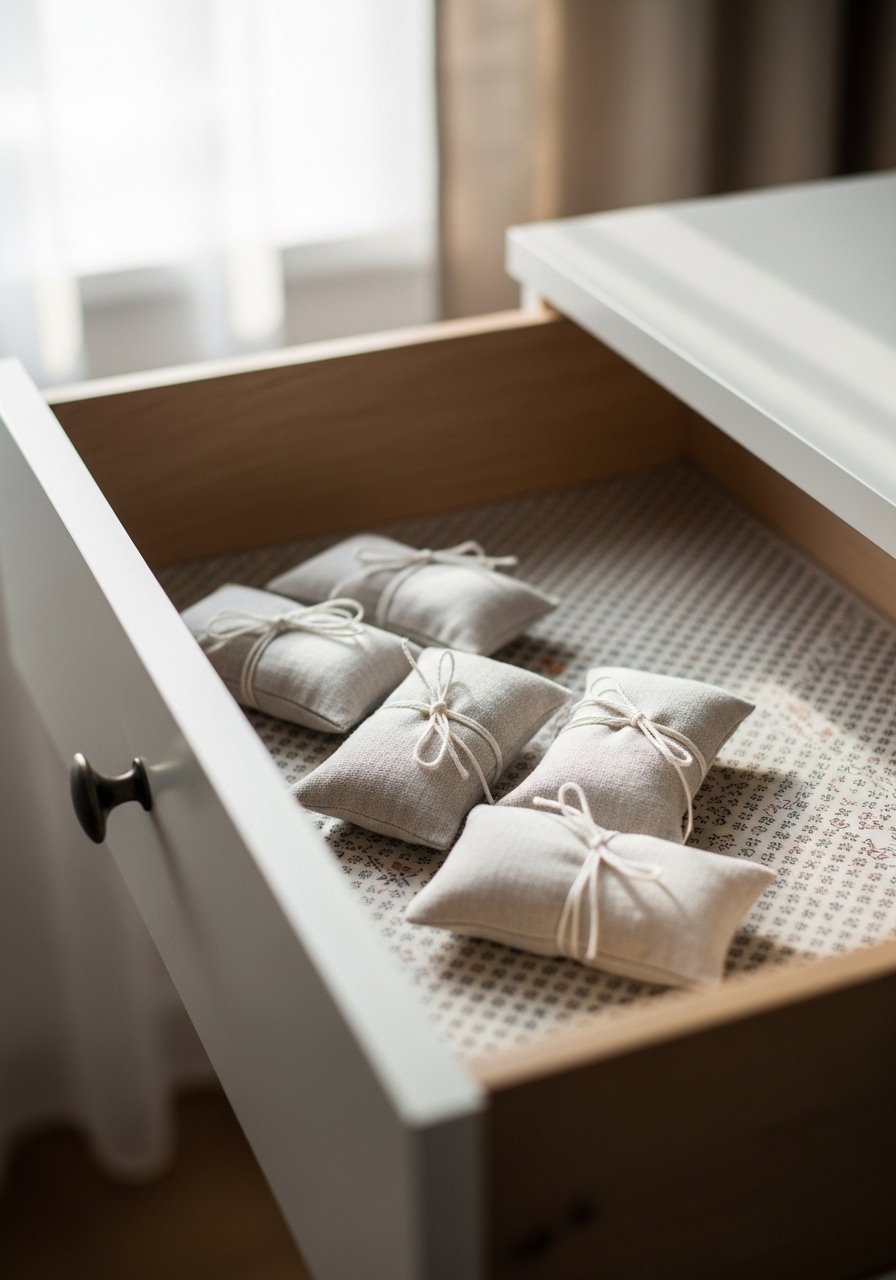
Sachets are easy to sew and great for wardrobes or linen closets. Fill small linen bags with lavender or cedar chips and line drawers with a printed paper to add a scent layer. For a more durable option, glue a removable shelf liner to the drawer base. These are small details that make clothes feel cared for and are low cost. A pack of dried lavender sachets and removable shelf liner keep things simple.
Mistake to Avoid: Using scented sachets directly against delicate fabrics without a breathable linen pouch to avoid staining.
11. Chalk Paint Rescue For Mismatched Ceramics
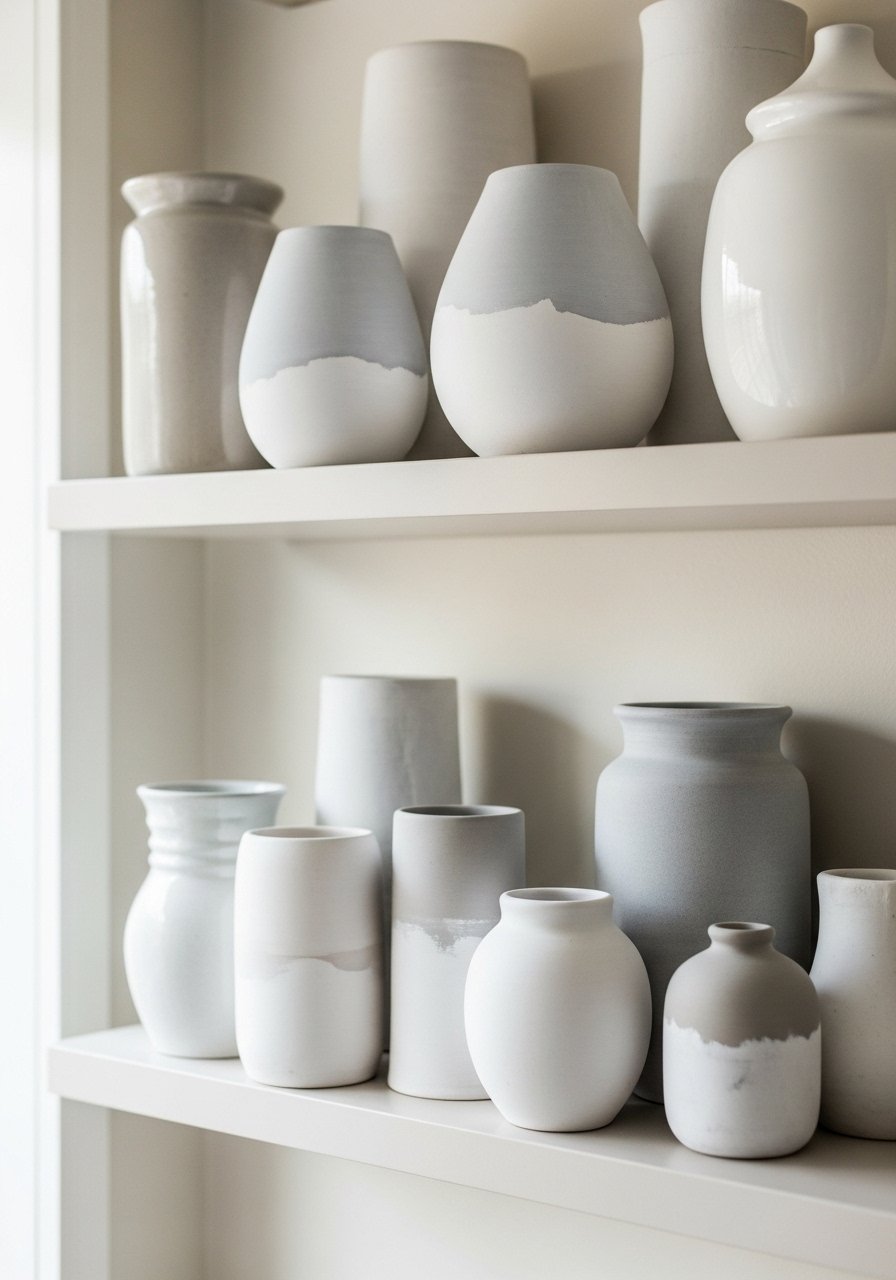
Mix chalk paint with water for a thin wash to mute an odd ceramic or chip a thrifted vase into the shelf rotation. Two light washes with a soft brush and a quick sand at the edges creates a vintage, tonal look that blends mismatched pieces. Seal with a matte wax for durability. This is quick, low skill, and the right move when you want cohesion without buying new. A chalk paint starter set is all you need.
Mistake to Avoid: Dipping the whole piece in paint and losing the ceramic surface texture instead of building thin layers.
12. Layered Window Treatments for Depth
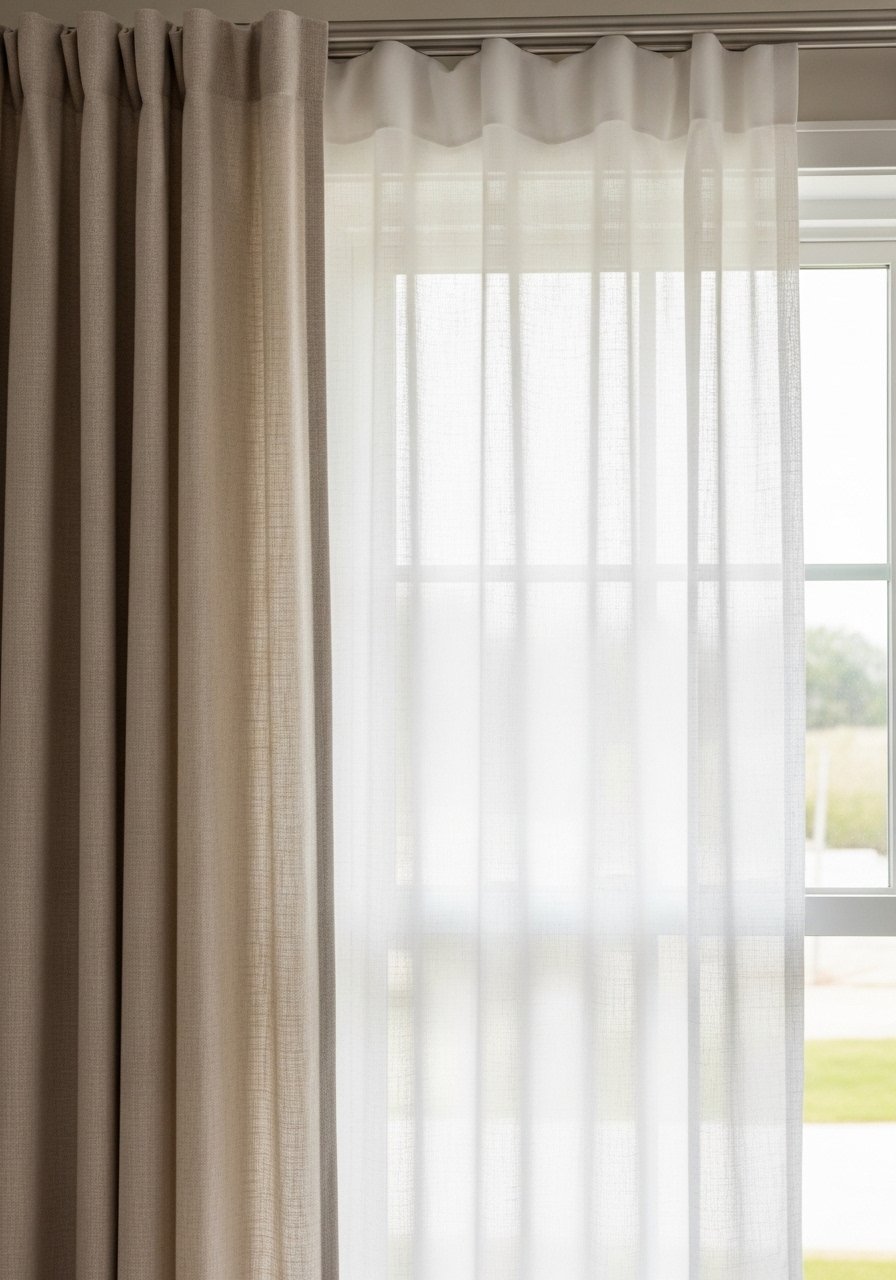
Combine a lightweight sheer for daylight privacy with a heavier curtain for texture and blackout when needed. Mount the rod high and wide so windows read larger. Use clip rings for easy removal and a linen curtain panel for a lived-in finish. This works on every body of window and is an instant refresh that hides old blinds and makes rooms feel taller.
Mistake to Avoid: Hanging curtains too narrowly over the window so they block light instead of framing the opening.
13. Fringed Drop Cloth Rag Rug
Cut drop cloths into strips and braid or sew them into a flat rug, then add a fringed hem. It gives a textured, handcrafted floor piece without buying a pricey rug. Use a rug pad underneath to keep it from sliding and rotate the rug to even out wear. This is an easy weekend project and it washes down in a gentle cycle if needed. A non-slip rug pad keeps the finished piece anchored.
Mistake to Avoid: Placing the rug on a slick surface without a pad so it slides and bunches.
Quick Renter Fixes That Last
Thin coats look better. One even coat of trim paint will show brush marks, but two thin coats read smooth and professional.
Grab picture hanging strips. They make leveling a gallery wall painless and avoid multiple holes when you change your mind.
If you want a pendant without electrician costs, a plug-in pendant kit is the fastest option and keeps things reversible.
Use peel-and-stick-subway-tile only on cleaned, de-greased surfaces so the adhesive bonds and you do not have lifting later.
For textiles, a heavy-cotton-drop-cloth sewn with simple hems will soften after washing and looks much more intentional than it sounds.
