
The pin showed a perfect crescent, my nails looked like tiny moons, and I spent an hour trying to copy it with a shaky hand and too-thick polish. After ruining two bottles and learning to slow down, I stopped chasing a single swipe and started building the tip in thin layers. That tiny change made salon-looking French tips realistic, faster, and less wasteful.
These ideas are not salon-only, ornate, or time-consuming looks. They are simple French tip approaches you can do at home with basic tools or a short salon visit. Most are friendly for short to medium natural nails, and I note which ones need a lamp or a little more skill. Expect budget options and a few intermediate moves you can practice in one evening.
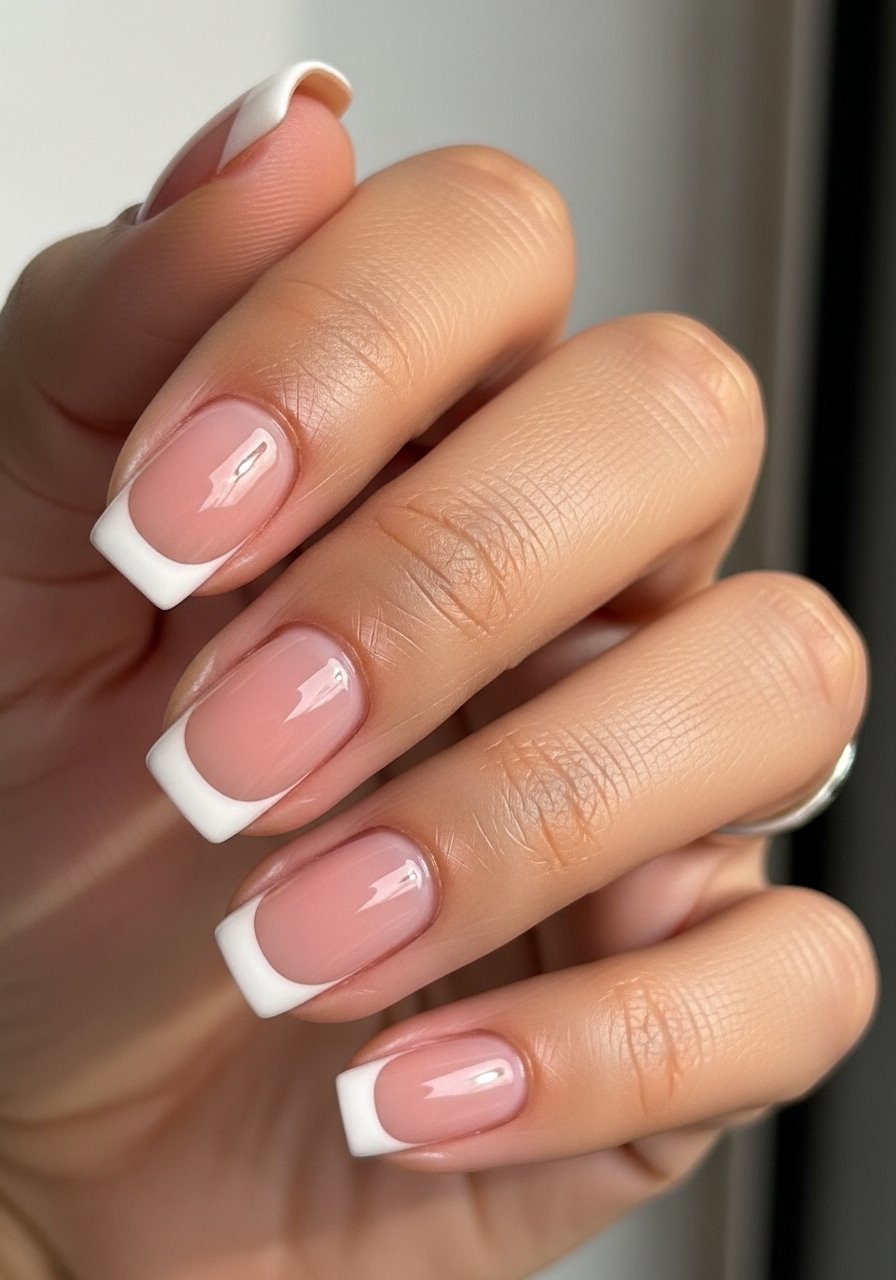
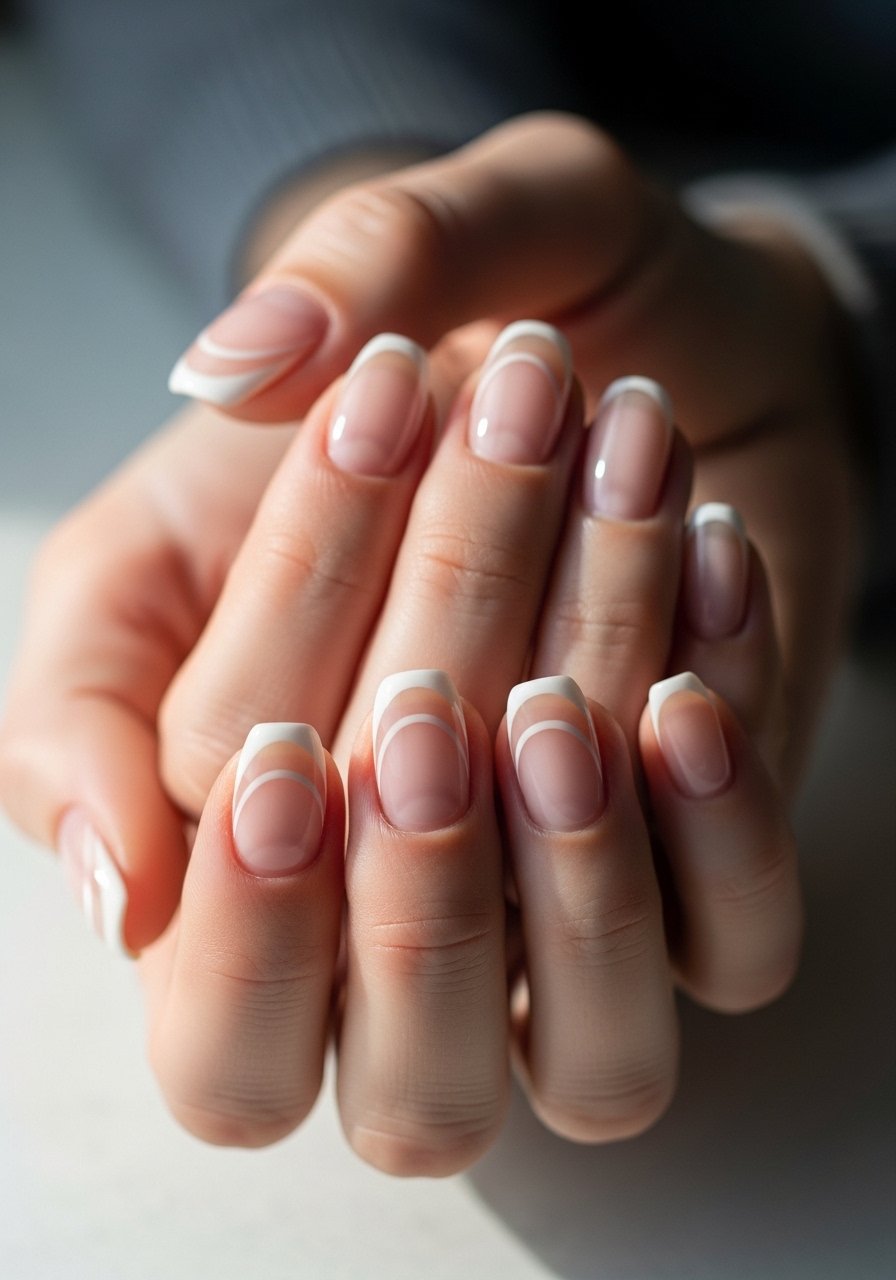
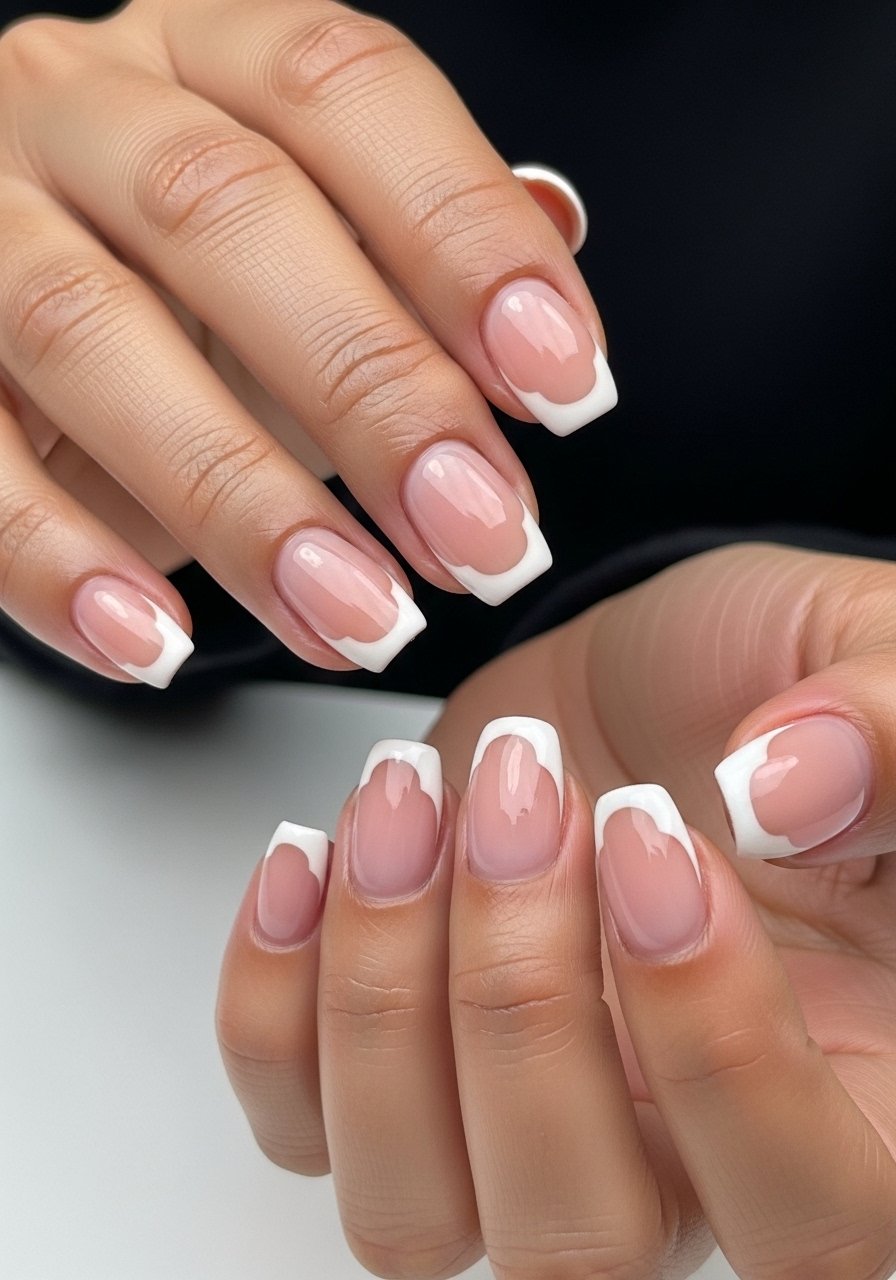
1. Classic Thin White Smile
Style/Vibe: Classic clean French
Best For: Short to medium nails, everyday wear
Skill: Beginner
The visual trick is a 0.5 mm white edge, not a chunky bar of polish. I do two thin coats of base, then a single, steady 1 mm white line that I feather inward with a tiny brush. It reads neat in photos and in person because the white is thin enough to sit on the nail plate instead of pooling. Use a reliable white like white nail polish and a fine art brush for cleanup. Budget friendly and quick once you practice.
Mistake to Avoid: Pushing too much polish on the tip so the smile line becomes a thick, obvious ridge.
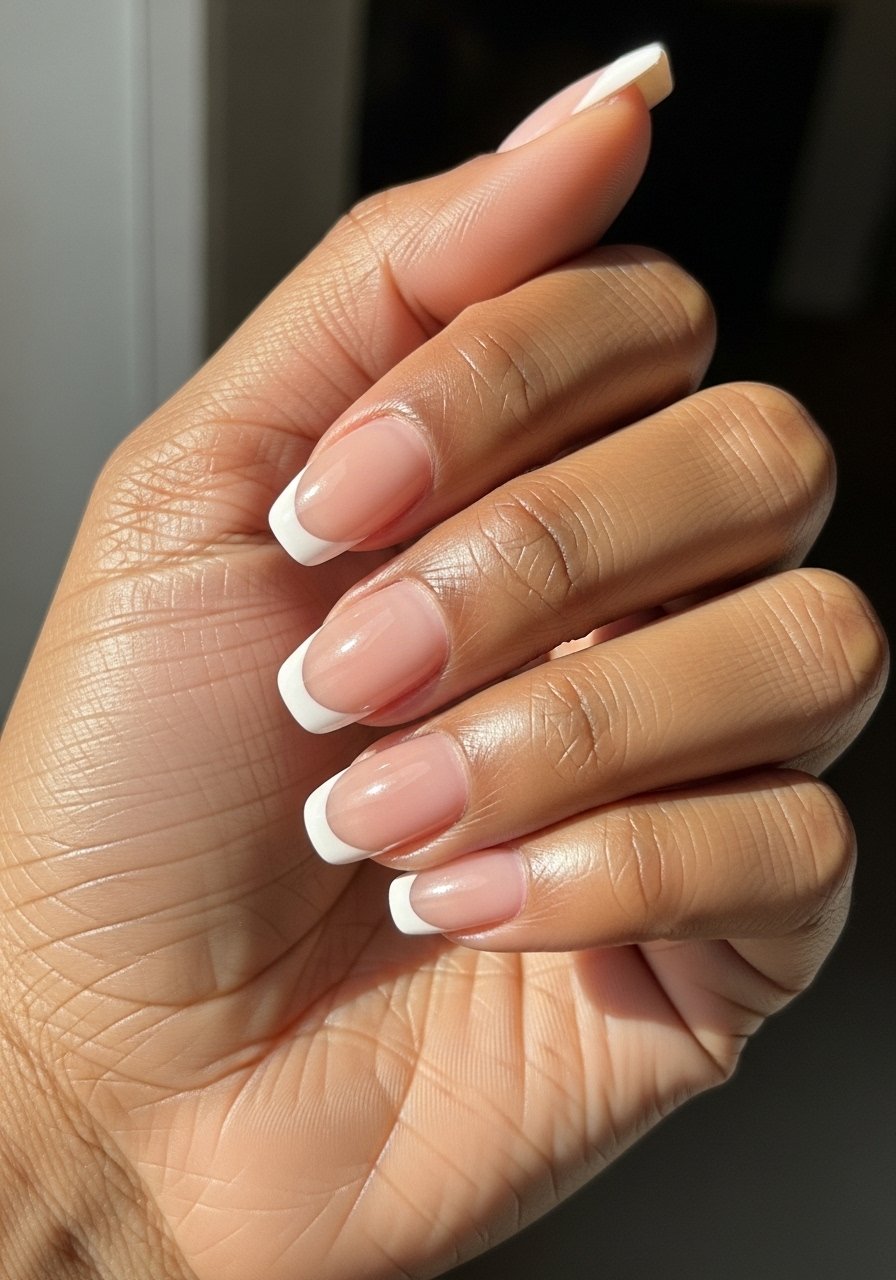
2. Sheer Nude With Sharp Edge
Style/Vibe: Subtle, wearable French
Best For: Work or weddings, short nails
Skill: Beginner
Swap opaque white for a sheer nude base under a thin white smile for a softer effect that still looks polished. I layer two thin coats of a sheer nude, let it dry, then use striping tape to mask a crisp edge. The tape leaves a 0.7 mm crisp line, and removal while the white is tacky but not dry gives the cleanest finish. Try striping tape for under $6. Works fast and hides small shape mistakes.
Mistake to Avoid: Pulling tape off after the polish fully dries, which flakes the white edge.
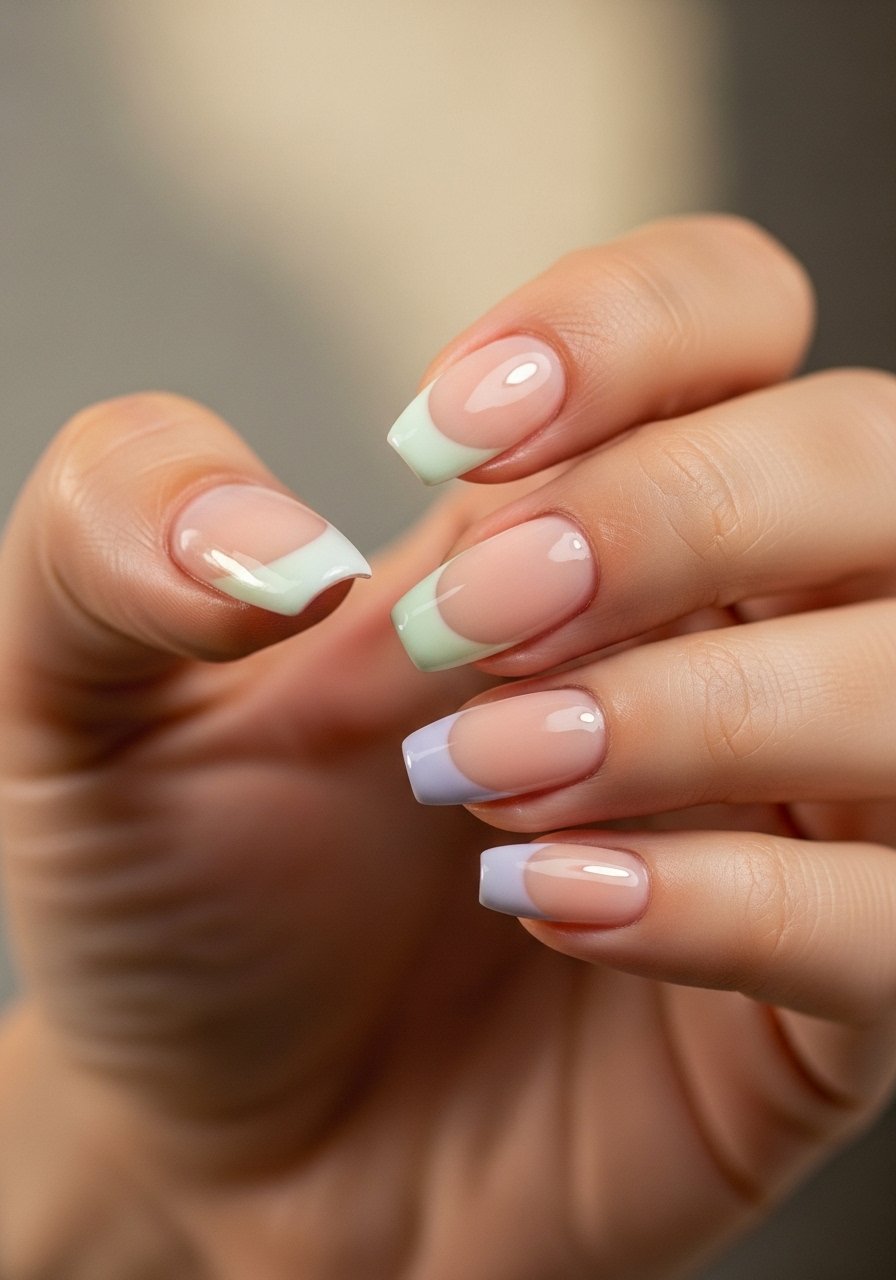
3. Reverse French Crescent
Style/Vibe: Modern classic with color
Best For: Medium to long nails, trendier looks
Skill: Intermediate
Reverse French means a colored crescent at the nail base instead of the tip. It creates a framing effect that makes nails read longer. I paint a sheer blush base, then use a round sticker guide to stamp a 2 mm colored crescent at the cuticle. Pastel colors like mint or butter soften the look. For small runs try nail guide stickers. This is one of the gaps other guides skip but it is great for short cuticle-to-tip ratios.
Mistake to Avoid: Using opaque color as the base under the crescent; it flattens the layered effect.
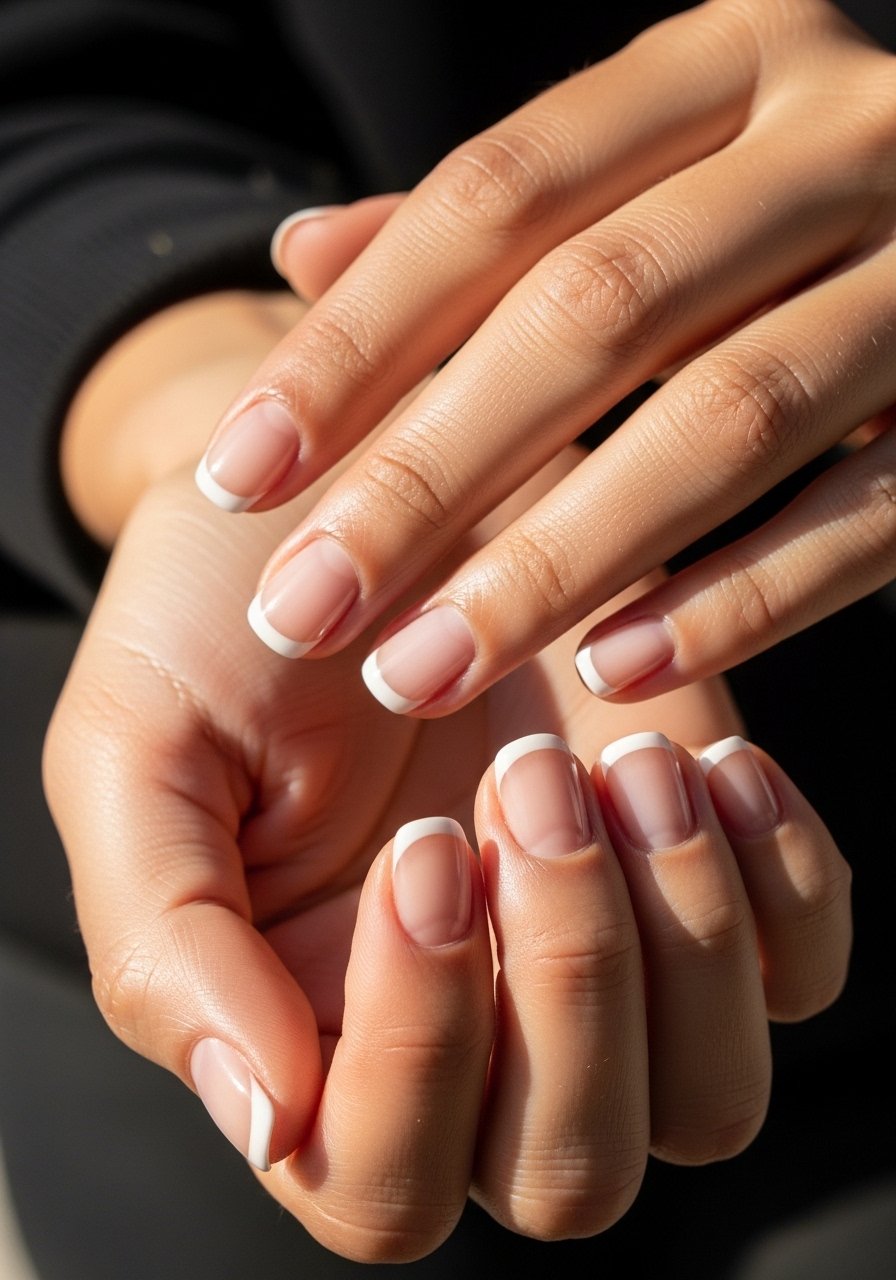
4. Micro Smile For Very Short Nails
Style/Vibe: Minimal and neat
Best For: Very short nails, neat office looks
Skill: Beginner
When nails are stubby, a full smile eats visual space. The micro smile is a 0.5 to 1 mm white arc placed at the very edge. I use a white gel pen for precision, then top with a thin quick-dry top coat. It reads intentional rather than trying to fake length. Try a white nail art pen for this. It is one of the small practical moves most articles skip, and it is forgiving for shaky hands.
Mistake to Avoid: Drawing a thick crescent that covers the nail edge and makes the nail look shorter.
5. Glitter-Fade Tip

Style/Vibe: Festive but subtle
Best For: Parties, short evening looks
Skill: Intermediate
Instead of a stark white, press loose glitter or a glitter top coat into just the tips and feather it inward about 2 mm. I dab with a makeup sponge to get a soft gradient and seal with two thin top coats to avoid texture. Use glitter top coat and work in thin passes to keep the sparkle even. This plays well with medium nails and looks luxe without full-on sparkle.
Mistake to Avoid: Rubbing heavy glitter into the whole nail, which creates thick, chunky texture.
6. Baby Boomer Ombre French
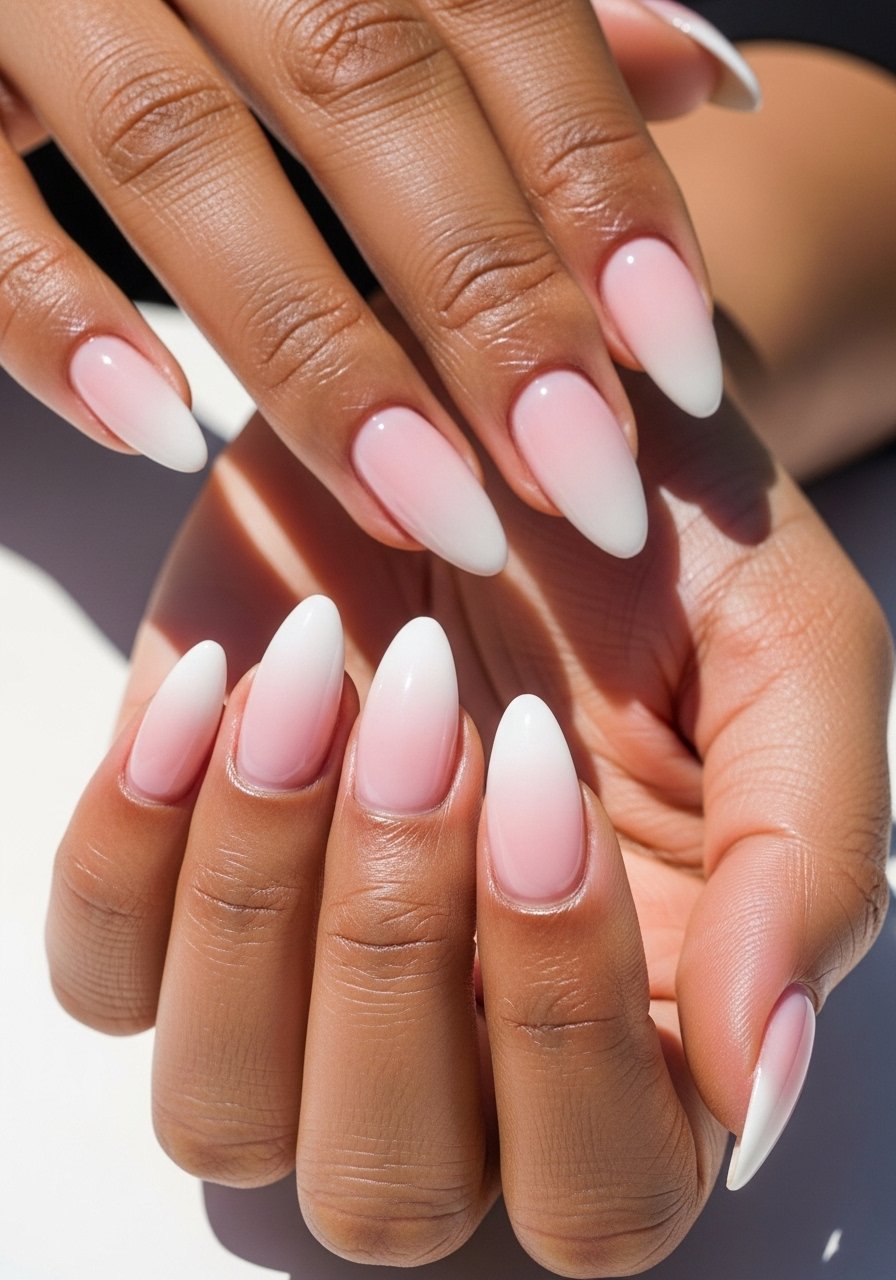
Style/Vibe: Soft gradient French
Best For: Long nails, bridal or formal
Skill: Advanced
Baby boomer blends a sheer pink into white for a soft ombre smile. I sponge in a 60:40 ratio of blush to white, then very lightly buff the transition so it reads seamless. It takes patience, and an LED lamp helps if you use builder gel. I used a tiny cosmetic sponge and sheer pink polish for a salon look at home. This is pricier but photos beautifully.
Mistake to Avoid: Over-sanding the blend so the ombre looks fuzzy instead of soft.
7. Negative-Space Curved Tip
Style/Vibe: Modern architectural French
Best For: Creative office or casual wear, medium nails
Skill: Intermediate
Cutting away negative space creates a graphic smile that is less fussy than perfect white lines. I paint a sheer base, mask a crescent with a tiny guide, then outline with white and leave the center bare. The contrast makes nails look intentionally designed and low-maintenance. A fine liner brush is helpful, try nail art brushes set. This technique solves the problem of visible regrowth while still feeling fresh.
Mistake to Avoid: Making the negative area too large so nails seem unkempt rather than crisp.
If any of these ideas have you ready to actually try something, here are the everyday products I reach for.
French Tip Essentials I Use
Base & Color:
- Base coat (~$8-12). A smooth base prevents bubbling and evens the surface.
- White nail polish (~$6-12). Choose opaque coverage.
- Sheer pink polish (~$7-15). Good for soft bases.
Tools & Guides:
- Striping tape (~$5-8). For crisp edges.
- Nail guide stickers (~$6-10). Helpful for reverse French and crescents.
- Fine nail art brush (~$6-12). For clean lines and touchups.
Finish & Cleanup:
- Quick-dry top coat (~$8-14). Thin layers prevent pooling.
- Latex barrier (~$6-12). Saves cleanup around cuticles.
- Polish remover pen (~$5-9). For tiny mistakes.
8. Bright Colored Tip Swap
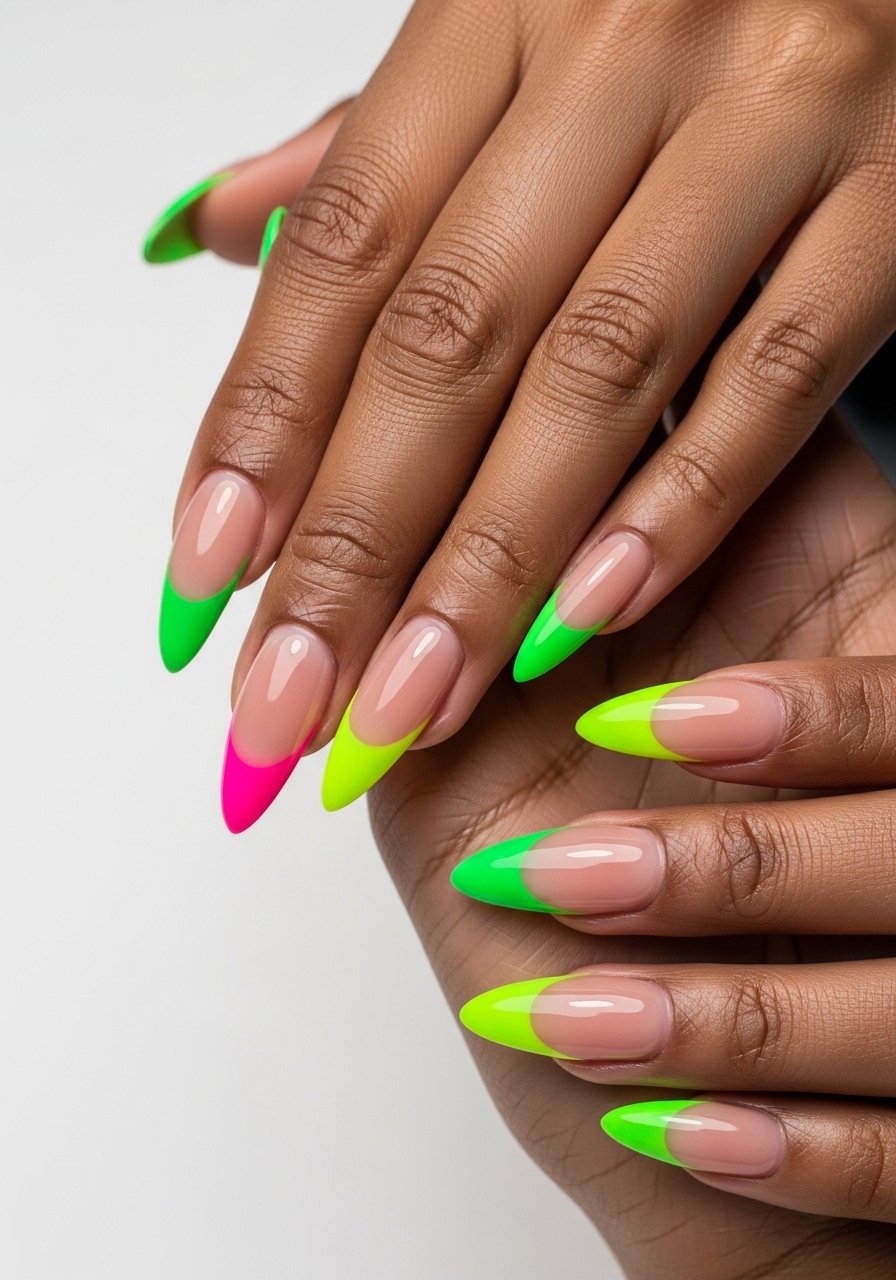
Style/Vibe: Playful contrast
Best For: Weekend looks, medium to long nails
Skill: Beginner
Swap the usual white for a color. Neon orange, cobalt blue, or fuchsia read youthful and modern. I balance one colored tip with a sheer neutral base so the tip reads intentional not loud. Two thin coats of color keep the tip crisp. For safe picks try neon nail polish. This is a quick mood change that needs almost no skill beyond steady application.
Mistake to Avoid: Using opaque base colors under the tip which competes with the colored edge.
9. Matte Tip With Glossy Smile

Style/Vibe: Textural contrast, understated
Best For: Minimalist looks, medium nails
Skill: Intermediate
Texture contrast makes a simple French feel intentional. I apply a matte top coat over the base, then paint a glossy white smile line and seal only the white with a glossy top coat to maintain the contrast. A tiny art brush helps keep the glossy line clean. Try pairing matte top coat with your usual white. It looks editorial without being fussy.
Mistake to Avoid: Applying glossy top coat over the matte base, which removes the matte effect.
10. At-Home Gel French Starter

Style/Vibe: Long-wearing salon finish
Best For: People who want durable finish, any nail length
Skill: Intermediate
Gel lasts, but the kit matters. I learned from a tech who works at a salon downtown to apply thinner layers and flash cure between passes. Use a builder or base gel, one thin white layer, then cure and finish with a tack-free top gel. My go-to starter is a compact LED lamp kit that includes base and top gels. Expect a learning curve but the payoff is chip-free wear for two weeks.
Mistake to Avoid: Painting thick gel layers and under-curing, which causes lifting and sticky residue.
11. Press-On French Fast Fix
Style/Vibe: Instant and neat
Best For: Last-minute, short-term wear
Skill: Beginner
Press-ons are a lifesaver if you need a perfect French in 10 minutes. Choose a set that matches your nail bed curve and file the edges to blend. Use adhesive tabs rather than glue for gentler removal. A quality set looks like polish, try press-on nails set for easy options. This solves spacing and shape problems without technique, especially when you are short on time.
Mistake to Avoid: Choosing a size too wide and filling the gap with glue, which feels bulky and obvious.
12. Scalloped Soft Smile
Style/Vibe: Feminine, subtle detail
Best For: Medium nails, romantic occasions
Skill: Intermediate
Instead of a straight smile line, paint delicate scallops to soften the edge. I use a small dotting tool and connect three tiny arcs, then thin them down with a brush. The detail looks hand-done and unique without being busy. A set of dotting tools is cheap and useful. This is one of those small creative touches other lists miss but it photographs well.
Mistake to Avoid: Making scallops too large so they dominate the nail surface.
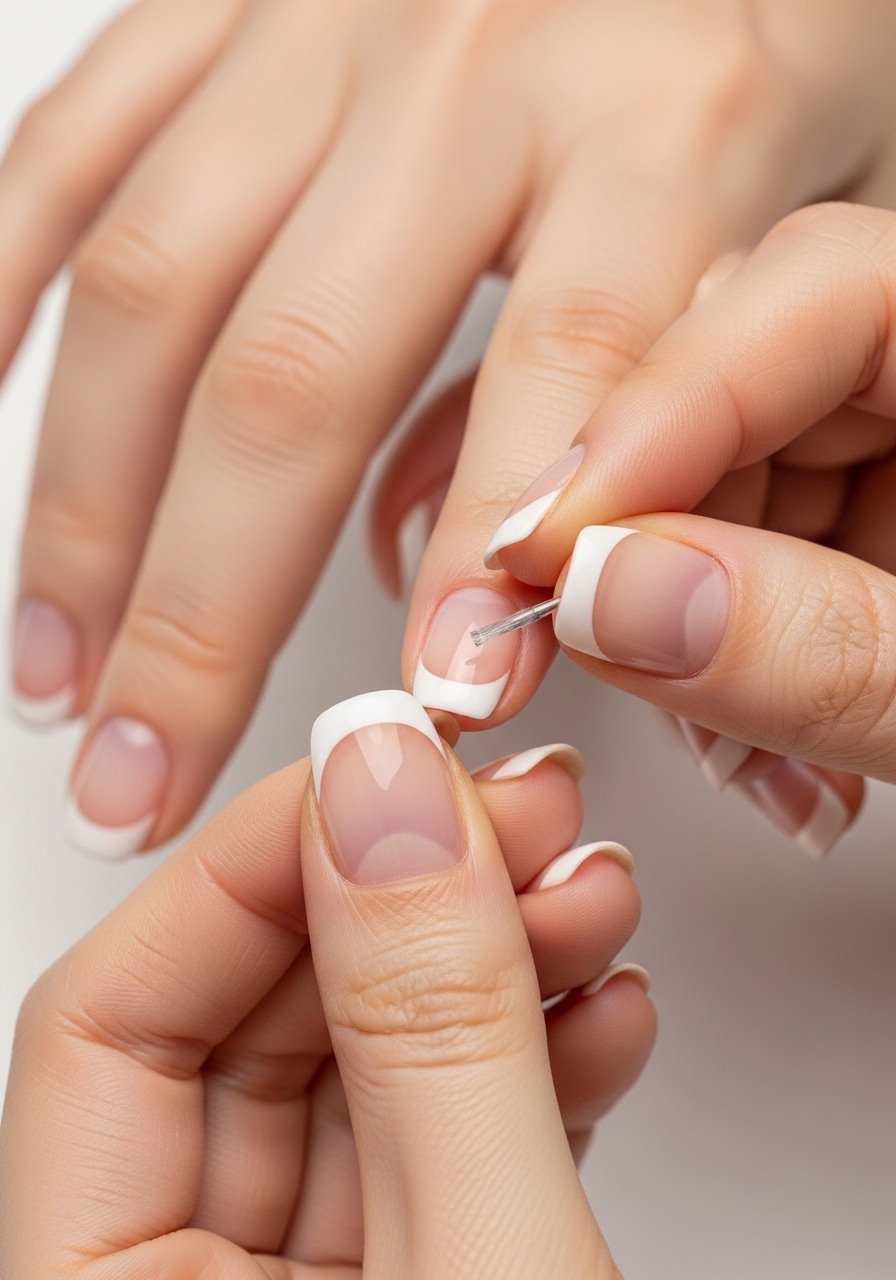
13. Tape Guide For Shaky Hands

Style/Vibe: Practical, beginner-friendly
Best For: People with shaky hands or little time
Skill: Beginner
If your hand vibrates, use tape guides. I use thin striping tape to mark the smile, paint white, and pull the tape away while the white is still tacky. It creates an instant clean line and saves hours of cleanup. Keep a striping tape roll in your kit. This technique fixed the main frustration that keeps people from trying French at home.
Mistake to Avoid: Pressing the tape down too firmly over wet base polish, which peels the base when removed.
14. Chrome or Foil Tip

Style/Vibe: High-shine, modern glam
Best For: Night outs, long nails
Skill: Intermediate
Chrome powder or foil on the tip creates a metallic French that reads luxe. I apply foil adhesive just to the tip area, press chrome, then seal with a strong glossy top coat. Work in thin layers to avoid blistering. A small jar of chrome powder stretches the look across multiple manicures. It is a flashier take that still reads French because it keeps the tip distinct.
Mistake to Avoid: Rubbing chrome powder into the entire nail so the tip loses its contrast.
15. Accent Rhinestone Tip
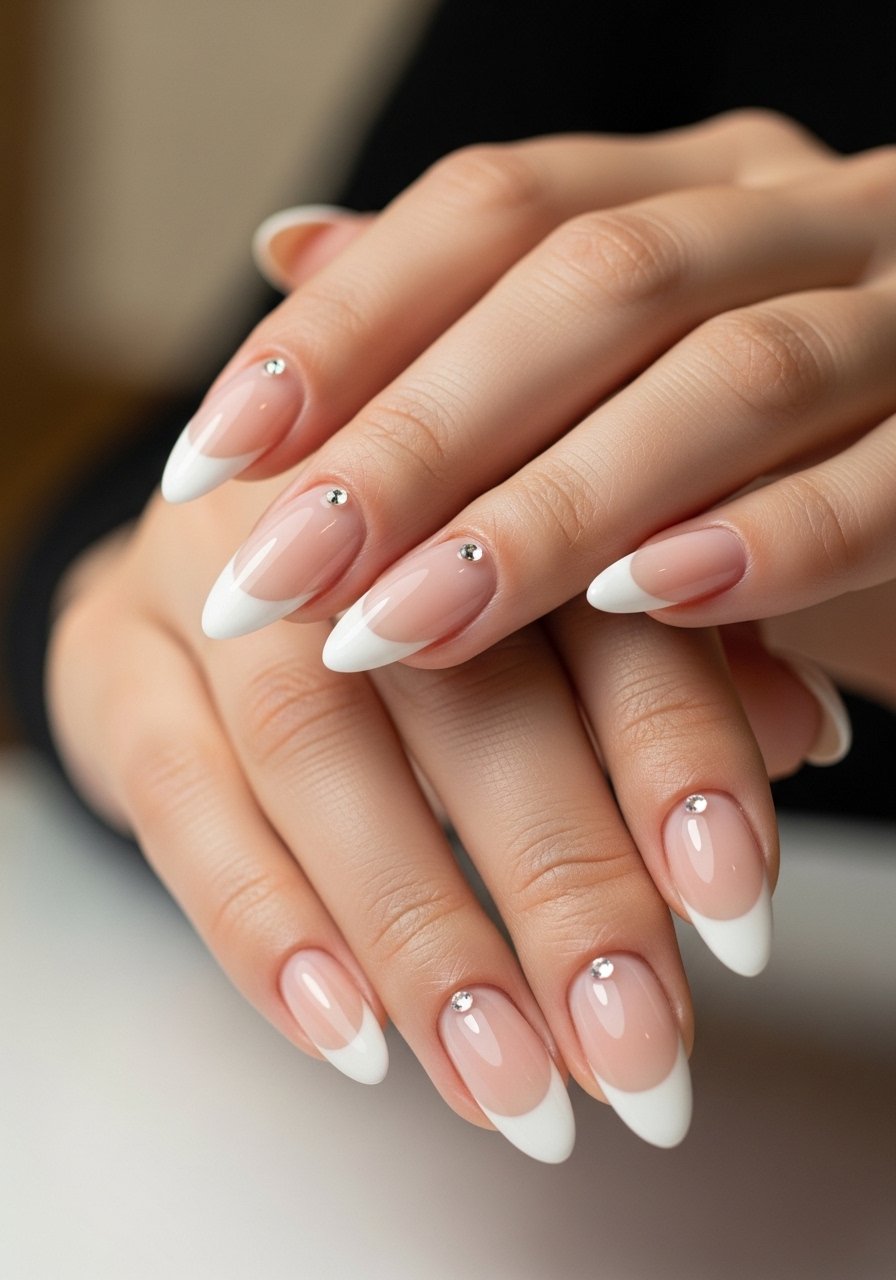
Style/Vibe: Glam with restraint
Best For: Special events, longer nails
Skill: Intermediate
A single rhinestone near the cuticle or at the center of the tip adds sparkle without overpowering the French. I anchor stones with a tiny dab of nail glue, then seal with top coat around but not over the stone. Use a small rhinestone kit for varied sizes. This is the easiest way to make a classic French feel elevated without being over the top.
Mistake to Avoid: Gluing big clusters that peek off the nail and catch on everything.
Mani Moves That Actually Help
Thin coats beat one thick coat every time. Three thin layers of quick-dry top coat look smoother and last longer than one gloopy layer.
Grab latext barrier. Painting around the cuticle, not on it, then peeling the barrier away saves ten to twenty minutes of cleanup.
When you are working on short nails, try a micro smile instead of stretching a full white tip. A white nail art pen gives control and reduces mistakes.
Most people buff aggressively thinking it helps polish adhere. Instead, lightly buff for a matte grip, then clean with rubbing alcohol. A nail buffer block for under $5 keeps your layers even.
If you plan a gel French at home, practice thin gel passes and flash cure between layers. A reliable LED lamp kit and patience make the difference.
