
I kept slathering on whatever conditioner was nearest and wondering why my hair still looked like straw in photos. One rainy afternoon I tried a hot oil wrap and left it on for thirty minutes, and for the first time my mid-length hair actually reflected light instead of eating it. That single habit change started this list of fast fixes I rotate depending on porosity and how many minutes I actually have.
If your hair is thirsty and you want fixes that fit a weeknight, this list is for you. Most ideas cost under $30, with a few salon-style products around $40 to $60. I tested many of these across four hair textures I have styled, and I note porosity where it matters. Expect quick at-home options and a couple that work better with a heat source or salon touch.
1. 10-Minute Hot Oil Wrap for Immediate Shine
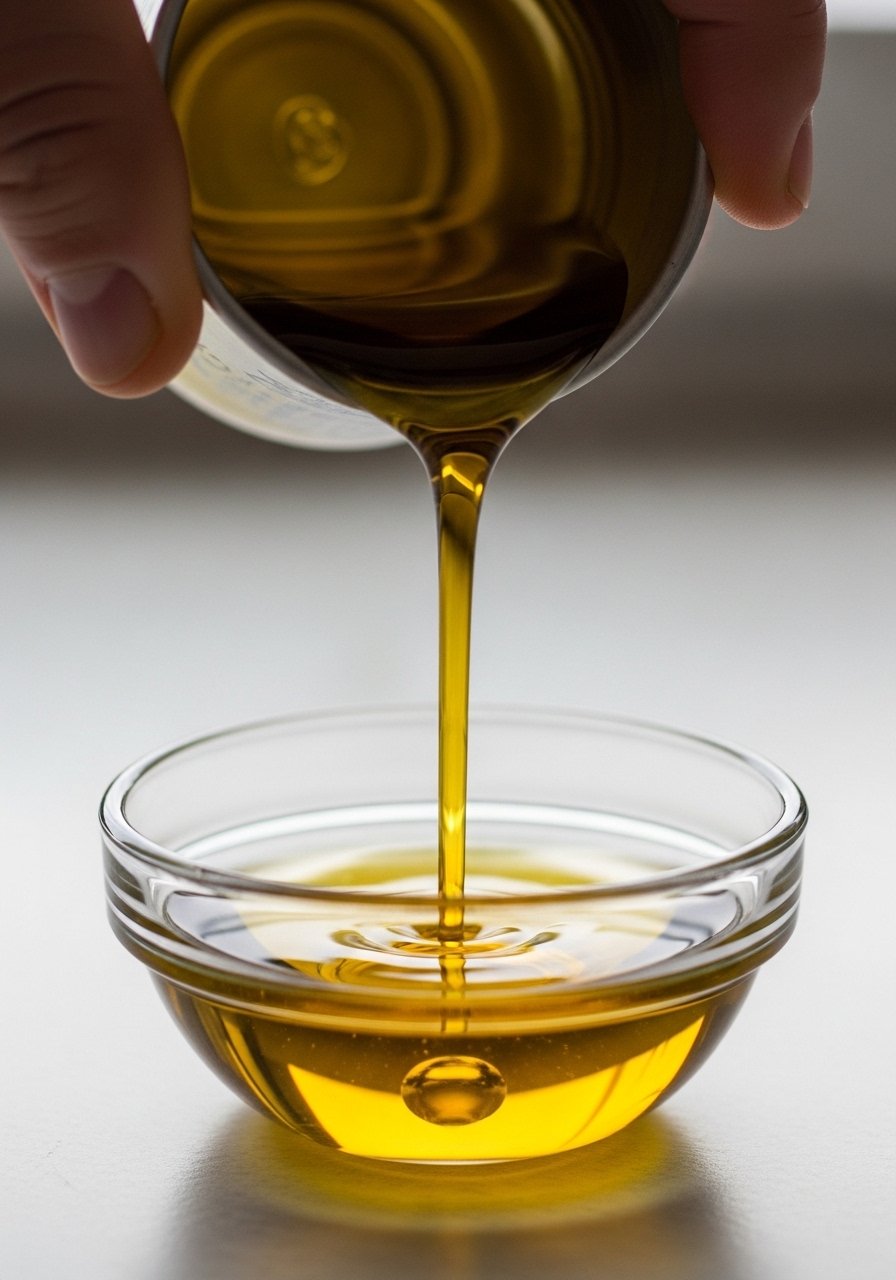
Warm oil opens the cuticle just enough to let moisture sink in, which is why a 10-minute hot oil wrap can change the look of thirsty hair fast. Use 1 tablespoon of coconut oil mixed with 2 tablespoons of your conditioner, warm in a mug for 20 seconds, massage through mid-lengths, and wrap in a warm towel for ten minutes. Works on straight to coily hair, and for high-porosity hair, leave just five minutes to avoid limp results. Try organic coconut oil for a lightweight finish.
Mistake to Avoid: Don’t heat oil in a microwave for more than 30 seconds, test temperature on your wrist first.
2. Overnight Deep Mask for Next-Morning Smoother Strands

Overnight masks let proteins and lipids do their work while you sleep. Use a pea-sized amount of a rich mask like Aussie 3 Minute Miracle Moist Deep Conditioner as a base, then add 1 teaspoon of argan oil if your ends are dry. Apply sparingly to lengths and sleep on a silk pillowcase to prevent abrasion. Best for thick, curly, or dry chemically treated hair. For low-porosity hair, smear on damp hair so product absorbs instead of sitting on top.
Mistake to Avoid: Rubbing heavy product into roots overnight, which can create buildup and weigh hair down.
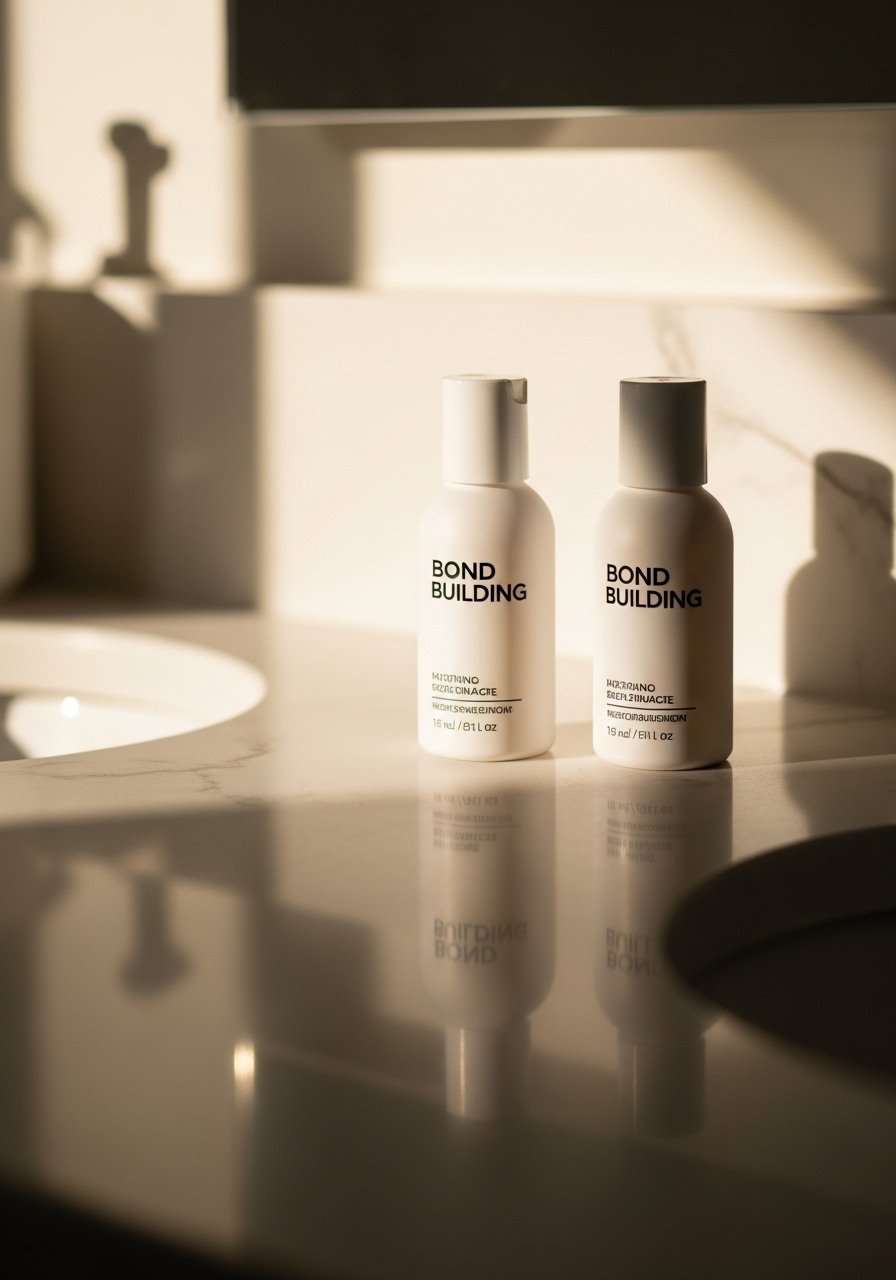
3. Quick Bond-Repair Treatment Before Styling

If color or heat has left hair fragile, a bond-repair step before styling helps. Apply 1 to 2 pumps of a bond-builder treatment to towel-dried hair, comb through, and air-dry for five minutes before heat. Products like Olaplex No. 3 work across hair types, but use it weekly for maintenance. It creates a felt improvement in texture within one use, especially on mid-lengths and ends that tend to look fuzzy in photos.
Mistake to Avoid: Leaving bond products on only one minute; most need at least ten minutes to work.
4. Apple Cider Vinegar Rinse to Restore Lived-In Shine
A 1:4 ratio of apple cider vinegar to water clarifies while flattening cuticle scales so light reflects better. Pour slowly over hair after shampoo, leave for one minute, then rinse with cool water. It helps dull, product-heavy hair and reduces flaky scalps. Use once every one to two weeks for most people. Pair this with a lightweight conditioner if you have fine hair so you do not strip needed moisture.
Mistake to Avoid: Using undiluted vinegar, which can irritate the scalp and dry out ends.
5. Gelatin Protein Boost for Temporary Plump
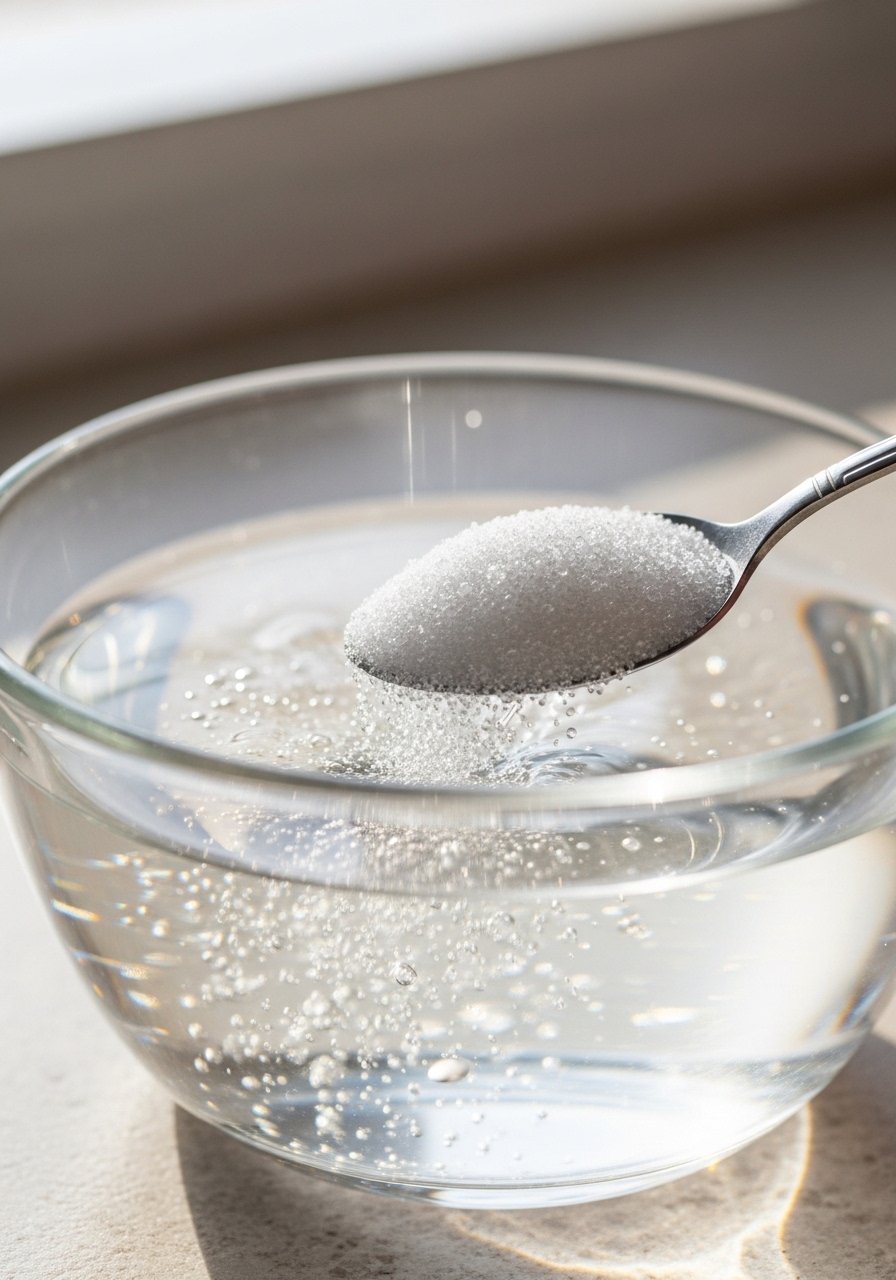
For a quick protein boost mix 1 teaspoon unflavored gelatin with 2 tablespoons warm water, dissolve, then add to 3 tablespoons of conditioner. Apply to damp hair for five to eight minutes and rinse. It fills raised cuticles, giving the illusion of thicker, smoother strands for a day or two. Best for medium to low porosity hair that needs structure before a special event. Test on a thin strand first to avoid stiffness on already brittle hair.
Mistake to Avoid: Overdoing protein on fragile hair, which can make it feel crunchy instead of bouncy.
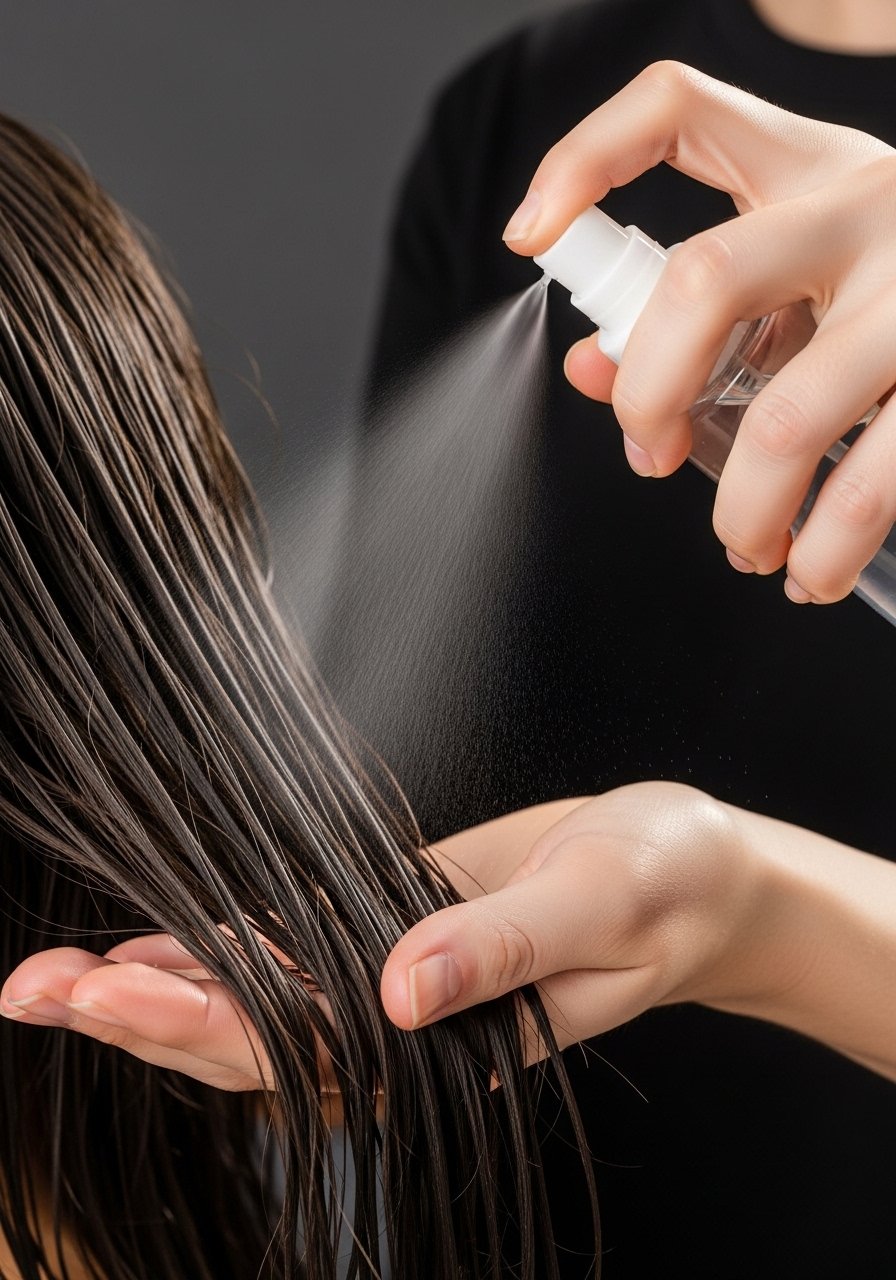
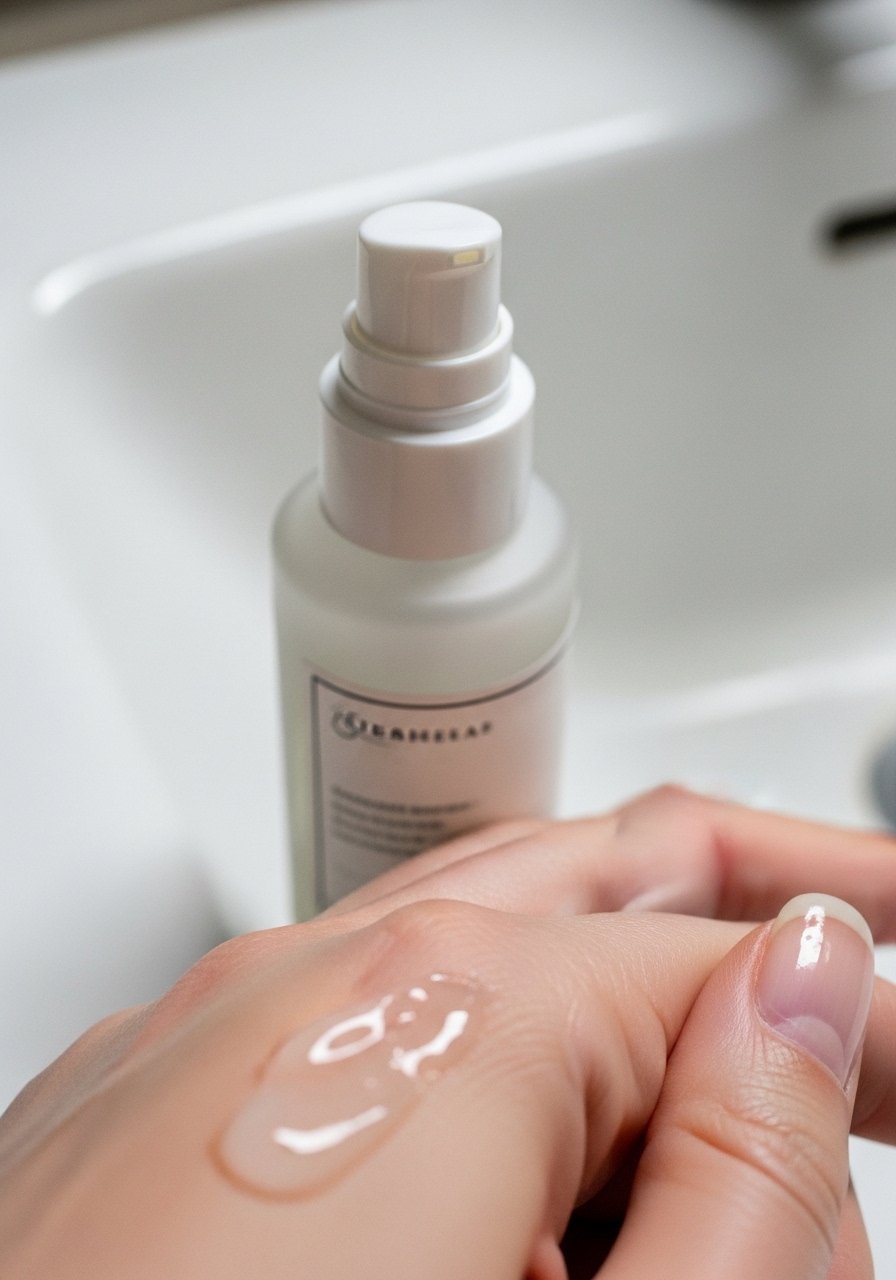
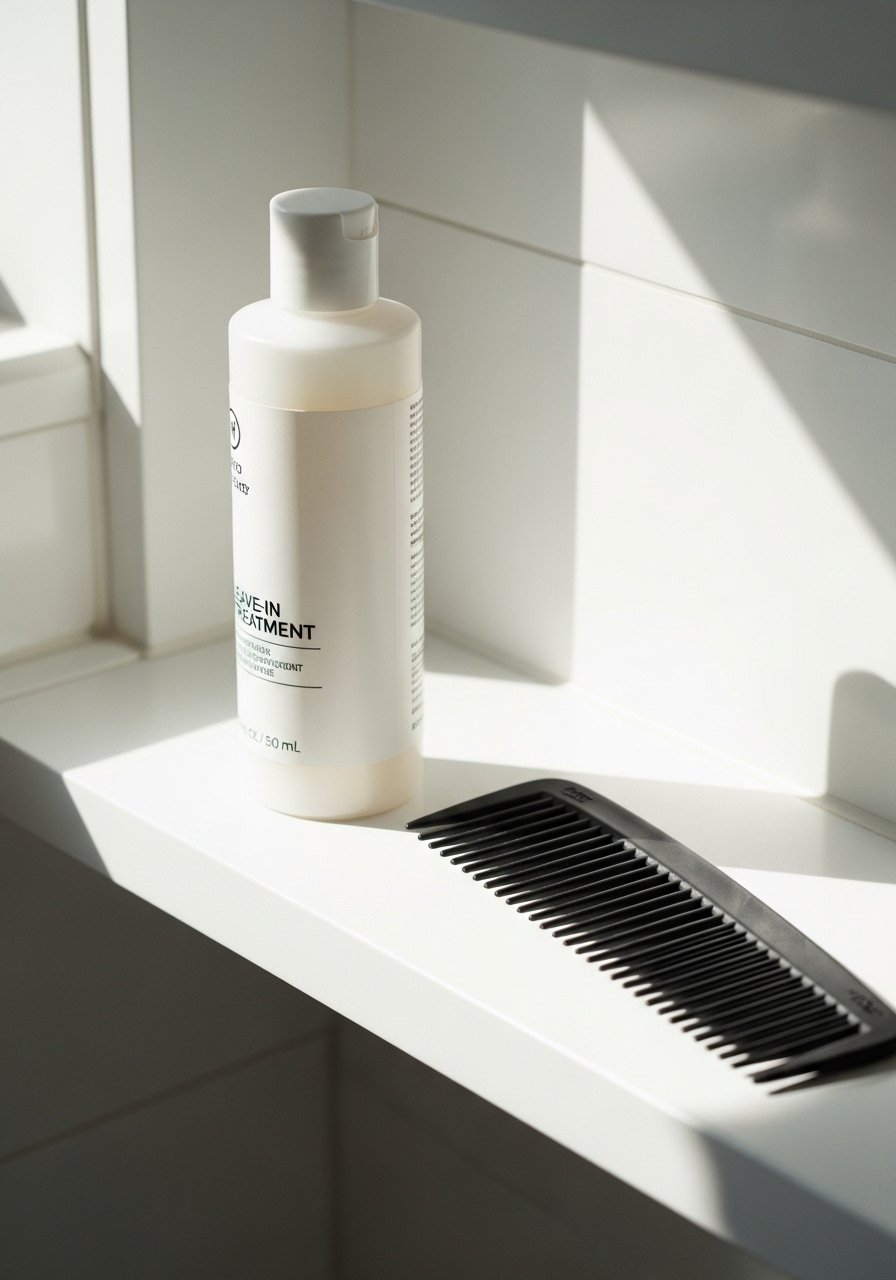
6. Leave-In Spray With Hyaluronic Acid for Instant Plump

A leave-in with hyaluronic acid or glycerin draws moisture into the hair shaft, making hair look fresher fast. Spray 1 to 2 pumps on damp hair, focusing mid-lengths to ends, then comb through with a wide-tooth comb. This lightweight leave-in spray works on fine to wavy hair without weighing it down. For high-humidity days use sparingly to avoid frizz.
Mistake to Avoid: Spraying near the scalp for volume, which can create buildup and flatten roots.
7. Hot Towel Steam for Better Mask Penetration
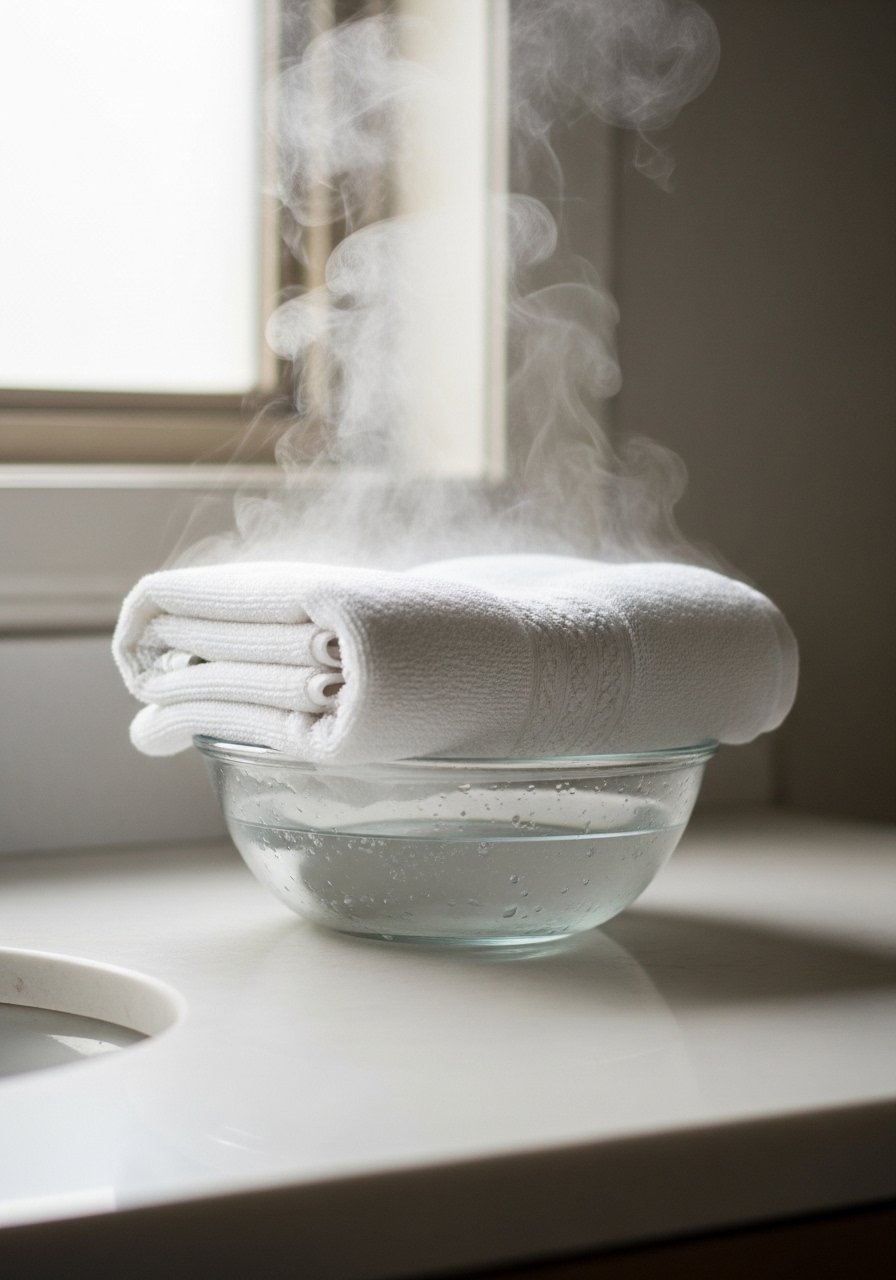
Turn a five-minute mask into a salon-level treatment by topping it with a hot towel. Heat a damp towel in the dryer for 90 seconds, wrap around a masked head for ten minutes, and let steam open the cuticle. This helps ingredients penetrate, especially when using heavier oils or butters. It is ideal for thick or coarse hair that needs more than a quick rinse. For thin hair reduce time to five minutes to prevent limpness.
Mistake to Avoid: Using scalding towels, which can overheat scalp and damage fragile strands.
8. Clarifying Shampoo Micro-Dose to Remove Build-Up
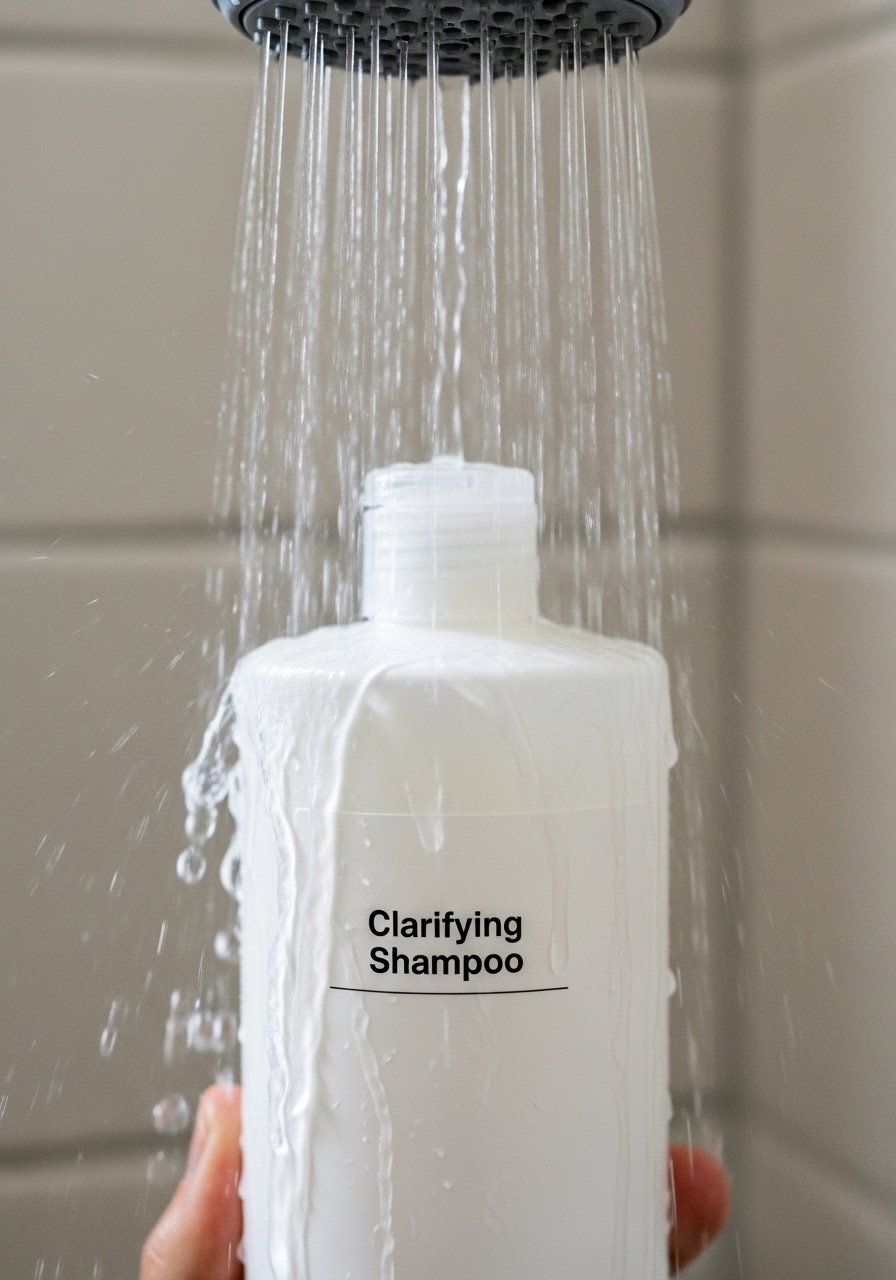
If serums and masks stop seeming to work, a clarifying shampoo once every 10 to 14 days resets the canvas. Use a quarter-sized amount, lather at the scalp only, and rinse thoroughly. Follow with a deep conditioner on the lengths. Neutrogena Anti-Residue Clarifying Shampoo is a good option for occasional use. This fixes the problem where hair looks dull even after care.
Mistake to Avoid: Overusing clarifier weekly, which strips natural oils and triggers more dryness.
9. Cold Water Rinse to Seal and Smooth

A 30-second cold water rinse at the end of your wash routine flattens the cuticle and boosts shine. It is a quick trick that changes how light hits your hair in photos. This technique is universal, though fine hair benefits most because it reduces frizz without adding product. Do it after conditioner, and follow with a leave-in if you need more slip for detangling.
Mistake to Avoid: Turning water ice cold immediately, which is uncomfortable and unnecessary for effect.
10. Olaplex Alternative for Budget Bonding
If Olaplex is out of budget, a DIY bond-support step using a diluted protein conditioner can help. Mix 1 part protein conditioner with 3 parts regular conditioner and apply for 10 minutes. Rinse gently and style. It smooths razored ends and provides temporary repair. Try a protein conditioner from the drugstore aisle for an affordable version. Works best on hair with light chemical damage.
Mistake to Avoid: Leaving protein too long on already brittle hair, which can cause breakage.
11. Silk Pillowcase and Satin Scarf Overnight Combo

Switching to silk or satin reduces friction that strips moisture while you sleep. Use a silk pillowcase and tie a loose satin scarf around mid-lengths if you toss at night. The result is less frizz and fewer split ends showing the next morning. A single investment like a silk pillowcase often visibly improves hair by day three. Try a mulberry silk pillowcase for a smoother sleep surface.
Mistake to Avoid: Tying scarves too tight overnight, which causes creases and tension.
12. DIY Avocado and Banana Mask for Instant Softness
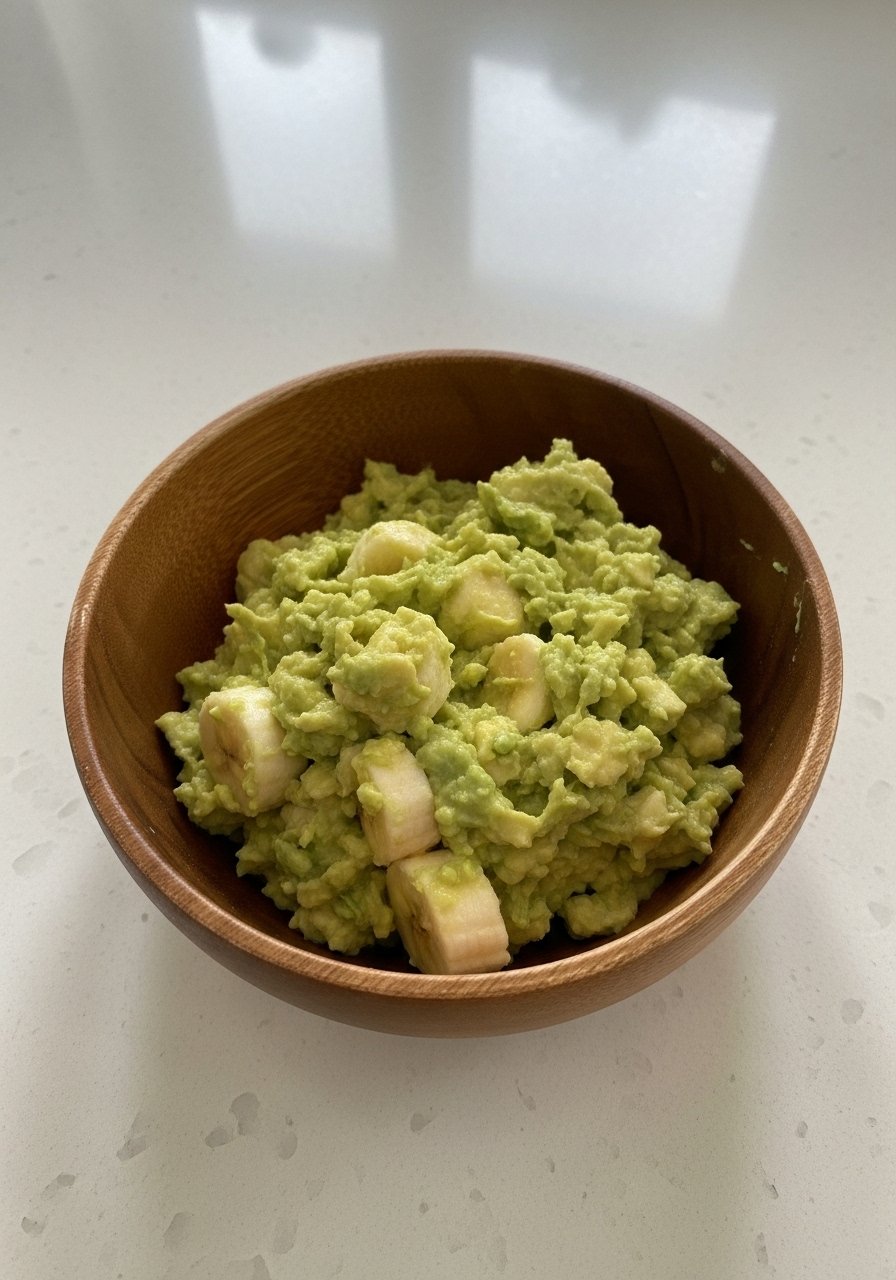
Mash half an avocado with half a banana and 1 tablespoon of olive oil for a nutrient-rich mask. Apply to damp hair for 15 minutes, then rinse. The fats and vitamins add softness quickly, and the texture makes it easy to spread. Use on medium to thick hair. For fine hair use only a tablespoon applied to ends to avoid heaviness. This is a pantry-friendly alternative when a store-bought mask is not on hand.
Mistake to Avoid: Using whole fruit on dry hair without emulsifying, which makes rinsing harder.
13. Scalp Exfoliation for Better Product Absorption

A gentle scalp scrub removes dead skin and product film, allowing treatments to reach hair roots and follicles. Use a sugar-based scrub one time every two weeks, massage for 60 seconds, then shampoo. It helps itchy, flaky scalps and allows leave-ins to work better. This scalp scrub pairs well with a light oil massage afterward. Avoid on irritated or broken skin.
Mistake to Avoid: Scrubbing daily, which can inflame the scalp and cause more flaking.
14. Heat Protectant Spray With Lightweight Polymers
A good heat protectant applied evenly prevents moisture from escaping when you blow-dry or flat iron. Spray 4 to 6 inches from hair and comb through to distribute. For straight and fine hair choose a lightweight formula, and for coarse or curly hair choose richer oils or serums after the protectant. A silicone-free heat spray reduces dryness without weighing hair down.
Mistake to Avoid: Applying protectant only to the ends, which leaves mid-lengths vulnerable to heat damage.
15. Protein-Then-Moisture Sequence for Balanced Results
When hair is both weak and dry, do a protein treatment first followed by a rich conditioner. Wait five to ten minutes between steps so the protein can set, then finish with moisture to soften. That sequencing prevents the crunchiness that comes from oversupplying protein. This method works for chemically treated hair and is one of the competitive gaps many articles skip.
Mistake to Avoid: Skipping the moisture step, which leaves hair stiff after protein treatment.
16. Overnight Serum for Split End Camouflage
A silicone-free evening serum applied to ends smooths frayed tips so hair looks healthy until your next trim. Use 1 pump on the ends of shoulder-length hair, and less for shorter cuts. Serums with light oils like argan or meadowfoam add gloss without buildup. A lightweight argan oil serum works well for daytime and night.
Mistake to Avoid: Applying serum to roots for shine, which makes hair appear greasy by noon.
17. Steam Cap Session for Deep Hydration

A steam cap kicks a five-minute mask into deep mode by forcing moisture into the shaft. Heat for 10 to 15 minutes depending on thickness. It is especially useful for high-porosity hair that drinks products quickly. Use with a water-based mask for best results. A rechargeable steam cap is a small splurge that pays off for regular maintenance.
Mistake to Avoid: Using steam on very damaged hair without a bond product first, which can open cuticles too wide.
18. Low-Heat Blow-Dry With a Diffuser for Texture Control
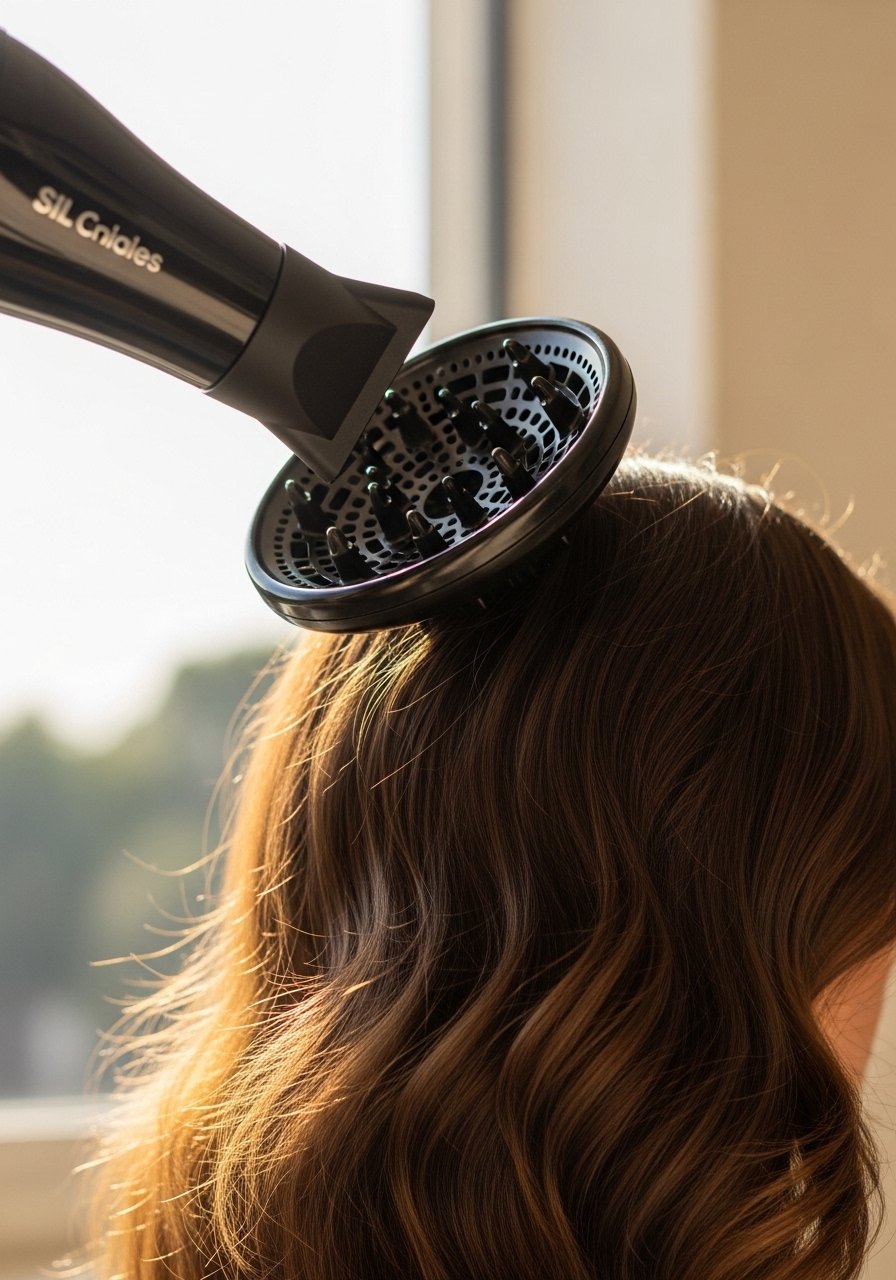
Switch to low heat and a diffuser to dry hair without stripping moisture. Cup sections and hold the diffuser near roots for five to eight seconds per area. This method preserves curl pattern and reduces frizz. It is the heat-free alternative to straightening for many curl types. Use a heat protectant and finish with a small amount of cream for hold. A universal diffuser is inexpensive and versatile.
Mistake to Avoid: Cranking the heat and rushing the process, which causes long-term dryness.
19. DIY Honey and Olive Oil Gloss for Immediate Sheen
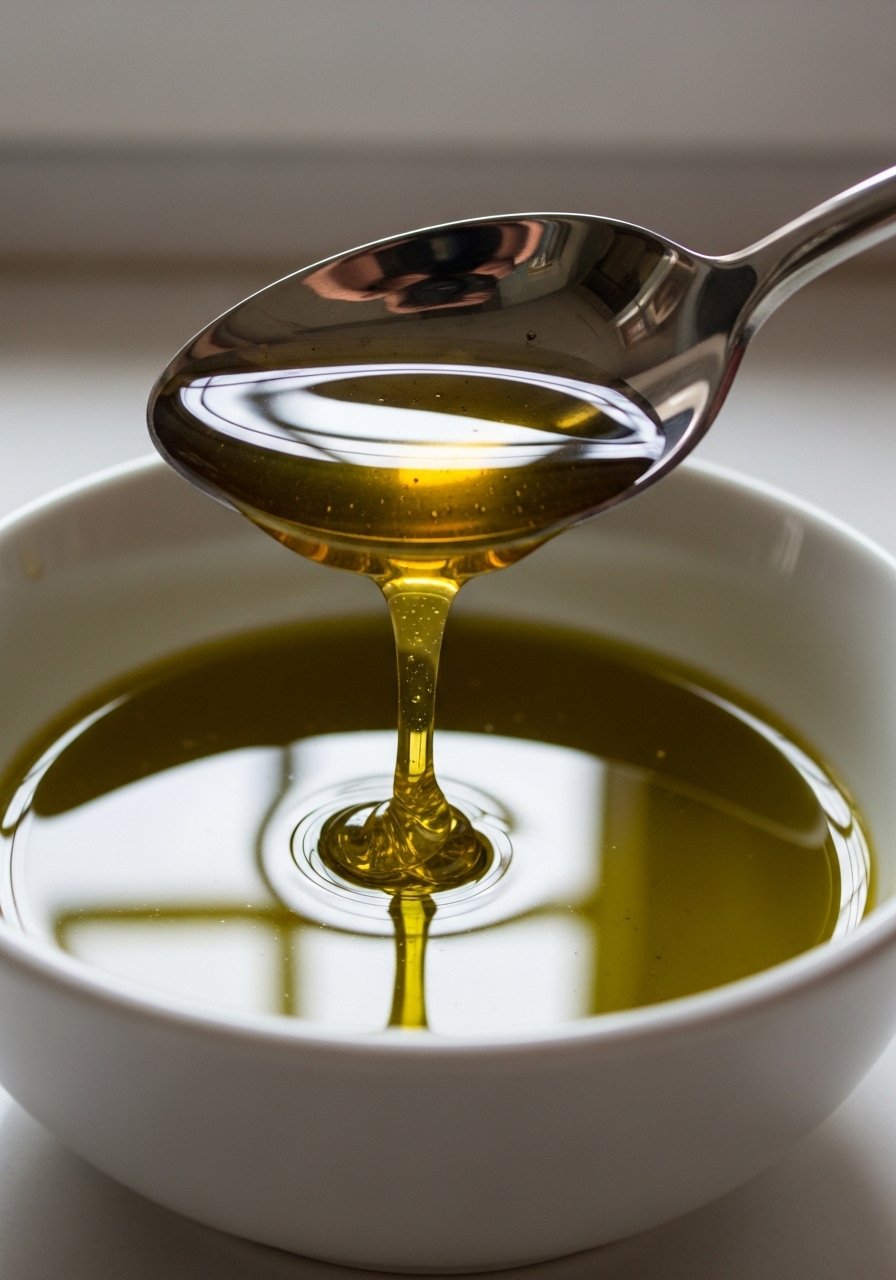
Mix 1 tablespoon honey with 2 tablespoons olive oil, apply to damp hair for 15 minutes, and rinse. Honey acts as a humectant, drawing moisture in, while olive oil seals in softness. It is a fast gloss for dull, color-treated hair. Use less oil on fine hair to avoid weighing it down. This pantry trick is one of the simple swaps I reach for when salon time is not an option.
Mistake to Avoid: Using raw honey without diluting, which is sticky and harder to wash out.
20. Microfiber Plopping for Faster Air-Dry Without Frizz

For curly or wavy hair, use a microfiber towel to scrunch excess water and plop for 10 minutes. This reduces drying time and preserves pattern without roughing the cuticle. Combine with a leave-in or light gel for hold. A two-pack of microfiber hair towels is under $20 and saves styling time on busy mornings.
Mistake to Avoid: Rubbing hair with a cotton towel, which roughs the surface and increases frizz.
21. Weekly Olaplex-Style At-Home Maintenance
Set a weekly maintenance routine with a bond-building or restorative mask. Apply on washed, towel-dried hair, leave for 10 to 30 minutes depending on product instructions, then rinse. Doing this weekly keeps damage from accumulating and reduces the need for drastic salon fixes. Pair with trimming every 8 to 12 weeks for best results. A restorative at-home treatment fits into this schedule.
Mistake to Avoid: Treating only when hair looks terrible, which makes improvement harder to achieve.
22. Water Softener Tip for Hard-Water Dryness

Hard water can leave mineral deposits that make hair feel dry and straw-like. Install a simple shower filter or use chelating shampoo once every two weeks to remove buildup. A small shower filter can decrease that chalky feeling overnight. For renters, a portable filter is renter-friendly and easy to install. A shower filter for hair is a practical fix many guides miss.
Mistake to Avoid: Assuming product alone will fix mineral buildup without clarifying or filtering.
23. Emergency Salon-Style Gloss at Home
A quick gloss treatment at home can add reflective sheen and smooth the surface for up to six washes. Apply a color gloss or clear gloss according to directions for ten to fifteen minutes, then rinse. It is ideal before an event. Use a demi-permanent gloss if you want subtle tone correction. A clear hair gloss gives an instant camera-ready finish.
Mistake to Avoid: Leaving gloss on too long for lightly colored hair, which can slightly shift tone.
Your Hair Styling Kit
- Honestly the best heat protectant I have used. Lightweight heat protectant spray (~$12-18). Use before any hot tool.
- For quick deep conditioning, try Aussie 3 Minute Miracle Moist Deep Conditioner (~$6-10). Budget friendly and effective.
- For bond repair, Olaplex No. 3 Hair Perfector (~$28-40). Use weekly for damaged hair.
- Night care sorted with a mulberry silk pillowcase (~$25-60). Reduces friction and breakage.
- Easy steam sessions with a rechargeable steam hair cap (~$30-60) for deep hydration.
- For clarifying, Neutrogena Anti-Residue Clarifying Shampoo (~$6-9). Use every 10 to 14 days.
- Always have a wide-tooth detangling comb (~$5-12) to distribute treatments gently.
- Quick gloss at home with clear hair gloss treatment (~$15-30). Adds shine before events.
- Home staple oils like organic coconut oil (~$8-15) for hot oil wraps.
- For curls, a universal hair diffuser (~$10-20) preserves pattern.
- For towels, microfiber hair towel set of two (~$12-18) cuts drying time.
- Keep a scalp exfoliating scrub (~$10-20) for occasional use.
Hair Styling Tips Worth Knowing
Thin coats beat one thick coat every time. Three light layers of serum applied only to ends let shine build without greasiness. Try a lightweight argan oil serum for a non-greasy finish.
Grab a microfiber towel set of two for about $14. Plopping curls and blotting straight hair saves styling time and reduces friction damage.
Curly hair air-dries best plopped in microfiber not wrapped in cotton. This two-pack of turbans is under $15 and cuts dry time without roughing the cuticle.
Observation-first: A quick rinse with cool water after conditioning makes a bigger visual difference than extra product. Keep a shower filter handy, like a shower filter for hard water, if your water is mineral-heavy.
Contrast-first: Instead of one heavy mask, alternate a protein treatment one week with a moisturizing mask the next. Use a clarifying shampoo occasionally to reset product buildup.
