
I kept painting butter yellow nails and walking out annoyed, because in photos they read like a soft pastry and in real life they looked neon under office lights. After a salon tech showed me one small change, the color stopped fighting my skin tone and started reading like a warm neutral instead of a highlighter. That afternoon I unpacked a different base, switched my brush pressure, and the whole mani finally felt like mine.
These are simple almond nail ideas aimed at someone who does most of their at-home manis and wants durable salon-adjacent results. Expect beginner to intermediate skill, budget picks alongside splurge polish finds, and time frames written as quick wins versus an involved weekend set. Most looks here work on natural or gel nails and are described with short, medium, and long length notes so you can pick what fits your hands.
1. Soft Full-Cover Butter Coat

Style/Vibe: Clean creamy yellow
Best For: Short nails, everyday wear
Skill: Beginner
Start with a thin ridge-filling base, then two thin coats of a true butter yellow polish for even coverage. I learned to press the brush flatter for the first 60 percent of the stroke and gently pull to the tip to avoid pooling. On natural nails, one thin coat of ridge filler plus two thin color coats dries in about 12 to 18 minutes total. Pair with a glossy top coat for that soft pastry look. I link a dependable base and a creamy butter shade below.
Try a ridge-filling base and butter yellow nail polish for a simple at-home mani.
Mistake to Avoid: Painting one thick coat to save time, which leaves streaks and long dry times.
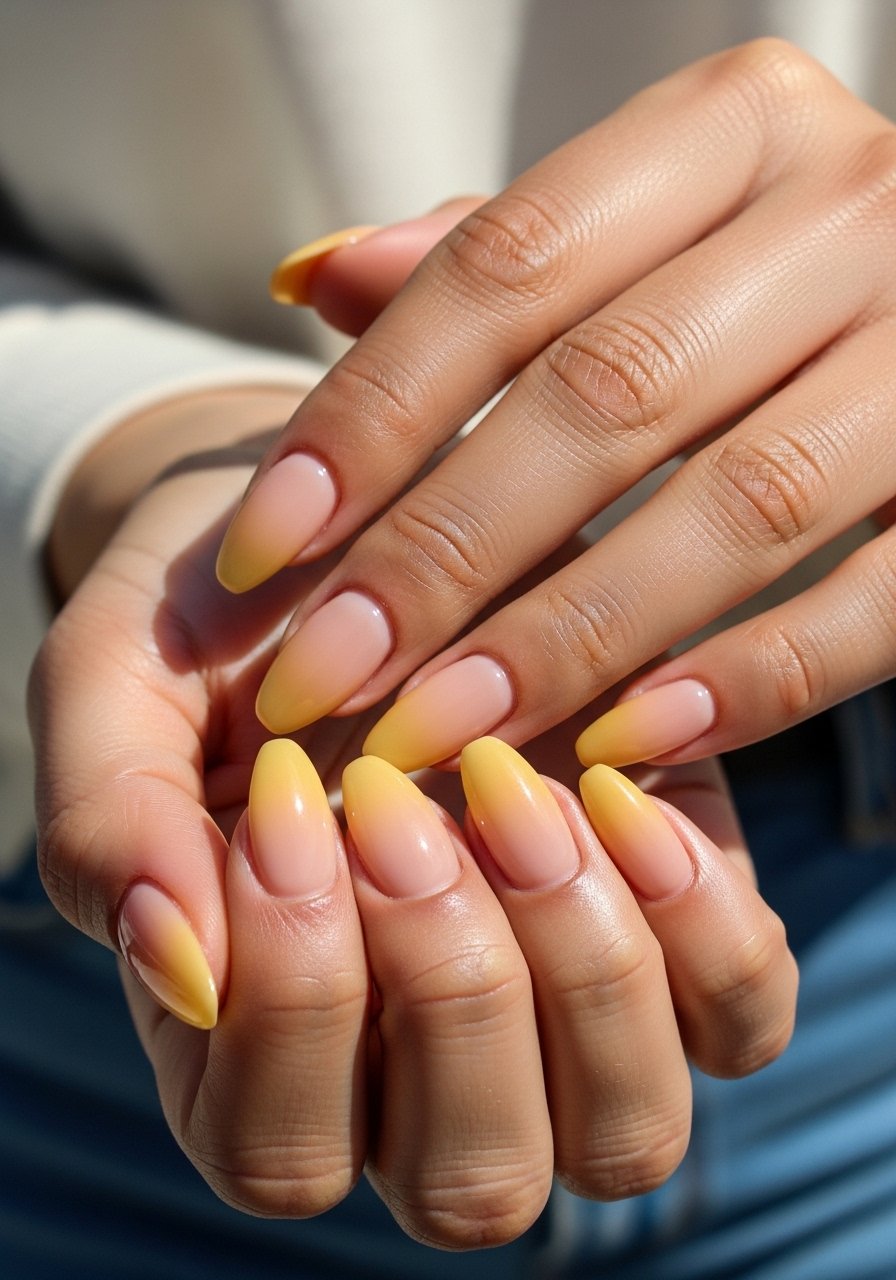
2. Sheer Milk Butter Gradient

Style/Vibe: Soft milky ombre
Best For: Medium nails, work-safe looks
Skill: Intermediate
This uses a 70 to 30 mix of sheer neutral base to butter yellow for a translucent milky finish. I keep a small drop of opaque yellow on a palette and dilute with a clear sheer polish, then apply over a single sheer nude base. The result reads like a soft wash that warms the nail without screaming color. It takes patience and thin layers. A small makeup sponge and a light dabbing motion gives the smooth gradient without harsh lines.
Sheer base polish and small cosmetic sponge make this easier.
Mistake to Avoid: Dragging big sponge pieces across the nail, which leaves blotchy texture.
3. Glossy Tip Almond Accent
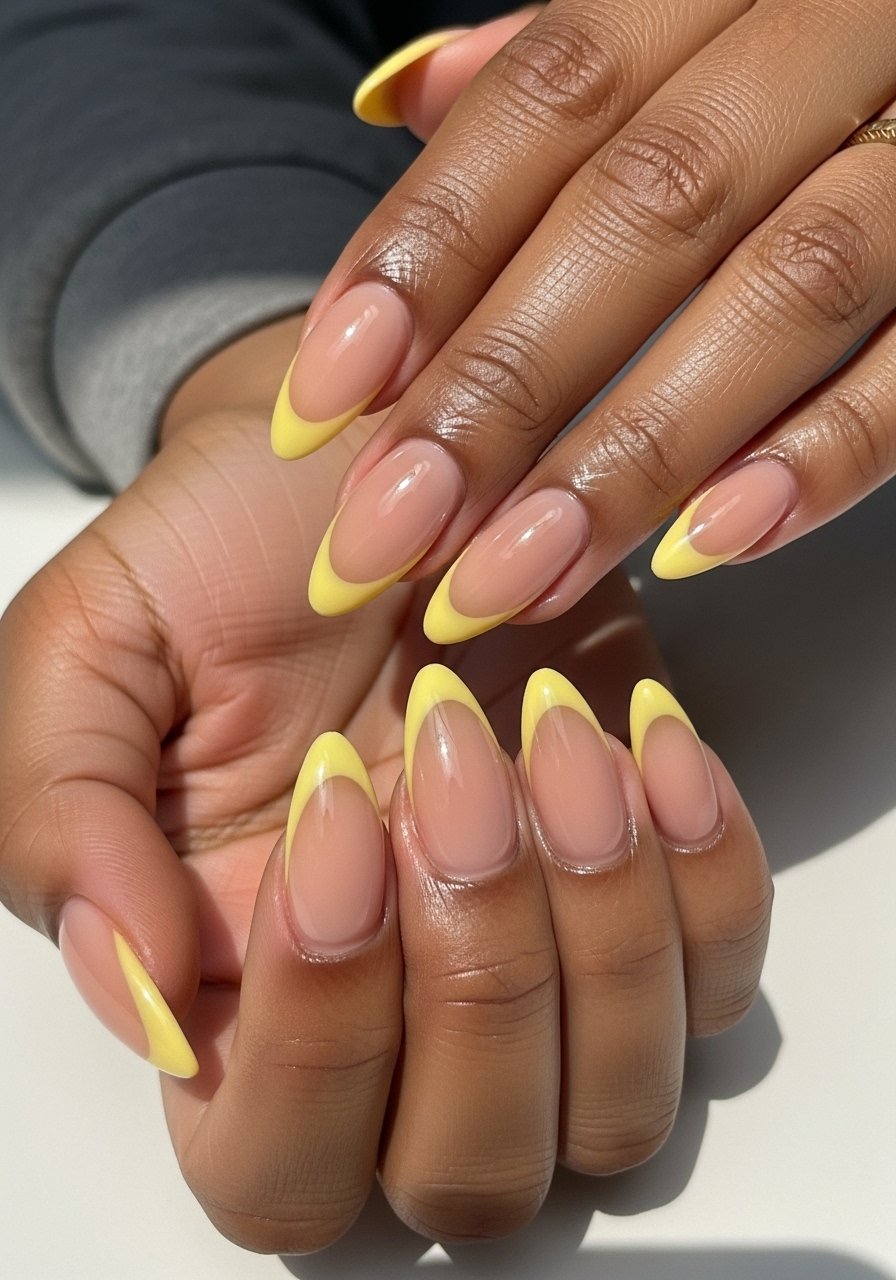
Style/Vibe: Modern tipped accent
Best For: Long nails, nights out
Skill: Beginner to intermediate
Paint a nude or sheer base and use tape or a steady hand to create a soft V-shaped tip in butter yellow. The trick is a very glossy top coat just on the tip, applied after the base is fully cured. That contrast of satin nude and glossy butter creates dimension without extra hardware. Two thin coats on the tip, cured or air-dried completely, then one thicker gloss layer just over the yellow. Works well on natural and gel.
Sheer nude polish and quick-dry top coat are worth having.
Mistake to Avoid: Applying glossy top coat across the whole nail first, which blurs the tip contrast.
4. Matte Butter With Shine Bar
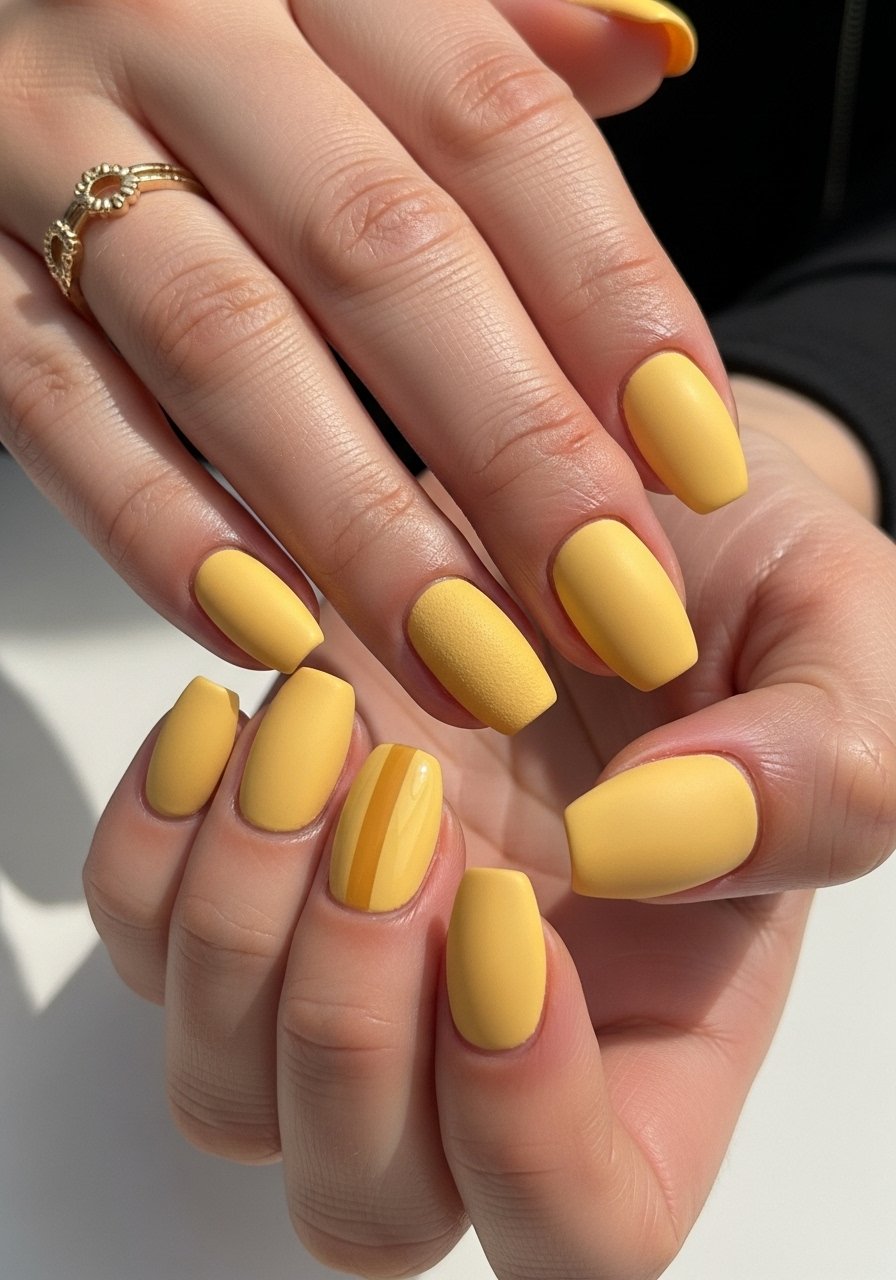
Style/Vibe: Textural contrast
Best For: Medium nails, creative office looks
Skill: Intermediate
Matte butter yellow on most fingers with a single glossy "shine bar" down the center of one nail feels intentional in photos and real life. Use a matte top coat on all nails, then with a nail art brush paint a 1.5 mm glossy strip on the accent nail only. That thin glossy band catches light and prevents the matte finish from looking flat in photos. A salon tech taught me to wait 90 seconds after matte top coat before adding the gloss to avoid lifting.
Matte top coat and nail art brush will do this.
Mistake to Avoid: Rushing the matte coat and painting the gloss immediately, which causes bubbling.
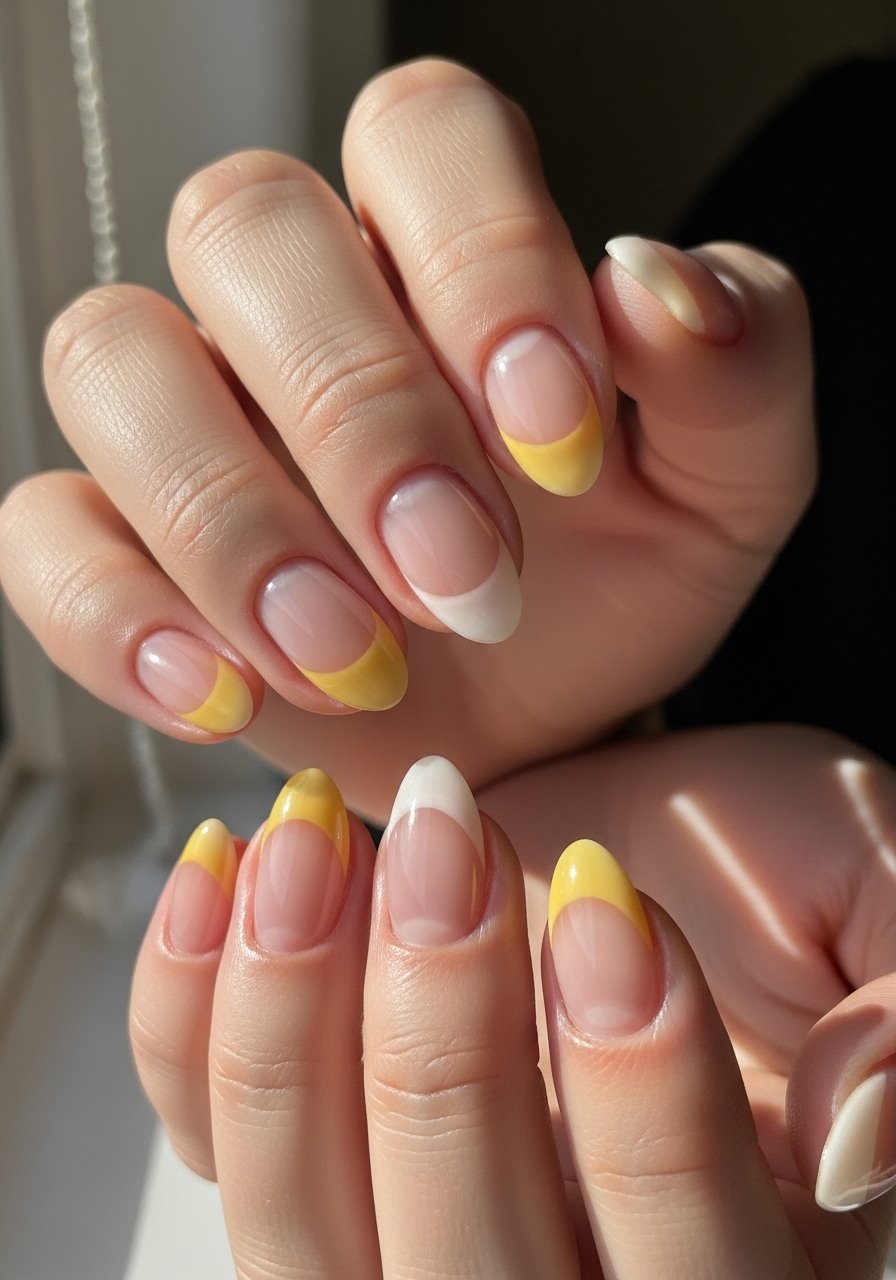
5. Two-Tone Buttery French Frame
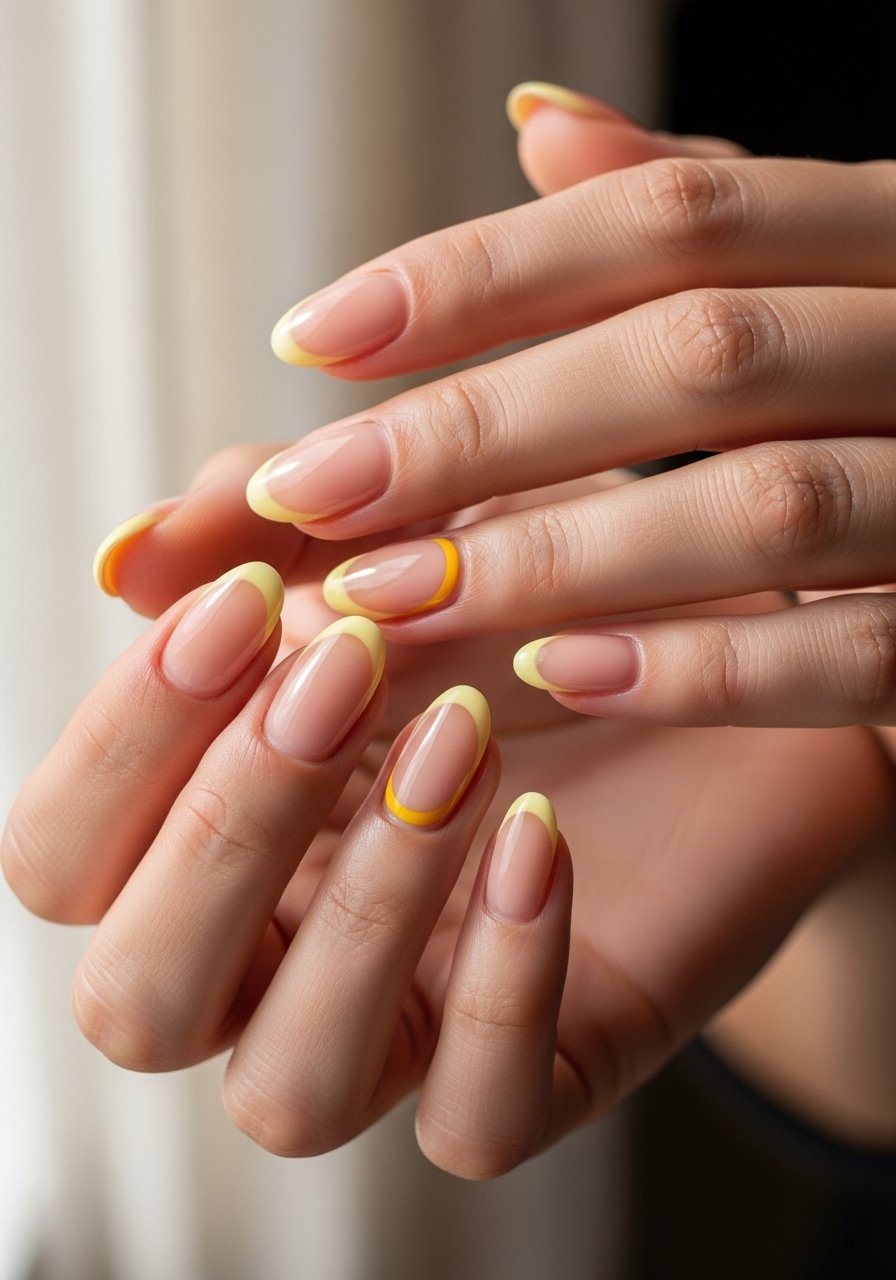
Style/Vibe: Updated French tip
Best For: Short nails, polished looks
Skill: Beginner
Swap the classic white for a butter yellow smile line and add a second thinner line in a warm beige just below it. The tiny second line grounds the yellow so it reads soft instead of bright. Keep the smile line at roughly 1.5 to 2 mm wide for short nails. Use a fine brush and paint two thin layers for opacity. This look wears well and only needs touch-ups every 10 to 14 days depending on growth.
Fine nail lining brush and warm beige polish are helpful.
Mistake to Avoid: Making the yellow line too thick, which overwhelms short nail proportions.
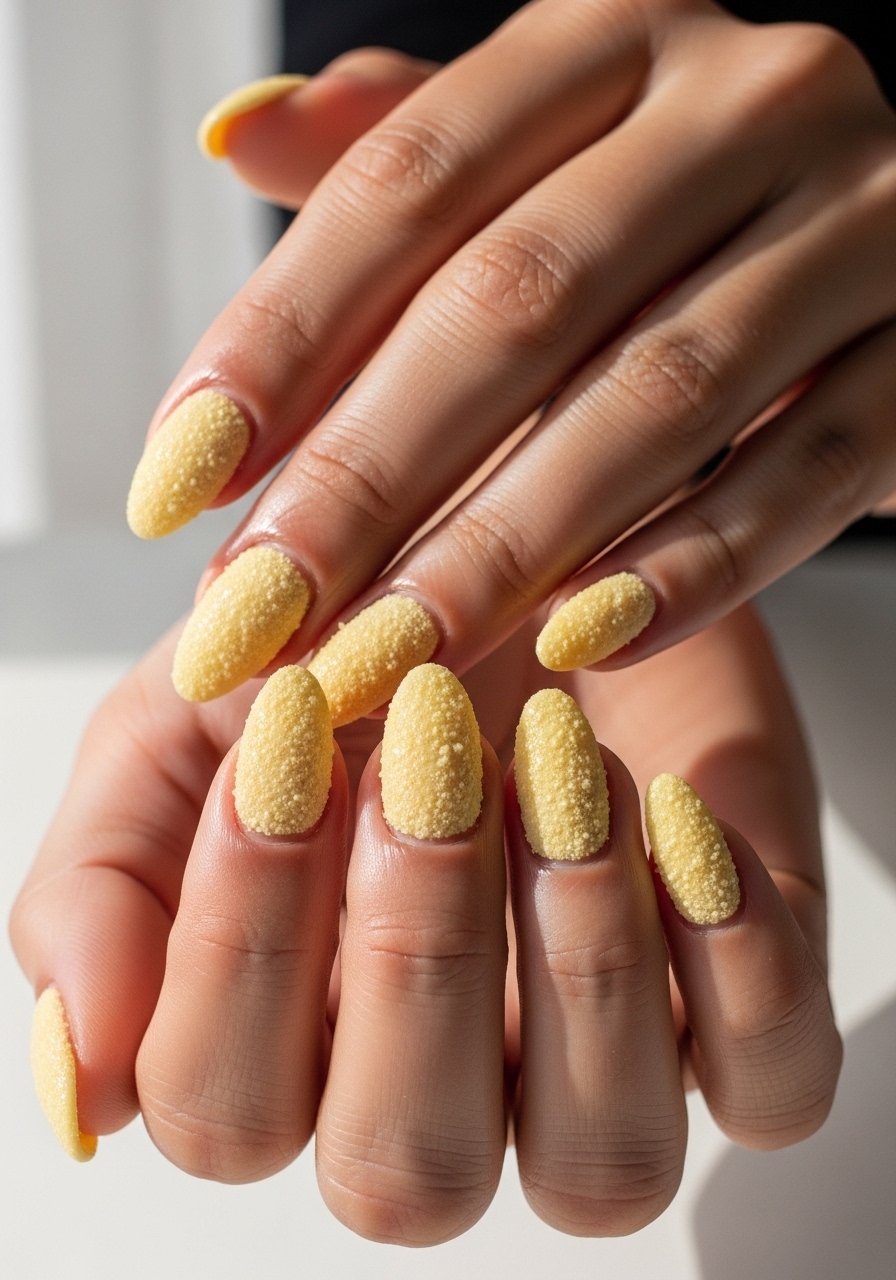
6. Speckled Butter Confetti Top

Style/Vibe: Playful textured top
Best For: Medium nails, casual wear
Skill: Beginner
Use a clear speckle top coat or mix micro glitter into a clear top and apply over butter yellow. I like using one thin base coat, two thin color coats, and one light speckle layer sparsely. Keep speckles confined to the free edge for a confetti gradient. This is a budget-friendly way to add personality without committing to art on each nail. A dotting tool or a toothpick helps move specks deliberately if needed.
Speckled top coat and dotting tool set are the tools I reach for.
Mistake to Avoid: Overloading with glitter so the nail looks clogged and loses the butter tone.
7. Satin Pearl Butter Almond
Style/Vibe: Soft pearlescent sheen
Best For: Long nails, bridal or daytime events
Skill: Intermediate
A pearlized top coat over a butter yellow base gives a soft satin glow without metallic flash. Apply two thin base coats, then one thin layer of a pearl top coat. The trick is to buff lightly before the polish so the pearl catches evenly. This finish reads elegant in photos because the pearl breaks light gently. It pairs well with simple gold rings. If you use gel, cure each layer for 30 seconds under LED for a uniform sheen.
Pearl top coat and nail buffer smooth the result.
Mistake to Avoid: Rubbing the top coat before it sets, which leaves streaks.
If any of these ideas have you ready to actually shop, these are the products doing most of the work.
Butter Yellow Mani Essentials
Base & Prep:
- Ridge-filling base coat (~$8-15). A thin even base makes thin color coats look salon-smooth.
- Nail buffer block (~$4-10).
Color & Finish:
- Butter yellow nail polish (~$8-18). Pick a cream finish for the recipes above.
- Pearl top coat (~$7-14).
- Matte top coat (~$7-14).
- Quick-dry top coat (~$6-12).
Tools & Extras:
- Fine nail art brush set (~$6-15).
- Dotting tool set (~$5-12).
- UV LED lamp (~$25-50) for gel finishes.
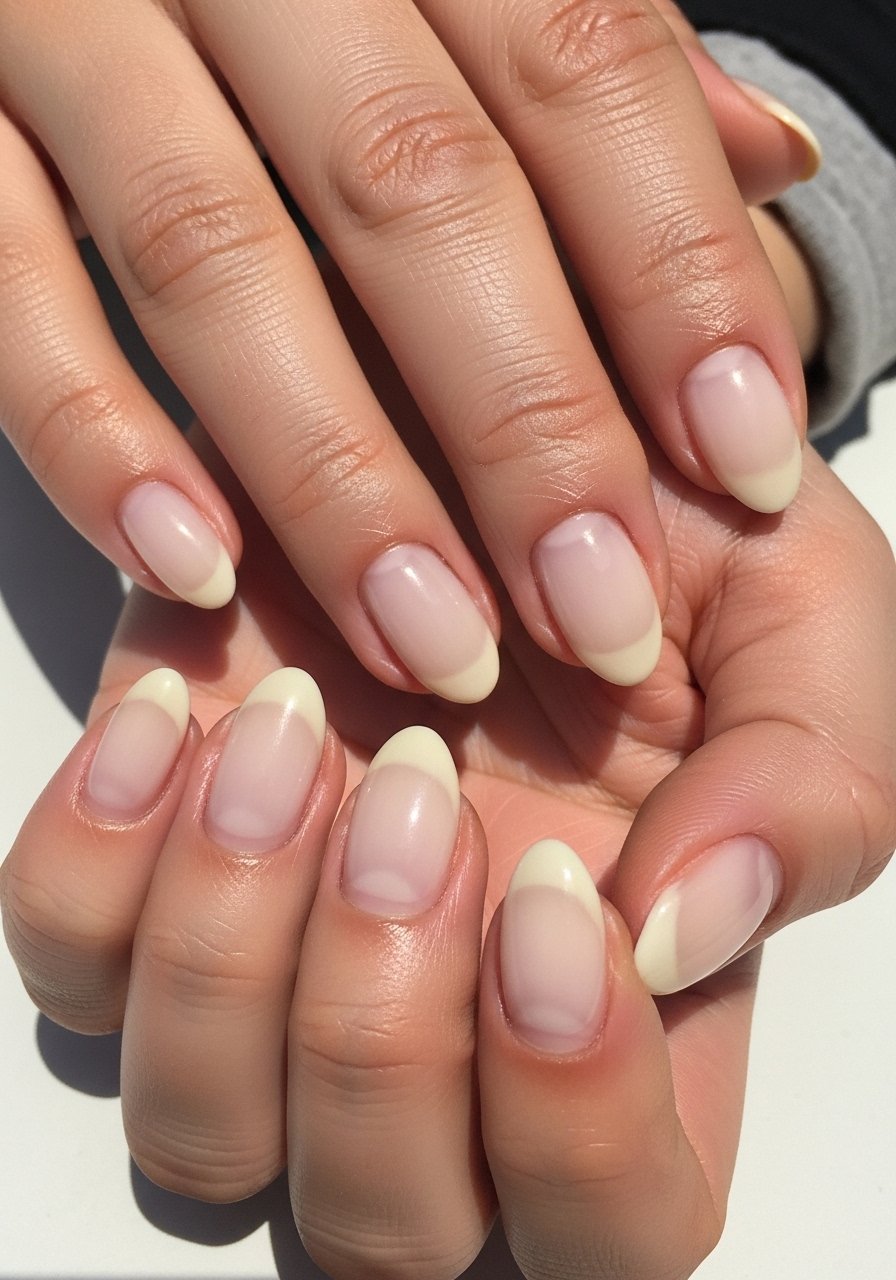
8. Negative Space Almond Half Moon
Style/Vibe: Modern minimal negative space
Best For: Short nails, minimalist wardrobes
Skill: Intermediate
Leave a crescent of natural nail at the cuticle and paint the rest butter yellow for a negative space half moon. I use a 2 mm gap at the cuticle for short nails so growth looks intentional. Use reinforcement stickers to mask the half moon, then apply two thin color coats. A gloss top coat over the painted area ties the look together. It is low maintenance and grows out gracefully.
Reinforcement stickers and gloss top coat finish it.
Mistake to Avoid: Making the half moon too large on short nails, which shortens the visual length of the finger.
9. Ombre From Butter To Nude
Style/Vibe: Soft blended ombre
Best For: Medium to long nails, weekend events
Skill: Intermediate
Blend butter yellow into a neutral nude using a light sponge and thin, repeated dabbing. I find two thin sponge passes followed by one gentle swipe with a top coat blends edges. The opacity ratio I use is roughly equal parts butter to nude on the sponge for a balanced fade. Work one nail at a time before the polish skins over. This look photographs warm and feminine.
Neutral nude polish and nail sponges help a lot.
Mistake to Avoid: Doing a single heavy sponge pass that leaves harsh lines.
10. Marbled Butter Yellow Swirl

Style/Vibe: Soft marble effect
Best For: Long nails, statement mani
Skill: Advanced
Drop small blobs of butter yellow and a translucent white onto a glossy base and use a thin brush to very gently swirl. Keep motions shallow to avoid overmixing. The most convincing marble has visible veins of both colors. It helps to dilute one drop of polish with a drop of clear top coat to lengthen working time. Seal with two coats of gloss for depth.
Clear top coat and fine nail brush are what I reach for.
Mistake to Avoid: Overworking the swirl until the colors muddy.
11. Tiny Floral Butter Accent Nail
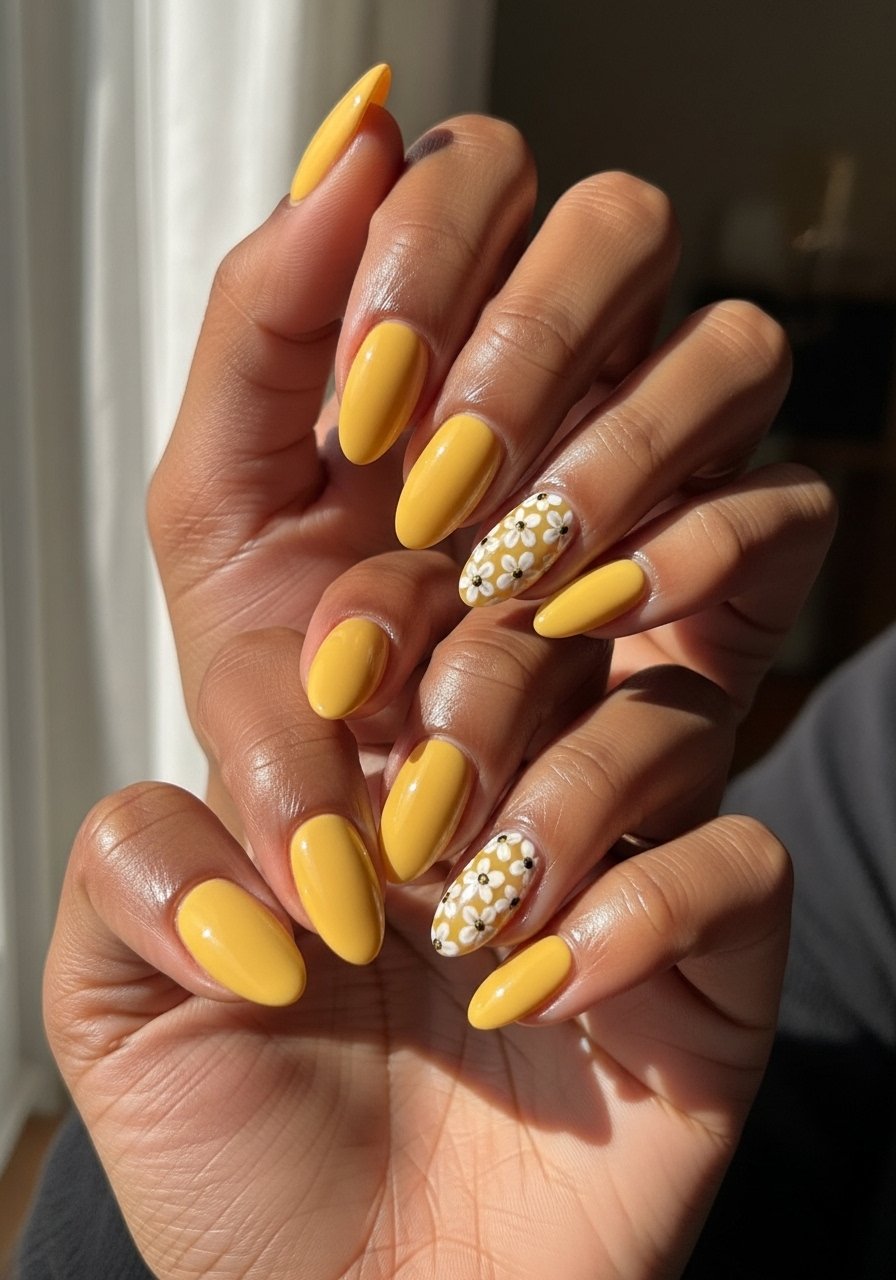
Style/Vibe: Petite floral accent
Best For: Medium nails, daytime events
Skill: Intermediate
Paint the base butter yellow and choose one accent nail for tiny white daisies. Use a 1 mm tip from a dotting tool for petals and a small gold dot in the center. Keep each flower at about 3 to 4 mm across so they read delicate and not crowded. A single accent nail balances the playfulness with wearability. Finish with a thin layer of gloss to protect the art.
White nail polish and gold nail stud accents work well.
Mistake to Avoid: Making flowers too large so they compete with the almond shape.
12. Mix-Your-Own Butter Sheer
Style/Vibe: Custom diluted butter
Best For: Short nails, subtle warmth
Skill: Beginner
If store shades read too bright, mix your own by adding one clear sheer polish to two drops of butter yellow on a palette. Use a clean brush and one thin wash over a ridge-filling base. The math is simple and repeatable, and you can adjust the ratio for warmer or cooler tones. This technique solves the common problem of factory shades not matching skin undertones, and it is cheap and forgiving.
Clear top coat and mixing palette are the small extras I keep on hand.
Mistake to Avoid: Mixing too much at once so it skins over before you finish.
13. Textured Sugar Butter Finish
Style/Vibe: Tactile sugar texture
Best For: Medium nails, weekend mani
Skill: Beginner
Apply two thin color coats and while the final wet layer is still tacky, sprinkle ultra-fine glitter or "sugar" onto the nail. Tap off the excess and cure or dry. The texture reads soft and gives a tactile quality that photos pick up as subtle shimmer rather than mirror shine. Seal the edges with a small bead of clear top coat to reduce chipping. This is an accessible way to add interest without freehand art.
Fine glitter powder and small fan brush help apply it.
Mistake to Avoid: Dousing the sticky surface so glitter clumps instead of settling.
14. Metallic Butter Foil Accent

Style/Vibe: Luxe foil accent
Best For: Long nails, special occasion
Skill: Intermediate
Press gold or champagne foil into a thin layer of foil glue set on top of butter yellow. The irregular foil pieces catch light and make the butter hue look richer. I use tiny flakes applied with tweezers and press gently to avoid tearing. Finish with a smoothing top coat to flatten the foil slightly so it is comfortable to the touch. One foil nail goes a long way paired with creamy butter on the rest.
Gold nail foil and foil glue are what you need.
Mistake to Avoid: Applying foil to a fully wet top coat, which prevents the foil from sticking.
15. Gel Almond With Creamy Finish

Style/Vibe: Long-wear creamy gel
Best For: Medium nails, long-lasting wear
Skill: Intermediate
For the longest wear go gel. Use a ridge-filling base gel, two thin builder or color gel passes cured 30 seconds each under LED, and a glossy gel top cured to final hardness. Thin layers are the rule here. A tech at a salon downtown showed me to cure each thin coat rather than one thick one for better adhesion. Gel keeps the butter tone true longer and resists chips between fills.
Ridge-filling gel base and led nail lamp are essential for this.
Mistake to Avoid: Building the color in thick layers that lift and peel quickly.
Almond Mani Maintenance Moves
Thin coats beat one thick coat every time. Three thin layers of quick-dry top coat look smoother and hold up better than one gloopy layer.
Do an oil massage every other day. Cuticle oil pen costs under $10 and keeps the skin around the nail from looking dry, which makes any butter shade read warmer.
If you are short on time, stick to a single accent nail. Nail stickers save twenty minutes and still read intentional.
For gel at home, cure each thin layer 30 seconds. LED lamp models with 30 to 60 second settings speed things up without overheating the nail.
Most chips happen at the free edge. Keep a glass nail file nearby to smooth rough edges and prevent rips between fills.
