
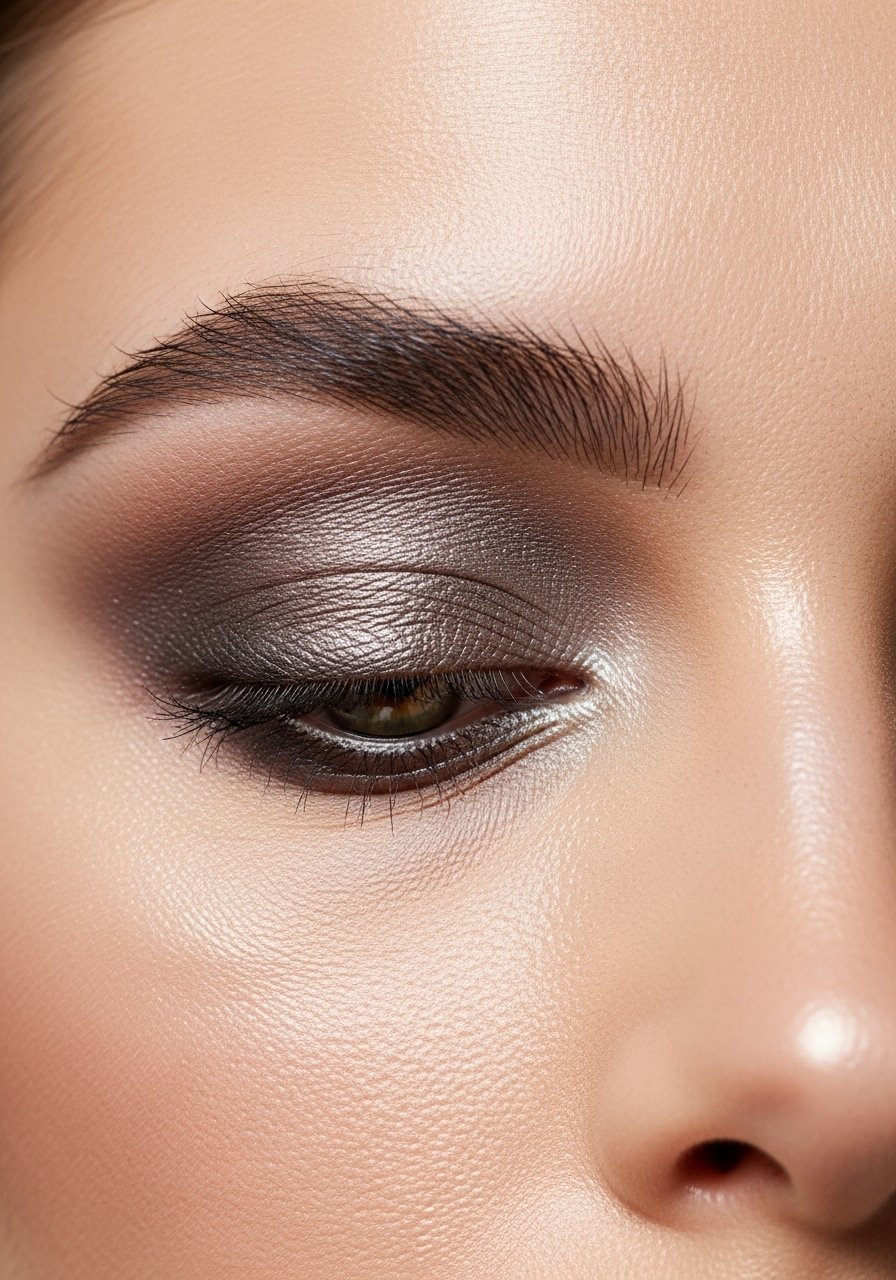
I kept trying to recreate that bright editorial look from a saved photo and every attempt read like color-by-numbers gone wrong. The turning point was when I stopped over-blending and started placing color where light actually hits the eye, not where I assumed it should be. That one change, and a better primer, let neon and deep plum both sit on my lids without fighting each other.
These ideas lean toward bold finishes, from matte color blocks to foil and glitter. Most looks take 5 to 20 minutes, with beginner-friendly options and a few that need steady hands. I tested several palettes over six weeks and wore many looks across four skin types, so you get what holds, what creases, and what needs an extra setting step.
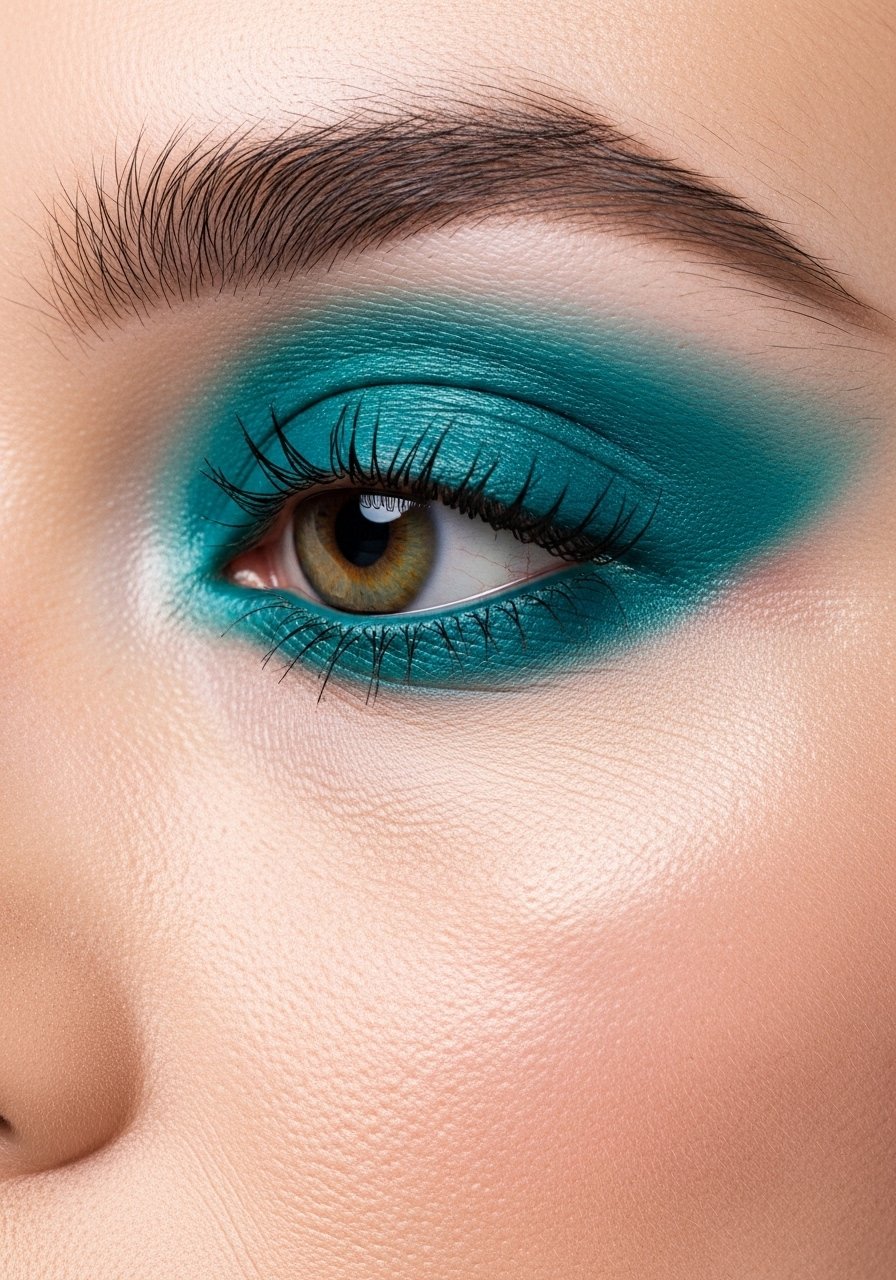
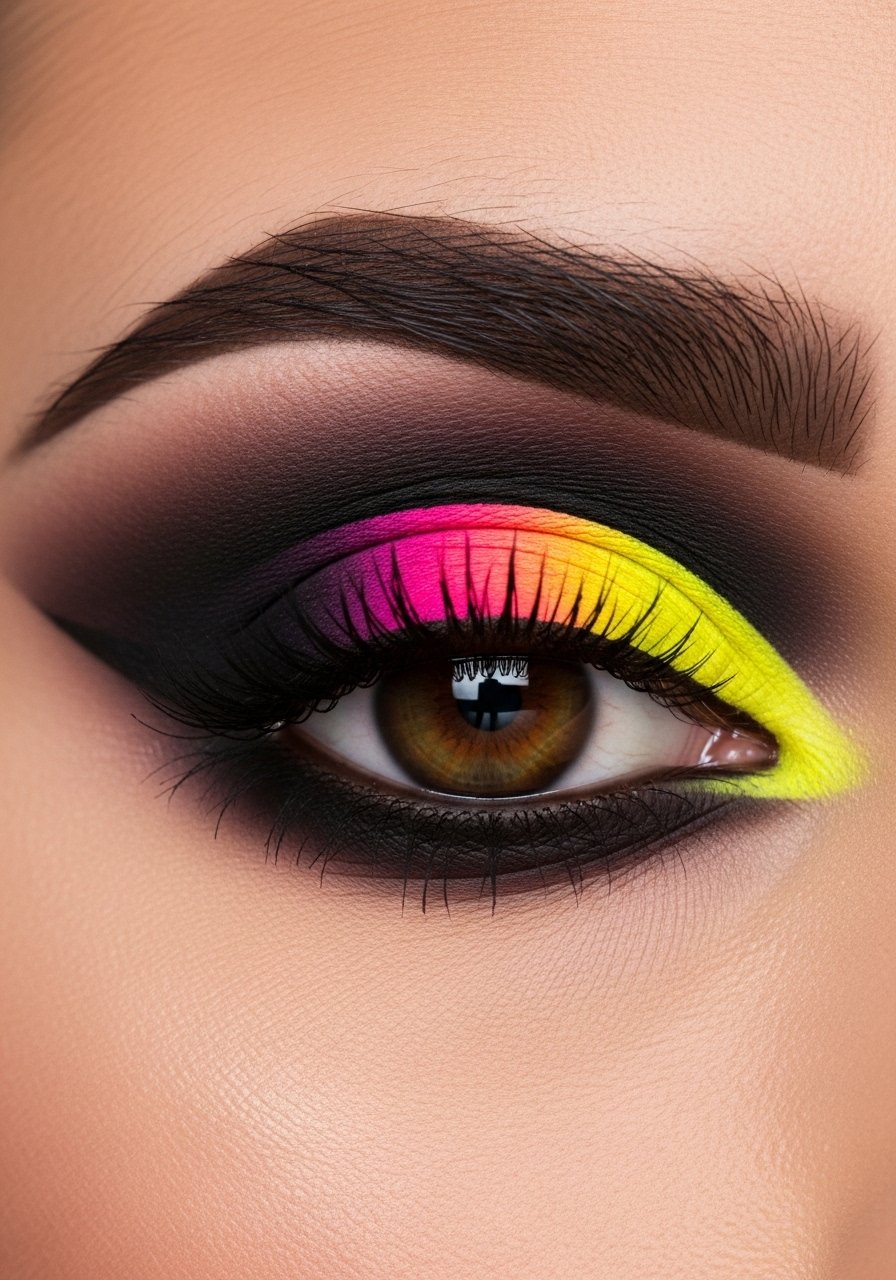
1. Neon Packed Lid, Soft Diffused Edges
Place the neon in a dense 70 percent-on, 30 percent-off rhythm. Press a neon cream base sparingly, then pack a powder shade on top, building in three small layers until color reads electric without patching. Works best on normal to oily lids if you use a thin matte primer first. I like pairing an intense neon with a neutral matte in the crease to anchor the look, so it does not read costume on warmer undertones.
Text link: Try a long-wear cream base
Mistake to Avoid: Over-blending the neon into the crease, which dulls the payoff. Tap and then blend outward lightly.
2. Two-Tone Cut Crease With Metallic Inner Corner
A clean cut crease keeps bold color readable. Use a concealer to carve a 2 to 3 mm half-moon across the lid, then press a metallic shadow into the inner third. The contrast between a matte outer lid and a foil inner third makes the metallic pop on cool and neutral undertones. For dry skin, add a tiny dab of cream highlighter first so the foil layers without creasing.
Text link: I like this lightweight concealer in a small pot
Mistake to Avoid: Leaving concealer tacky before applying metallics. Let it set for 6 to 12 seconds, then press the pigment.
3. Smudgy Colored Liner That Reads Intentional
A colored smudge across the lash line reads bold but relaxed. Use a waterproof cream pencil to draw a thin line, then smudge it with a flat brush in short 3 to 5 mm strokes. This works on all skin types and adds color without needing a full lid application. For oily lids, set the smudge with a matching powder shadow in a 2:1 ratio of powder to cream for longevity.
Text link: A creamy pencil that blends well
Mistake to Avoid: Smudging from one sweep. Build in short strokes and press the color into the lash line.
4. Monochrome Matte Block With Gloss Finish

Lay a single matte shade across the lid and blend only 3 to 4 mm into the crease so the block stays intact. Finish with a thin swipe of clear gloss in the center to catch light. This method works especially well on medium to deep skin tones with warm undertones because the gloss reads like a highlight. Use a tapping motion for the gloss to avoid migrating.
Text link: A non-sticky clear gloss for lids
Mistake to Avoid: Applying too much gloss. One light tap is enough or it will slide by midday.
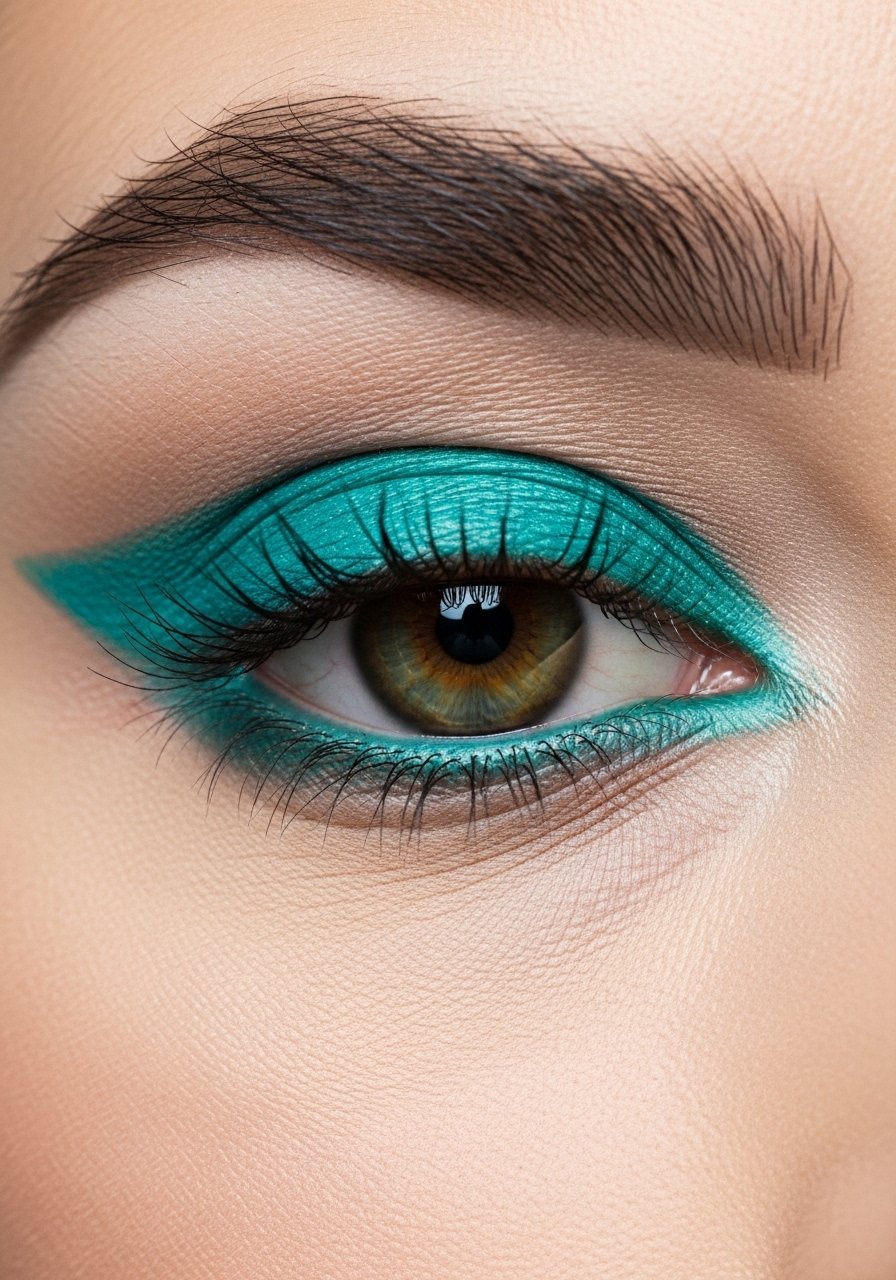
5. Graphic Negative Space With a Pop Hue
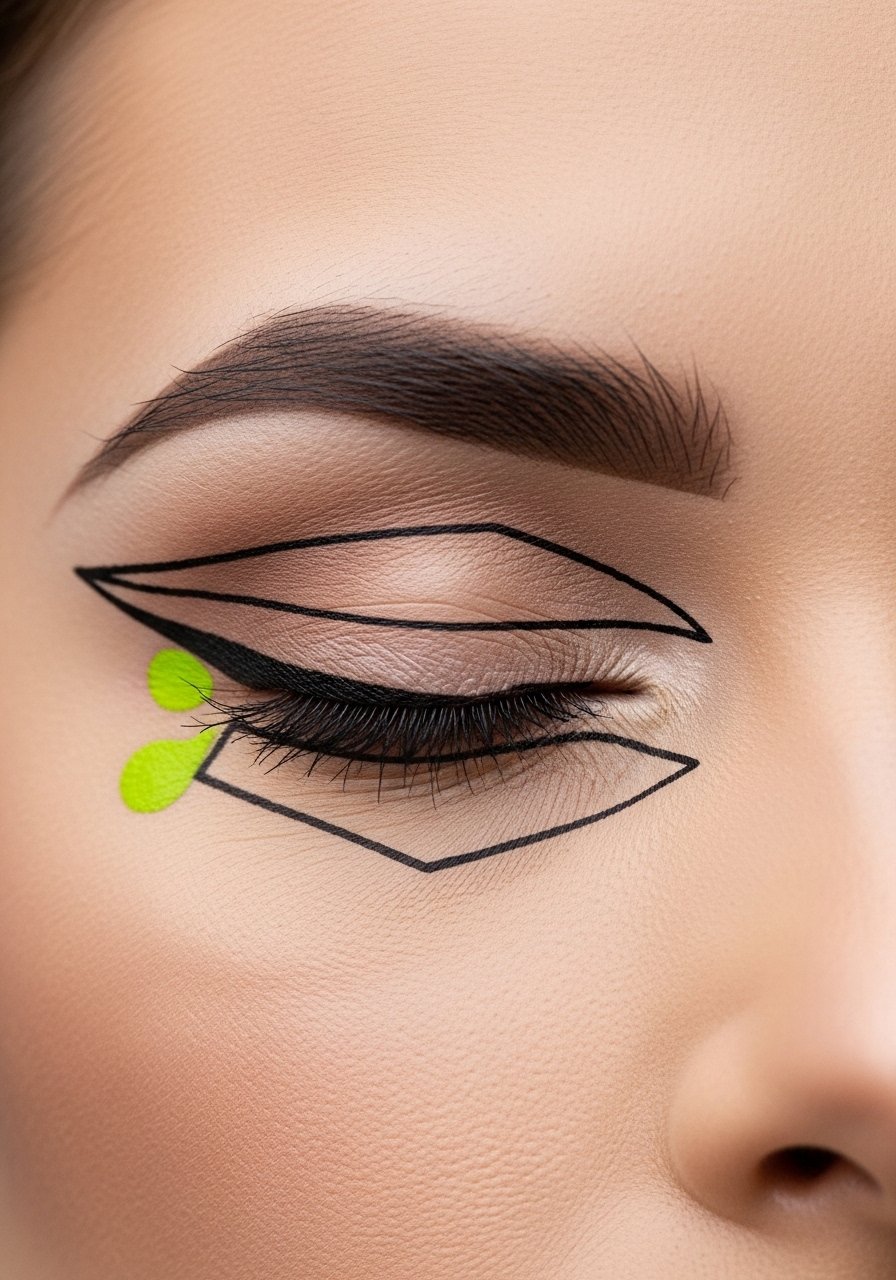
Negative space keeps bold color from overwhelming the face. Paint a crisp curved line about 1 to 2 mm wide, then fill the outer corner beyond that line with a pop hue. It is a higher-skill look but quick if you use a small angled brush and a cream paint base. Neutral undertones can pull off brighter pops; cool undertones can try mint instead of chartreuse for balance.
Text link: A precise angled brush helps
Mistake to Avoid: Rushing the negative-space edge. Hold the eye taut and paint in short controlled strokes.
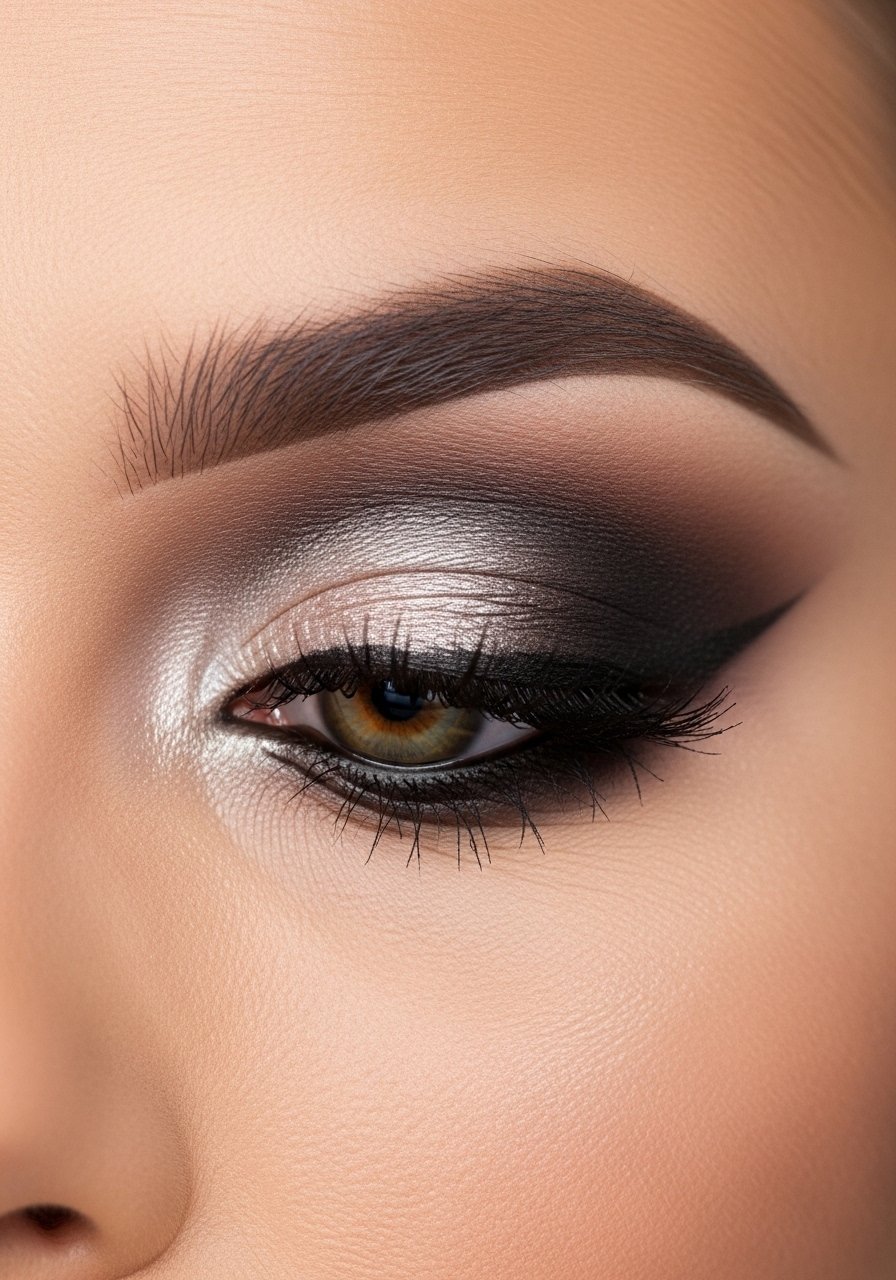
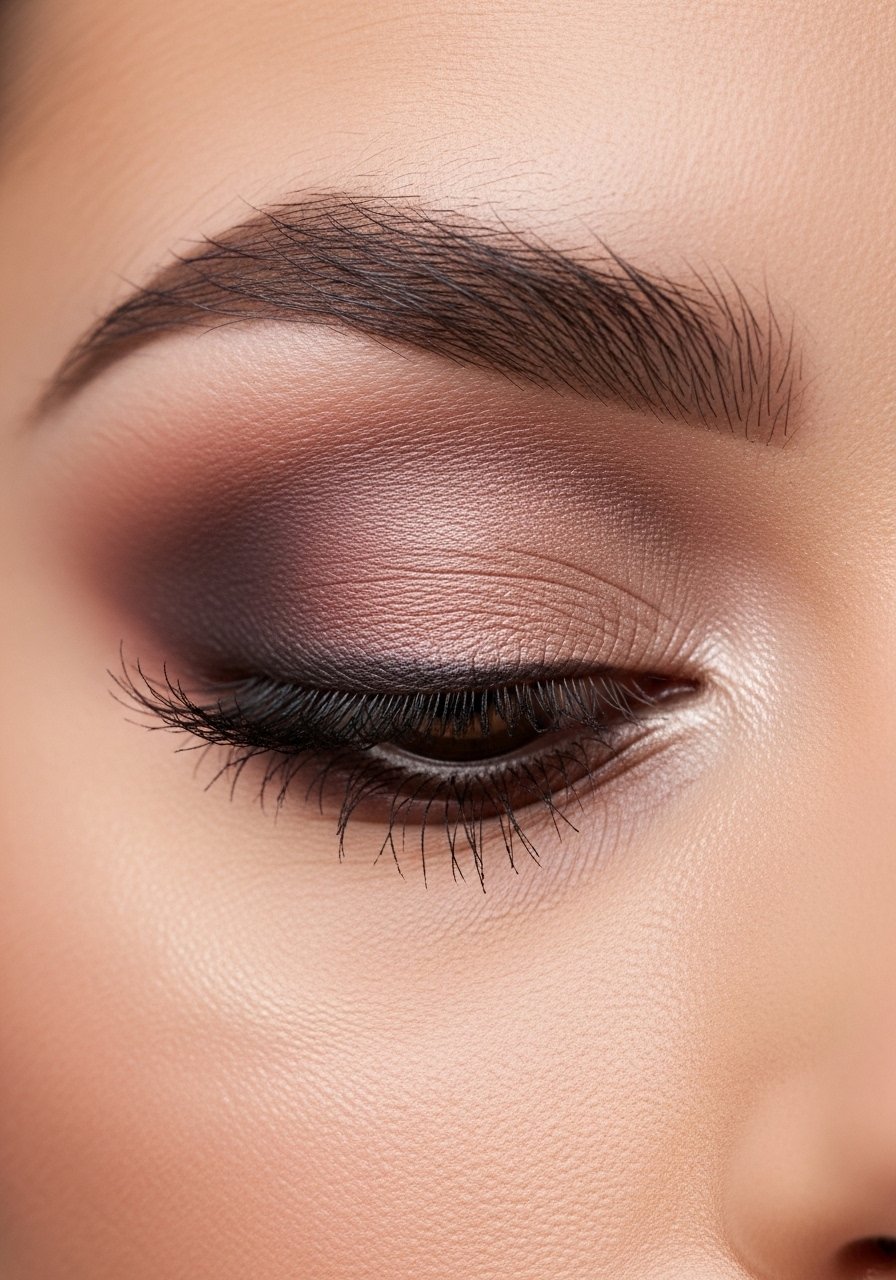
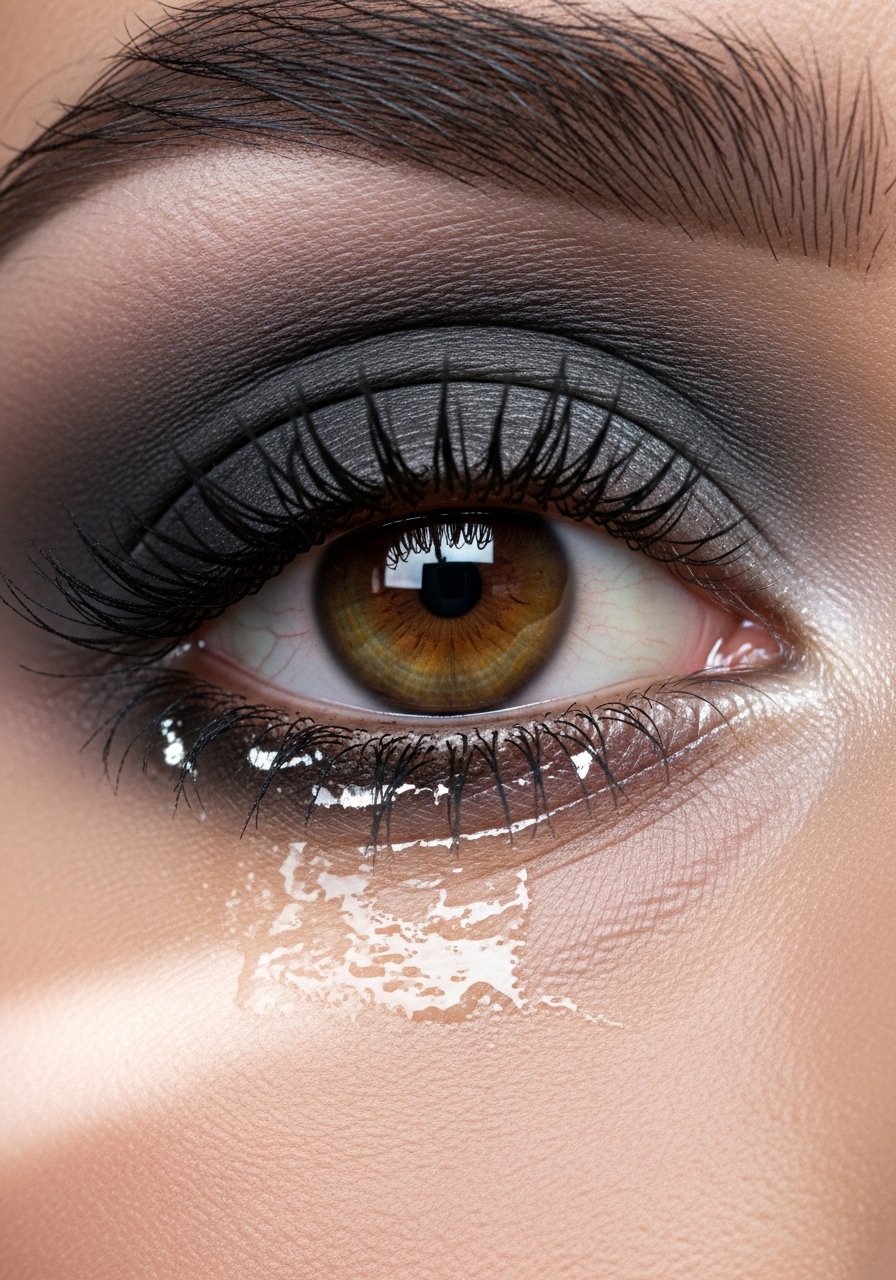
6. Smoky Jewel Tones With a Matte Base
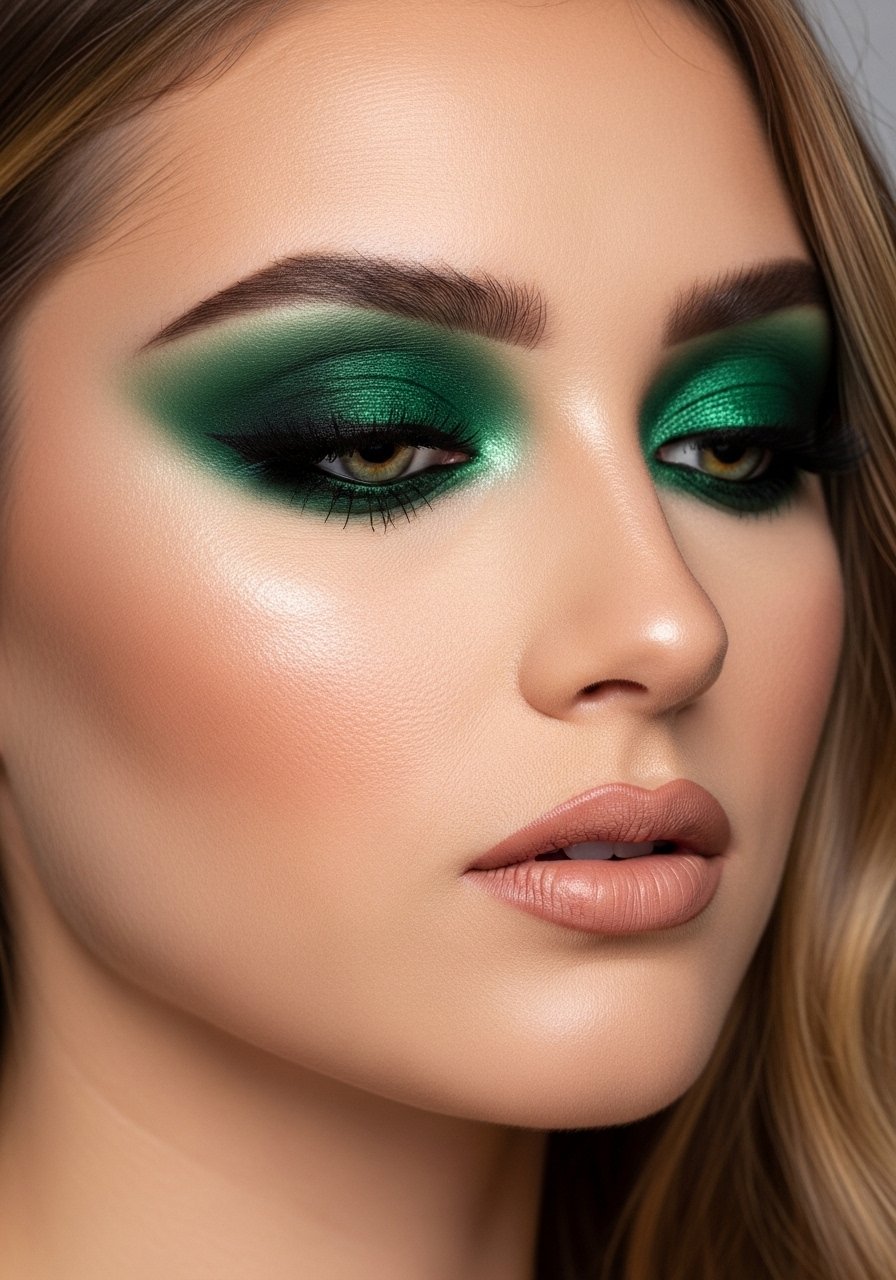
Start with a matte taupe base to map the crease, then blend deep jewel tones like emerald and sapphire up to 40 percent into the socket. Press jewel-tone shimmer at the center lid with a damp flat brush to intensify reflection. Good for combination and oily lids when you use a thin layer of primer and set with translucent powder across the crease before adding shimmer.
Text link: A small spray bottle for dampening brushes
Mistake to Avoid: Skipping the matte base, which causes jewel tones to crease or shift color.
7. Two-Shadow Halo With High-Contrast Brow Bone

Center a metallic or intense shimmer on the pupil, then smoke a deeper matte into both inner and outer corners leaving a crisp 1.5 to 2 mm ring around the shimmer. Lift the look with a bright matte on the brow bone, not shimmer. For hooded eyes, keep the outer matte higher by about 2 mm to maintain the halo when eyes are open.
Text link: This micro blending brush is great
Mistake to Avoid: Blending the halo until it loses shape. Preserve a small ring of contrast.
8. Wet-Finish Foil Over Tinted Primer
A tinted primer gives foils a glassy finish without a separate glue. Apply a thin veil of tinted primer, then press a loose foil pigment in two gentle presses to avoid fallout. Works on dry skin particularly well because the primer keeps shimmer from emphasizing texture. Use 2 to 3 tiny taps rather than a single heavy press to avoid fallout on the cheeks.
Text link: Try a tinted eye primer
Mistake to Avoid: Rubbing the foil in, which creates streaks. Press and lift instead.
9. Two-Tone Smoky With a Colored Lower Lash
Ground a dark smoky on the lid but add a bright color along the lower lashes for a modern twist. Use a thin pencil or small brush to apply color within 1 to 2 mm of the lashes. This balances heavy upper lids on round faces and works well on warm undertones when the lower line is a complementary shade. Set the lower color with a matching shadow to avoid transfer.
Text link: A small smudger brush that fits the lower lash
Mistake to Avoid: Dragging the lower color down the cheek. Keep it tight to the lash line.
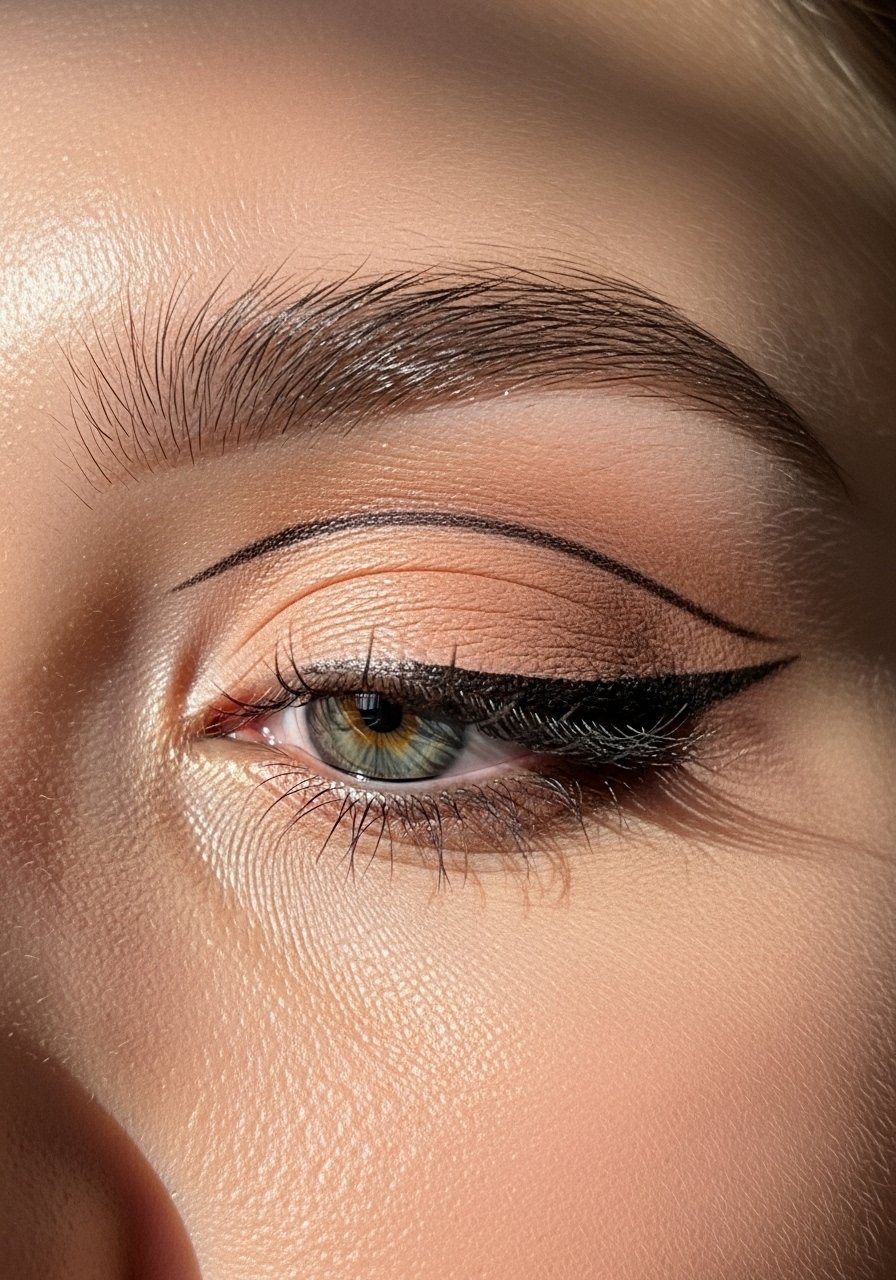
10. Graphic Winged Matte With Metallic Inner Lid
Keep the wing graphic and sharp by using a thin 2 mm tape guide or a steady hand. Fill the wing with a matte pigment, then apply a metallic in the inner third to open the eye. Dry skin benefits from a bare minimum of powder under the wing area so the matte adheres cleanly. For hooded eyes, angle the wing slightly upward so it reads with eyes open.
Text link: A thin roll of makeup tape helps keep edges crisp
Mistake to Avoid: Extending the wing too far horizontally. Lift it slightly to flatter the eye shape.
11. Smoky Pastel With Defined Crease Line

Use a pastel matte across the lid, then define the crease with a darker matte about 1.5 mm above where you normally blend. That defined line gives structure and keeps pastels from looking powdery. Pale and fair skin with cool undertones can go all-in on lavender or baby blue, while deeper skin tones should choose richer pastels like periwinkle for opacity.
Text link: A synthetic blending brush for clean edges
Mistake to Avoid: Airbrushing the crease away. Keep that darker line visible for shape.
12. Double-Ended Shadow With Satin Center
Divide the lid into thirds and use two matte shades on outer and inner thirds, leaving the center for a satin shade. Center satin reflects light and makes lids appear fuller. Time-wise this is a quick 7 to 10-minute look for mornings. For oily lids, set the matte thirds with powder before applying the satin to avoid migration.
Text link: A dual-ended brush set for precise placement
Mistake to Avoid: Over-blending the center into the matte thirds. Tap the satin in instead.
13. Smoky Brown With a Neon Lower Accent
A warm smoky brown lid makes neon on the lower lash line look composed. Apply neon with a tiny angled brush right at the lash base and set with a similar powder to lock it. This look flatters warm and neutral undertones and is quick for daytime drama. For sensitive eyes, choose pigment-rich but fragrance-free lower line products.
Text link: A pigmented neon single shadow
Mistake to Avoid: Applying neon too far from the lashes. Keep it tight or it looks accidental.
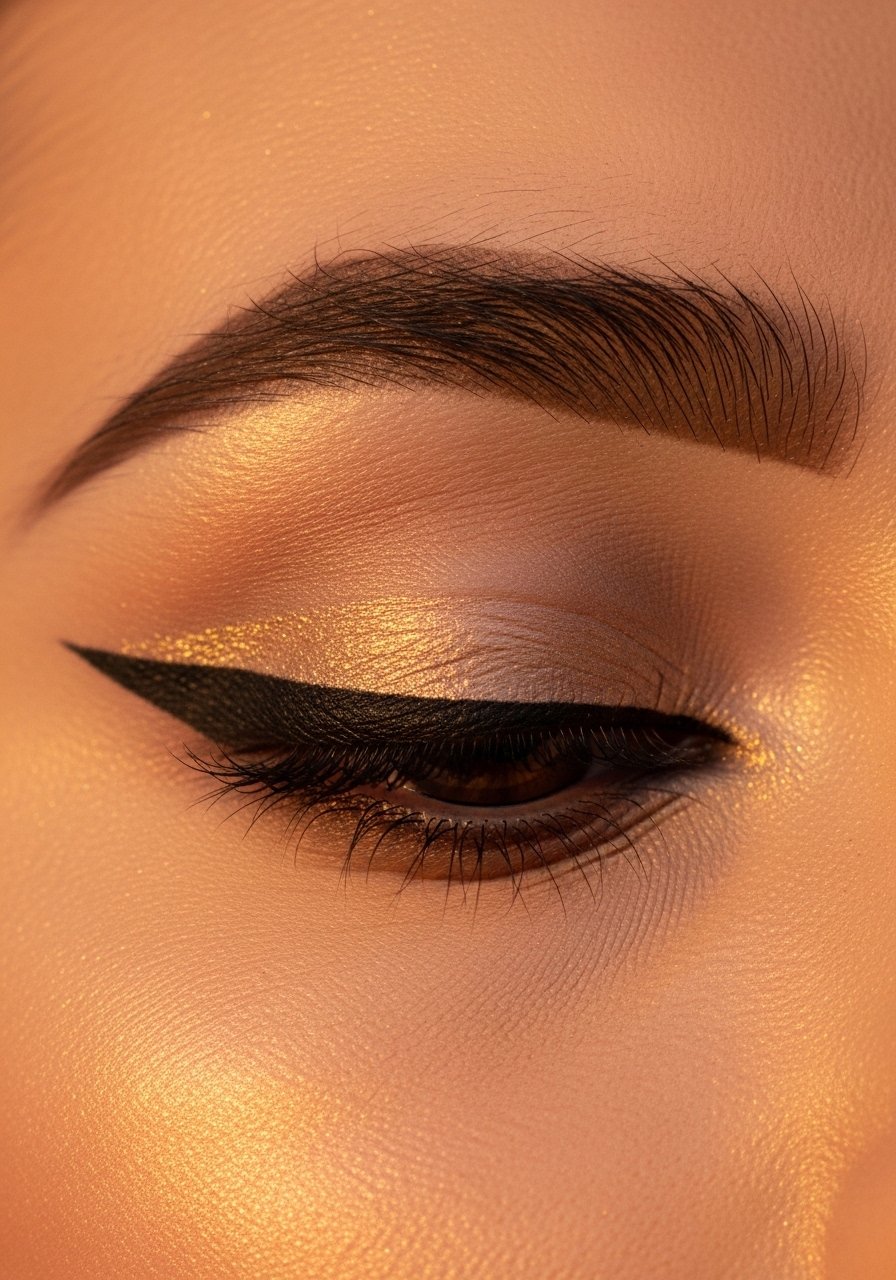
14. Foil Halo With Matte Transition
Start with a matte transition color up to about 6 mm above the socket to stop the foil from bleeding. Press foil into the center of the lid using a flat synthetic brush in two to three tiny presses. This technique reads editorial on deeper skin and luminous on fair skin. For longevity, lightly mist the brush with a setting spray before picking up foil.
Text link: A small setting spray travel size
Mistake to Avoid: Applying foil over oils or a dewy primer without pressing it in first. It will move.
15. Soft-Edged Color Block With Floating Liner
Color blocking can look modern when edges are soft but defined. Create a soft rectangular block across the lid, then draw a thin floating liner above it about 3 to 4 mm above the lash line. Works well on hooded eyes if the block sits slightly higher. Use a mix of two matte shades in a 60:40 ratio for depth.
Text link: A tiny liner brush for floating lines
Mistake to Avoid: Making the block too tall. Keep it low enough so the floating liner remains visible.
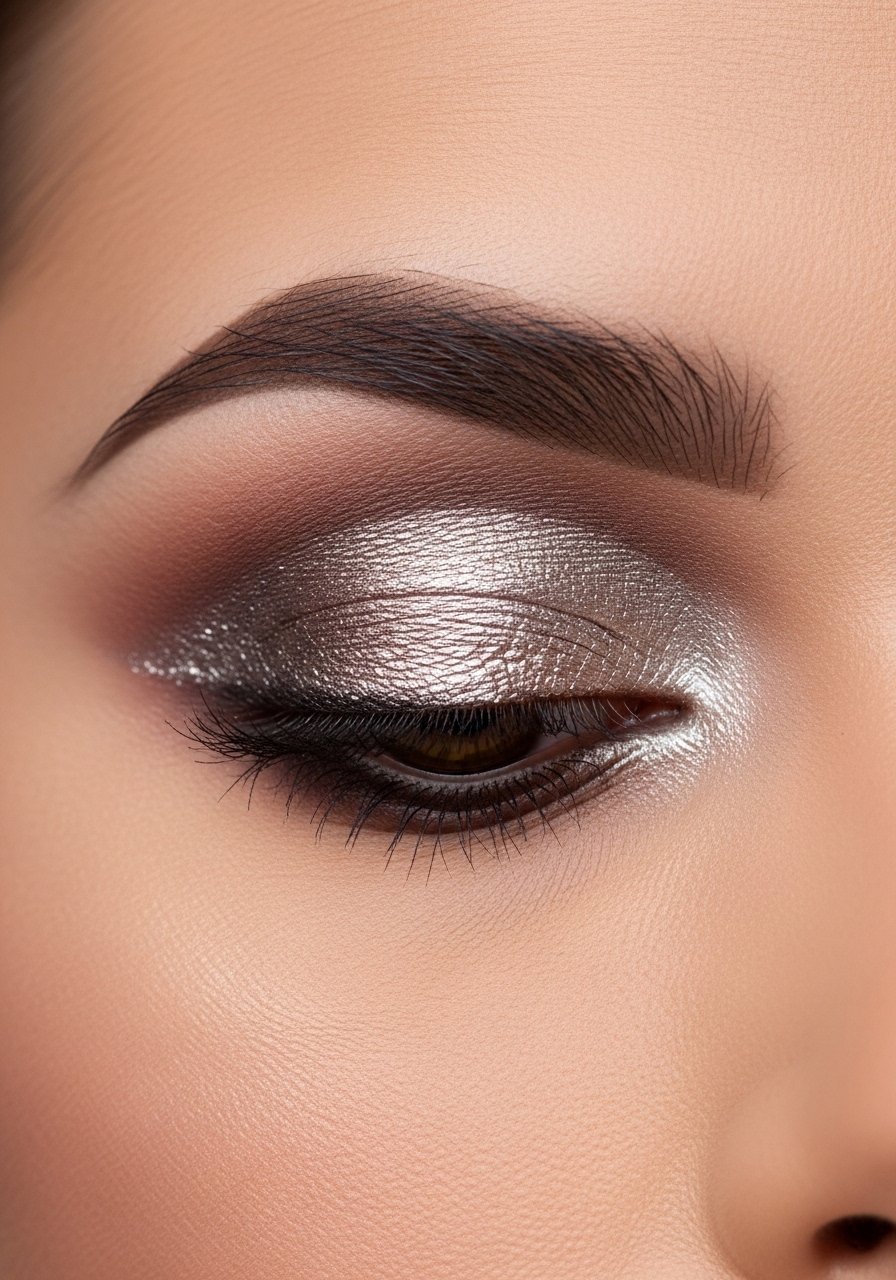
16. Monochrome Metallic Smoky With Clean Brows
Let the eye be the focal point by keeping brows softly groomed and skin minimal. Sweep a single metallic across lid and smoke edges with a matching matte. Neutral undertones will enjoy bronze metallics. For oily lids, use a primer that dries down before applying metallics so it's less likely to crease.
Text link: This metal-toned palette is compact
Mistake to Avoid: Over-inking brows to "match the drama." Keep them soft so the eyes stand out.
17. Graphic Inner Corner Slash
A small slash of color at the inner corner lifts the eye and stands out without heavy lid work. Use a micro liner brush to apply a 2 to 3 mm stroke angled toward the tear duct. Great for all skin types as a quick pop and it pairs with a neutral wash on the lid. For watery eyes, set the stroke with a matching powder immediately.
Text link: A micro brush pack for detail work
Mistake to Avoid: Drawing the slash too wide. Keep it narrow or it reads messy.
18. Matte Smoky With a Glossed Lower Lash
Apply matte smoky shades above and keep the lower lash line glossy but thin. Use a tiny amount of clear gloss applied to the outer lower lash line and press a matching powder just on top to slightly set. This is a playful, evening look for normal to dry skin. For oilier skin, use a gel-based gloss that dries more quickly.
Text link: A non-transferring clear gloss option
Mistake to Avoid: Putting glossy product too near the waterline. Keep it external to avoid irritation.
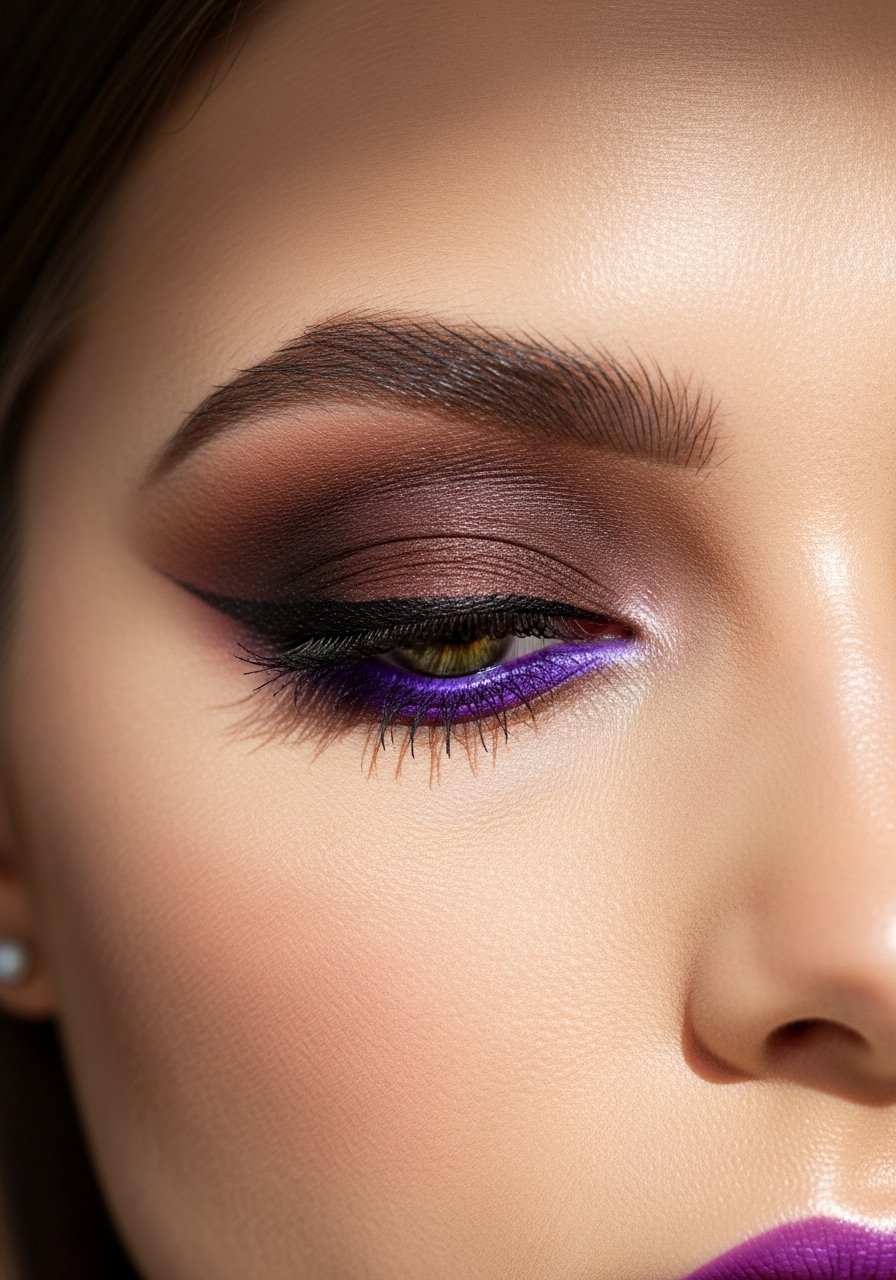
19. Tonal Berry With Sharp Inner Corner Highlight
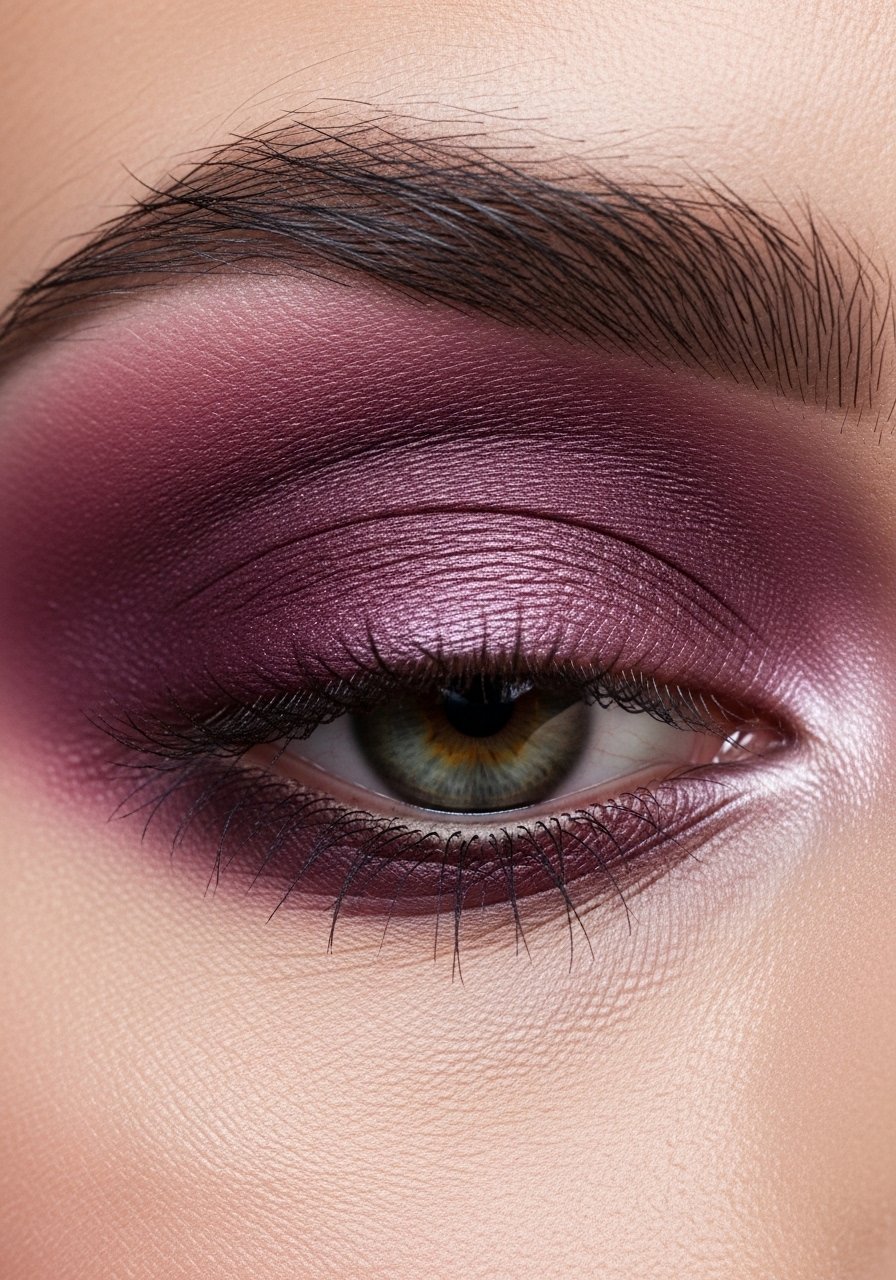
Layer a berry matte across the lid, then use a cool-toned champagne in a precise 3 mm wedge at the inner corner to sharpen and brighten the eye. Works perfectly on cool undertones. For deeper skin, warm up the highlight to a rose gold so it reads luminous rather than ashy.
Text link: A compact berry quad that travels well
Mistake to Avoid: Using a stark white highlight on deeper tones. Choose a hue that complements undertone.
20. Stacked Colored Liner With Natural Lid
Stack two lines, like a cobalt above black, keeping the lid skin neutral. Draw the black closest to the lashes, then a 1 mm gap and a colored line above. This gives a pop without heavy lid makeup and suits most eye shapes. For sensitive skin, use ophthalmologist-tested formulas and set both lines with a matching powder.
Text link: A dual-color liner set is handy
Mistake to Avoid: Making the gap too wide. Keep it tight or the stacking will read disjointed.
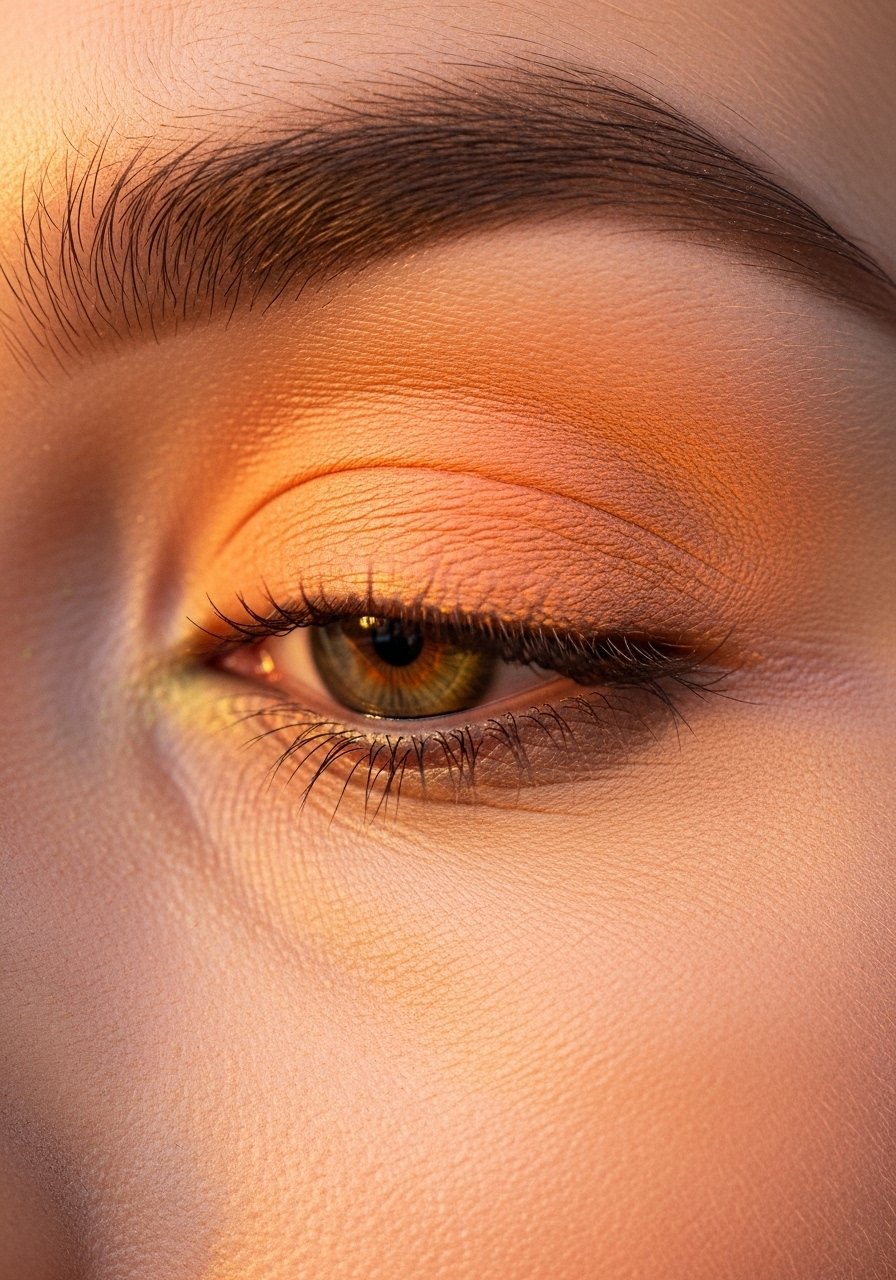
21. Matte Tangerine With Defined Lower Waterline
Tangerine on the lid brightens eyes and pairs well with a shaded lower waterline in brown or deep plum. Apply tangerine in thin layers until opaque, about three light packs, then softly smudge a darker shade on the lower waterline to ground the look. Works well for warm undertones and brings out green or hazel eyes.
Text link: A buildable tangerine single shadow
Mistake to Avoid: Applying tangerine too sheer. Layer until it reads true on your skin tone.
22. Glossy Top Coat Over Matte Color
Sealing a matte color with a thin, glossy top coat creates a wearable vinyl effect. Apply matte pigment first, let it set for 8 to 12 seconds, then very lightly tap a gloss in the center third only. This keeps shape intact while adding shine. For oily lids, reduce the gloss to a pinpoint highlight instead of a full layer.
Text link: A lightweight eye gloss that does not crease quickly
Mistake to Avoid: Smearing gloss across the whole lid. Less is better or it will slide.
23. Smoky With a Clean Lid and Bold Lower Wing

Leave the lid clean and smoky the crease, then extend a bold colored wing from the lower lash line outward. This counters heavy upper drama and adds a graphic element. It works for medium to deep skin and is quick when you use a small angled brush and a pigmented liner. Set the lower wing with powder to keep the edge crisp.
Text link: An angled brush for precision lower wings
Mistake to Avoid: Letting the lower wing fade into the cheek. Keep it lifted by angling slightly upward.
24. Matte Black Bookending With Bright Center
Place matte black in the inner and outer corners, leaving the center free for a bright punch. This bookending opens the eye and makes the center color look more vivid. On hooded eyes, raise the outer black slightly. For longevity, set the center with a very small dab of setting spray and a powder shadow.
Text link: A travel matte black compact for deep color
Mistake to Avoid: Smudging the inner black toward the tear duct. Keep that inner edge sharp.
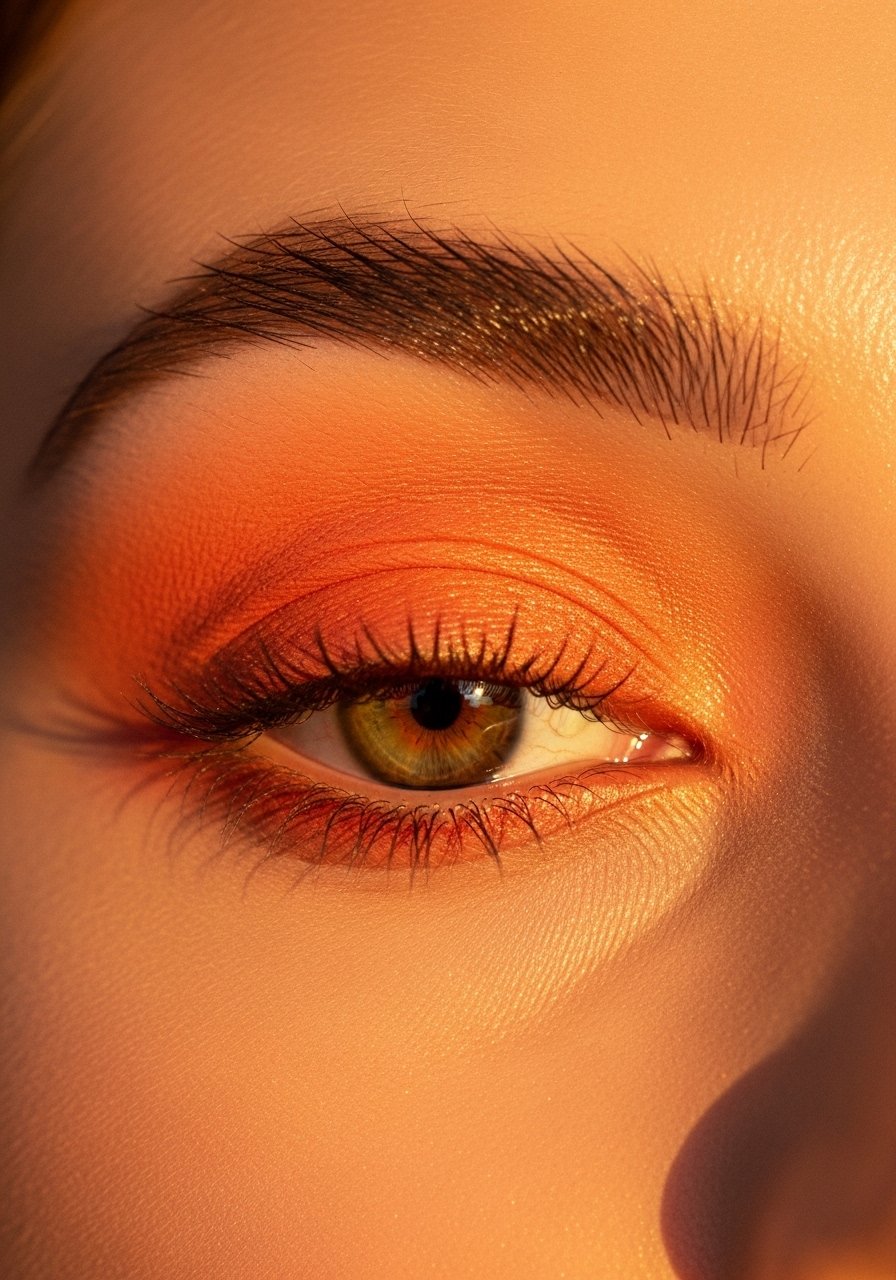
25. Burnt Orange Gradient With Defined Lower Lash Pop
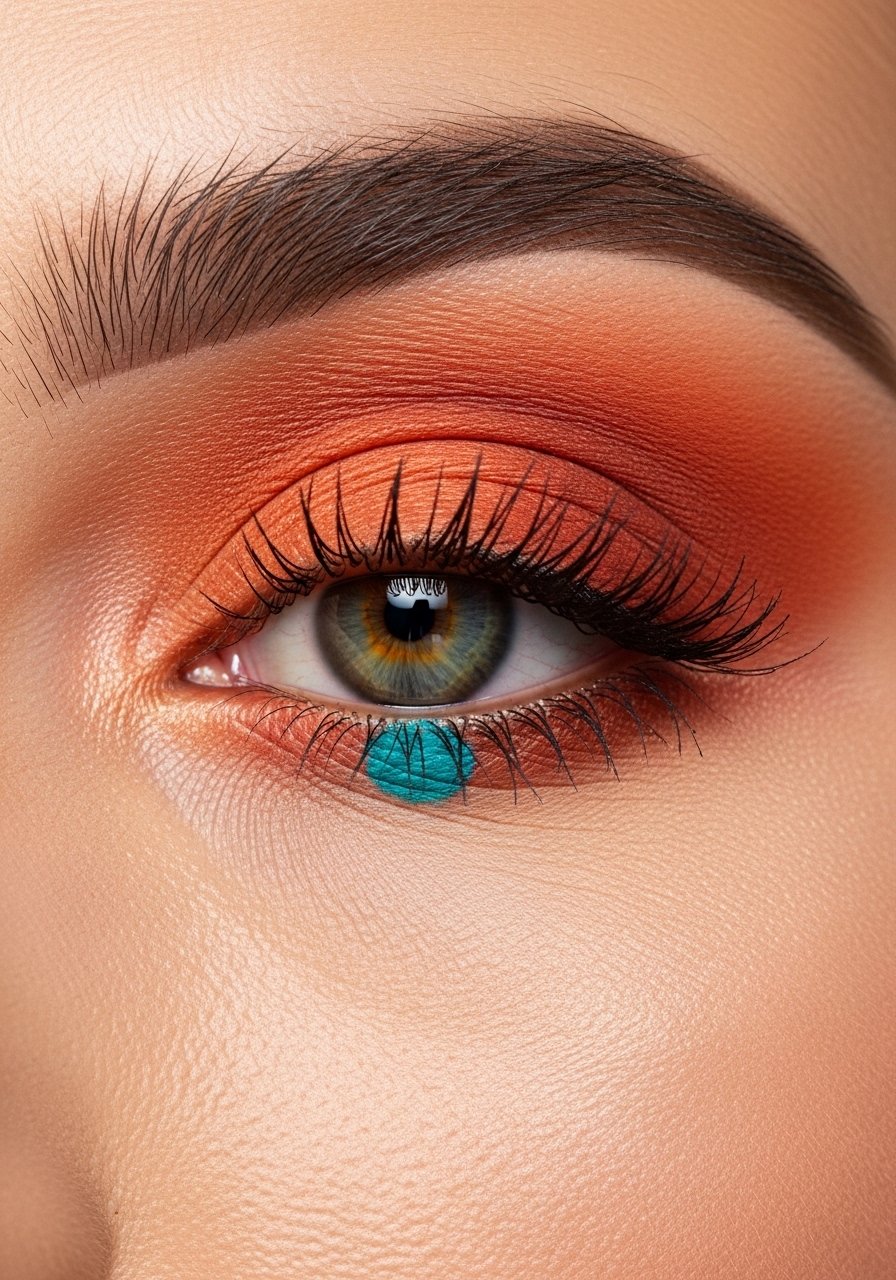
Build a burnt orange gradient from lash line to crease in four thin layers, then add a small turquoise dot at the lower outer lash line for contrast. The tiny lower accent creates a modern, editorial effect without being loud. Warm undertones will find burnt orange flattering and it takes about 10 minutes to execute with a blending brush.
Text link: A small dotting brush for the lower lash accent
Mistake to Avoid: Fatiguing the orange by over-brushing. Short packing motions keep pigment vibrant.
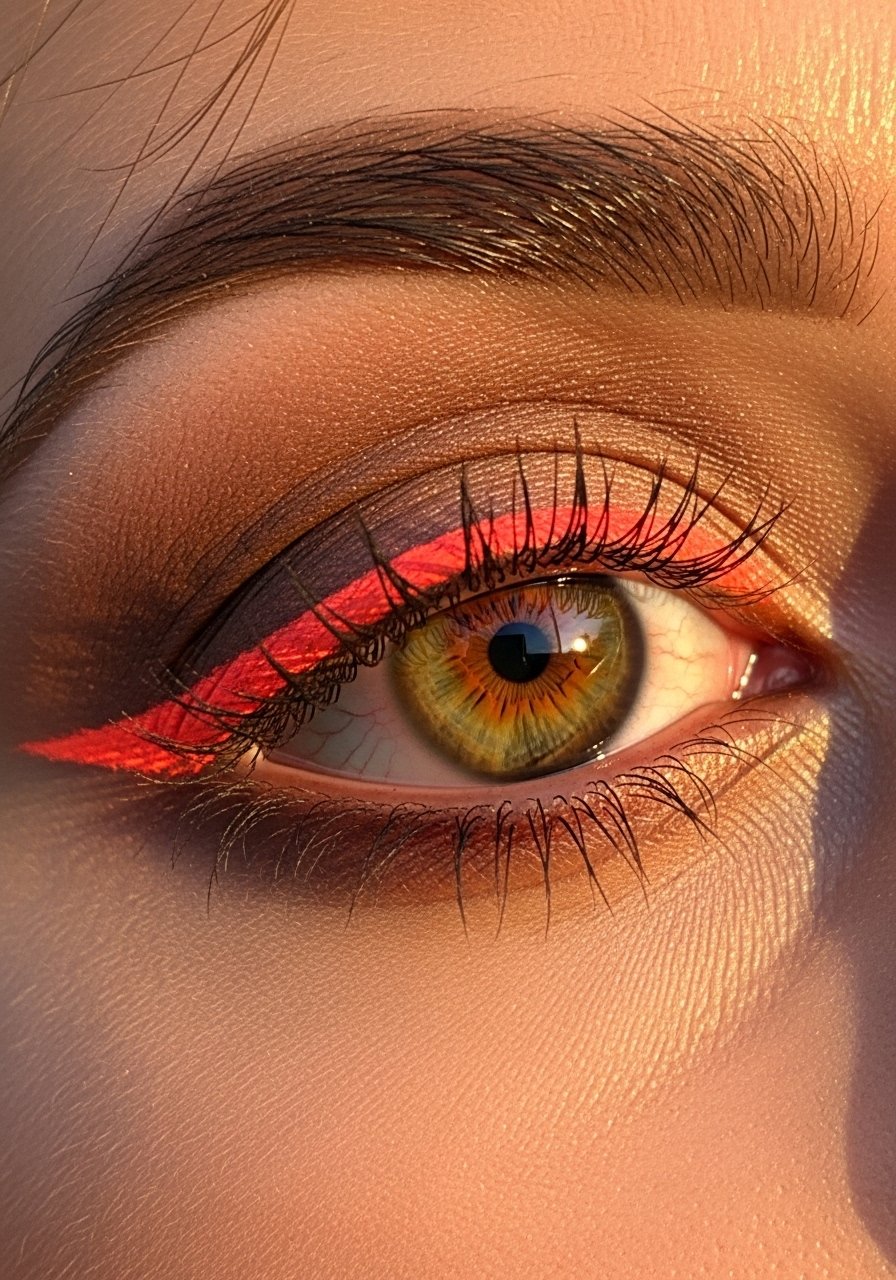
26. Sheer Wash With Electric Liner Flick

A sheer wash keeps the eye fresh while an electric liner flick gives attitude. Apply a wash of cream tint and then draw a 3 to 4 mm electric flick at the outer corner. This is one of the quickest bold looks for mornings and is forgiving on all skin types. For oily lids, set the wash with translucent powder before drawing the flick.
Text link: A bright liquid liner for tiny flicks
Mistake to Avoid: Making the flick too heavy. Start tiny and build if needed.
27. Full-Intensity Matte Cut With Sheer Top Layer

Run a full matte cut crease for structure, then sweep a barely-there shimmer using a fan brush across the center. The shimmer should be 10 to 15 percent opacity relative to the matte underneath so the shape remains defined. This technique works across skin types and reads especially crisp on neutral undertones. For dry lids, use a cream base to make the matte sit smoothly.
Text link: A packed matte palette for cut creases
Mistake to Avoid: Applying too much shimmer, which erases the cut crease edges.
Your Makeup Kit
- Honestly the best base step I kept coming back to, a long-wear eye primer (~$10-18). It dries down without flaking and helps neon and foil stick.
- For color variety, a 12-shade matte and shimmer palette (~$18-35), great for experiments across undertones.
- For tiny details, a micro angled brush set (~$8-12). Use it for floating liners and inner corner slashes.
- For foils and glitters, a small setting spray travel size (~$6-12) to mist brushes before packing pigment.
- For neon and single-color pops, a pigmented single shadow or pencil (~$6-14).
- For precision, thin makeup tape (~$4-7) keeps wings and negative space crisp.
- For gloss finishes, a lightweight eye gloss (~$10-18), non-sticky versions last longer.
- For setting lower-line color, a small smudger brush (~$6-10).
- For clean-up and cut creases, a small concealer pot (~$8-20).
- For quick blending, a synthetic blending brush trio (~$12-20). These hit the 70/30 pressure you need for packing then blending.
- For travel and touch-ups, a compact mirror with lights (~$15-30).
- For precision foiling, flat synthetic packing brush pack (~$9-16).
- For long lashes to finish bold eyes, a volumizing mascara (~$8-18).
Makeup Tips That Actually Help
Thin coats beat one thick coat every time. Three thin layers of a pigmented matte look smoother than one heavy swipe. A reliable buildable matte shadow works best.
Grab a tiny roll of makeup tape for crisp edges. Use it for negative space, cut creases, and wings. It takes two minutes and saves a ten-minute clean-up.
Observation first: I stopped packing foils with a dry brush. Dampening the brush with about two quick sprays of a setting mist gives foil 30 to 50 percent more shine. A travel setting spray is the easiest tool.
Use a pencil or gel liner to map the shape first, then go over it with shadow. A waterproof gel pencil helps the color stay put until you set it with powder.
Contrast-first: Instead of crowding the entire lid, pick one focal point. One neon lower lash or a metallic center is more readable than neon on every surface. A pigmented single shadow is perfect for these spots.
Prep your lid like you prep skin. Clean and slightly mattify the lid if you have oil. A small translucent powder puff costs little and reduces creasing.
Link-first: This micro blending brush is worth keeping in your kit. Use it to keep color placement precise, especially for inner corner slashes and tiny floating liners.
Curate one bold item per look, not three. If the lid is heavy, go minimal on the lower lash and skip an extra highlight. A compact travel palette makes that selection easy.
