
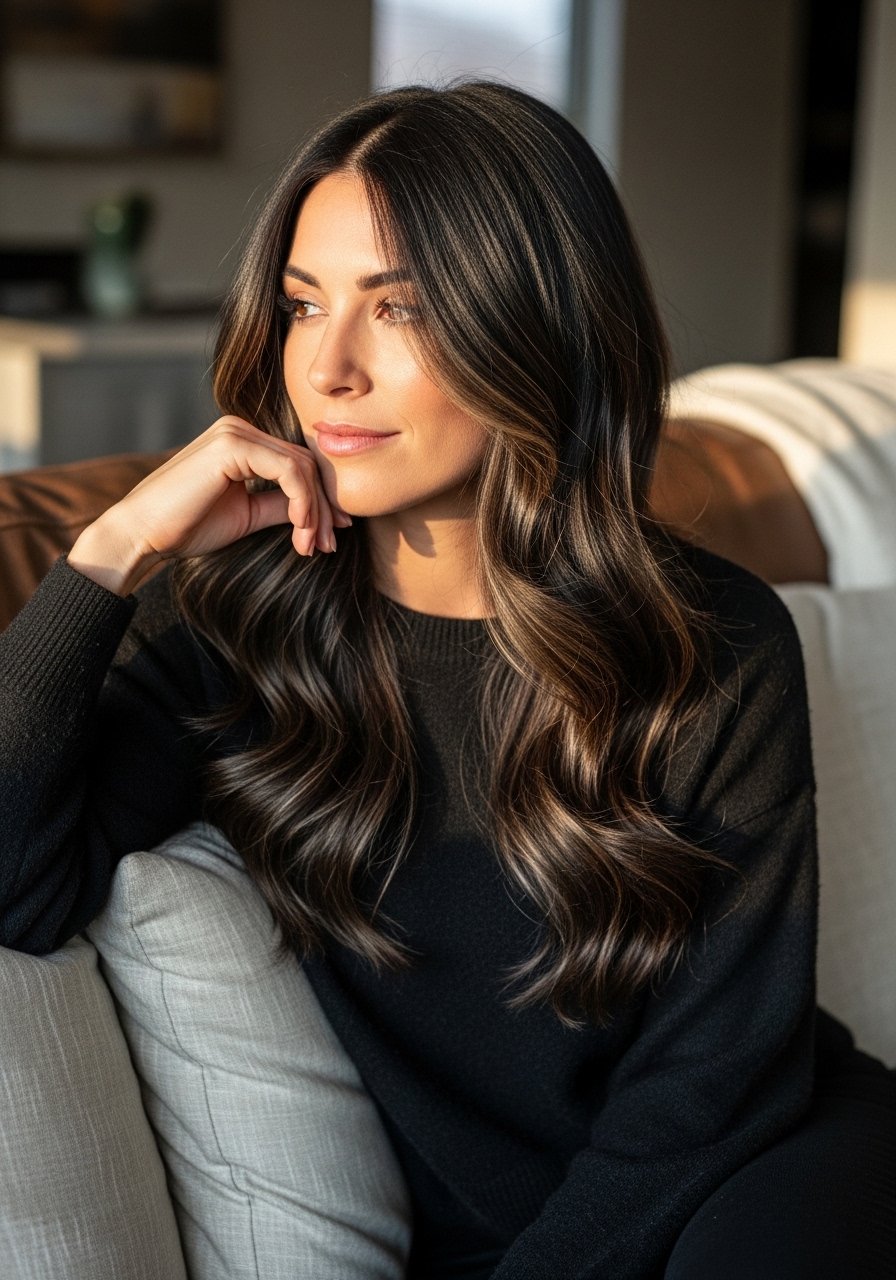
I kept swiping pins of black hair with bright strips and trying to copy them, only to end up with two-tone stripes that read harsh under store lighting. The moment I stopped chasing visible contrast and started picturing how highlights catch movement, everything changed. I learned to place lighter pieces where hair parts, where the face catches light, and to blend on purpose so photos and real life match.
These ideas are for anyone with naturally dark hair who wants highlight options that read polished in photos and in person, whether you color at home or sit in a salon chair. Most looks are low-commitment and wallet-friendly. I tested variations across four hair textures I have styled, and I note heat-free ways and porosity tips where they matter.
1. Face-Framing Honey Halo
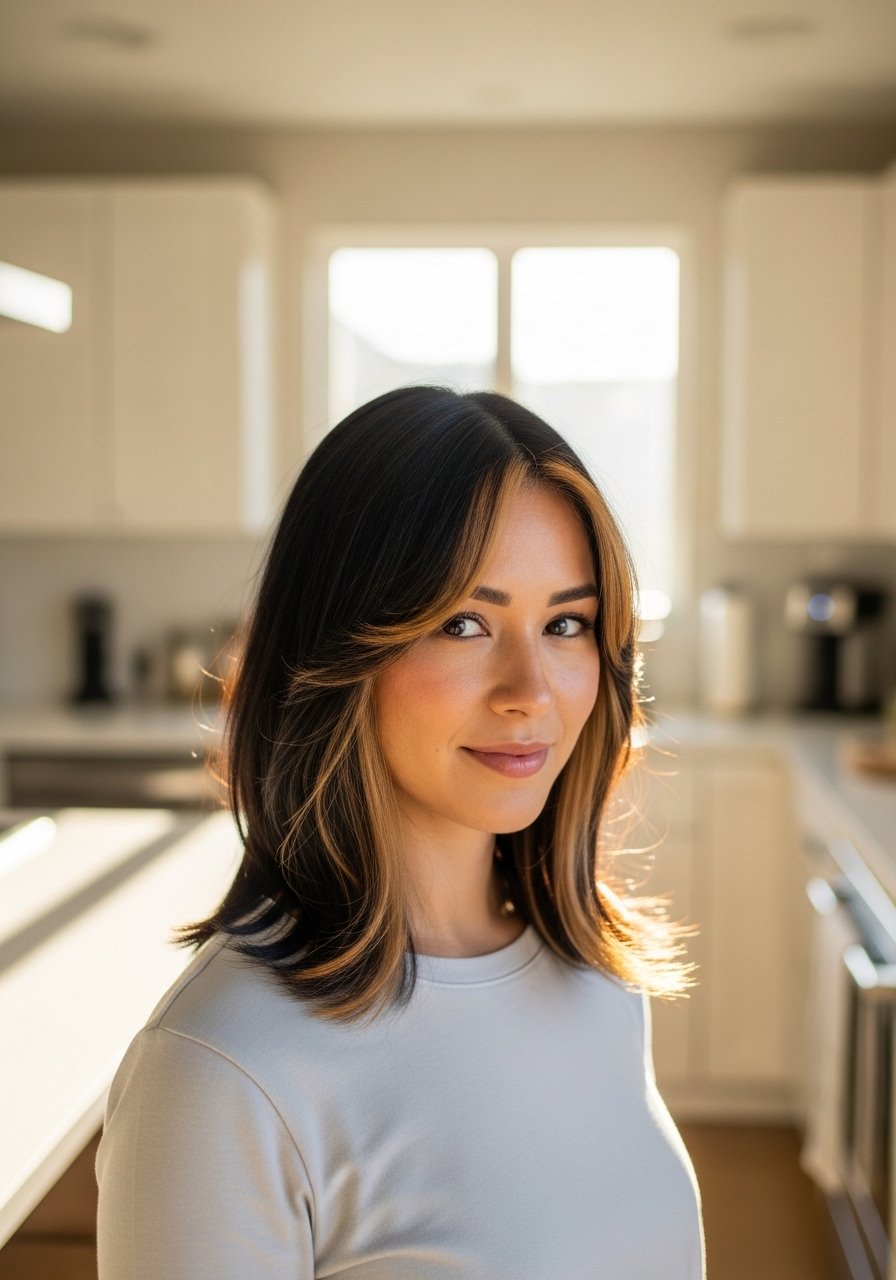
This is a small, deliberate highlight band around the hairline that brightens the face without touching the rest of the length. It works visually because the light pieces sit where the sun and selfies hit, so photos show dimension without a full head of color. Best for medium to long hair, quick to place in a salon or DIY with a freehand foil technique. I use a demi-permanent gloss after highlighting to control brassiness, like a color-depositing conditioner for upkeep between visits. Porosity note, fine hair absorbs highlights faster, so lower processing time keeps tone from going too warm.
Mistake to Avoid: Placing the lightest pieces too close to each other, which looks like a stripe instead of a halo.
2. Money Piece, Soft Edges
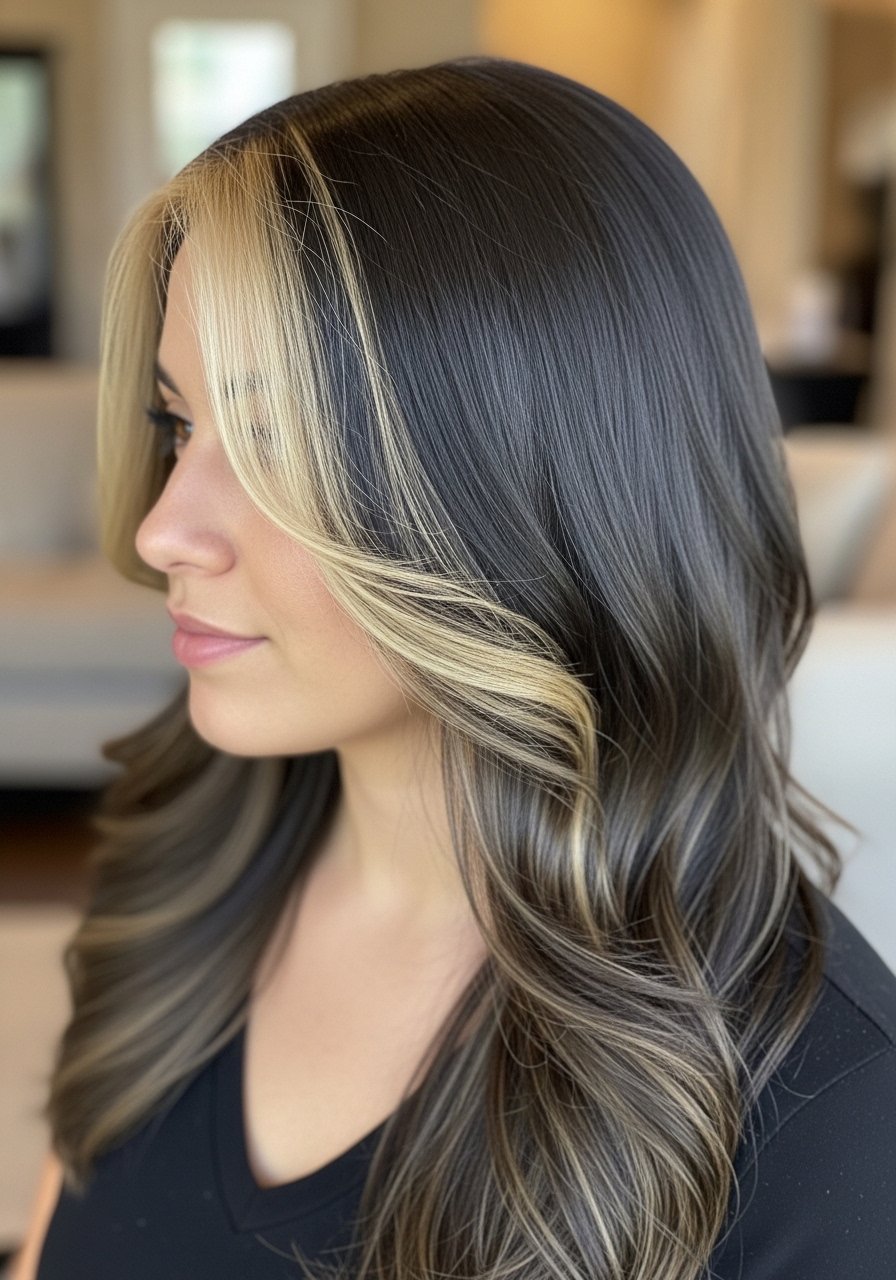
The money piece is the bold slice at the face, but on black hair I soften the edges so it photographs like intentional contrast rather than a stripe. What makes it work is a blurred root-smudge at the top of the piece, so growth looks natural. This is a higher-impact style for anyone who wears hair down a lot. For at-home refreshes, a glossing treatment keeps tone shiny and less brassy. Skill level mid, but a stylist can do a quick front-only appointment.
Mistake to Avoid: Lifting the money piece to maximum lightness, which makes regrowth obvious within weeks.
3. Subtle Babylights For Soft Lift
Babylights are tiny, closely spaced foils that give a sun-kissed luminosity. On black hair the effect reads soft, not chunky, so it lifts the whole silhouette without a harsh line. This suits anyone who wants low-contrast brightness and photographs evenly in harsh light. It takes longer in the chair and costs more, but maintenance is low because there is no obvious demarcation. I pair this with a sulfate-free shampoo to protect the delicate highlights. For low porosity hair, add a little heat during processing to help lift evenly.
Mistake to Avoid: Pulling too-large sections for babylights, which defeats the point of diffused brightness.
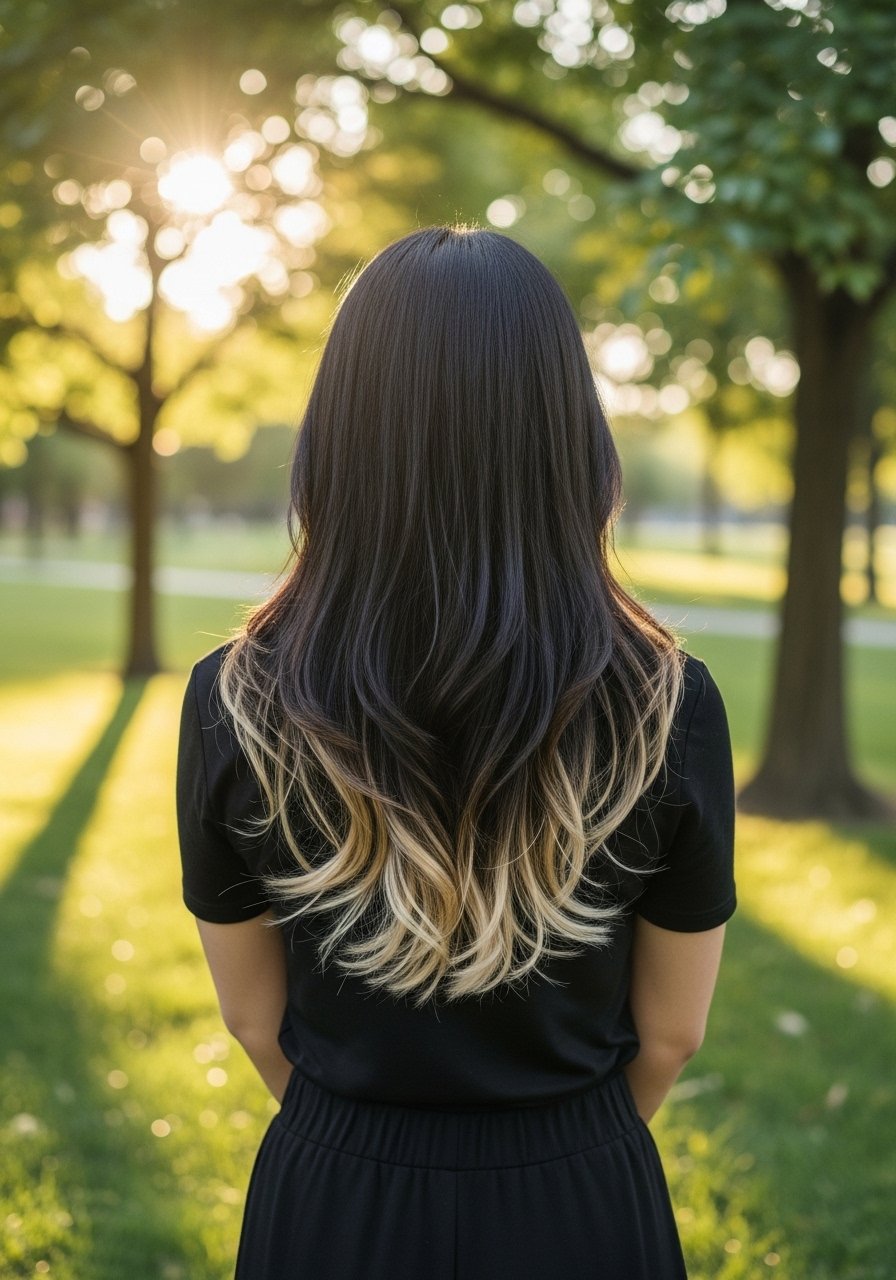
4. Peekaboo Lowlights Behind Length
This reverse approach uses darker tones under the top layer of black hair to create depth so the top highlights pop. It works because contrast is built from within the hair, so movement reveals flashes rather than a static streak. Great for thick hair that needs dimension. It is a smart, lower-maintenance salon add that keeps base color mostly intact. For at-home styling, a lightweight hair oil preserves shine without weighing the pieces down.
Mistake to Avoid: Placing lowlights only at the ends, which can make lighter top pieces look disconnected.
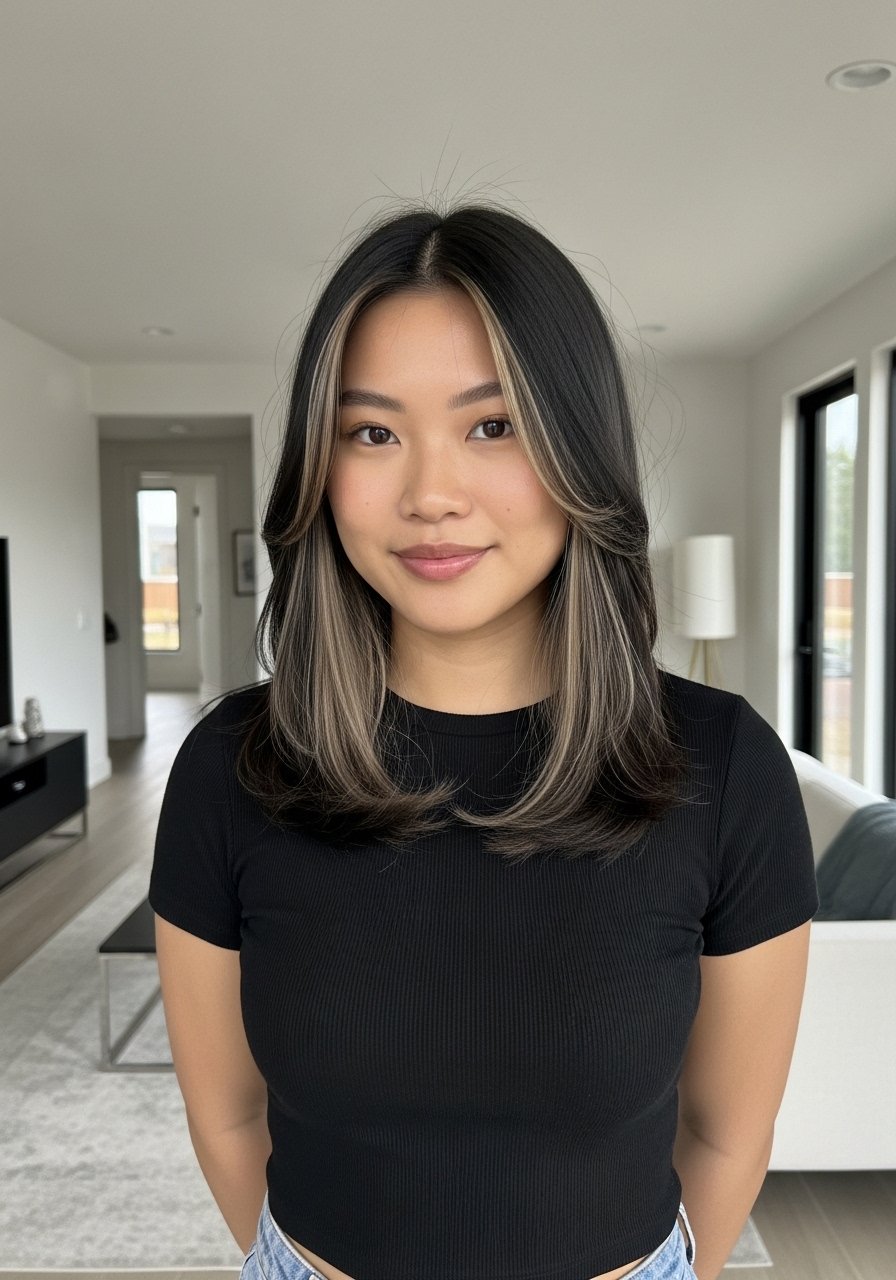
5. Halo Babylight Around the Part
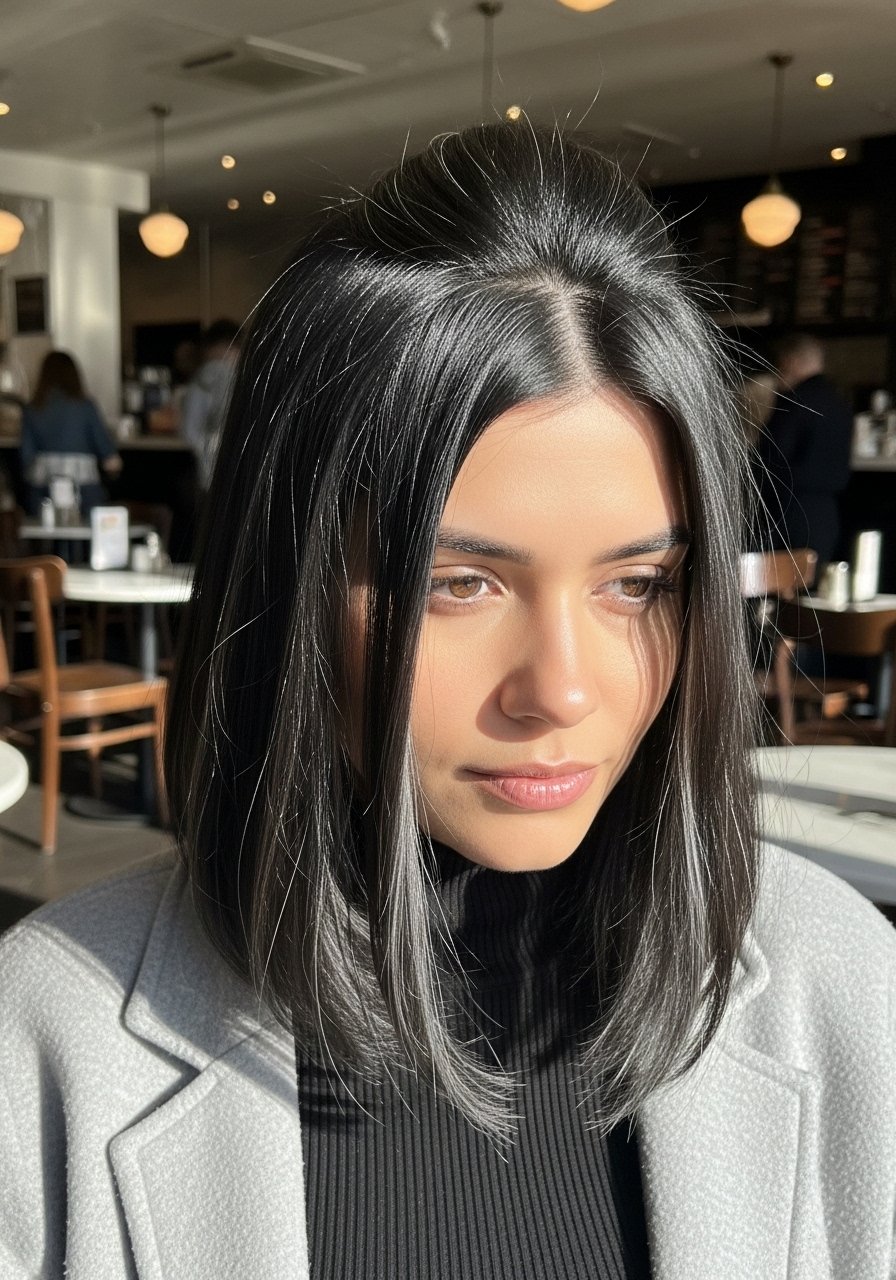
Concentrating micro-highlights along the part brightens your face in photos and in real life, especially if you wear a middle part. The effect is delicate and modern, and it is easy to refresh. It suits straight and wavy textures. For warm skintones, choose slightly golden tones rather than ash. I like a light purple toning spray after salon visits to keep brass at bay between appointments. This is a budget-friendly add because only thin slices are lifted.
Mistake to Avoid: Over-toning immediately after lift, which can make highlights look flat and steel-like.
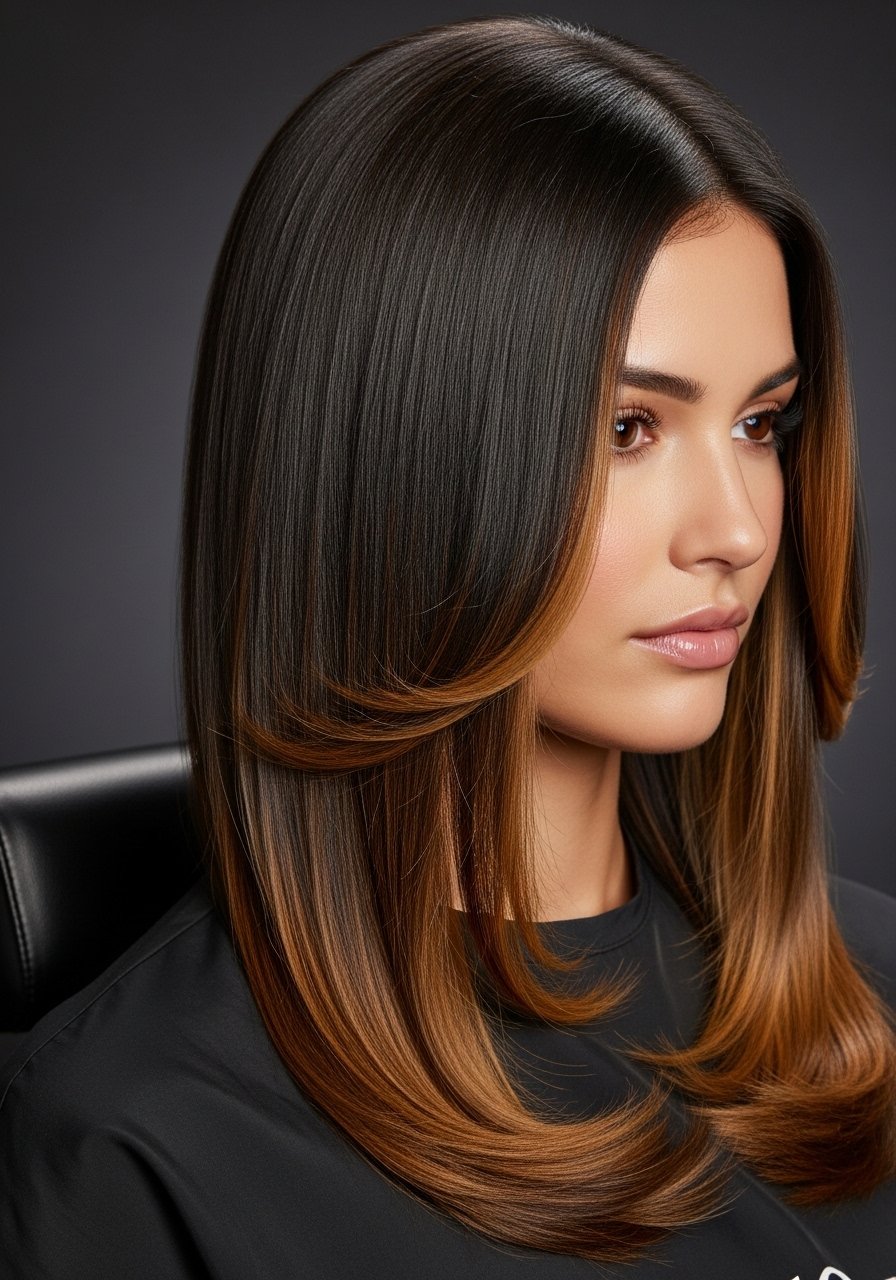
6. Face-Sculpting Caramel Contour
This places warmer highlights at cheek level to mimic how light hits the face, creating a sculpted look that photographs like a filter. It reads intentional and works well with shorter cuts like bobs and lobs. Salon placement is precise, but you can ask for "cheekbone contouring" rather than random foils. For upkeep, a color-safe heat protectant spray keeps highlighted strands from drying out during styling.
Mistake to Avoid: Highlighting from the root down on short hair, which makes contrast look top-heavy.
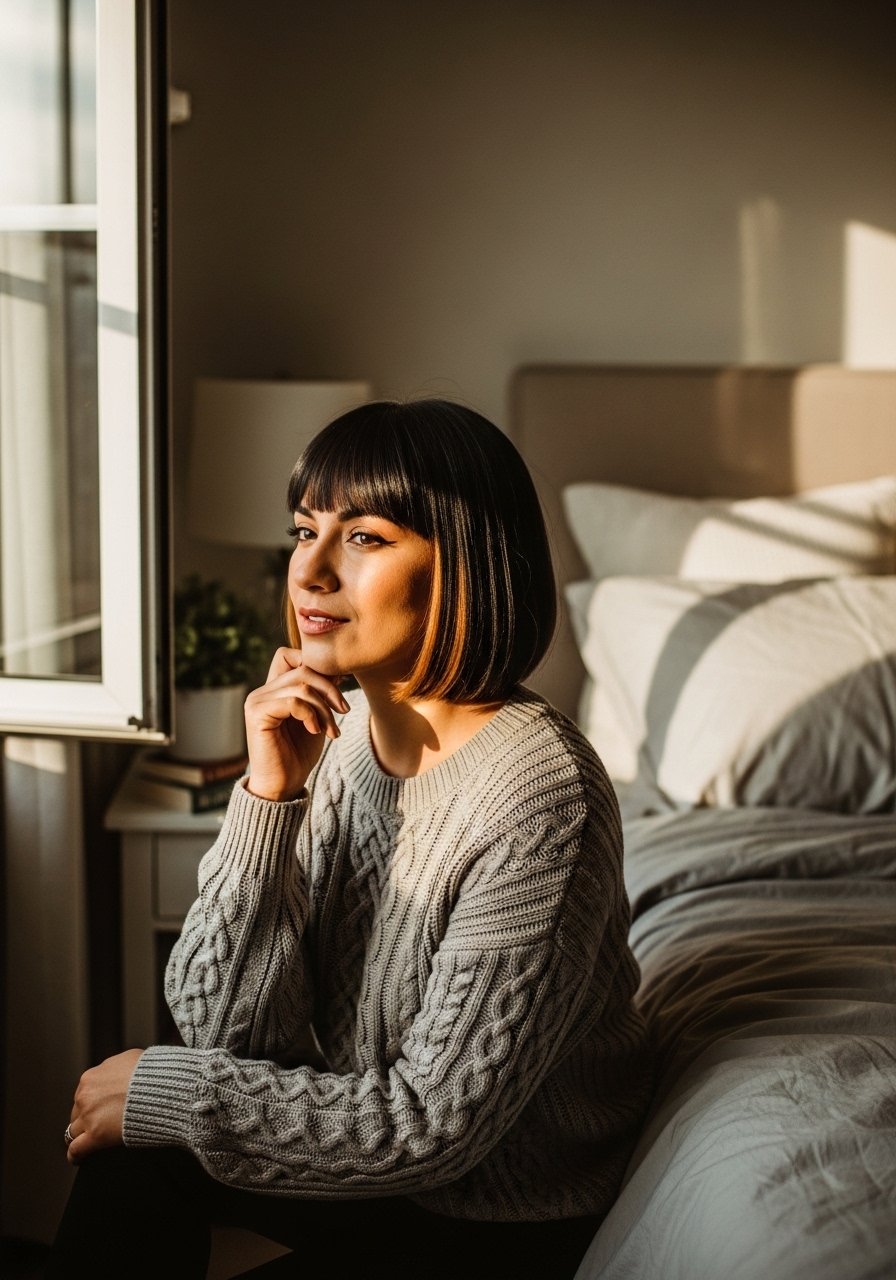
7. Dipped-Blonde Ends For Playful Contrast
Dipping only the ends gives a pop of brightness that feels casual and photo-ready, with less damage than full foiling. It works well for anyone who wants an edgy but repairable look. Use a conditioning gloss after processing and a bond-building treatment to keep ends from frizzing. This is a quick, lower-cost refresh every few months. For curl textures, the lighter ends will spring differently, so cut slightly longer to account for shrinkage.
Mistake to Avoid: Lifting ends to maximum level without a bond treatment, which causes breakage.
If any of these ideas have you ready to try something, here is a compact list of the things I actually buy for this kind of color work.
Highlight-Kit Essentials For Dark Hair
Color Care:
- For tone maintenance try a purple-toning shampoo (~$12-20). Keeps brass under control between glosses.
- For daily moisture a color-safe conditioner (~$8-18) makes highlights look fresh.
At-Home Treatments:
- Bond-building treatment (~$20-30) for pre- and post-lightening upkeep.
- Glossing serum (~$12-22) for instant shine.
Tools & Styling:
- Wide-tooth comb (~$6-12) to detangle highlighted hair gently.
- Heat protectant spray (~$10-18) before styling.
- Microfiber towel (~$8-15) to reduce friction and breakage.
- Tinting brush and bowl set (~$10-16) if you do touch-ups at home.
- Clarifying shampoo (~$9-14) for monthly reset before fresh gloss.
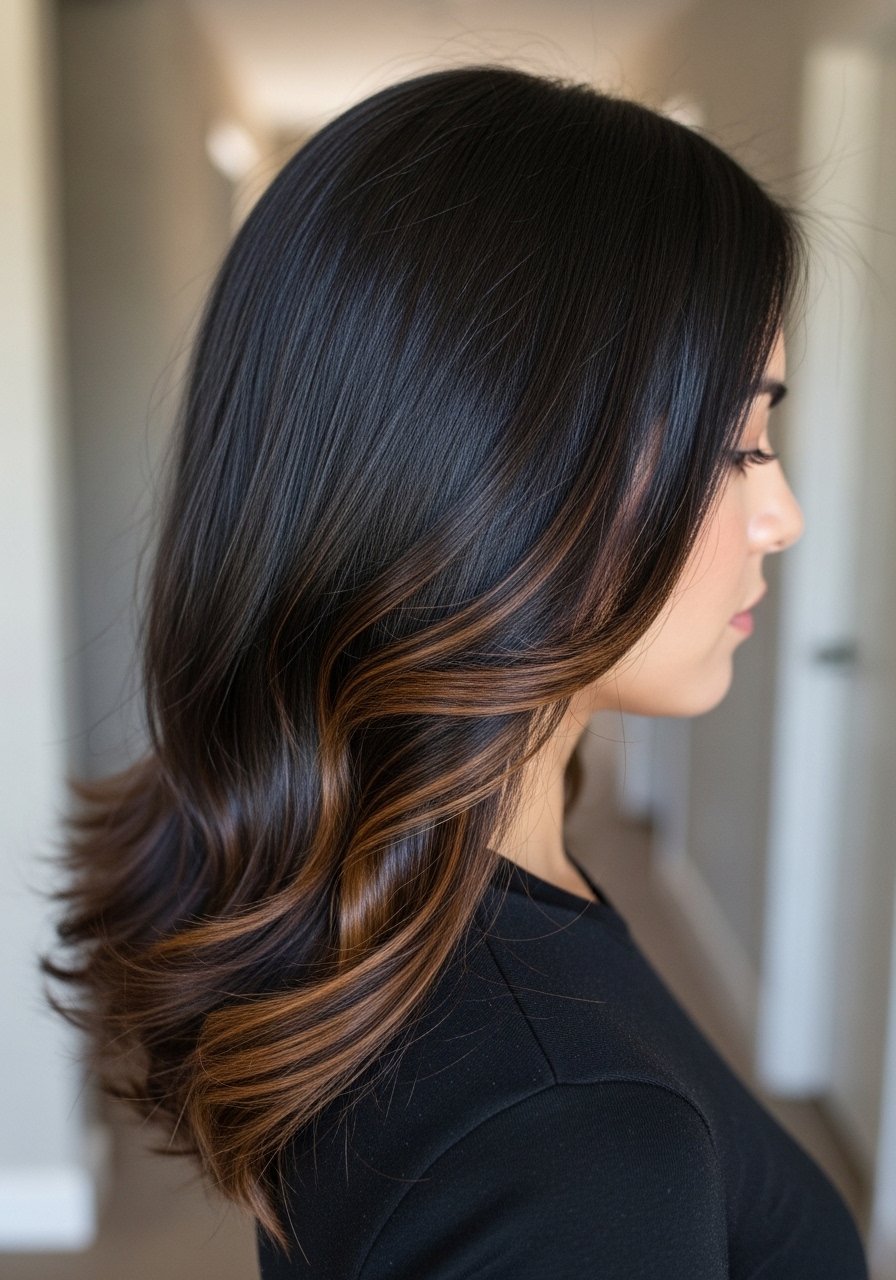
8. Low-Maintenance Root Melt
Root melts blur the contrast between natural black roots and lighter lengths so regrowth reads softer in photos over time. The visual works because the color transition is gradual, so the hair looks intentional even five weeks post-appointment. This is an excellent pick for busy schedules and for first-timers who do not want sharp grow-out lines. I like finishing with a cream leave-in treatment to smooth highlighted sections.
Mistake to Avoid: Asking for a root melt and getting a hard demarcation; ask specifically for blended transitions.
9. Copper Thread Accents For Warmth
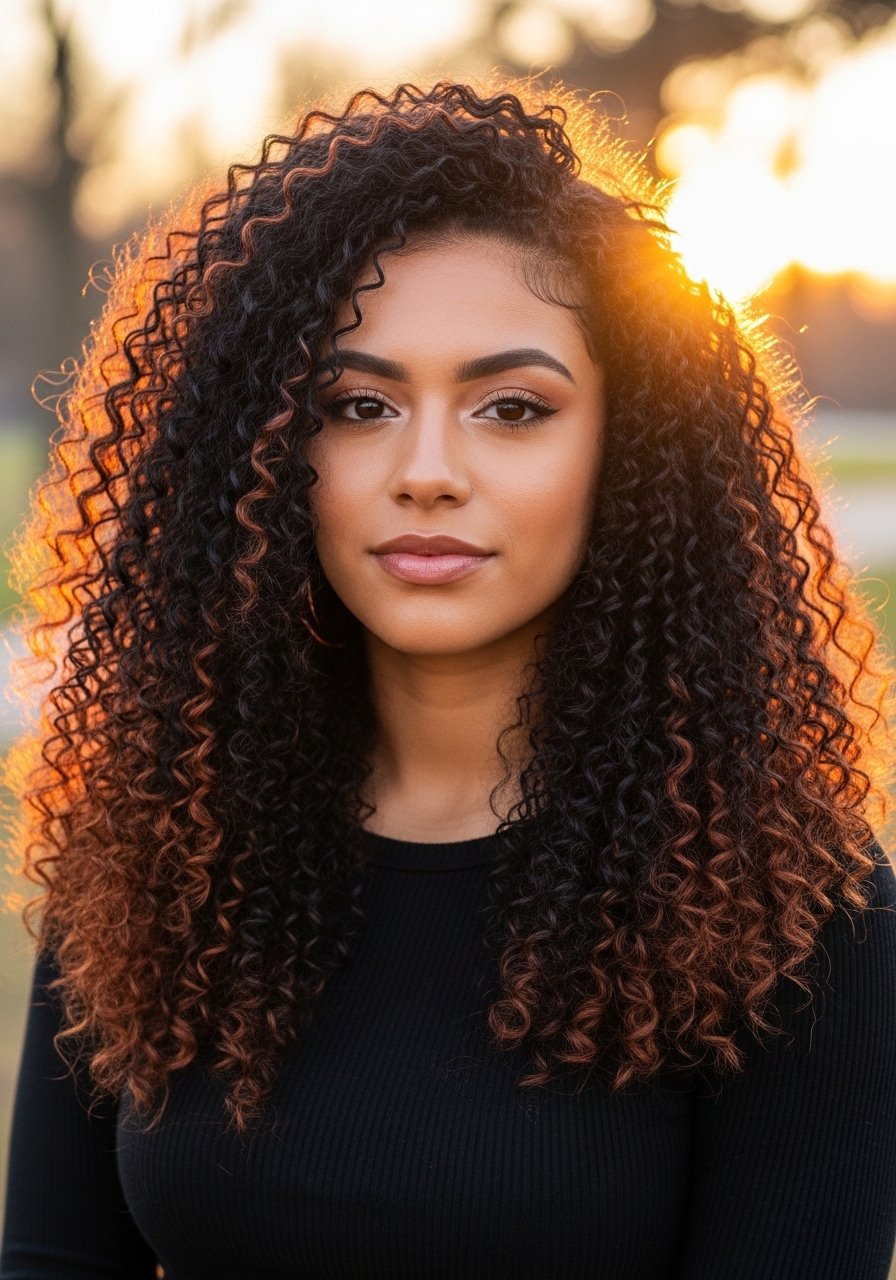
Thin copper threads through curls give warmth that photographs as depth and sparkle. For tightly coiled hair, place the warm accents on outer curls where they catch light. Copper tones tend to fade faster, so a targeted color-refresh spray helps. This is a trend-forward pick for anyone who wants warmth without losing base darkness. Use a low-heat styling approach to preserve curl definition after coloring.
Mistake to Avoid: Overlapping copper on adjacent foils, which turns warm accents into a single flat patch.
10. Ashy Shadow Lights For Cool Contrast
Ash tones on black hair read as understated and photograph like subtle contrast, especially under studio light. These are good for someone avoiding warm brass and who prefers muted looks. Processing must be carefully watched to avoid green undertones. I often follow with an ammonia-free gloss and use a clarifying scalp brush once in a while to prevent product buildup that dulls ash highlights.
Mistake to Avoid: Trying to force ash on hair that lifts to orange without an extra bleaching step and toner.
11. Micro-Face Lights For Glasses Wearers
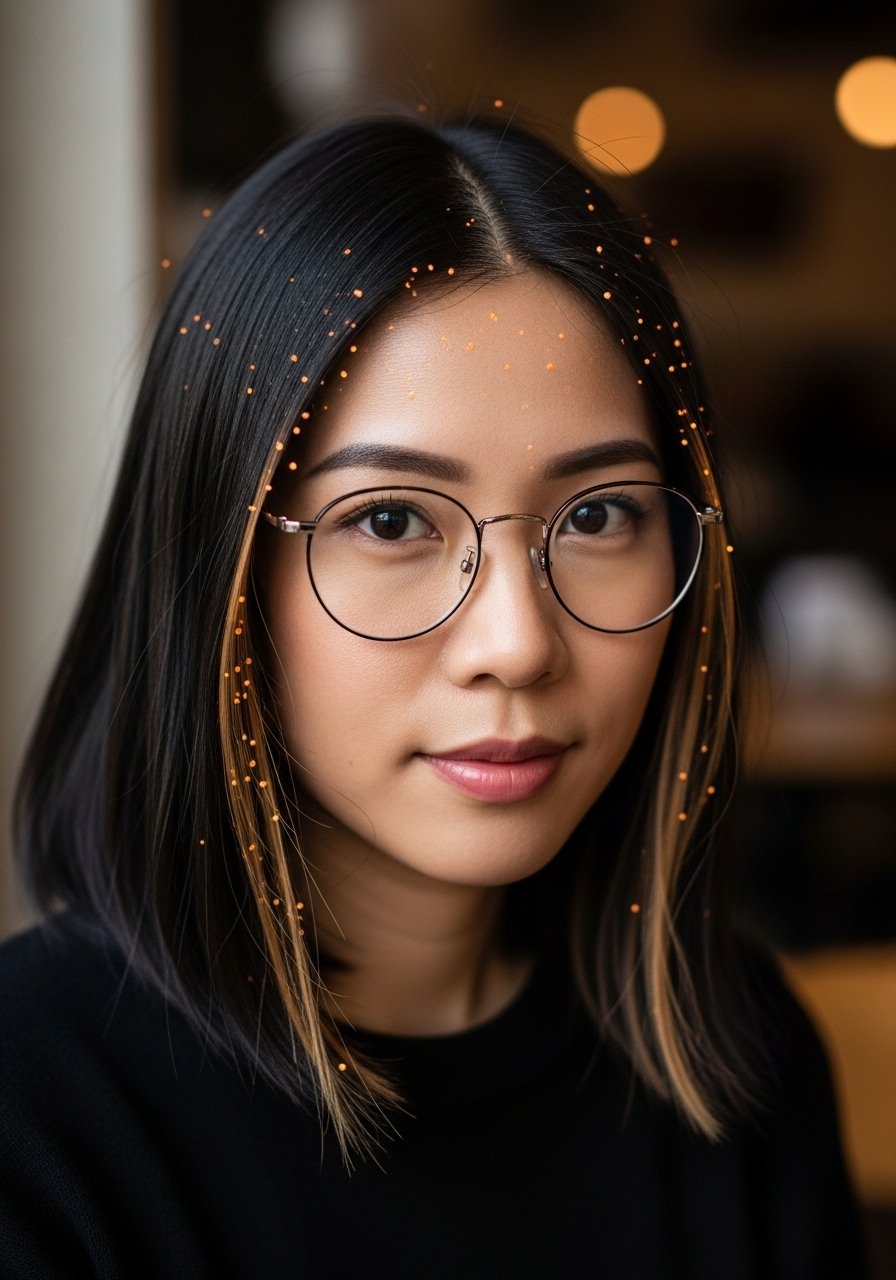
If you wear glasses, place micro-highlights at the temples and browline so they peek over frames in photos. The trick is scale, tiny pieces only, which brighten the face without competing with frames. This is a low-cost salon add and an excellent gap most lists miss. For keep-up, a lightweight texturizing spray helps those small pieces move and show when you turn your head.
Mistake to Avoid: Highlighting directly under frames, which makes the color look blocked by lenses.
12. Warm Nape Lowlights For Hidden Depth
Placing lowlights at the nape adds a secret depth that only shows when hair is in a ponytail or turns. It is low-effort, renter-friendly, and keeps the top layer predominantly dark. This is one of the competitor gaps I kept seeing missed, because it gives photos unexpected richness with almost no upkeep. A small dab of hair balm on the nape pieces prevents them from drying out.
Mistake to Avoid: Pulling lowlights too high, which makes them visible all the time and removes the surprise depth.
13. Glossed Black With Hidden Lights

Sometimes the best highlight is nearly invisible until movement reveals it. This approach keeps most hair black and places tiny highlights under the top layer. It reads ultra-refined in photos because the top shine makes the hidden pieces look like a glint. Ideal for conservative workplaces or anyone easing into color. I finish with a clear shine spray after styling to mimic that glossy, mirror-like finish without flattening the lights.
Mistake to Avoid: Overloading hidden sections, which makes the style no longer hidden when you want it to be subtle.
Keeping Highlight Tone Fresh
Thin coats beat one thick coat every time. Three thin layers of a purple toning mask look more even and avoid patchy tone than one heavy application.
Grab a bond-building treatment for after any lightening session. It costs more up front but cuts split ends and keeps highlights from feeling rough.
Curly and coily textures prefer heat-free styling for 48 hours after coloring. A microfiber hair towel reduces friction and helps color-set without frizz.
Most people comb wet highlights with a wide-tooth comb, not a brush. A wide-tooth comb detangles gently and keeps highlighted strands from snapping.
