
Pinterest promised a spa, my rental gave me beige tile and a towel bar bolted in at elbow height. After the tenth failed attempt to make it look intentional, I stopped copying full-room photos and started swapping small, specific things that actually fit a tiny footprint. The result felt fresher with less money and less sweat than the big reno I kept pinning.
After trying this in three rentals, these ideas are aimed at renters and homeowners who want fresh-looking bathrooms on a small budget. Most projects are renter-friendly or reversible, many take under an hour to install, and none require advanced skills. Expect low to mid price points, a few tools like a level and 3M strips, and practical tips about spacing and finishes that actually read well in real photos, not just on a pin.
1. Plug-In Towel Warmer for a Cozy Finish
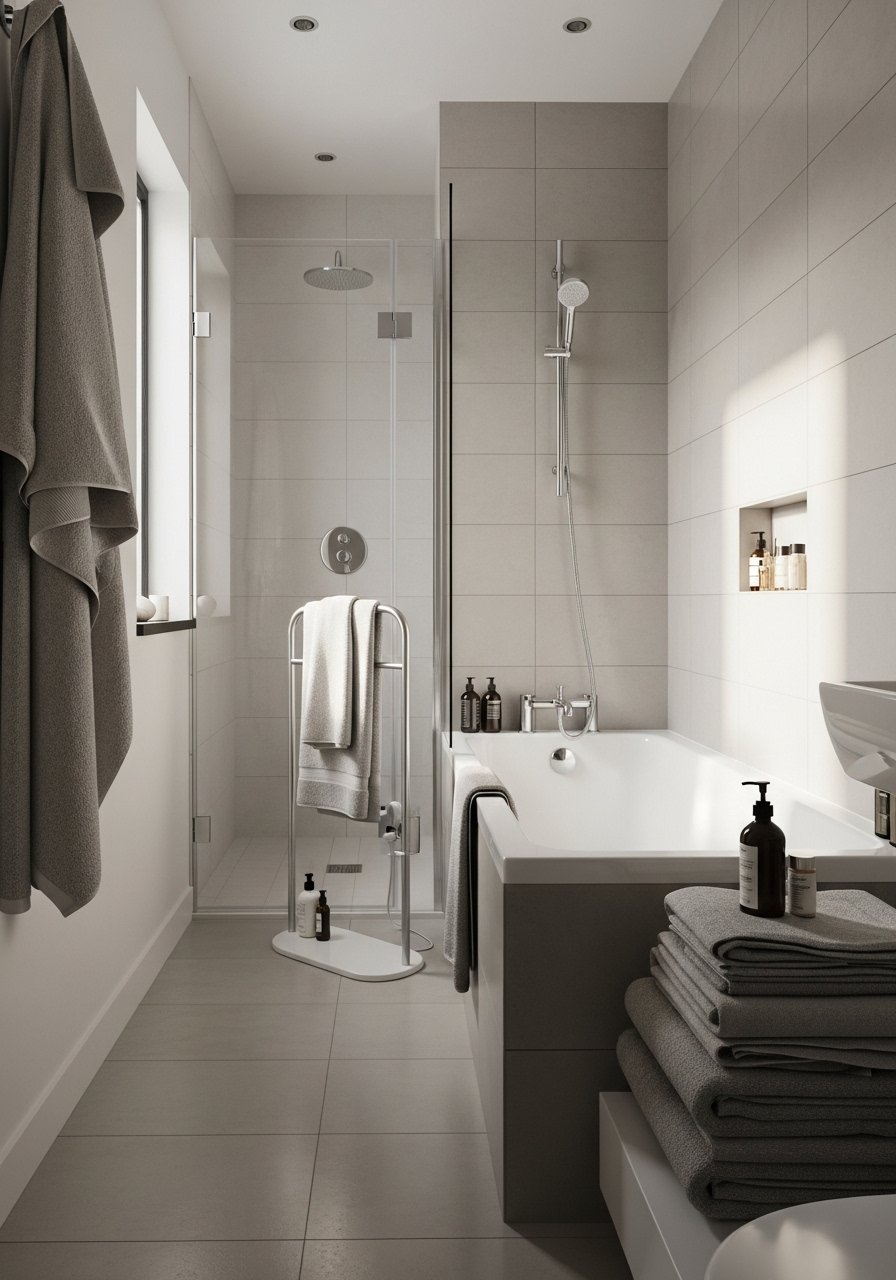
A slim plug-in towel warmer makes towels look like they belong in a boutique hotel, and it takes up roughly the same footprint as a ladder towel rack. Pick one that plugs into a GFCI outlet and mount it with the included bracket, leaving a 2-inch clearance from the wall for airflow. I use a plug-in heated towel rail and a waterproof outlet cover for peace of mind. It reads warm in photos and actually dries towels faster in real life.
Mistake to Avoid: Buying a hardwired unit for a rental and assuming you can rewire without permission.
2. Layered Mirrors to Add Depth

Putting a leaned mirror in front of a wall mirror creates reflection depth without shaving square footage. Aim to overlap the edges by about 1.5 to 2 inches and hang the center of the main mirror at 60 to 65 inches from the floor for flattering angles. I paired a leaning round mirror with a slim wall mirror to read more expensive than the tiles. This is renter-friendly, you can hang the wall mirror with removable picture-hanging strips rated for the weight.
Mistake to Avoid: Hanging mirrors too high, which makes countertops look cramped in photos and in person.
3. Swap Hardware to Matte or Warm Metal
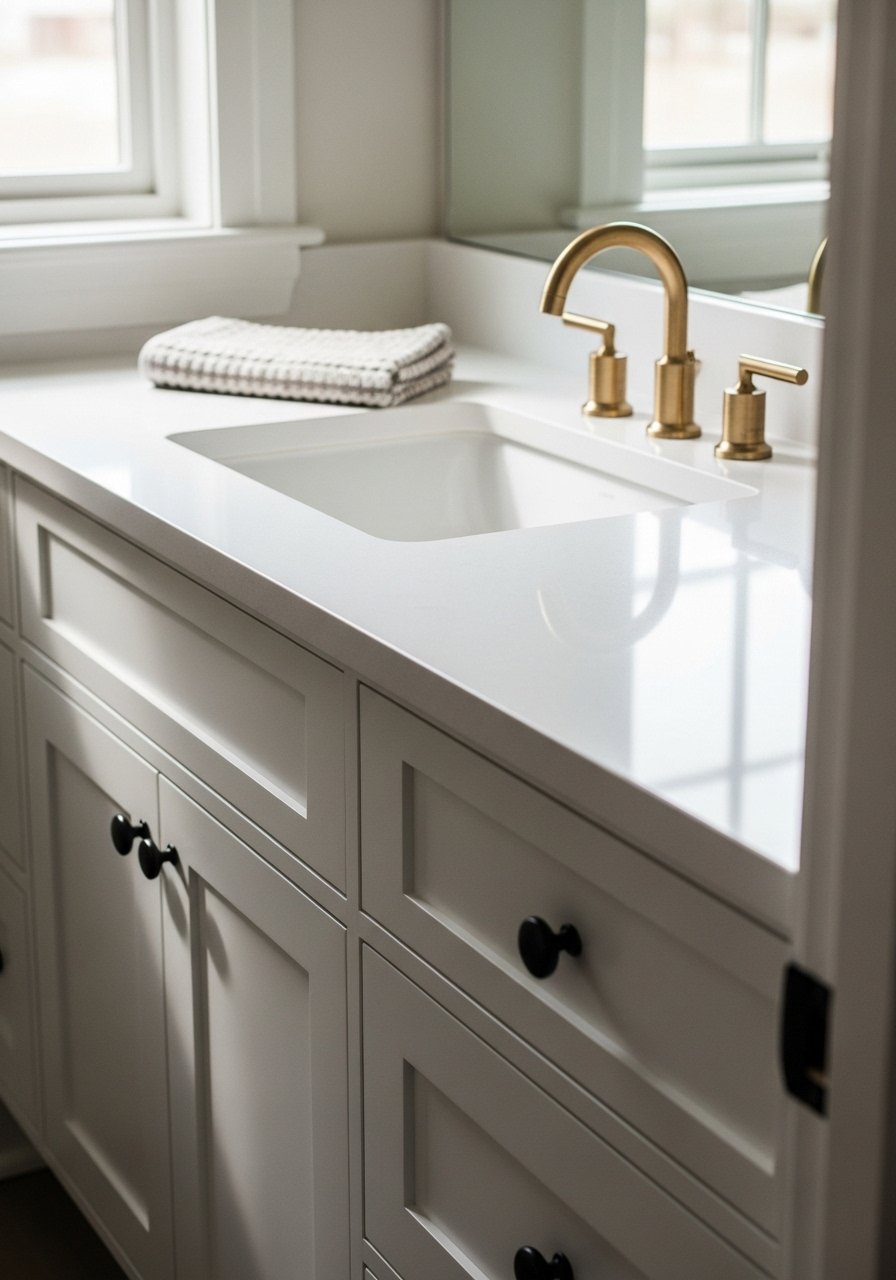
Changing drawer pulls and the faucet finish updates the whole vanity. I recommend picking one metal family and sticking with it, use a 60 to 40 mix of matte to warm metal if you want contrast without chaos. A matte black faucet plus brass cabinet knobs reads intentional. Install is usually a 20 to 40 minute job for a single sink. In rentals, swap back before moving and keep original parts in a labeled box.
Mistake to Avoid: Mixing three different finishes because you liked individual pieces in isolation.
4. Peel-And-Stick Tile Accent Behind Vanity

Peel-and-stick tiles are a low-effort way to get the "tile-to-ceiling" look without contractors. Pick a neutral stone pattern and install a 12- to 24-inch band behind the vanity to create a focal point. Work in 2-inch rows and use a metal straight edge for clean seams. I used a matte stone peel-and-stick tile and a small rubber grout tool to press edges down. It photographs like a full renovation, but you can remove it later.
Mistake to Avoid: Applying to damp walls or uneven surfaces, which causes bubbling and peeling.
5. Plants That Love Steam

Plants make a bathroom feel alive and they actually thrive in humidity when you pick the right ones. Go for pothos, bird's nest fern, or snake plant in glazed pots that resist moisture. Place plants where they get indirect light and mist them once or twice a week. I keep a self-draining ceramic planter and a small watering syringe to avoid overwatering. In rentals, use a saucer under the pot so you do not mark surfaces.
Mistake to Avoid: Buying sun-loving succulents that look sad in low-light, humid bathrooms.
6. Narrow Gallery Above the Toilet
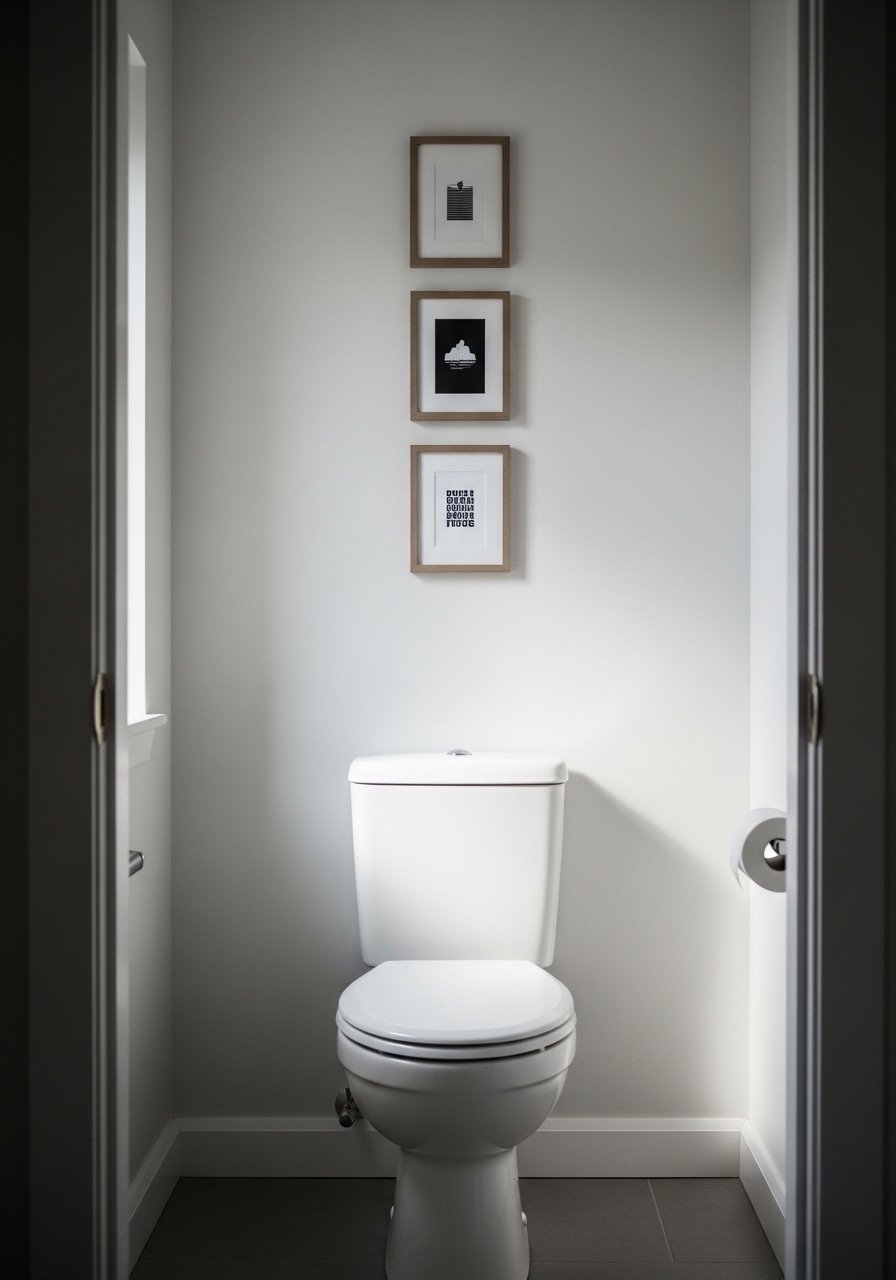
A vertical trio of narrow frames over the toilet makes the whole wall read taller. Use uniform mats and hang centers 2 to 3 inches apart, total grouping width no wider than the toilet tank minus 2 inches each side. I framed digital prints and used black picture frames that cost less than custom framing. This is a cheap graphic move that shows up well in photos and does not feel cluttered in reality.
Mistake to Avoid: Choosing mismatched frames in different colors and sizes, which looks DIY in a bad way.
7. Open Shelving With Woven Storage
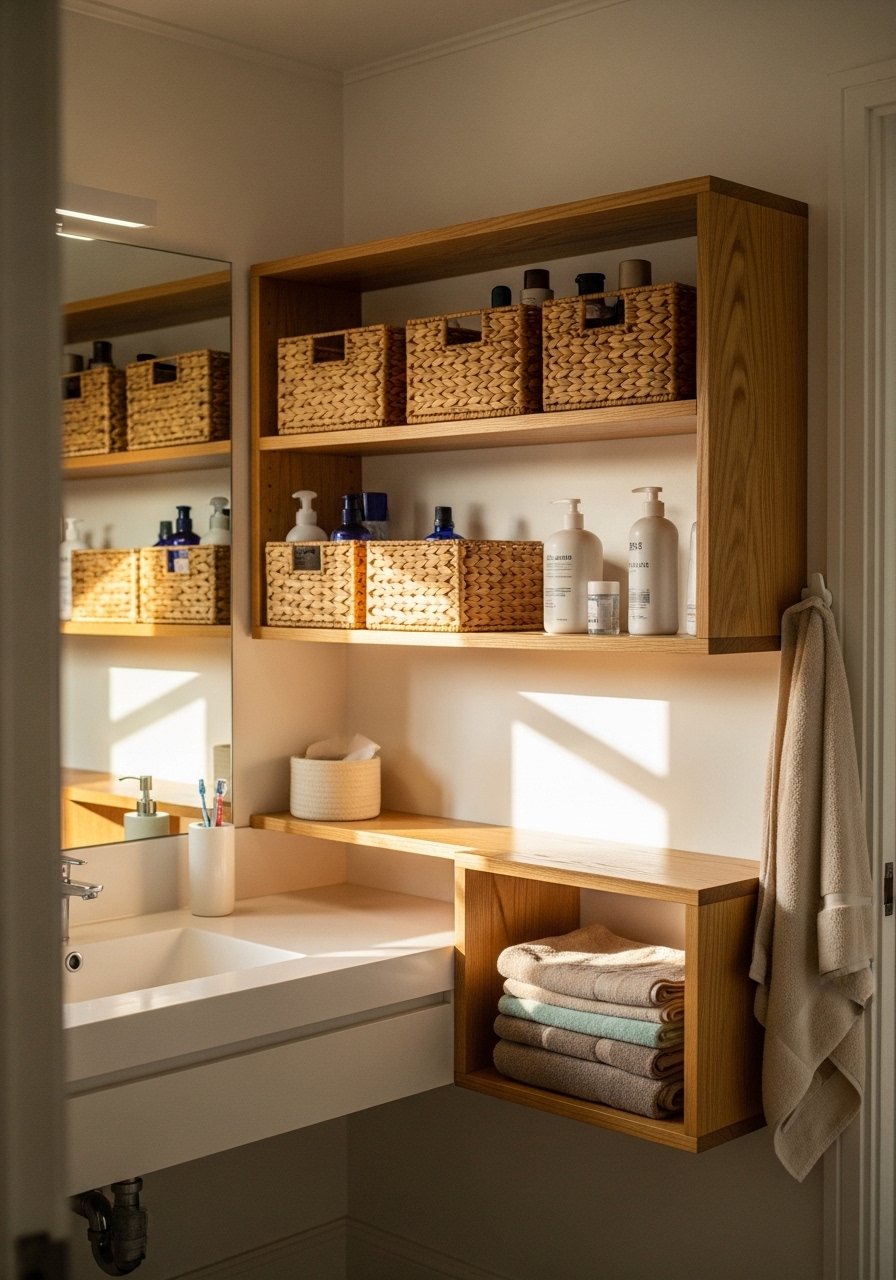
Open shelves keep things visible but tidy when you use uniform baskets. Aim for three baskets on a 24- to 30-inch shelf, use similar textures and leave one shelf 25 to 30 percent empty for a breathable look. I use woven seagrass baskets and a floating shelf kit for quick install. In small bathrooms, open shelving looks less heavy than closed cabinetry and is easy to remove in a rental.
Mistake to Avoid: Filling every shelf with products, which creates visual clutter instead of calm.
If any of these ideas have you ready to buy, here are the specific things I actually reach for.
Bathroom Refresh Essentials List
Hardware & Fixtures:
- Matte black bathroom faucet (~$80-150). A single finish swap updates the whole sink area.
- Brass cabinet knobs (~$12-25). Small cost for big impact.
Textiles & Soft Goods:
- Linen shower curtain (~$30-60). Texture reads expensive in photos.
- Quick-dry bath mat (~$15-30). Prevents mildew and looks neater.
Storage & Styling:
- Woven seagrass baskets (~$20-40 each). Uniform baskets make open shelves look curated.
- Ceramic vanity tray (~$12-25). Keeps counters tidy and photograph-ready.
Lighting & Electrical:
- Warm white LED bulbs 2700K (~$10-20). Swap cold bulbs for instant warmth.
- Plug-in heated towel rail (~$70-150). Hotel vibes without hardwiring.
Decor & Plants:
- Lean round mirror (~$60-120). Adds depth when layered.
- Self-draining ceramic planter (~$15-35). Protects surfaces from moisture.
Humidity-Friendly Styling Habits
Make towels look like a spa by folding them into thirds before rolling. A neat roll takes less space on a shelf and looks intentional, try a towel rolling technique with a bamboo shelf caddy to keep them contained.
Grab warm white LED bulbs 2700K to swap out harsh lighting in under five minutes. Warm light photographs closer to real life and softens tile glare.
Most people stack identical baskets on open shelves. Try mixing one low basket with two taller ones instead. A set of woven storage baskets creates visual rhythm and hides the clutter.
Avoid placing plants directly on wood that is not sealed. Use a small saucer or tray under pots to prevent water damage and the slow ring marks that look worse in reality than in photos.
Everyone thinks more shelves fix storage problems. Instead, remove one shelf and use the cleared space for a vertical ladder towel rack or tall plant. A slim leaning towel ladder anchors a corner and keeps the room feeling airy.
