
My short nails used to look like an afterthought, a trimmed edge hiding whatever design I tried. I kept copying long, sculpted photos and then wondering why the gradient vanished on my own nails. The moment it clicked was when a tech at a salon downtown trimmed the free edge, blended the ombre lower on the nail, and the whole hand read polished even at a thumb-length I could actually type with.
These are eleven short baby boomer looks meant for people who want manicures that read tidy, low-maintenance, and wearable at a desk job. Most ideas work with natural nails and gel or regular polish depending on time and budget. If you are a beginner, think 20 to 30 minutes per hand for a basic ombre. If you go to a salon, tell the tech you want the fade placed lower on the nail to avoid a stubby look. A tech who works at a salon downtown showed me this placement trick and it changed the outcome.
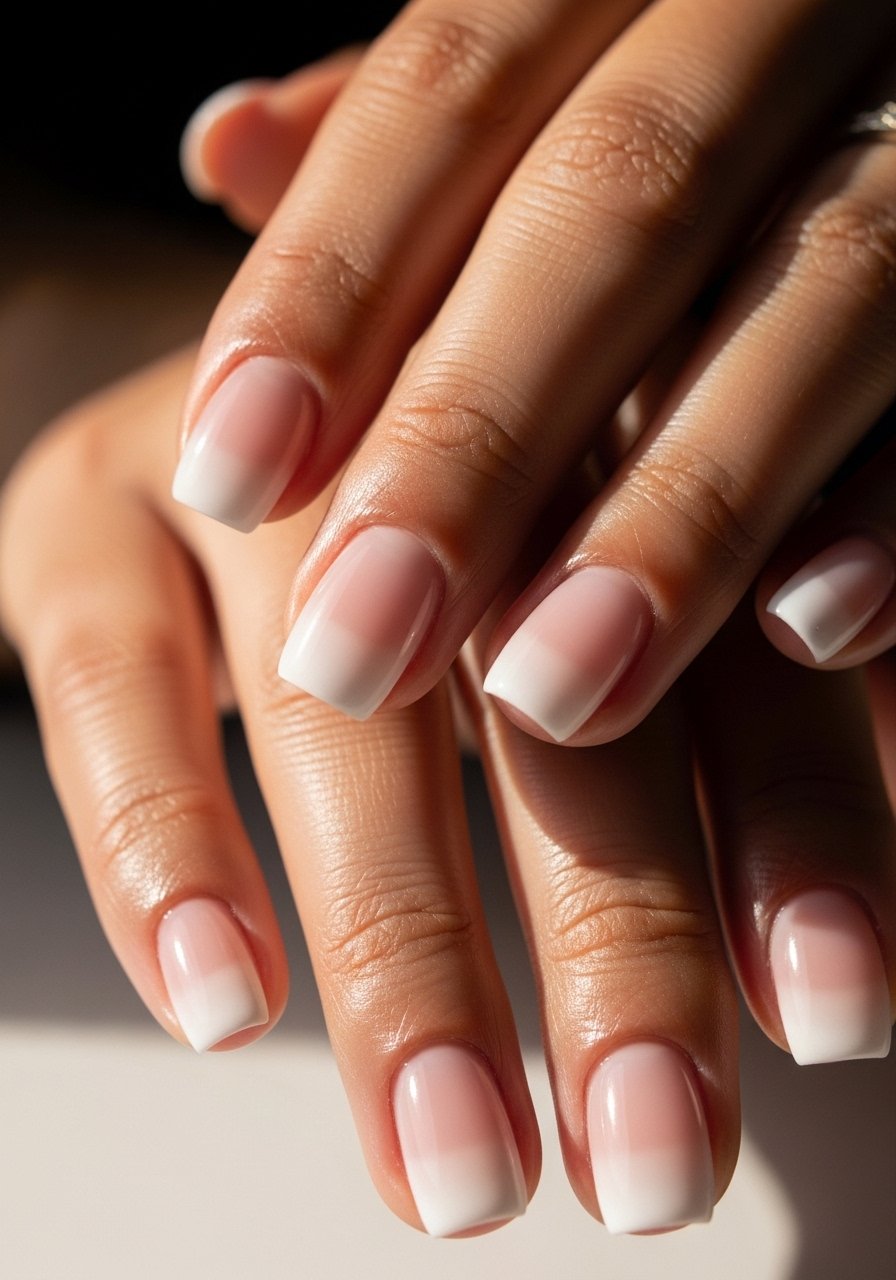
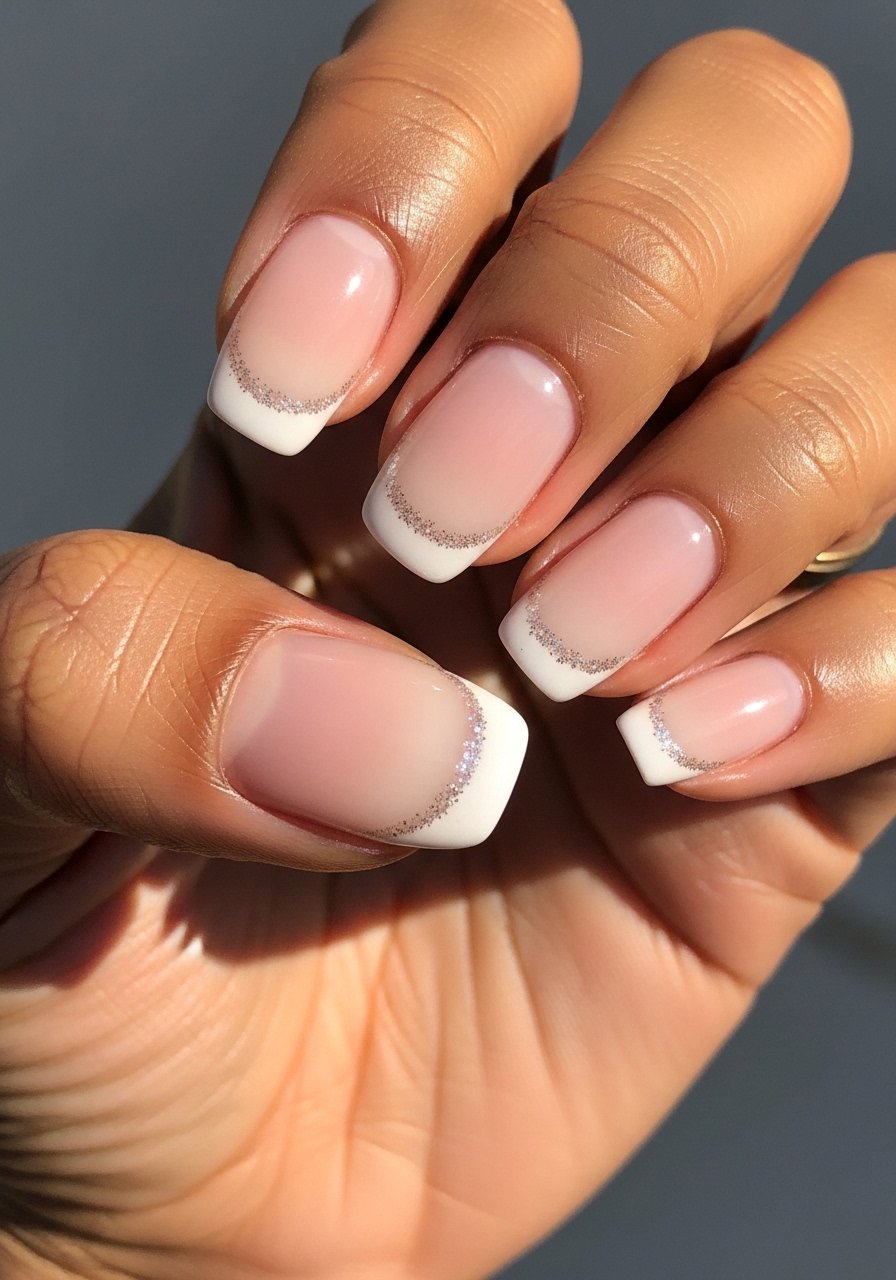
1. Sheer Pink Classic Ombre

The classic starts with a sheer pink base and a translucent white tip blended down about one third of the nail, which keeps the nail visually longer. I layer three thin coats of a sheer pink, then a 70 to 30 swipe of white to pink while the polish is tacky, then soften with a small fan brush. This reads clean and office-appropriate. Use a quick-cure LED lamp if you are using gel so each thin layer cures for 30 to 60 seconds. Try a sheer pink like sheer-pink-polish and a sheer white like translucent-white-polish.
Mistake to Avoid: Applying a thick white tip that sits on top of the nail instead of feathering it down so the gradient reads abrupt and chunky.
2. Matte Soft-Fade
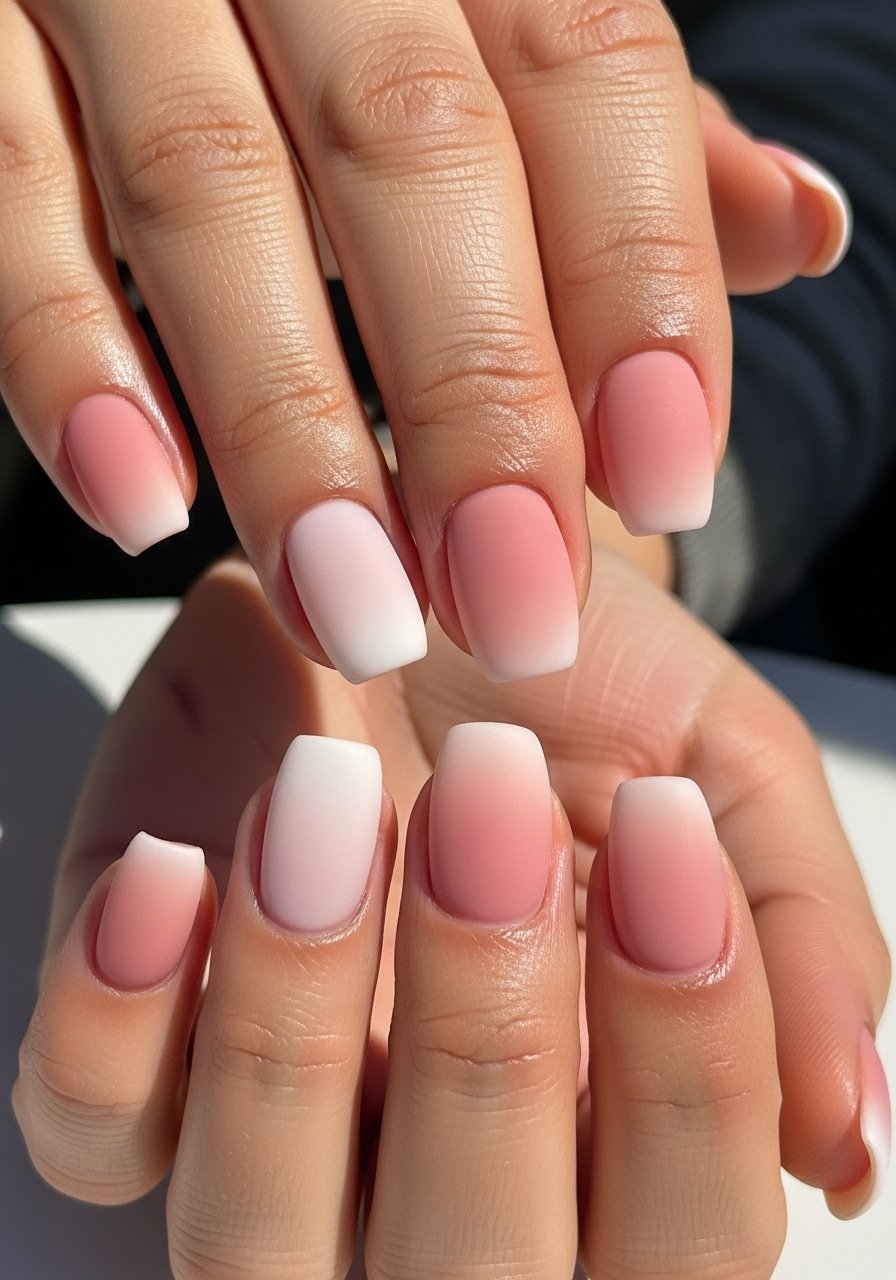
Swap a glossy finish for matte to make short nails feel modern and understated. After creating a standard ombre, top with a fine-matte top coat and let it dry fully for at least five minutes. The matte finish reduces glare so the fade looks softer, which helps tiny free edges appear more intentional. This works for natural and gel polishes. If you want a product to try at home, add a matte-top-coat to your kit. Budget friendly and beginner friendly, this look takes about the same time as a glossy ombre.
Mistake to Avoid: Spraying or wiping matte top coat while it is still tacky, which creates streaks and spots.
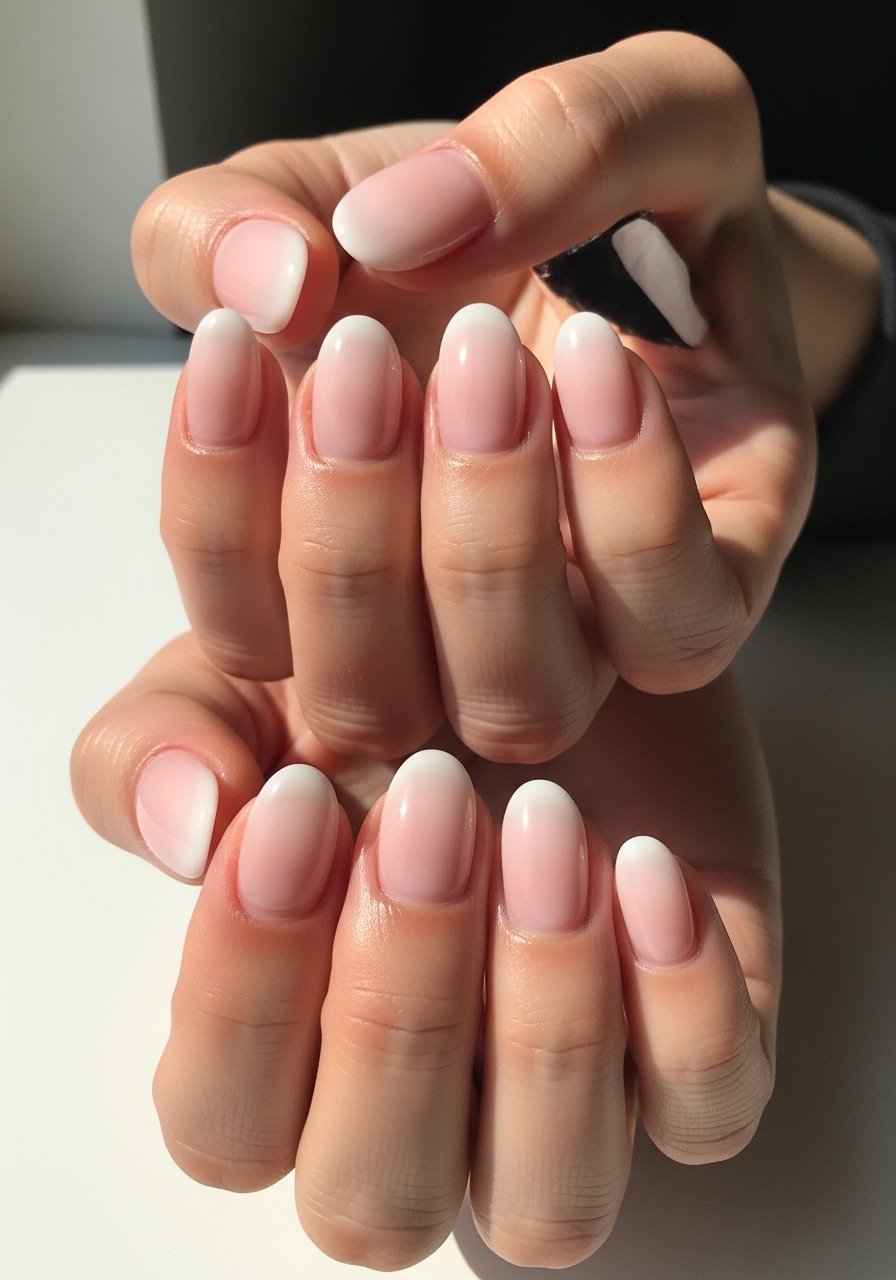
3. Micro French Fade
Place the white closer to the tip for a micro French effect that reads like a soft white line rather than a full white tip. Visually, this lengthens the nail because the eye follows the pale band. Use a 2 to 1 ratio of sheer pink to white when sponging so the white stays narrow. This is excellent for someone who wants a hint of a French without the strong white arc. Try a thin artist brush or a nail-art-brush-set to control placement.
Mistake to Avoid: Sponging with too much white so the micro line turns into a full tip and the nail looks shorter.
4. Sheer Rose With Negative Space Crescent
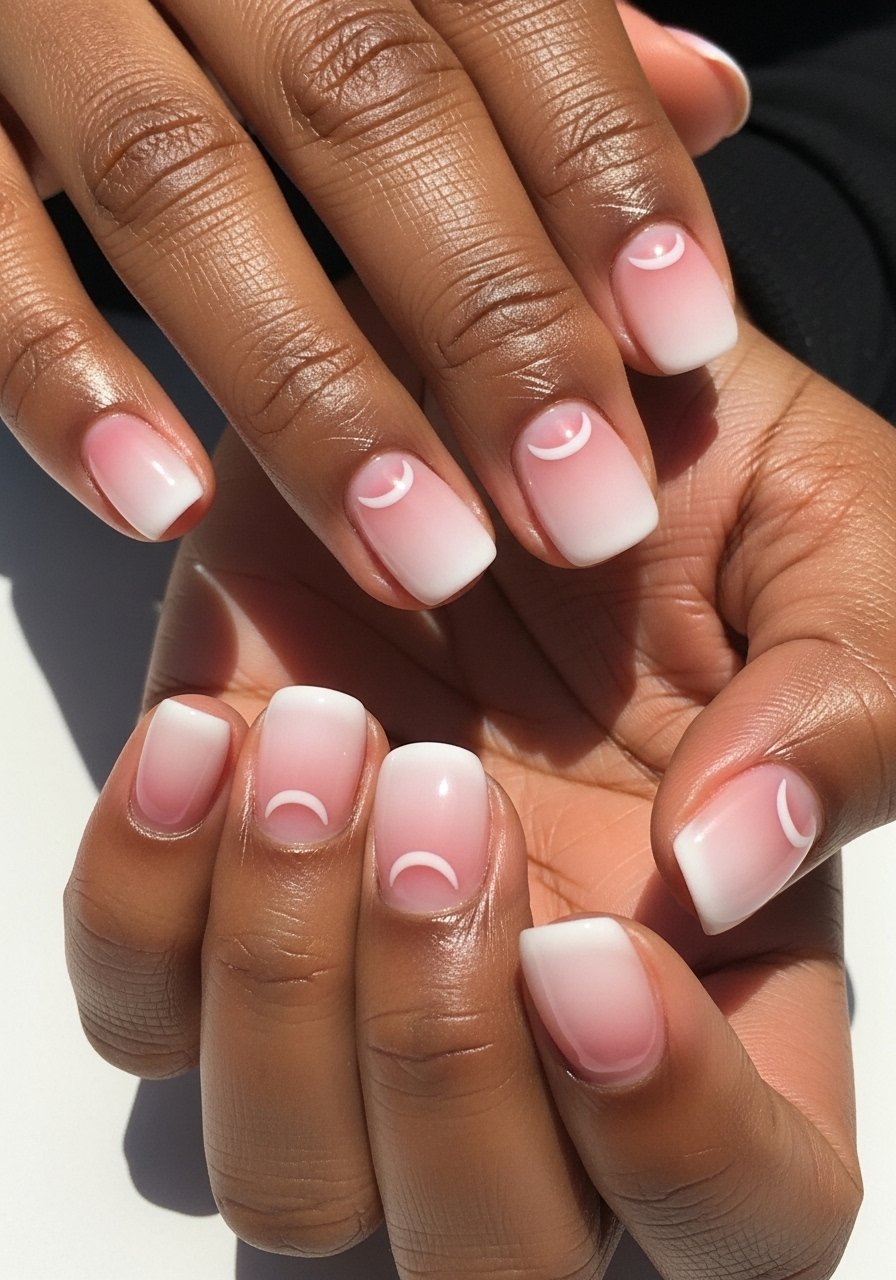
Add a small negative-space crescent at the base to make short nails read more intentional and less trimmed-down. Paint the ombre as usual but use a round latex sticker or a small cutout to protect a crescent near the cuticle before sponging. The crescent draws the eye inward and suggests an extended nail bed. This technique is excellent for natural nails and for people who prefer lower upkeep. Use a gentle cuticle oil like nourishing-cuticle-oil after the manicure to keep the crescent neat.
Mistake to Avoid: Placing the crescent too large so the nail looks like it has a gap rather than a design feature.
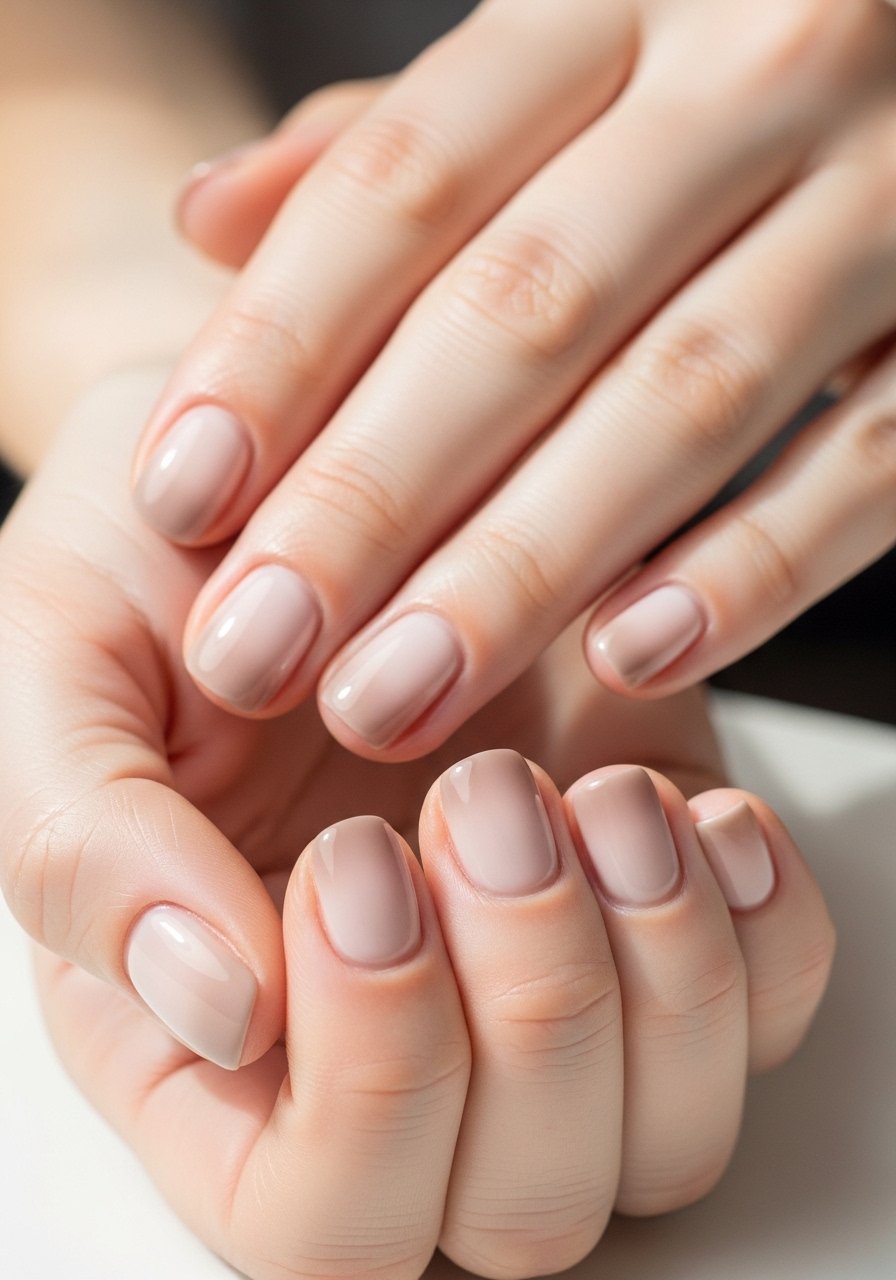
5. Blush Jelly Ombre
A jelly finish gives a translucent, glassy look that is forgiving on short nails. Replace opaque pink with a jelly formula and build depth with two to three thin coats. The translucency creates the illusion of depth at the free edge which lengthens the nail visually. This is a good low-commitment option for someone who wants nails that look polished without a heavy opaque layer. Try a jelly-style polish such as blush-jelly-polish.
Mistake to Avoid: Applying the jelly in one thick coat which pools and looks uneven instead of layering thinly for a glassy effect.
6. Tiny Glitter Fade
Add a band of fine glitter along the white to make the tip pop without overwhelming a short nail. Use a scatter of superfine glitter or a glitter polish thinned with a drop of clear base. Keep the glitter to a 1 to 2 millimeter stripe for balance. This gives a festive feel that still reads professional. For at-home use, look for a superfine glitter polish like fine-glitter-topper.
Mistake to Avoid: Dosing too much glitter so it builds into a thick ridge that adds bulk and chips quickly.
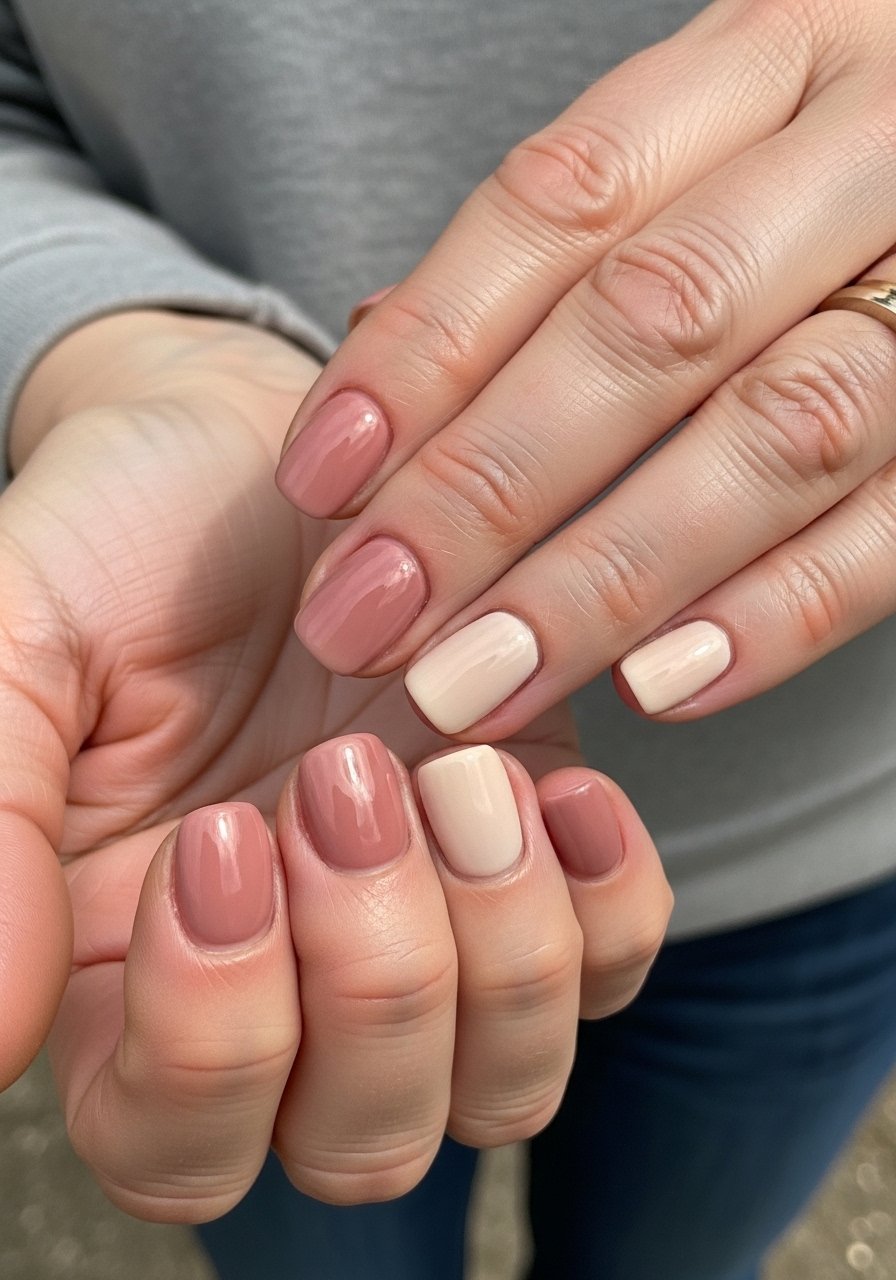
7. Creamy Taupe Ombre
Swap pink for a warm taupe to suit cooler wardrobes or neutral lovers. Taupe tones disguise the free edge and read elegant and low-key, which is helpful if you often wear long sleeves or neutral jewelry. This look works well with both natural and gel polish. Try a warm taupe creamy-neutral-polish and finish with a durable top coat to keep the muted tones smooth.
Mistake to Avoid: Using a taupe that is too close to your skin color so the manicure reads bare instead of intentional.
If you want to shop everything in one place before trying more looks, here are the essentials I reach for.
Short Baby Boomer Kit
Tools
- Nail sponge wedges (~$5-12). Small wedges give control for short tips and less mess.
- Fine fan brush (~$6-15). Use this to feather and soften the gradient.
Polishes and Top Coats
- Sheer pink polish (~$8-18). The base for most boomer fades.
- Translucent white polish (~$6-15). Look for a buildable sheer finish.
- Matte top coat (~$7-14). For the soft-fade options.
Care
- Nourishing cuticle oil (~$6-12). Keeps the crescent and cuticle area tidy between fills.
- Quick-cure LED lamp (~$18-40). Handy if you use gel and want even thin cures.
8. Tiny Flora Accent
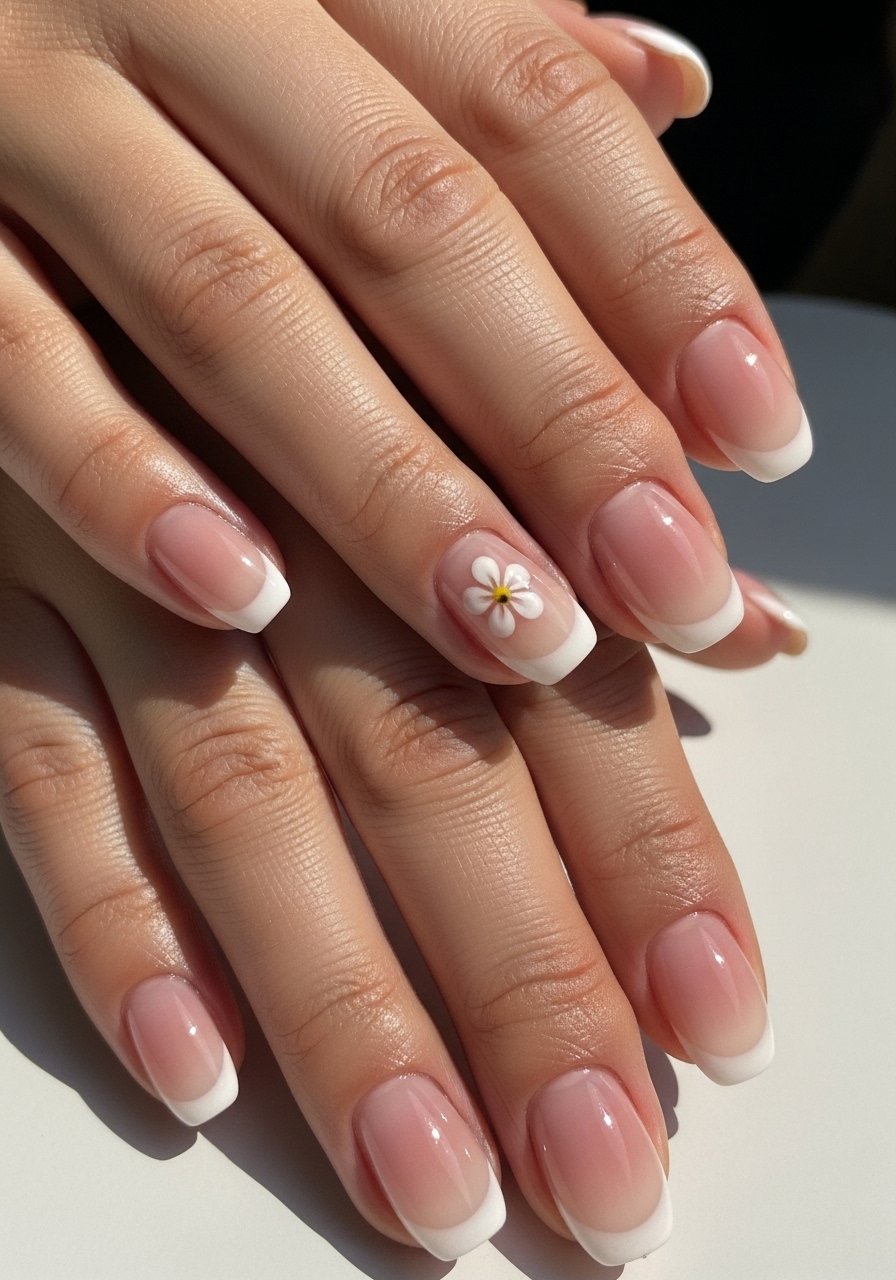
A single tiny floral accent on one nail reads delicate and avoids cluttering short tips. Paint the ombre first, then use a dotting tool and a toothpick to craft a two to three petal blossom. Keep the bloom about 2 to 3 millimeters wide so it does not overpower the nail. This works for weekend or special-occasion looks and pairs well with the micro French from idea 3. Use a small dotting tool or nail-dotting-tool.
Mistake to Avoid: Making the flower too big so it competes with the gradient and makes the nail appear cramped.
9. Low-Contrast Ombre for Older Hands
Lower the contrast between pink and white to flatter older hands where high contrast can draw attention to texture. Use a softer white or ivory blended with a slightly deeper rose so the transition reads gentle. This approach is softer in photos and under fluorescent lights. It is beginner friendly and quick to maintain. A muted ivory like soft-ivory-polish works well when paired with a mid-tone sheer pink.
Mistake to Avoid: Choosing a stark, cool white with a bright pink which makes nails look less natural and can highlight skin texture.
10. Short Ombre With Micro Rhinestone
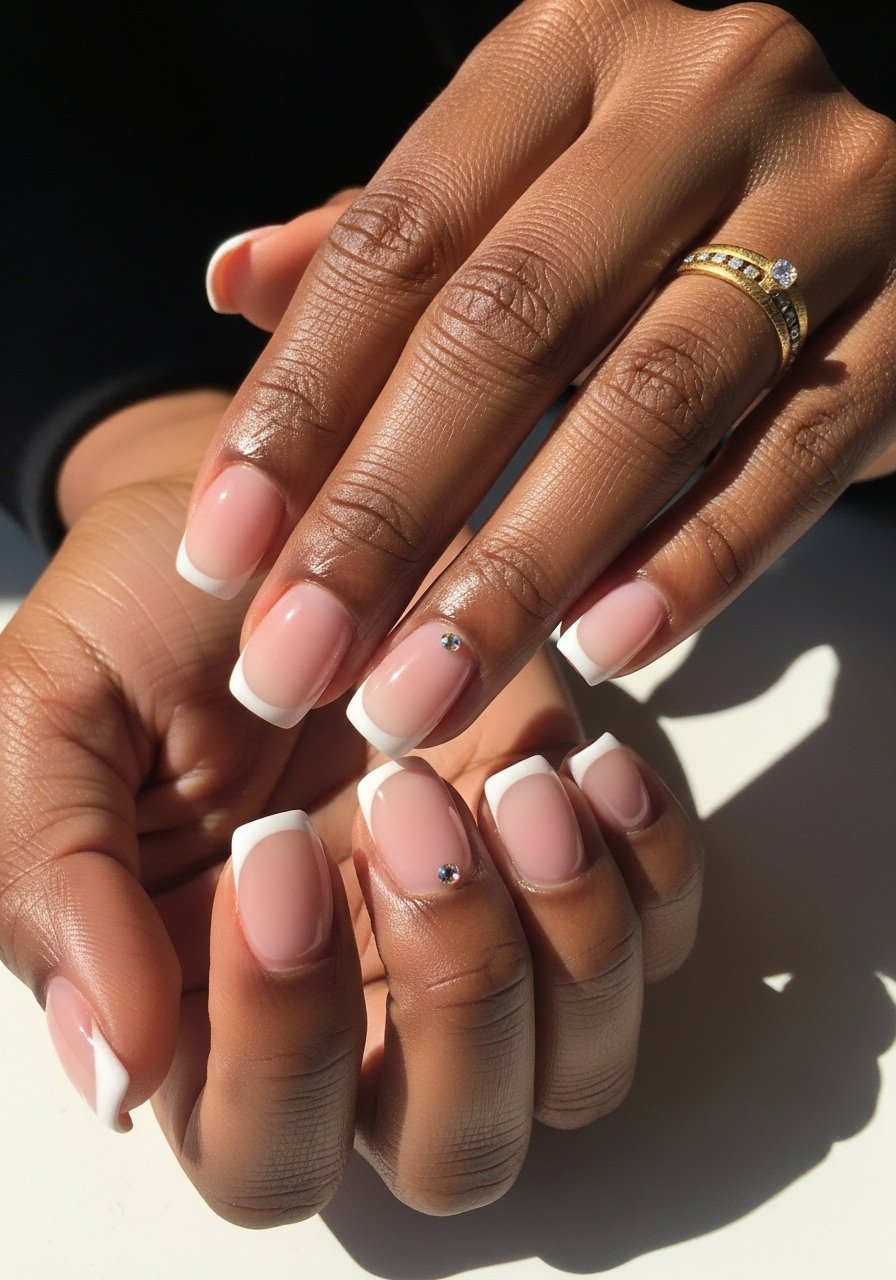
Add one micro rhinestone at the base of the cuticle on a single nail for a bit of catch without bulk. Glue a 1mm crystal onto a tacky top coat and seal with another thin layer of top coat. This keeps short nails comfortable and snag-free. It reads like thoughtful detail rather than full-on bling. Use a precision applicator or micro-rhinestone-nails.
Mistake to Avoid: Using large rhinestones that stick out and catch on fabrics or snag during daily tasks.
11. French-Guided Gradient With Gel Pen Lines
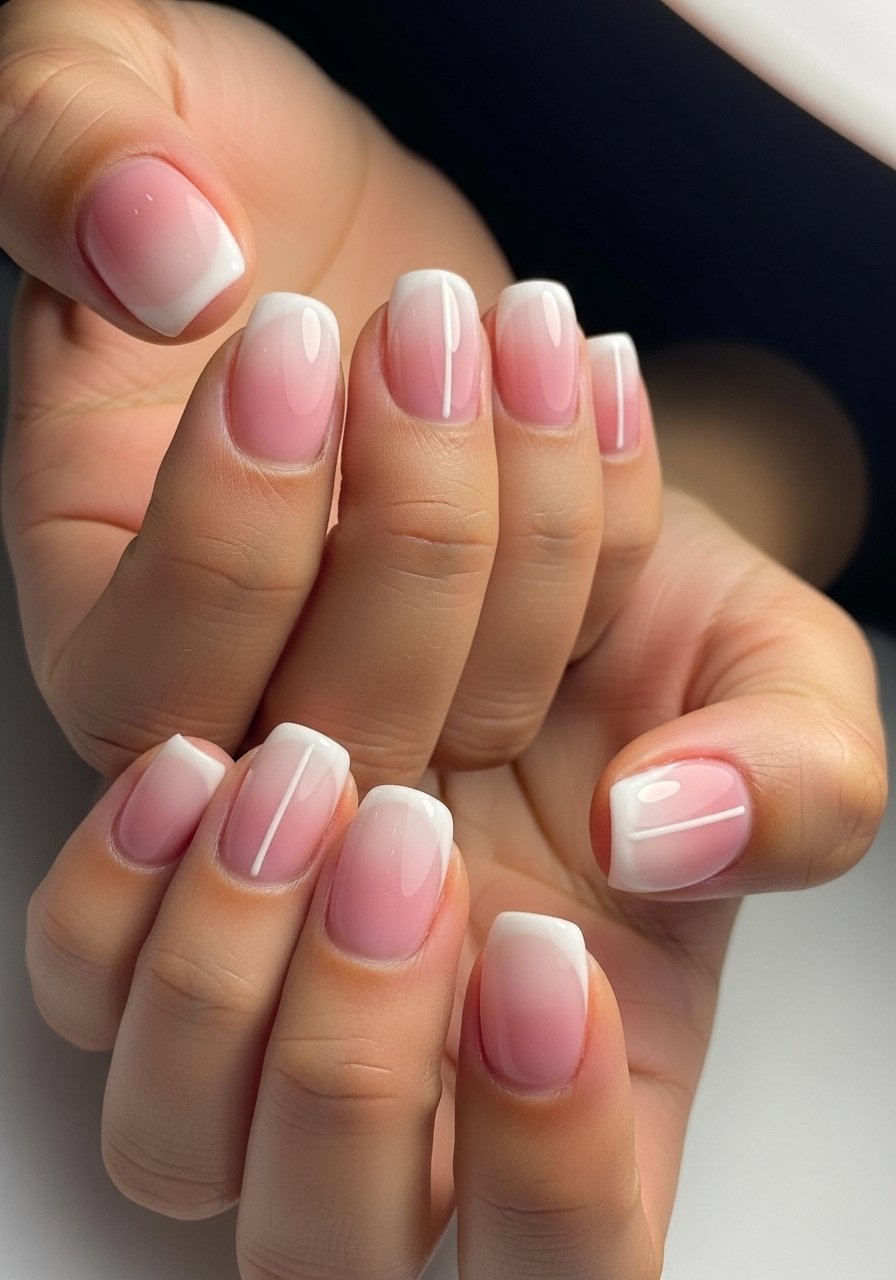
For a modern finish, after the ombre cures, draw a very fine, slightly curved white line near the transition with a white gel pen made for nails. This frames the fade and gives the eye a deliberate focal point which tricks the nail into looking longer. This is an intermediate technique that pairs well with gel polish because the line stays crisp when sealed. A steady hand and a white-nail-gel-pen help make the line sharp.
Mistake to Avoid: Drawing the line too thick which reads heavy and shortens the apparent nail length.
Short-Mani Survival Moves
Thin coats beat one thick coat every time. Three thin layers of a quick-dry top coat look smoother and last longer than one gloopy layer.
Grab nail-sponge-wedges for about $5. Use small wedges and dab the white on with a light hand so you do not overbuild the tip.
If you use gel, cure thin layers for 30 to 60 seconds in an LED lamp. A compact LED lamp keeps cure times predictable and avoids overheating the nail bed.
Curate your base tones by swatching on a peel-off wheel. Peel-off swatch wheels help you see which pinks sit warm or cool against your skin.
Most people forget cuticle care between fills. Keep a small bottle of nourishing-cuticle-oil in your bag and swipe daily to keep the look neat and reduce lifting.
