
I kept asking for crisp white tips and walking out with something cold and hard on my hands. The turning point came when my tech suggested sanding the apex thinner and blending the white only three millimeters down the nail bed. Suddenly the same pinks read warm, the acrylic felt lighter, and my hands looked like themselves again. That tiny change made me stop hiding my nails in my pockets.
These eleven looks are not extreme length or a glitter festival. They are soft fades, low-maintenance overlays, and tiny accents made to suit mature nail beds, easy budgets, and salon or at-home maintenance. Expect mostly short to medium lengths, one- to two-week upkeep, and a few beginner-friendly techniques. If you want something long and dramatic, keep scrolling past this list. For those who want believable, flattering acrylic baby boomer finishes that wear well, these are the picks I keep asking for.
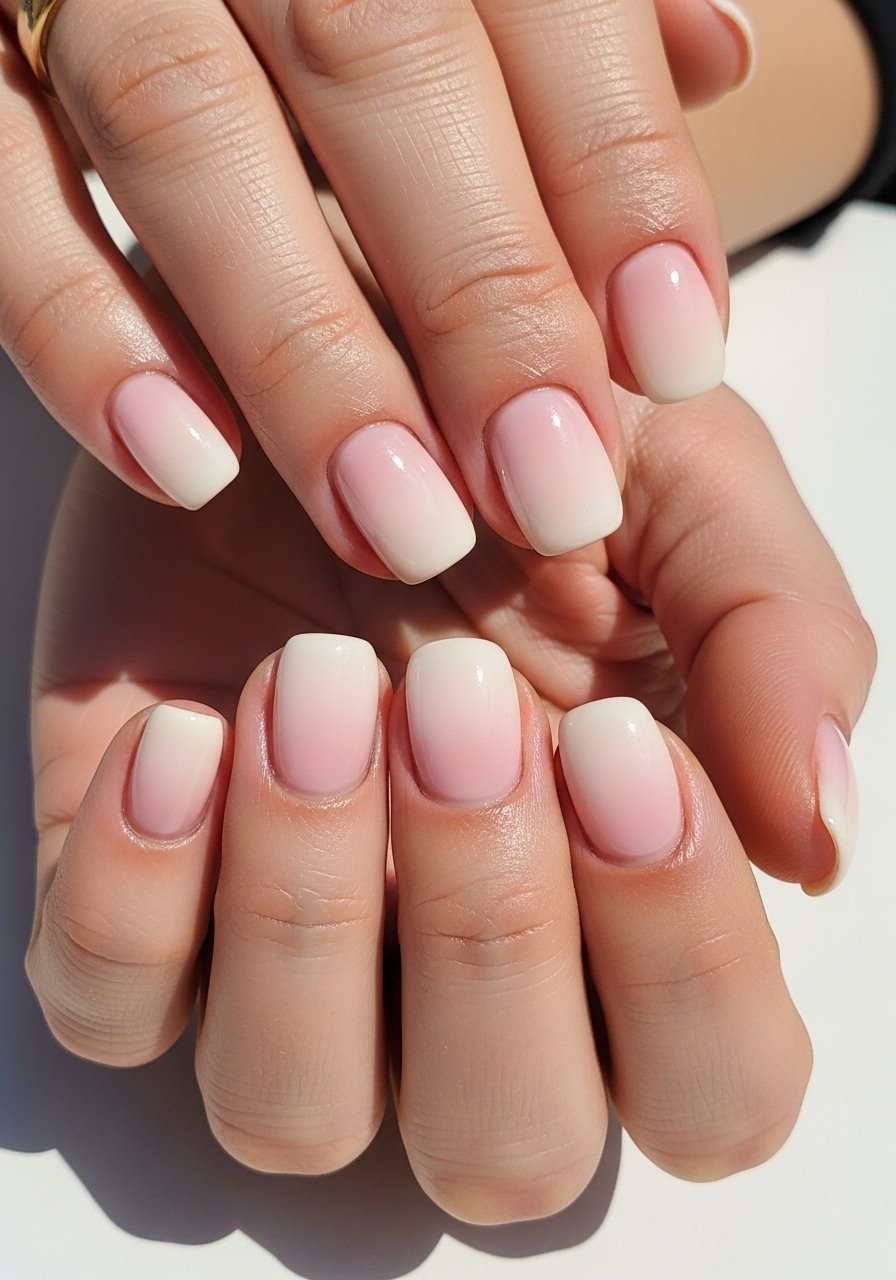
1. Classic Soft-Blend Ombre
Style/Vibe: Classic soft ombre
Best For: Short to medium nails, everyday wear
Skill: Beginner
The classic ombre works because it disguises nail ridges and length without screaming French tips. For acrylic, pick a white acrylic powder mixed to a 2:1 powder-to-liquid dab for a softer opacity, and blend the white down about 3 millimeters before feathering. That creates a natural gradient instead of a stark line. I like finishing with a thin layer of clear builder gel for extra wear. Try a cream-white powder and a sheer pink base like white acrylic powder and sheer-pink builder gel if you are experimenting at home. Budget-wise this is approachable because you need only one powder color and a clear top.
Mistake to Avoid: Dragging the white too far down the nail, which makes the tip look painted and older.
2. Short Squoval Natural Overlay

Style/Vibe: Natural overlay
Best For: Very short nails, active lifestyles
Skill: Beginner
If your nails are short and you want a tidy, natural look, an acrylic overlay with a sheer baby pink powder adds strength and a healthy sheen. Use paper-thin bead placement, pressing slightly toward the cuticle then patting forward to leave a 0.5 to 1 millimeter smile line, so the apex stays low. For durability, finish with a durable top coat rather than thick builder layers. A salon tech showed me that this keeps the nail from catching and chips less. For at-home practice, a starter set like clear nail forms and sheer-pink nail powder covers the essentials.
Mistake to Avoid: Overbuilding the apex, which makes short nails look bulky and fake.
3. Reverse Baby Boomer Tip

Style/Vibe: Modern reverse French
Best For: Medium nails, special occasion
Skill: Intermediate
This flip of the classic places the white closer to the cuticle in a tiny crescent while leaving the tip soft pink. It visually shortens the nail bed and gives an elegant uptick without length. Keep the white crescent narrow, around 1.5 to 2 millimeters wide, and feather the edges with a damp brush to avoid a hard line. It pairs well with a tiny clear gel bead over the crescent for shine. If you want a controlled tool, try a fine acrylic brush and white acrylic powder for crisp results.
Mistake to Avoid: Making the crescent too large, which reads costume rather than refined.
4. Matted Blush With Gloss Tip

Style/Vibe: Mixed-matte finish
Best For: Medium nails, modern style
Skill: Intermediate
Combining a matte pink body with a high-gloss tip creates contrast without sparkle. Apply acrylic as usual, cure, then buff the face to remove shine. Add a single gloss top coat just on the tip and cure. I use a 50/50 buff ratio where I remove 50 percent of the surface shine but preserve the structure. That keeps the acrylic lightweight and prevents peeling around the free edge. For a reliable gloss, try matte top coat and a separate gloss top coat.
Mistake to Avoid: Buffing too aggressively and thinning the acrylic until it chips.
5. Micro-Glitter Halo Accent

Style/Vibe: Subtle sparkle accent
Best For: Short nails, celebration looks
Skill: Beginner
A single halo of micro-glitter near the cuticle is festive without being loud. Use a sparse layer of fine glitter mixed into clear acrylic and apply only at the cuticle perimeter, leaving the rest of the nail sheer. The effect reads like a gentle shimmer and does not add thickness. On my own hands, one glittered accent lasted two weeks with normal wear. Try fine cosmetic glitter and apply with a small dotter. This is a budget-friendly way to add interest while keeping the baby boomer softness.
Mistake to Avoid: Piling glitter on thickly, which creates a rough surface that snags.
6. Linen Texture Accent Nail

Style/Vibe: Textured accent
Best For: Medium nails, tactile interest
Skill: Intermediate
A linen texture on one accent nail adds a tactile, fabric-like finish that still feels grown-up. After applying acrylic, drag a dry brush gently across a still-tacky layer to create fine crosshatch lines. Seal with a thin glossy top coat to keep the texture visible but not rough. I recommend keeping the textured nail as the ring finger only, which reads deliberate and balanced. Try a small art brush and thin-detail brush set for control. This look is slightly more time-consuming but worth it for a quiet, lived-in detail.
Mistake to Avoid: Overworking the texture until it looks messy rather than fabric-like.
7. Pearl Sheen Gradient

Style/Vibe: Soft pearl finish
Best For: Short nails, daytime elegance
Skill: Beginner
Adding a pearl pigment into the top clear creates a soft, youthful sheen that makes the nails look hydrated. Mix a single pinch of pearl powder into your final clear layer, then spread thinly and cure. I keep the pearl concentration low, about a quarter teaspoon per standard jar of clear, so it catches light without looking metallic. The result good for day-to-day wear and photos. Pair with pearl pigment powder for an at-home try.
Mistake to Avoid: Using too much pearl, which reads frosty and artificial.
If any of these picks have you ready to shop, here are the supplies I actually grab first.
Core Acrylic Picks For Natural Boomer Looks
Application Basics:
- white acrylic powder (~$8-15) — Good opacity without chalkiness.
- sheer-pink nail powder (~$8-14) — The base for most baby boomer fades.
- clear builder gel (~$12-22) — Adds thin strength and glossy finish when needed.
Tools & Finishes:
- thin-detail brush set (~$7-18) — For blending and accents.
- fine cosmetic glitter (~$5-10) — For a single accent nail.
- matte top coat (~$6-12) — For the matte-body, gloss-tip look.
- nail forms (~$5-12) — For length building without tips.
8. Bare-Edge Negative Space

Style/Vibe: Minimal negative space
Best For: Medium nails, modern minimalists
Skill: Intermediate
Negative space keeps the baby boomer soft without full coverage. Leave a thin strip of natural nail exposed along one side or in a tiny V near the free edge, then blend the surrounding pink and white. The visual breathes and makes acrylic feel lighter. Keep the exposed area narrow, about 1.5 to 2 millimeters, so it reads intentional. I often pair this with a matte body and glossy tip. Use a liner brush and sheer builder gel to seal edges.
Mistake to Avoid: Leaving too wide an exposed area, which can read unfinished.
9. Thin Apex, Natural Profile

Style/Vibe: Low-profile strength
Best For: Short nails, hands that need subtle reinforcement
Skill: Intermediate
A thin, well-placed apex gives strength without bulk. Place a small bridge of acrylic at the stress point and sculpt forward with light patting motions until the apex is only as high as needed. I aim for the apex to be just 0.5 to 0.8 millimeters above the nail plate for short nails. That prevents breakage while keeping nails looking natural. A clear builder gel top layer smooths the surface. Try a fine domed file and clear builder gel for finishing.
Mistake to Avoid: Laying down a thick apex across the whole nail, which makes nails look heavy and fake.
10. Tiny Gemline Along the Smile
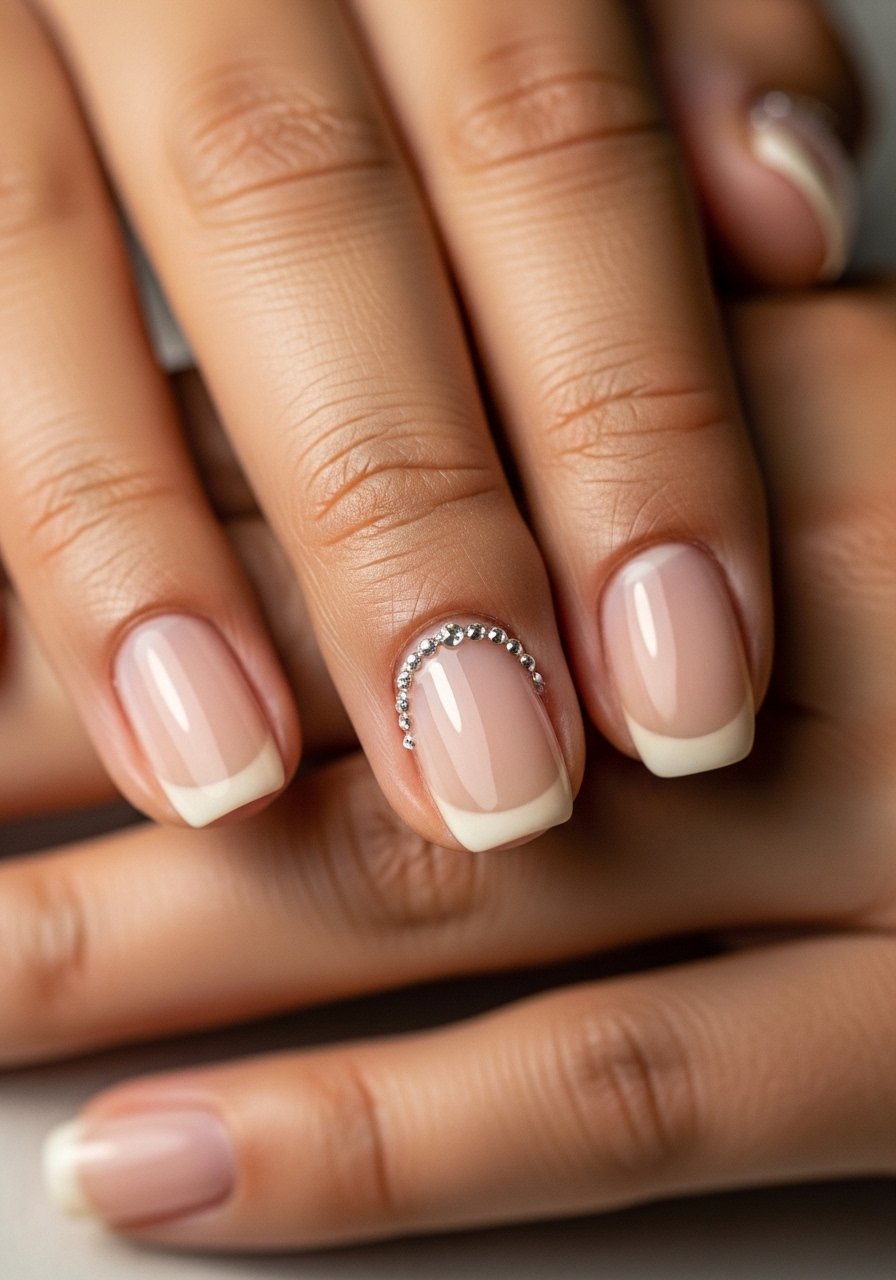
Style/Vibe: Subtle gem accent
Best For: Medium nails, evening looks
Skill: Beginner
A row of micro crystals along the smile line reads delicate and intentional. Place crystals with a clear gel dot and seal with a thin top coat. Use crystals in sizes 1.5 to 2 millimeters for scale that suits older hands. Keep the rest of the nails soft ombre so the gems do not dominate. For a low-cost option, try micro rhinestones and a precision picker.
Mistake to Avoid: Over-embellishing multiple fingers, which can age the hand visually.
11. Sheer Nude With Satin Finish

Style/Vibe: Satin nude
Best For: Short nails, professional settings
Skill: Beginner
A sheer nude acrylic that mimics the nail bed is the quietest baby boomer option. Use a translucent beige powder and apply thin coats, building just to cover ridges. Finish with a satin top coat for a lived-in sheen that resists obvious chip lines. I find a satin finish wears more forgivingly between fills, especially for those who prefer low maintenance. If you need a product, try translucent nude powder and a satin top coat.
Mistake to Avoid: Applying opaque nude on short nails, which can look like a solid painted block.
Nail Care Habits That Help
Cuticle and Fill Routine
Thin coats beat one thick coat every time. Three thin layers of a quick-dry top coat look smoother and last longer than one gloopy layer.
Keep a small jar of cuticle oil near your nightstand. Apply nightly and massage for thirty seconds. Cuticle oil with jojoba helps the acrylic interface with the skin and reduces lifting.
Everyone files too aggressively at the free edge. Use a 180-grit on the face and a 240 on the lateral sides for a natural shape. A double-sided nail file costs under ten dollars and saves a fill.
Rotate between glossy and satin top coats to disguise small surface scratches. Keep a satin top coat in your kit for a softer finish that masks wear.
