
I kept covering every tiny floral tattoo with bandages that made them look swollen until the day my artist suggested shrinking the composition, not the care. That one change stopped the ink from blurring into a smudge and let the whole design read as delicate rather than indecipherable. Small April birth flower tattoos are about restraint, placement, and aftercare more than size alone.
These ideas are all small, mostly one-session pieces meant for people who want a subtle nod to April without a full sleeve. Expect easy aftercare, low to medium pain, and designs that work for coverable or visible placements. I pulled these from sketches I tried across five shops I have visited, so you get what holds up after healing and what tends to blur if scaled wrong.
1. Single-Needle Daisy on the Wrist

Style/Technique: Fine Line Single-Needle
Pain Level: 3/10
Session Time: 20 to 40 minutes
Best For: Inner wrist, coverable with a watch or bracelet
A single-needle daisy reads as tiny and intentional when the artist uses a 1RL or single-needle liner, not a heavier round shader. The thin stems give a vintage, handwritten feel, and the size keeps it easily covered at work. It creates a quiet, personal result for someone who likes jewelry-like ink. Budget wise this is a short session and usually under typical starter-price ranges. Pair it with a fragrance-free aftercare balm like fragrance-free tattoo balm applied sparingly for the first week.
Mistake to Avoid: Asking the artist to "sharpen" the lines by adding extra passes, which can cause blowout.
2. Tiny Sweet Pea Behind the Ear

Style/Technique: Micro Realism Outline
Pain Level: 2/10
Session Time: 15 to 30 minutes
Best For: Behind ear, discreet and easy to hide with hair
This is a cropped sweet pea blossom with minimal color blocking, ideal for people who want a hidden nod to April. The shape works well with a 3-round shader for soft petal shadows and one light color wash if you want a hint of pink. It feels feminine and secret, good for first-timers. Keep session time short and plan a touch-up if you want saturated color. I recommend bringing a clean headband and using a hydrocolloid bandage for the first 24 hours if your artist approves.
Mistake to Avoid: Choosing heavy color behind the ear without accounting for hair rubbing during sleep.
3. Micro Daisy on the Side of a Finger
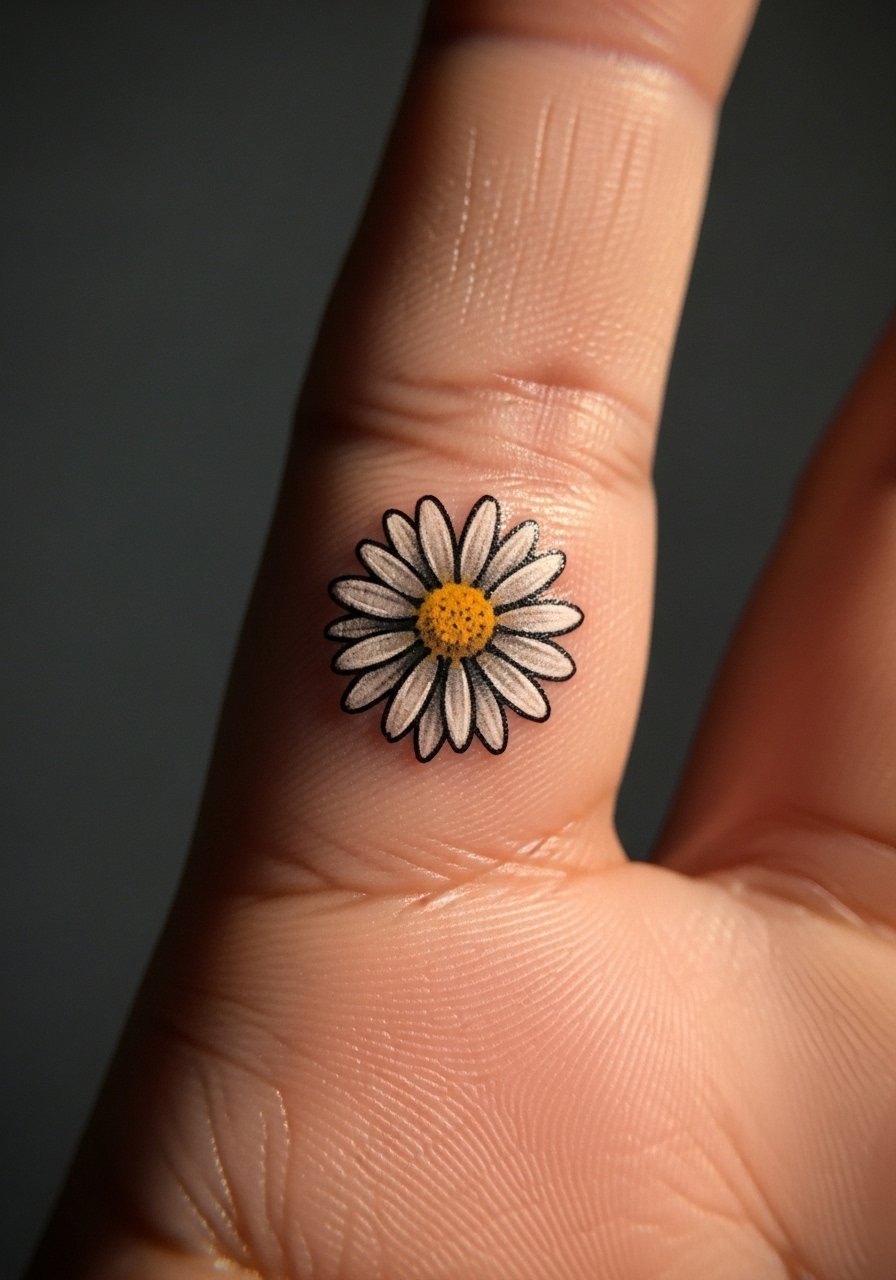
Style/Technique: Small Placement Linework
Pain Level: 4/10
Session Time: 10 to 20 minutes
Best For: Finger, good for someone who wants always-visible tiny ink
A finger daisy reads like a ring when placed on the side rather than the top. Use single-needle lines and keep the petal count minimal so it does not bleed over time. This is a budget-friendly idea but expect faster fading and potential touch-ups because of the skin texture. Use a thin barrier like a medical-grade bandage after the first day and avoid submerging hands for long. A dot of scent-free healing ointment helps retain ink in the first week.
Mistake to Avoid: Insisting on too much detail on a fingertip area that will blur with normal hand use.
4. Micro-Realist Seedling on the Ankle

Style/Technique: Micro-Realism Shade Work
Pain Level: 3/10
Session Time: 30 to 45 minutes
Best For: Ankle, covers with socks or shows with sandals
A tiny seedling uses crisp single-needle lines plus soft 3-round shader dots for a realistic leaf texture. It looks like a moment of growth on the body and works for someone who wants a nature motif without obvious floral ornamentation. This style benefits from a slightly longer session for smooth shading. Bring an extra lightweight shoe to the appointment and plan for a gentle wash routine with a mild cleanser like fragrance-free soap bar.
Mistake to Avoid: Expecting high photographic detail at very small sizes without planning touch-ups.
5. Negative-Space Daisy Crescent on the Collarbone

Style/Technique: Negative-Space Minimalism
Pain Level: 4/10
Session Time: 25 to 40 minutes
Best For: Collarbone, works for someone who likes jewelry-adjacent placement
A crescent of tiny daisy outlines left unfilled creates a soft arc that moves with the collarbone. Negative-space designs age well when lines are spaced at least 2 mm apart so they do not merge. The effect is elegant and lightweight, good for daytime visibility and for photos. Clean lines and measured spacing are the trick. Use a light, non-greasy moisturizer recommended by your artist and consider a breathable cover for the first night like cotton bandage wrap.
Mistake to Avoid: Packing lines too close together which creates a visible dark block after healing.
6. Bouquet Ring That Wraps a Finger

Style/Technique: Tiny Composition Wrap
Pain Level: 4/10
Session Time: 20 to 35 minutes
Best For: Ring finger or index finger, ideal for people who like symbolic jewelry
A tiny bouquet of April blooms wrapped as a band reads like a ring and is great for someone who likes symbolic, everyday wear. Composition matters more than detail so the artist should use alternating single-needle stems and tiny 3RL dots for blossoms. It gives a sentimental, wearable result on a budget of a short session and occasional touch-ups. Protect the area from rough soaps and pick a no-fragrance moisturizer like unscented lotion.
Mistake to Avoid: Cramming too many flowers into a narrow band which becomes indistinct.
7. Dotwork Pollen Freckle Near the Clavicle

Style/Technique: Dotwork Stippling
Pain Level: 2/10
Session Time: 15 to 30 minutes
Best For: Clavicle or shoulder, good for subtle accent pieces
A cluster of tiny stippled dots mimicking pollen gives a wistful, organic scatter that reads like a freckle cluster. Dotwork ages gracefully because it relies on density rather than continuous lines. This is great for someone who wants subtle texture rather than a formal flower. It is low cost in time and aftercare. A quality aftercare balm stick applied thinly helps settle the dots without saturating the area.
Mistake to Avoid: Asking for a solid filled circle instead of stippling which creates a heavy, flat patch after healing.
If any of these smaller setups have you ready to try one, here are the essentials I actually use and recommend before booking.
Small Floral Tattoo Essentials
Aftercare:
- Fragrance-free tattoo balm (~$8-15), thin layers only.
- Hydrocolloid bandage (~$7-12) for first 24 hours when approved by your artist.
- Unscented lotion (~$6-12) for ongoing moisturize-and-protect.
Protection & Cover:
- Medical tape and breathable wrap (~$5-10) for travel home.
- Cotton bandage wrap (~$8-14) for sensitive placements.
Studio Prep:
- Clean disposable razor (~$4-8) to remove hair before the appointment, not after.
- Scent-free soap bar (~$5-10) for gentle washing post-session.
Extras:
- Aftercare balm stick (~$10-18) that fits in a pocket for touch-ups on the go.
- Hydrogel cooling pads (~$12-20) for swelling-prone spots.
8. Hidden Initial Petal Inside the Wrist
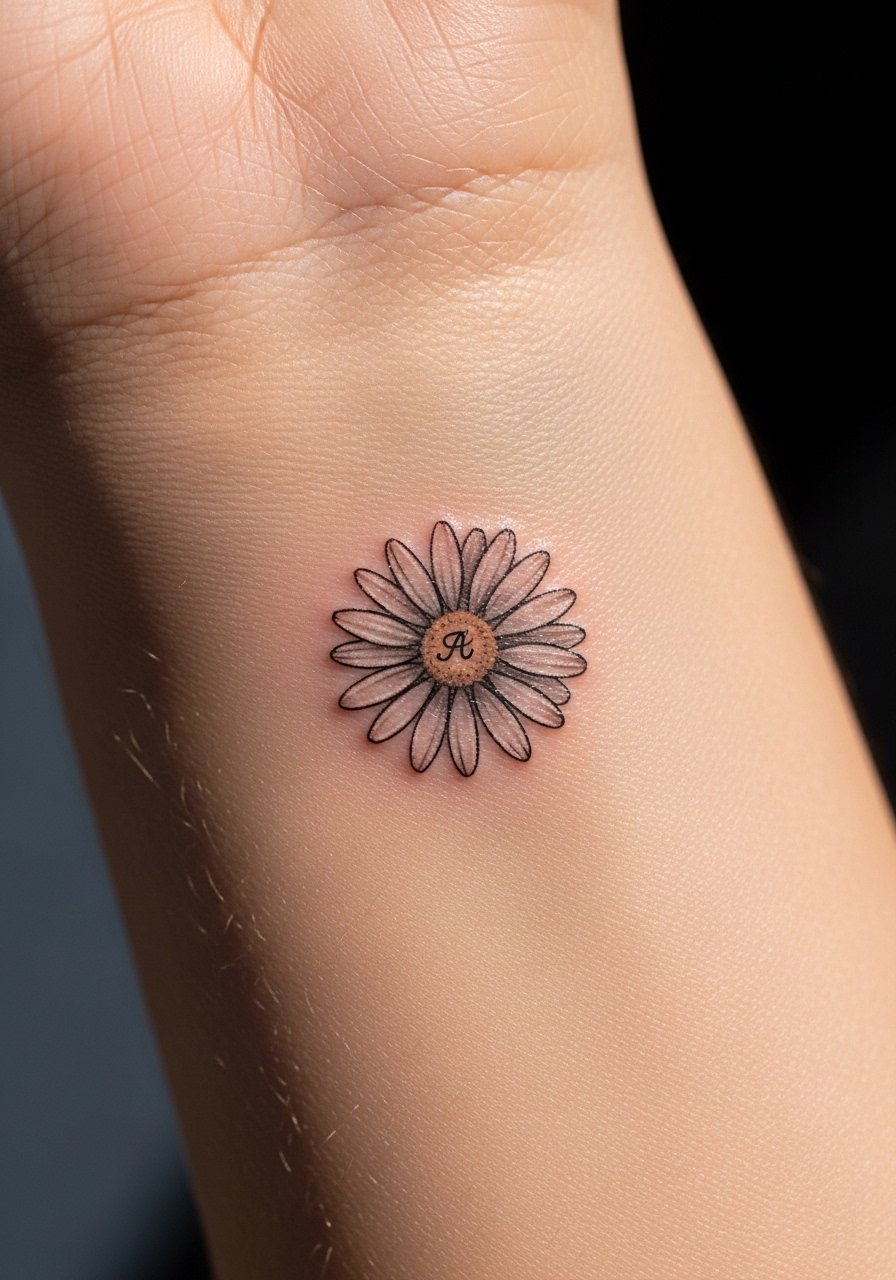
Style/Technique: Micro-Placement with Negative Space
Pain Level: 3/10
Session Time: 20 to 30 minutes
Best For: Inside wrist, ideal for sentimental placements
A single petal shaped to contain a tiny initial is a quiet personalization that reads as floral at a glance. This works well for someone who wants meaning without a literal letter on display. The trick is to reserve the negative space and keep line weight to single-needle detail so the initial does not fill in. Design time might add a few minutes to the session. I usually clean the area with an approved scent-free soap right after the appointment if the artist agrees.
Mistake to Avoid: Making the initial too thin which disappears after a few months.
9. Watercolor Sweet Pea Mini on the Ribcage

Style/Technique: Micro Watercolor Wash
Pain Level: 5/10
Session Time: 30 to 60 minutes
Best For: Ribcage, for someone comfortable with occasional visible ink
A tiny watercolor wash gives a splash of soft color behind a delicate outline. It creates movement and a painterly look for someone who likes fine art on their body. Because ribcage skin moves a lot, expect more pain and the need for a careful first-week moisture routine. Choose an artist experienced with diluted color and ask for a light glaze rather than saturated fills. Use an approved healing ointment jar as directed.
Mistake to Avoid: Requesting intense color saturation in a single micro session which leads to patchy healing.
10. Nape Daisy in Tiny Blackwork

Style/Technique: Micro Blackwork
Pain Level: 4/10
Session Time: 15 to 30 minutes
Best For: Nape, easy to show with hair up or hide with hair down
A tiny solid black daisy at the nape reads bold from a distance but remains small and graphic up close. Blackwork at this size benefits from crisp fill with a 3RL or 5RL depending on area. It feels modern and stands up to time better than very fine color in high-friction zones. Budget is low for the single session but plan on periodic touch-ups if you wear tight collars.
Mistake to Avoid: Picking a saturated black that is too large which can create a hard, blob-like healed look.
11. Fine White-Highlight Daisy on the Shoulder Blade

Style/Technique: Fine Line with White Accents
Pain Level: 3/10
Session Time: 20 to 35 minutes
Best For: Shoulder blade, flattering on people who like subtle shine
White ink highlights add a tiny lift to petals when used sparingly. This is best for someone with lighter to medium skin tones because white can fade faster and sometimes yellow on darker tones. The secret is to keep white as an accent rather than a primary fill and to space highlights using micro-dot placement. Use a gentle, unscented moisturizer and avoid direct sun while healing. A small tube of white-ink friendly aftercare balm keeps the highlights from drying out.
Mistake to Avoid: Expecting white to stay bright forever without periodic touch-ups.
12. Tiny Daisy and Bee Pair for Motion

Style/Technique: Paired Micro Illustrative
Pain Level: 3/10
Session Time: 25 to 40 minutes
Best For: Forearm, fits people who like small narrative pieces
A small companion bee adds a sense of movement and story to a daisy motif. Keep the bee minimal with a tiny 1RL outline and a few 3RL shaded dots for body texture. The pairing reads lively and works for someone who wants a small scene rather than a single symbol. This is a slightly longer single-session idea and pairs well with sparse dotwork backgrounds. Pack a small cooling gel pad for swelling-prone spots if your artist recommends it.
Mistake to Avoid: Over-detailing the bee at a scale where features will melt together.
13. Constellation of Daisies Around the Ankle

Style/Technique: Modular Micro Placement
Pain Level: 3/10
Session Time: 30 to 45 minutes total or spaced over sessions
Best For: Ankle, beginners who might want to add later
A little constellation of tiny daisies spaced around the ankle makes a modular piece you can add to over time. Each flower is small enough to be a discrete element, which means you can build a band or leave gaps intentionally. This design is great for people who like to expand their collection slowly and for those who want a balanced look with shoes. Keep each flower at least 6 to 8 mm apart to avoid merging. A dependable unscented lotion keeps the skin supple as you add new pieces.
Mistake to Avoid: Tattooing new elements too close to healed ink which causes uneven edges.
Last-Minute Small Tattoo Tricks
Thin coats beat one thick coat every time. When your artist layers pigment, ask for light passes rather than heavy filling to avoid blowout and speed healing. A small tube of fragrance-free balm applied in thin layers keeps the surface supple.
Grab hydrocolloid bandages before your appointment. They protect tiny pieces from rubbing and help with scab management during that first sticky week.
Most people wash with hot water. Cold to lukewarm rinses and gentle patting dry preserve ink and reduce swelling. A mild unscented soap like fragrance-free soap bar is all you need.
Everyone thinks more detail equals more meaning. Small tattoos are about negative space and suggestion. Ask your artist to simplify the sketch and bring a photo of the spot to check scale, then pack a small aftercare balm stick for the ride home.
