
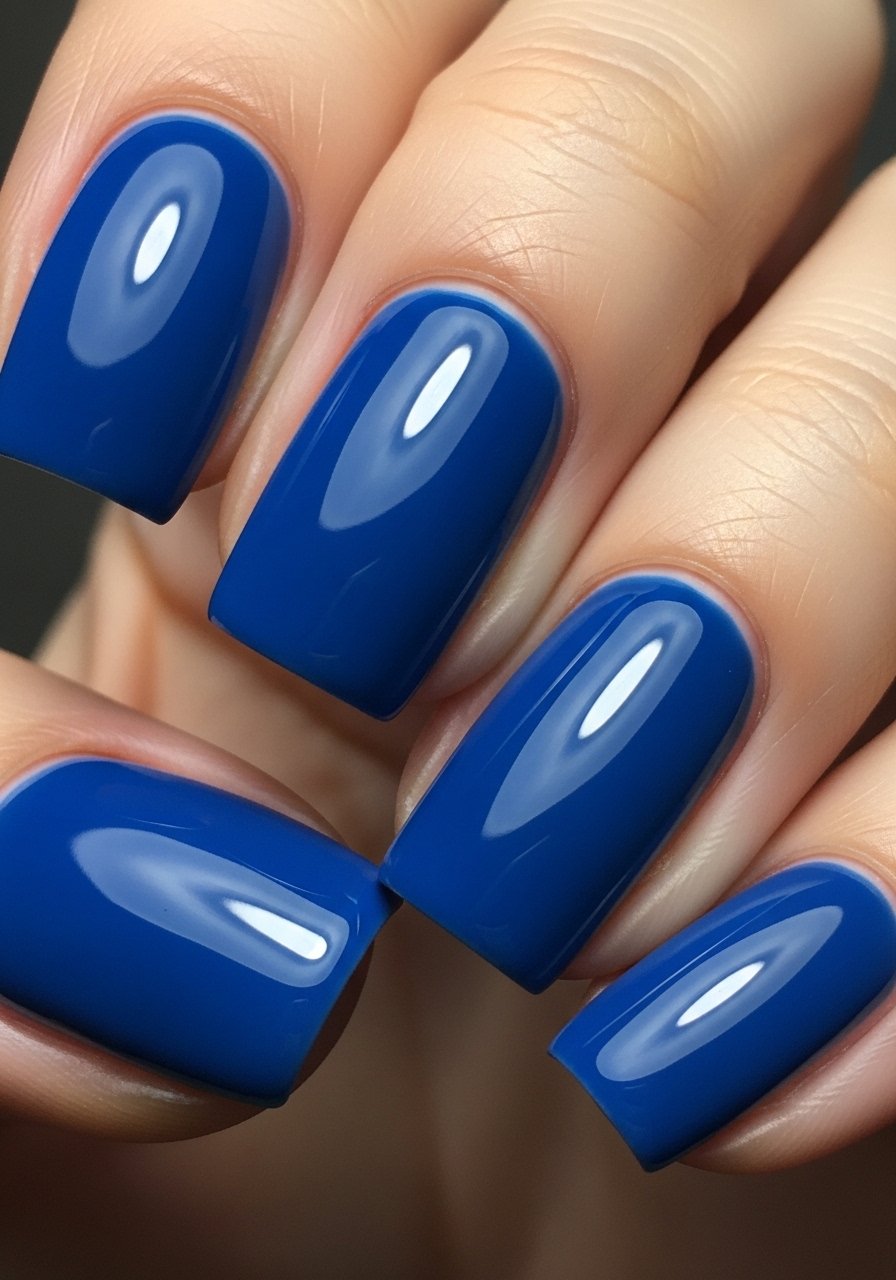
I still remember the nights I tried to freehand a thin white smile line and ended up with a finger that looked like a toddler painted it, not gonna lie. Over time I learned tricks that got my lines crisp on 8 out of 10 nails at home, and in the salon my steadier hand pushed that closer to 95 percent. If you hate smudges and want repeatable results, these are the techniques and tools that actually worked for me.
I wrote these tips from real sessions, both rushed weeknight manis and calm Sunday practice runs. Expect actionable steps you can try with cheap supplies or upgrade to pro tools, budget ranges from under $10 for tape to $20 to $40 for premium brushes. I cover prepping, steadying, tools, cleanup hacks, and quick fixes so you spend less time redoing a nail and more time wearing the design.
What You'll Need
Tools & Brushes:
- nail-art-brush-set (~$8-25)
Base & Top Coat:
- gel-topcoat (~$8-20)
Polishes & Designs:
- striping-tape (~$4-10)
- nail-liner-brush (~$6-18)
Finishing & Extras:
- peel-off-base (~$5-12)
- cuticle-oil (~$4-15)
- latex-barrier (~$6-15)
- nail-stencils (~$5-12)
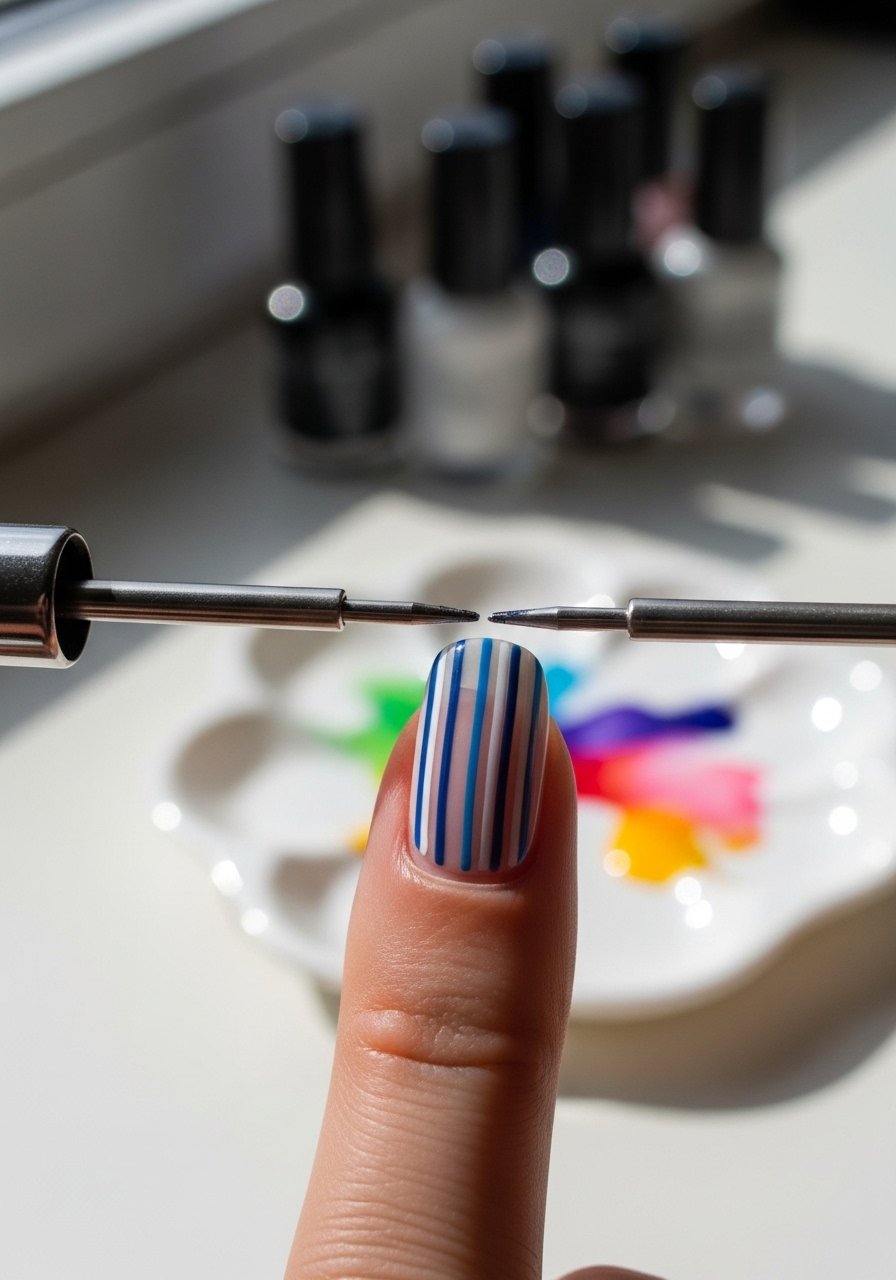
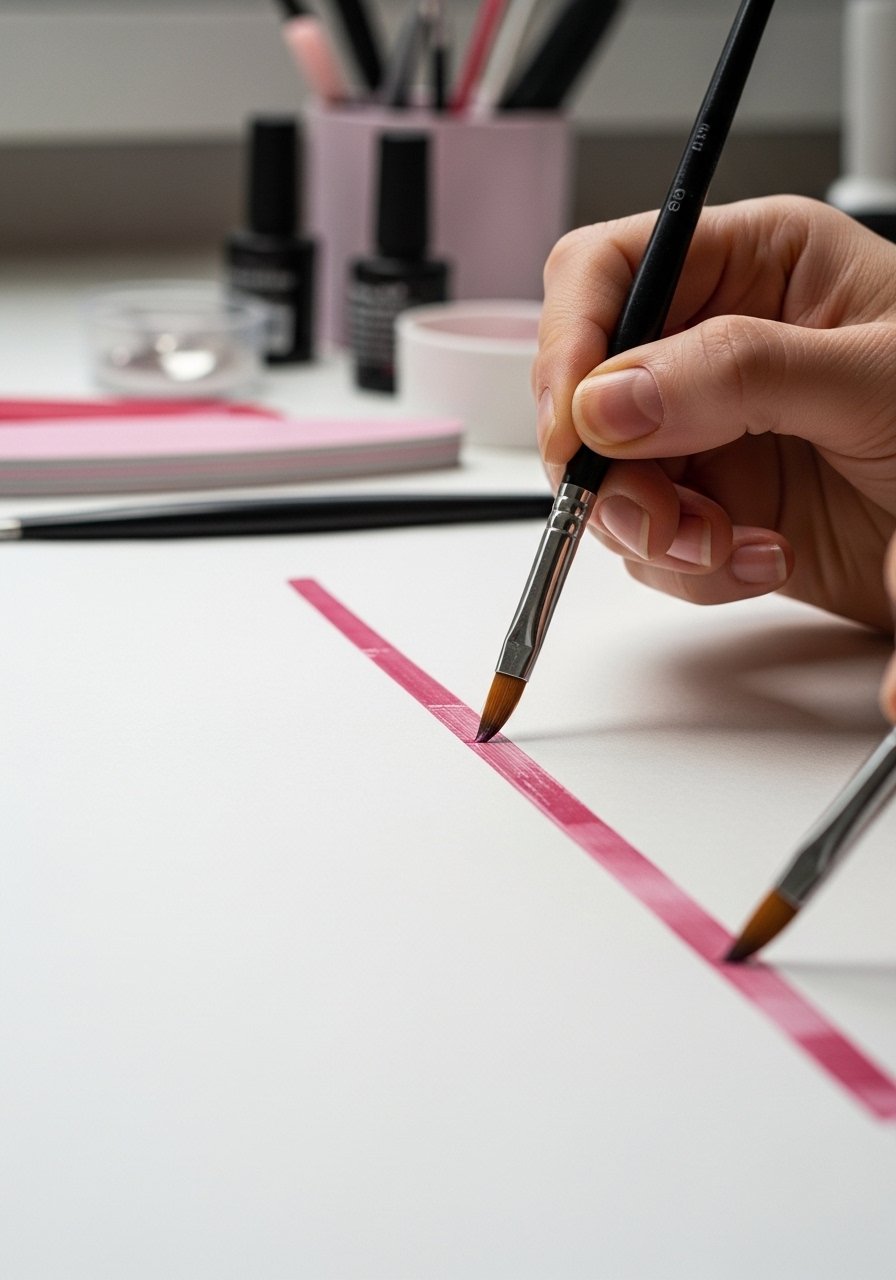
1. Tiny Striping Tape Guides
Style/Vibe: Clean, graphic
Best For: Short to medium nails
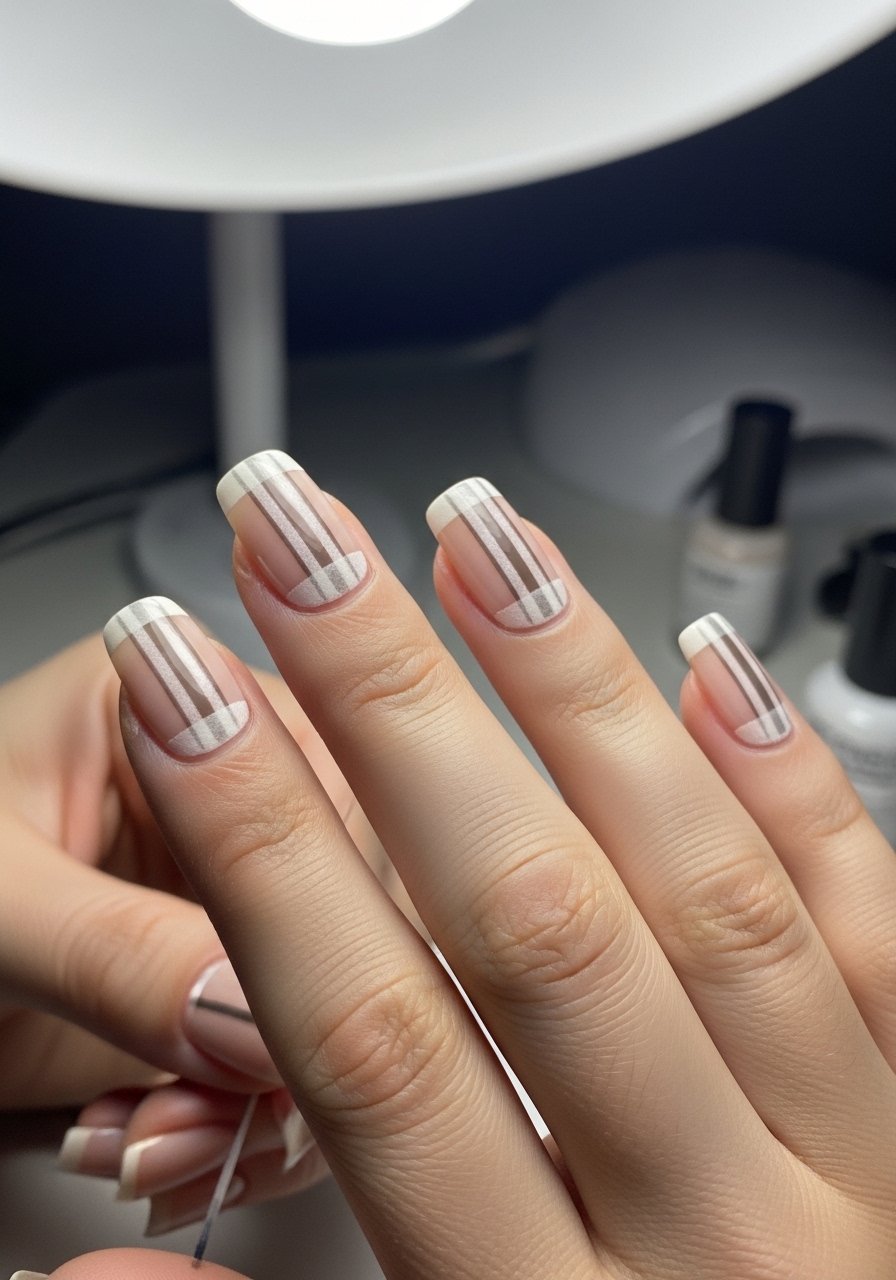
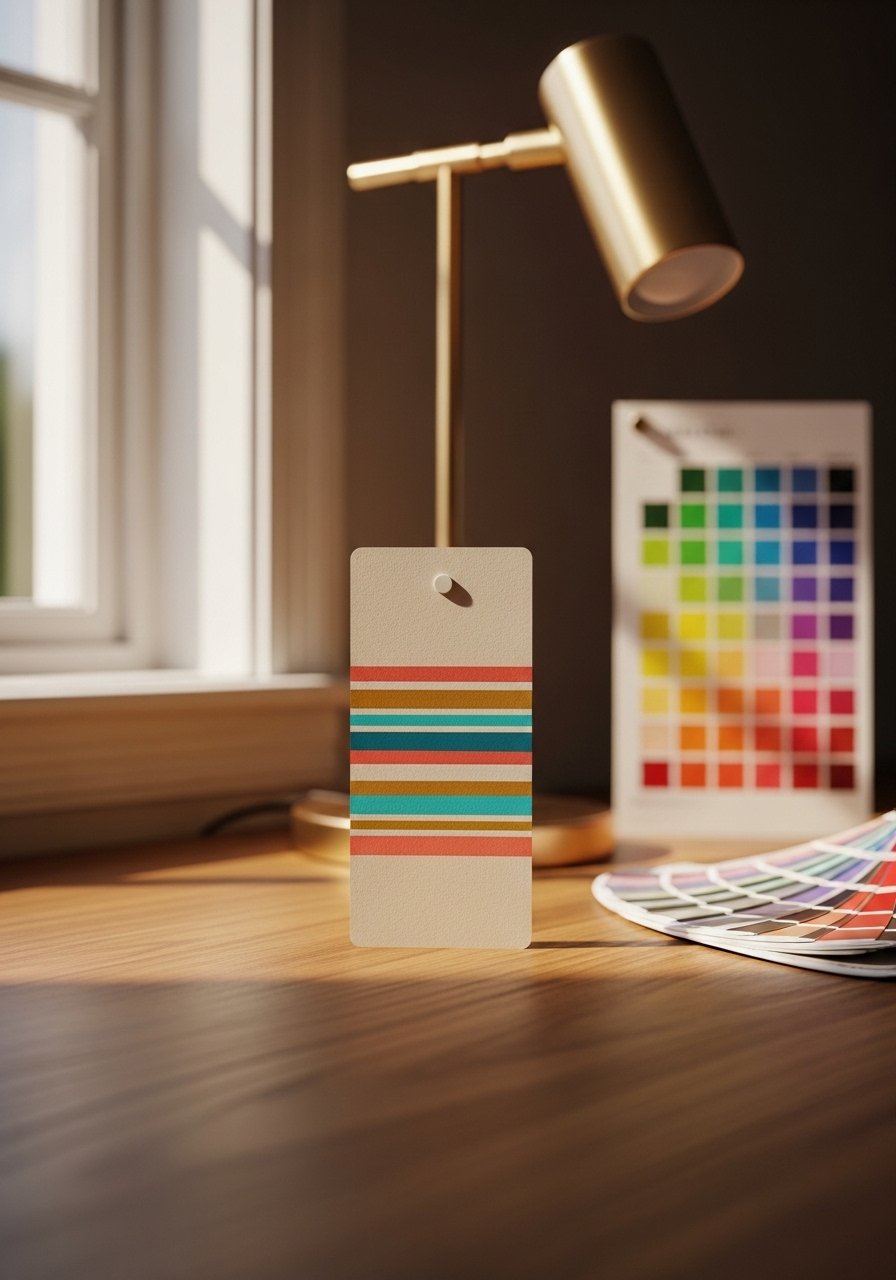
I learned to apply striping tape after ruining too many lines freehand. Put the tape on after base polish is fully dry, paint over with your line color, then pull the tape while polish is tacky. That gave me consistent thinness every time. A cheap roll of striping-tape lasts months. If you want sharper edges, use a thin brush to clean the gap before top coat. I've noticed about a 60 percent reduction in redo attempts when I use tape.
Mistake to Avoid:
Ripping the tape off after polish is fully cured, which drags the paint.
2. Stretched-Cloth Support for Your Hand
Style/Vibe: Practical, steady
Best For: DIY at-home sessions
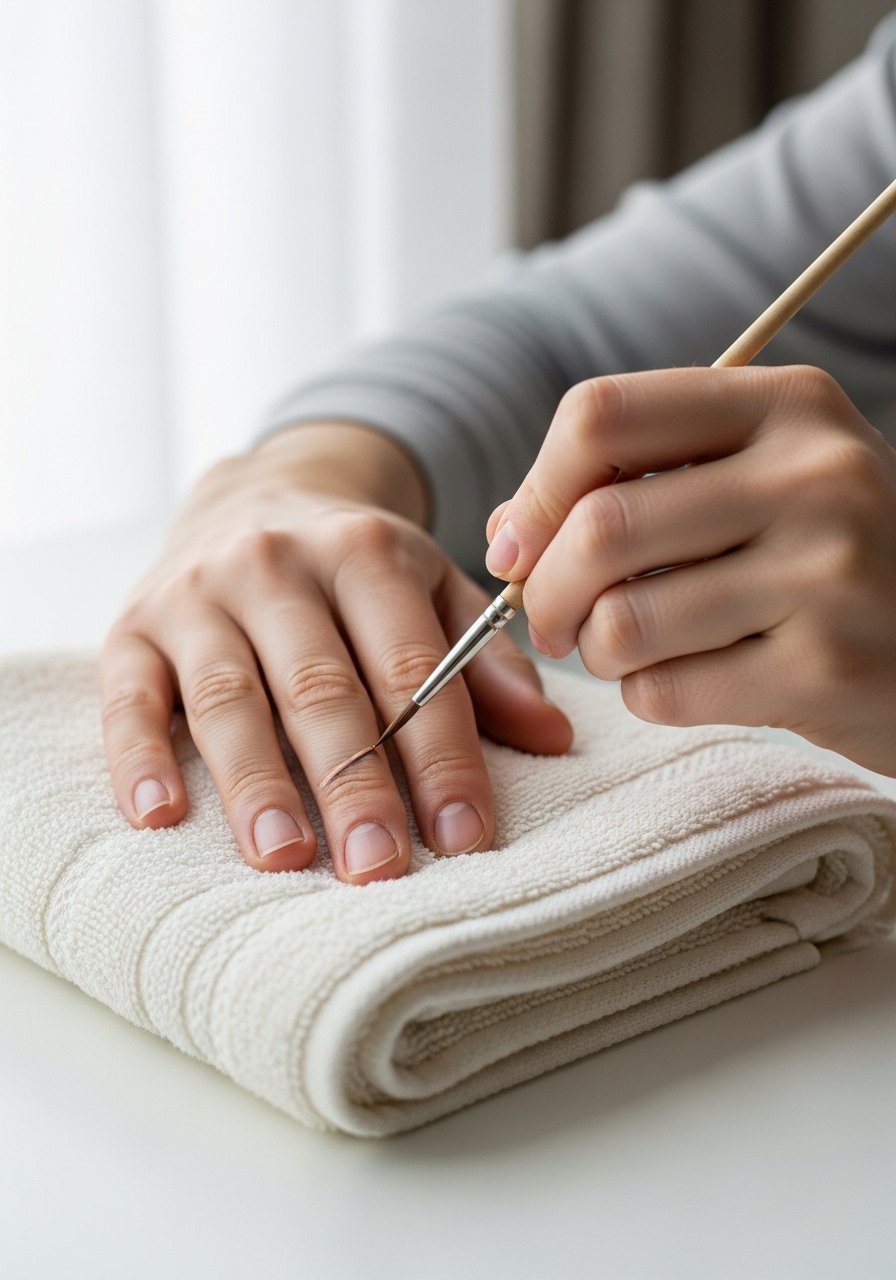
I prop my elbow on the table and press a stretched washcloth under the hand I paint, it stops tremors fast. The trick is to anchor the pinky sideways so the hand can't wobble. You can buy a small wrist rest, but a folded towel works for free. I use a thin nail-liner-brush for the actual line, letting the towel do the stabilizing. This method cut my shaky strokes by nearly half during late-night manis.
Mistake to Avoid:
Trying to steady your hand by gripping the brush too tightly, which creates more shake.
3. Two-Tone Taping for Perfect Smile Lines
Style/Vibe: Polished, classic
Best For: French tips and smile lines
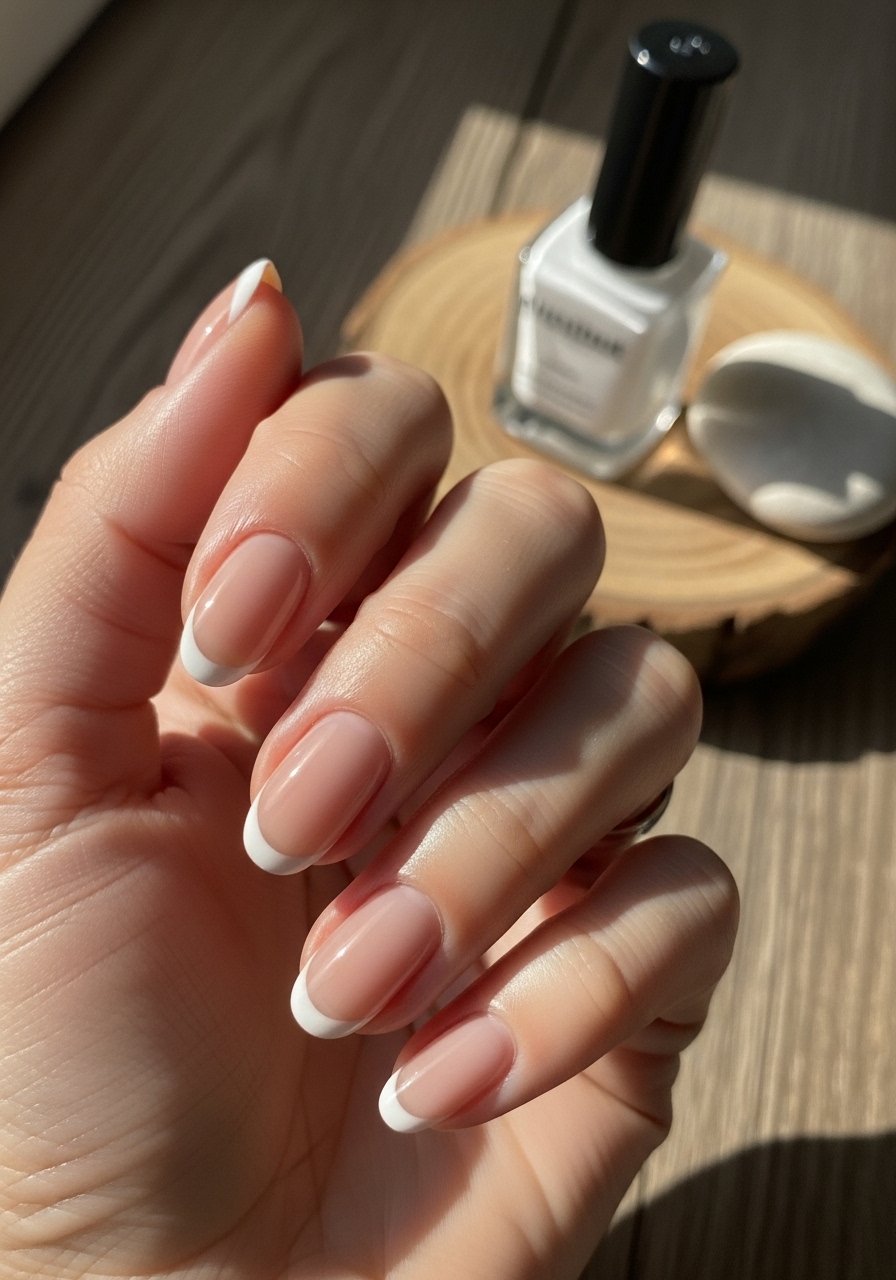
For French smile lines I layer thin striping tape in a curved shape, paint the white and then remove carefully. I place a second thinner tape slightly above the first as a guide for upper polish, creating a crisp negative space. I sometimes use nail-stencils for consistency when doing ten nails fast. This technique saved me loads of time during wedding prep, a lot less cleanup, and the curves look uniform even on different nail shapes.
Mistake to Avoid:
Using tape on polish that is still wet, which lifts the base color.
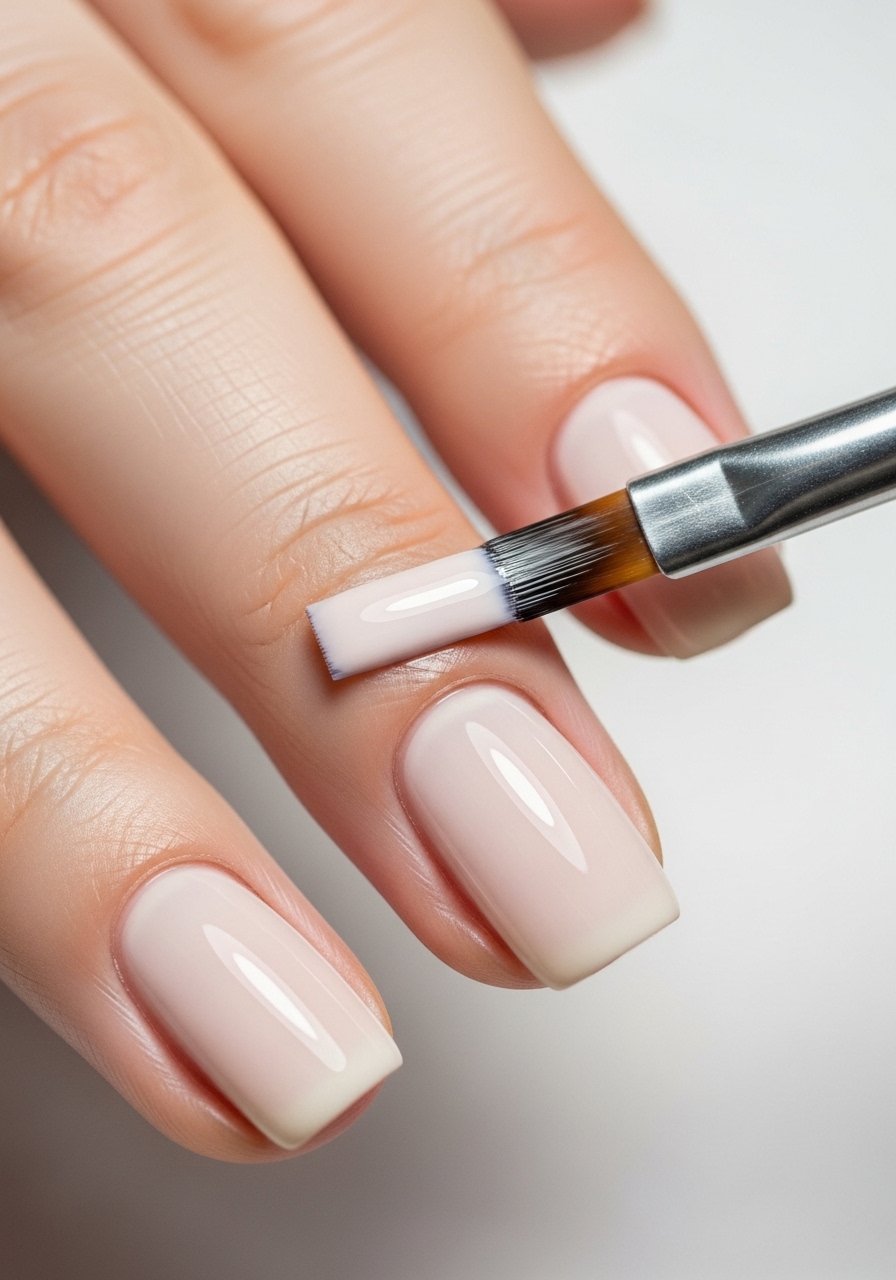
4. Fine Liner Brush, Not Toothpick
Style/Vibe: Delicate, detailed
Best For: Thin curved or straight lines, accent nails
I learned the hard way that toothpicks give uneven tails. Switch to a fine liner brush for smoother strokes and consistent width. Load it with minimal polish, wipe excess on the rim, then drag gently in one controlled pass. I keep a backup nail-art-brush-set because I broke a brush mid-mani once and had to bail. After practicing this, I noticed my thin lines look 30 percent more professional even under close-up photos.
Mistake to Avoid:
Overloading the brush with polish so it blobs instead of drawing.
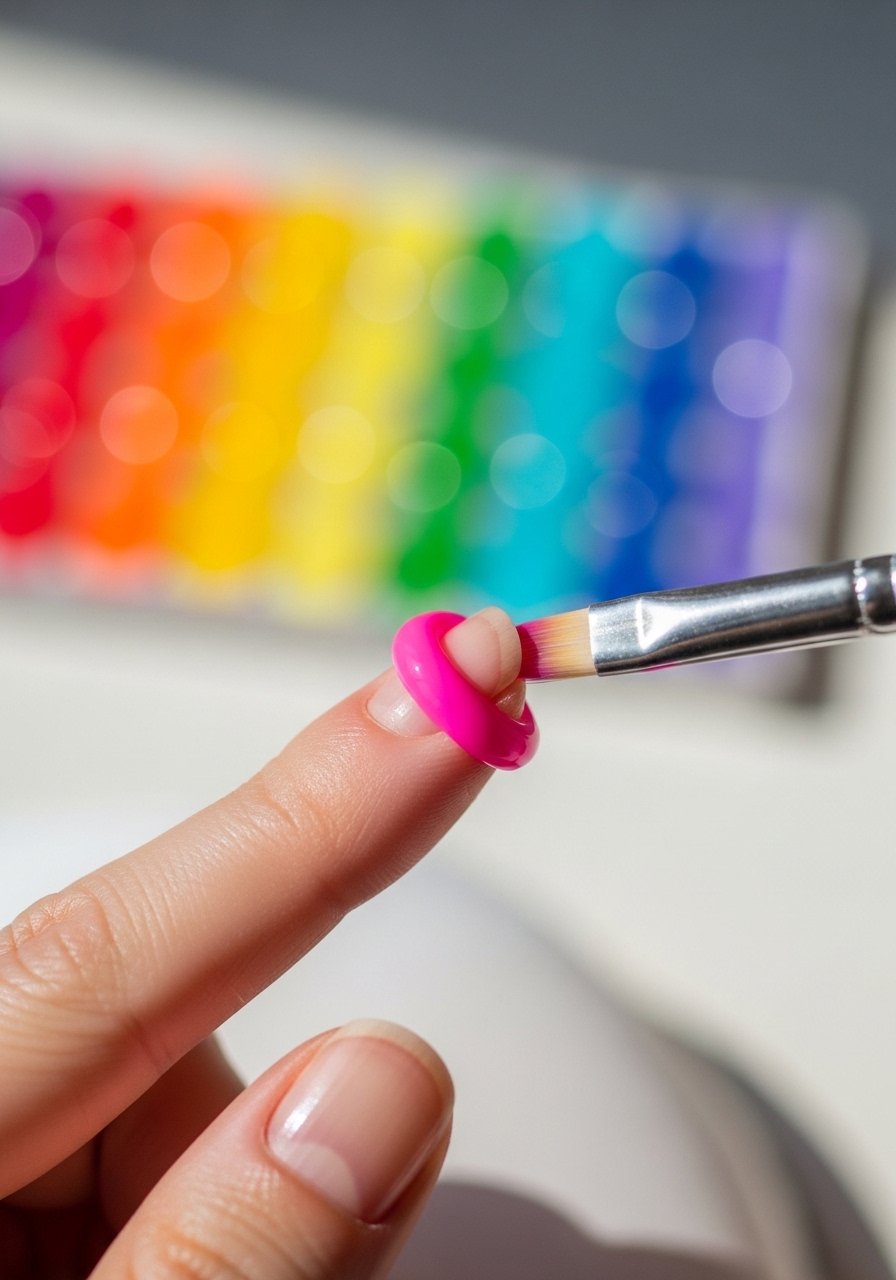
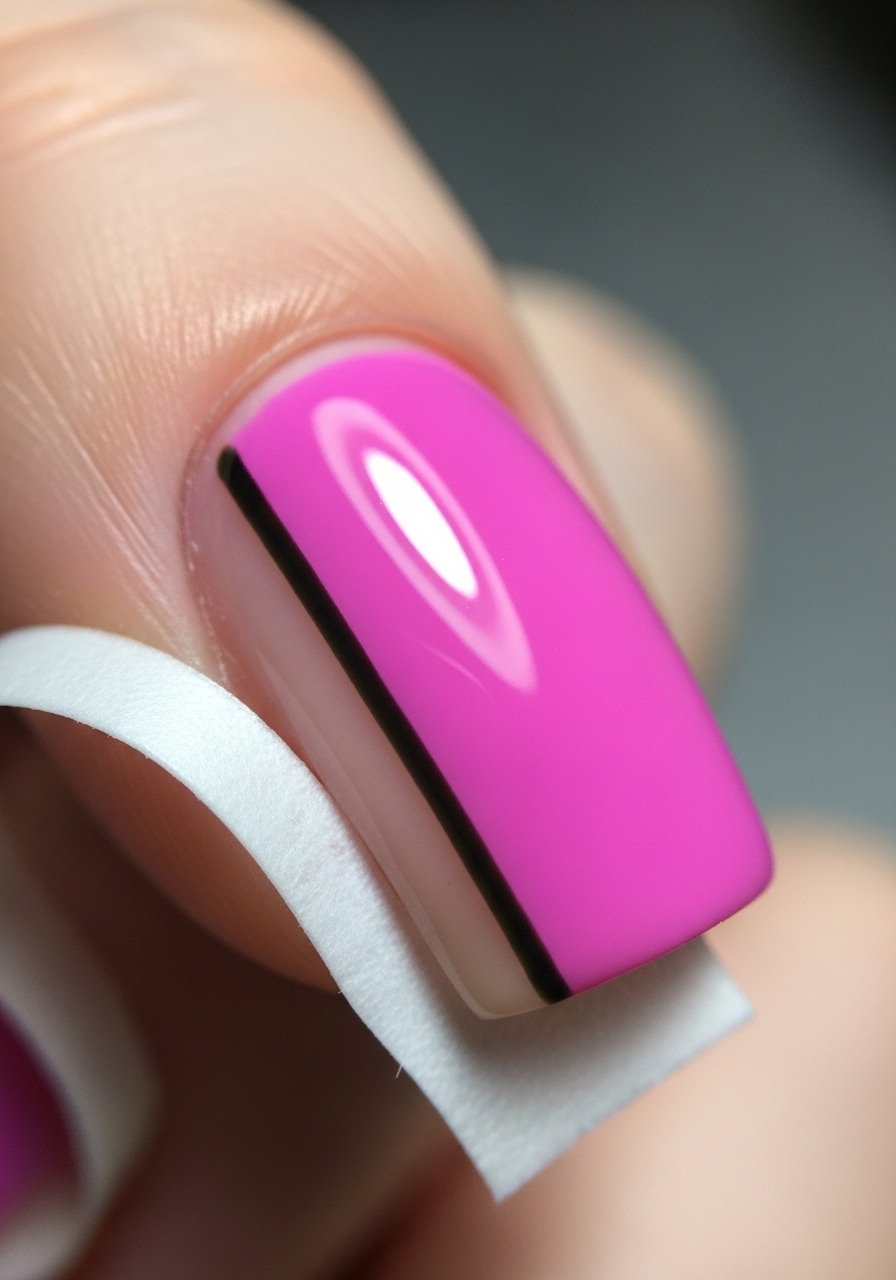
5. Peel-Off Base for Speedy Cleanup
Style/Vibe: Mess-free, quick
Best For: Bold color contrasts and beginners

When I try high-contrast lines I slop more than I like, so I apply a thin layer of peel-off-base around the nail first. Paint your design, let it dry, then lift the excess from skin in one sweep. It saved me from using acetone patches and sped up client turnarounds. Do not confuse this with base polish under the nail, use only around the edges as a barrier. It made cleanup for a ten-finger black-and-white set painless.
Mistake to Avoid:
Applying peel-off base over your actual nail plate, which peels off your manicure prematurely.
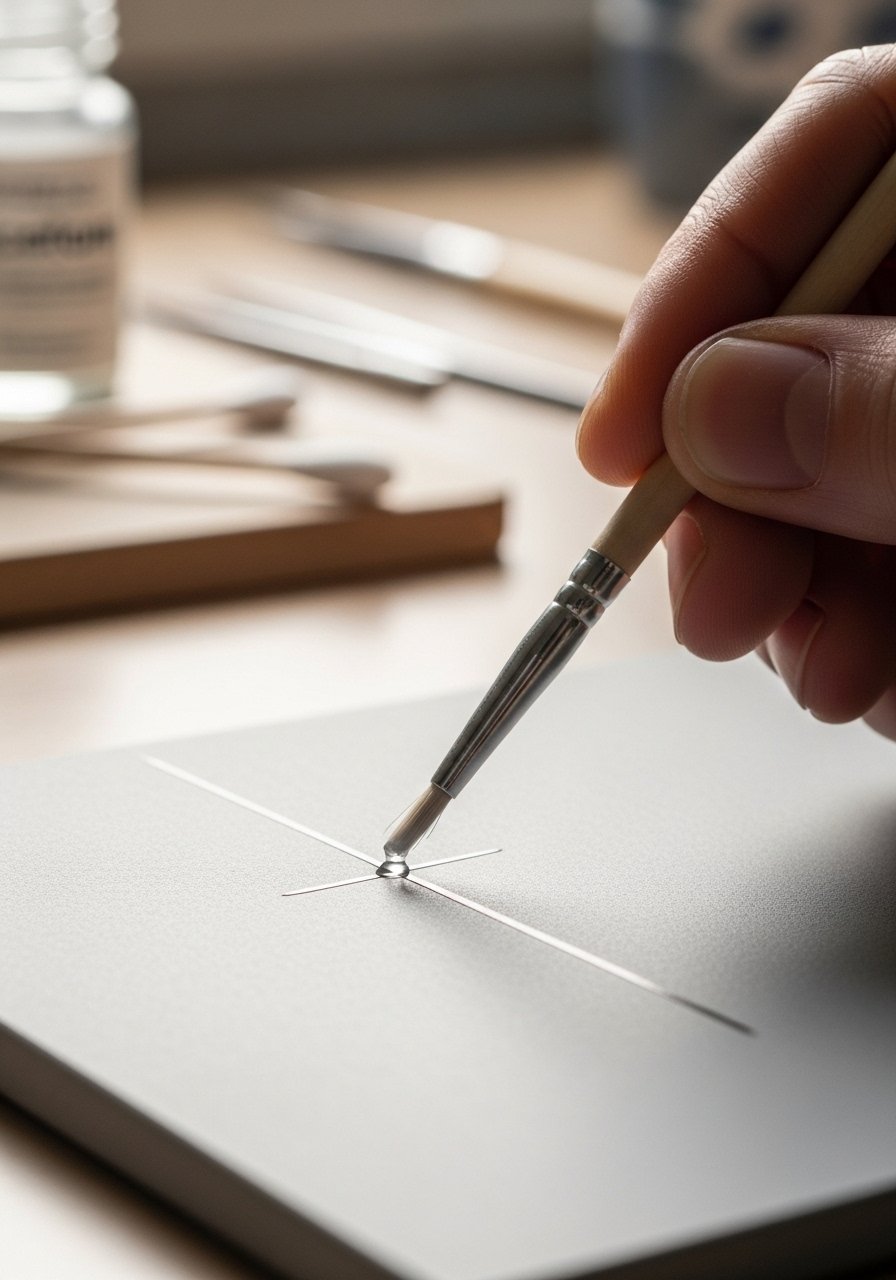
6. Use a Dotting Tool as a Mini Ruler
Style/Vibe: Functional, inventive
Best For: Parallel thin stripes and pattern repeats
I use a dotting tool sideways to mark equal gaps before committing to a line. Press lightly, make tiny dots at start and end, then connect with a liner brush. That little trick saves time compared to eyeballing spacing. I pair it with the nail-liner-brush for the connecting stroke. After using this on a set of striped nails, I noticed the symmetry is way better, clients commented on the uniform spacing without me fussing for ages.
Mistake to Avoid:
Pressing too hard with the dotting tool, which dents wet polish.
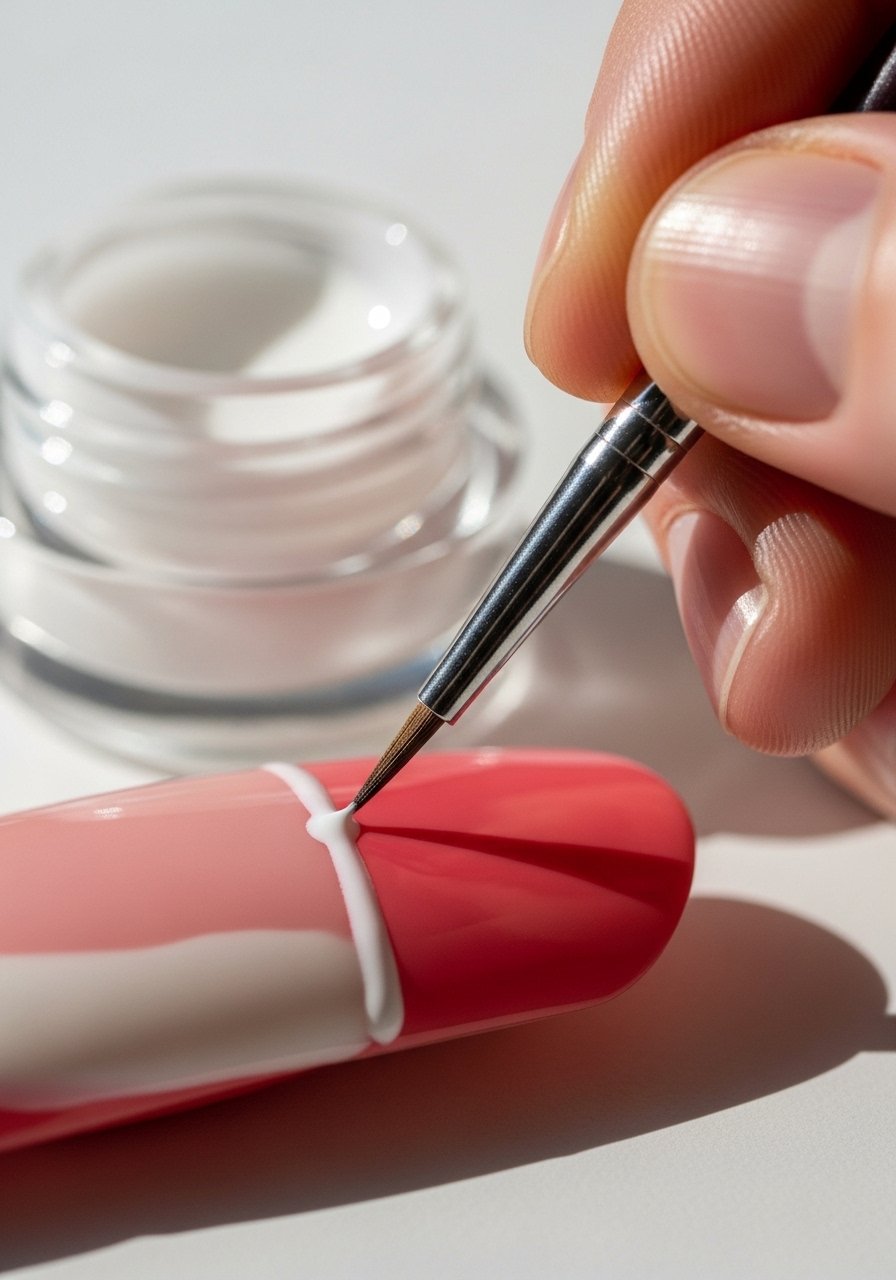
7. Tape-and-Trim for Custom Thickness
Style/Vibe: Customized, neat
Best For: Long nails and geometric looks
If I want a line that's 0.5 millimeter wider on the ring finger, I cut a small strip of tape and trim its edge. Apply, paint, remove carefully. You can layer narrower tapes to create tiny gradients too. I use precision manicure scissors and a roll of striping-tape and it gives me exact control over thickness across a set. This took my geometric sets from amateur to intentional without expensive tools.
Mistake to Avoid:
Using dull scissors that create ragged tape edges, causing uneven paint lines.
8. Hold Breath Technique for Micro-Steady Lines
Style/Vibe: Quieter, focused
Best For: Thin single-stroke details
I know it sounds silly, but holding my breath for a one-second stretch while I draw a micro line reduced tiny shakes. Anchor your painting hand and exhale after the stroke. It is a short practice and not for every stroke, but it saved me when doing very thin vertical lines on accent nails. Pair with a fine nail-art-brush-set and steady wrist placement. Works best when you keep strokes short and decisive.
Mistake to Avoid:
Holding breath for too long, which will make your hands tense and shaky.
9. Use a Latex Barrier for Fast Edges
Style/Vibe: Salon-clean, quick
Best For: Messy-edge designs and multiple colors
Liquid latex is my cheat for near-instant edge cleanup. Paint the skin around the nail with latex-barrier, do your lines, peel it away. Instant clean margin, saved me ten to fifteen minutes per set when I was doing rapid client changes. The only downside is that you need a steady hand to apply the barrier. Still, this method dropped my cleanup time dramatically during busy shifts, and clients loved how neat everything looked.
Mistake to Avoid:
Applying latex too thick, which peels unevenly and drags polish.
10. Paint in Short Strokes, Not One Long Pull
Style/Vibe: Controlled, practiced
Best For: Long straight lines and vertical accents
One long drag looked great in theory but I always hit a blob. Now I use short, overlapping strokes to build a straight line. Keep the brush loaded but not wet, then connect the strokes while the polish is still tacky. I learned this on an evening shift when my hands were tired; it helped me maintain precision. Use a nail-liner-brush and practice on a spare plastic tip to get rhythm before doing skin.
Mistake to Avoid:
Trying to correct a wobble mid-stroke with heavier pressure, which flattens the line.
11. Paperclip Pinch as a Micro-Ruler
Style/Vibe: Resourceful, low-cost
Best For: At-home artists without fancy tools
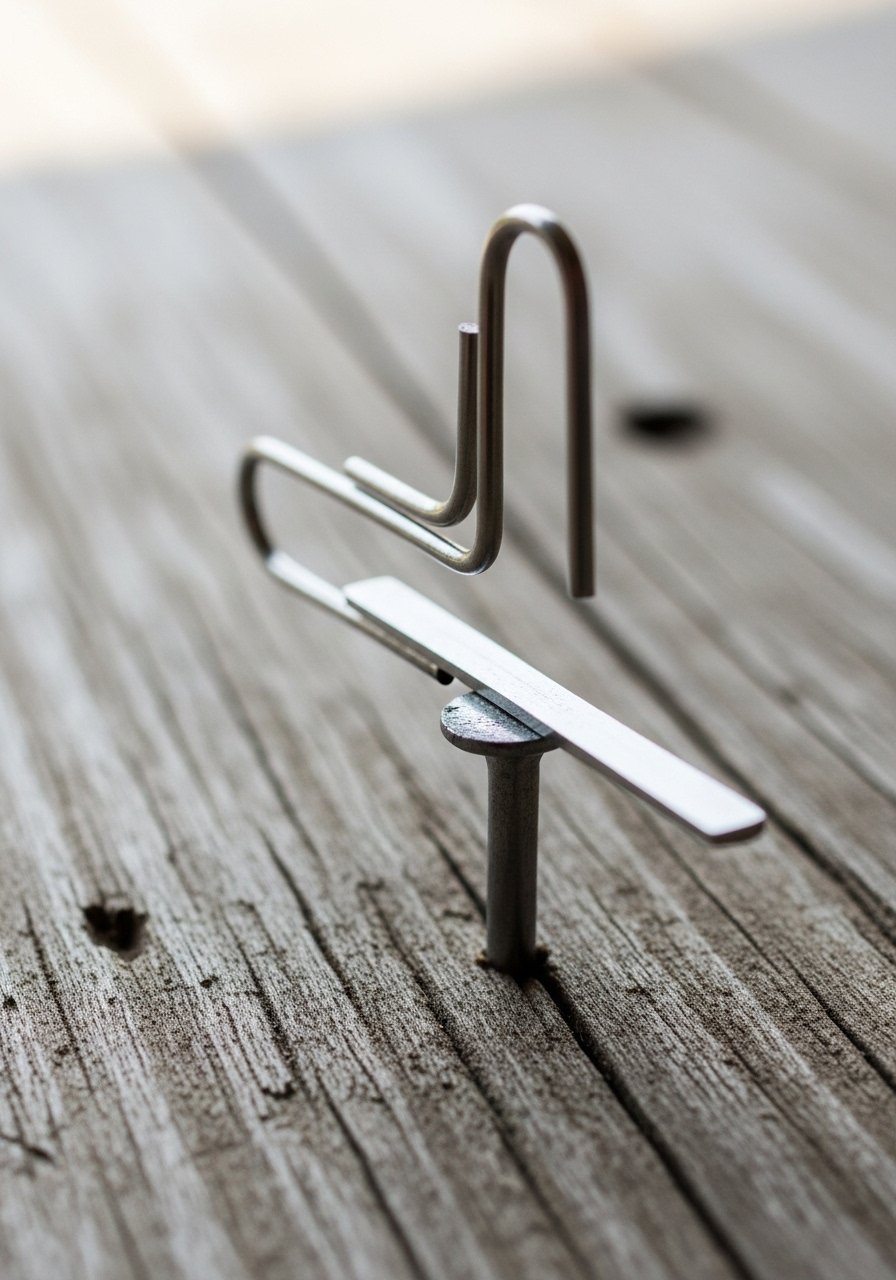
I once forgot my tape and bent a paperclip into a small L shape, using it as a tiny straight-edge against the nail. Hold it steady, and paint along the exposed edge for a quick straight line. It is finicky but works when you need a fast fix. Keep a cheap roll of striping-tape in your kit though, the paperclip is more of a backup. Still, it got me out of a bind more than once during touch-ups.
Mistake to Avoid:
Using a bent metal edge directly on wet polish without a thin barrier, which can scratch your base.
12. Thin Top Coat Layer to Smooth Lines
Style/Vibe: Subtle, polished
Best For: Slightly uneven hand-drawn lines
If your line is tiny uneven, a thin layer of gel-topcoat can level minor ridges and make the line read smoother. I learned to press lightly and stroke once along the line to avoid dragging pigment. This trick rescued many near-perfect sets that otherwise needed full redo. Use a quality top coat for durability. Overdo it and the line can blur, so thin is the rule, not thick.
Mistake to Avoid:
Applying a thick top coat right away, which will cause the line pigment to bleed.
13. Paint From Cuticle Out, Not Tip In
Style/Vibe: Predictable, cleaner
Best For: Small curved lines near the cuticle

I switched my direction for lines below the cuticle and it made a huge difference. Starting near the cuticle gives you a better anchor and a cleaner edge where the line meets skin. It reduces filaments of polish dragging away from the starting point. I use this for delicate crescents and half-moons, with a nail-liner-brush and a steady wrist. After adopting this, clients noticed their lines looked more deliberate and that saved me time on touch-ups.
Mistake to Avoid:
Starting at the tip for cuticle-area lines, which often causes uneven beginnings.
14. Use a Concealer Brush and Acetone for Micro-Cleanups
Style/Vibe: Precise, corrective
Best For: Tiny edge cleanups and polish removal
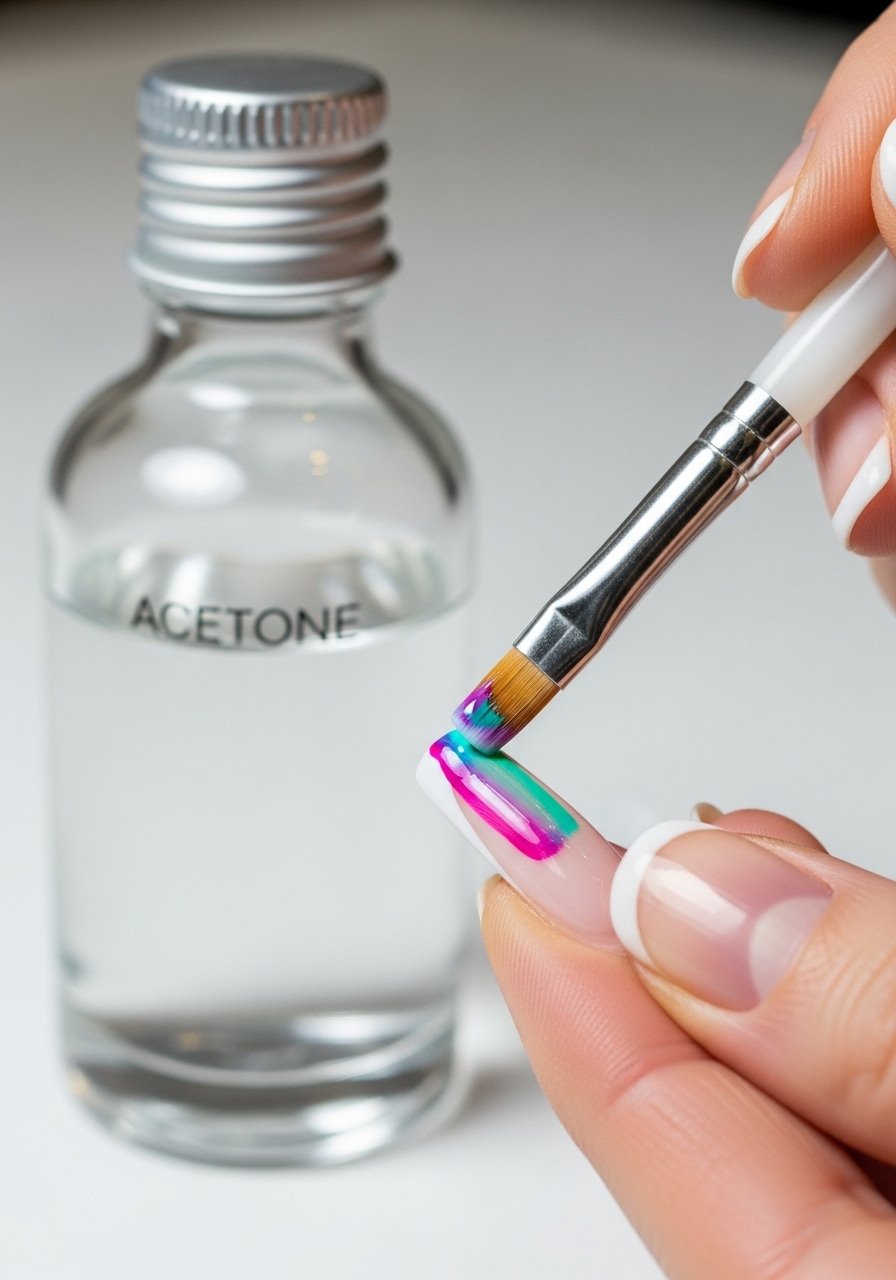
When a thin line gets a tiny smudge, I dip a flat concealer brush in acetone and gently swipe to fix the edge. It is faster than cotton and gives more control. Keep the stroke short and the brush barely damp, not dripping. I use a small jar so I can swipe without flooding the nail. This method saves a lot of nail wipes and gave me better results than cotton swabs when I was under time pressure.
Mistake to Avoid:
Using a soaked brush, which will eat into surrounding polish and widen the mess.
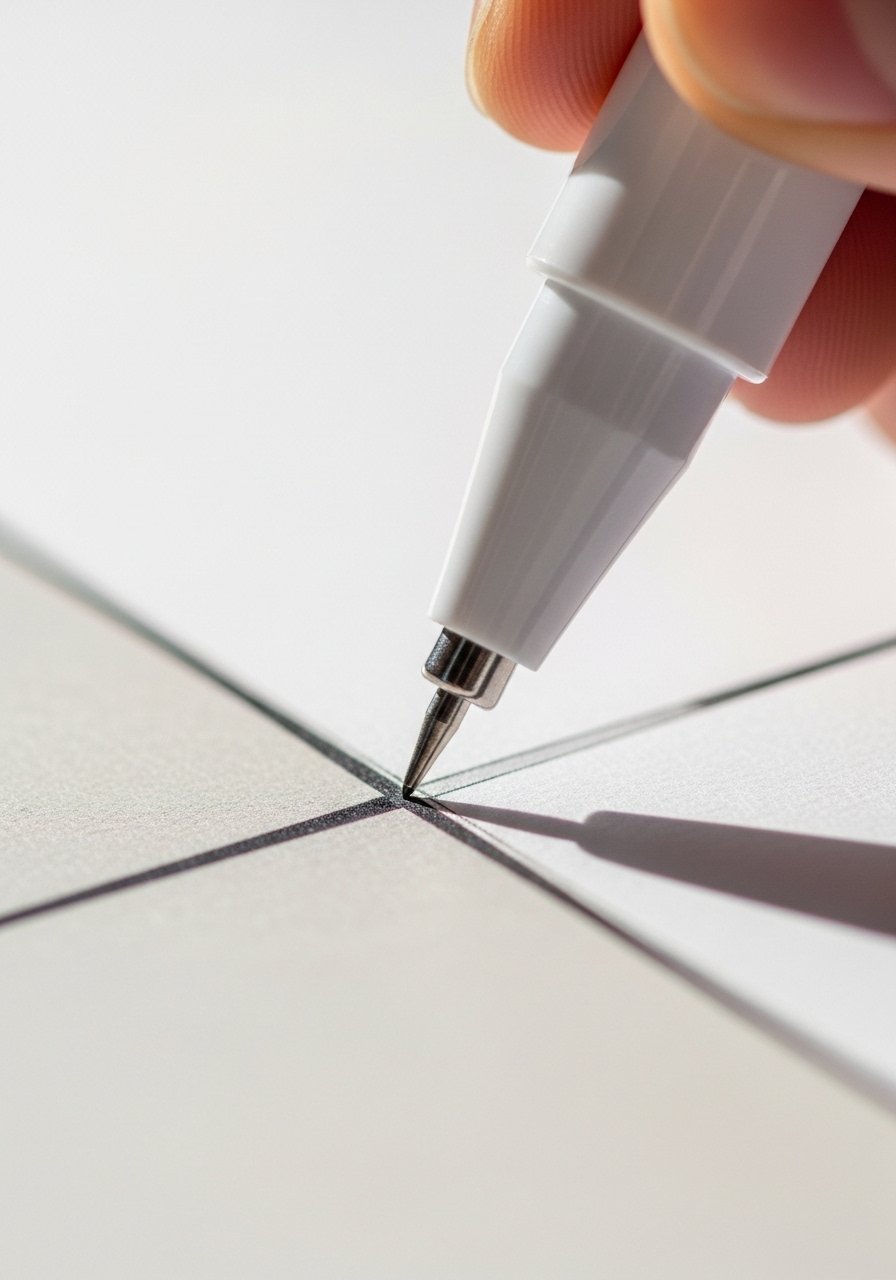
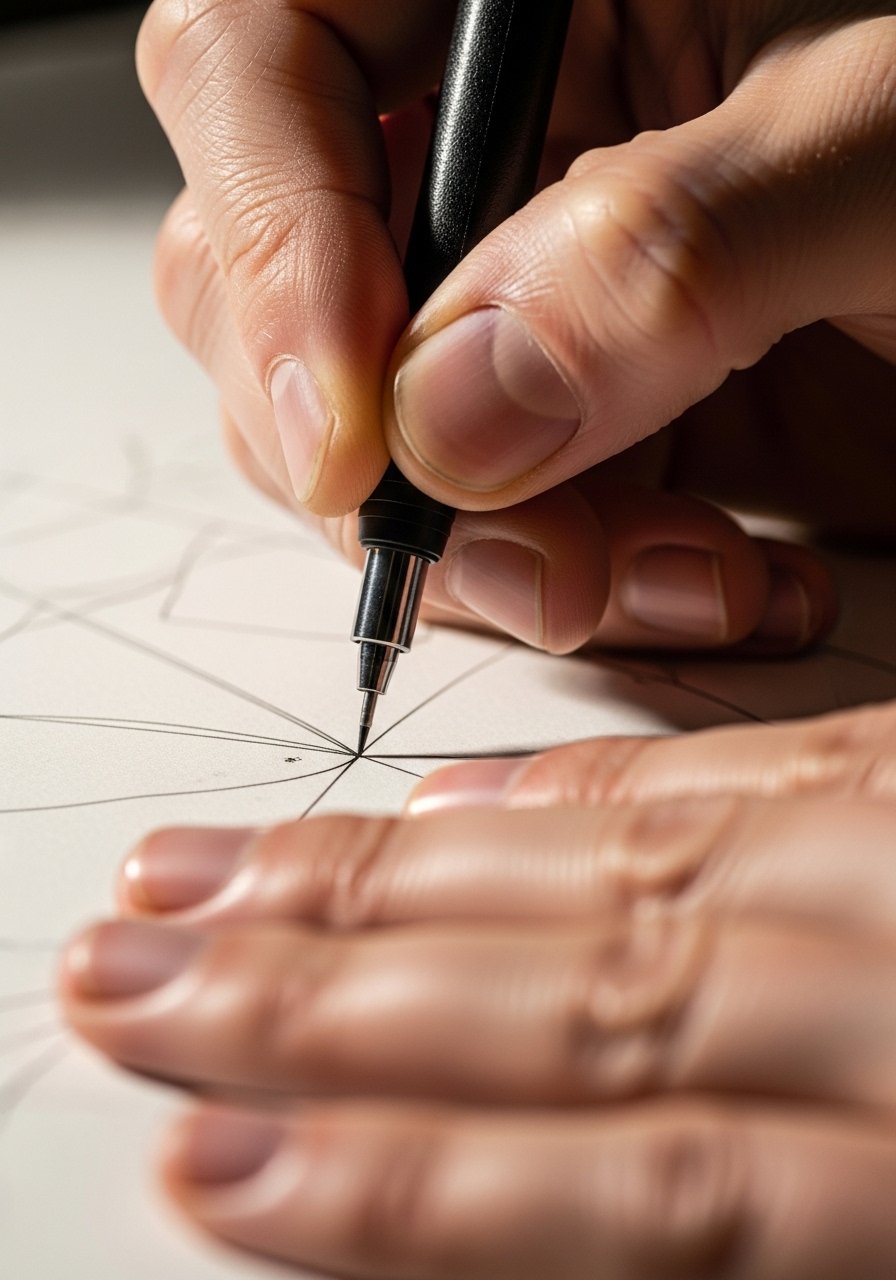
15. Mark Points with a Pencil Beforehand
Style/Vibe: Blueprint-like, planned
Best For: Symmetrical lines across multiple nails
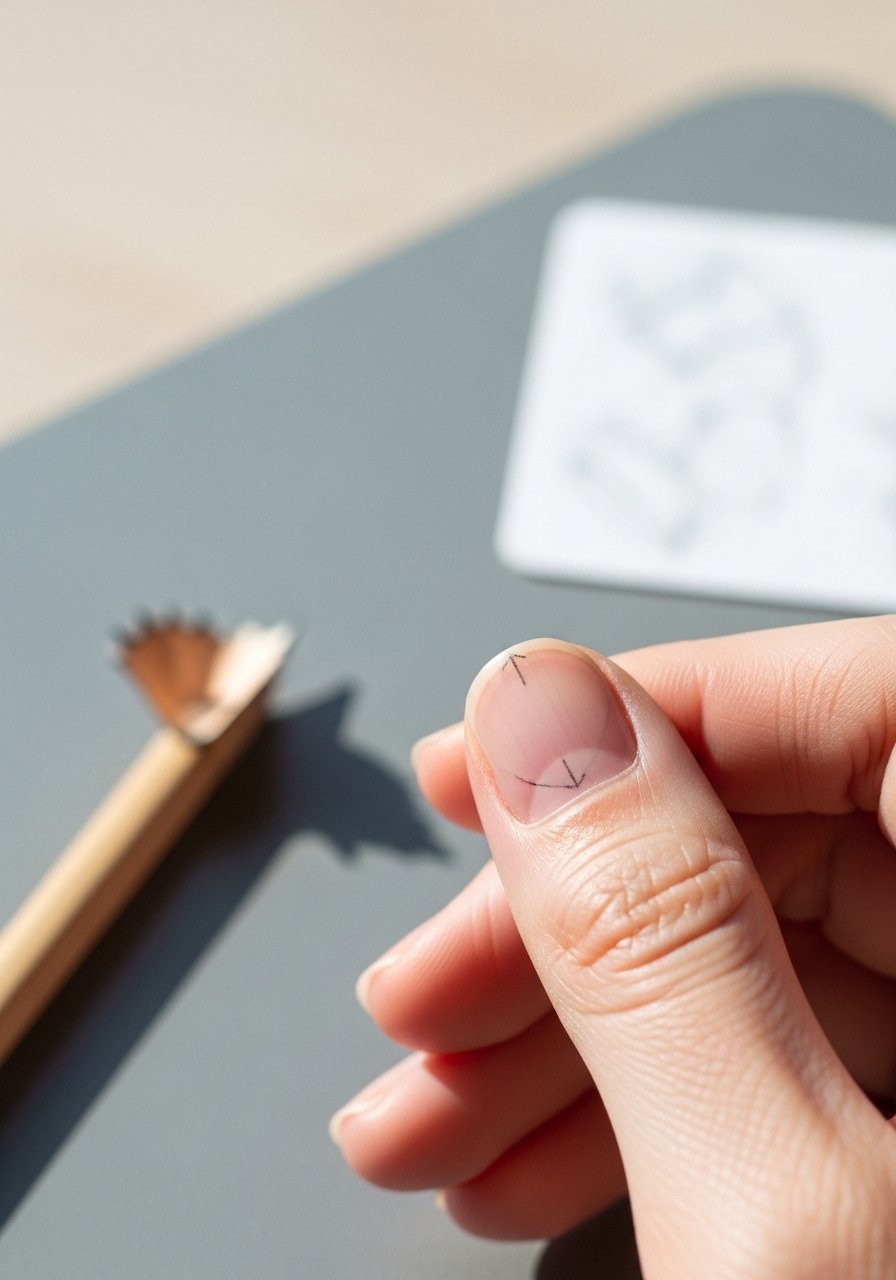
I sketch faint points with a soft cosmetic pencil before committing, especially when matching line heights across both hands. Then I connect the dots with a liner brush. It sounds slow but saves time from constant corrections. Use a cosmetic pencil that wipes off with a little alcohol after top coat. This method gave me uniform placement for sets where symmetry mattered, like paired diagonal accents or matching thumb details.
Mistake to Avoid:
Pressing pencil too hard, which leaves a stubborn mark that resists polish.
16. Use Thin Tape from the Inner Nail Edge
Style/Vibe: Architectural, crisp
Best For: Thin internal negative-space lines
For inner detail lines I apply striping tape from the inner nail edge toward the center, creating a slim reserved stripe when removed. This creates a precise gap for your color to live in. Do it after your base color cures fully. I found this method makes thin internal lines look intentional on any nail length. Pair with a strong clear top coat to lock in the crisp edge without pushback.
Mistake to Avoid:
Leaving the tape on until polish is fully hardened, which can create jagged edges on removal.
17. Slightly Stiffer Brush for Long Nails
Style/Vibe: Structural, controlled
Best For: Long nails and stiff gel paint
On longer nails I sometimes swap to a slightly stiffer liner brush so the bristles do not splay over the long stroke. It gives a consistent width and resists the tendency to feather. This helped me with long-arc lines that needed to stay true from base to tip. Use a nail-art-brush-set that includes varied stiffness so you can pick the right tool for each nail length.
Mistake to Avoid:
Using a too-soft brush on long strokes, which causes irregular widths.
18. Practice on False Tips Before the Real Thing
Style/Vibe: Rehearsal, low-stakes
Best For: Learning new line patterns
Whenever I try a new line pattern I do three practice nails on a tip wheel first. That way I figure out pressure, polish load, and stroke length. It saved me bruised confidence and polish waste. Keep a few practice tips in your kit; they are cheap and hugely helpful for trying a new shape or scale. You can measure improvements in steadiness after just a few runs, I noticed my control improves after two quick attempts.
Mistake to Avoid:
Skipping practice and going straight to client nails, which increases redo risk.
19. Use Matte Base to See Contrast
Style/Vibe: Visual-testing, corrective
Best For: Choosing line colors and thickness
Before committing, I test thin lines on a matte base swatch to see how the color and thickness read. Shiny surfaces can hide minor imperfections, matte reveals them. This little test helps you pick whether a lime green thin line will pop on a dusty rose or get lost. I keep a small swatch book in my kit and save time by knowing the right combo before painting actual nails.
Mistake to Avoid:
Trusting only glossy previews, which can mask problem areas you will regret later.
20. Micro-Tip Correction Pen for Edges
Style/Vibe: Corrective, efficient
Best For: Quick on-the-spot fixes
A micro-tip correction pen is a lifesaver for tiny edge fixes without acetone. I use it to nudge a stray pixel of polish back into line before the top coat sets. Keep it capped and clean; it is precise. I pair this with a thin nail-liner-brush for rebuilding any lost pigment. It helped me during a fast event where eight nails needed micro-adjustments in ten minutes.
Mistake to Avoid:
Using correction pens on fully cured polish, which can smudge rather than correct.
21. Warm the Polish Bottle Slightly
Style/Vibe: Technical, handy
Best For: Thick polishes that resist smooth lines
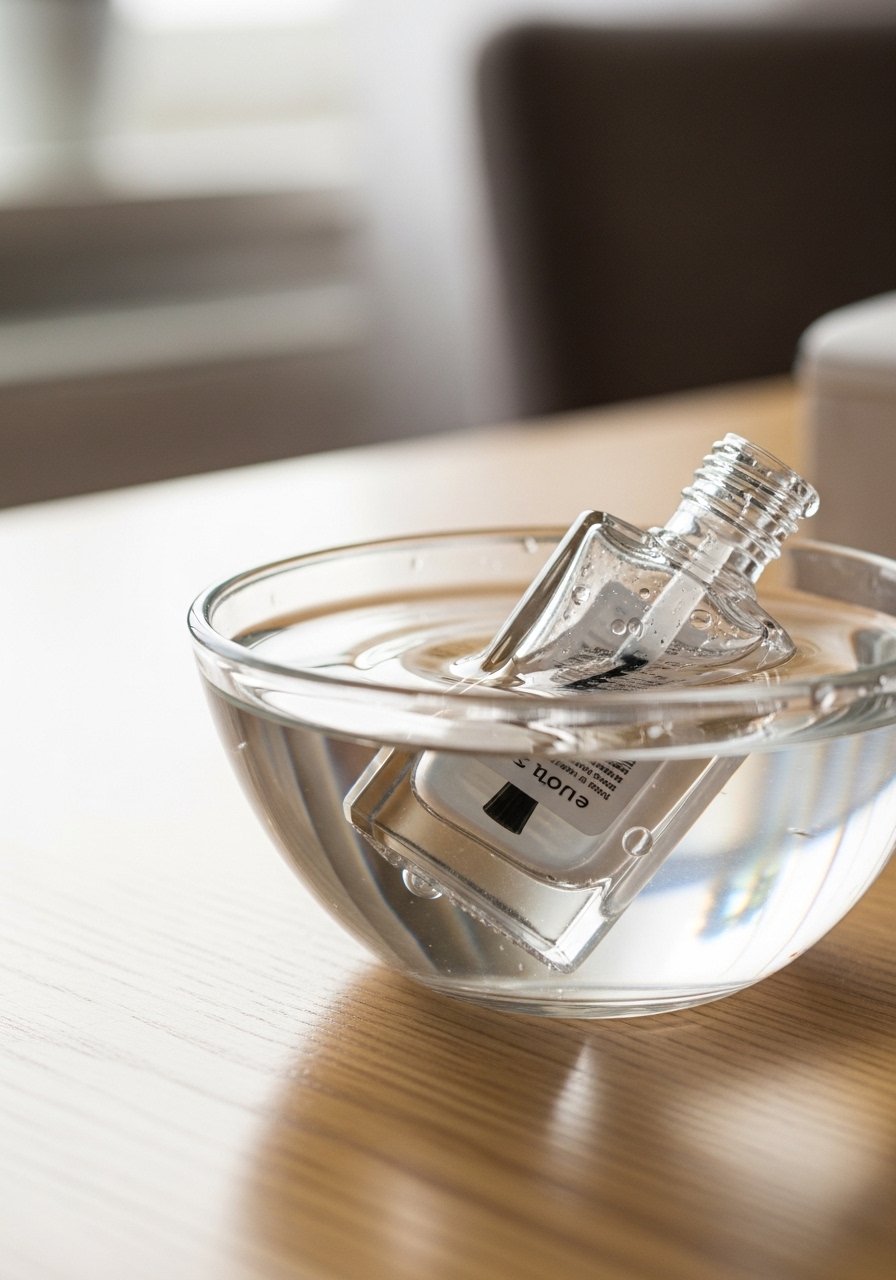
If your line keeps dragging because the polish is thick, warm the bottle in a bowl of warm water for a few minutes. It thins the polish slightly and helps it flow off the brush more evenly. I only heat gently, not hot, and it made dense whites behave for thin lines. This small change often converted a clumpy mess to a buttery stroke and saved me a redo.
Mistake to Avoid:
Heating the bottle too much, which can ruin polish formula or create bubbles.
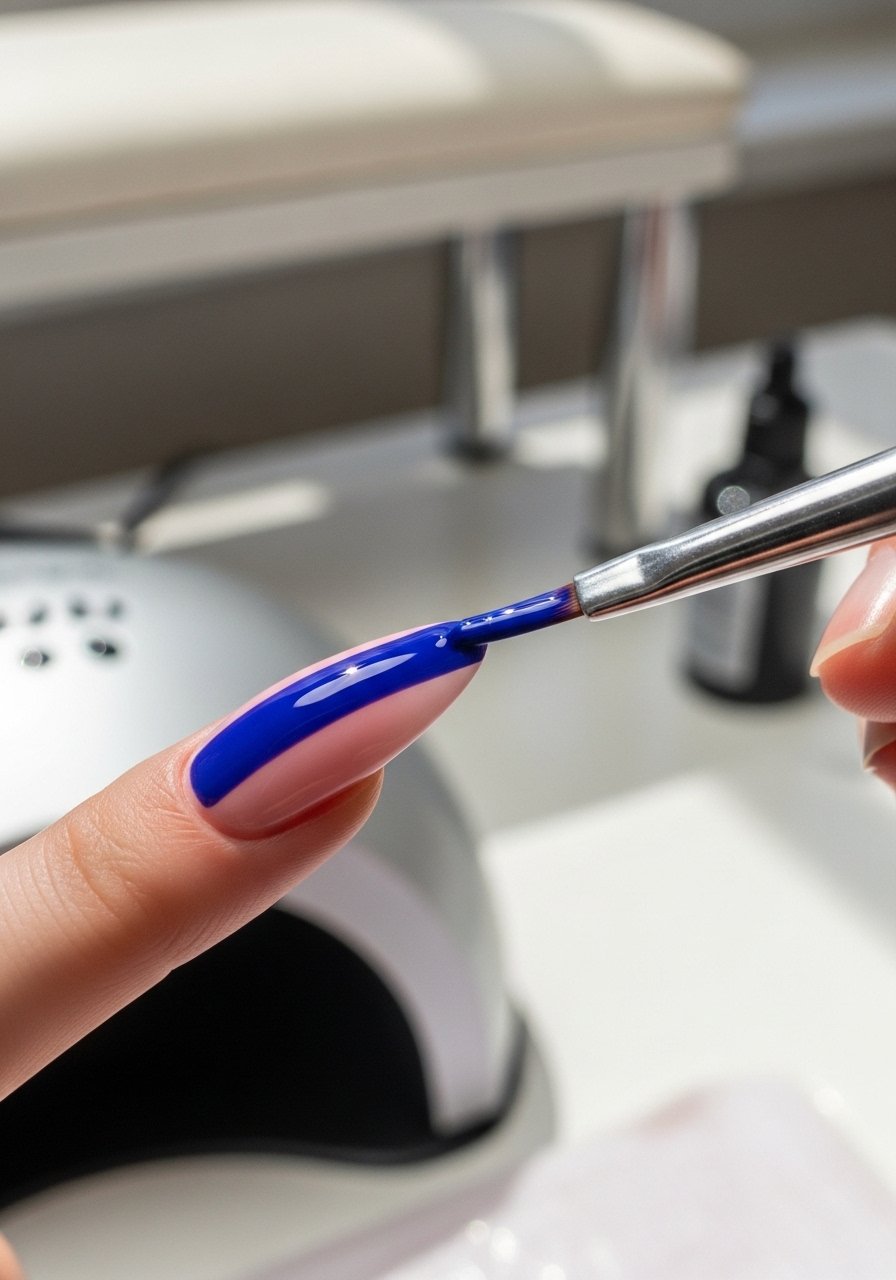
22. Use a Second Light Pass to Correct
Style/Vibe: Layered, patient
Best For: Gel lines and cured layers
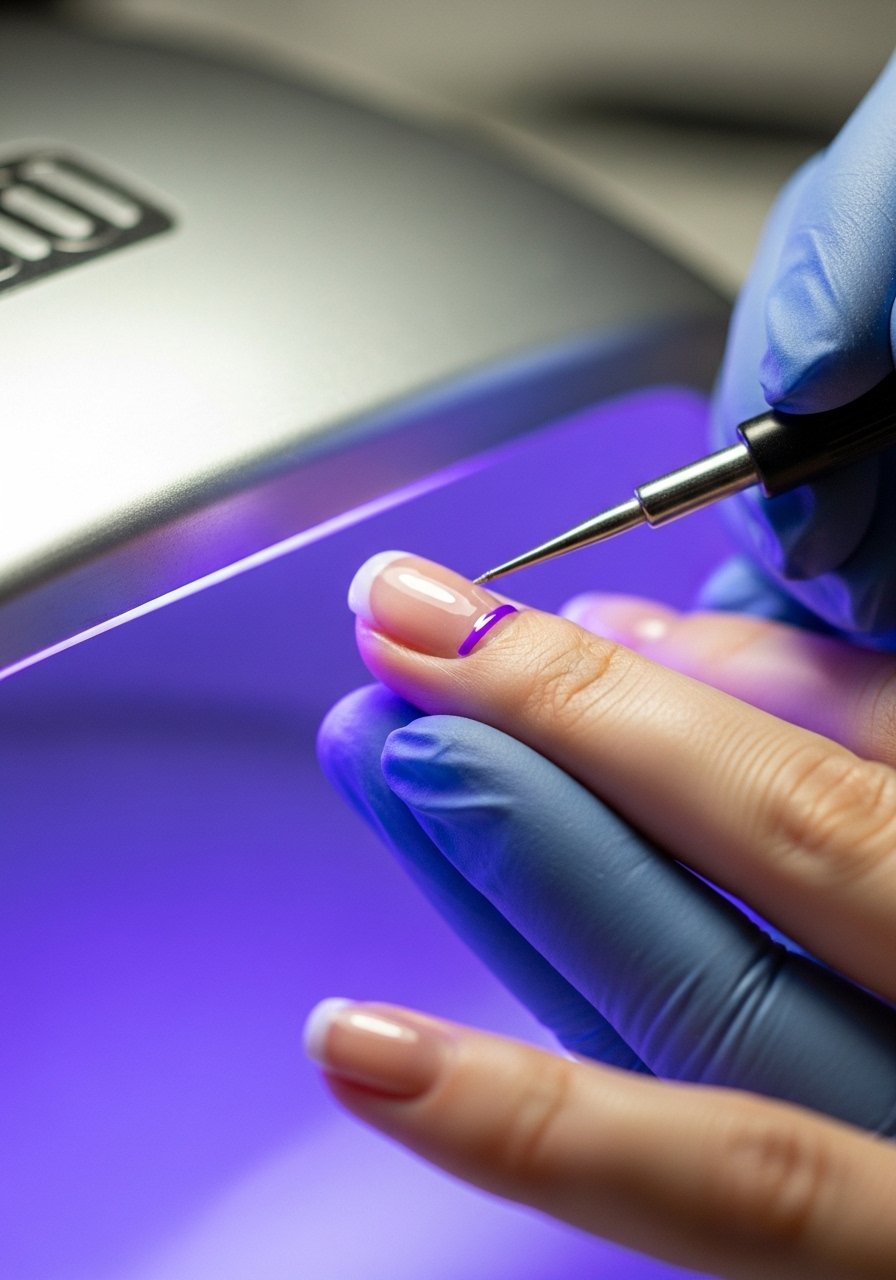
For gel work I paint a thin line, cure briefly, then add a second micro pass to perfect edges. The partial cure prevents pigment migration and gives you a stable surface to refine. I do a 15-second flash cure, tidy the line, then finish with a full cure and top coat. This method raised my accuracy on gel lines and made client sets more durable in daily wear.
Mistake to Avoid:
Skipping the flash cure and trying to correct wet gel, which ruins the surface.
23. Use Color Contrast to Mask Small Wobbles
Style/Vibe: Strategic, forgiving
Best For: Natural nails with minor imperfections
If your hand is shaky for tiny details, choose a slightly darker or lighter line color to mask a small wobble. Contrast can trick the eye into seeing the line as cleaner. I use this when clients want thin lines but their nail texture is uneven. Pair with a quality gel-topcoat for a finished look. It is not cheating, it is smart visual design.
Mistake to Avoid:
Picking a color too close to the base shade, which shows every imperfection.
24. Use a Ruler on a Clear Nail Art Shield
Style/Vibe: Precise, tool-aided
Best For: Exact geometric line placement
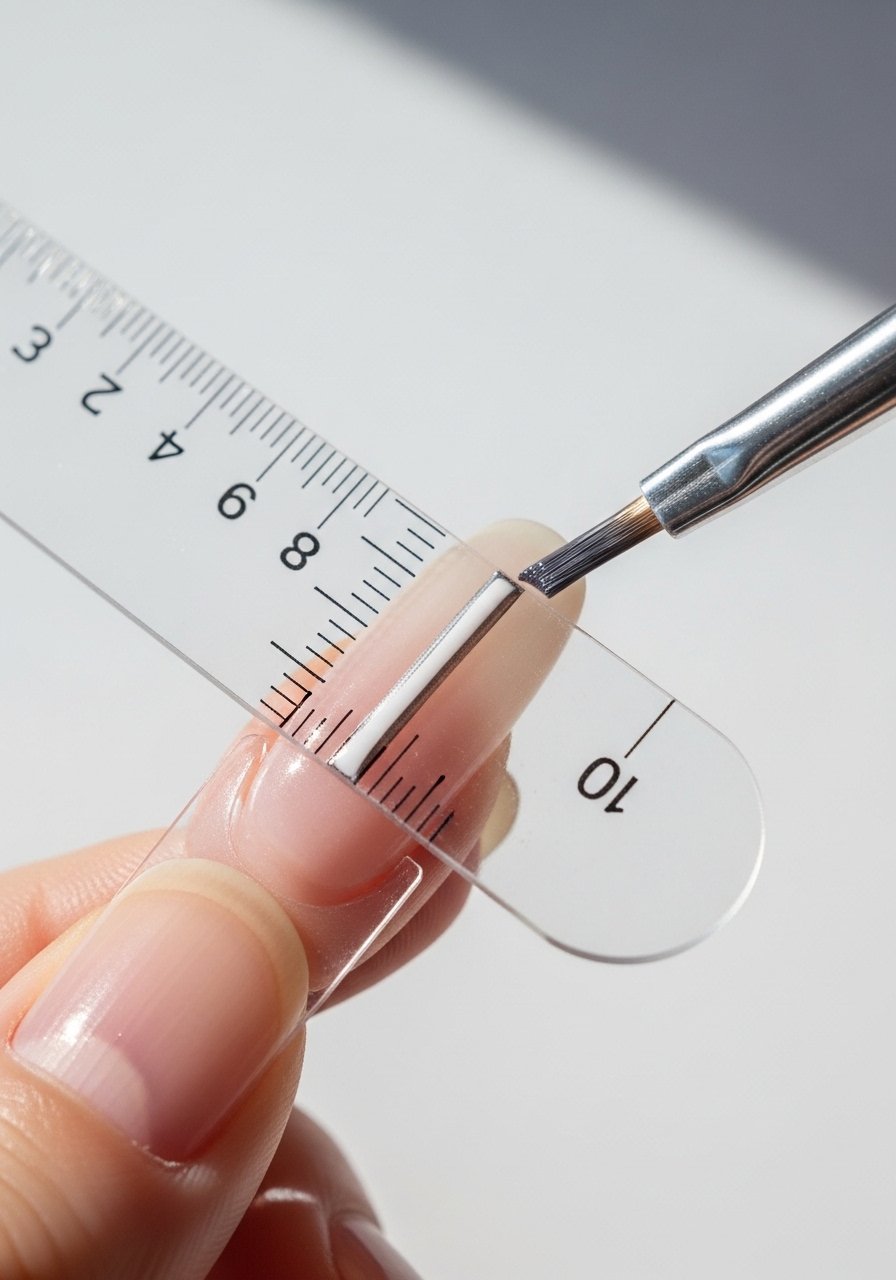
I use a clear art shield with a ruler edge to guide perfectly straight thin lines, especially for geometric sets. Hold the shield against the nail and drag the brush along the edge. The transparency helps you align with the nail's natural curve. It is one of those small pro tools that I keep in my kit; it stopped me from guessing placements and smudging designs during quick changes.
Mistake to Avoid:
Shifting the guide mid-stroke, which creates ghosted double lines.
25. Use a Slightly Dampened Brush for Cleanup
Style/Vibe: Clean, minimal
Best For: Tiny edge correction and smoothing
For a tiny evening out I dampen a flat brush with a drop of acetone, then gently roll it along the edge to blend and smooth. It is more delicate than wiping with a cotton bud. I learned to use this when clients wanted micro corrections without losing shape. It allows you to nudge pigment where it needs to sit and keeps the overall line crisp.
Mistake to Avoid:
Soaking the brush, which removes too much paint and causes larger gaps.
26. Keep a Two-Color Backup for Contrast Tests
Style/Vibe: Prepared, experimental
Best For: Trialing line color on the fly
When I am unsure which line color will read better, I keep two quick options in my tray and paint thumb tests before deciding. A 10-second test avoids hours of regret. This quick swap method helped me when a bride changed colors last minute; I tested two tones and matched the dress under natural light. Having a nail-topcoat handy seals the test so you can see the final effect.
Mistake to Avoid:
Picking color based solely on bottle appearance under artificial light.
27. Use a High-Quality Top Coat for Line Integrity
Style/Vibe: Durable, long-wear
Best For: Designs that need to last daily wear
A decent top coat protects thin lines and prevents chipping around edges. I stopped using bargain top coats after seeing lines feather in a few days. Invest in a reliable gel-topcoat and do thin, single strokes when sealing delicate lines. That extra two minutes at the end saved me from redoing sets midweek more than a few times. You'll keep the crispness longer and clients leave happy.
Mistake to Avoid:
Rushing several thick passes of top coat which dulls fine details.
28. Practice One-Minute Line Drills Daily
Style/Vibe: Habit-building, efficient
Best For: Anyone wanting consistent improvement
I do a quick one-minute line drill every morning on a practice wheel: five thin lines in sixty seconds. It builds muscle memory and steadiness faster than long sessions. After a month I could see measurable improvement in consistency. Keep a tiny kit with a nail-liner-brush and a test wheel so you can practice anywhere. This habit turned shaky beginnings into reliable strokes on the regular.
Mistake to Avoid:
Practicing with old, frayed brushes which teaches bad technique.
Nail Tips
Steady Your Breath: I hold a steady breath for a one-second stroke to reduce micro-shake, try it with a nail-art-brush-set.
Thin Layers Rule: Always apply thin layers of color, they dry faster and make thin lines easier to paint, I use gel-topcoat for sealing.
Test Colors: Paint a small swatch on a tip before committing to match contrast, keep nail-stencils handy for consistent tests.
Tool Rotation: Rotate brushes and replace them when the bristles splay, I learned that cheap brushes are fine but not forever.
Use Flash Cures: For gel lines, flash cure for stability before refining, it prevents migration and keeps edges tight.
Prep Wins: Keep cuticles conditioned with cuticle-oil, a smooth nail plate makes thin lines behave much better.
