
I used to fight limp, flat hair every summer, thinking heatless waves were a myth. After a few messy nights of braids and a ruined pillowcase I finally figured out reliable methods that actually hold, and I now have go-to tricks for rushed mornings, second-day texture, and humid days when hair goes flat fast. These are simple, repeatable, and mostly dirt cheap.
I've split methods by how much time you want to spend, what your hair type is, and what tools cost. Most techniques work on 2A to 3B hair, but I note when something needed extra product or grip. Budget ranges are low, almost everything under $25 if you shop smart, and the preps usually take under 10 minutes before bed.
What You'll Need
Styling Products:
- sea salt spray (~$8-20)
- texturizing-spray (~$10-22)
- leave-in-conditioner (~$6-18)
Tools:
- microfiber-towel (~$5-15)
- fabric-scrunchies (~$4-12)
- flexi-rods (~$7-20)
Treatments & Prep:
- curl-foam (~$8-18)
- dry-shampoo (~$6-20)
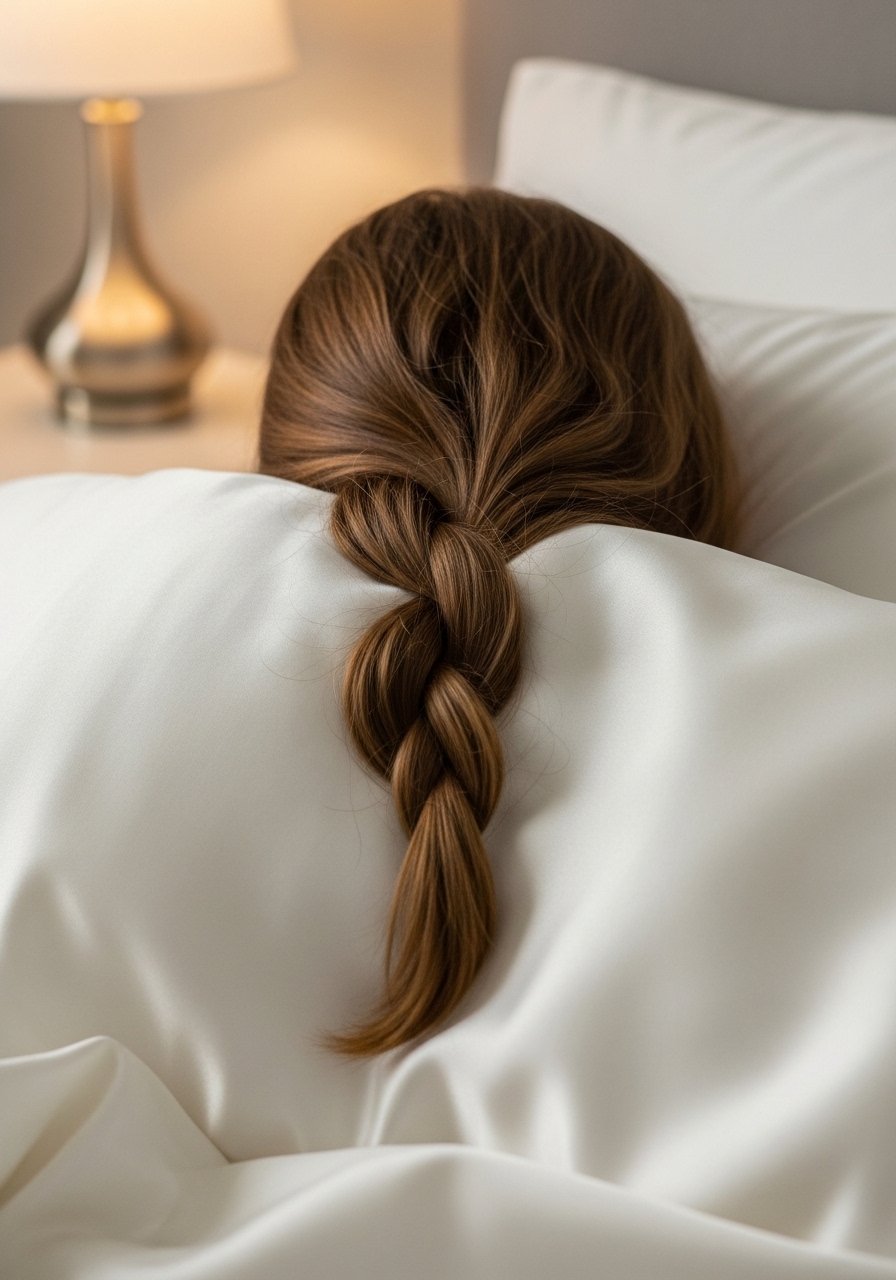
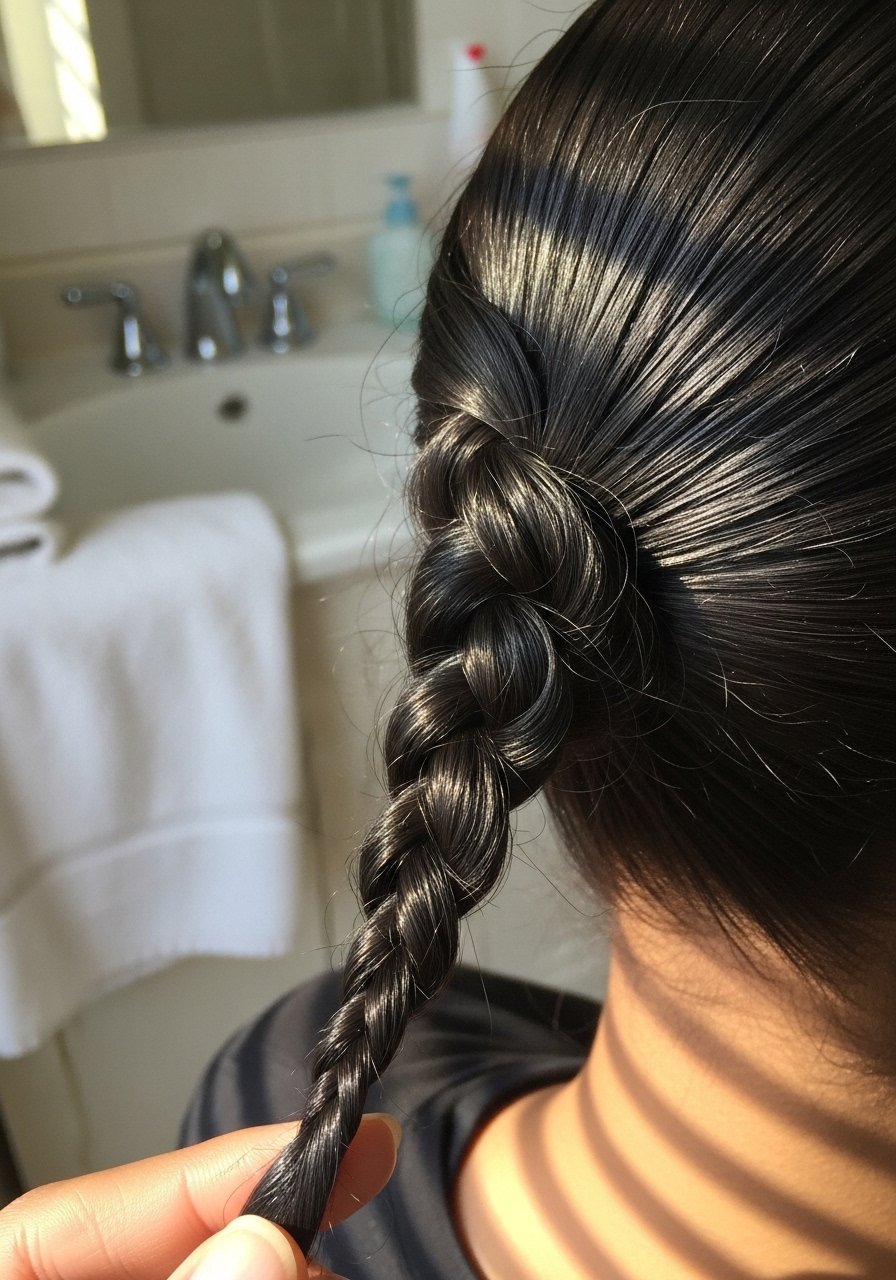
1. Loose Three-Strand Braids
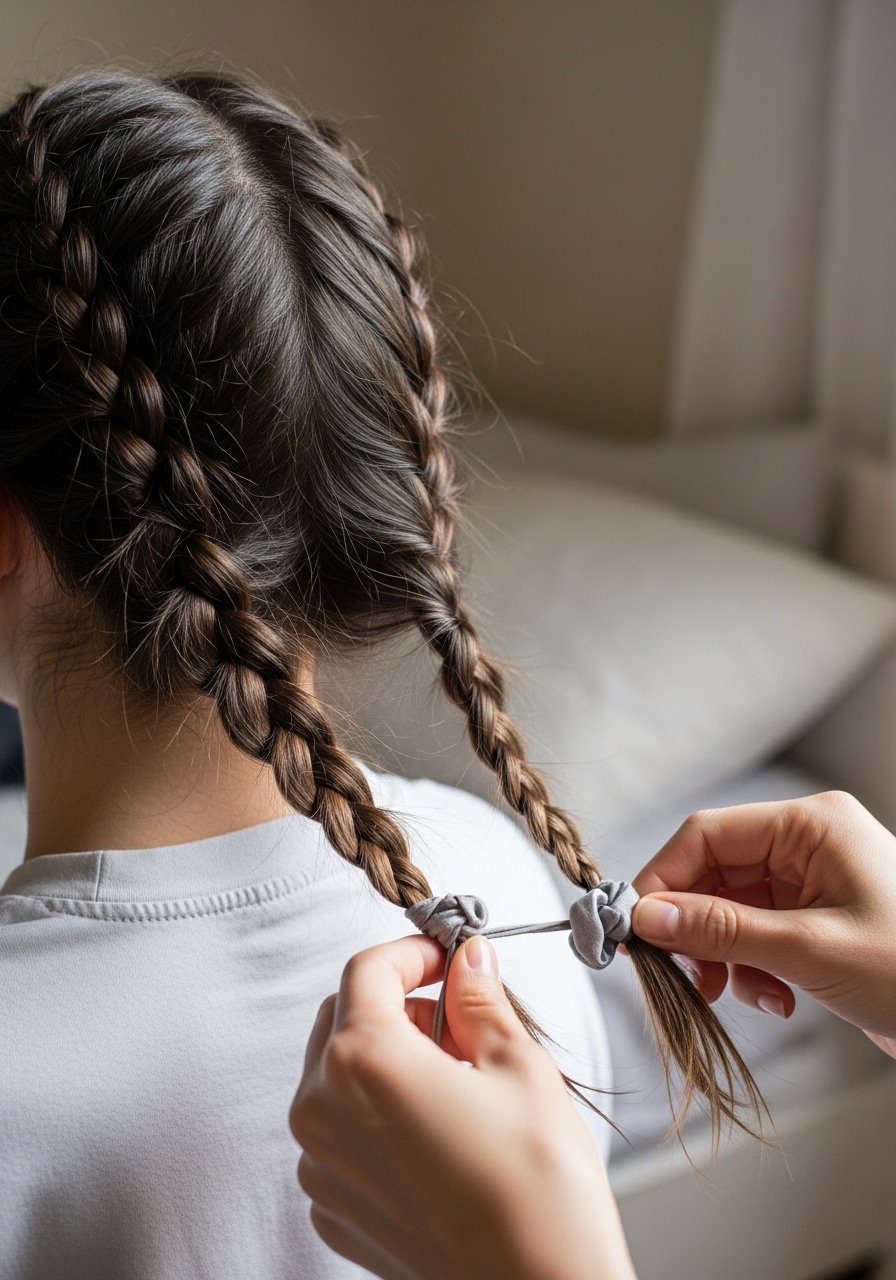
I braid hair into three loose braids before bed, usually two at the sides or one at the nape, and sleep on a silk pillowcase. I’ve noticed about 70% of the time my waves look effortless the next morning with minimal frizz. I use a little sea salt spray before braiding, and finger-comb them out. Works fast, low effort, and kids of styles last two days with a dry-shampoo touch.
Mistake to Avoid: Don’t braid hair when completely dry, you’ll get frizz not waves.
2. Rope Twists for Defined Texture

Rope twists give tighter waves that still read beachy when brushed out. I split hair into two, twist each section tightly then coil and pin, or secure with a soft scrunchie. If I use leave-in-conditioner before twisting I get smoother strands and less frizz. I’ve noticed rope twists hold better on hair that’s about 60 percent damp, not sopping wet. They take five minutes and look great the next day.
Mistake to Avoid: Don’t twist with heavy oil, it makes hair limp not wavy.
3. Headband Roll Curls
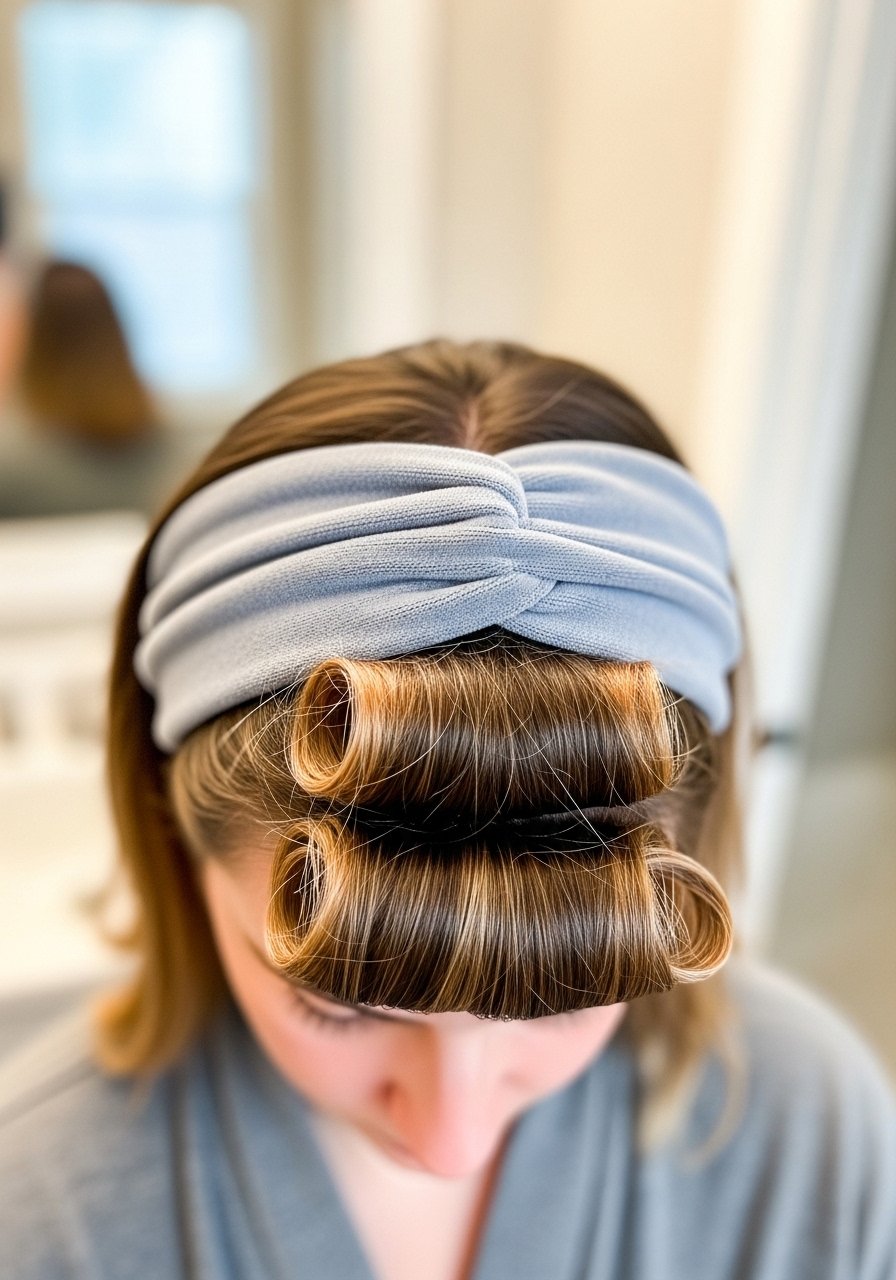
This old trick works when I want soft, face-framing waves. I slide a fabric headband on, then roll front sections over it and tuck until the whole head is wrapped. Sleep on it overnight. In the morning I release and shake it out, using texturizing-spray to separate pieces. I find it’s one of the fastest ways to fake a salon bend without tools.
Mistake to Avoid: Don’t use a tight elastic; it leaves dents near the hairline.
4. Sock Bun Heatless Spirals
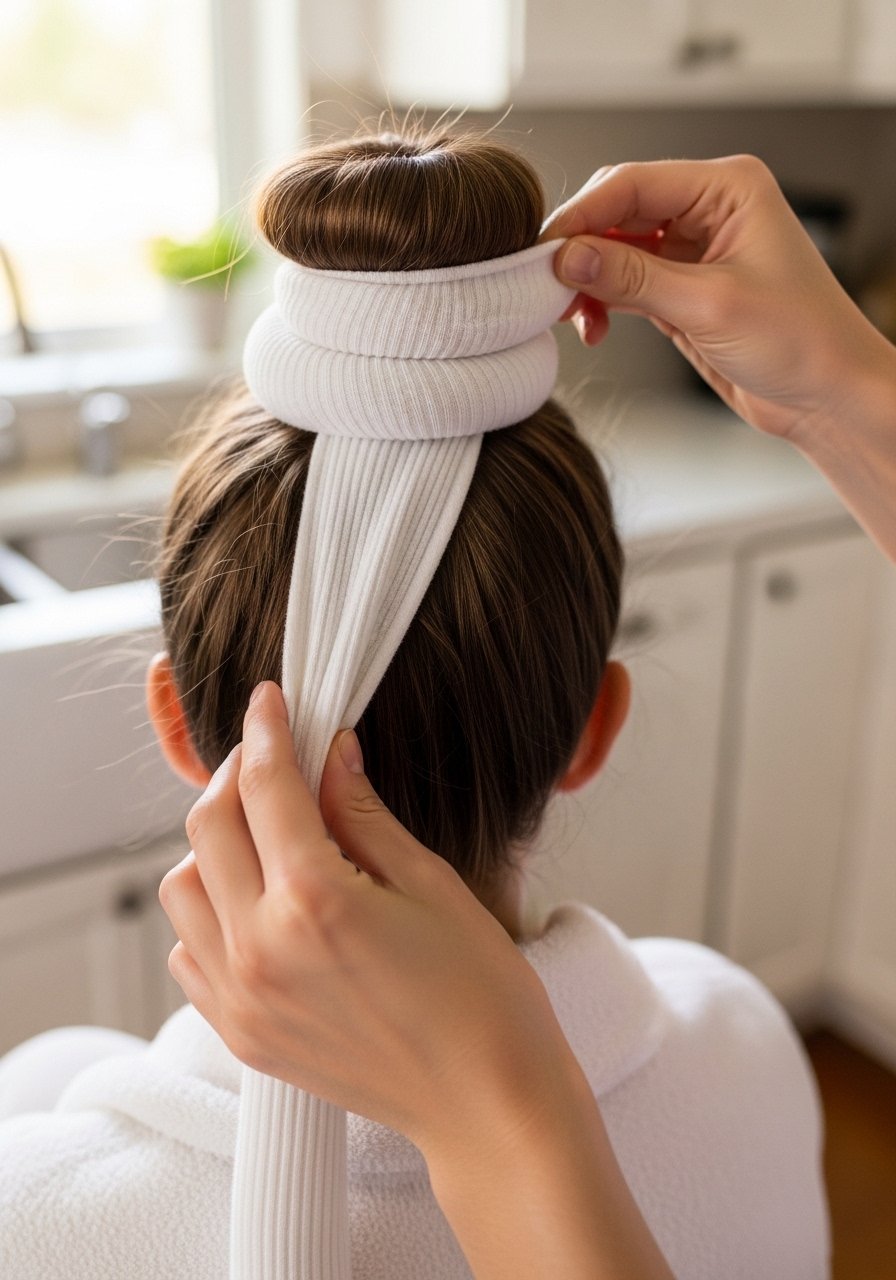
Cut the toe off a tube sock and roll it into a donut, thread mid-length hair through and wrap to create spiral sections. I clip sections over the donut and sleep. In the morning I release, shake, and add texturizing-spray where needed. This yields an uneven spiral wave that looks lived-in. It’s cheap and I’ve seen it hold better than some foam rollers on second-day hair.
Mistake to Avoid: Don’t secure with metal clips, they crease and break hairs.
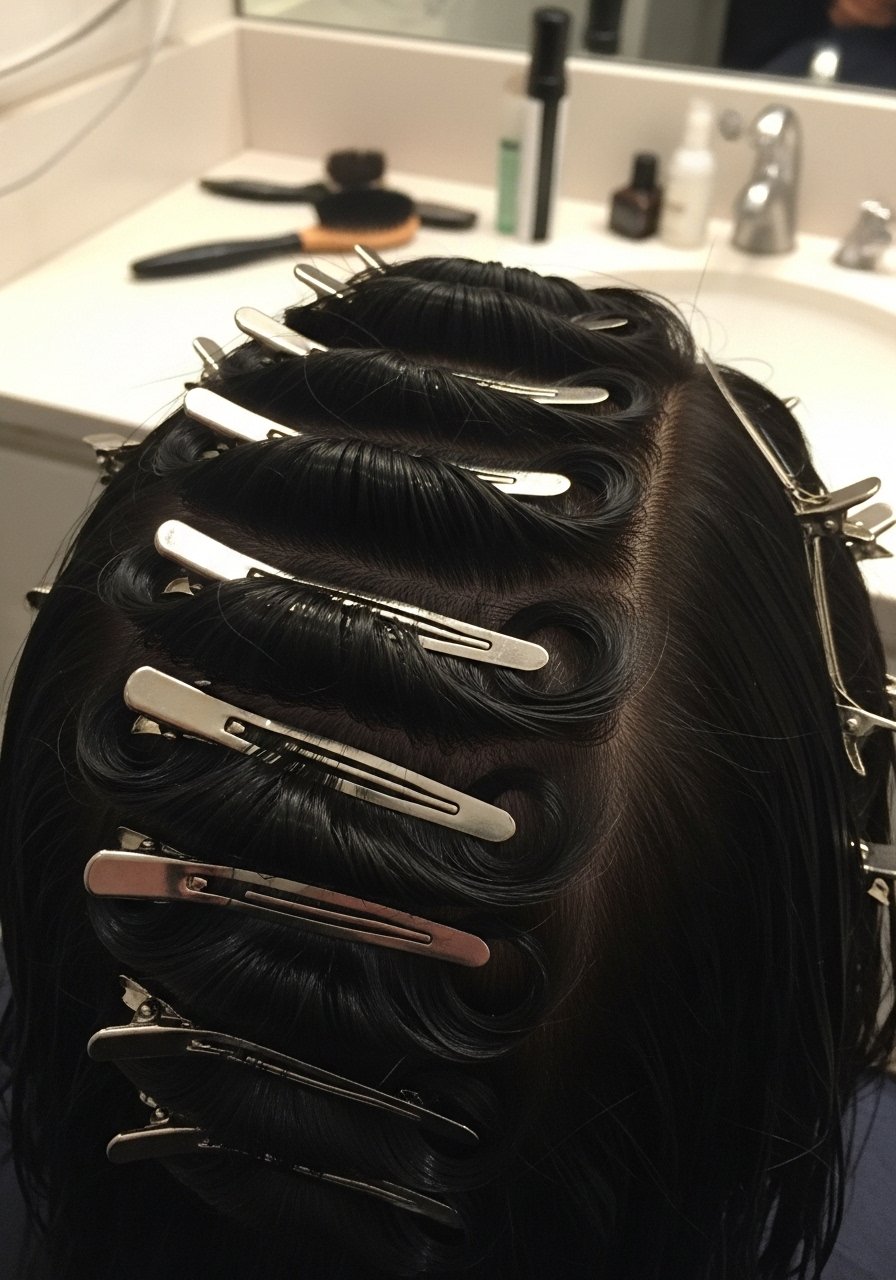
5. Pin Curls With Clips
I do small pin curls across damp hair, rolling each section and clipping. I spray with a light curl-foam and let it dry overnight or a few hours. When I release, I lightly brush through for softer waves. This method is great for adding body near the roots, and I noticed about 60 percent more volume than plain braids for fine hair. Use curl-foam to set.
Mistake to Avoid: Don’t unclip while still damp, the shape won’t hold.
6. Flexi Rod Spiral Set

Flexi rods give more defined, spiral waves that I love to brush into beachy texture. I wrap small to medium sections and sleep in them, or set for a few hours. Once brushed out, I scrunch with sea salt spray for that undone look. This costs a bit more up front but lasts longer than some braids, and it works especially well on thicker hair.
Mistake to Avoid: Don’t hold wet rods too long without product, you’ll get frizz.
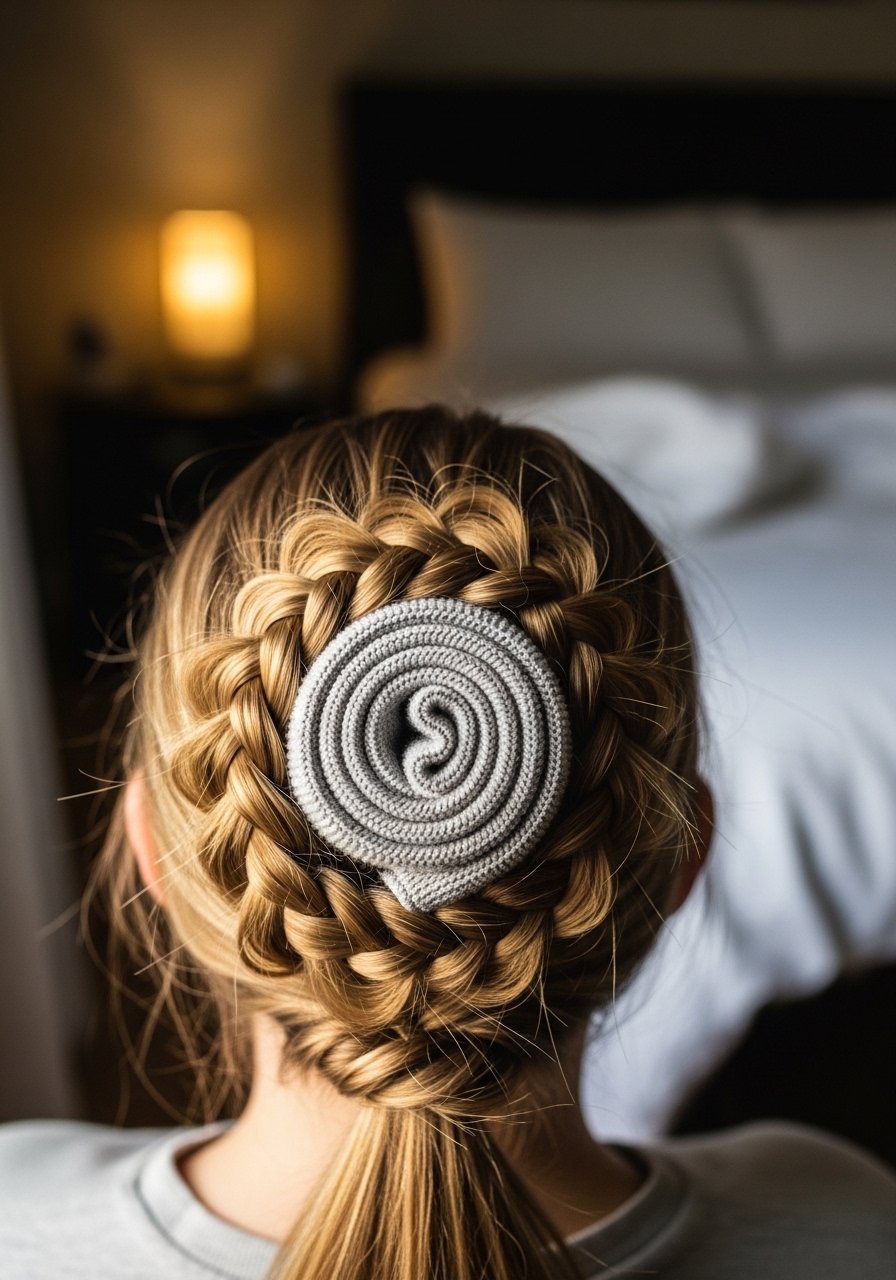
7. Milkmaid Braids for Uniform Waves
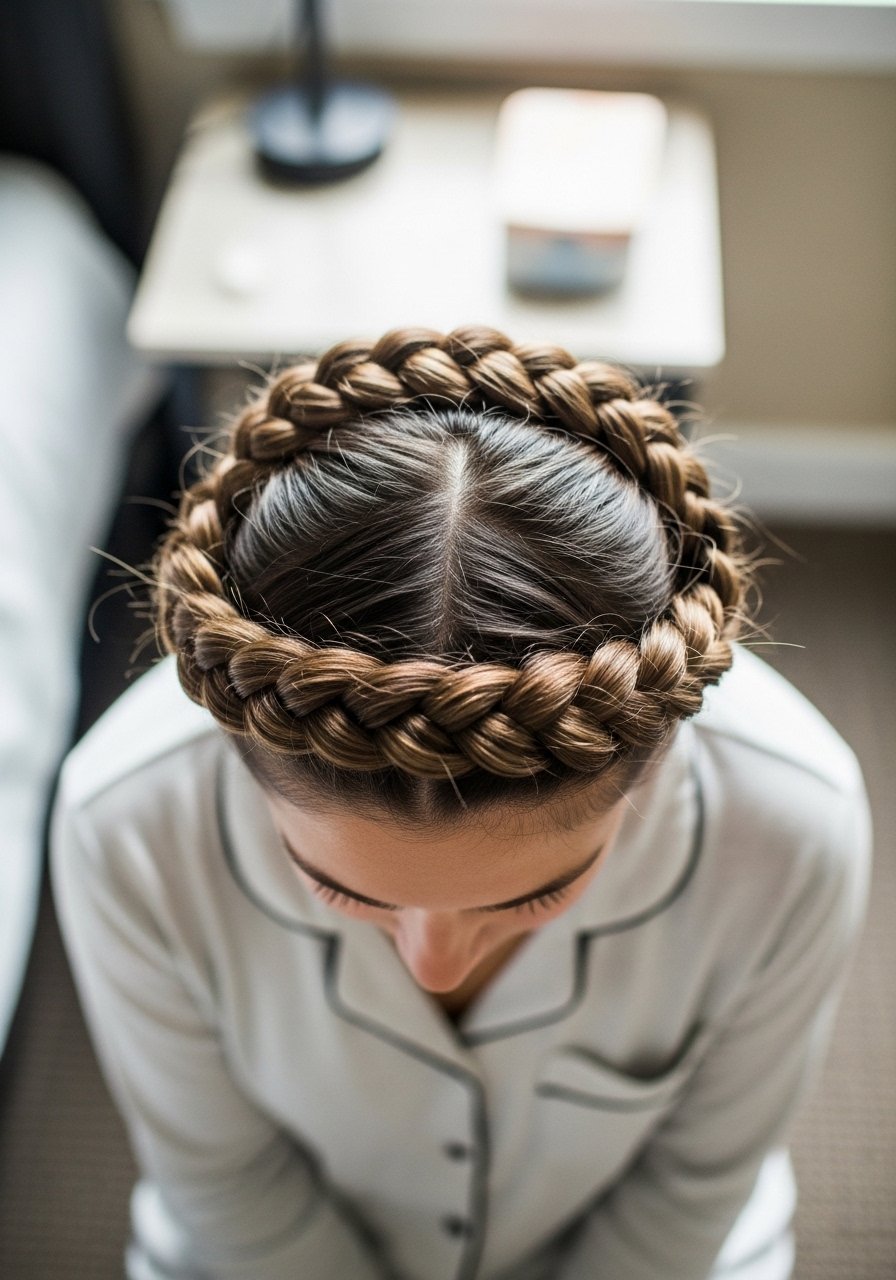
Milkmaid braids make consistent waves and frames the face nicely. I braid two Dutch braids, wrap them over the crown, and secure with pins or scrunchies. This method gives a gentle S-wave when released. I like to mist with light sea salt spray before braiding, and it holds through humid commutes surprisingly well. It takes a little practice but gives a tidy, romantic bend.
Mistake to Avoid: Don’t braid too tight, you’ll get a straighter, kinked pattern.
8. Banding Method for Soft Waves

I use the banding method when I want loose, stretched waves without crimps. After a quick ponytail, I add small elastics every 1-2 inches, smooth each section, leave overnight, and release. The result is long, beachy bends that feel natural. Works especially well on layered cuts. I sometimes add a dab of leave-in-conditioner to control flyaways.
Mistake to Avoid: Don’t use stiff rubber bands, they cause breakage and dents.
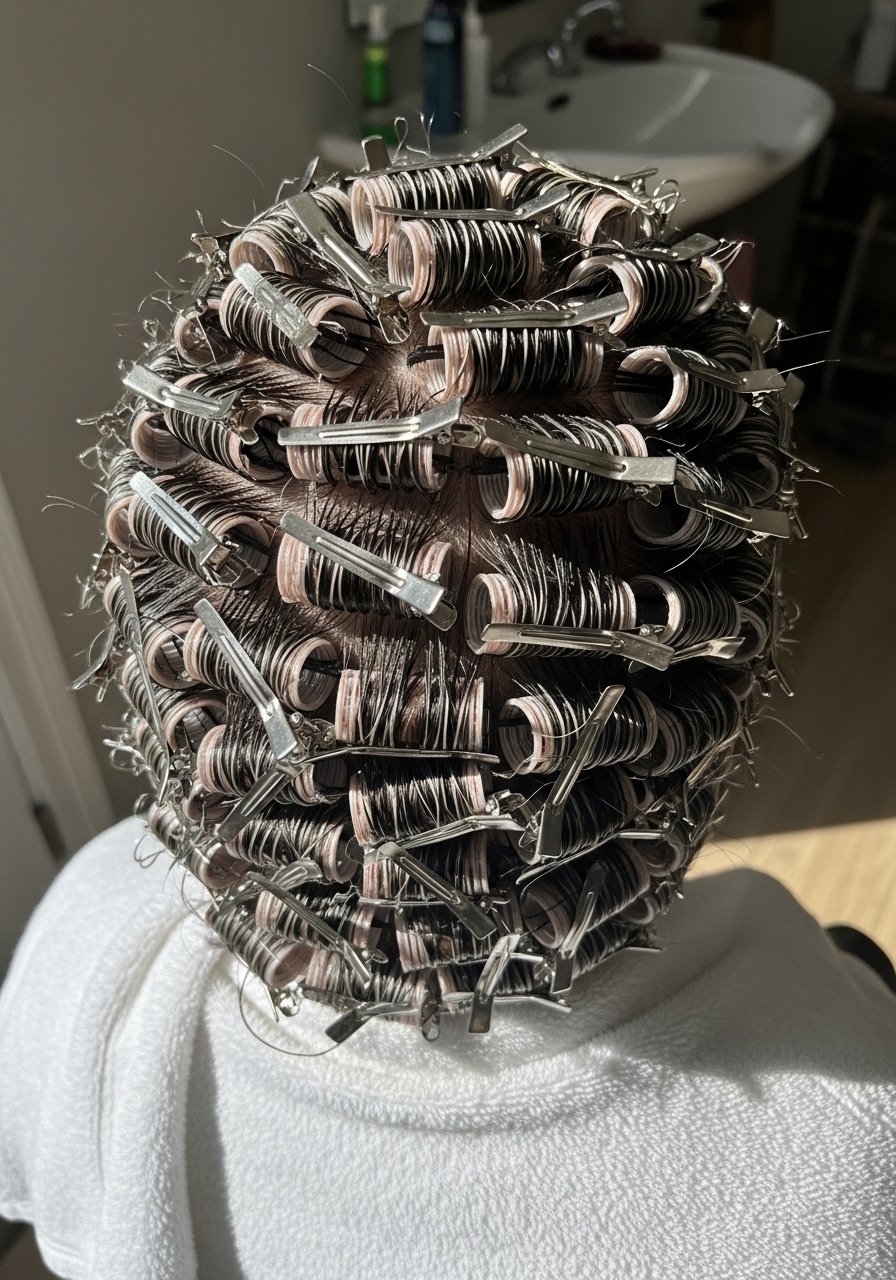
9. Overnight Foam Rollers
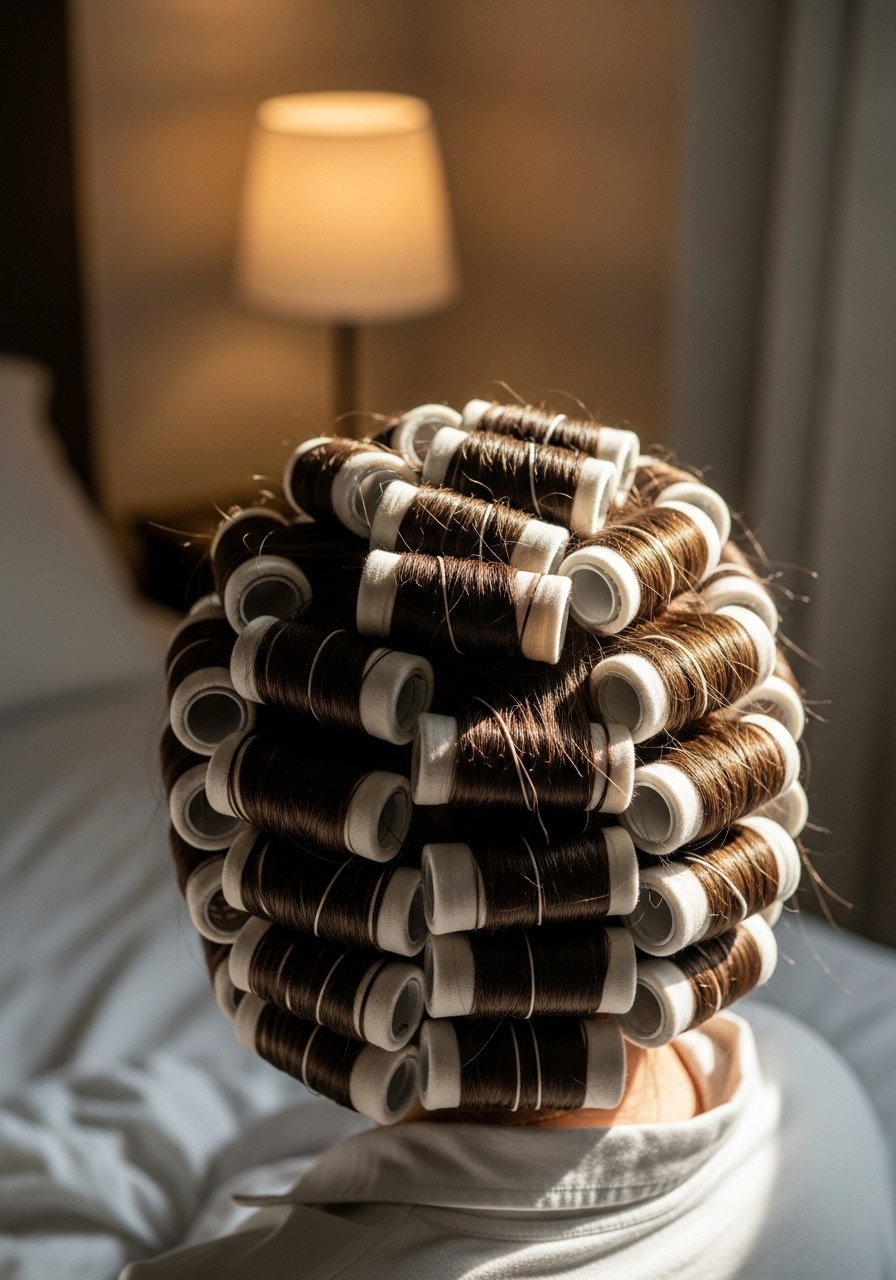
Foam rollers are classic for a reason, they give smooth waves without heat. I wrap damp hair and sleep, or set for a few hours. When I remove them, I finger-comb and mist with texturizing-spray for separation. They can be a little bulky but worth it, especially when I want long-lasting shape for a weekend event.
Mistake to Avoid: Don’t roll too tightly, you’ll get ringlets not waves.
10. Bantu Knots for Tight-Then-Loose Waves
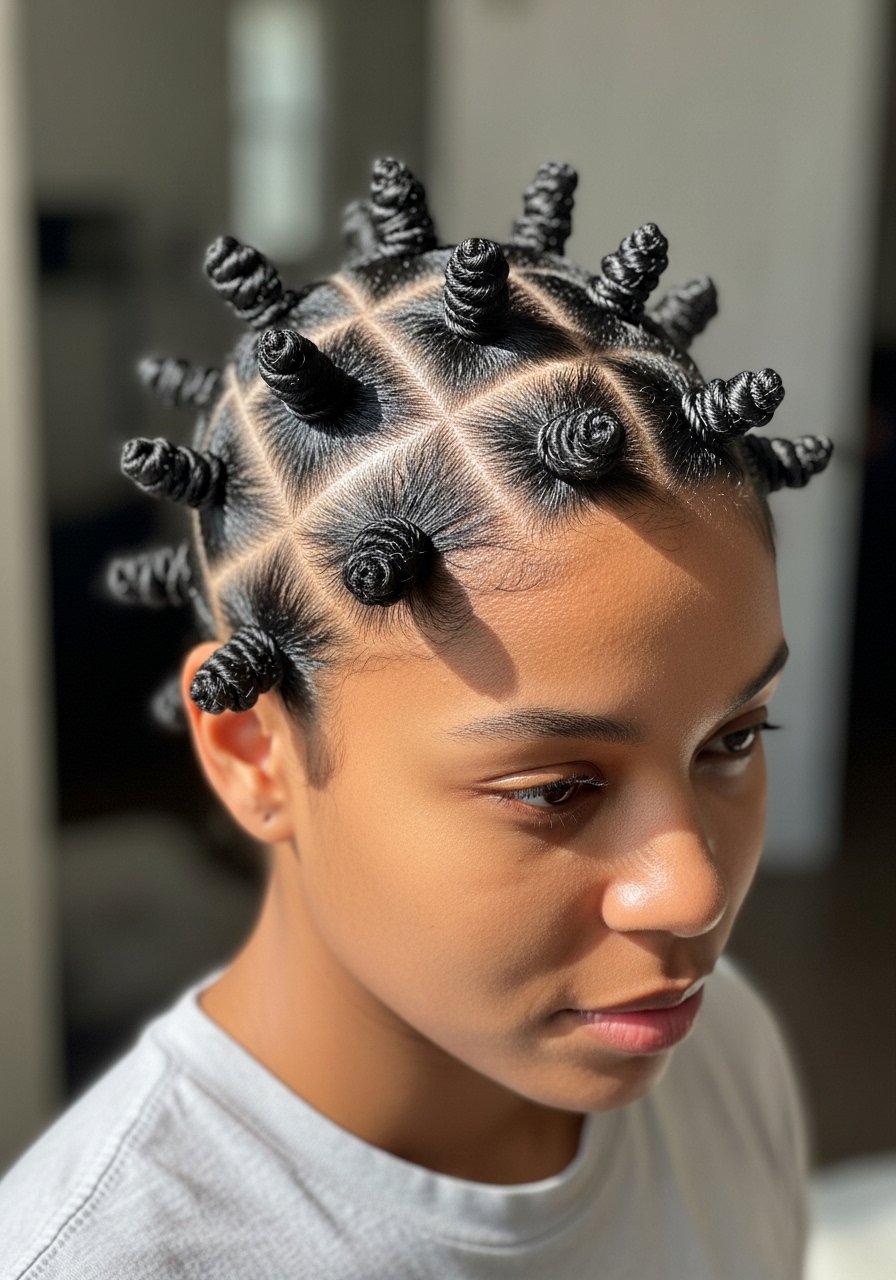
Bantu knots can give a range of textures depending on size. I do medium knots for tighter waves, then gently unravel and finger-comb into softer bends. Use a lightweight setting foam so hair stays shaped without heaviness. I noticed that this technique gives more uniform curl patterns for thicker hair types and it lasts longer into day three than some loose methods.
Mistake to Avoid: Don’t leave knots too long damp, mildew can form in bad airflow.
11. Twist and Clip for Loose Bouncy Waves
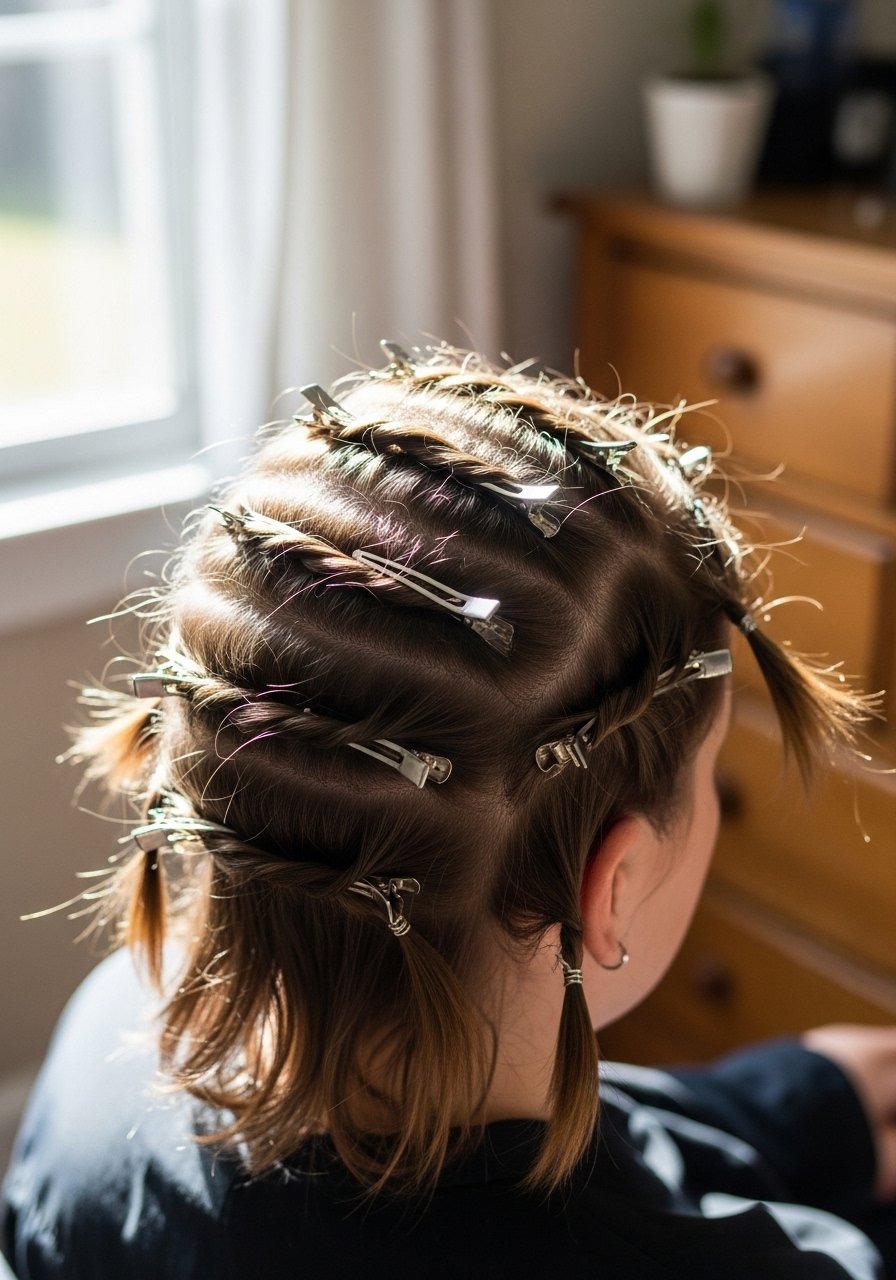
I twist sections away from the face and pin them flat with duckbill clips. After they dry, I unclip, shake out, and use a touch of sea salt spray to roughen the texture. This is my go-to when I want waves with movement but not tight ringlets. It takes under 15 minutes and the result looks breezy and natural.
Mistake to Avoid: Don’t over-clamp clips, they create kinks at the clip points.
12. Shower Steam Set
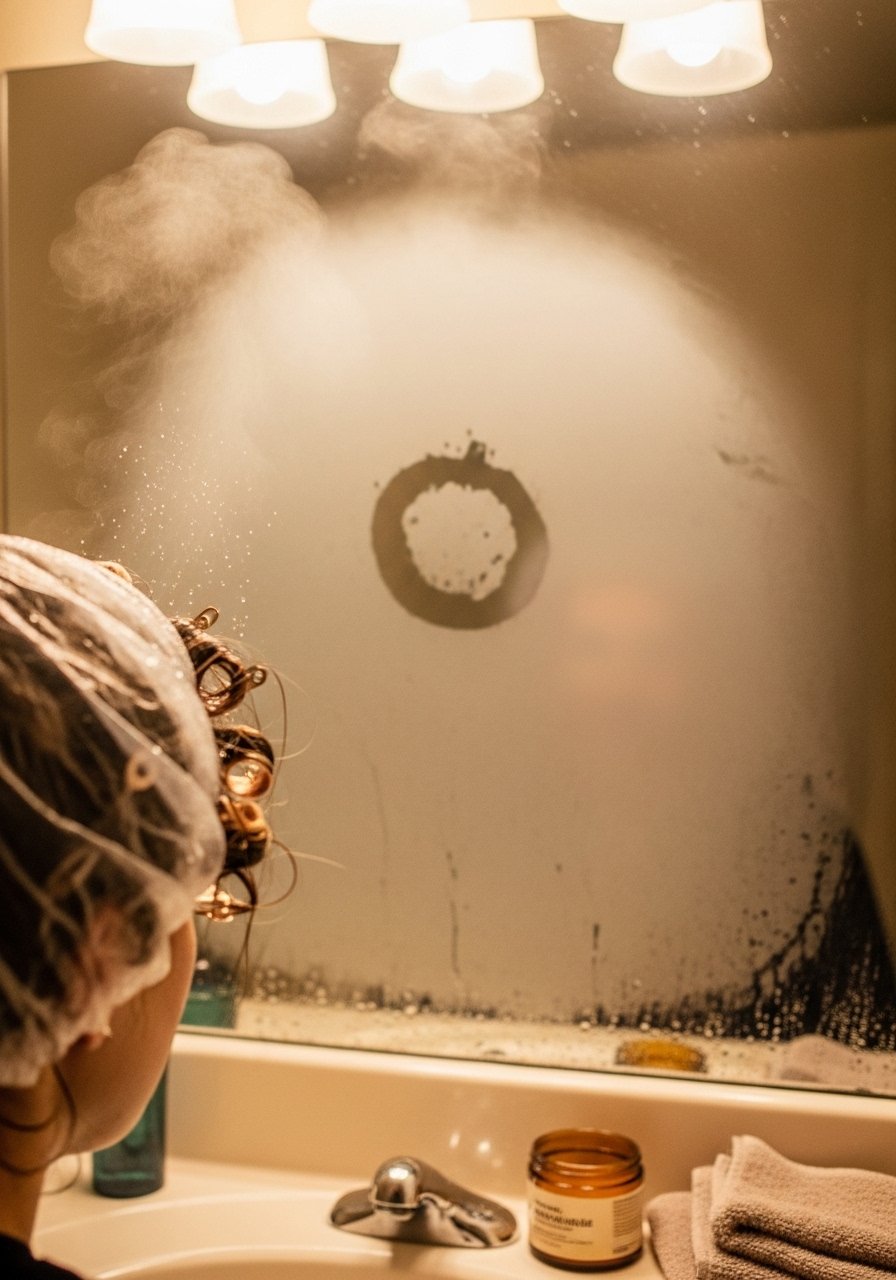
Funny but effective: after a warm shower I twist sections and pin under a shower cap to steam-set them. The humidity helps the product take and gives soft, natural waves when released. I use a small amount of curl-foam prior to pinning. This method is quick and great when you only have ten minutes to set something before heading out.
Mistake to Avoid: Don’t leave hair wrapped while soaking in hot steam for too long, it weakens the shaft.
13. Finger Wave with Styling Gel

For a retro-but-soft beach look I sculpt finger waves with a tiny amount of gel on damp hair and hold with clips until dry. When I brush gently, the pattern relaxes into a wave. This is one of the methods people ask me about most. I pair it with leave-in-conditioner so waves stay soft, not crunchy.
Mistake to Avoid: Don’t use too much gel, you’ll end up with a crunchy finish not a soft wave.
14. Plopping for Natural Bend
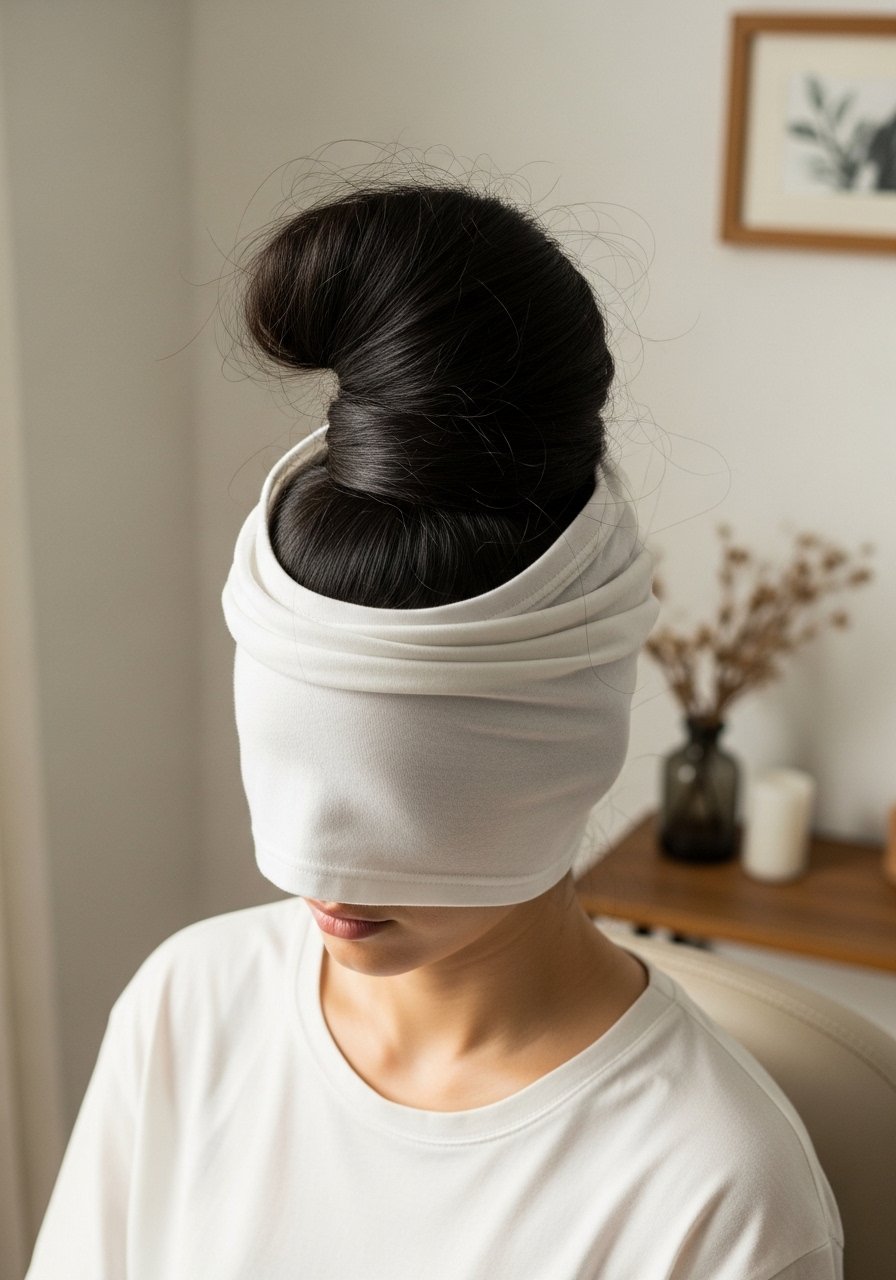
Plopping is usually for curls but it works on wavy textures too. I apply a light foam, flip hair onto a soft cotton shirt, tie, and sit 20-30 minutes. It helps hair keep a natural bend with minimal frizz. I use microfiber-towel alternatives sometimes. This method feels like low-effort sculpting and is perfect when I want a lived-in shape after a quick wash.
Mistake to Avoid: Don’t leave tied too loose, waves will flatten and be uneven.
15. Bubble Ponytail Reverse Waves
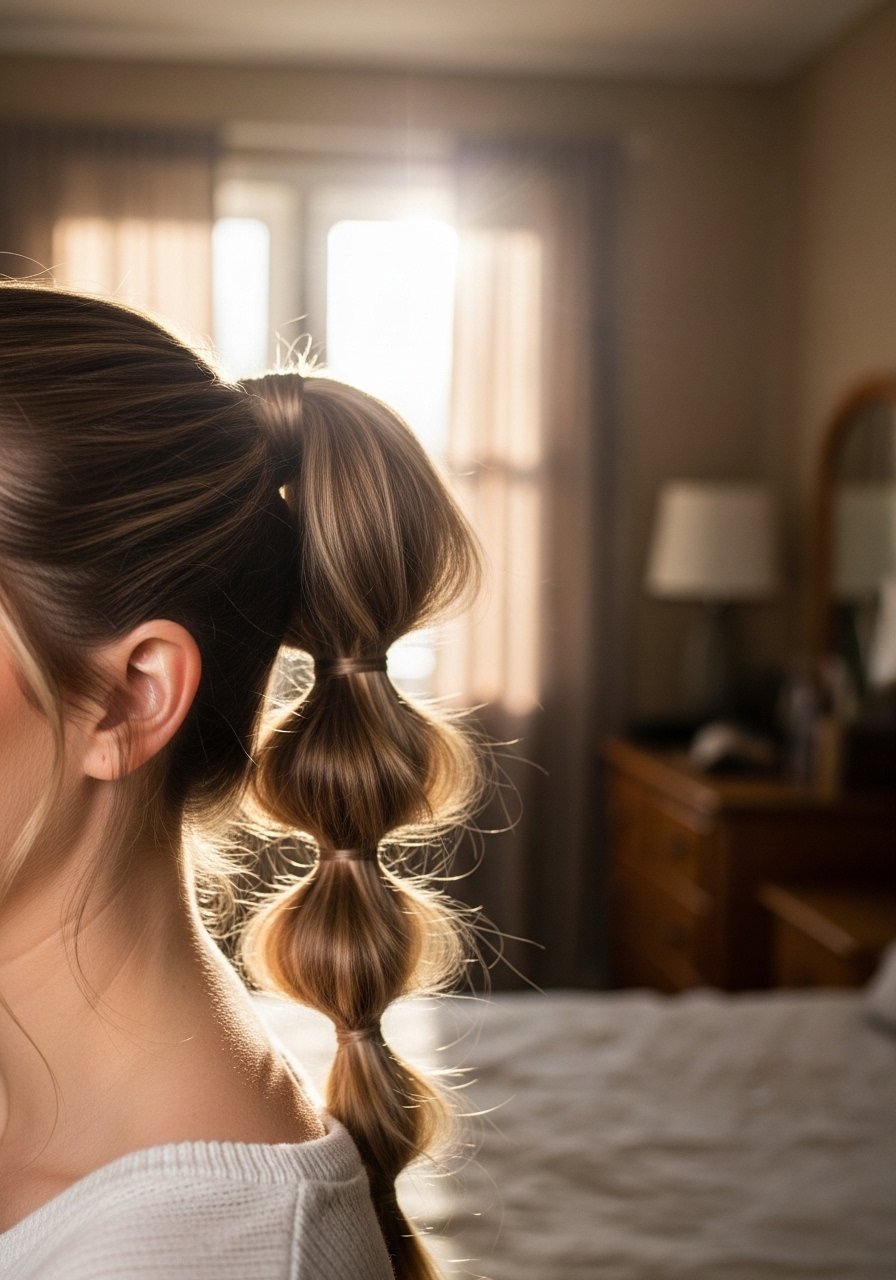
This is a slightly newer trick I picked up: create a low ponytail, add elastics every couple of inches, then flip the ponytail up and tuck it under the elastics. It creates soft reverse bends that read like waves when loosened. I mist texturizing-spray after releasing to separate. It’s quick and refreshes limp hair on day two.
Mistake to Avoid: Don’t use thin elastics alone, they dent the hair; use soft fabric ones.
16. Pillowcase Twist for Subtle Volume
I twist hair into a low coil and tuck it under the pillowcase corner for a soft set overnight. This gives subtle waves and a little extra root lift, perfect when I want shape but not a full wave. Using a silk pillowcase helps reduce friction, and a spritz of sea salt spray adds texture. I often use this on planes or long naps.
Mistake to Avoid: Don’t sleep on cotton if you want less frizz; it soaks moisture and roughs strands.
17. Funnel Braids for Undone Layers
I do tiny braids only in the mid-lengths, leaving roots and ends free. When released, the braids add mid-hair bends that read as layered waves. This works great if you have long layers that need body. A tiny dab of leave-in-conditioner smooths flyaways without weighing hair down. It’s a subtle trick that competitors often skip.
Mistake to Avoid: Don’t braid too close to the scalp, you’ll create unwanted tension.
18. Scarf Roll Overnight Curls
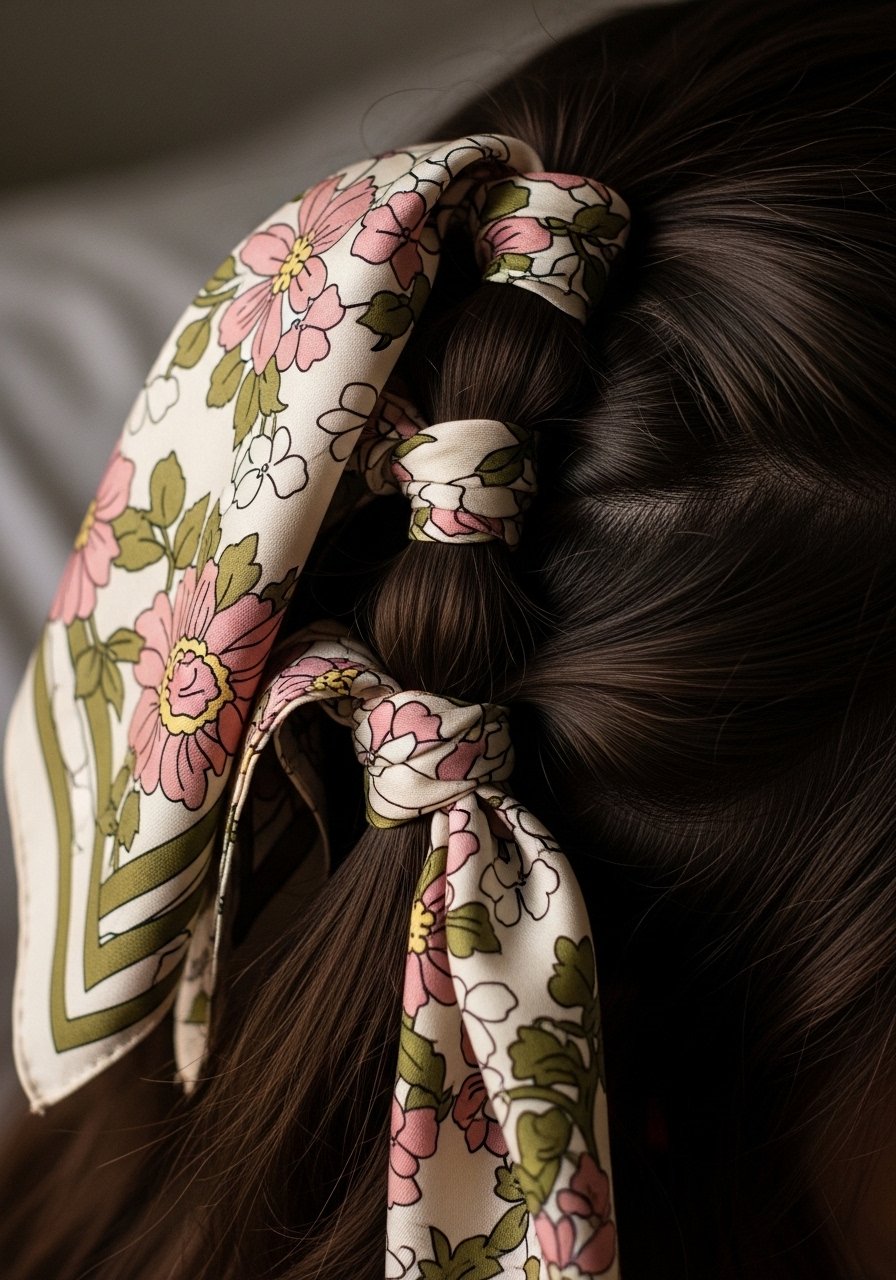
I wrap sections around a silk scarf and tie securely for smoother waves with less frizz than cotton. It’s gentler on hair and gives a soft, elongated wave. I usually use three or four wraps for long hair and wake up with low-friction texture. Using fabric-scrunchies to secure ends helps avoid dents.
Mistake to Avoid: Don’t tie too tight, you’ll compress the wave and cause headaches.
19. Reverse Braid for Natural S-Waves
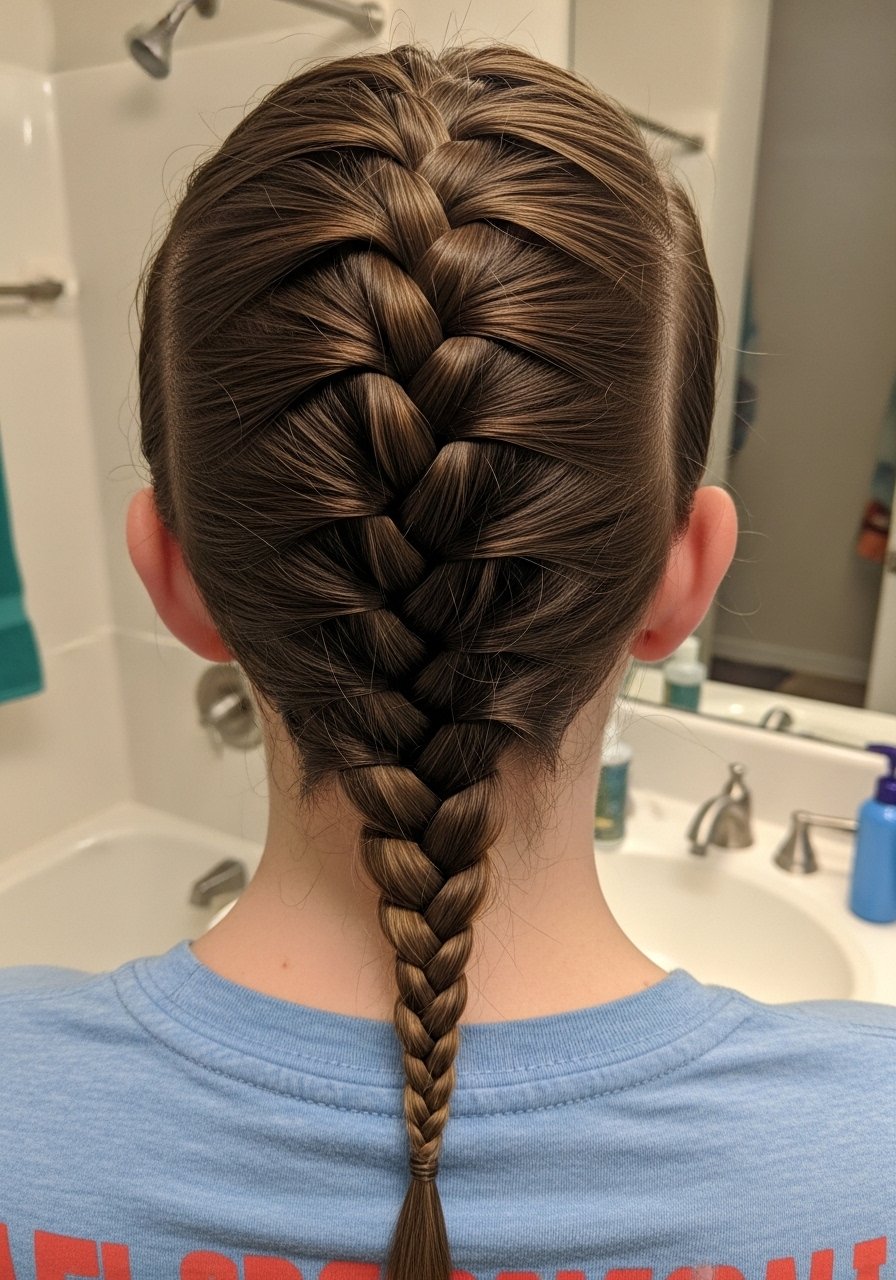
I French-braid from the nape upwards so the hair sits over the braid when released, which creates a natural S-wave rather than zigzag curls. It’s clever for a soft, continuous bend and lasts into day three with a dry-shampoo touch. I like to add a little curl-foam before braiding when my hair needs hold.
Mistake to Avoid: Don’t braid from the crown down; the wave pattern will be uneven.
20. Bandana Tuck Waves
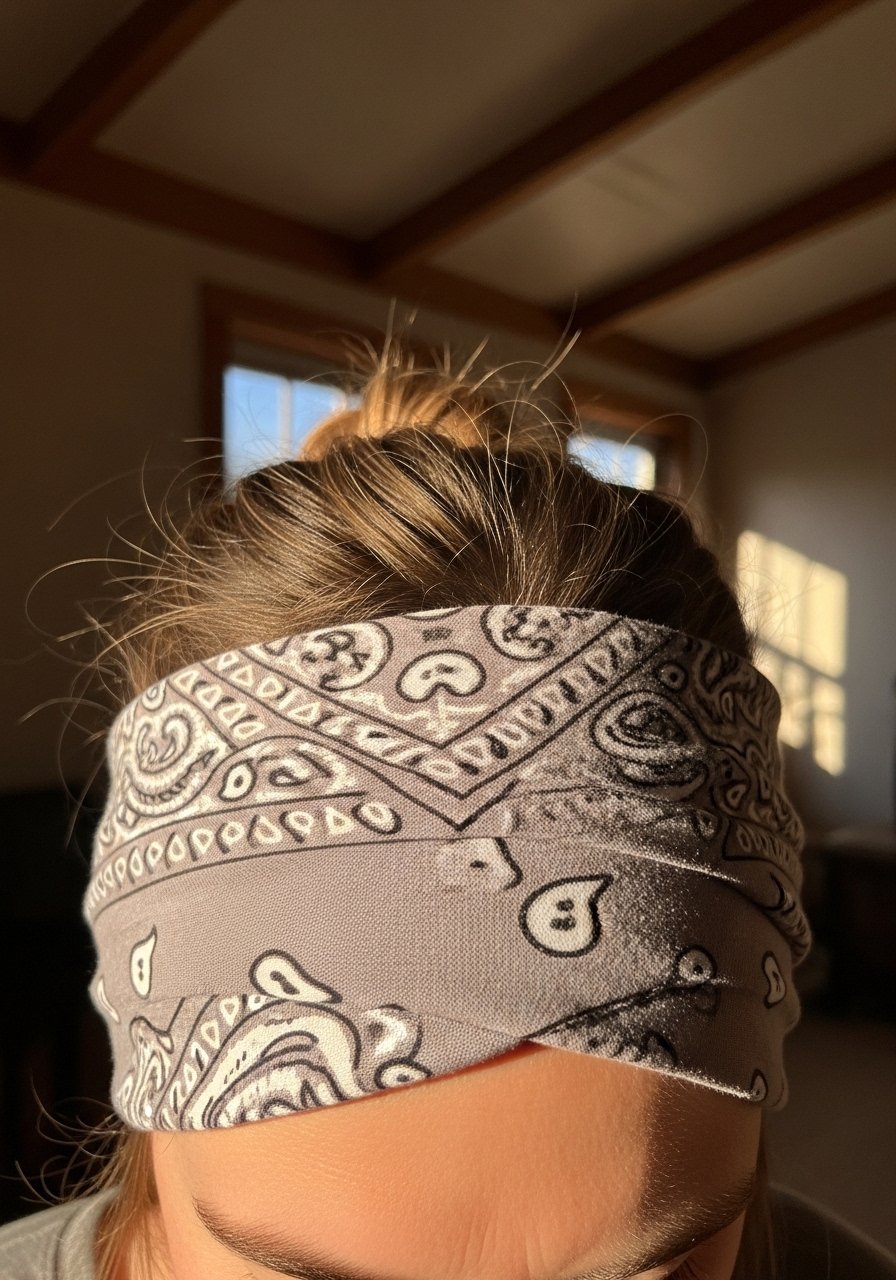
I use a bandana as an armature: tie it around the head, wrap small sections over it, and pin. It’s great for short to medium hair because the band snaps waves into place. I spray lightly with texturizing-spray and release after a few hours. This trick is cheap and doubles as a cute accessory for daytime wear.
Mistake to Avoid: Don’t use a stiff bandana with rough fabric, it will fray and snag hair.
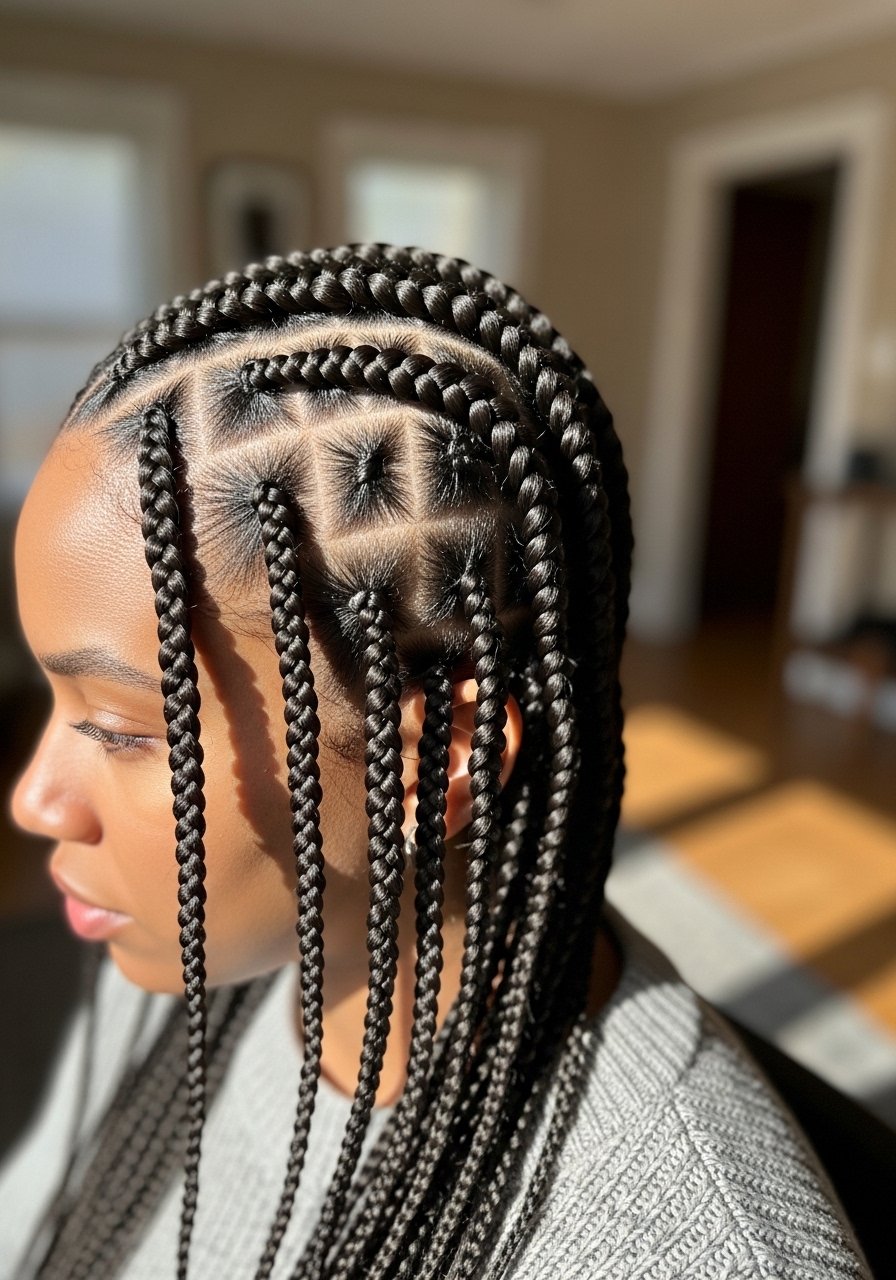
21. Knotless Mini Braids for Long-Lasting Texture
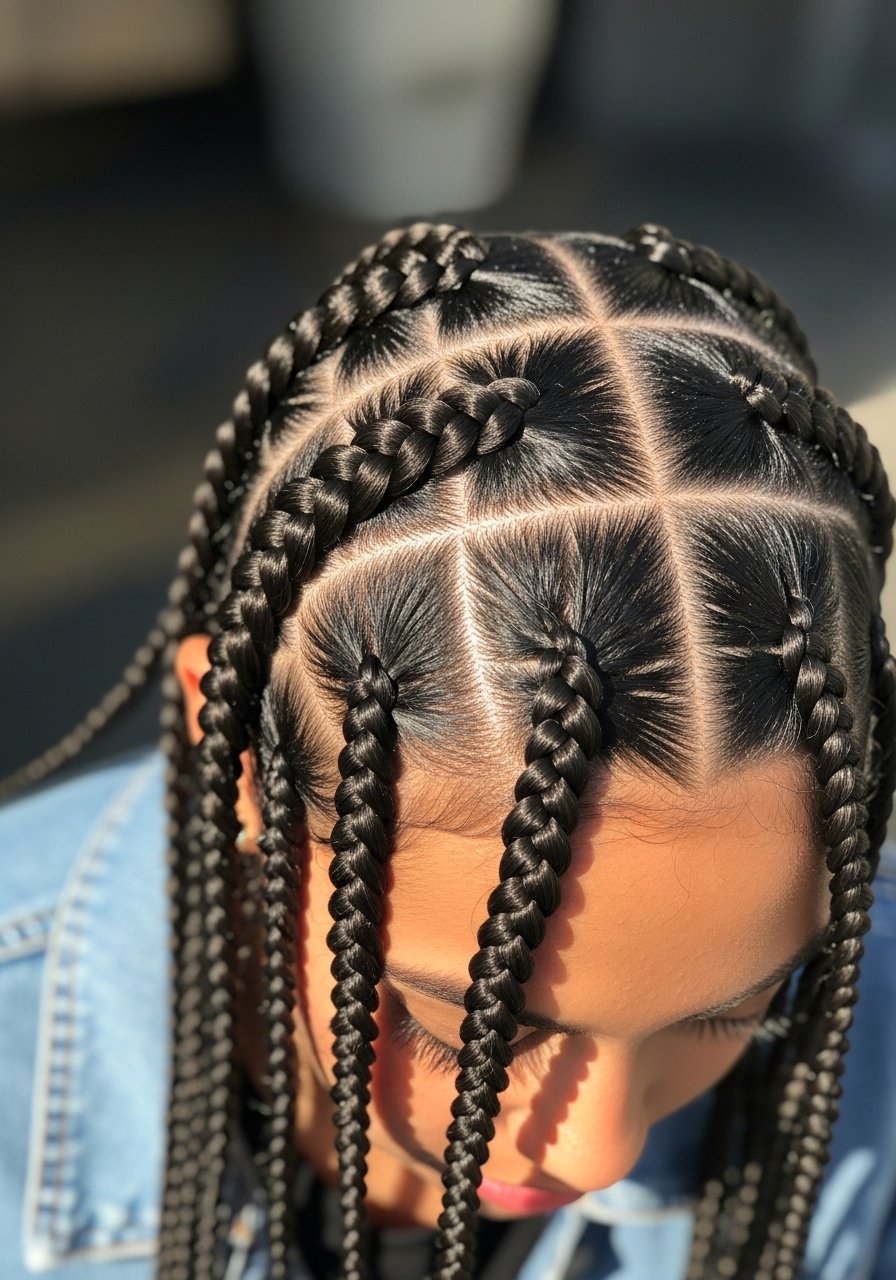
Knotless mini braids across the crown give textured waves that loosen over days into a lovely beach pattern. I keep them small and mellow, then unravel after 24 hours for a full, lived-in wave. They hold better in humid weather compared to single braids. I apply a light mist of leave-in-conditioner to prevent dryness in the braids.
Mistake to Avoid: Don’t make braids extremely tight near the scalp, it causes pain and thinning.
22. Twist-Out With Lightweight Gel
I two-strand twist small sections with a lightweight gel, sleep in them, and unravel carefully. After a gentle shake, the hair has springy beachy waves. This method gives a bit more definition than loose braids and holds through humid days if you prep with curl-foam. It’s reliable for medium to curly hair types.
Mistake to Avoid: Don’t untwist while damp, the pattern will collapse.
23. Wet Set with Clips for Hollywood Waves
For a more structured but still beachy wave I wet-set into S-patterns and secure with wave clips until fully dry. When removed, I brush gently and finish with a tiny mist of texturizing-spray. This method takes a bit longer but gives a refined wave with volume and movement. I use it when I want a slightly elevated look without heat.
Mistake to Avoid: Don’t remove clips before hair is totally dry, the shape will deform.
24. The Sock Braid Hybrid
This is one of my favorite hybrids: I roll a sock donut, wrap small braids around it, and secure. The braids add pattern while the sock shapes the curls into soft waves. I wake up to a beachy silhouette with good volume and minimal frizz. It’s one of the unique methods I haven’t seen everywhere and it works on stubborn straight hair if I use a light sea salt spray first.
Mistake to Avoid: Don’t use oversized braid sections, you’ll lose the detailed wave pattern.
Hair Styling Tips
Prep Right: Start from slightly damp hair, not dripping wet, and use a light leave-in-conditioner to give the hair slip and reduce frizz.
Choose the Right Product: For fine hair I reach for a light sea salt spray, for thick hair a stronger texturizing-spray helps the waves hold.
Sleep Smart: Silk pillowcases or a silk scarf preserve wave shape and reduce frizz, use fabric-scrunchies to avoid dents.
Refresh Without Water: Revive waves with a little dry-shampoo at the roots and a light spritz of texturizer, then scrunch with fingers.
Work in Sections: Smaller sections set more uniformly, bigger sections give a looser beach vibe. I alternate sizes when I want a natural mix.
Protect When Trying New Tricks: If you’re experimenting, use cheaper scrunchies first, and have a backup plan if something flops; I once rewore the same method three nights before it finally looked right, so be patient.
