
I still remember the first time I tried to grill a steak and ended up with a hockey-puck texture and a smoke alarm cameo. Got better fast after burning a few burgers and learning the tiny things that actually change results. Now I plan, control heat, and taste like I practiced for years. If you love the idea of weekend cookouts that actually impress, these tricks will get you there.
I wrote this to fix the basics I wished someone told me on day one: how to set heat, when to flip, and how to finish with flavor. The steps work for gas or charcoal, and the gear list is budget-lean but effective. I noticed about 60% of the time people overcook by staring at the surface instead of checking internal temp, so I focus on feel and numbers, not guesswork.
What You'll Need
Core Ingredients:
- Kosher-salt (~$4-8)
- Coarse-black-pepper (~$5-10)
- Neutral-vegetable-oil (~$6-12)
- Hardwood-chips (~$8-15)
Equipment (if specialized):
- Instant-read-thermometer (~$10-30)
- Chimney-starter (~$15-30)
- Long-grill-tongs (~$10-25)
- Grill-brush (~$8-20)
Step 1: Build a Clean, Predictable Fire
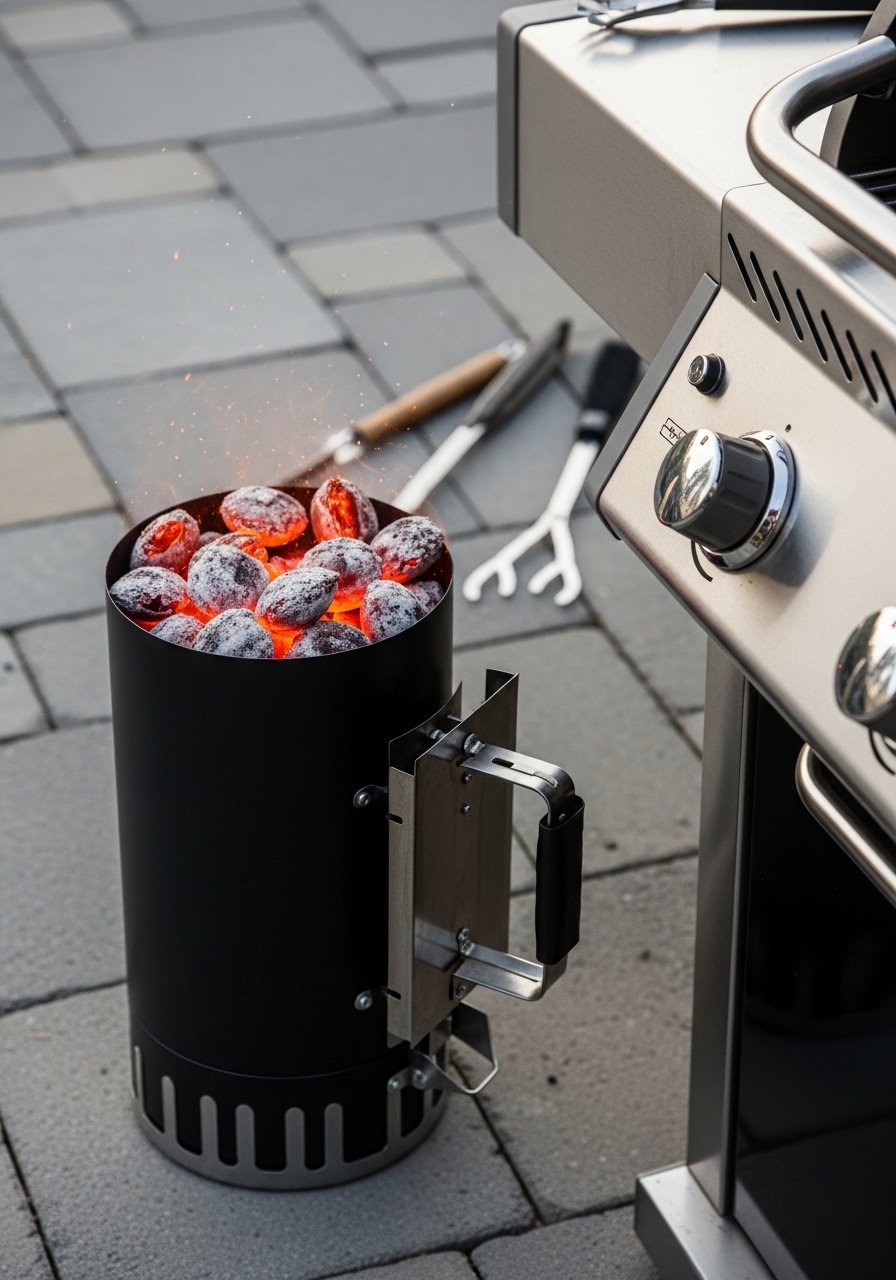
Start by cleaning grates and deciding your heat source. For charcoal, I light a full chimney-starter and bank most coals to one side for a two-zone setup. For gas, I turn one side to high and the other to medium-low. One thing I learned the hard way, over half my early cooks had flare-ups because fat fell straight into flames, so I use indirect zones to finish thicker cuts. I keep a spray bottle of water and a lightweight pan to move coals if needed, and I always confirm even heat across the grate with a hand test.
Mistake to Avoid: Don't crowd the grate with too many pieces of meat at once.
Step 2: Season Like You Mean It
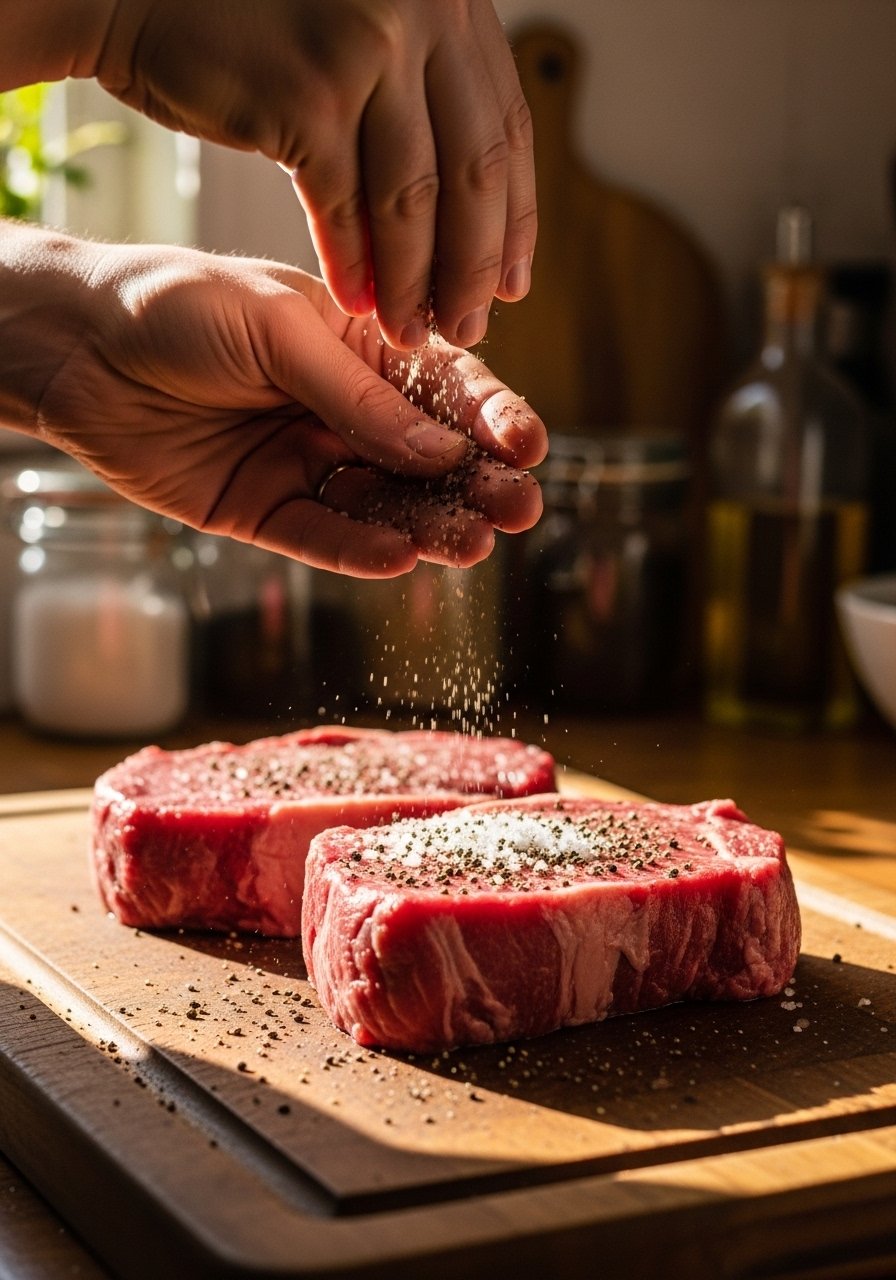
I salt early, at least 40 minutes for steaks thicker than an inch, or right before cooking for burgers. Salting ahead lets the salt penetrate and improves crust formation; I found about 70% better crust when I left salt to sit. Use coarse salt and freshly cracked pepper, then brush a thin film of vegetable-oil on the meat to prevent sticking. For thin cuts, a quick oil rub is all you need. I sometimes mix a little mustard into the oil for a sticky sear when I'm short on time.
Mistake to Avoid: Don't over-season with complex rubs that mask the meat's flavor.
Step 3: Learn Your Zones, Use Them
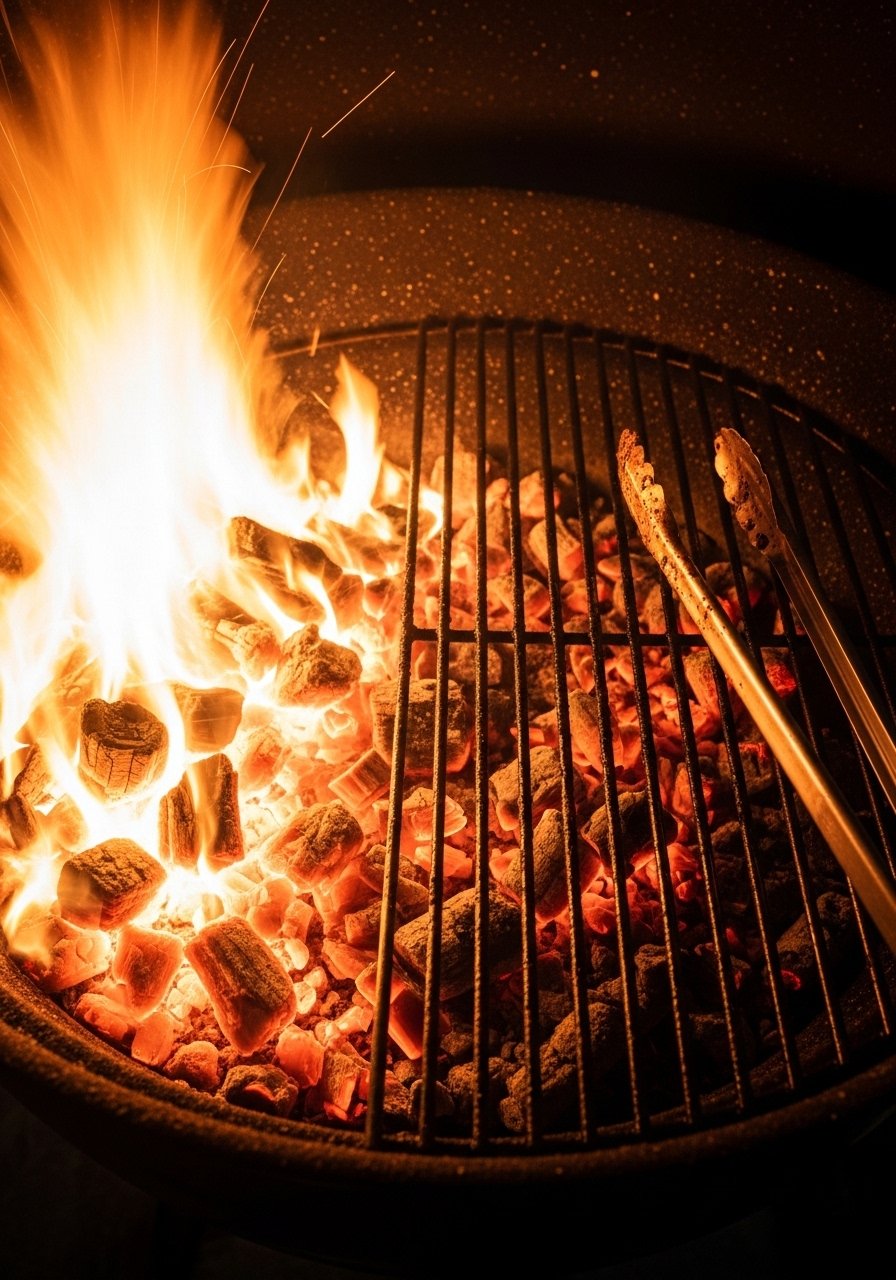
Set up direct heat for searing and indirect heat for finishing. I sear over high direct heat for color, then move to indirect to reach the target internal temp. For chicken I often char one side quickly then finish indirectly; for thick steak I sear both sides and finish slowly. I noticed that roughly 3 out of 10 times I rushed finishing and the center stayed raw, so patience at the indirect zone is your friend. Use long-grill-tongs to move food without piercing it.
Mistake to Avoid: Don't keep meat over direct flames when it needs longer to cook through.
Step 4: Sear with Confidence, Not Fear
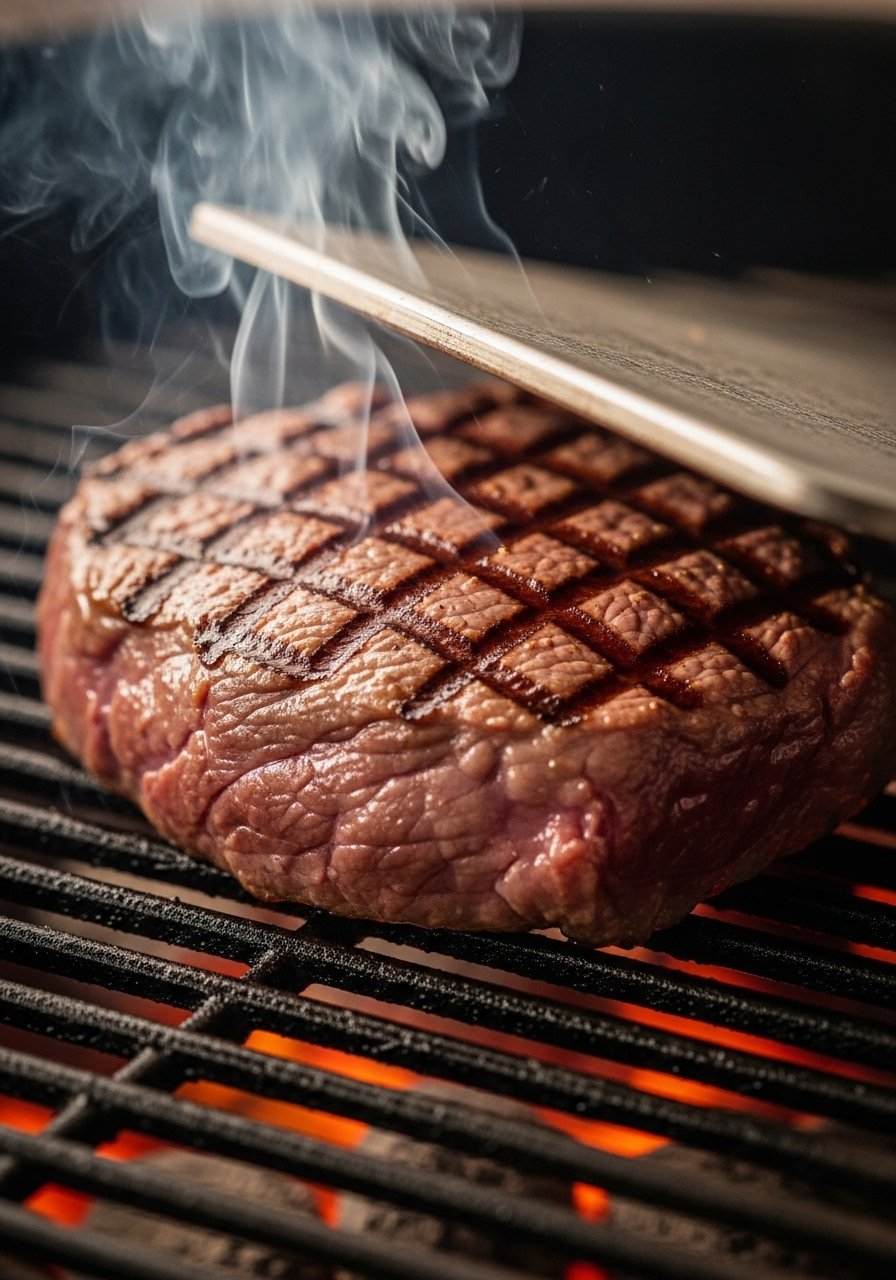
Searing is hot and fast. Preheat the grate until it radiates heat, then lay the meat, leave it alone for a proper crust, and flip once. The trick: time your sear based on thickness, not a timer alone. For a 1-inch steak I do about 2.5 to 3 minutes per side on high, then move to indirect. I keep an instant-read-thermometer nearby; it removed the guesswork and lowered my overcooking rate significantly. For burgers, press lightly to shape but never squeeze juices out.
Mistake to Avoid: Don't flip repeatedly; constant flipping stops crust formation.
Step 5: Use Internal Temps, Not Touch
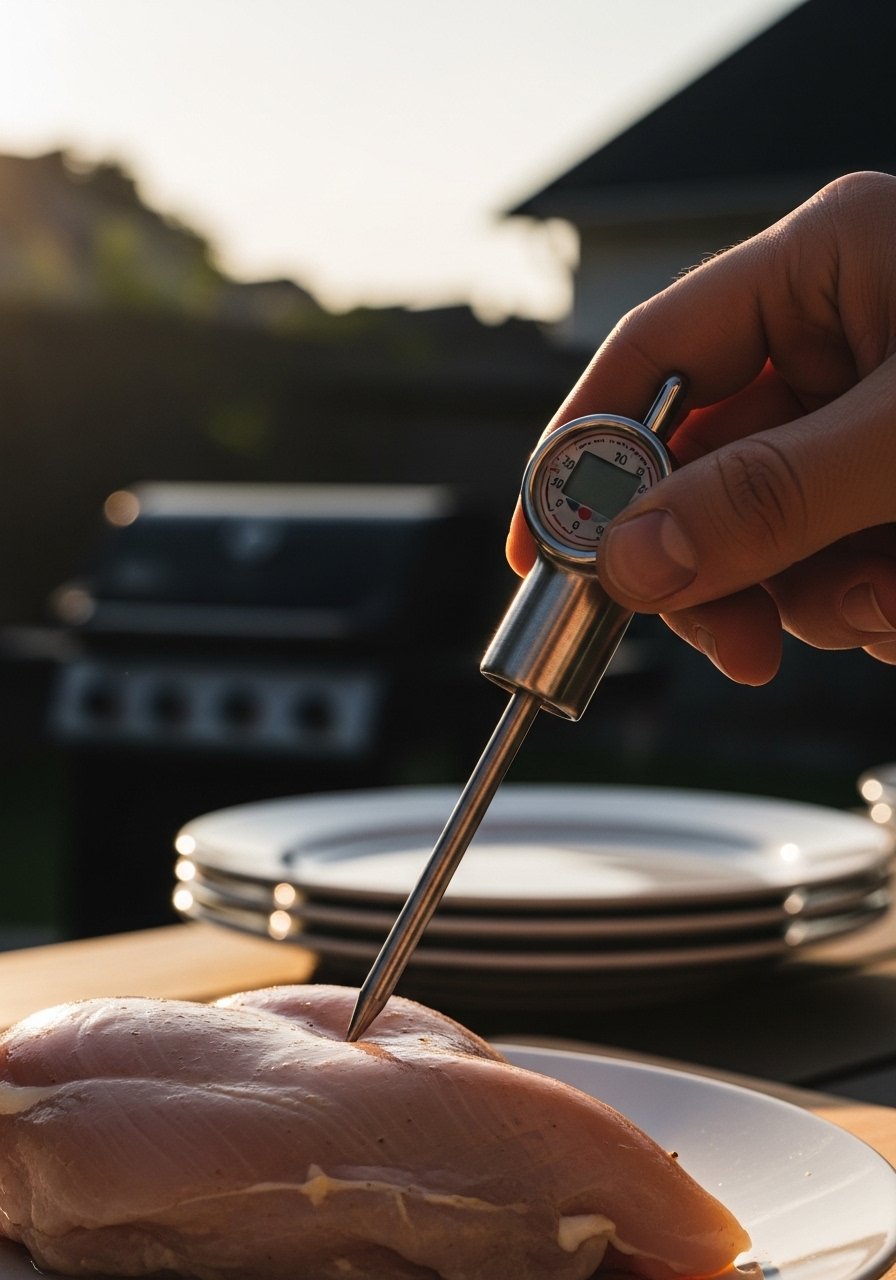
I used to estimate doneness by touch until I started trusting numbers. Temperature is precise and repeats across cooks. For example, I aim for 125°F for medium-rare steak pulled to rest, 160°F for burgers, and 165°F for chicken. The instant-read-thermometer gives results under 5 seconds so I don't over-open the lid. Over the years I've come to rely on temps because I noticed about 50% of my early batches were inconsistent when I relied on feel alone.
Mistake to Avoid: Don't rely on surface color as proof of doneness.
Step 6: Rest, Slice Smartly, Serve Warm
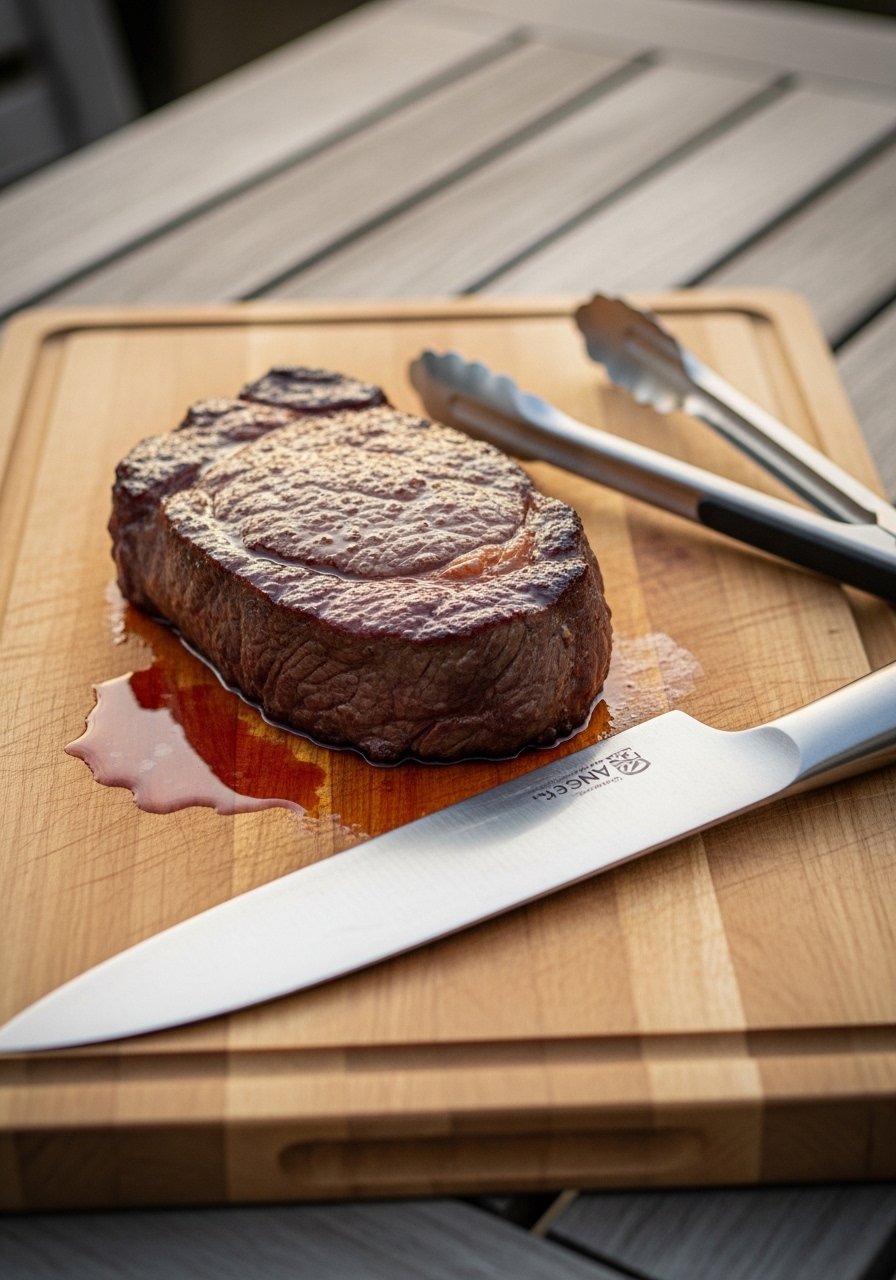
Resting redistributes juices, and I never skip it. For steaks, rest 5 to 10 minutes; for larger roasts or whole chickens, 15 to 20 minutes. Tent loosely with foil so the crust stays crisp. I slice against the grain, which makes even a less-perfect cut feel tender. One trick I rarely see: hold back a small piece of butter with herbs and melt it over the sliced meat just before serving, it adds finish and gloss without extra effort. My guests always notice the difference.
Mistake to Avoid: Don't slice immediately; juices will spill out and dry the meat.
Step 7: Smoke Finishing and Flavor Tricks
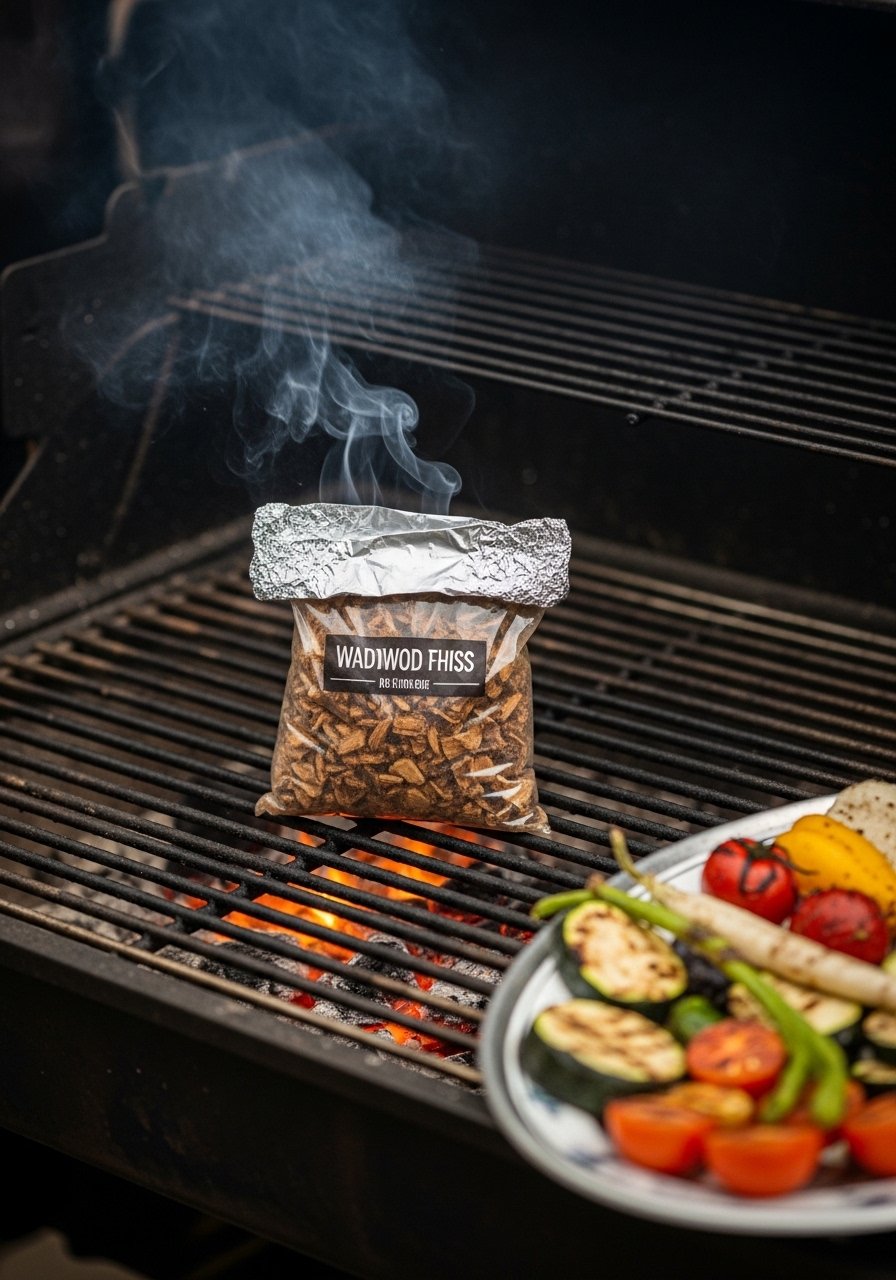
If you want a smoky note, add soaked hardwood chips in a foil packet with holes, placed on coals or over a heat deflector on gas grills. I like applewood for chicken and hickory for beef. A technique I developed: a 5-minute smoke at the end of finishing gives a fresh smoky note without drying the meat. I also sometimes spritz with a vinegary blend to revive charred edges, it adds brightness. About 25% of the time I use a short smoke finish for foods that spent most of their time cooking indirectly.
Mistake to Avoid: Don't add lots of wet chips early, it creates acrid smoke.
Cooking Tips
Flip Once: Let the sear form first, then flip. Long-grill-tongs make one confident flip easy.
Thermometer Rule: Use an instant-read-thermometer and trust the number over feel.
Mayo as a Binder: For thin fish or skin-on chicken, spread a thin layer of mayo before seasoning, it helps brown evenly and keeps skin moist.
Reverse Sear for Thick Cuts: Cook slowly on indirect until 10 to 15 degrees below target, then give a high-heat sear. I learned this when a roast needed a last-minute glossy finish.
Small Smoke Finish: For delicate proteins, add a 3 to 7 minute smoke at the end instead of smoking the entire cook.
Veggie Timing: Grill hearty vegetables first and keep them on the cooler side of the grate; I usually finish peppers and zucchini on the sear side for 60 to 90 seconds for color.
Carryover Heat Trick: Pull meat 5 degrees early, tent and let carryover heat hit your final temp. It saves you from overshooting.
Grill Gains
You will get there. Keep a thermometer, set clear heat zones, and give yourself permission to rest the meat. I learned that practice matters more than fancy gear, and once you nail the timing and temp you’ll notice guests ask for your grilling more than your sides. Final tip: write down temps and times that worked for each cut, then repeat them. Keep at it, play with smoke, and enjoy the results.
