
I kept asking for "short" and leaving the salon with something that needed more daily work than I had time for. The moment it clicked was when my stylist cut just a quarter inch off the crown and added texture with a razor. The difference was immediate. My morning routine dropped by half and my hair actually looked like the photos I saved, not a flat, stubborn clone of itself.
These are practical short cuts that work for busy mornings, small budgets, and a range of textures. Expect low to medium styling time, heat-free options where possible, and quick maintenance. Most styles here are salon-friendly but easy to adapt at home with one or two products and a quarterly trim.
1. Choppy Pixie With Long Fringe

This is the pixie that still reads feminine because of the longer fringe. It works visually because the choppy layers create movement at the crown and a soft line around the face. For straight, wavy, and fine hair it adds instant texture. For curly hair ask your stylist to remove weight rather than cut lots of short layers. I use 2 pea-size pumps of a lightweight styling cream, mixed with a teaspoon of water in my palms, then scrunch for a lived-in finish. Pair with a texturizing sea salt spray for second-day hold.
Mistake to Avoid: Cutting the fringe too bluntly in one go, which forces frequent trims.
2. Sleek Jaw-Length Bob
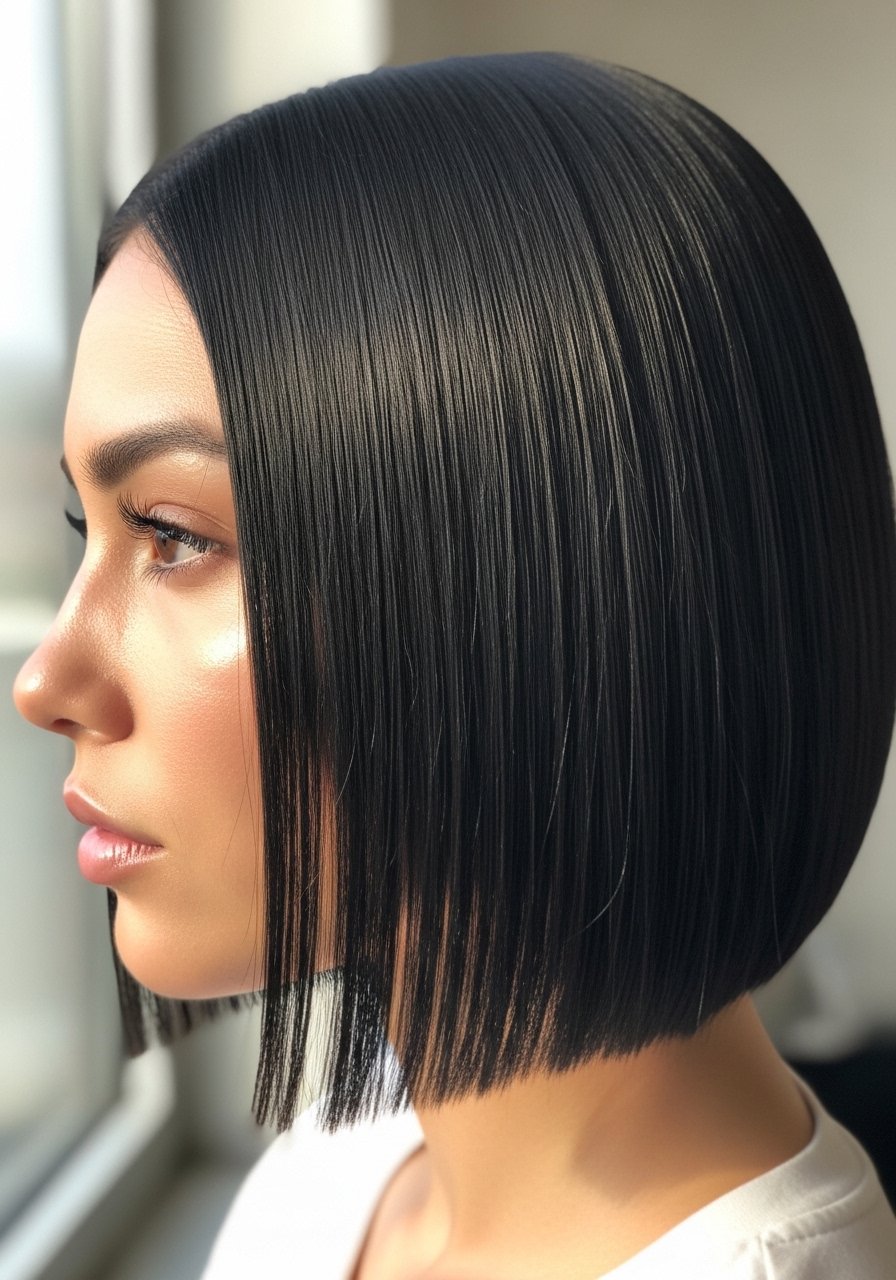
The blunt jaw bob looks crisp because of a clean edge and a subtle inward press at the ends. It creates a minimalist, modern feel and flatters round and oval faces by adding structure. For a quick morning routine, use a one-inch flat iron on low heat and a single pump of a heat-protectant serum. For low-porosity hair, warm the serum between fingers first so it spreads evenly. I rotated this cut for a full season and my styling time stayed under ten minutes. Try a lightweight heat protectant serum to keep shine.
Mistake to Avoid: Overusing heavy oils that flatten the clean edge and kill the shape.
3. Textured Crop for Thick Hair

Thick hair benefits from a cropped cut that removes bulk and adds layered texture. The trick is visible slicing at the crown to reduce dome volume while keeping longer top pieces. It creates a light, airy silhouette and is very low maintenance for warm months. Ask for thinning around the nape rather than full razor thinning through the top. At home, mist roots with a 70/30 water-to-leave-in conditioner ratio and tousle with fingers. Use a thicker matte clay paste sparingly, no more than a thumbnail size, to define pieces.
Mistake to Avoid: Shaving too much at the sides which can make thick hair look like a helmet when it grows out.
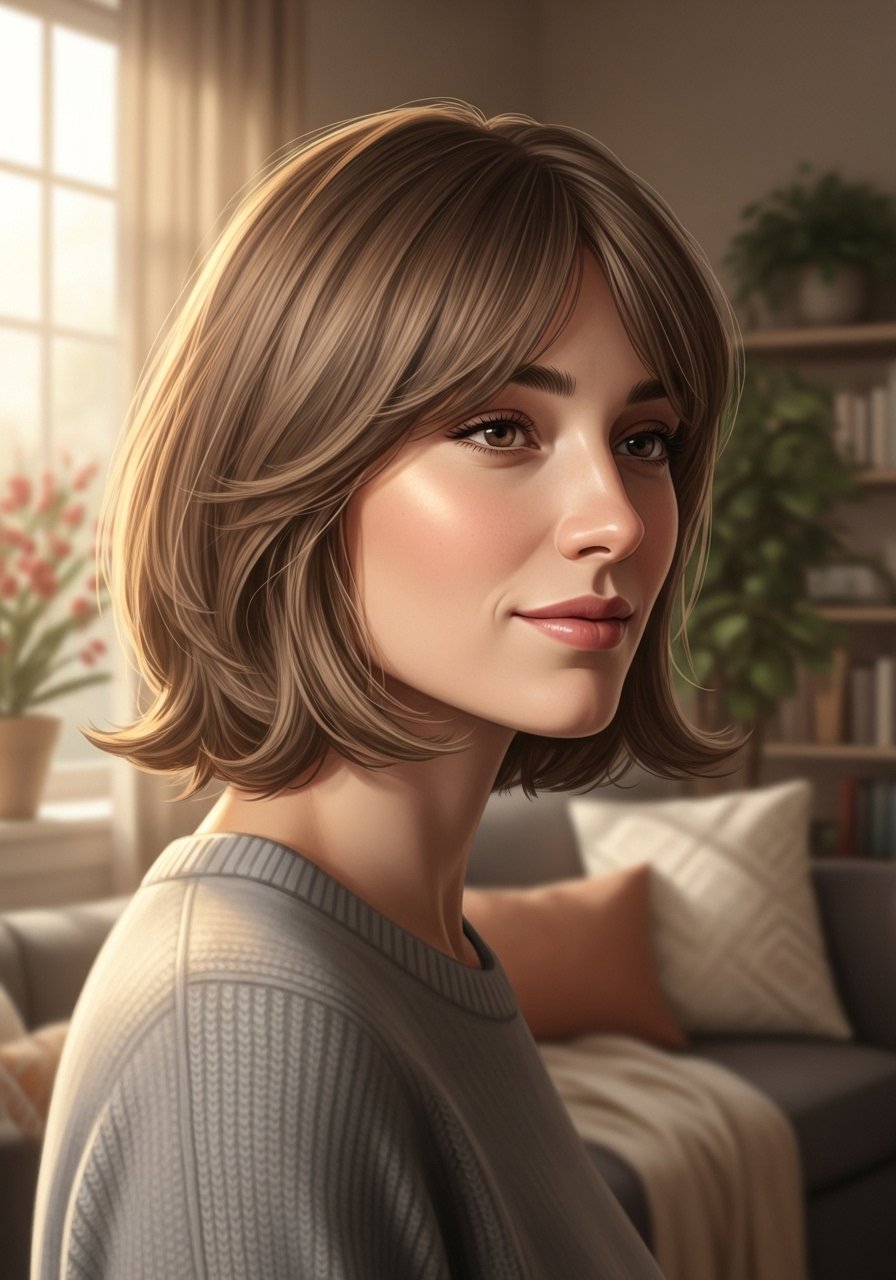
4. Soft Wave Lob, Heat-Free Version

This longer short cut plays well with air-dried texture. What makes it work is cutting length slightly shorter in the back and leaving soft face-framing layers. It reads casual and polished, perfect for wavy or straight hair that wants movement without daily heat. For a no-heat wave, braid damp hair into two loose braids and sleep on them. Use a small dab of sea-salt spray at the roots in the morning and finger-comb. Try a travel-size sea-salt spray to keep the texture light.
Mistake to Avoid: Rough-drying into the roots, which causes frizz instead of soft waves.
5. Graduated Bob for Fine Hair
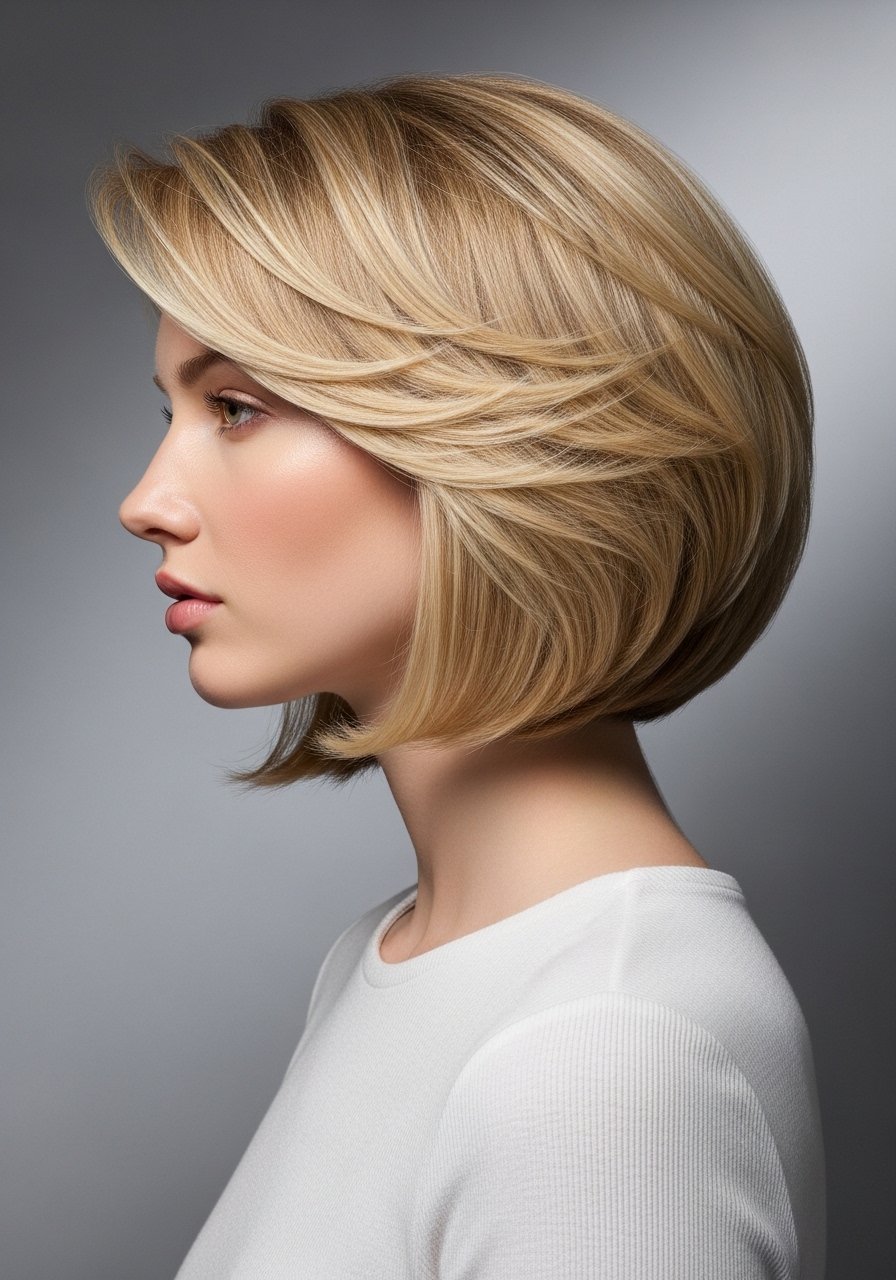
A graduated bob lifts fine hair because the stacked back gives a subtle internal support system. The visual result is fuller-looking hair without adding product weight. It feels polished and works for office and weekend styling. Ask your stylist for one-quarter inch of internal stacking and a slightly longer front section to maintain elegance. At home, use a round brush with a medium-size barrel and one pump of a volumizing mousse spread through damp roots. I keep a small medium round brush in my kit for touch-ups.
Mistake to Avoid: Adding too much conditioner at the roots, which collapses the built-in lift.
6. Soft Undercut Pixie for Cowlicks

If you have a stubborn cowlick, a soft undercut can remove the excess weight that fights styling. The undercut is subtle and hidden, so the top layers lay smoothly. This creates a clean, modern look that still reads feminine. For texture, use 1 to 2 fingertip-sized dots of cream to smooth while preserving movement. For coarse hair, a light blowout with a paddle brush helps the top sit. A small styling cream goes a long way.
Mistake to Avoid: Asking for an aggressive undercut that creates visible regrowth lines as it grows out.
7. Curly Tapered Cut for Defined Curls

Curly hair needs shaping not length removal. A tapered cut that keeps length on top and shortens the sides gives a rounded silhouette and prevents a triangle shape. It feels springy and light because curls have room to form. Use the "pineapple" method overnight to preserve definition and apply gel in 3 even sections using a pea-size amount per section to avoid crunch. For porosity, dampen hair with a 60/40 water-to-leave-in mix before applying product. I learned this across four hair textures I have styled and it works repeatedly.
Mistake to Avoid: Cutting curls dry without stretching them first, which can make them land shorter than expected.
If any of these cuts have you ready to shop, here are the basic things to keep in your kit before your next appointment.
Short Cut Styling Essentials
Tools:
- Medium round brush (~$10-20). Good for quick blowouts and shaping a blunt bob.
- One-inch flat iron (~$40-80). Use low heat for short styles.
- Hair thinning shears (~$15-30). For minor at-home shaping, only for confident hands.
Products:
- Texturizing sea salt spray (~$8-18). Great for lived-in texture on second day hair.
- Matte clay paste (~$12-22). Defines pieces without shine.
- Lightweight heat protectant serum (~$10-20). Protects short ends during styling.
- Microfiber hair turban (~$8-15). Cuts drying time and reduces frizz.
8. Curtain Bangs On Short Layers
Curtain bangs soften short cuts by breaking the face frame without heavy commitment. They work for most face shapes because you can sweep them off to the side. For a fresh look, trim bangs at a 10-degree angle and leave two fingers of length below the brow so they can be tucked behind an ear. Style with a round brush and one drop of lightweight oil at the ends to prevent stickiness. Try a travel light oil to smooth flyaways without weighing down short layers.
Mistake to Avoid: Cutting curtain bangs too short at the first trim, which forces daily styling.
9. Wet Look Tuck for Coarse or Curly Hair
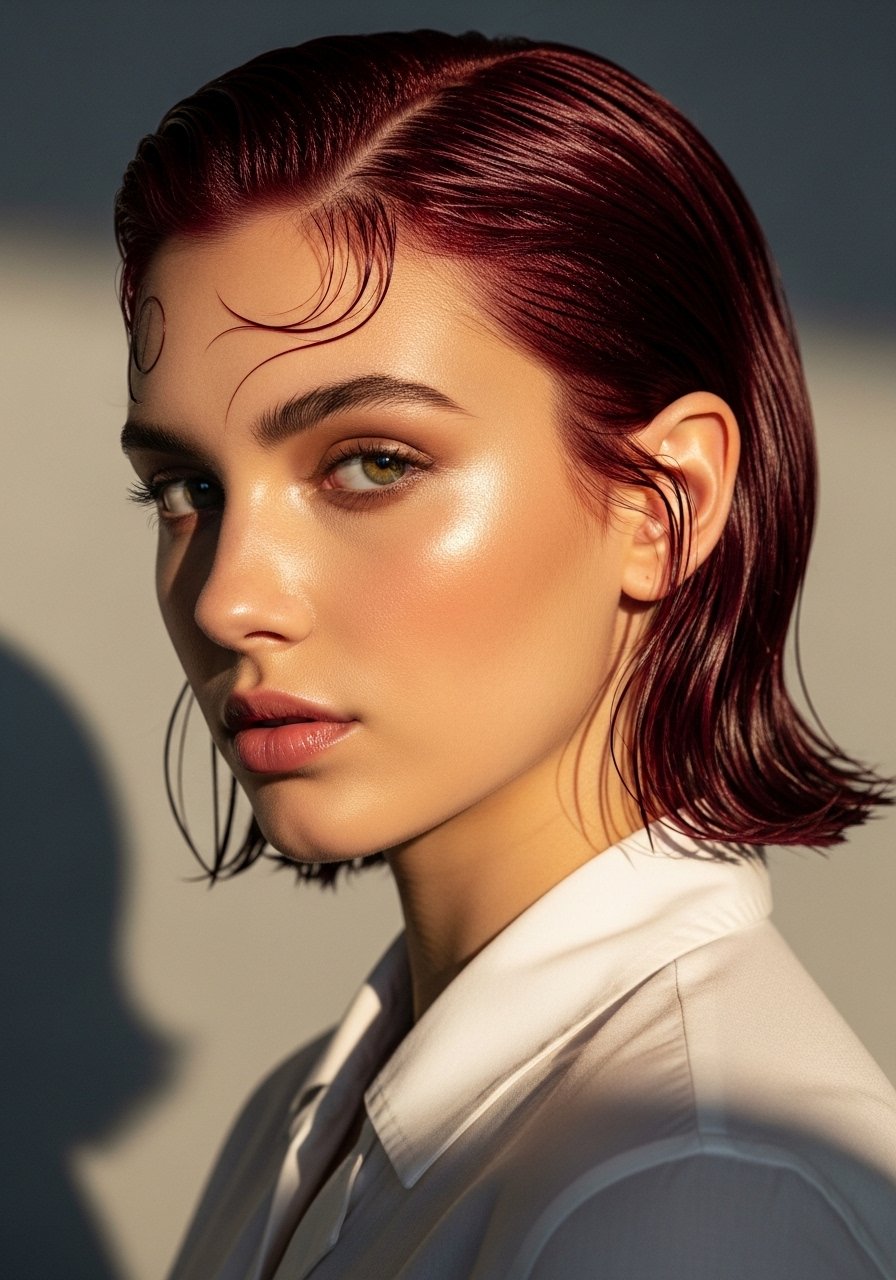
The wet look tuck reads polished but is surprisingly simple. Work a pea-size amount of gel through damp hair, comb it back, and tuck the sides behind the ears with bobby pins for hold if needed. For coarse or curly hair, use a gel with medium hold and follow with a satin scarf for ten minutes to set. This creates a sleek, intentional finish that lasts through a humid day. I have used this approach after trying it in three rentals where styling time needed to be minimal. Pair with a medium-hold styling gel.
Mistake to Avoid: Using too much gel at the roots, which creates a greasy look instead of the intended glossy tuck.
Quick Short Cut Tricks I Use
Broad tip: Use a microfiber hair turban after showering. It speeds drying and reduces frizz compared with regular towels.
Product-first tip: Grab a small jar of matte clay paste. I use it to define ends and separate layers without shine.
Observation tip: Short hair holds shape better when trimmed regularly. Book a thirty-minute maintenance trim every 6 to 8 weeks and keep the shape alive.
Common mistake tip: Most people pile product into the roots for volume. Apply lightweight mousse to damp roots, then finish with texturizer at mid-lengths for lasting lift.
