
I kept grabbing the brightest lemon polish and walking out of the salon thinking the color looked cheap in daylight. The moment my technician at the salon downtown mixed a soft warm base into my acrylic, the shade stopped reading fluorescent and started reading buttery. It was one small habit change that made the color feel lived-in, wearable, and oddly modern instead of costume-y.
These looks are for anyone who likes yellow but wants it to feel grown-up, from quick weekend sets to longer salon appointments. Most designs are doable on short to long nails, average skill for DIY, and simple for a tech to reproduce. Expect salon timings from 45 minutes for short sets to 90 minutes for detailed art, and budget options are included for at-home practice.
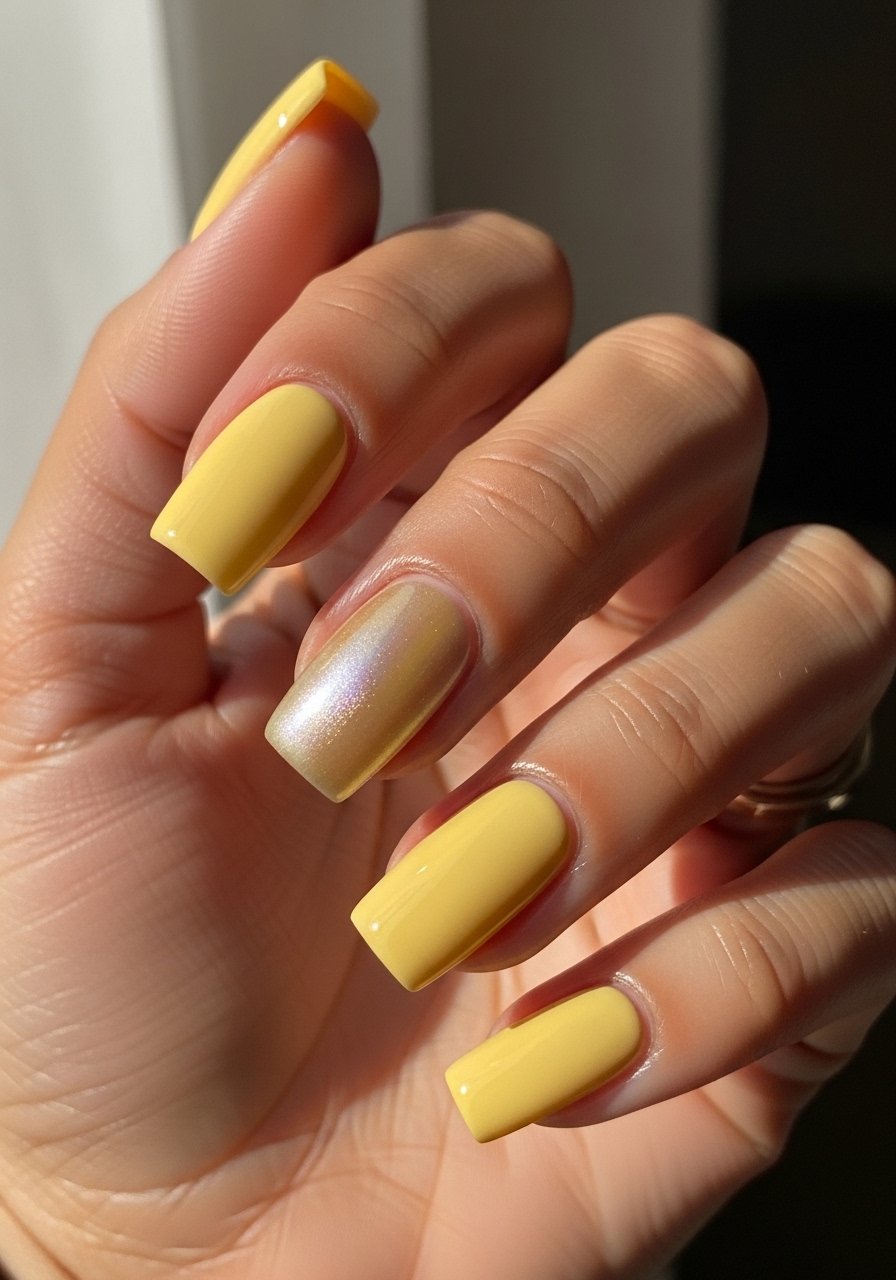
1. Classic Butter Yellow Almond Acrylic
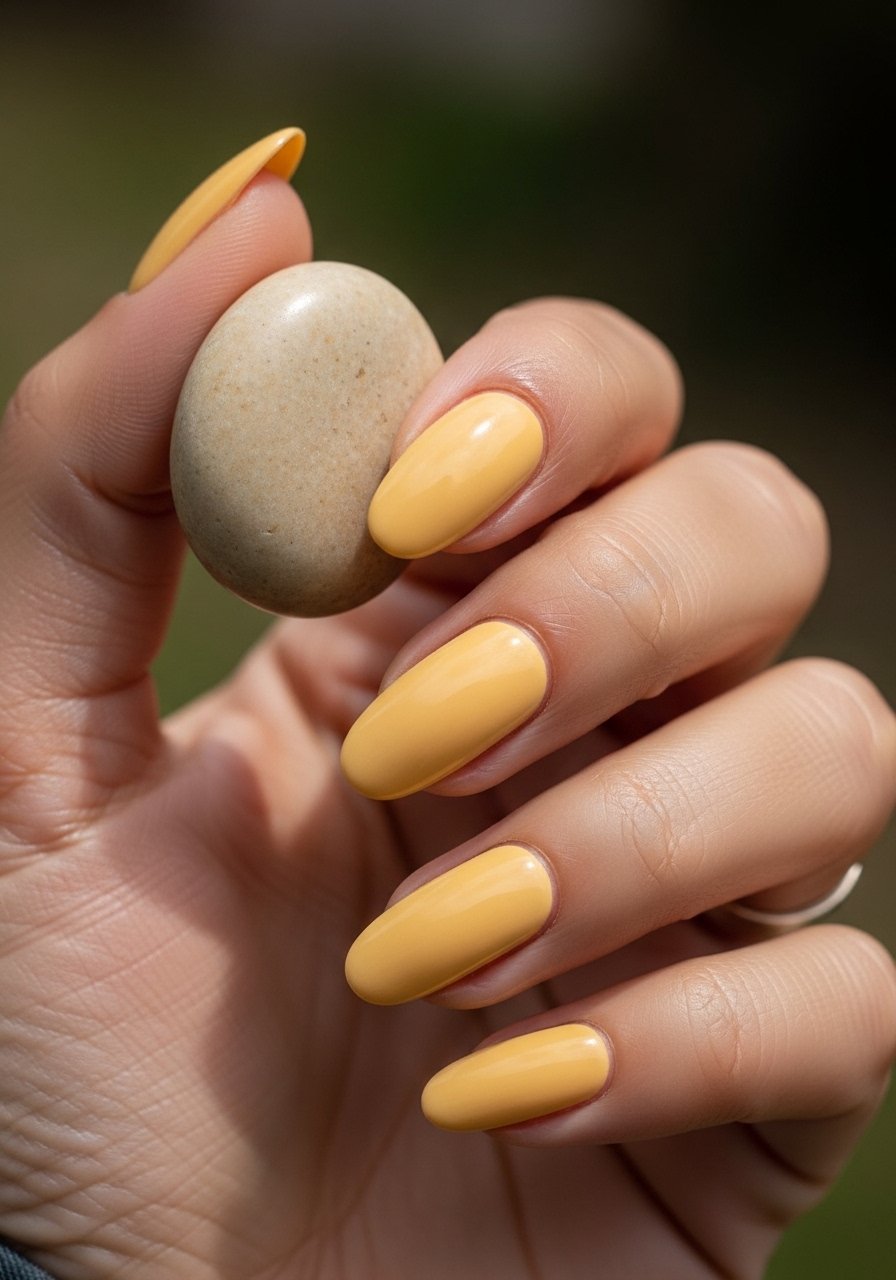
Start with a slightly warm base color to stop yellow from looking flat under daylight. Over a nude base the yellow reads creamy and flattering. This works visually because the base softens the pigment and the almond shape lets the color feel intentional. It suits medium to long nails and is beginner friendly if you use soft acrylic powder. Try a butter yellow nail polish like butter yellow nail polish for at-home touch-ups and add acrylic powder for the full salon look.
Style/Vibe: Classic creamy yellow
Best For: Medium to long nails, everyday wear
Skill: Beginner
Mistake to Avoid: Skipping a neutral base under pure yellow pigment which can make the color read too bright.
2. Sheer Butter Yellow French Tip
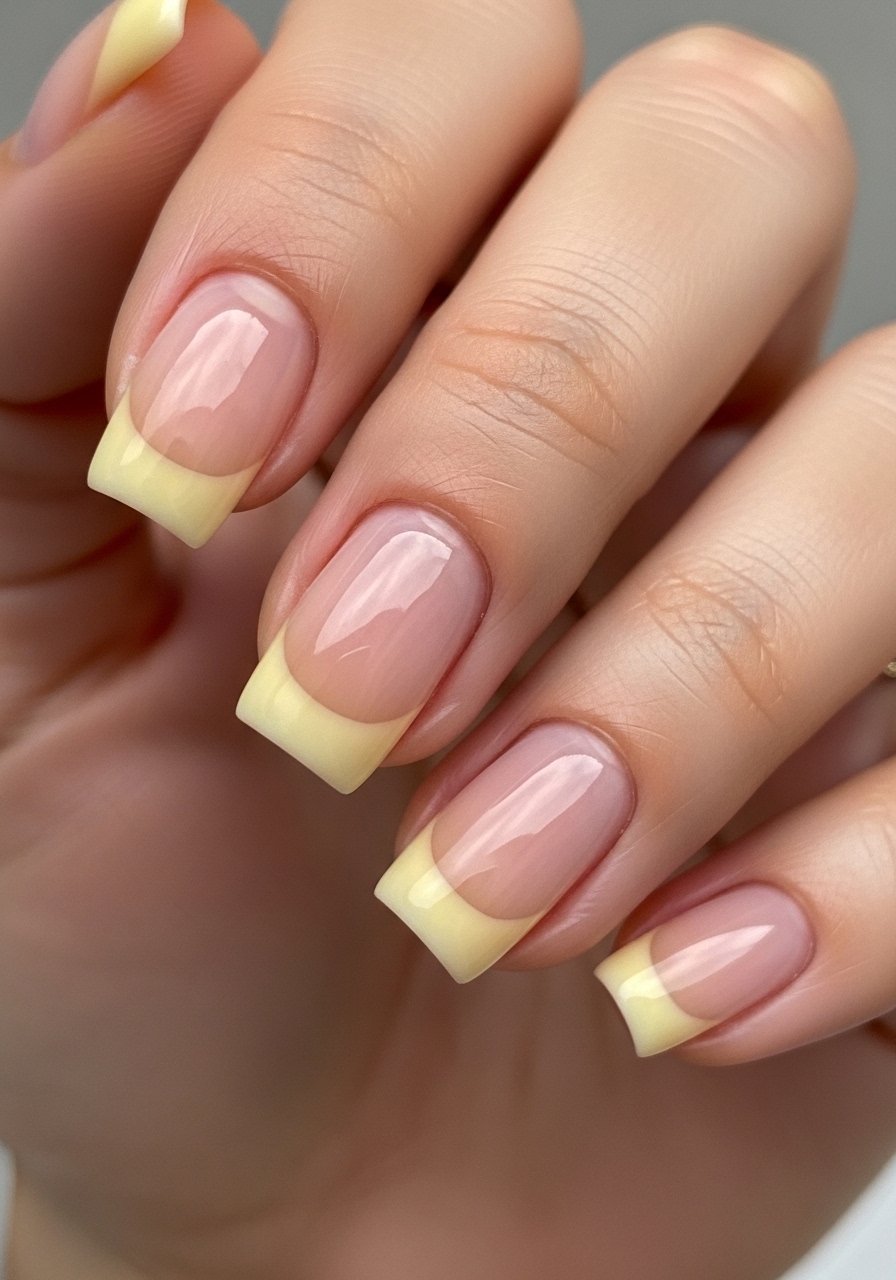
Use a thin translucent yellow for tips only, not full coverage. The result feels modern because the tip floats instead of covering the whole nail. It creates a soft, waking-up-makeup vibe rather than a painted-on look. This suits short to medium nails and is perfect for office wear or vacations. DIY method is to thin polish with a few drops of clear base coat. I like pairing with a fast-dry top coat like quick-dry top coat to keep tips from smudging during the first hour.
Style/Vibe: Soft French with yellow tips
Best For: Short to medium nails, work-friendly
Skill: Beginner
Mistake to Avoid: Painting the tip too thick, which loses the sheer, effortless effect.
3. Matte Butter Yellow With Glossy Smile

A matte finish makes butter yellow feel like a fabric rather than a neon. Add a glossy smile at the cuticle for contrast. The tactile change makes the design read sophisticated and keeps polish from looking flat in photos. This is great for medium to long nails and suits intermediate skill if you mask the smile with careful placement. Pair a matte top coat with a small brush and nail-art-detail-brush for crisp smiles.
Style/Vibe: Matte with glossy detail
Best For: Medium to long nails, statement mani
Skill: Intermediate
Mistake to Avoid: Applying matte polish over an uneven surface which highlights texture flaws.
4. Marbled Butter And White Accent
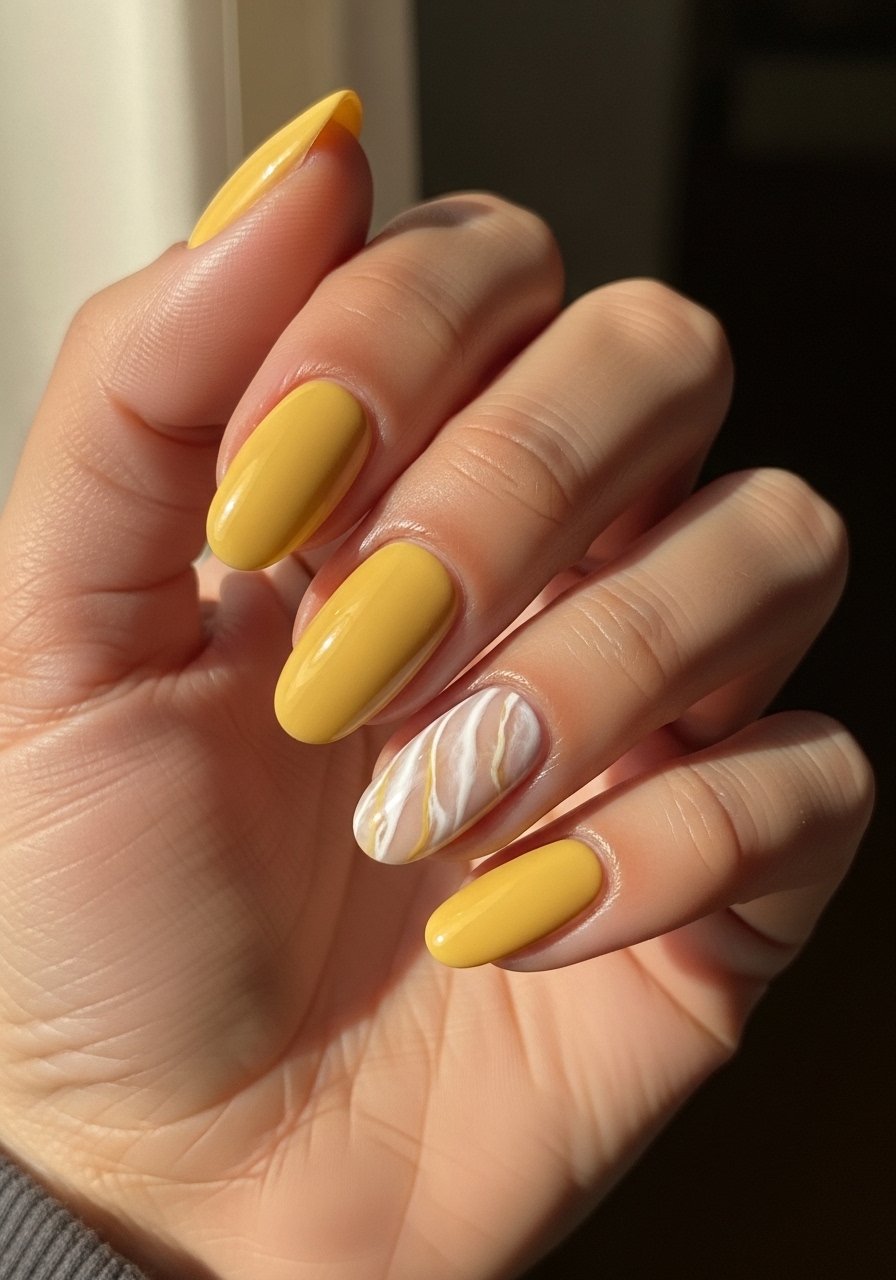
Marble tones down yellow by introducing white veins and soft blending. The eye reads movement which makes the set feel high-end. This works best on medium nails and for anyone willing to spend extra five to ten minutes per nail. Use a thin brush and a drop of acetone or a mixing medium to pull swirls. For at-home attempts try a small bottle of white nail polish and a second butter shade for variation.
Style/Vibe: Subtle marble accent
Best For: Medium nails, weekend or event sets
Skill: Intermediate
Mistake to Avoid: Over-mixing the colors and ending up with a muddy, indistinct tone.
5. Tiny Hand-Painted Daisies on Butter Yellow
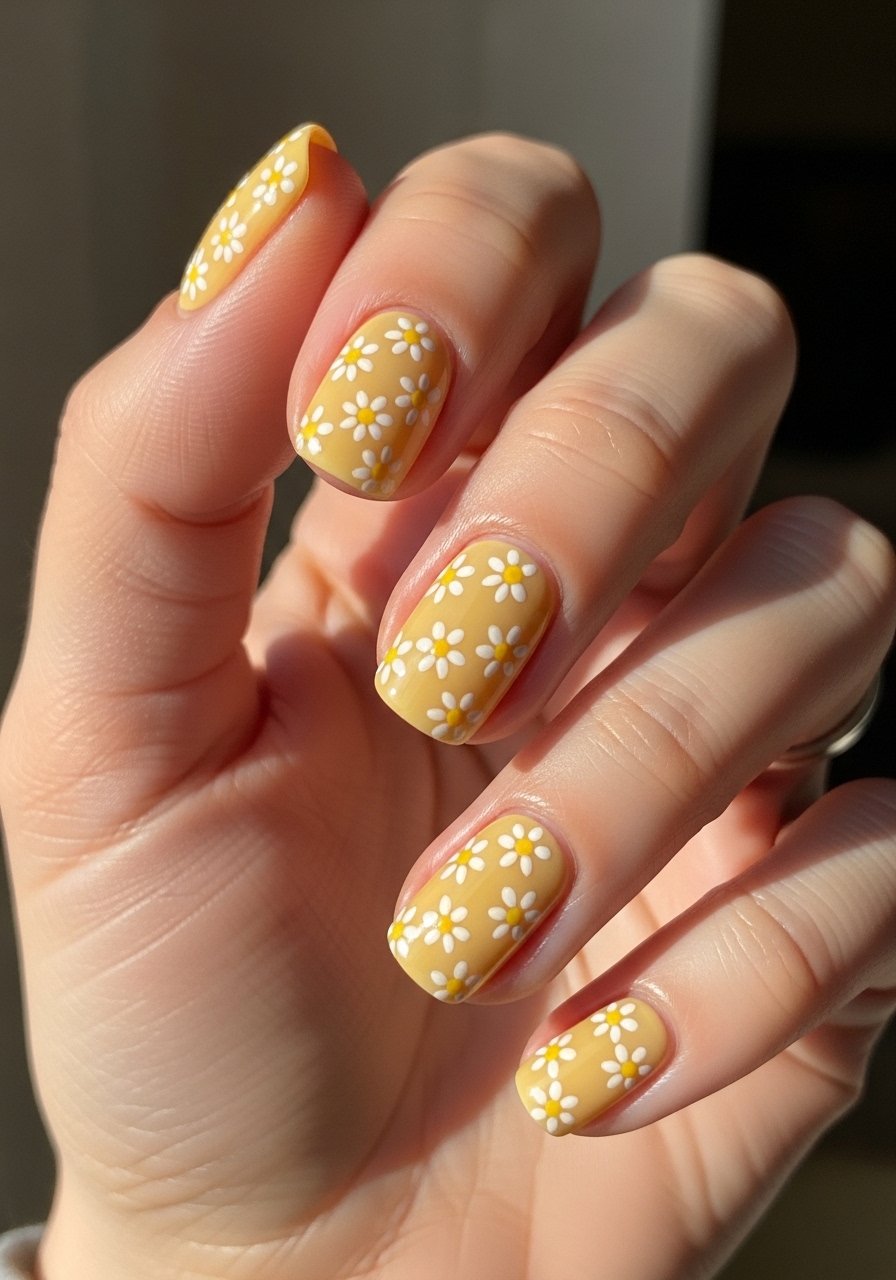
Small florals keep yellow from feeling loud by adding a delicate focal point. Tiny daisies or dots reduce visual noise and add a playful but tidy finish. This is ideal for short nails and beginner painters can use a toothpick or dotting tool. I used a micro dotting tool and a steady hand. Pick a fine white paint and a tiny brush like nail-dotting-tools-set to control petal shapes.
Style/Vibe: Mini floral accents
Best For: Short nails, casual or festival looks
Skill: Beginner
Mistake to Avoid: Making petals too large which overwhelms the small nail surface.
6. Pearlescent Butter Yellow Chrome Flare
A pearlescent powder over a soft yellow creates a candlelit skin tone effect. It catches light without shouting. Use a chrome powder lightly buffed into tacky gel for a sheen that stays put. This suits medium nails and people comfortable with a lamp cure step. I prefer a sheer base coat, then a single pass of pearlescent powder and a gel top coat like led-gel-top-coat.
Style/Vibe: Soft chrome sheen
Best For: Medium nails, evening or photo-ready sets
Skill: Intermediate
Mistake to Avoid: Rubbing chrome powder too hard which creates streaks and uneven shine.
7. Negative Space Butter Yellow Geometric
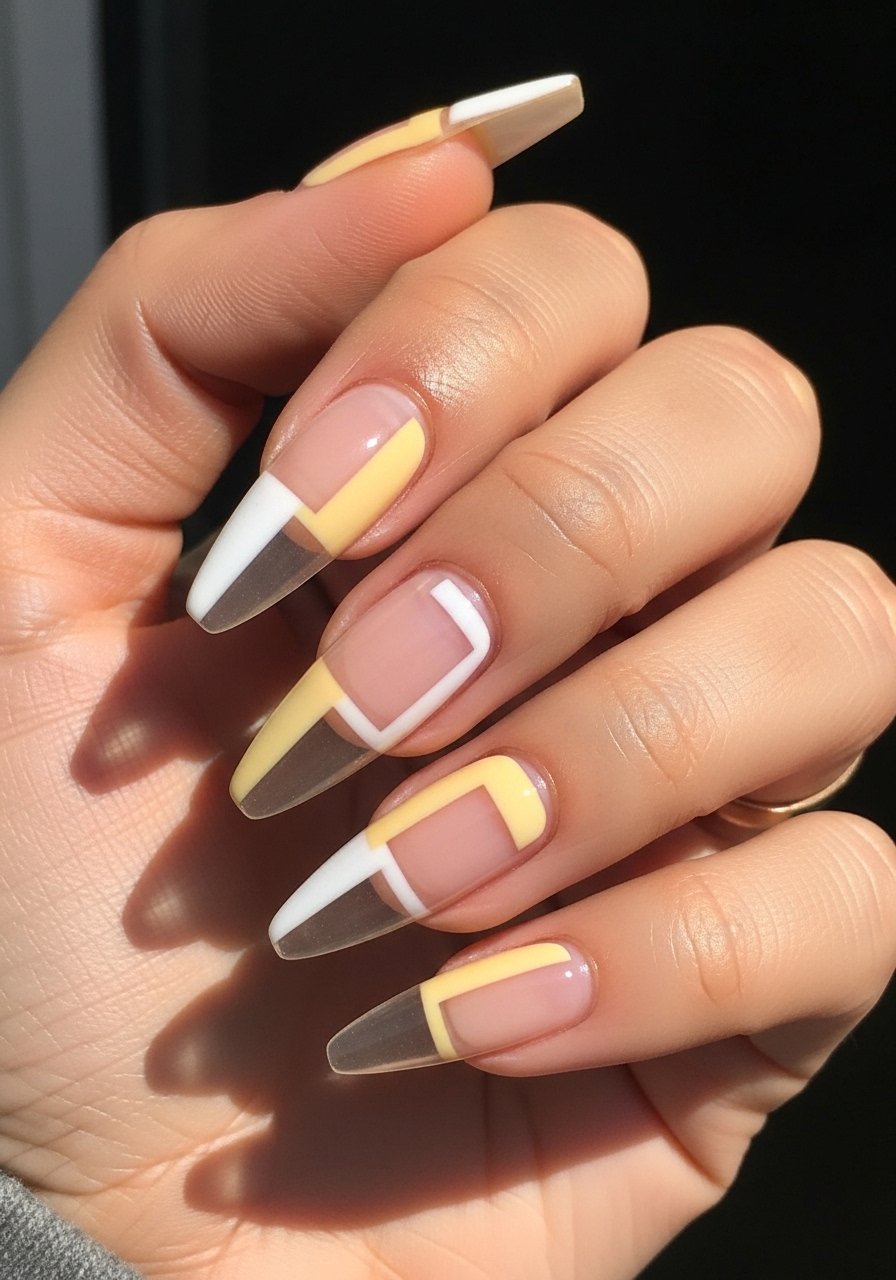
Negative space makes yellow feel architectural and modern. Blocks, half-moons, and sliced lines allow skin to balance the pigment. This is a higher-skill look but visually impactful. Use striping tape and steady thin coats of acrylic or gel. Try a striping brush and a neutral clear base like nail-striping-tape for crisp edges.
Style/Vibe: Geometric negative space
Best For: Long nails, editorial or style-forward clients
Skill: Advanced
Mistake to Avoid: Removing tape too early which smears edges and ruins the shape.
If any of these ideas have you ready to try the look, here are the products I reach for most.
Butter Yellow Mani Essentials
Application Tools:
- Acrylic nail powder (~$8-20). The base texture matters more than brand for color payoff.
- Nail-tip-forms (~$6-14). Use when building length at home.
- uv-led-lamp (~$25-50).
Surface & Finish:
- fast-dry-top-coat (~$6-12). Prevents early dents.
- matte-top-coat (~$6-12). For texture swaps.
Art Supplies:
- nail-dotting-tools-set (~$8-15). For tiny daisies and dots.
- nail-striping-tape (~$5-10). For crisp geometric lines.
Butter Yellow Mani Habits
Thin coats beat one thick coat every time. Apply three thin layers of a butter yellow polish like butter yellow nail polish and let each dry a minute between passes.
Start with a neutral base coat, not raw white. Use clear base coat to warm the yellow and stop it from reading fluorescent.
If you want glossy accents, apply the glossy detail last. A small nail-art-detail-brush saves time and keeps lines tidy.
Most people file nails into one shape. Try switching the dominant nails to almond or coffin to change how butter yellow sits on the hand.
Keep a small bottle of cuticle oil like cuticle-oil in your bag. Hydrated cuticles make acrylic edges look intentional not ragged.
