
The Pinterest picture promised waist-length, flawless jumbo box braids, but my first try had uneven parts and painfully thin edges. I kept redoing the same step until I learned which braid shapes actually protect my hair and which ones just look good for a photo.
Contrast to glossy tutorials, these 15 picks are braid styles that last without wrecking your edges, easy enough for a weekend install or a pro appointment, and friendly to short or long natural hair. I pulled these from what worked across four hair textures I have styled, and most styles can be done without heat in under three hours if you simplify part sizes. Expect a mix of low-tension techniques, porosity-friendly product notes, and ways to sleep so your style survives the first week.
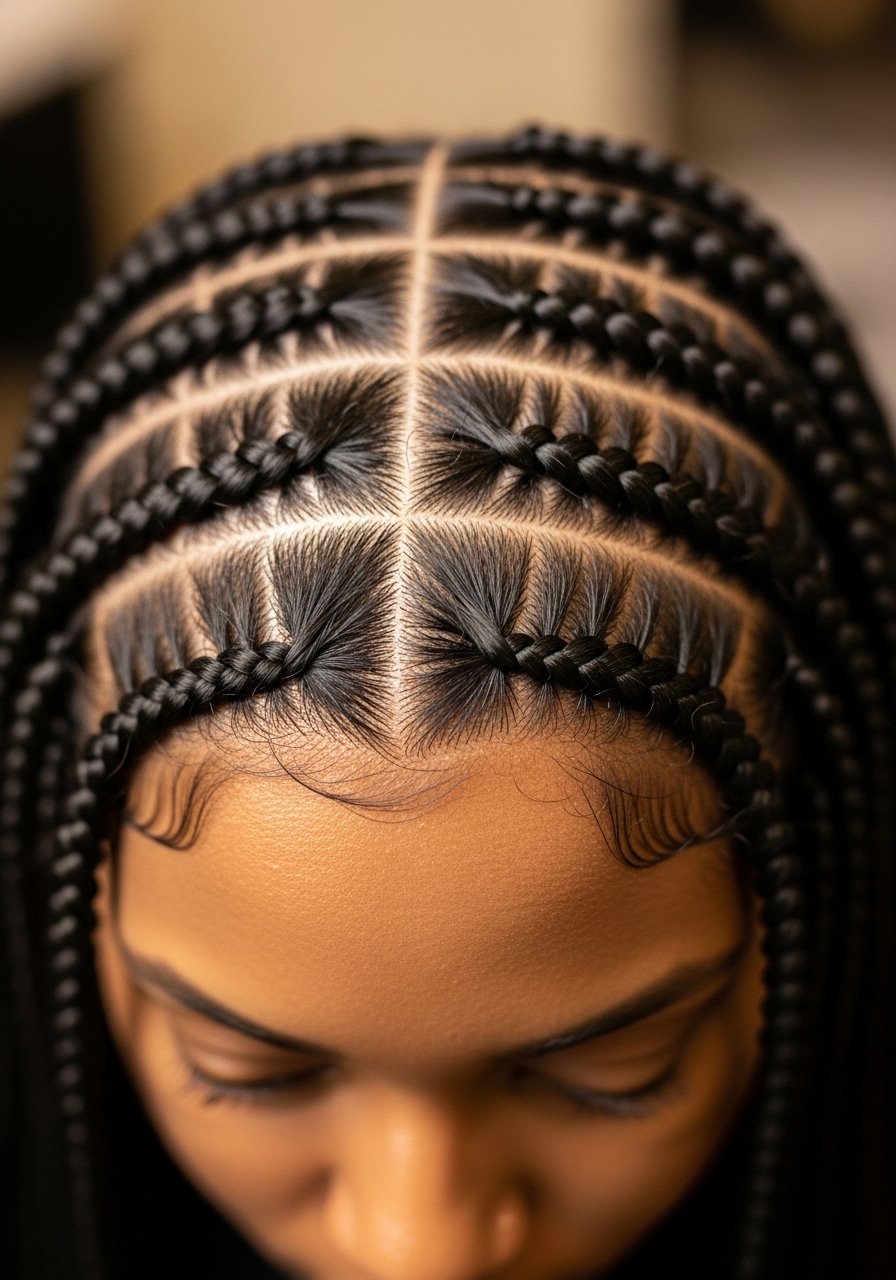
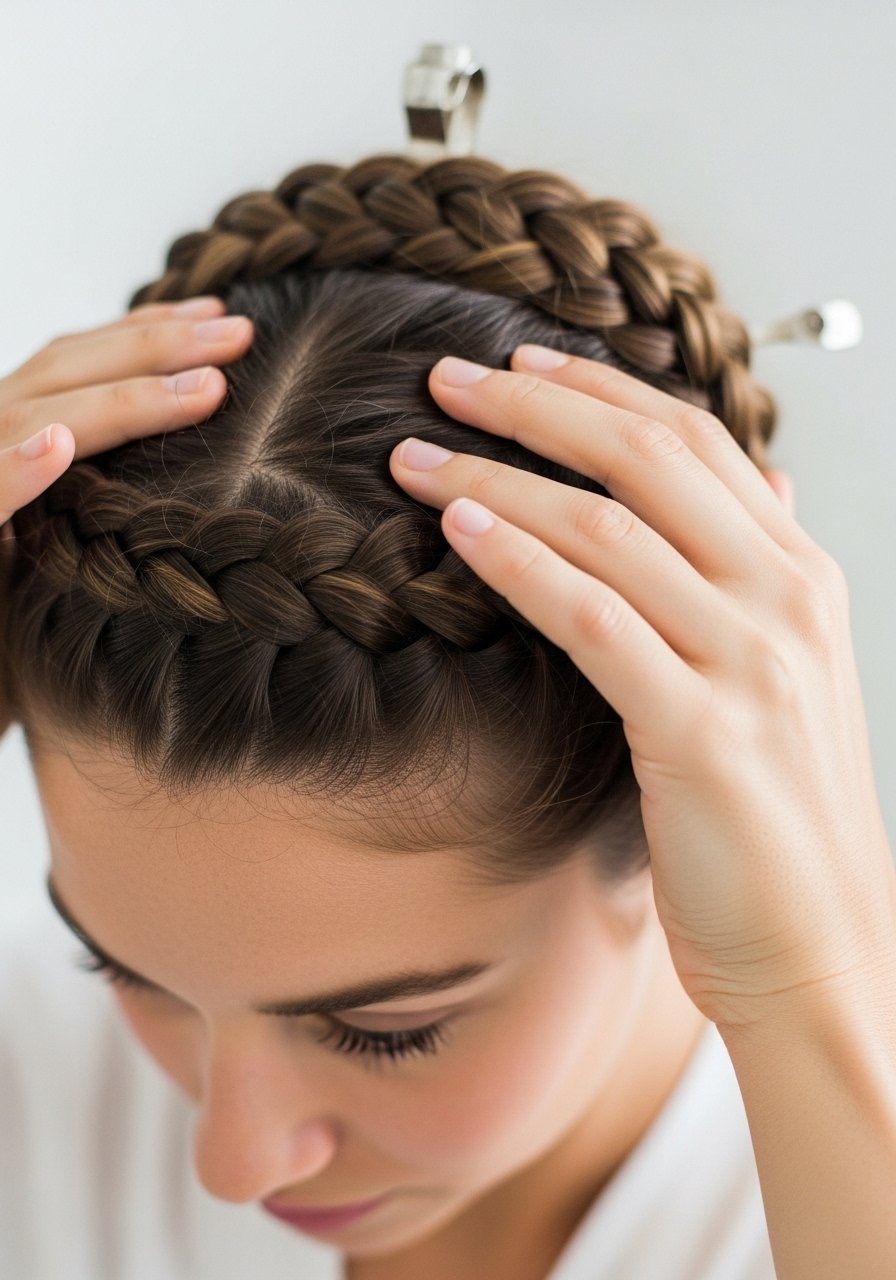
1. Low-Tension Jumbo Box Braids
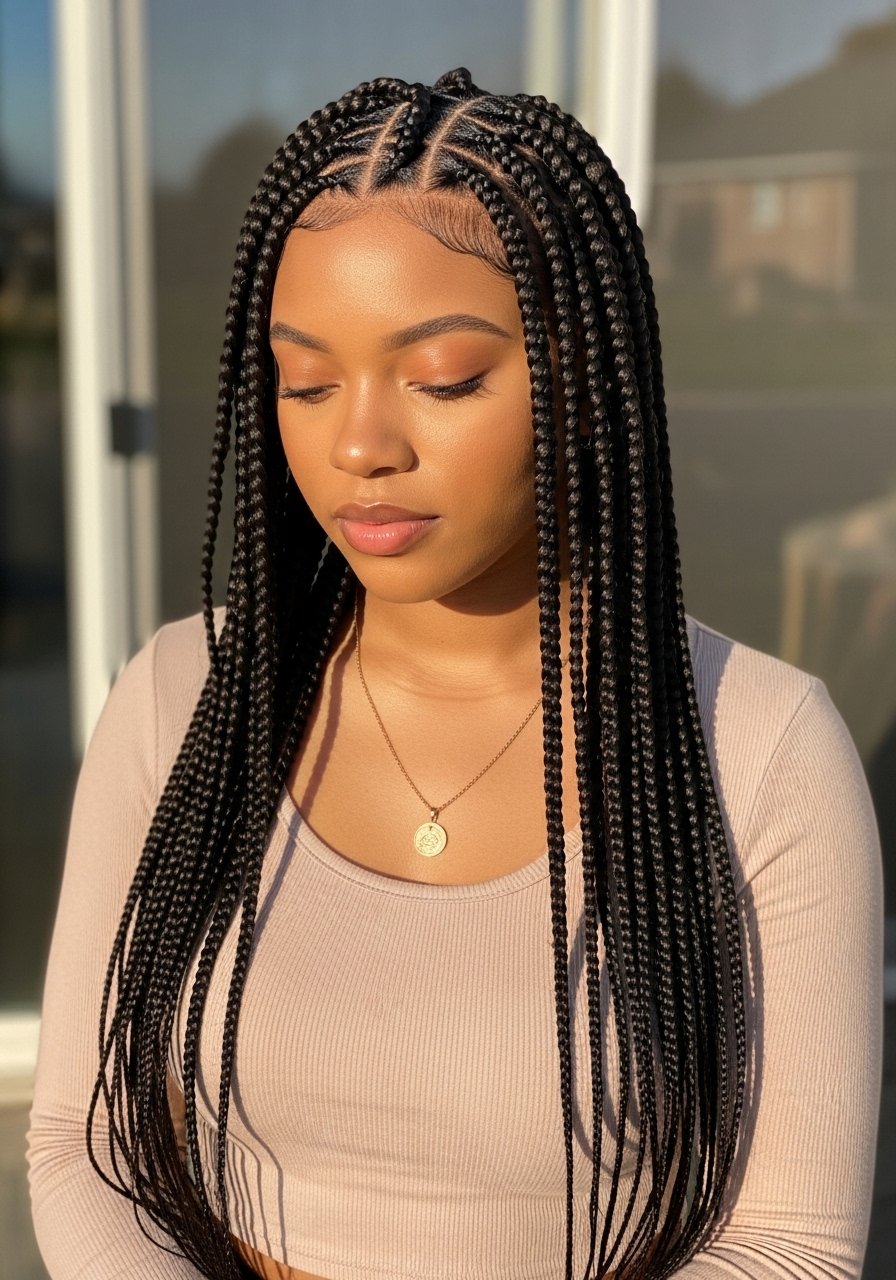
If you want the box braid look without sore edges, make the parting wider and start the extension an extra half inch from the hairline. Visually it reads full, but functionally it spares fragile perimeter hairs. Use a lightweight edge gel and seal with two to three drops of lightweight hair oil on each braid end to avoid bulk. Part width around 1/2 inch creates a bolder braid and reduces tension. This fits anyone wanting fuller braids on a budget, install time about two hours for shoulder length.
Mistake to Avoid: Starting extensions flush against the hairline, which creates unnecessary pull and breakage.
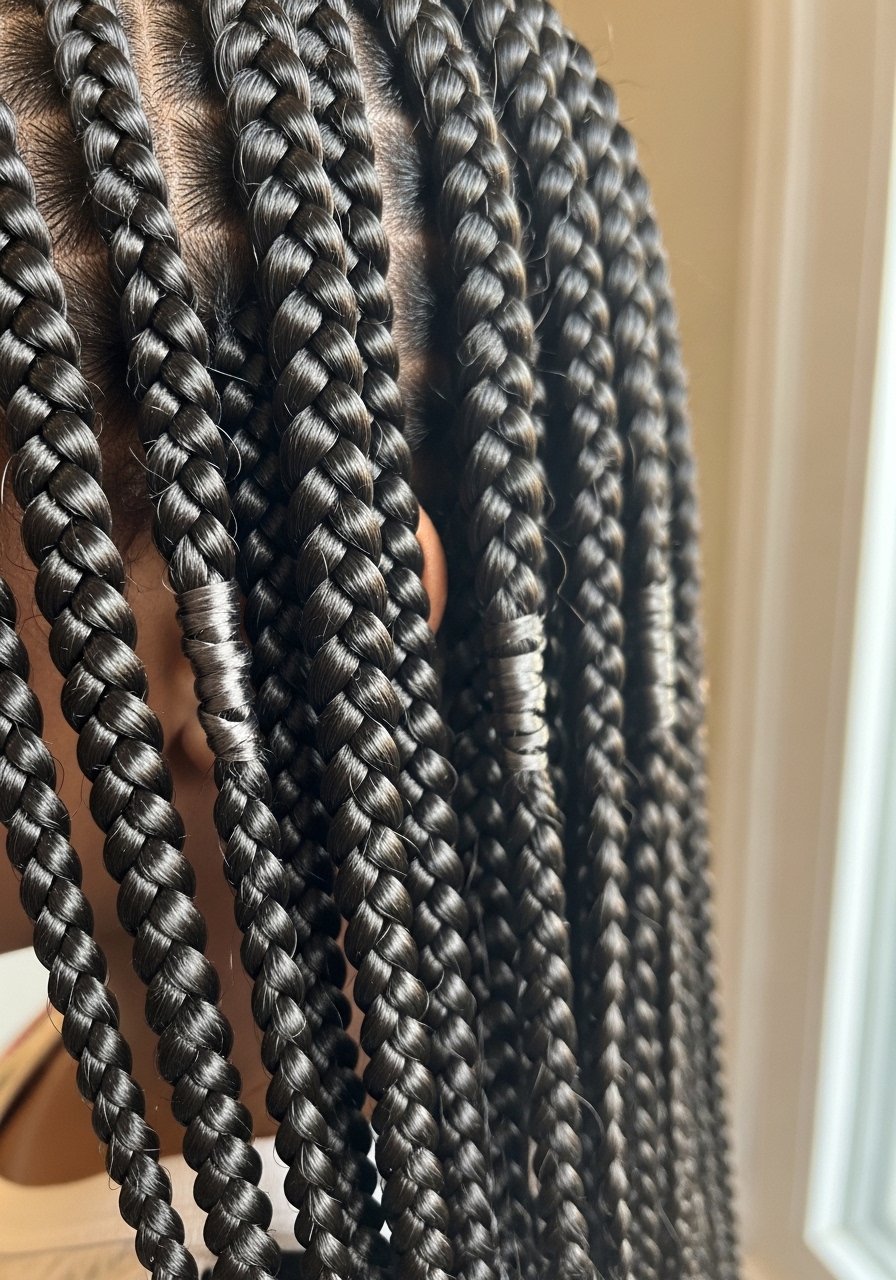
2. Feed-In Knotless Braids

Knotless feed-in is a protective staple because the added hair is braided in gradually, which reduces the lump at the base and spreads weight along the natural strand. Part size of 1/4 inch gives a neat look without over-manipulating the root. For blending, use smaller bundles of kanekalon braid hair and add one feed every three passes to keep tension even. This style reads polished and is best for medium to long hair, with a pro install usually three hours or under.
Mistake to Avoid: Adding too much extension at once, which creates heavy knots and scalp strain.
3. Halo Braid Crown for Short Hair

Halo or crown braids are great when you want a low-manipulation protective style that still shows face shape. On hair under four inches, do an invisible feed-in along the top edge with a part width of 3/8 inch and tuck the ends underneath to avoid bulk. I like finishing with a satin scarf pressed for five minutes to set the shape. A satin scarf keeps the edge laying soft. This is quick, beginner friendly, and travel-ready.
Mistake to Avoid: Braiding too tightly around the crown, which creates tension headaches and visible thinning.
4. Knotless Cornrow Ponytail
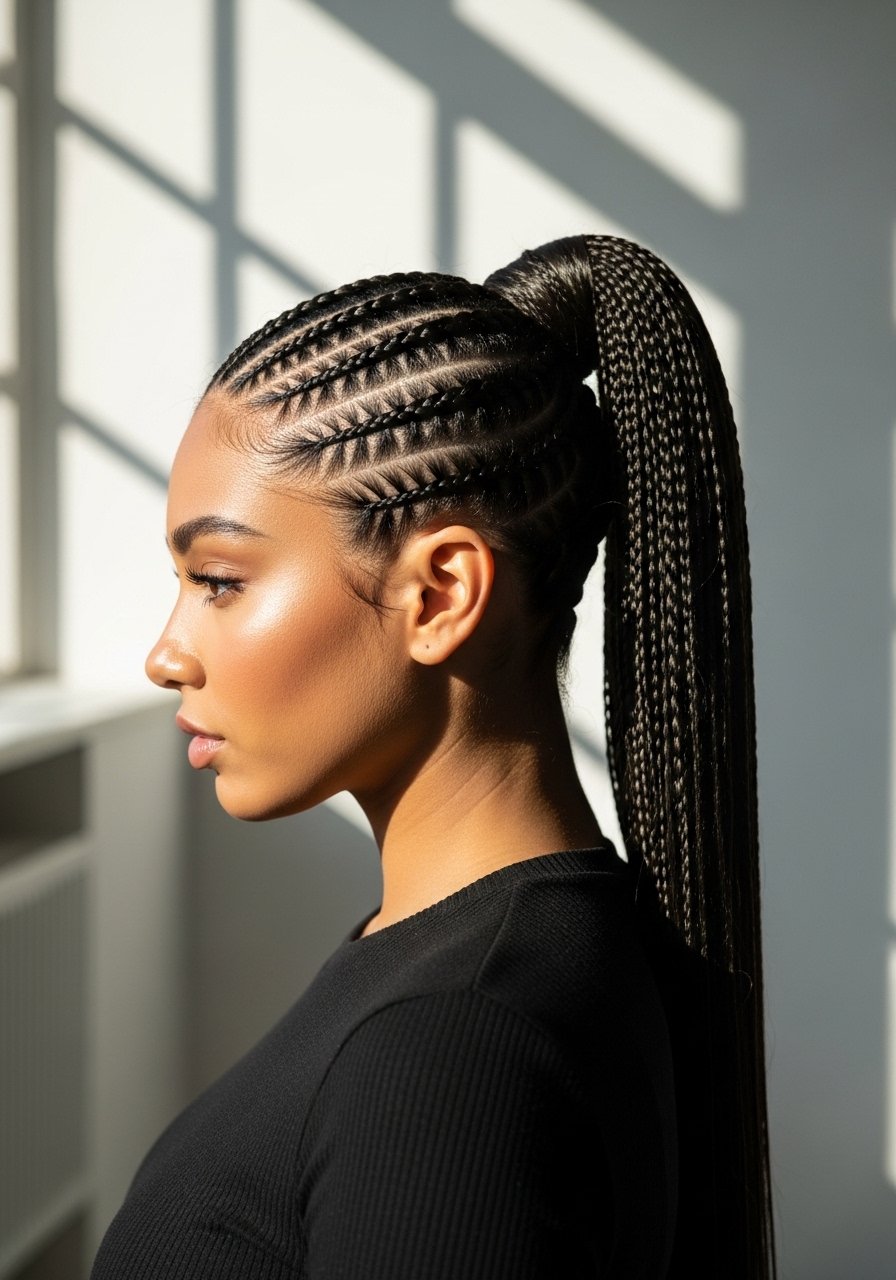
This look mixes low-tension cornrows with the convenience of a ponytail. Use a rat-tail comb to create straight parts about 1/3 inch wide, then feed in hair gradually. The ponytail feels light if you wrap the base with silk thread and use a soft elastic. For extra hold without crunch, smooth on a small amount of edge control gel and press with a silk scarf for 10 minutes. Ideal for work-visible styles and those who want a clean updo that stays intact.
Mistake to Avoid: Tying the ponytail too tight, which pulls at the base of the cornrows.
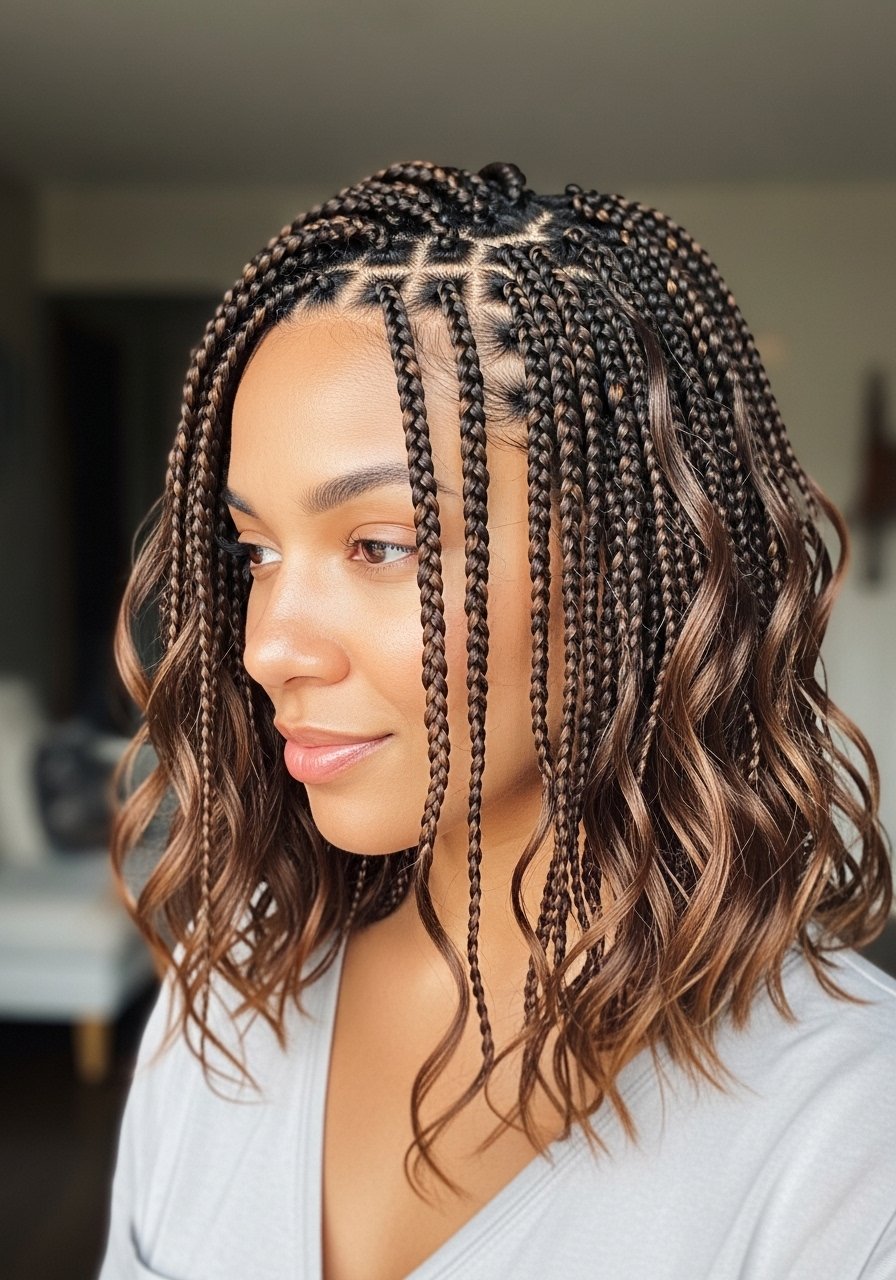
5. Senegalese Twists with Lightweight Finish
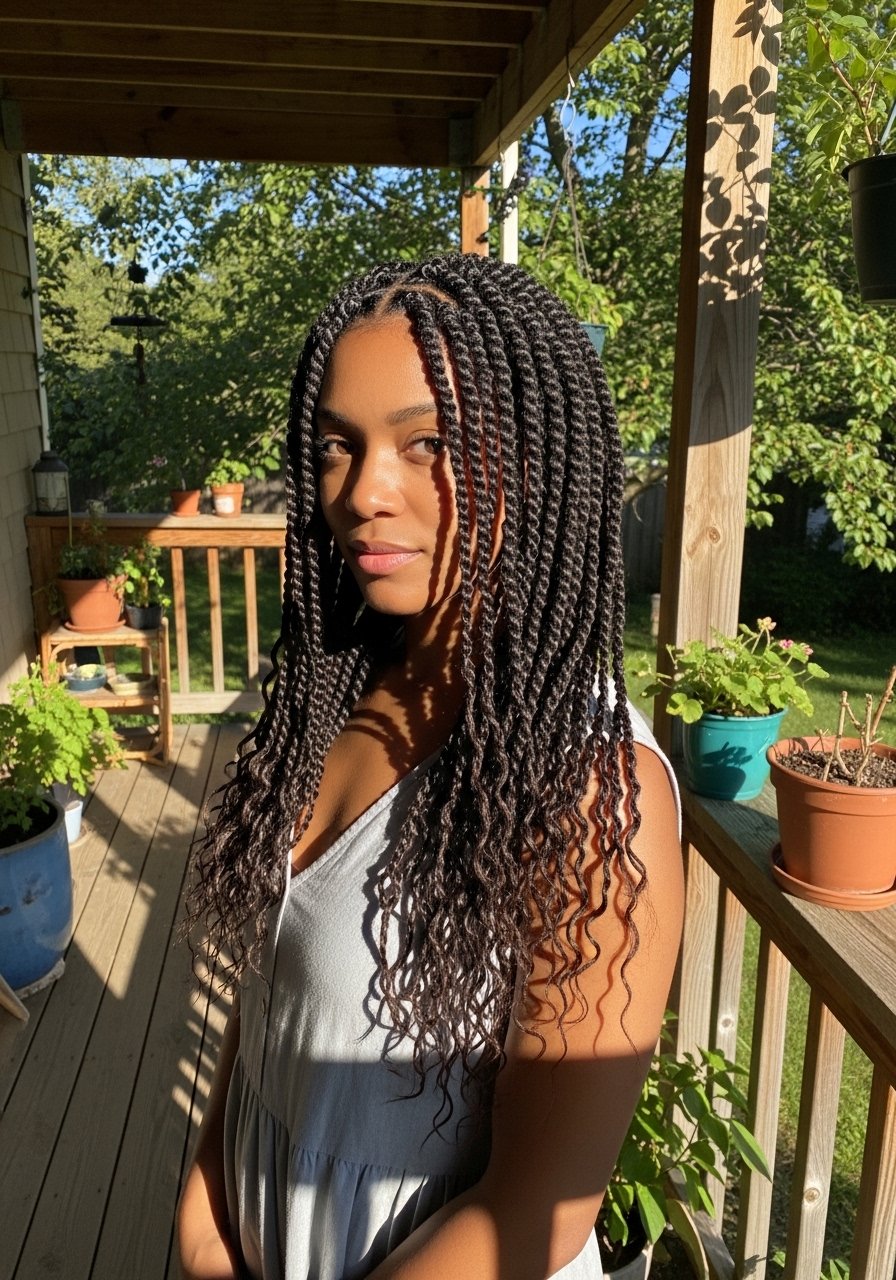
Senegalese twists can be heavy if you use full bundles. Use half-bundles and rotate the twist direction every two rows for flexibility and reduced bulk. For a soft finish, I run three drops of jasmine-scented lightweight oil down each twist and scrunch gently to break the shine into a lived-in texture. Time and budget: moderate, about two to three hours with practice. Works well across straight to coily textures.
Mistake to Avoid: Using full heavy bundles for every twist, which shortens wear and strains roots.
6. Faux Locs Half-Up Half-Down

Faux locs read protective because real ends are tucked inside synthetic wrap, reducing nightly friction. For lightweight locs, choose pre-looped or soft Marley hair and split bundles into thirds. Use a 2:1 wrap ratio of base hair to extension for secure, flexible locs. I like adding a touch of braid mousse to the roots to control flyaways without stiffness. This look suits events and daily wear, medium install time, and is easier on low-porosity hair when you avoid heavy creams.
Mistake to Avoid: Over-wrapping with too much product, creating a stiff loc that rubs at clothing.
7. Micro Knotless for Maximum Longevity
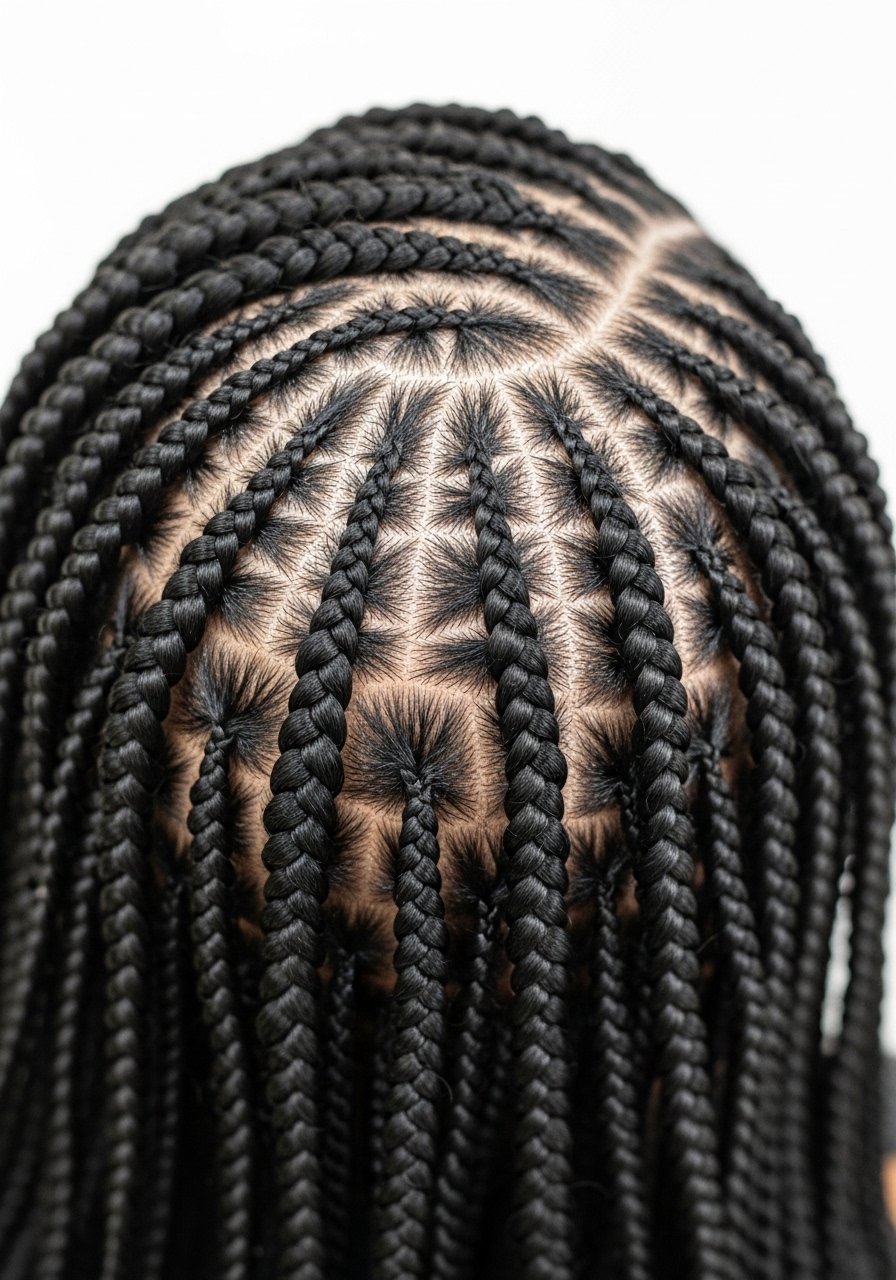
If you want braids to last six to eight weeks without constant maintenance, micro knotless is the move. Small parts distribute the weight but mean longer install time. Keep part width at about 1/8 inch for a neat edge-to-edge look and plan for four to six hours if DIY. To prevent breakage, apply two sprays of a light leave-in blend to each section before braiding. For DIY ease, a rat-tail comb and steady lighting are essential.
Mistake to Avoid: Rushing micro parts, which leads to uneven tension and earlier slippage.
If any of these ideas have you ready to actually try something, here are the tools and products I reach for most.
Essentials For Long-Lasting Braids
Combing & Sectioning:
- wide-tooth comb (for detangling) (~$6-12)
- rat-tail comb (for precise parts) (~$5-10)
Finish & Seal:
- edge control gel (~$6-15)
- lightweight hair oil (~$10-20)
Night Care:
- satin scarf (for wrapping edges) (~$8-15)
- satin pillowcase (reduces friction) (~$12-25)
Extensions & Tools:
- kanekalon braid hair (for consistent color) (~$6-12 per pack)
- crochet hook for hair (for crochet styles) (~$4-8)
- braid mousse (light hold and sheen) (~$8-14)
8. Scalp-Friendly Box Braid Parting
Healthy scalp while braided is the non-glam part most guides skip. Make parting in a grid with 1/2 inch squares and leave a little natural hair at the base before adding extension. After every two rows, mist the scalp with a diluted tea-tree spray to reduce itch. Use a spray bottle that gives a fine mist and a lightweight hair oil on the edges two times a week. This approach works for anyone prone to dry scalp or sensitivity.
Mistake to Avoid: Pouring oil directly onto the scalp, which can clog follicles and weigh down braids.
9. Satin-Wrapped Ends for Frizz Control
I tie braid ends with a small loop of satin thread instead of melting or rubber-banding. The satin prevents fray and preserves moisture at the tips. Wrap about 1 inch of satin around the end and tuck secure with two passes. Use a small amount of braid mousse on the mid-lengths for a softer finish. This is low-cost and keeps braids looking intentional for weeks, especially for textured hair.
Mistake to Avoid: Melting synthetic ends too close to natural hair, which can singe delicate strands.
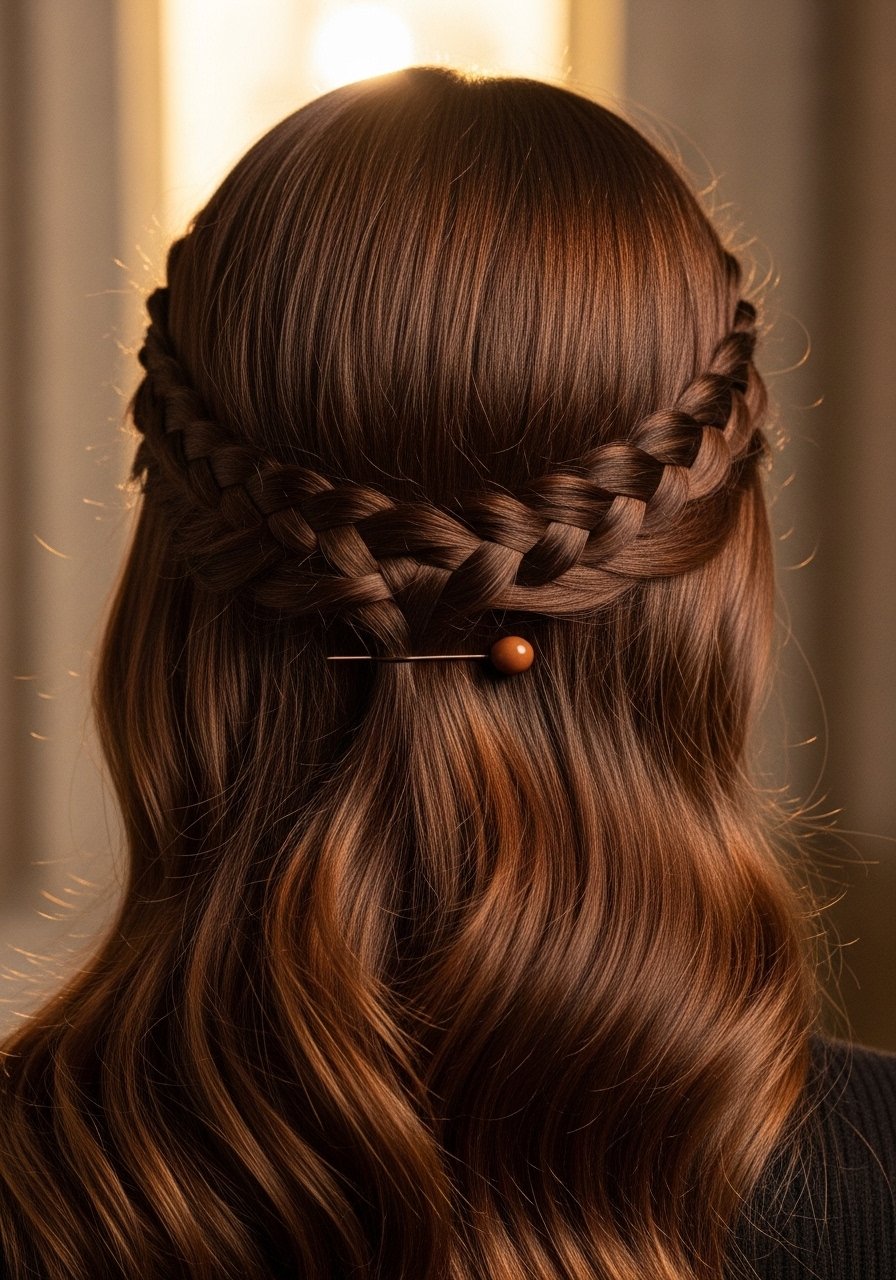
10. Side-Swept Fulani Braids With Jewelry

Fulani braids borrow small cornrows and face-framing twists to create a decorative protective style. For balance, make the two front cornrows slightly narrower, about 1/4 inch, and stagger the bead placement every five inches. Add hair cuffs sparingly so weight stays low. A light mist of edge control gel keeps the hairline neat without hardening the whole style. Great for medium-length and longer hair that wants a statement without daily styling.
Mistake to Avoid: Cluttering the braids with too many heavy accessories, which increases pull on the roots.
11. Crochet Water Wave over Cornrows
Crochet water wave gives you the curly, undone look while the cornrows underneath are the protection. Make cornrows shallow and follow a 2-row cornrow base with 1.5 inch spacing between rows for even volume. Use a crochet hook for hair and knot the bundle once, not twice, to reduce scalp pressure. This is quick to install and easy to refresh, especially for fine hair that needs a gentle base.
Mistake to Avoid: Tightening each crochet knot to the scalp, leading to irritation and early shedding.
12. Mini Twists Pinned Up for Sleep

Mini twists are cozy and last when you pin them into a loose low bun at night. For daytime wear, leave them loose with a satin bonnet. Apply a fingernail tip of lightweight hair oil to each twist every 4 days and avoid heavy creams if you have low porosity. Mini twists suit those who want a soft protective style and are willing to spend extra time installing. Expect medium install time but easier daily maintenance.
Mistake to Avoid: Sleeping with twists in a high, tight topknot that creates constant tension.
13. Short Box Braid Bob With Face-Framing
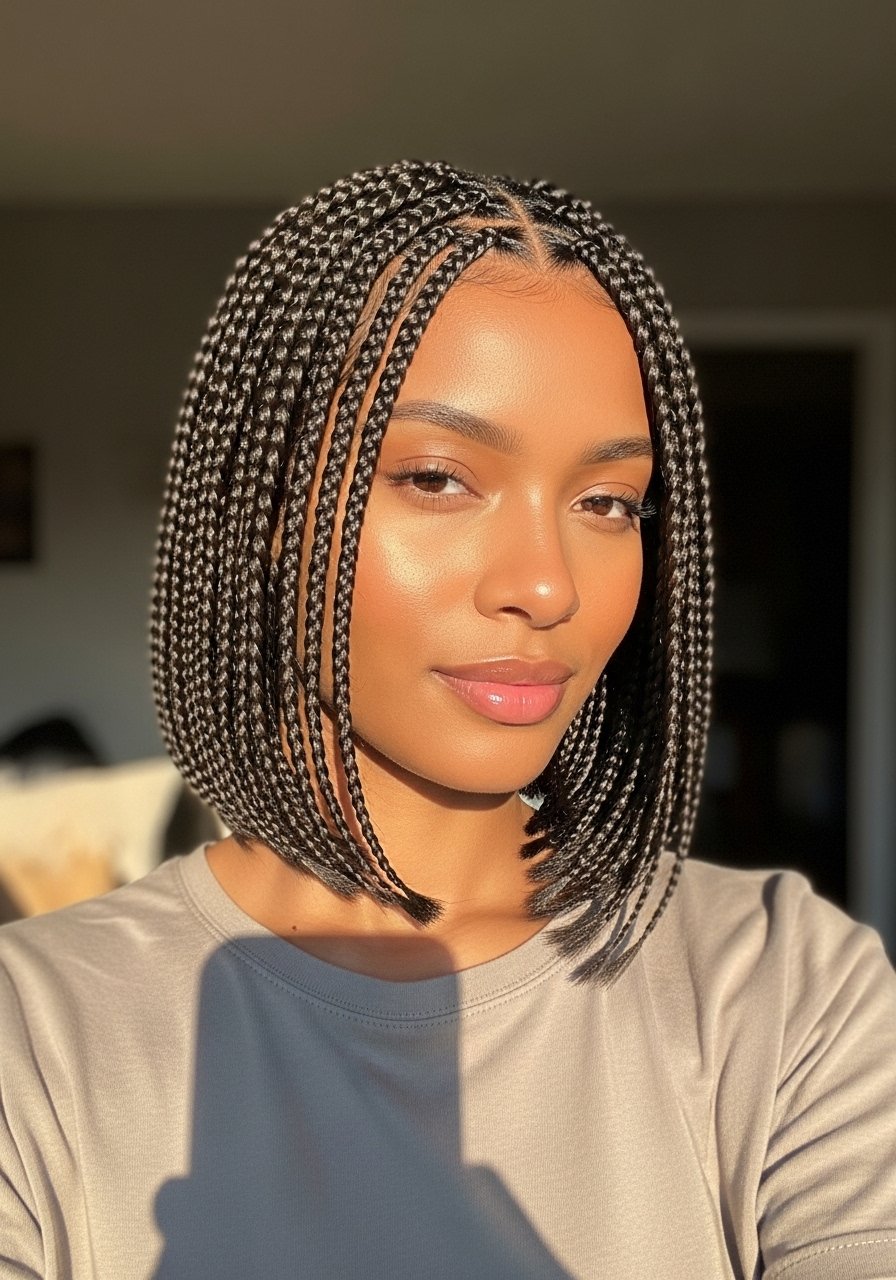
Short box bobs read modern and protect ends by keeping them wrapped and off clothing. Keep braid length at jawline, use part widths of 3/8 inch, and avoid adding heavy bundles at the ends. A quick run of braid mousse smooths baby hairs without making the bob look greasy. This is a low-daytime maintenance style that looks intentional and works well for petite frames.
Mistake to Avoid: Adding full-length heavy extensions to a short bob, which defeats the point of a lightweight protective cut.
14. Scalp Massage Routine for Braided Styles
Scalp care is a gap most braid guides skip. A 90-second massage with fingertips and a few drops of lightweight hair oil boosts circulation and helps product absorption, especially for high-porosity hair. Do this twice a week while braids are pinned loosely. It reduces flaking and keeps roots healthier over long wear. This is a low-effort add-on that helps the style last and prevents the "crusty scalp" look some people get after week two.
Mistake to Avoid: Scrubbing the scalp hard under braids, which irritates and can lift braids prematurely.
15. Tension-Free Baby Braid Border
If your perimeter is fragile, opt for a baby braid border that is two rows deep, braided loosely with a 1/4 inch part width. Instead of tight baby braids, use larger feed-ins staggered every two passes to disperse tension. Finish the border by wrapping a satin thread for one inch only. For hold without stiffness, keep a small tube of edge control gel on hand to smooth flyaways when needed. Great for anyone whose edges need gentle protection.
Mistake to Avoid: Trying to over-define baby hairs into tiny knots, which causes breakage over time.
Braid Night Habits
Thin coats beat one thick coat every time. When you seal braid ends or add product, one thin layer of braid mousse gives shape without buildup and lets the style move naturally.
Grab a satin scarf for under $12. Wrap your edges before bed and the next morning everything looks smoother, especially after the first week.
Curly or coily hair benefits from sleeping with the braid base pinned low, not piled high. Use satin pillowcase too, it reduces friction and preserves the parting edges.
Most people overwash braids thinking freshness equals health. Instead, mist the scalp with diluted cleanser twice a month and spot-clean with a spray bottle to avoid drying out your roots.
