
I kept asking for tiny kanji behind my ear and getting designs that blurred into a smudge after a few months. I learned the hard way that size, line weight, and the artist's needle choice matter more than the word itself. After trying five shops and a bad touch-up, I landed on a set of small, readable pieces that age well and hide under hair when I need them to.
If you want subtle, coverable ink that still reads as Japanese style, these are for you. Most of these ideas are beginner-friendly in cost and take 20 to 60 minutes. Expect basic aftercare and short touch-ups over the first year. I wrote these after visits to five shops, so you get ideas that work across artists, hair lengths, and budget levels.
1. Single-Stem Bamboo Sprout
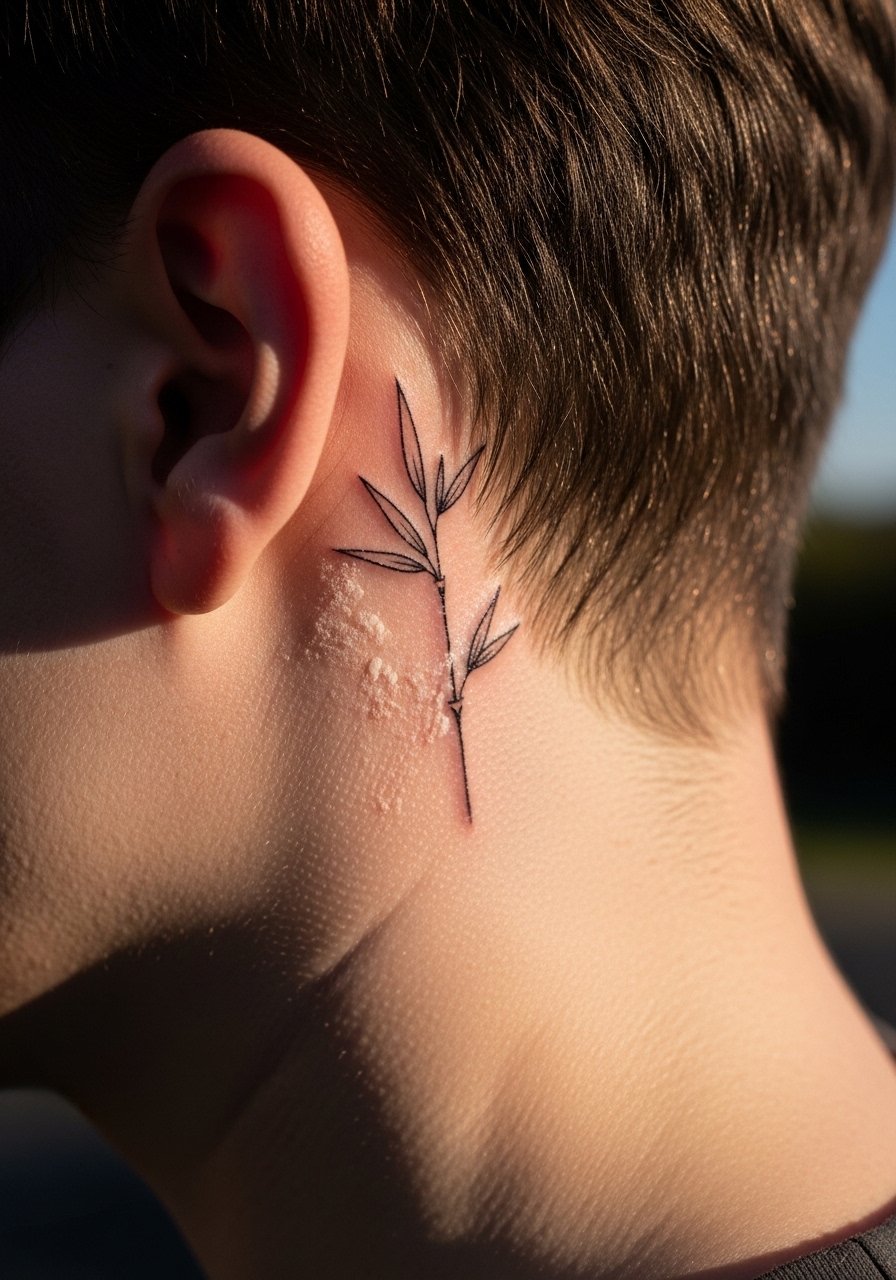
A vertical bamboo sprout reads clean behind the ear because it follows the curve of the skull. Keep the piece around 5mm to 12mm tall and ask for a 3RL needle grouping for fine stems so the lines do not bleed over time. It gives a calm, organic vibe and suits anyone who wants a coverable symbol that peeks through short hair. Bring a photo of a live bamboo stem so the artist nails the proportion and avoid kanji confusion by not forcing characters into this shape. For healing, I smear a thin layer of fragrance-free healing balm for nights one through five.
Mistake to Avoid: Asking for the design "as tiny as possible" without specifying millimeter height, which makes the lines illegible later.
Style/Technique: Minimal Fine Line
Pain Level: 3/10
Session Time: 20 to 40 minutes
Best For: Coverable aesthetic, short or tucked hair
2. Tiny Wave Crest Line
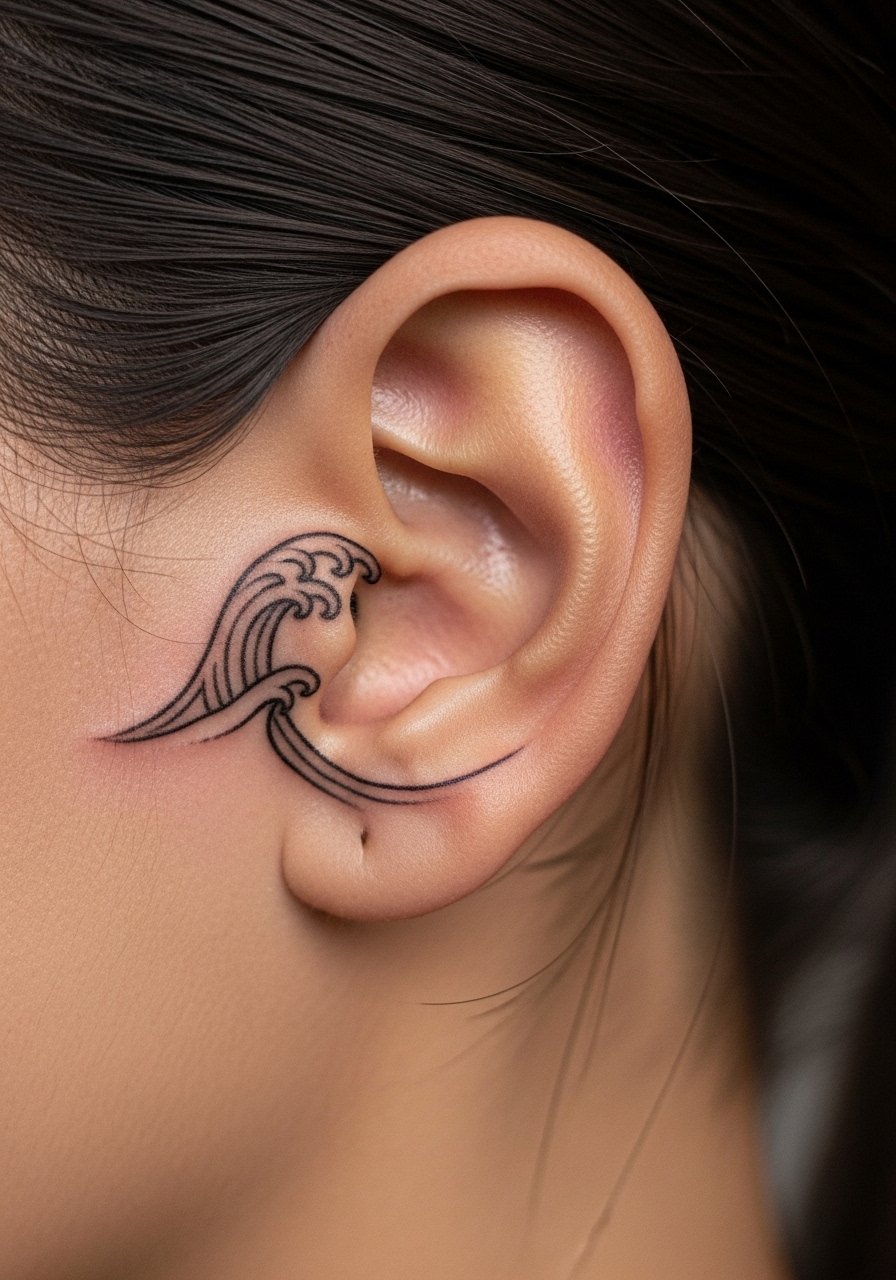
A single undulating line that mimics a wave works because it moves with the ear contour, so it reads from different angles. Ask your artist to space peaks by about 3 to 4mm so the shape keeps definition when the skin settles. It feels modern and a little playful, and it is great for people who like subtle movement rather than characters. Pair with a clear aftercare spray like a saline wound wash until the outer scab lifts. I used a gentle tattoo cleanser that foamed lightly without stripping the ink.
Mistake to Avoid: Letting a heavy hand make the line too thick, which looks bold rather than delicate.
Style/Technique: Single-Line Minimal
Pain Level: 2/10
Session Time: 15 to 30 minutes
Best For: Work-coverable, active lifestyles
3. Small Sakura Petal Cluster
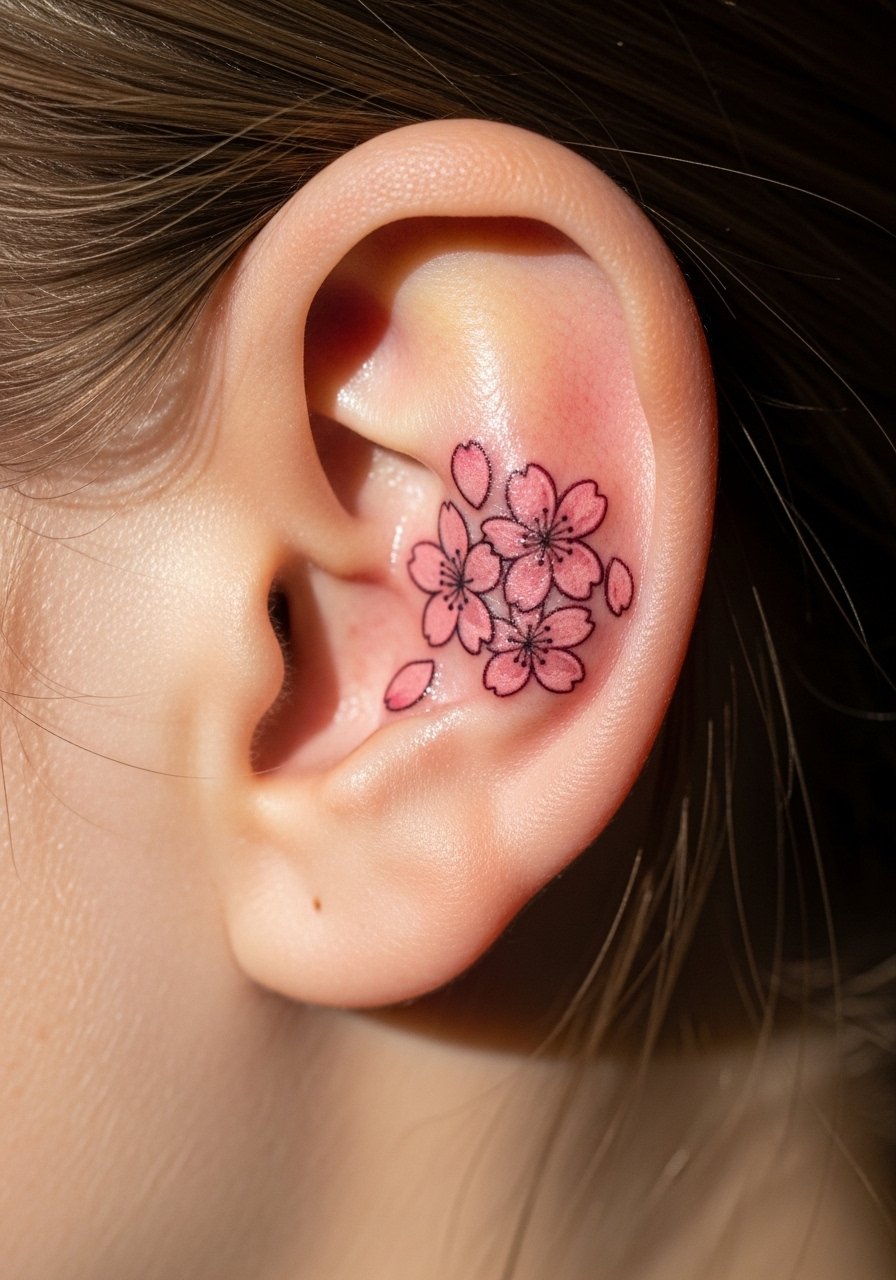
A trio of tiny sakura petals gives a Japanese reference without full floral complexity. Keep each petal under 6mm and ask for subtle dot shading rather than filled blocks to avoid early blowout. It creates a soft, fleeting look that suits casual and refined wardrobes. Culturally, use petal motifs rather than stylized imperial symbols to avoid appropriation concerns. During the flaky stage, I dabbed a silicone healing sheet over the piece for short stretches to reduce scabbing thickness.
Mistake to Avoid: Requesting heavy fill or color for such a small petal, which scars more and loses detail.
Style/Technique: Micro Dot Shading
Pain Level: 3/10
Session Time: 20 to 40 minutes
Best For: Feminine or soft aesthetics, small-scale placements
4. Mini Tsuru Outline (Crane)
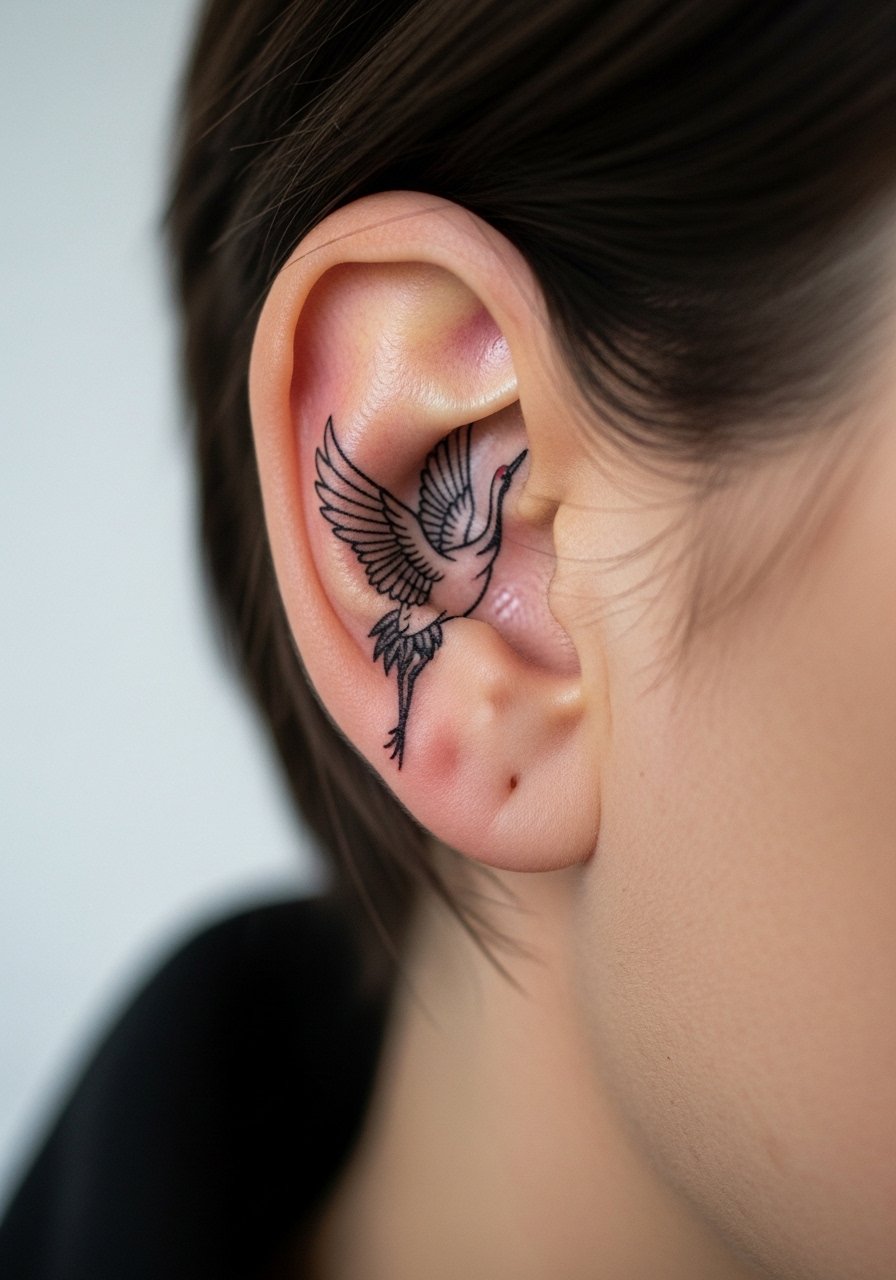
A tiny crane silhouette reads as Japanese iconography without becoming a full sleeve. Keep the wingspan narrow, around 12 to 15mm, and ask for open-line work so it breathes on the skin. It looks poised when your hair is up and discreet when down. Because cranes carry cultural meaning, confirm the style with the artist and avoid stylized versions that mix unrelated symbols. I tucked this under short layers and used a broad-spectrum mineral sunscreen stick once it fully healed to slow fading.
Mistake to Avoid: Combining the crane with unrelated script in the same tiny space, which muddles meaning and detail.
Style/Technique: Minimal Silhouette
Pain Level: 4/10
Session Time: 30 to 45 minutes
Best For: Visible-but-coverable art, classic taste
5. Single Kana Character
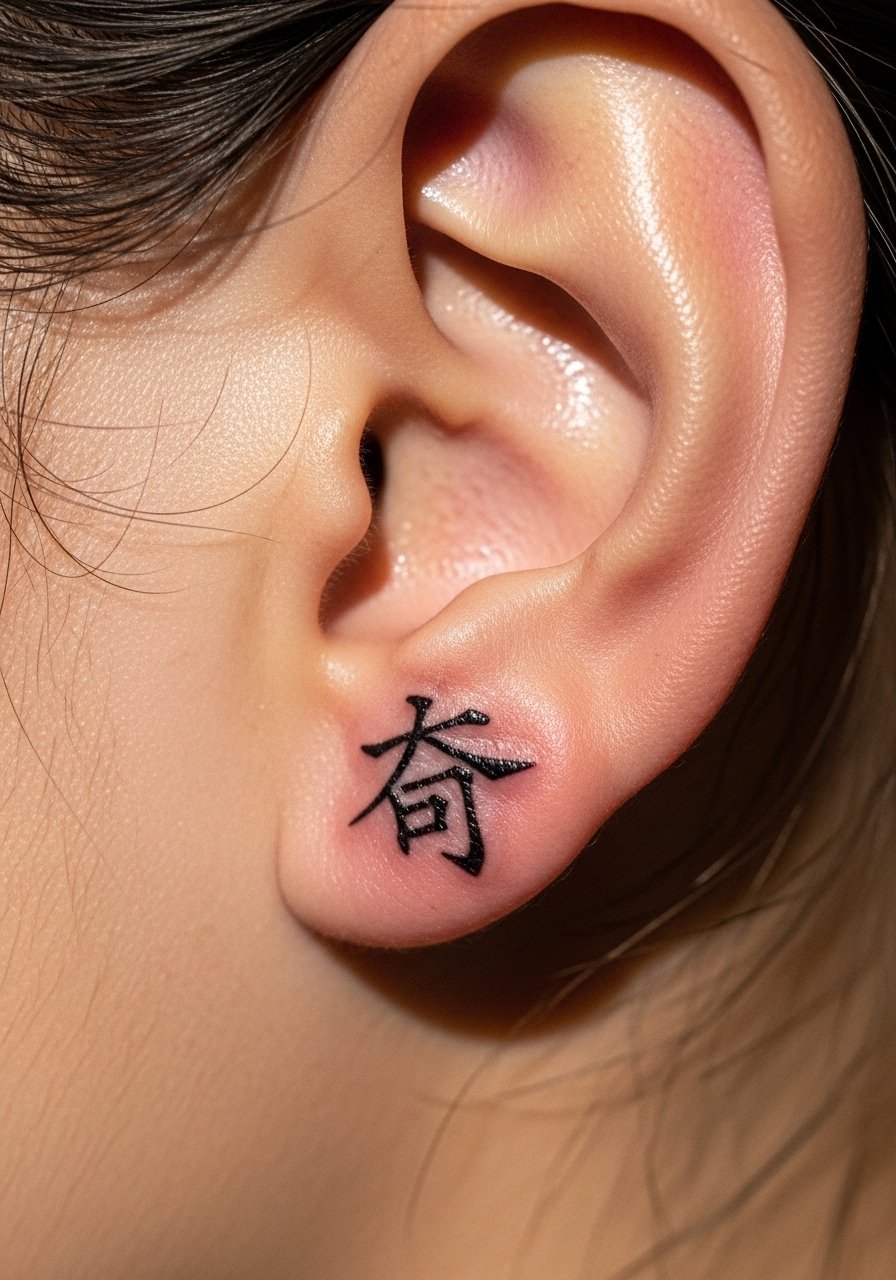
Choosing a single kana instead of kanji often prevents meaning errors because kana are phonetic and simpler to render tiny. Keep the character around 6 to 8mm tall and ask the artist to stencil and then verify with you before inking. The result feels intimate and personal, oriented toward people who like text but not full sentences. For accuracy, have a native speaker or a vetted source confirm the kana. After the first week, I switched to a lightweight, unscented moisturizing lotion to keep the scab supple.
Mistake to Avoid: Trusting a poor-quality reference image, which can flip strokes or change meaning at tiny sizes.
Style/Technique: Micro Script
Pain Level: 3/10
Session Time: 15 to 30 minutes
Best For: Discreet text tattoos, travel-friendly placements
6. Crescent Moon With Tiny Star
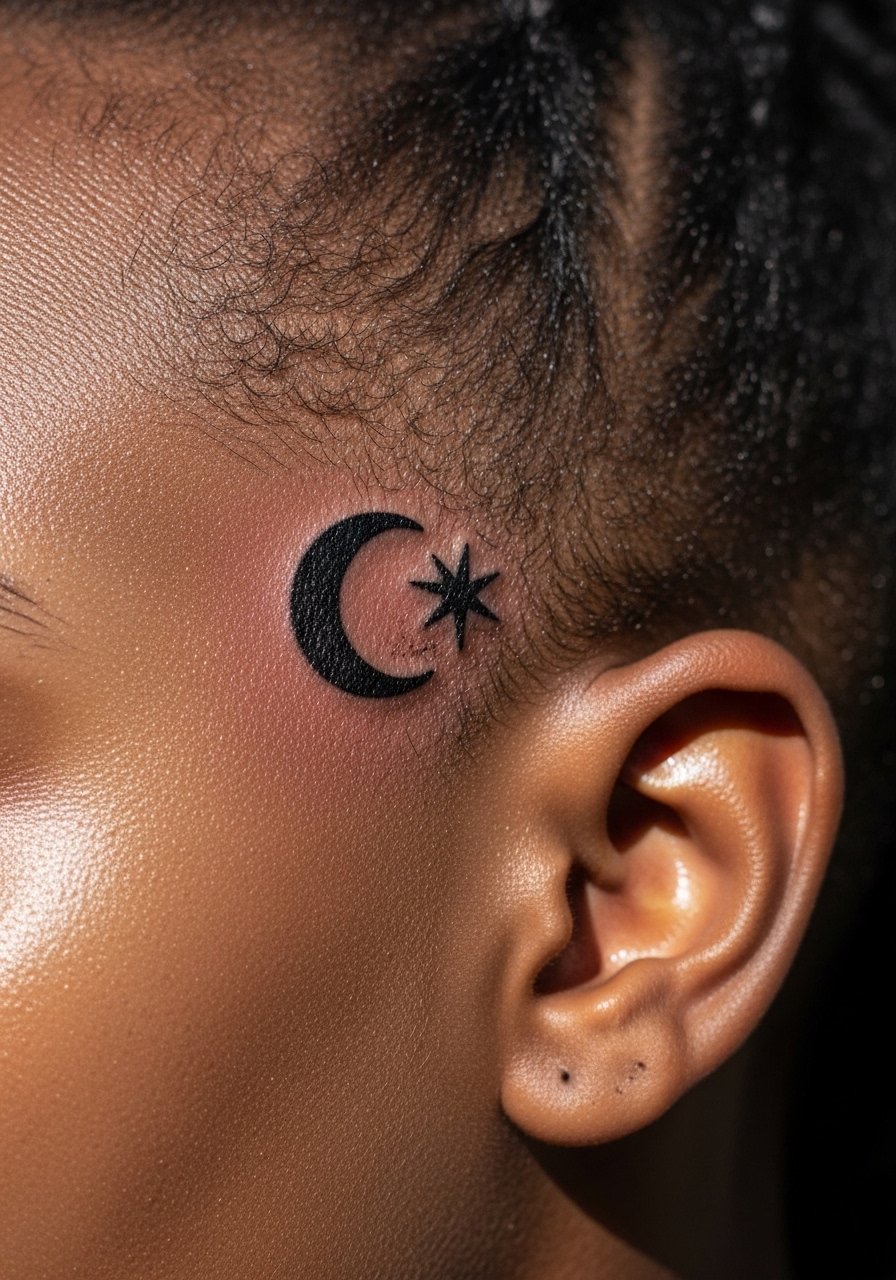
A small crescent with a single star is a universal symbol that pairs well with Japanese minimalism. Keep the moon arc thin and the star a single dot, about 2 to 3mm, which preserves shape as the skin ages. It creates a quiet, intentional accent and fits anyone who wants a celestial hint without color. This design requires little touch-up normally, especially with line weight kept light. I used a breathable tattoo bandage for the first 24 hours to limit friction from collars.
Mistake to Avoid: Asking for a filled star at that size, which tends to blur into a blob.
Style/Technique: Tiny Icon Outline
Pain Level: 2/10
Session Time: 15 to 25 minutes
Best For: Night-shift workers, people who tuck hair often
7. Little Koi Silhouette
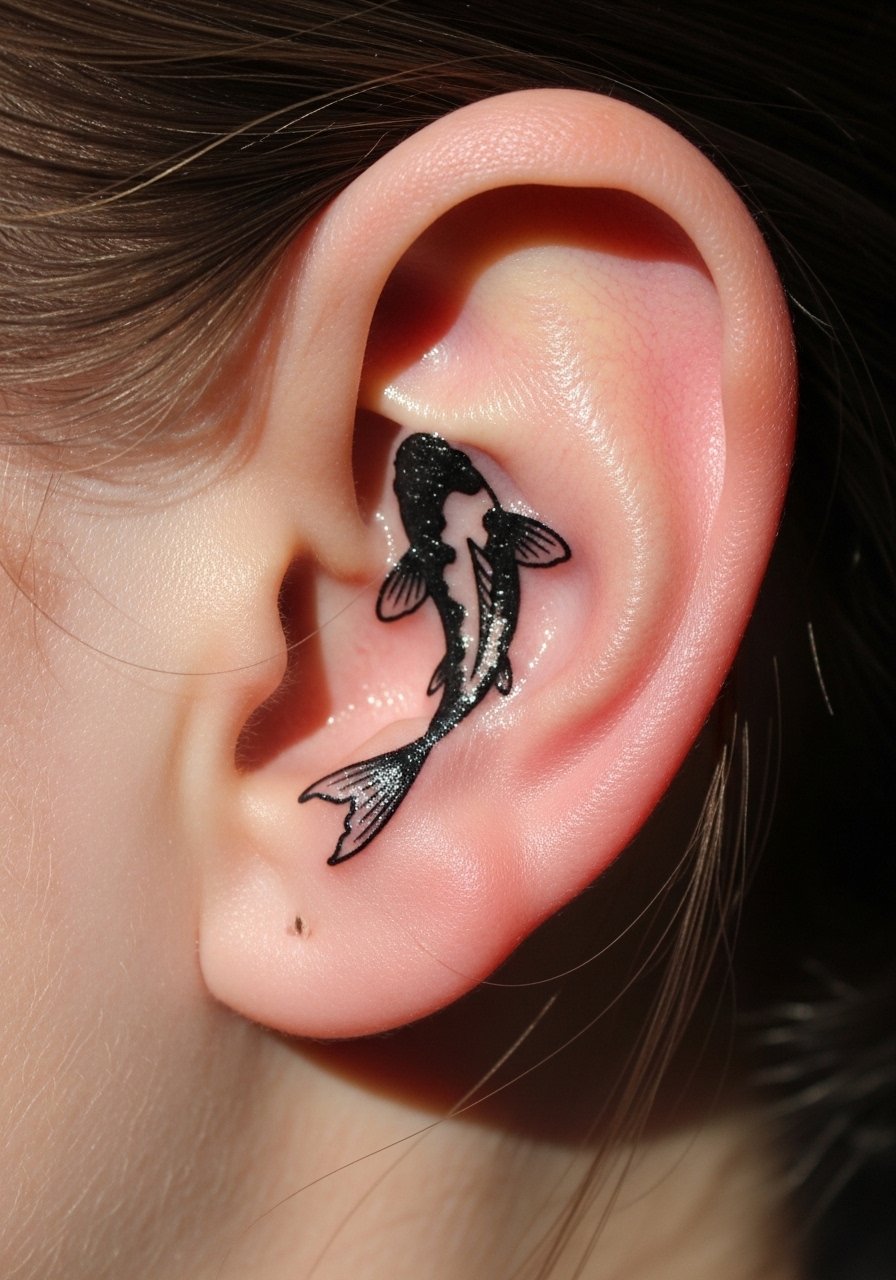
A tiny koi facing downward or upward fits the ear curve, and simple negative-space scales keep the fish readable even at 10mm. The motion of a koi suggests movement and resilience. Because koi are emblematic, pick a simplified silhouette rather than a detailed traditional piece when scaling this small. During healing, avoid sleeping on the tattoo and use a dab of tattoo aftercare ointment for the first four days.
Mistake to Avoid: Insisting on full color for a koi under 15mm, which will not hold.
Style/Technique: Micro Silhouette
Pain Level: 3/10
Session Time: 25 to 40 minutes
Best For: Symbolic small-scale pieces, aquatic motifs
If any of these small ideas have you ready to pick up something for healing and maintenance, here are the actual products I reach for.
Behind-Ear Aftercare Kit
Basic Aftercare:
- Fragrance-free healing balm (~$10-18). I used this at night for the first week, a pea-sized amount only.
- Gentle tattoo cleanser (~$8-15). Foam wash that does not strip oils.
- Breathable tattoo bandage (~$12-20). Small strips for the first day.
Sun Protection & Long-Term Care:
- Mineral sunscreen stick (~$9-16). Use once the piece is fully healed.
- Silicone healing sheet (~$10-25). Short sessions to help scab texture.
- Unscented moisturizing lotion (~$6-12). Daily after the initial healing window.
- Small transfer stencil paper (~$8-14). Handy if you bring a printed reference to the artist.
Behind-Ear Care Habits
Thin layers, short time. Apply a pea-sized amount of fragrance-free healing balm at night. Thick smears trap moisture and slow proper scab formation.
Grab breathable tattoo bandages for the first day. They stop shirts and hair from sticking while letting air reach the skin.
Most people sleep on their side. Try sleeping with your tattooed ear elevated on a clean pillowcase to reduce pressure. A silk pillowcase is gentle and easy to wash.
Check your stencil twice before the needle hits skin. Bring a printed reference and a native speaker if you are getting text. A small portable mirror helps you confirm placement in the chair.
If you wear hearing aids or behind-ear jewelry, test the fit over days before inking. Use a soft ear cushion when trying out placement so you do not discover irritation after healing.
