
I used to think gel nails last because the polish itself was stronger, not because I was skipping one small prep step and overloading the free edge. After two weekends of chipping I finally stopped slapping on thick coats and started filing the nail tips correctly, and the whole mani lasted the week without drama.
This list is for people who like a fresh mani that still works for weekdays and weekends. These are mostly at-home friendly, mid-budget looks and a few salon-level ideas you can ask a tech to adapt. Expect simple cures, tips for short and long nails, and realistic time notes so you do not overcommit on a weeknight.
1. Sheer Blush With Tiny Gold Foil
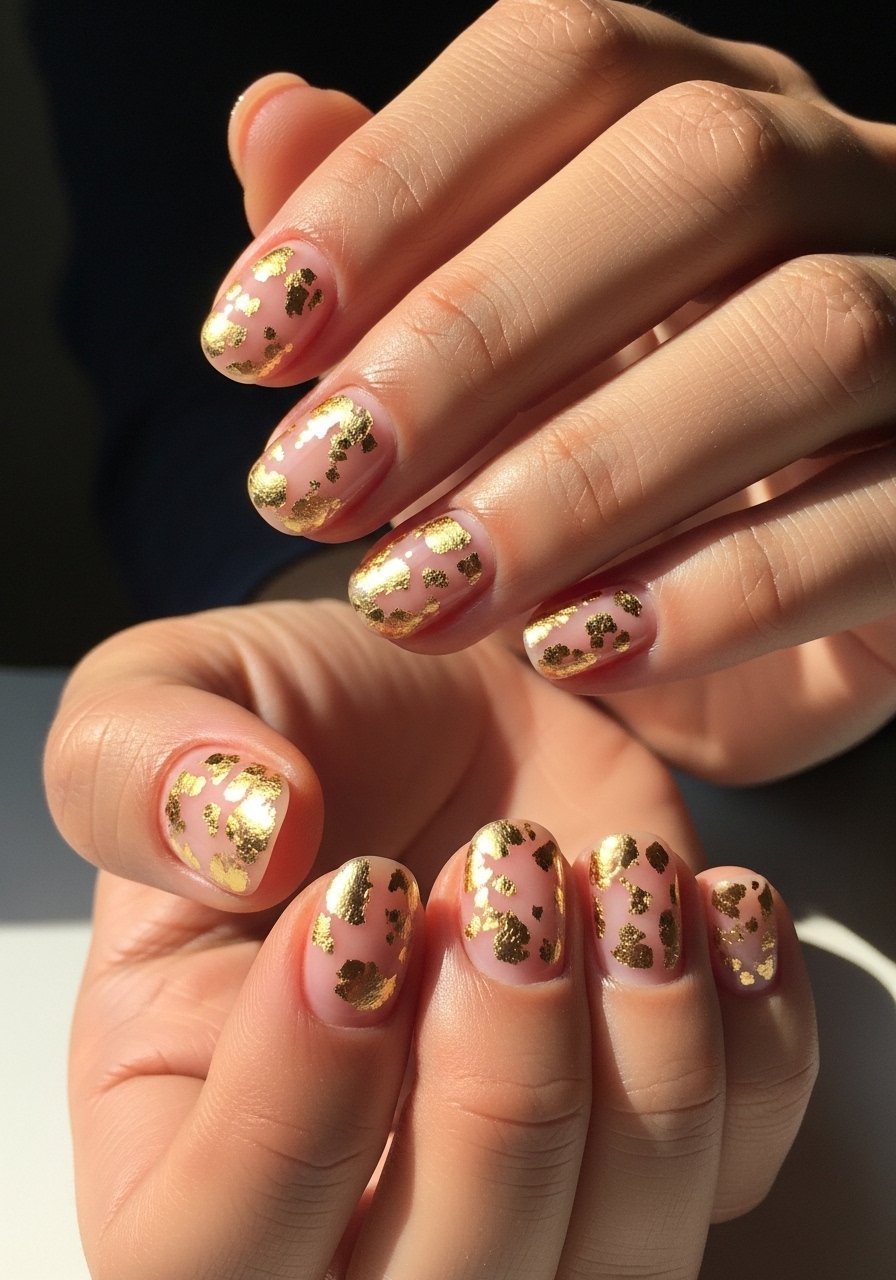
A barely-there pink keeps the mani clean while tiny foil bits catch the sun, so it reads special without being fussy. What makes it work is thin, even layers, two 30-second cures per coat under an LED lamp so the foil lays flat. It feels tidy and slightly luxe, good for office or brunch, and suits short to medium nails. Try a translucent base like pearl pink gel polish and press on small foil pieces with nail tack glue for placement.
Style/Vibe: Delicate modern
Best For: Short to medium nails / everyday wear
Skill: Beginner
Mistake to Avoid: Applying foil onto a wet layer so it wrinkles instead of lying flat.
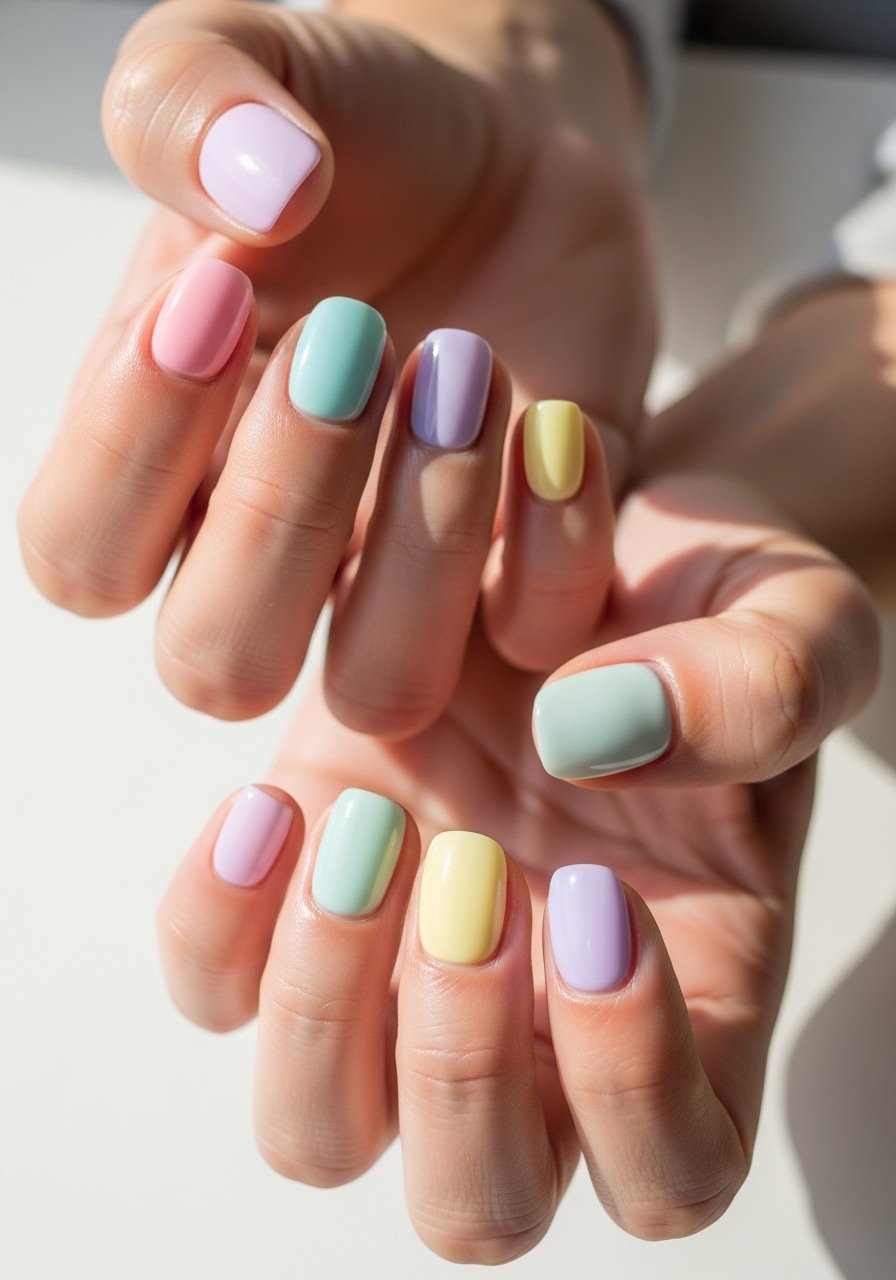
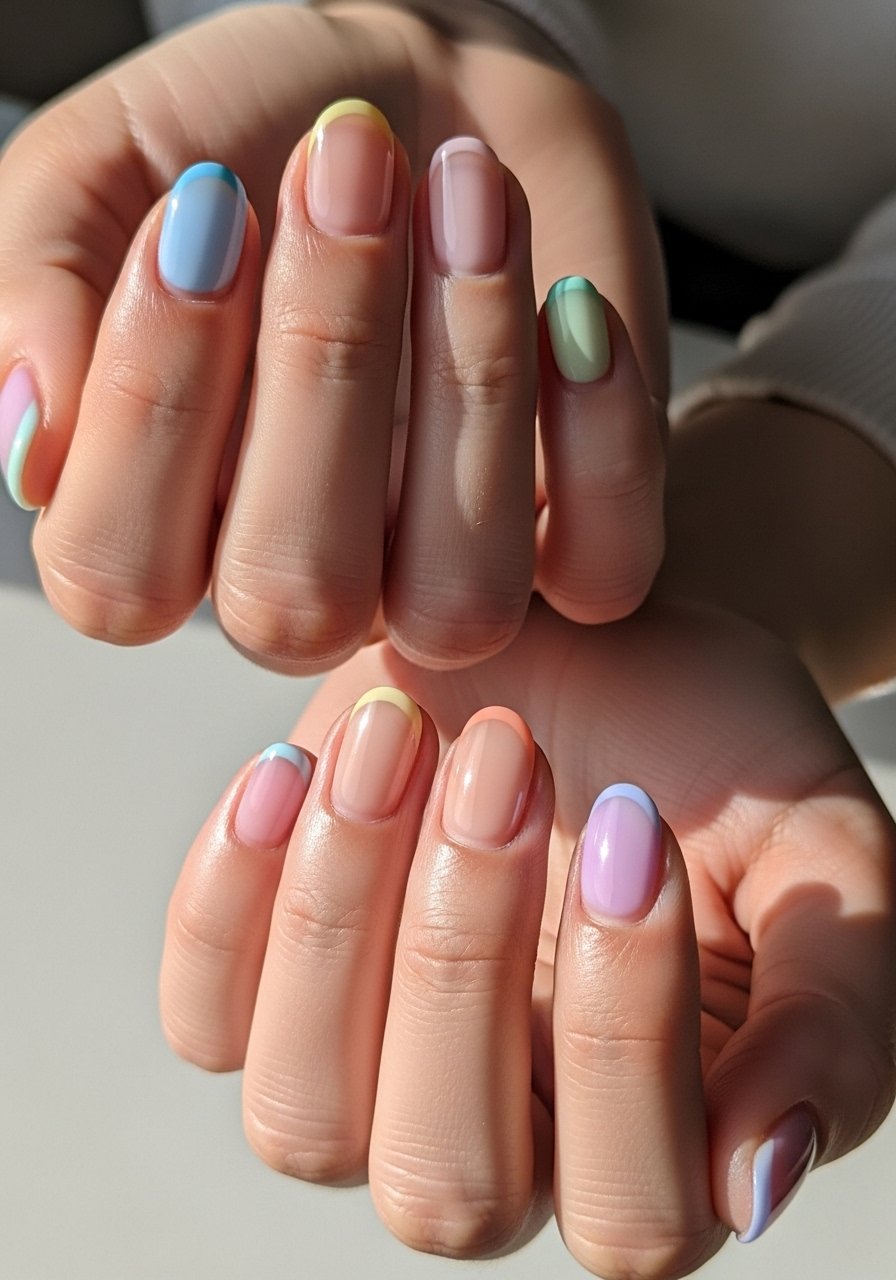
2. Pastel French With Rounded Smile Lines
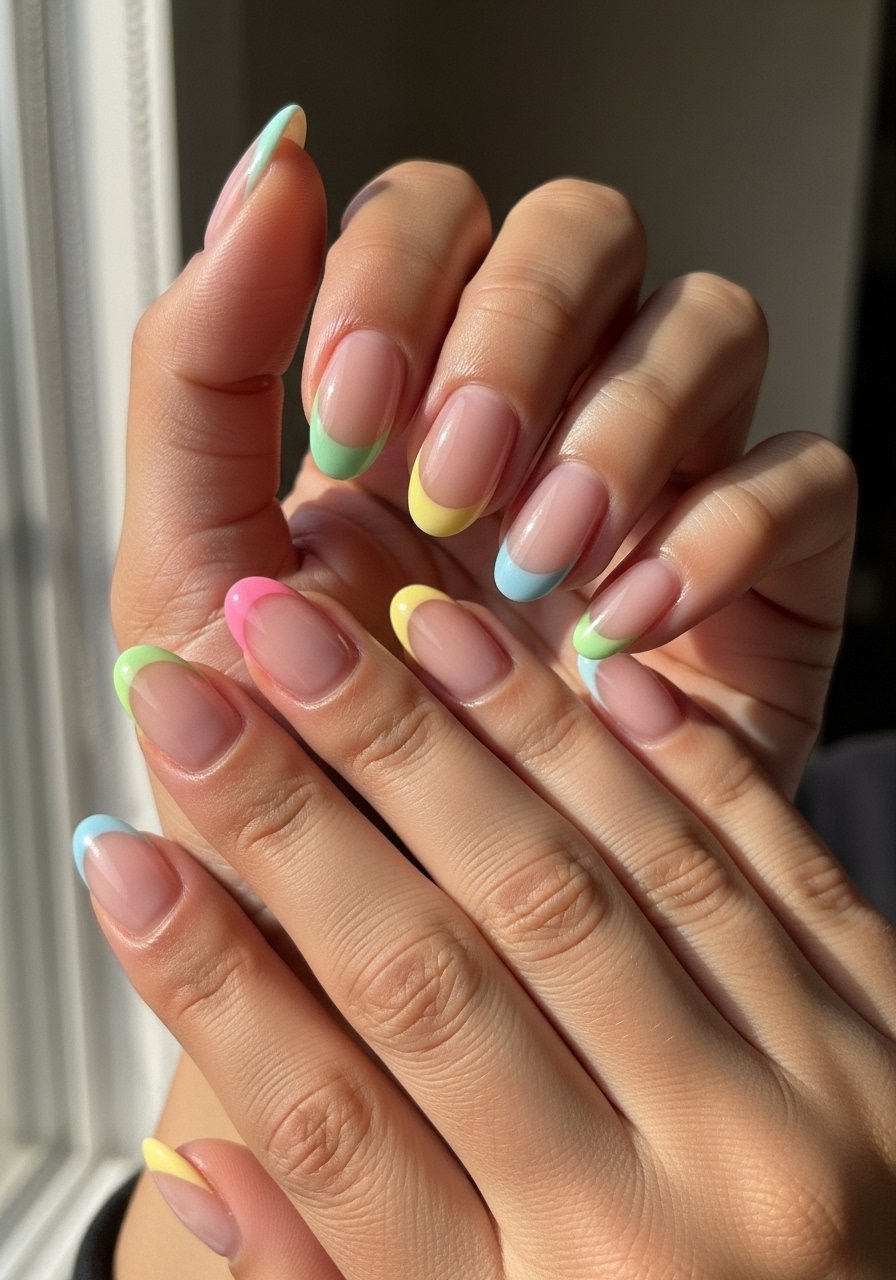
Swap stark white tips for soft pastels and paint the smile line with a rounded curve, it reads current without being theatrical. Use a thin brush and cure each tip for 15 to 20 seconds before finishing the whole nail to avoid smudging. This look feels playful while staying office friendly, and it works for medium to long lengths. For a steady hand, add a drop of brush cleaner beside you, and use a gel polish set like pastel gel polish kit.
Style/Vibe: Soft playful
Best For: Medium to long nails / casual events
Skill: Intermediate
Mistake to Avoid: Painting the tip in one thick stroke which bubbles and peels.
3. Micro-Floral Accent on One Nail
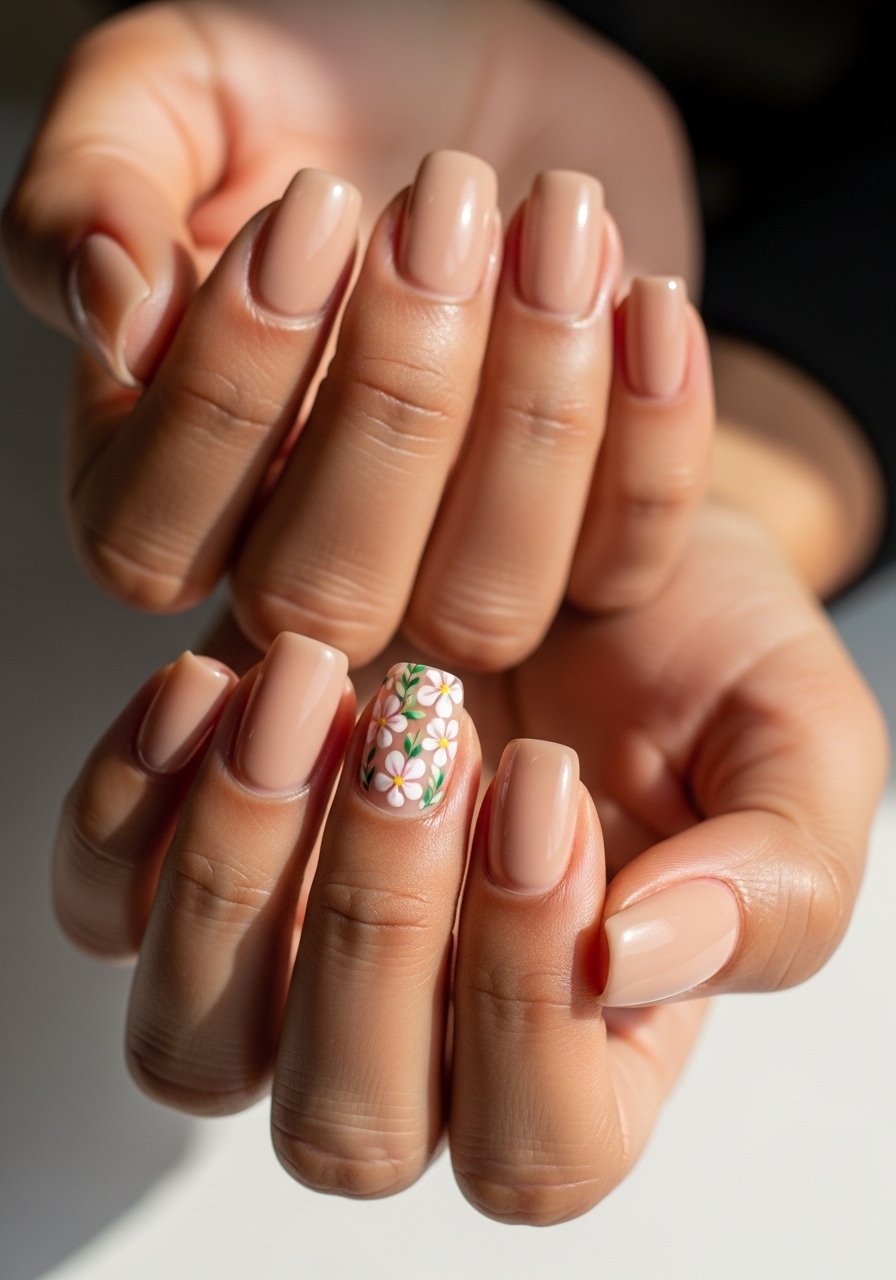
A single floral accent keeps the set wearable but interesting. Layer a sheer neutral base, then dot tiny petals with a 0.5 mm brush. The depth trick is layering five tiny dots per petal cured 10 seconds between layers so petals have dimension. It feels like a neat detail rather than a full art commitment, good for short nails and for people who want subtle personality. Use a fine liner brush and dotting tool set.
Style/Vibe: Minimal botanical
Best For: Short nails / low-key events
Skill: Beginner
Mistake to Avoid: Overloading the brush so petals merge into a blob.
4. Satin Finish Pastel Ombre
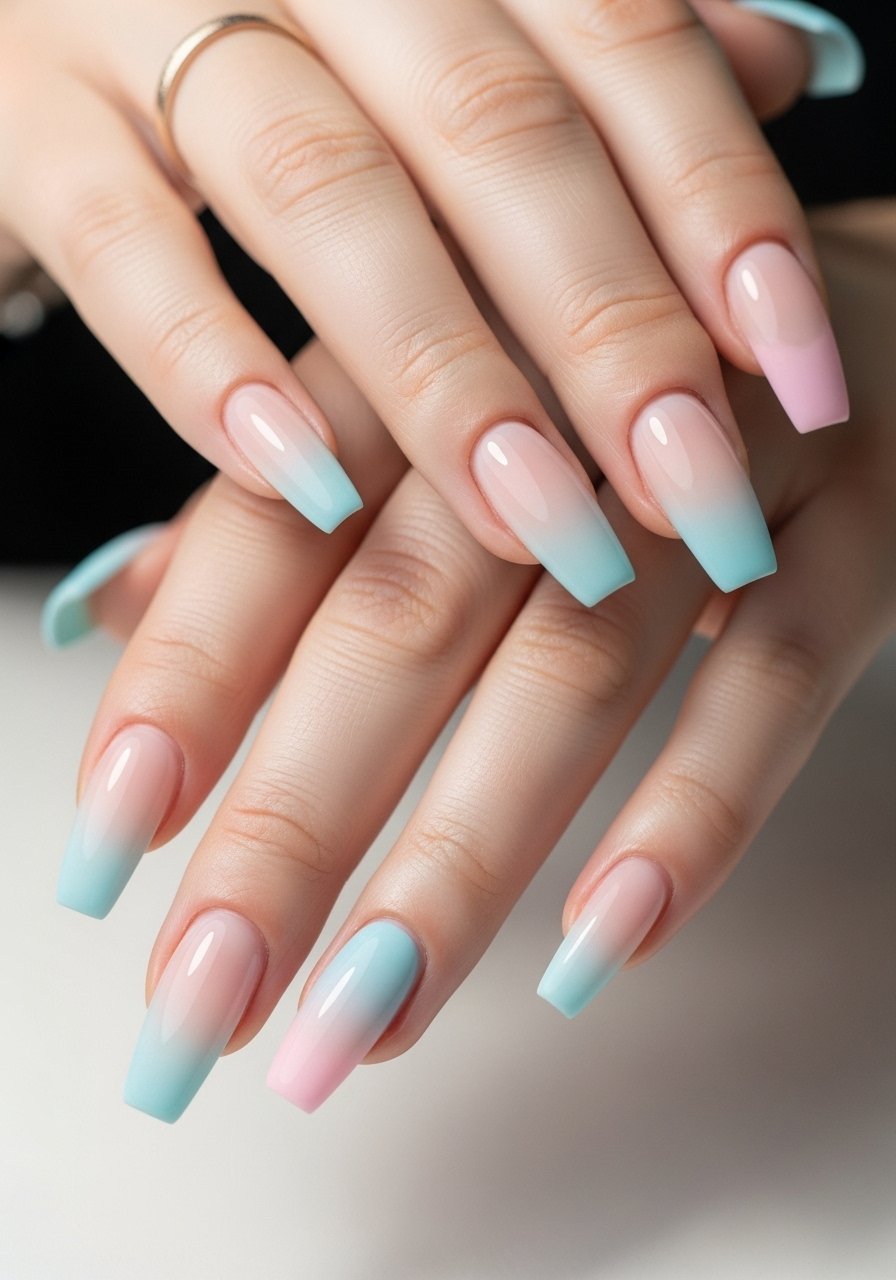
A satin finish mutes high-shine and makes pastel ombre look classy. Blend two thin gel colors on a sponge and cure each 20 seconds, then buff the top with a 180-grit buffer before the final satin top coat. It creates a gentle gradient that reads soft and intentional, perfect for spring weddings and suits long nails best. For at-home builds try ombre sponge set and finish with matte-but-satin top coat.
Style/Vibe: Soft gradient
Best For: Long nails / special occasions
Skill: Intermediate
Mistake to Avoid: Rubbing the sponge too hard so the color becomes patchy.
5. Tiny Gem Cluster at the Cuticle
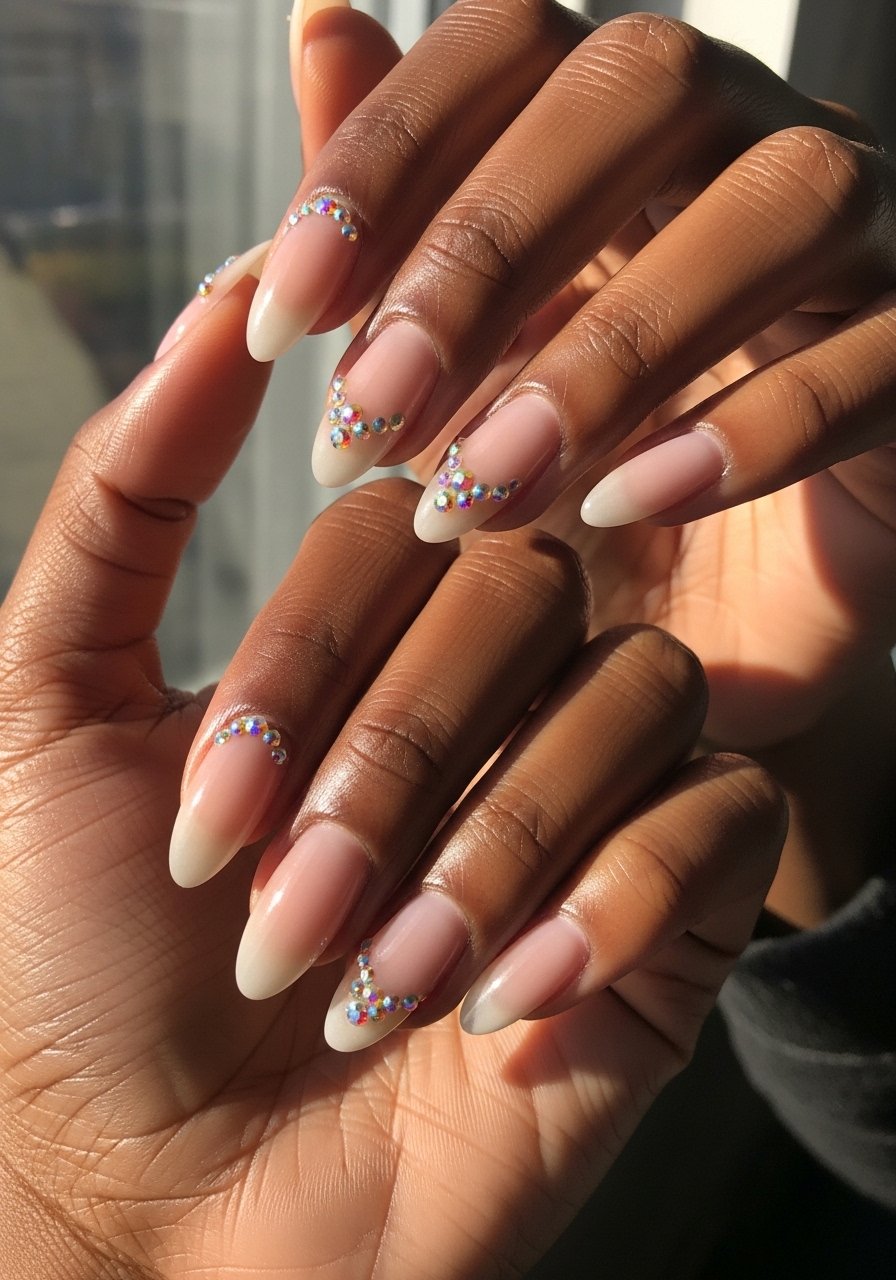
A small cluster of micro crystals near the cuticle adds polish without bulk. Place one tack drop of gel base, set the cluster, then cure 60 seconds under LED to secure. The visual is elevated but still minimalist, great for anyone who wants sparkle without rhinestone ridges. Use a precise wax picker pencil and a micro crystal set.
Style/Vibe: Tiny luxe
Best For: Medium nails / evening out
Skill: Beginner
Mistake to Avoid: Using too much adhesive so gems sit proud and catch on fabric.
6. Sheer Jelly Tints Over Short Nails
Jelly gels let natural nail show and do not overpower short nails. Multiple thin coats, each cured 30 seconds, build color without thickness. It feels fresh and wearable for casual weekends, and suits short nails because it adds color without bulk. Try a jelly gel set and a 48-watt LED lamp to speed curing.
Style/Vibe: Light and fresh
Best For: Short nails / everyday
Skill: Beginner
Mistake to Avoid: Putting down a thick coat that pools at the edges and lifts.
7. Tiny Negative Space Crescent

A little negative space at the base feels modern and keeps the mani light. Mask a crescent with a micro sticker, paint one thin coat of color, flash cure 10 seconds, remove sticker, then finish with a full top coat. The rule that helps is curing a short flash after painting to stop bleed. This is good for medium nails and busy people who want a neat look fast. Use nail masking stickers and a trusted gel color.
Style/Vibe: Modern minimal
Best For: Medium nails / quick mani
Skill: Beginner
Mistake to Avoid: Leaving the sticker on until fully cured so the paint lifts when removed.
If any of these picks have you ready to try something yourself, below are the actual products I reach for most of the time.
Spring Gel Mani Essentials To Own
Base & Top:
- pearl pink gel polish (~$10-18). A translucent base that layers nicely.
- satin top coat gel (~$12-20). Low-gloss finish that still seals well.
Tools:
- 48w led nail lamp (~$25-45). Fast cures for thin layers.
- dotting tool set (~$8-15). Tiny florals and accents.
- nail masking stickers (~$6-10). Clean negative space shapes.
Finishing:
- nail tack glue (~$6-12). For foil and micro gems.
- micro crystal nail set (~$5-12). Small accents that do not bulk.
- wax picker pencil (~$4-8). Puts tiny pieces exactly where you want them.
8. Confetti Gel Over Neutral Base
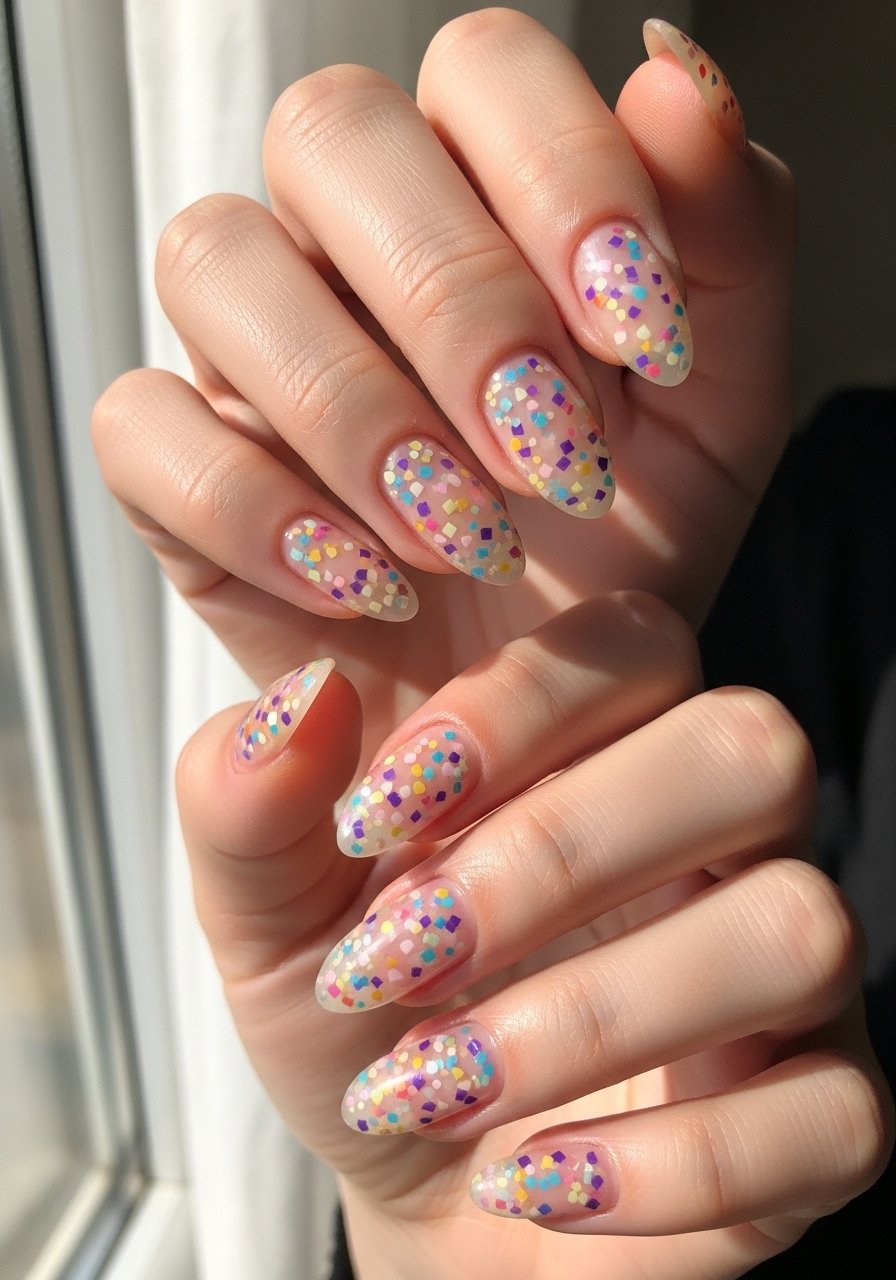
Confetti gels give a fun energy without being over the top. Mix a few micro confetti particles into a clear builder gel and thinly spread across the nail, curing 30 seconds per thin layer. It feels celebratory and low-commitment, ideal for weekends or festivals. Works on short to medium lengths. Use micro confetti mix and a clear builder gel.
Style/Vibe: Playful casual
Best For: Short to medium nails / party
Skill: Beginner
Mistake to Avoid: Piling confetti on wet gel so pieces float unevenly and catch on fabric.
9. Two-Tone Diagonal Color Block
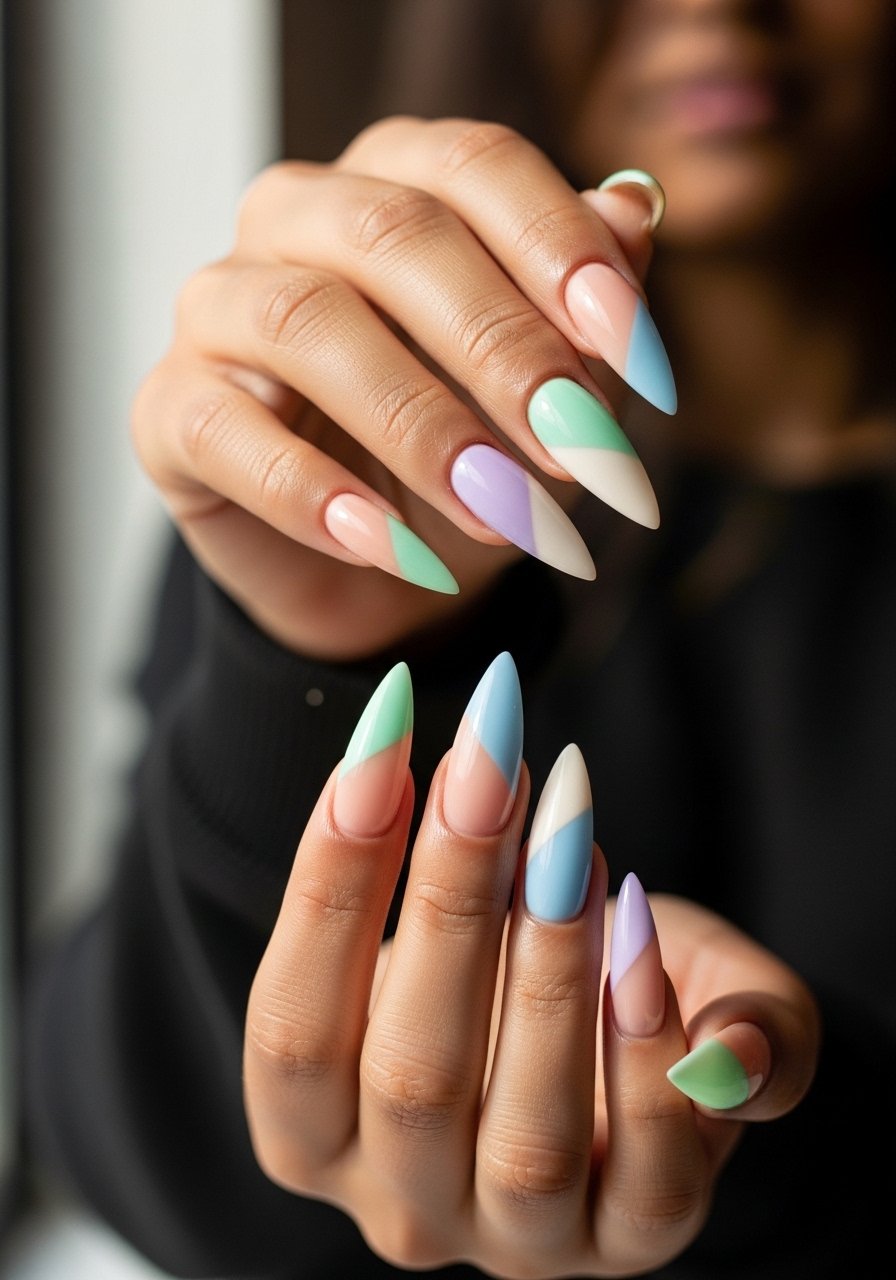
Diagonal blocks read modern and make long shapes look intentional. Tape a straight line, paint one side, cure, then remove tape and paint the other. The pro tip is to cure the first side to avoid color bleed. This feels graphic and suits long nails and people who like bold but tidy mani. Use thin painter's tape and cream gel polish.
Style/Vibe: Graphic spring
Best For: Long nails / statement
Skill: Intermediate
Mistake to Avoid: Pressing tape too hard and lifting previously cured gel.
10. Cloud Tips With Sheer Base
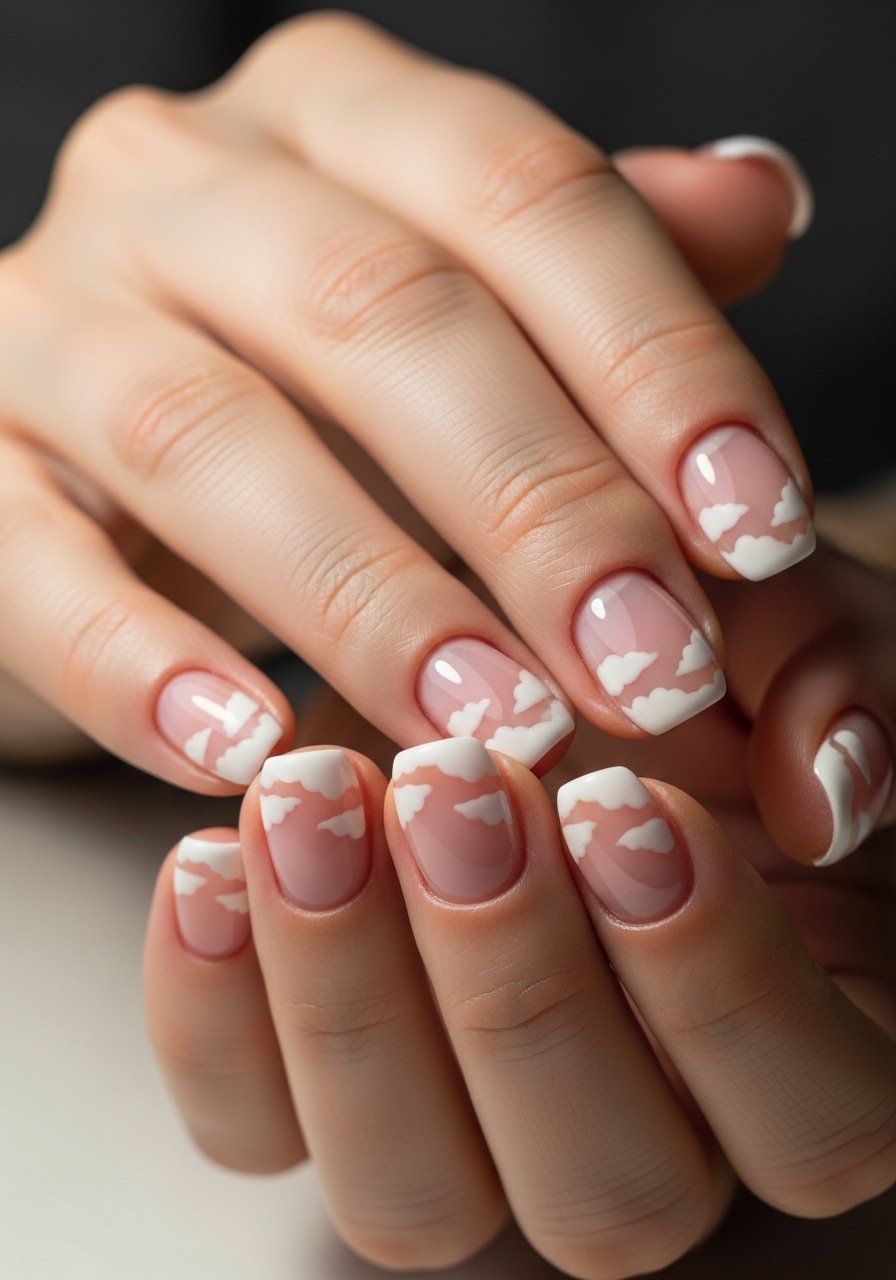
Tiny clouds at the tip feel whimsical without shouting, and keeping the base sheer avoids heaviness. Paint small curved shapes with a two-dot petal technique, flash cure 10 to 15 seconds between strokes, then seal with top coat. It reads cozy and works well for medium nails. Try a fine brush and opaque white gel.
Style/Vibe: Soft playful
Best For: Medium nails / weekend
Skill: Beginner
Mistake to Avoid: Making cloud edges too thick so they look clumsy.
11. Micro-Gradient Dots

Tiny dot gradients give texture without heavy layering, and they are forgiving on short nails. Use a 1 mm dotting tool and place dots closer at the cuticle, spreading them out toward the tip. Cure each small cluster 10 seconds so dots do not drag. The result is subtle motion across the nail, suited to short nails and those who like detail. Pair with a slow-cure builder like flexible top gel.
Style/Vibe: Textured subtle
Best For: Short nails / detail lovers
Skill: Beginner
Mistake to Avoid: Making all dots the same size which flattens the gradient effect.
12. Sheer Pearl With Tiny Matte Tips
Pearl sheens soften a spring palette and matte tips add contrast. Keep the pearl sheer, then apply a 1 to 2 mm strip of matte color to the tip and cure separately for 20 seconds. The mix feels balanced and less fussy than a full matte mani. It fits medium nails and people who want texture contrast. Use pearl top gel and matte color gel.
Style/Vibe: Mixed texture
Best For: Medium nails / weekend to work
Skill: Intermediate
Mistake to Avoid: Painting matte top coat over pearl without sealing, causing patchy shine.
13. Soft Marble Accent Nail
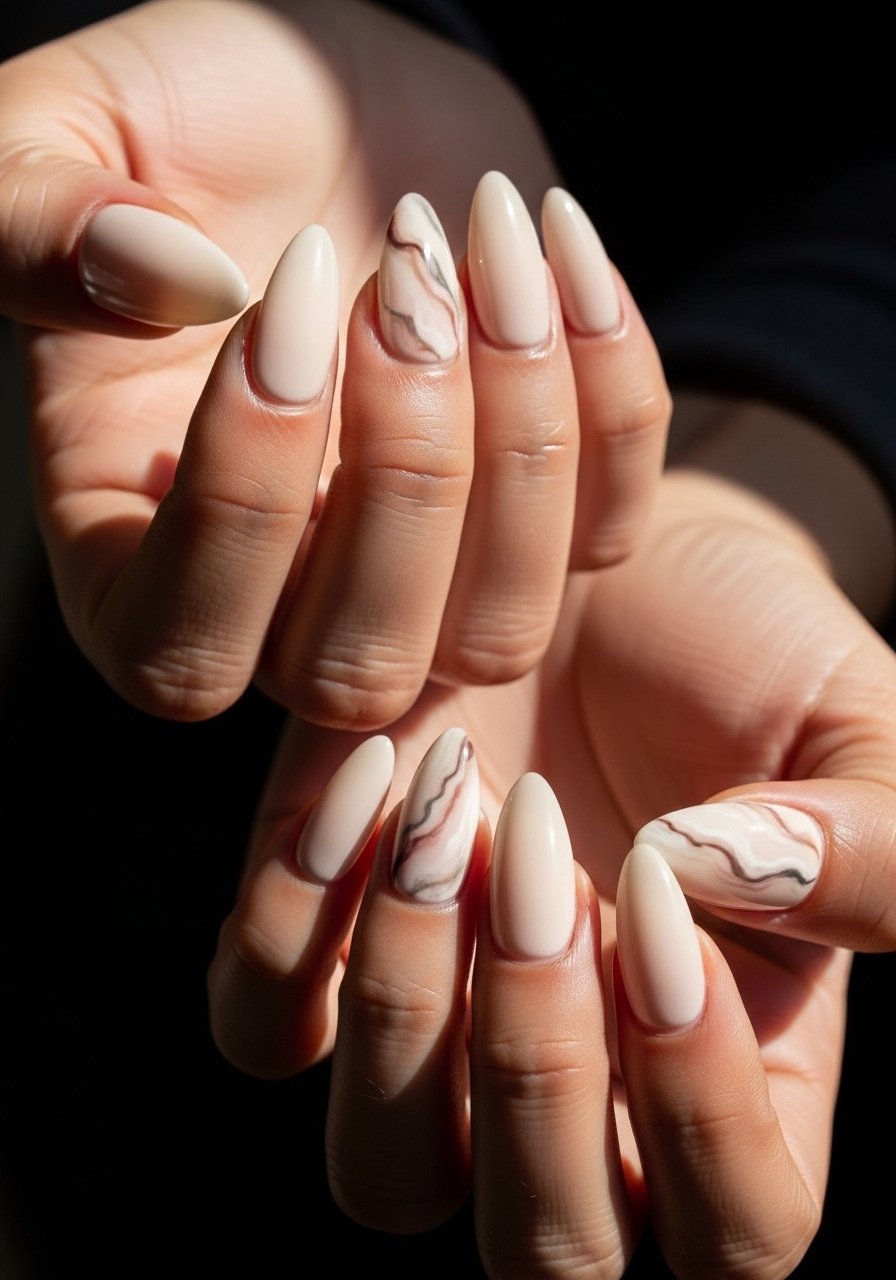
A single marble nail reads artisanal while the rest stay clean. Drag two contrasting sheer gels together with a fine brush and lift for soft veins, cure 20 seconds between lifts to build depth. It feels custom and not overdesigned, perfect for long nails or salon requests. Use neutral gel polish and a fine art brush.
Style/Vibe: Crafted elegance
Best For: Long nails / special events
Skill: Intermediate
Mistake to Avoid: Overworking the marble so colors muddy instead of veining.
14. Micro-Tip Color Swap
Instead of a full French, paint a 1 mm colored line along the free edge for a tiny pop. This uses almost no product and dries fast, which is great for short nails or quick changes. Cure each tiny edge 15 seconds and finish with a thin top coat. It feels modern and low-effort, fitting people who want color without length. Use neon micro gel set.
Style/Vibe: Minimal pop
Best For: Short nails / low-maintenance
Skill: Beginner
Mistake to Avoid: Trying to paint the line freehand without a steady rest and ending up crooked.
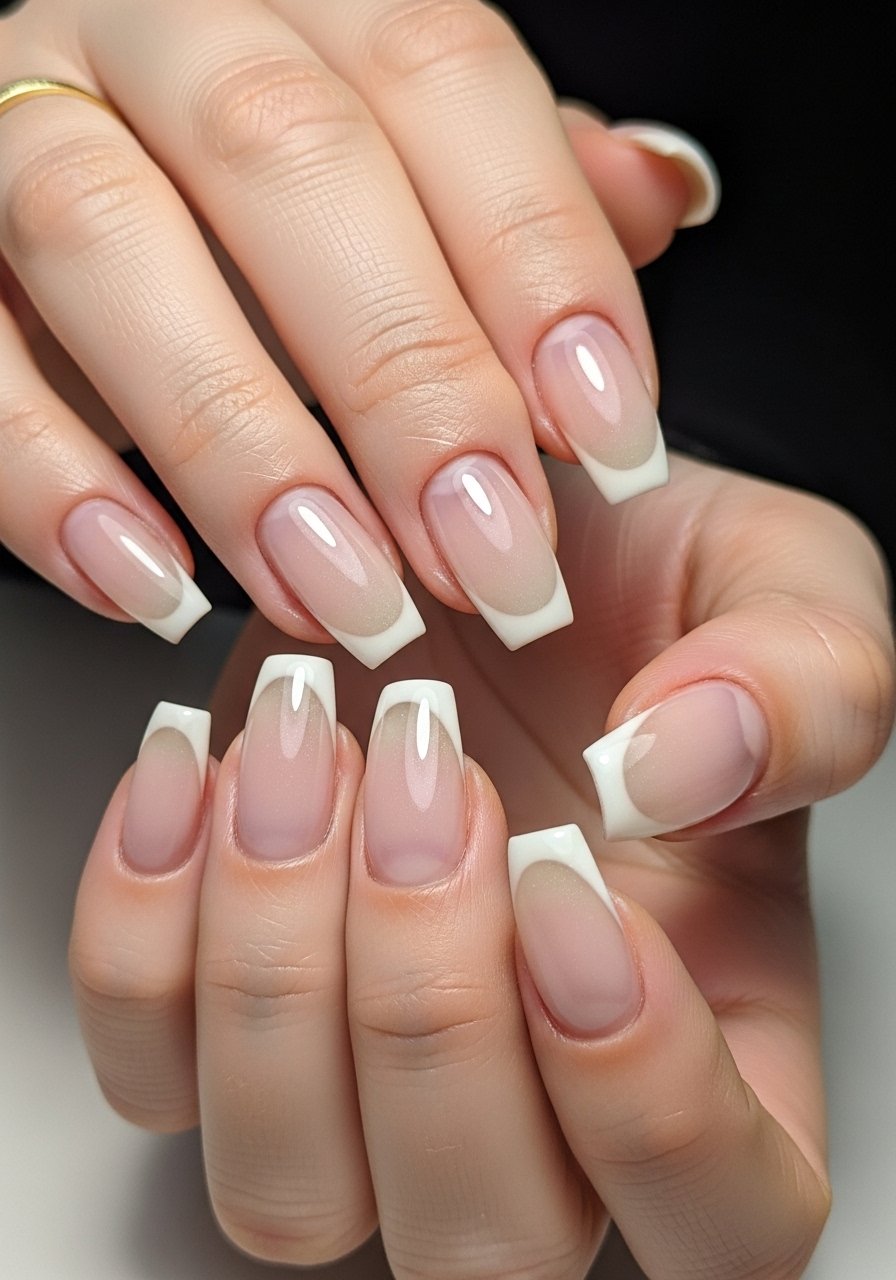
15. Milky White Builder With Soft Edge
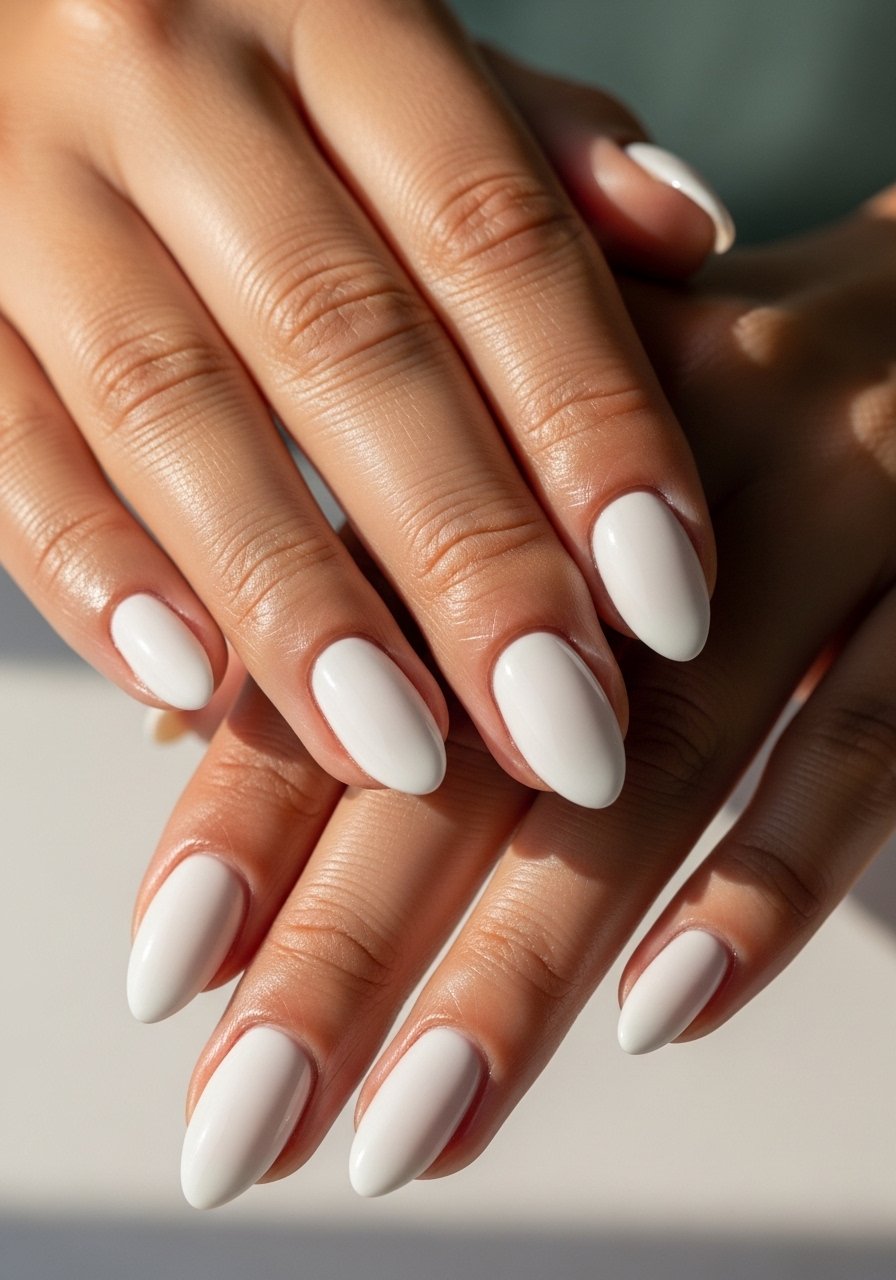
A milky builder creates a clean, uniform look that hides ridges and makes nails look slightly longer. Use two thin builder layers, curing 60 seconds each, and shape lightly with a 180 grit file between layers to keep thickness down. It feels polished and is good for natural nail reinforcement. This is salon-level but doable at home with practice. A tech who works at a salon downtown showed me to keep the bead small to avoid heavy tips. Try milky builder gel.
Style/Vibe: Clean natural
Best For: Medium nails / reinforcement
Skill: Advanced
Mistake to Avoid: Overbuilding the apex so the nail looks bulky and catches everywhere.
Spring Mani Shortcuts
Thin coats beat one thick coat every time. Three thin layers of a quick-dry top coat look smoother and last longer than one gloopy layer.
Grab nail masking stickers for about $6 to $10. Using masks saves time and keeps negative space shapes crisp, especially for diagonal and crescent looks.
Curing time matters. A 48-watt LED lamp like the 48w led nail lamp cuts total curing by almost half compared with weaker lamps, so thin layers stay thin but set solid.
Everyone files the same way when rushed. File the free edge first with a 180-grit, then shape the sidewalls gently. A nail file buffer block prevents over-filing and helps polish sit flat.
If you are unsure about gems, try micro crystal nail set instead of large stones. Smaller pieces settle better and do not catch on sleeves, which keeps the mani intact longer.
