
I kept reshaping my short squares into sad rounded tips for months, thinking length was the problem. The moment I stopped over-filing the sidewalls and softened only the corners, my hands suddenly read neat instead of tiny. That one technique fixed more botched sets than any color or glitter I tried.
These ideas are for people with short nail beds who want strong gel that still looks current, not bulky. Expect salon-level results on a weekday budget, most looks are beginner friendly and take 30 to 45 minutes in a chair. I tested several techniques on three friends with short nails and a tech who works at a salon downtown showed me the correct filing angle.
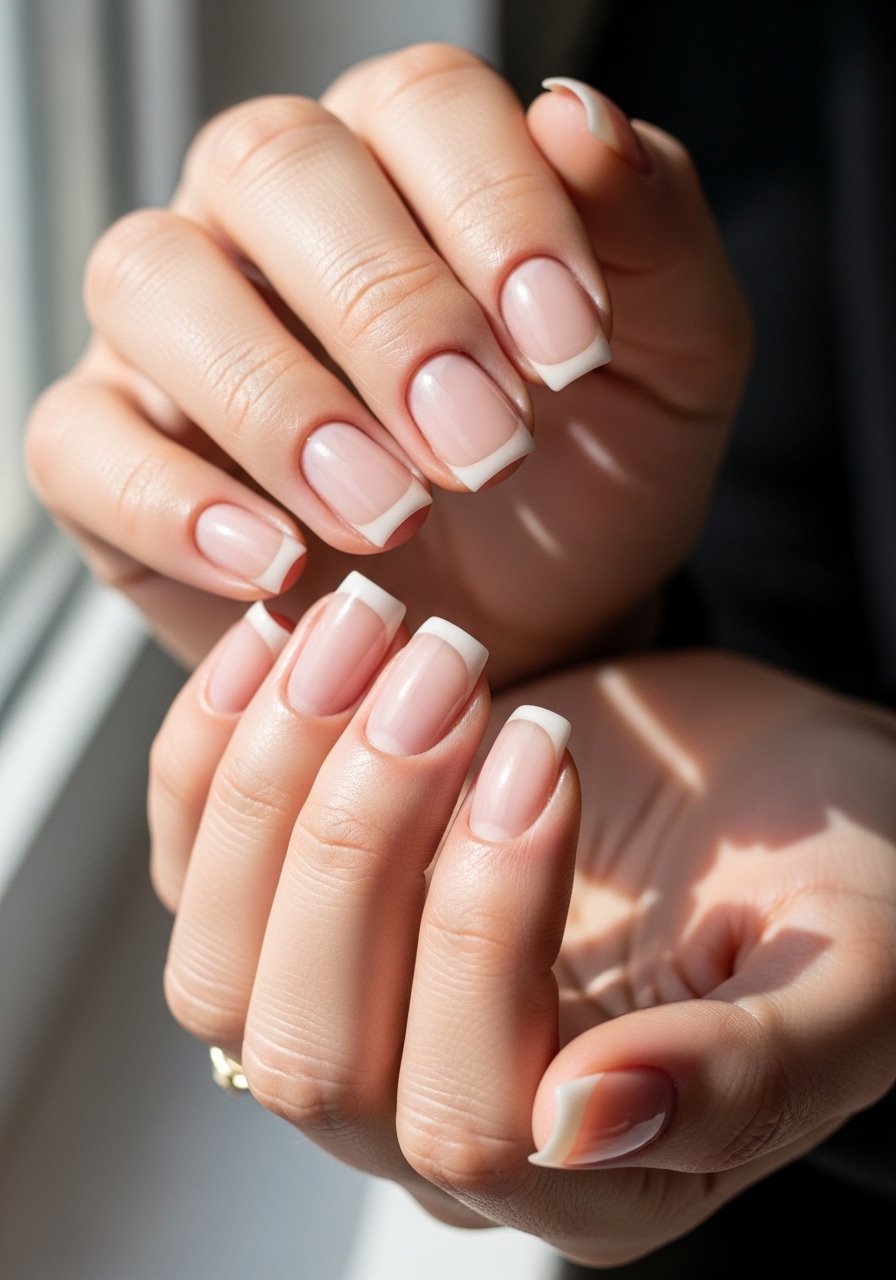
1. Soft White Micro French

Style/Vibe: Micro French, Minimal
Best For: Short nails / work-friendly
Skill: Beginner
A super-thin smile line creates the illusion of length without adding extension. File the free edge straight, then buff the top lightly so the gel adheres. Paint a sheer base, cure 30 seconds under a 48W LED lamp, then freehand a 1.5 mm white arc and cure again. One coat of a thin builder-gel seals without bulk. For steady work try a fine-detail nail brush. The narrow arc keeps the look modern and readable on short squares.
Mistake to Avoid: Drawing a thick white line, which eats up visible nail and makes tips look shorter.
2. Nude Ombre That Lengthens

Style/Vibe: Ombre, Elongating
Best For: Short nails / everyday wear
Skill: Intermediate
A soft gradient from sheer pink at the cuticle to a warmer nude at the tip fools the eye into seeing more length. Use two thin coats of color, about 0.4 to 0.6 mm per coat, curing each layer for 30 seconds. Sponge blending works but a tiny brush lets you control the fade on short beds. I like pairing this with a thin clear builder like a light builder gel to add strength without thickness. This read feels clean and wearable.
Mistake to Avoid: Overloading product at the tip, which adds visible bulk instead of length.
3. Negative Space Diagonal

Style/Vibe: Graphic, Minimal
Best For: Short nails / casual or night out
Skill: Intermediate
Diagonal negative space tricks the eye into elongating the nail. Map the diagonal with striping tape, paint one side with a single thin gel color and cure, remove tape, then finish with a 30-second cure and glossy top. Keep the painted area at roughly a 40/60 split so the naked portion reads like extension. Try striping tape for nail art for crisp edges. This look reads modern without relying on length.
Mistake to Avoid: Using tape on oily nails, which lifts the gel when removed.
4. Micro-Glitter Accent Tip
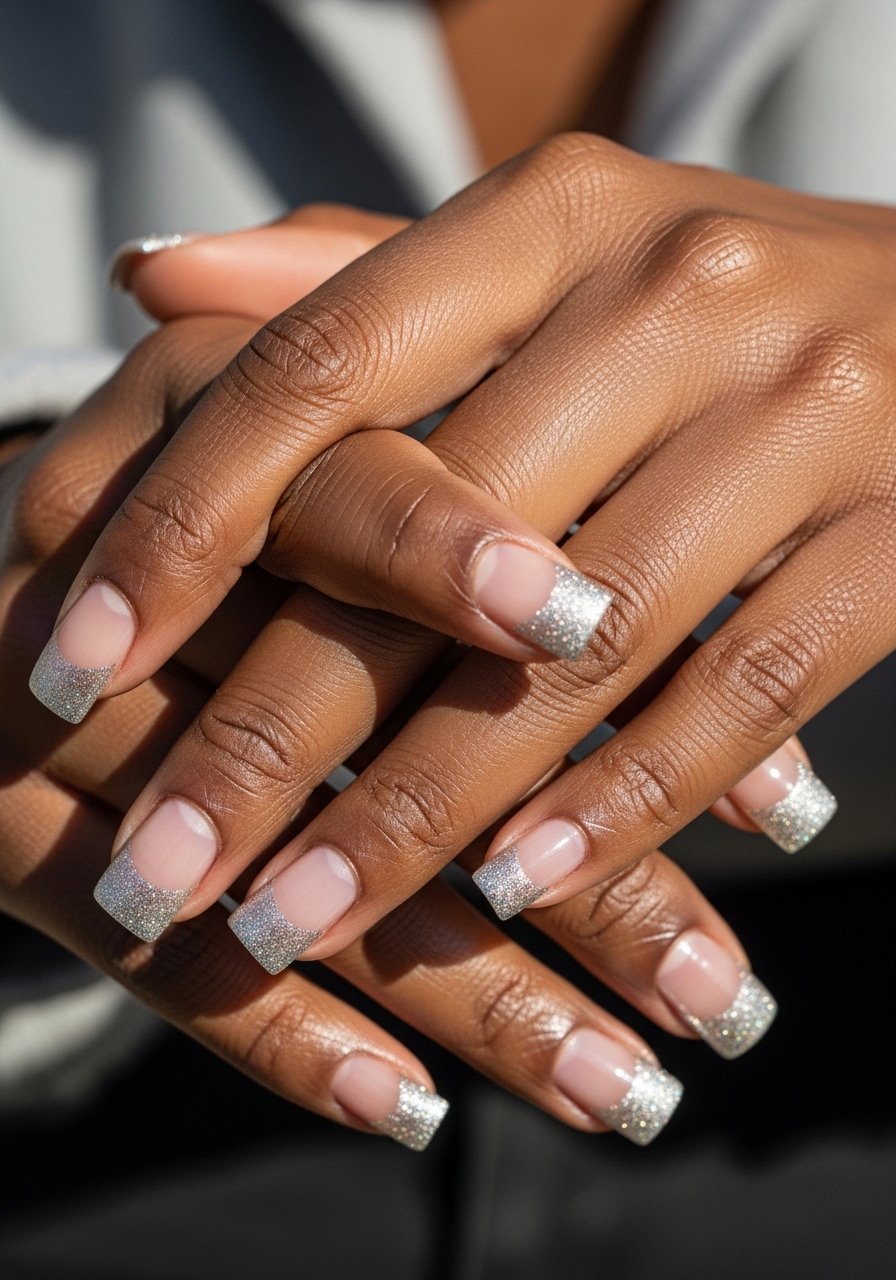
Style/Vibe: Subtle Sparkle, Low-Profile Glam
Best For: Short nails / special events
Skill: Beginner
A narrow glitter tip adds shine without weight. Dab glitter gel or micro-foil only on the top 1.5 to 2 mm of the free edge, press lightly, and cure for 45 seconds to lock it. Seal with a thin top coat cured for 30 seconds. Use a fine fan brush to remove stray particles before top coat. For easy picks try micro-glitter gel. The small band of sparkle reflects light and makes nails read longer.
Mistake to Avoid: Piling glitter in a thick ridge, which chips and feels bulky.
5. Matte Accent Half-Moon

Style/Vibe: Modern Matte-Gloss Mix
Best For: Short nails / fashion-forward
Skill: Intermediate
A matte semicircle at the cuticle paired with glossy gel on the rest creates contrast that pulls the eye up. After curing a glossy base, mask a small half-moon with a guide, apply matte top coat to just that area, and cure if required. The trick is keeping the half-moon to about 2 to 3 mm so it does not dominate the nail bed. I used a gel matte top coat that cures under LED.
Mistake to Avoid: Making the matte area too large, which shortens the visible nail.
6. Clear Builder With Tiny Pearls
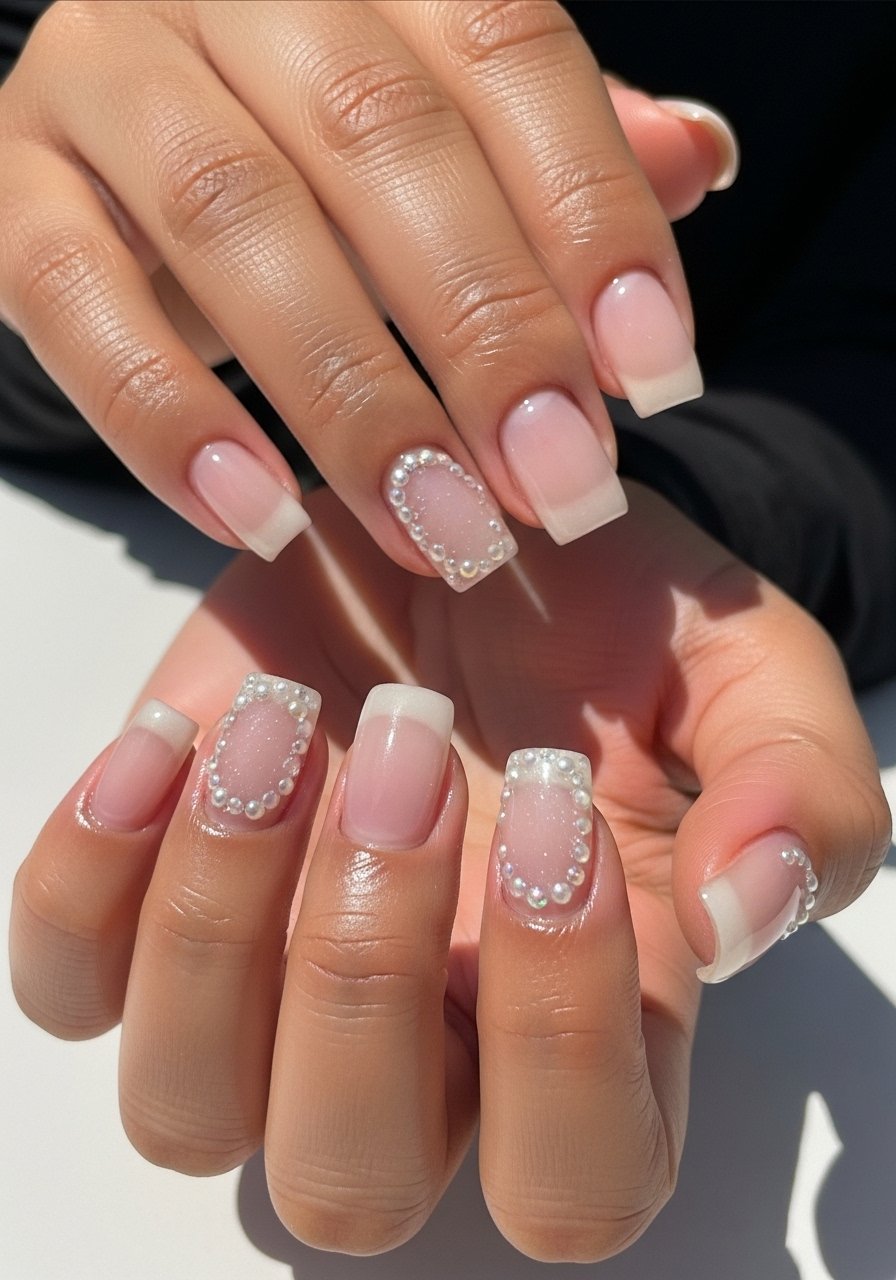
Style/Vibe: Clear Strength, Delicate Detail
Best For: Short nails / bridal or minimalist
Skill: Advanced
For clients who want strength and subtle detail, use a thin layer of builder gel across the entire nail to shore up edges, cure 30 seconds, then place 1 to 2 micro pearls near the cuticle with a dab of gel and cure again. This adds structural support without length. I tested this method across three short nail beds and it reduced lifting by days. Use tweezers and micro-pearls for nail art.
Mistake to Avoid: Applying a thick builder coat, which looks like an artificial extension.
7. Thin French Reverse Smile
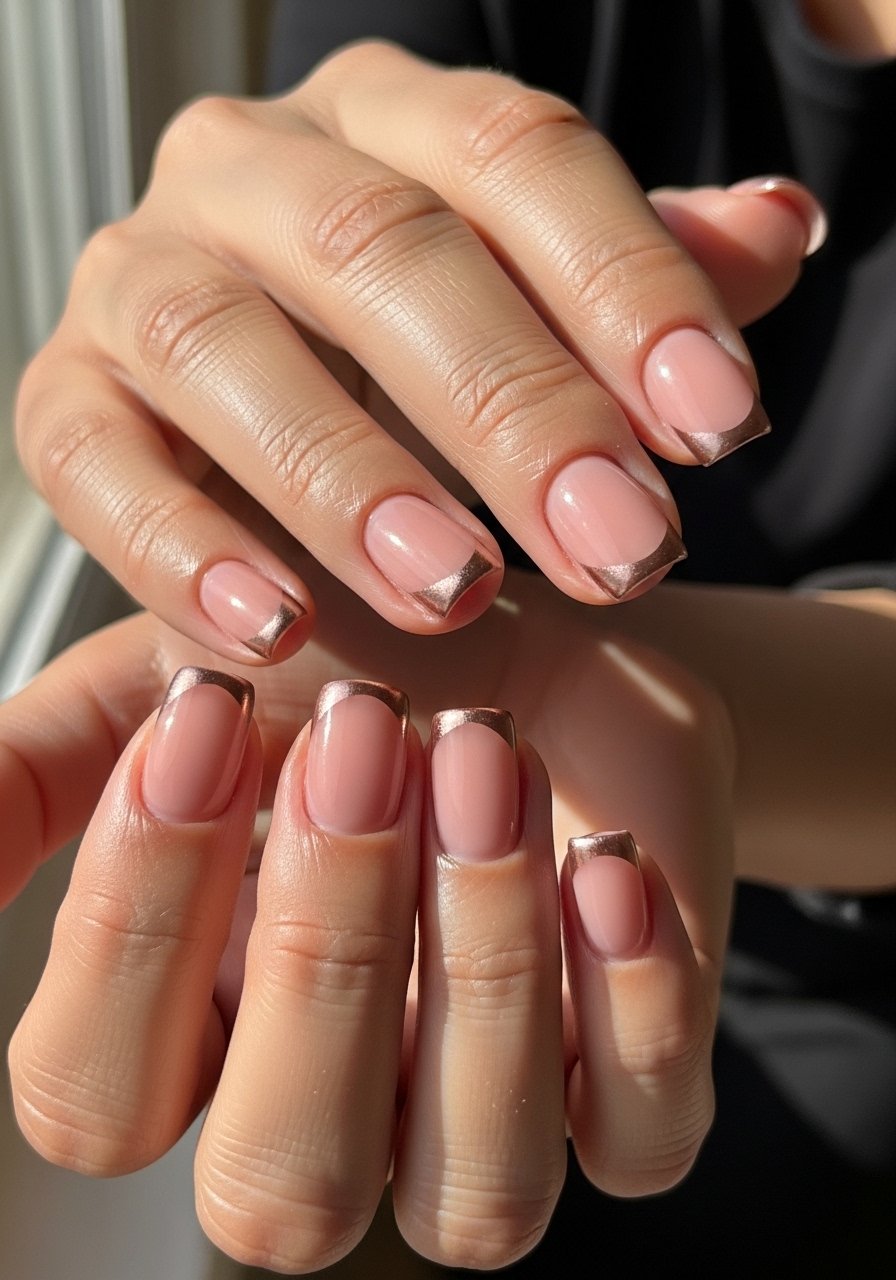
Style/Vibe: Reverse French, Chic
Best For: Short nails / creative workplace
Skill: Intermediate
Flip the classic French so the color sits at the cuticle in a hairline arc, and leave the tip sheer. That visual anchor pulls attention inward, making tips seem farther away. Use two thin pearlized coats at the cuticle, curing each for 30 seconds, then seal with a thin gloss. A curved brush helps keep lines at about 1.2 to 1.8 mm. Try pearlized gel polish for a subtle sheen.
Mistake to Avoid: Painting the cuticle area too thickly so the polish lifts around the edge.
If any of these ideas have you ready to shop, here are the tools I reach for most.
Short Square Gel Starter Kit
Polish & Builder:
- Light builder gel (~$12-18), a thin reinforcement that does not bulk.
- Gel polish neutral set (~$18-30), sheers that blend well for short tips.
Tools & Brushes:
- Fine detail nail brush (~$6-12), for micro lines and smile arcs.
- Striping tape set (~$4-8), for crisp negative-space edges.
Hardware & Extras:
- 48W LED nail lamp (~$25-45), cures thin layers quickly.
- Micro-pearls nail decorations (~$5-10), tiny accents that sit flat.
- Gel matte top coat (~$8-14), for mixed finish looks.
- Fine grit nail file pack (~$5-12), file sidewalls to a 90-degree edge.
- Cleanser wipes for nail prep (~$6-10), keeps the tape and gel adhering.
8. Sheer Jelly Tint

Style/Vibe: Jelly Tint, Fresh
Best For: Short nails / casual everyday
Skill: Beginner
Sheer jelly colors sit thinly and allow the natural nail to show through, which makes short beds look healthier and longer. Apply two translucent coats curing 30 seconds each so the color layers look luminous but not heavy. If you want extra strength, add one thin layer of builder gel, cured separately. I like sheer jelly gel polish because it levels nicely on short nails.
Mistake to Avoid: One thick coat that pools at the free edge and chips quickly.
9. Sculpted Beveled Corners
Style/Vibe: Sculpted Edge, Clean
Best For: Short nails / active hands
Skill: Intermediate
Beveling only the corners makes square nails appear wider and less prone to catching. File the sidewalls straight to a 90-degree angle, then take a tiny 1 mm softening at each corner with a 180-grit file. Seal with a thin builder gel and cure 30 to 45 seconds. This is a structural move more than a color one and pairs with any polish. Use a 180-grit buffer for the final smoothing.
Mistake to Avoid: Rounding the entire sidewall, which shortens the visible nail.
10. Single-Accent Foil Stripe

Style/Vibe: Accent Foil, Minimal Luxe
Best For: Short nails / evening wear
Skill: Beginner
A single vertical foil stripe down the center can lengthen the look slightly and reads like a manicure detail rather than an extension. Apply a thin clear layer, place a 0.5 mm foil strip, press, cure, and finish with a thin top coat. Foil placement should be centered and not wider than 1.5 mm for short nails. I used gold nail foil strips that come on a roll for exact placement.
Mistake to Avoid: Using wide foil that overwhelms a short bed.
11. Sheer Top Coat With Cuticle Glow

Style/Vibe: Subtle Glow, Natural
Best For: Short nails / daily polish
Skill: Beginner
A shiny, well-filed cuticle line reflects light in a way that makes the whole nail read neater. After your final top coat cure, buff just the cuticle edge lightly with a 240 buffer to remove any ridge, then add a sliver of pearlescent gel at the base cured for 15 seconds. It gives the illusion of nail health without color. Try a pearlescent gel pen for precise application.
Mistake to Avoid: Over-buffing the entire nail, which thins natural keratin.
12. Color Block Mini Squares

Style/Vibe: Geometric, Playful
Best For: Short nails / weekend look
Skill: Intermediate
Block a tiny square of contrasting color in the corner of the tip to create the sense of a longer free edge. Keep the block about 2 mm square so it accents rather than dominates. Paint the base, cure, then add the block with a small brush and cure again. A glossy top finishes cleanly. For crispness use mini-sponge applicators to dab clean edges.
Mistake to Avoid: Making the block too big, which visually shortens the nail.
13. At-Home Gel Maintenance Routine

Style/Vibe: Aftercare Routine, Practical
Best For: Short nails / prolonging salon set
Skill: Beginner
To keep short gel sets tidy, wipe the surface gently with a non-acetone cleanser every three to four days and moisturize cuticles nightly. If you see a small lift, file the loose edge lightly, clean the area, apply a dot of builder gel, and cure 30 seconds. I learned this from a tech who works at a salon downtown and it saves a lot of rebooks. Keep a small kit with nail cleanser pads and a travel-size builder for quick fixes.
Mistake to Avoid: Picking at tiny lifts instead of sealing them, which causes larger lifts later.
Short Square Mani Habits
Thin coats beat one thick coat every time. Apply three thin layers rather than one heavy one, curing each for 30 seconds, and a thin top coat will sit flatter and last longer. Grab a thin-layer gel top coat.
File sidewalls straight to 90 degrees, then soften corners by about 1 mm. It sounds exact, but that small change prevents snags and the need for early repairs. Try a fine grit file.
Keep a tiny dab of builder gel in a travel pot for lifts. A 30-second cure under a 48W lamp is usually enough for quick emergency adhesion. Travel builder gel pot is worth the drawer space.
When placing tiny decorations, use a single small dab of gel and press once. Use micro-tweezers for precision and fewer repositions.
If you wear rings or type a lot, choose full-coverage thin builder gel over thick tips. It keeps the profile low and the strength high. Light builder gel works well for this purpose.
