
Sunlight on my forearm showed every tiny blotch and the one thin line that refused to look like the stencil. I had spent a year wanting a small, readable forearm piece and kept picking designs that blurred into a single dark smudge as the months went by. The moment I slowed down, picked a scale and ink depth that matched my skin, everything finally read the way I wanted.
These ideas are for people who want small forearm art that still reads from a few feet away. Most of these take a single session and a modest budget. I learned across five shops I have visited that scale and placement matter more than complexity. Expect tips for coverable office pieces, sun-safe finishes, and one- to two-hour sessions for most designs.
1. Narrow Floral Band That Wraps the Arm
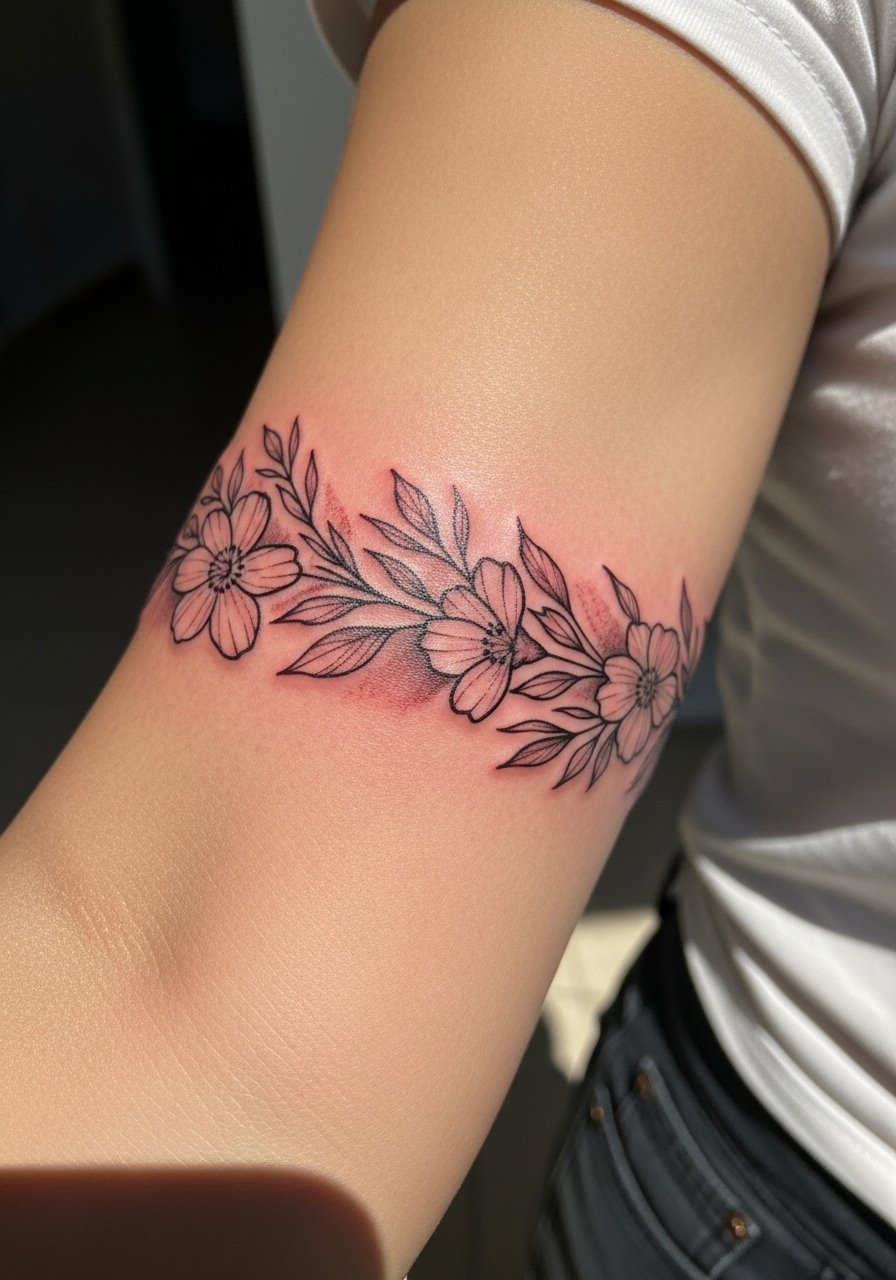
A 3 to 4 centimeter repeating floral band follows the forearm curve well because it moves with muscle and bone. It reads like jewelry and stays delicate by using 0.25 millimeter needle groupings and light 10 to 20 percent graywash for shadow. This suits anyone who wants something wearable and somewhat coverable under long sleeves. For aftercare I like using a gentle tattoo aftercare ointment in the first week. The companion stencil technique for even repeats is simple if you ask your artist for a mirrored transfer first.
Style/Technique: Fine-line botanical band
Pain Level: 3/10
Session Time: 0.5 to 1 hour
Best For: Mid-forearm, people wanting a jewelry-like look
Mistake to Avoid: Picking a band width that is too thin, which fills in and looks like a single dark line after a few months.
2. Single-Line Animal Silhouette
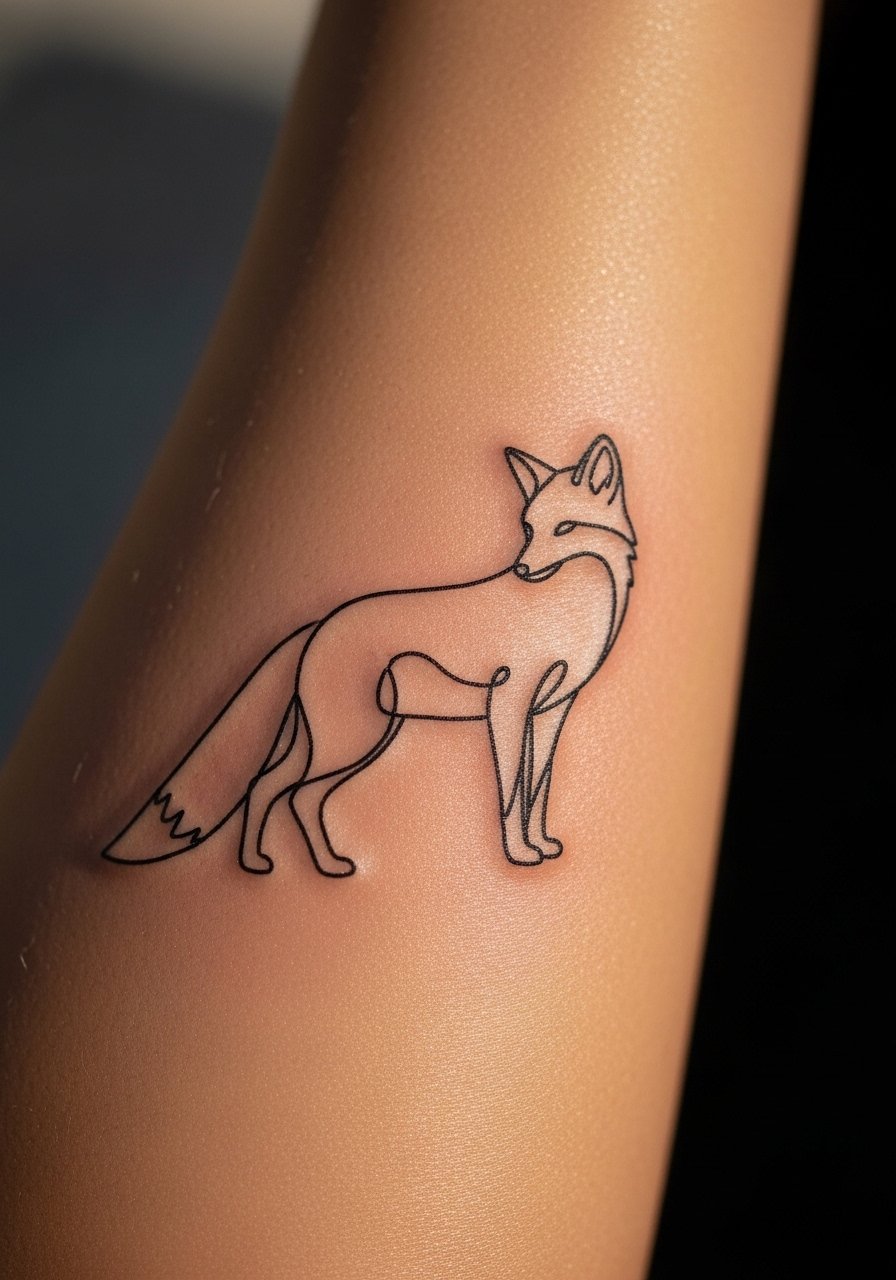
One continuous line gives the eye a fun path to follow. The trick that makes these work is keeping the line 2 to 3 millimeters away from itself at the narrowest parts so negative space reads properly in photos. It creates a playful, lighthearted feel and suits people who want a low-key piece that still has personality. If you want to practice placement at home, use tattoo transfer paper to test alignment before booking. This style is low cost and beginner friendly in terms of session time.
Style/Technique: One-line minimalism
Pain Level: 2/10
Session Time: 0.5 hour
Best For: Outer forearm, people who prefer subtlety
Mistake to Avoid: Crowding tiny details into a single-line design so they blur into an indistinct knot.
3. Tiny Script or Coordinates
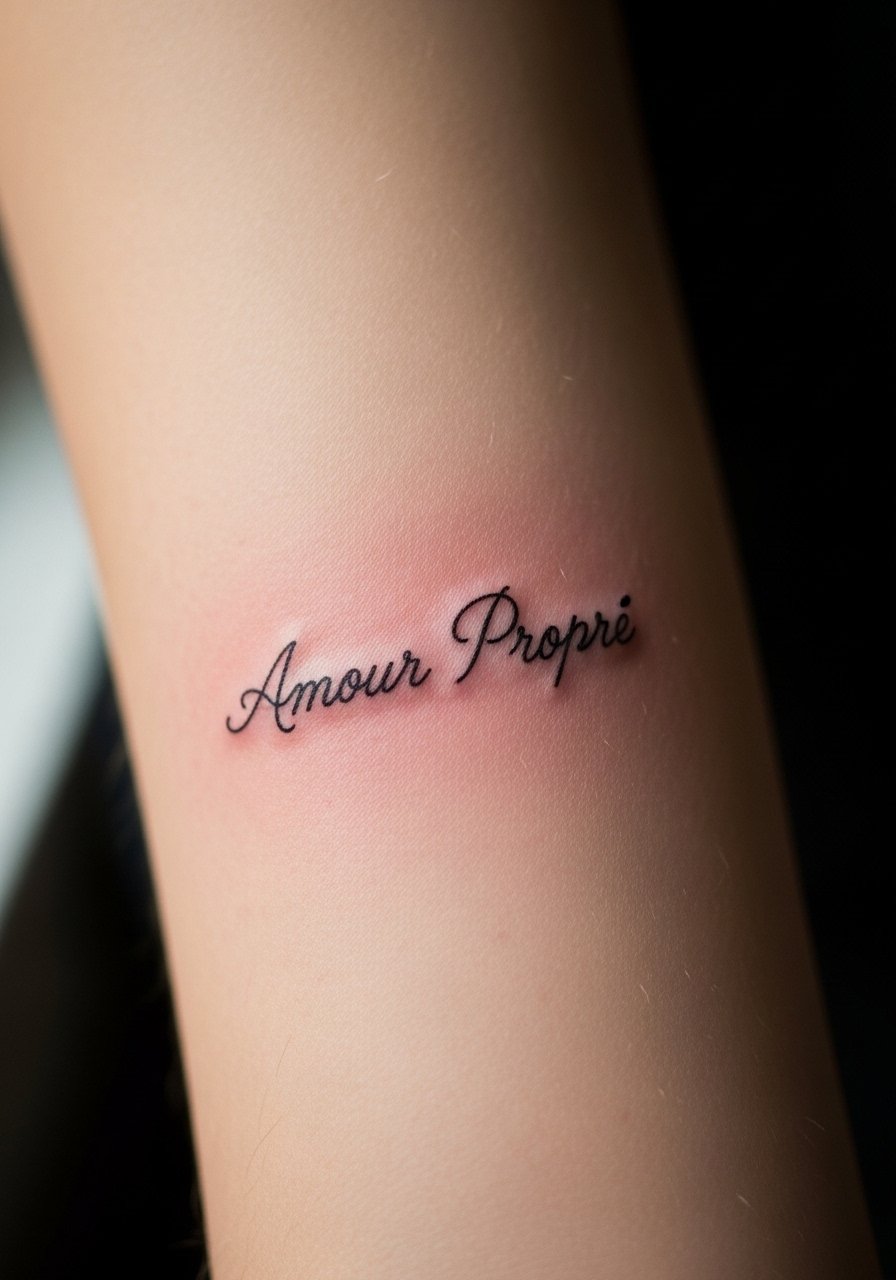
A name or a coordinate in 1.5 to 2 point sized script reads intimate from up close and classic in photos. Use a single needle and ask for slightly more space between letters than you expect, about a 25 percent spacing increase from your normal handwriting. This creates a calm, private energy that suits someone who wants a meaningful but discreet forearm mark. Protect it from the sun long term with a broad-spectrum tattoo-safe sunscreen once healed.
Style/Technique: Micro script
Pain Level: 2/10
Session Time: 0.25 to 0.5 hour
Best For: Inner forearm, people who prefer sentimental pieces
Mistake to Avoid: Requesting text at the same density as printed type, which leads to bleeding and loss of legibility.
4. Constellation With Dotwork Trails

Dotwork gives constellations an airy feel while still mapping into a clear shape. The visual trick is to use larger dots for anchor stars and a 2:1 ratio of space to dot size along the trails. That keeps the pattern from looking muddy in phone photos. It feels quiet and exploratory, good for someone who likes detail that doesn’t shout. For gentle upkeep I bring a travel-sized fragrance-free healing soap for cleaning during the first two weeks.
Style/Technique: Dotwork and microstars
Pain Level: 3/10
Session Time: 0.5 to 1 hour
Best For: Outer or inner forearm, detail lovers
Mistake to Avoid: Packing dots too close together, which causes the fine texture to merge as the skin heals.
5. Watercolor Wash Behind a Simple Silhouette
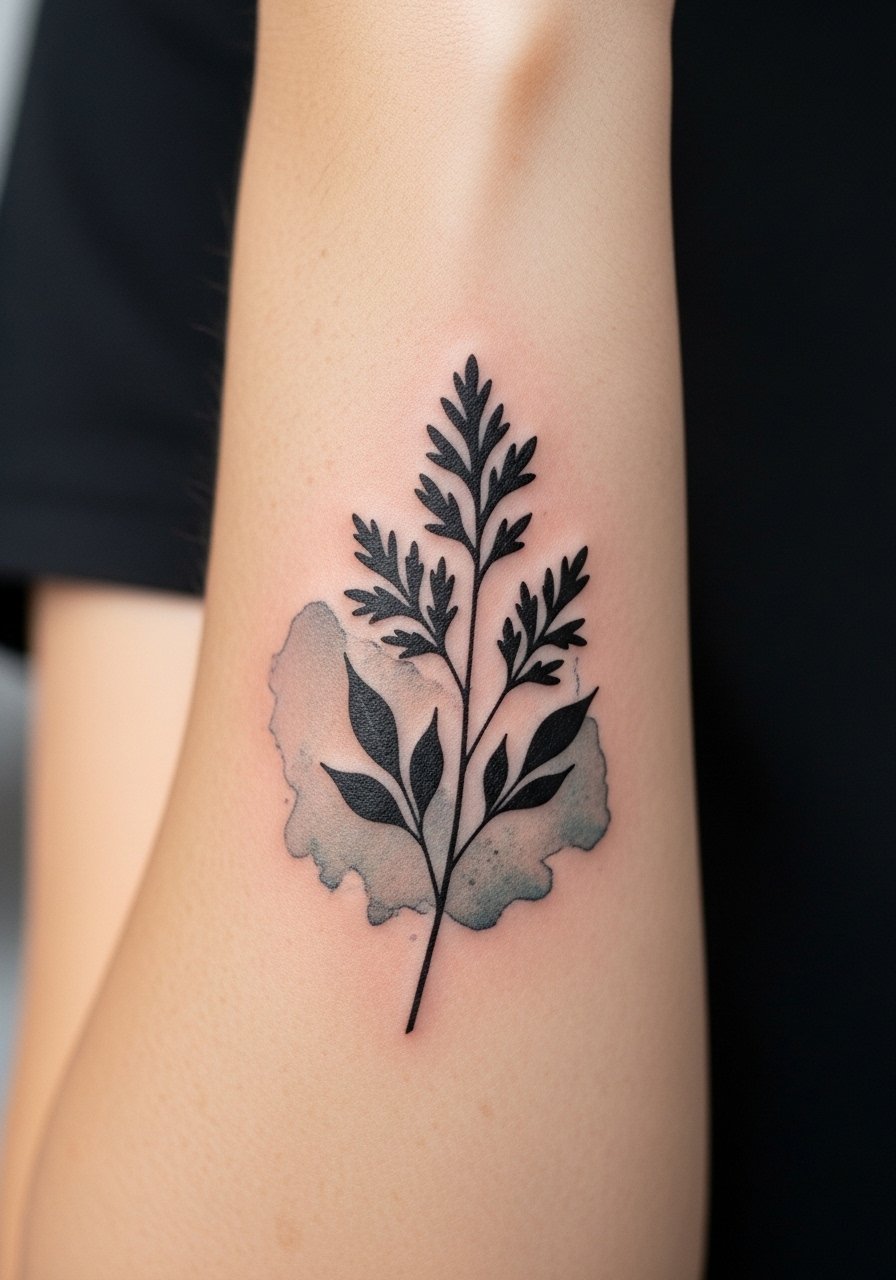
A soft watercolor wash provides color without heavy solid fills that age unevenly. Artists thin pigment so the color sits at about 20 to 30 percent opacity, which keeps it airy and reduces saturation loss over time. Pair the wash with a bold silhouette in black for contrast and to help the piece read at a distance. This look suits creative types who want color without full saturation. Use a gentle vegan tattoo-friendly aftercare balm if you avoid animal-derived products.
Style/Technique: Watercolor with solid silhouette
Pain Level: 4/10
Session Time: 1 to 2 hours
Best For: Outer forearm, people wanting color with subtle aging
Mistake to Avoid: Asking the artist for neon saturation, which fades unevenly and looks patchy within months.
6. Negative-Space Geometric Cuff
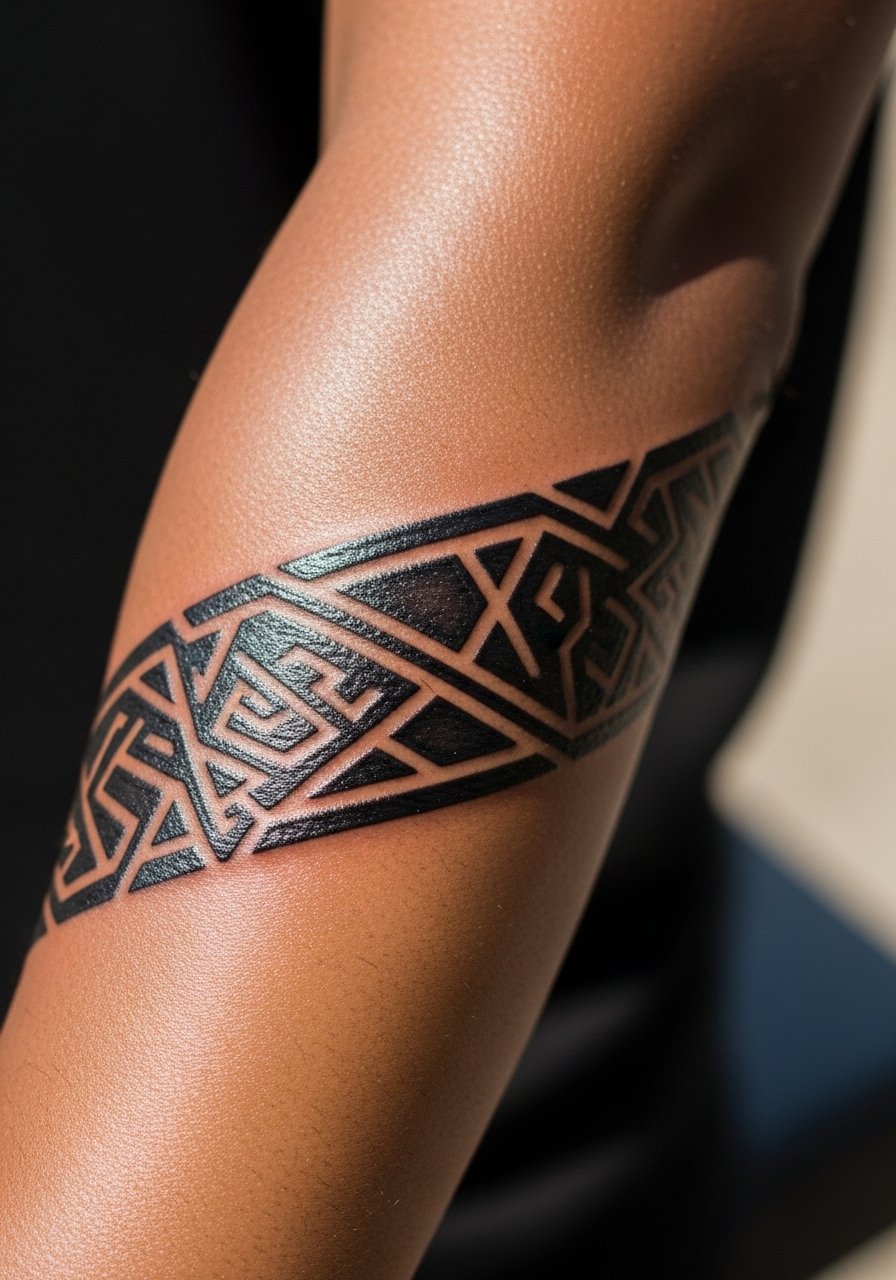
Negative space turns skin into a design element, especially on the forearm where straight lines can follow bone structure. Keep the bars at least 3 millimeters wide and space them by 4 to 6 millimeters so the gap reads as intentional. The result is modern and slightly architectural, ideal for someone who wants something bold but still easy to cover with a sleeve. For home care use a breathable transparent wound dressing for the first few nights to protect lines from friction.
Style/Technique: Geometric negative space
Pain Level: 4/10
Session Time: 0.75 to 1.5 hours
Best For: Outer forearm, people who like clean graphic work
Mistake to Avoid: Choosing lines too thin relative to your skin texture, which causes them to blur into a single block.
Shopping time. If you are bookmarking what you might need for any of these, these are the practical pieces I reach for.
Forearm Tattoo Essentials
Aftercare & Protection:
- Tattoo aftercare ointment (~$8-15), good for the first 3 to 7 days.
- Fragrance-free healing soap (~$6-12), gentle daily cleanser.
- Broad spectrum sunscreen (~$8-20), for long-term color protection.
Tools & Protection:
- Tattoo transfer paper (~$7-15), useful if you want to test placement at home.
- Transparent wound dressing (~$10-20), protects fresh lines from rubbing.
- Vegan tattoo aftercare balm (~$12-18), alternative for non-animal products.
- Microfiber sleeve protector (~$10-18), handy when sleeping or exercising.
8. Tiny Portrait or Stamp-Style Motif
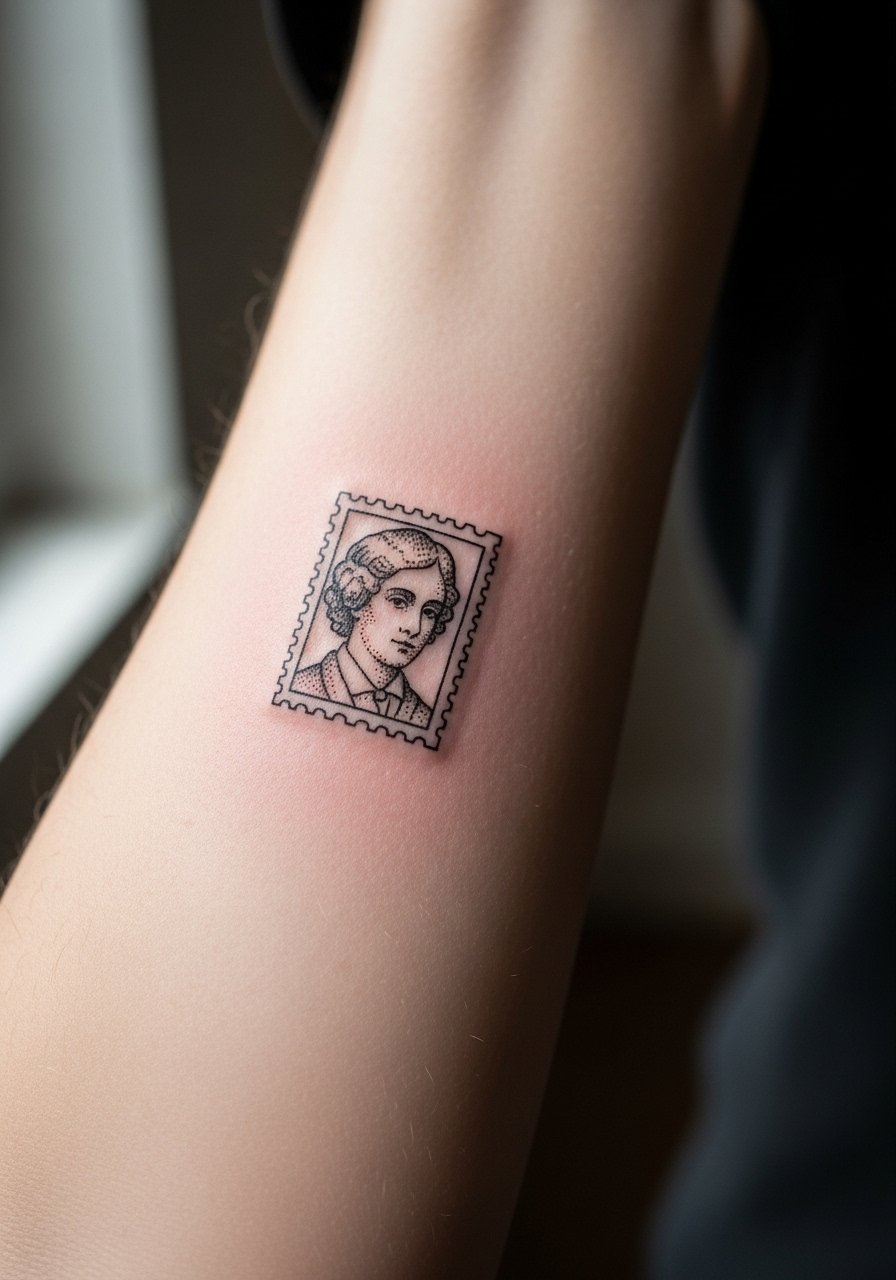
A pocket portrait works when kept roughly 2.5 to 3 centimeters square and high-contrast black. The small stamp format reads like a miniature print rather than a full realism piece because the artist simplifies hair and shadow into block shapes. It feels nostalgic and personal. This one ages predictably when done in slightly thicker lines around the perimeter. I recommend a breathable transparent dressing on night one to reduce smudging.
Style/Technique: Mini portrait/stamp
Pain Level: 4/10
Session Time: 0.5 to 1 hour
Best For: Inner forearm, people wanting a sentimental mini portrait
Mistake to Avoid: Asking for ultra-fine portrait detail at a scale that will never hold up, which reduces face recognition after healing.
9. Small Icon Storyline Along the Forearm
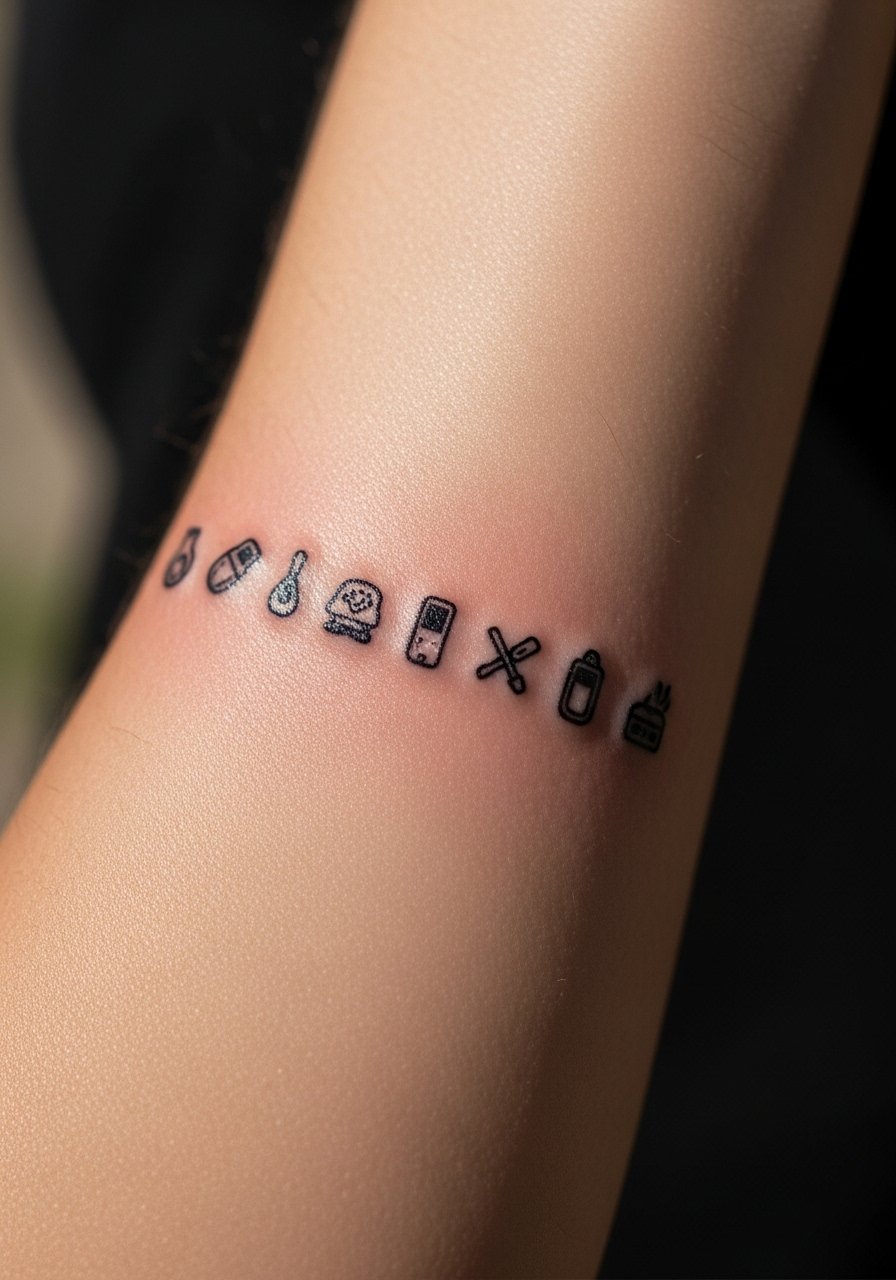
A running row of tiny icons or symbols tells a personal story along the forearm. Keep each icon about 6 to 8 millimeters across and leave 6 to 8 millimeters between them so each reads individually in photos. This approach is great if you like modular additions over time. It also solves the "one big piece or nothing" problem by allowing slow accumulation. For flexibility, reapply a non-greasy broad spectrum sunscreen once healed to slow fading of the smallest marks.
Style/Technique: Sequential icons
Pain Level: 2 to 3/10 per icon
Session Time: 0.25 to 1 hour, depends on number
Best For: Inner forearm, people who add over time
Mistake to Avoid: Crowding icons close together so they blur into a single unreadable line.
Forearm Finishing Moves
Keep the healed area out of direct sun for at least twelve months. A sunscreen like broad spectrum sunscreen after healing preserves contrast and slows pigment loss.
Grab tattoo transfer paper to test placement at home. It saves a missed-proportion regret and helps you walk into a consult with clear visuals.
Most people pack a small tube of tattoo aftercare ointment for the first week. A thin coat three times a day prevents scabbing that pulls on linework.
If your skin reacts easily, start with a short session to test ink and pressure. Try transparent wound dressing for the first night to reduce friction and keep lines crisp.
Before booking, ask about pigment type if you prefer vegan options or want colors that fade more gracefully. Packaging and names can be confusing, so request specifics during your consult.
