
I kept choosing the most detailed reference images and wondering why they blurred into a single dark blob on my skin. The moment it clicked was when an artist told me to shrink the stencil to 70 percent and pick where the lines would breathe with movement. After that my art nouveau pieces read like jewelry on the body instead of a poster pasted to skin.
These ideas are not photo-copy flashes meant for a single scroll-stopping shot, they are placements and techniques you can live with. These suggestions are for people who want decorative line flow, ornamental fills, and aging that looks intentional. Budget ranges from small studio sessions for minis to multi-session back pieces. I tested variations across five shops I have visited, so you get what actually holds up, not just a feed-ready version.
1. Forearm Flow Lily Accent

Start by scaling the stencil down to about 70 percent of the reference so the lilies curve with the forearm. The long whiplash lines make the design readable when you bend your wrist, and 0.25 to 0.35 millimeter line weights keep the detail crisp without blowout. This fits people who want something work-visible that still reads like jewelry. For aftercare, I use a fragrance-free tattoo aftercare ointment during the first 48 hours and switch to a gentle antibacterial soap for cleaning. Expect a one-session small piece, beginner-level placement-wise.
Metadata block
Style/Technique: Decorative line with soft shading
Pain Level: 3/10
Session Time: 1 to 2 hours
Best For: Inner forearm, people who want visible ornamentation
Mistake to Avoid: Pushing too many tiny details into a small forearm piece so lines blur as it heals.
2. Whiplash Portrait Behind the Ear

Behind-the-ear placements thrive on suggestion more than exact likeness. Use a 75 percent scale, two main whiplash lines framing the face, and a single dotwork shadow at 2 to 3 millimeter spacing for texture. It creates a secret ornamental moment that is easy to cover with hair when needed. This suits someone who wants work-coverable art with low session time. I asked for a mix of single-needle lines and a 3RL shading pass. Try a skin-friendly numbing gel if you are needle-averse, but be honest with your artist about sensitivity.
Metadata block
Style/Technique: Single-needle portrait with whiplash frames
Pain Level: 4/10
Session Time: 1 hour
Best For: Behind-ear, work-visible optional
Mistake to Avoid: Asking for tiny facial details that will fade into a smudge after a few years.
3. Stained-Glass Peacock Back Panel

Go big with architectural flow, but plan negative space as if it were a frame. Use 60 to 70 percent opacity for watercolor fills so the underlying linework stays readable once healed. The peacock tail becomes wearable when each feather has a 3 to 4 millimeter separation between colored elements to avoid bleeding. This is a multi-session project and fits people comfortable with sessions and cost. I recommend a vegan artist-grade ink set for saturated color that ages cleaner on olive tones.
Metadata block
Style/Technique: Ornamental color panel with line framing
Pain Level: 6/10
Session Time: 6 to 12 hours total
Best For: Upper back, people used to multi-session pieces
Mistake to Avoid: Filling every small cell with saturated color, causing muddying as the pigments spread.
4. Mini Mucha Motif Behind Collarbone
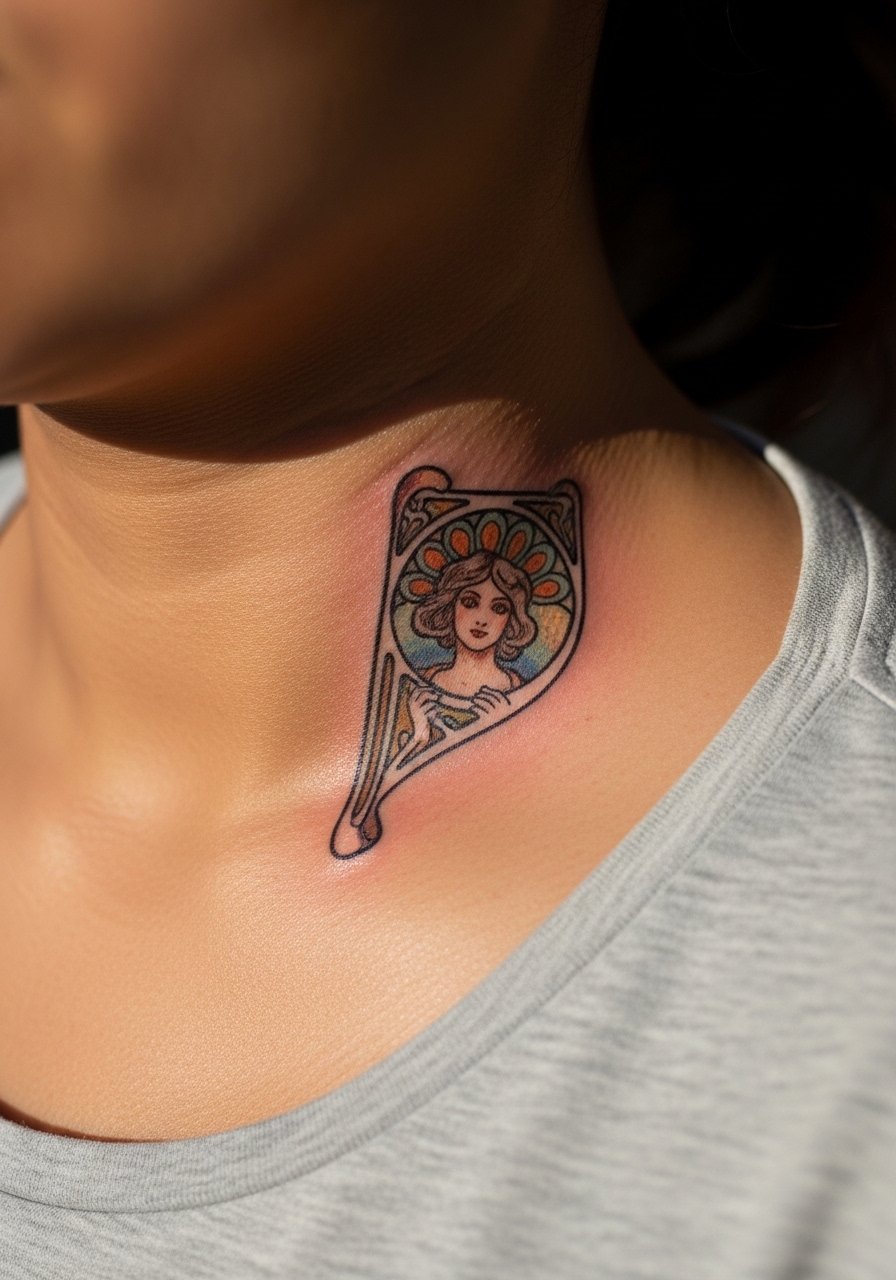
A mini Mucha-inspired motif works if you respect scale and negative space. Keep the central figure under 10 centimeters and emphasize ornamental halos rather than facial detail. Use 0.3 millimeter outline consistency and a 1.5 millimeter spacing for ornamental dots to hold texture. This placement looks elegant with a camisole and suits someone who needs a coverable piece for work. Pair it with a small compact sterile stencil paper for crisp transfers at home consults.
Metadata block
Style/Technique: Mini poster motif with ornamental halo
Pain Level: 4/10
Session Time: 1 to 2 hours
Best For: Collarbone, people who want poster influence in a small scale
Mistake to Avoid: Requesting photographic facial detail at a small scale instead of suggestion.
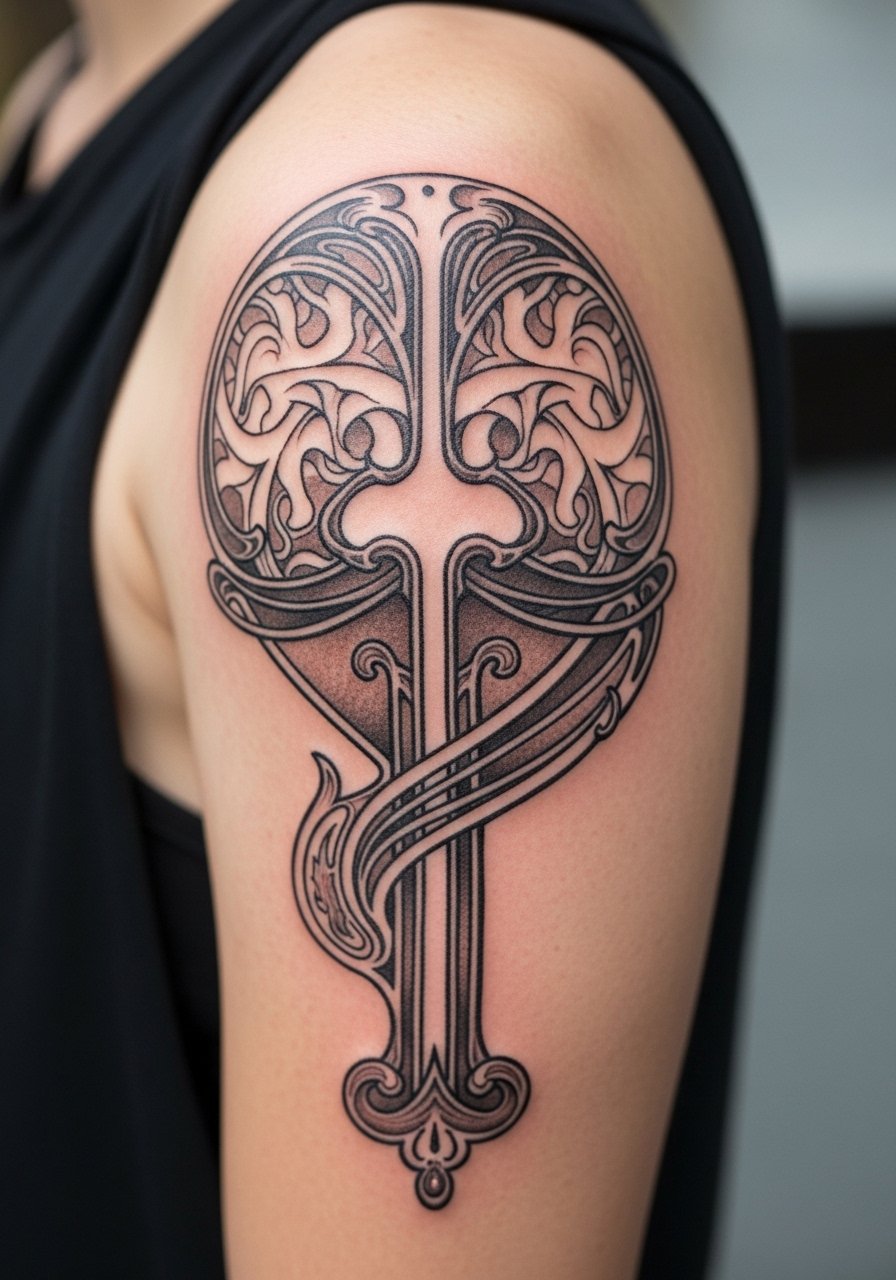
5. Golden Iris Watercolor Wash

Combine soft watercolor washes with defined ornamental lines. Keep the wash layers semi-transparent, about 40 to 60 percent density, so the black linework still reads after healing. This creates an elegant, modern finish that feels like painted jewelry. Best for someone who likes a painterly look and accepts occasional touch-ups. For maintenance try a UV protective sunscreen stick to keep gold tones from fading.
Metadata block
Style/Technique: Linework with watercolor wash
Pain Level: 5/10
Session Time: 2 to 3 hours
Best For: Outer upper arm, people who enjoy color and touch-ups
Mistake to Avoid: Asking for opaque color fills that hide the ornamental linework.
6. Architectural Frame Sternum Piece

Sternum pieces call for symmetry but allow slight asymmetry for natural breathing. Use mirrored whiplash lines and keep the central element 50 to 70 percent of chest width to avoid pulling at movement. Expect higher pain and longer healing in this area, so plan for two shorter sessions instead of one long one. A thin layer of fragrance-free healing balm after the first scab stage keeps scabbing soft.
Metadata block
Style/Technique: Symmetrical ornamental chest frame
Pain Level: 7/10
Session Time: 2 to 4 hours
Best For: Sternum, people prepared for sensitive placements
Mistake to Avoid: Centering a large motif too low so it pulls awkwardly with the bust line.
7. Botanical Wrist Cuff With Dotwork

A cuff reads best when it breathes a little. Leave 6 to 8 millimeters of skin between major motifs so the tattoo wraps without looking cramped. Tiny dots at 2 to 3 millimeter spacing give a textured fill without solid blacking out the skin. This is low-cost and beginner-friendly, perfect if you want a subtle ornamental accent that is easy to cover. For sensitive wrists I asked for fewer passes over joints to limit swelling. Pick a gentle fragrance-free moisturizer for long-term skin care.
Metadata block
Style/Technique: Botanical cuff with dotwork
Pain Level: 3/10
Session Time: 1 hour
Best For: Wrist, people wanting low-commitment ornament
Mistake to Avoid: Packing too many leaves close together so they blur into a solid band.
If any of these ideas have you ready to actually shop for supplies, here are the essentials that came up across these pieces.
Studio-To-Skin Tattoo Essentials
Stencils & Prep
- sterile stencil paper (~$8-20), for crisp transfers during consults
- disposable razors (~$6-12), for clean shave prep
Aftercare
- fragrance-free tattoo aftercare ointment (~$8-16)
- gentle antibacterial soap (~$4-10)
- small sunscreen stick (~$8-15), for healed-skin protection
Extras
- vegan tattoo ink set (~$25-60), if your artist uses compatible inks
- sterile nonstick dressings (~$6-18), useful for sensitive spots
8. Art Nouveau Ankle Token
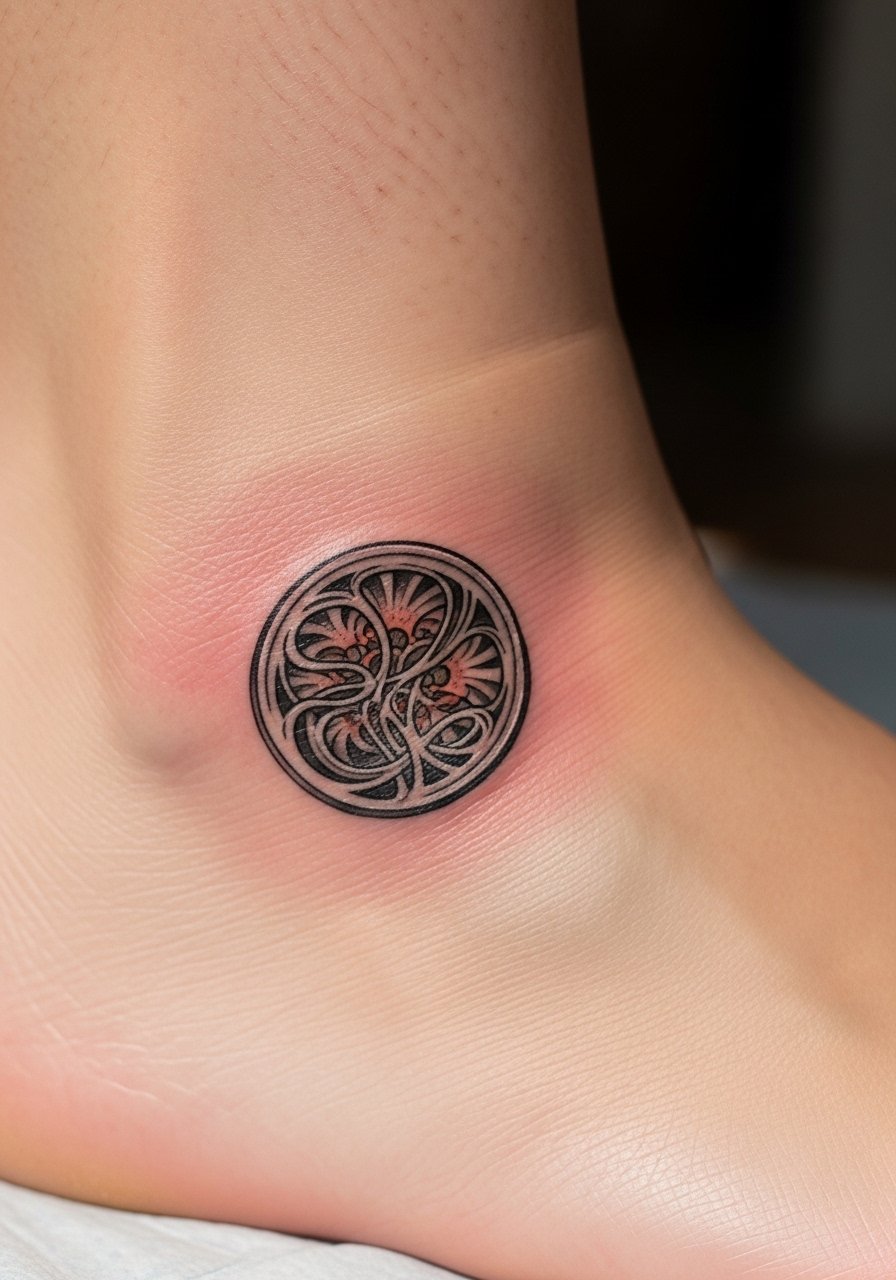
Ankle tokens should be simplified, not shrunken poster art. Use single-line framing with 0.3 millimeter outlines and a small ornamental knot at the pivot. Keep vertical height under 6 centimeters to avoid rubbing with shoes. This placement is great for seasonal showing and fits small budgets. For healing, avoid socks for the first week and use a breathable nonstick dressing if you must boot up for work. Expect a quick session and minimal touch-ups.
Metadata block
Style/Technique: Token-sized ornamental tattoo
Pain Level: 3/10
Session Time: 45 minutes to 1 hour
Best For: Ankle, people who want a small seasonal accent
Mistake to Avoid: Requesting dense shading that contacts shoe leather and causes scabbing.
9. Cover-Up With Ornamental Lines
Art nouveau lines make excellent cover-up scaffolding because flowing lines divert attention and allow layered fills. Start by photographing the old tattoo and sizing the cover to 120 percent of the faded area. Use thicker ornamental bands and plan dark anchor points where cover pigment needs to sit, then layer lighter ornamental fills above. This is a medium-skill solution and typically requires a consultation and at least two sessions. A good tattoo aftercare balm helps reduce scab thickness over heavily inked areas.
Metadata block
Style/Technique: Cover-up with ornamental flow
Pain Level: 6/10
Session Time: 2 to 4 hours
Best For: Upper arm, sleeves, people rehabbing old ink
Mistake to Avoid: Trying to hide dark old ink with only single-needle linework instead of planned dark anchors.
10. Collarbone Hairline Flourish
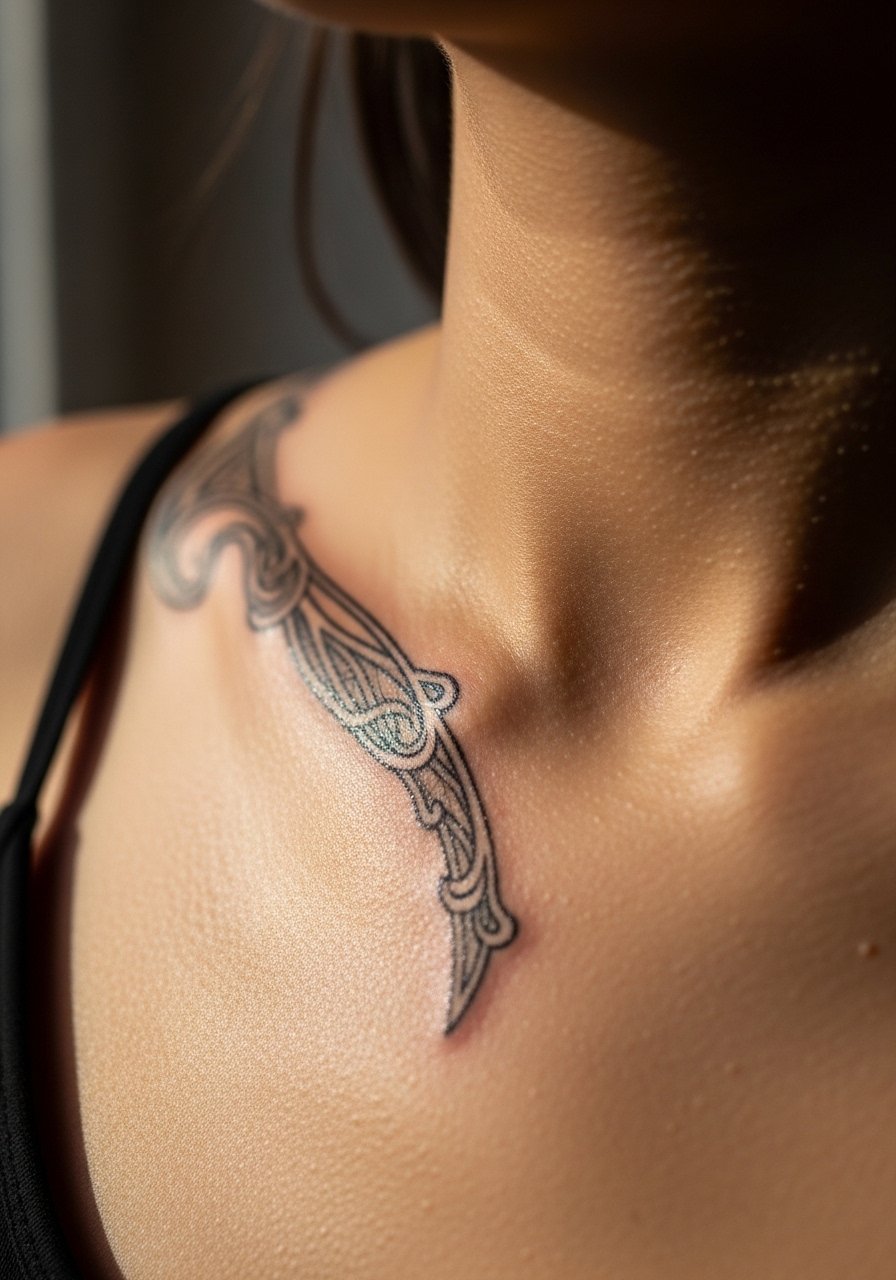
Thin, hairline flourishes along the collarbone read like a chain when spaced correctly. Use 0.18 to 0.25 millimeter lines and keep flourishes short so movement does not distort the design. This style is best if you want something discreet and elegant with minimal session time. It pairs well with the collarbone motif from idea four. A small sunscreen stick in your handbag will protect this visible area after healing.
Metadata block
Style/Technique: Hairline flourish with fine-line technique
Pain Level: 4/10
Session Time: 30 to 60 minutes
Best For: Collarbone, people wanting delicate visible ornament
Mistake to Avoid: Requesting wider strokes that read heavy and age poorly in thin placements.
11. Shoulder-Blade Negative Space Fan
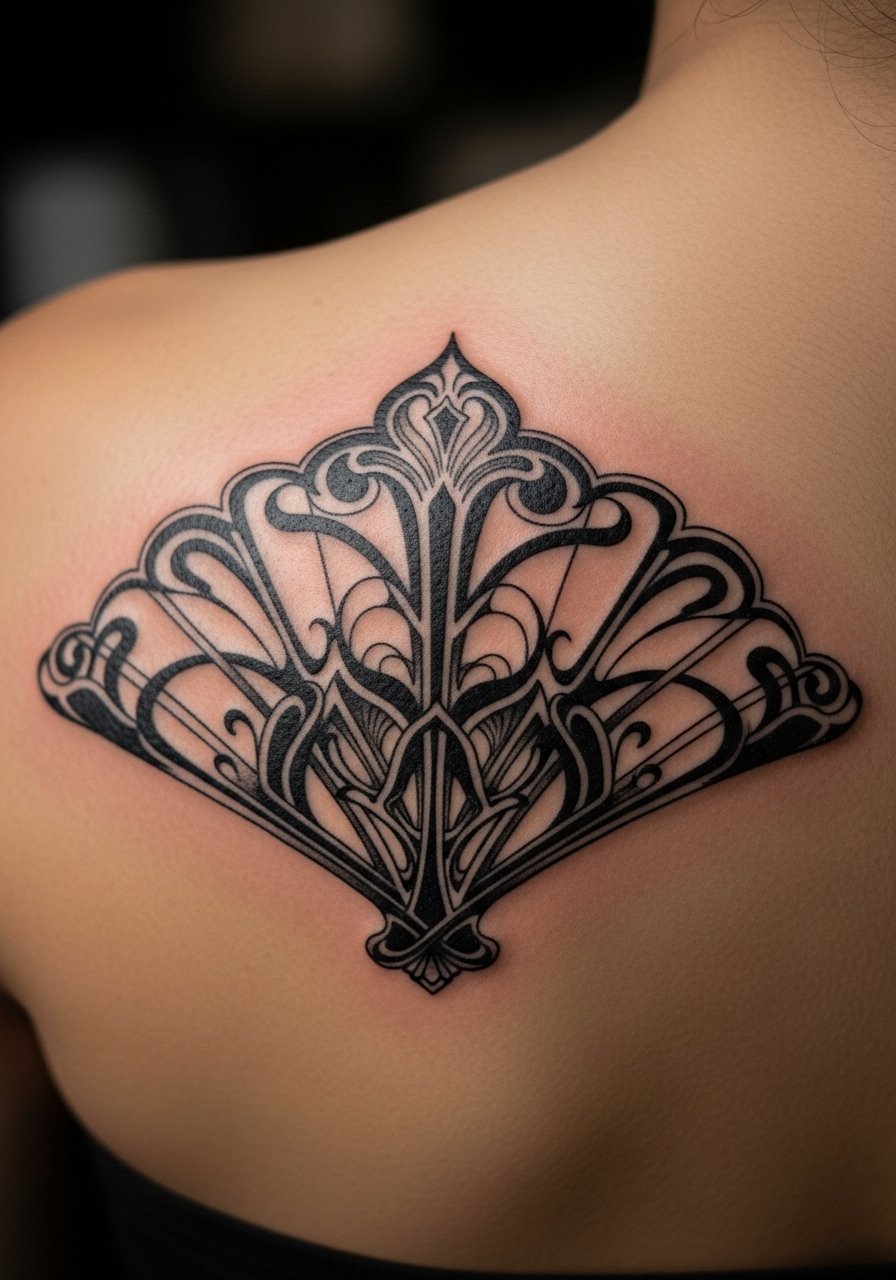
Negative space fans let skin tone be part of the design. Use solid black anchors no larger than 8 millimeters to avoid heavy scabbing, and let ornamental scrolls sit around them. This creates contrast and a striking silhouette when you wear straps. It fits people who want bold design without heavy color sessions. Aftercare includes light moisturizing and avoiding tight straps while scabs form. Consider a touch-up after six to twelve months for crisp black edges.
Metadata block
Style/Technique: Negative space ornamental fan with black anchors
Pain Level: 5/10
Session Time: 1.5 to 3 hours
Best For: Shoulder blade, people who like bold silhouettes
Mistake to Avoid: Overfilling the negative space so the intended skin contrast disappears.
Lineweight & Aftercare Tips For Art Nouveau
Skin ages the line. Stick to 0.18 to 0.35 millimeter line weights for most ornamental work. A 0.25 to 0.3 millimeter average keeps detail and reduces blowout risk, especially on soft areas like ribs and inner arm. Grab fragrance-free tattoo aftercare ointment for the first two days. I learned across five shops I have visited that thinner lines on mobile skin need fewer passes, not more pigment.
Grab sterile stencil paper and photograph any proposed placement on your body. Seeing the stencil at actual scale prevents the poster-to-skin problem I used to have.
If you plan color, protect healed pieces from sun with a small sunscreen stick. Gold tones and watercolor washes fade fastest without UV protection.
