
I kept breaking the tips off, expecting length to fix everything, until a tech who works at a salon downtown pointed out my filing angle was the real problem. Once I shifted from straight sawing to a 45 degree sweep, my almond shape finally sat right and the whole hand looked longer instead of fragile. That click changed how I pick shapes for short nails and long ones alike.
These ideas are for people who actually use their hands, not just stare at mood boards. Expect mostly budget-friendly options, a few salon techniques you can copy at home, and clear notes on which looks need length, which work on short nails, and which are easiest for beginners.
1. Soft Matte Almond With Sheer Base
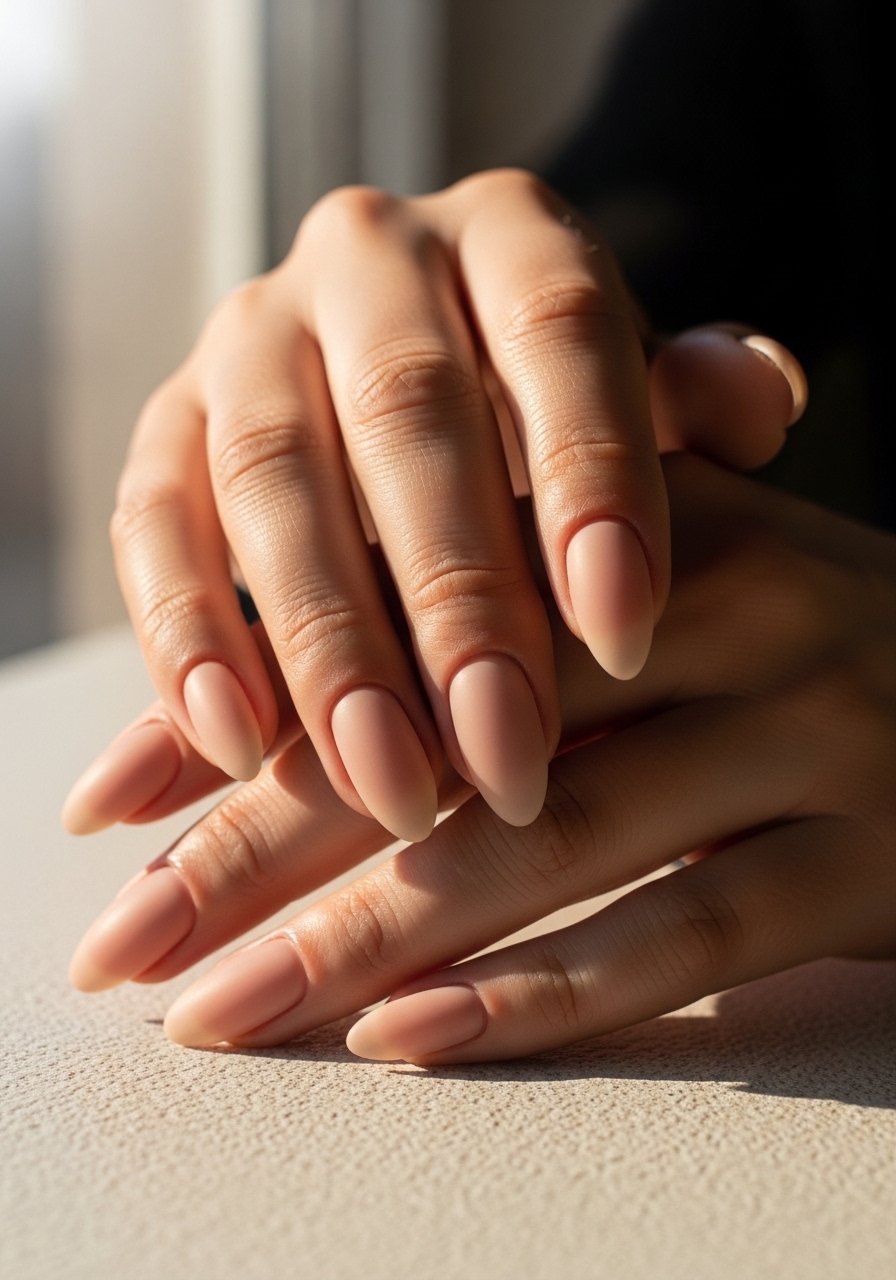
A soft matte over a sheer base makes almond nails feel modern without being loud. It works by muting shine while keeping the nail shape visible, which is why I do a thin 15-second wipe with alcohol before the top coat. Pair a buff sheer base like pearl nude base with a velvety matte top like matte top coat. It reads chic on medium to long lengths and is beginner friendly for at-home gel users. Light filing and a soft buff keep the finish even.
Mistake to Avoid: Applying one thick matte coat that pools at the cuticle and looks patchy.
Style/Vibe: Soft modern matte
Best For: Medium to long almond, everyday wear
Skill: Beginner
2. Sheer Nude Gradient With Tiny Glitter

A barely-there gradient brightens fingers without screaming party. The trick is two thin coats of sheer nude, then a sparse sweep of micro-glitter at the free edge. I use a small fan brush and tap off most of the glitter so you get scatter, not overload. Try sheer nude polish with micro-glitter. It creates a delicate result that flatters short or long almond, and it photographs nicely without the artificial shine. Cure times are standard 60 seconds under LED for thin layers.
Mistake to Avoid: Loading the brush with glitter and dabbing it on, which creates a clumpy look.
Style/Vibe: Soft glam nude
Best For: Short to long almond, special occasions
Skill: Beginner
3. Micro Negative Space Crescent
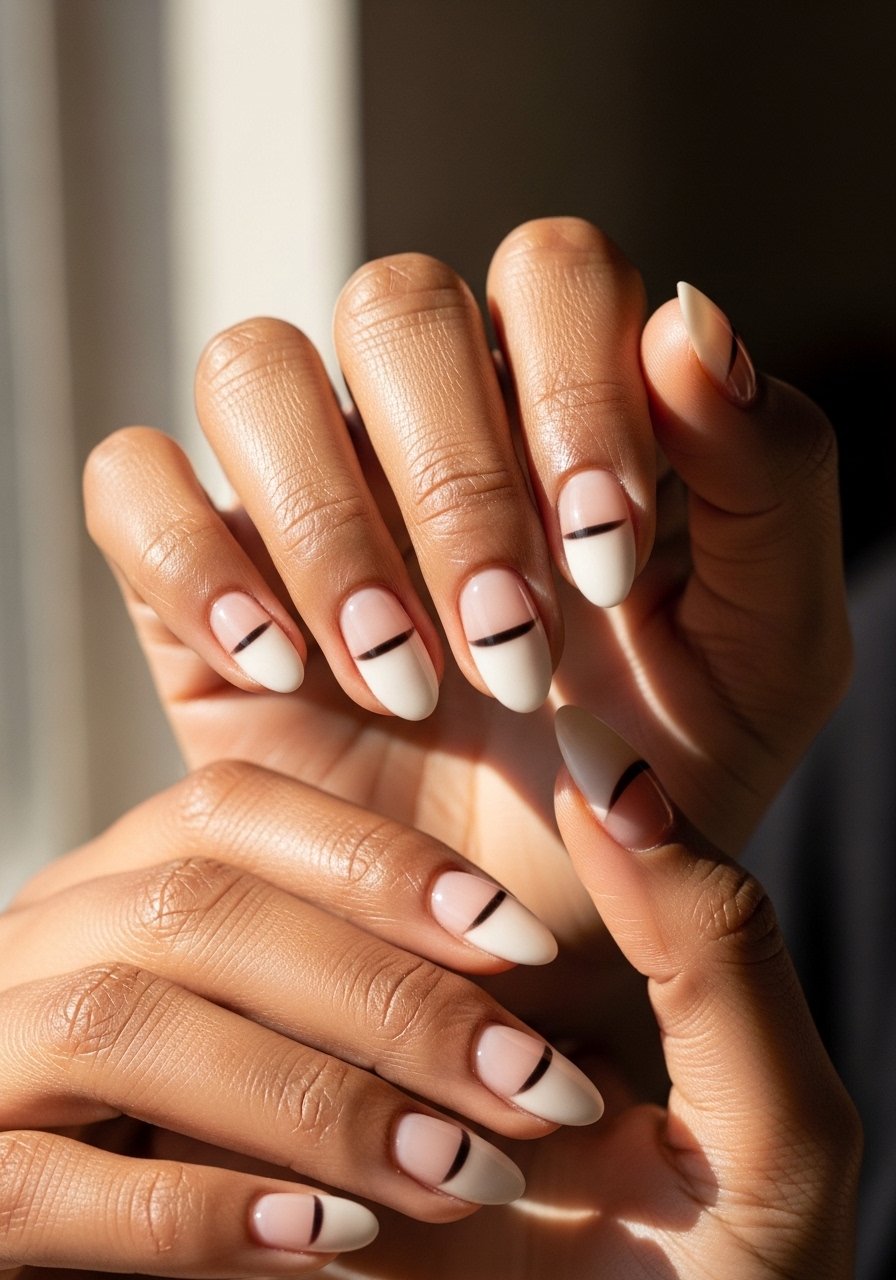
Negative space with a tiny crescent at the cuticle reads modern and keeps the nail low maintenance. Use a thin striping brush and leave a 1 to 2 millimeter gap at the cuticle for breathable shine. I like pairing a neutral base with a single metallic crescent for interest. Try thin striping brush and neutral polish. This suits short almond lengths especially well because it lengthens the nail visually without actual free edge. Quick to do at home in under 20 minutes.
Mistake to Avoid: Painting too close to the cuticle and flooding the negative space.
Style/Vibe: Minimal modern
Best For: Short almond, everyday and office
Skill: Beginner
4. Modern French With Ultra-Fine Tip
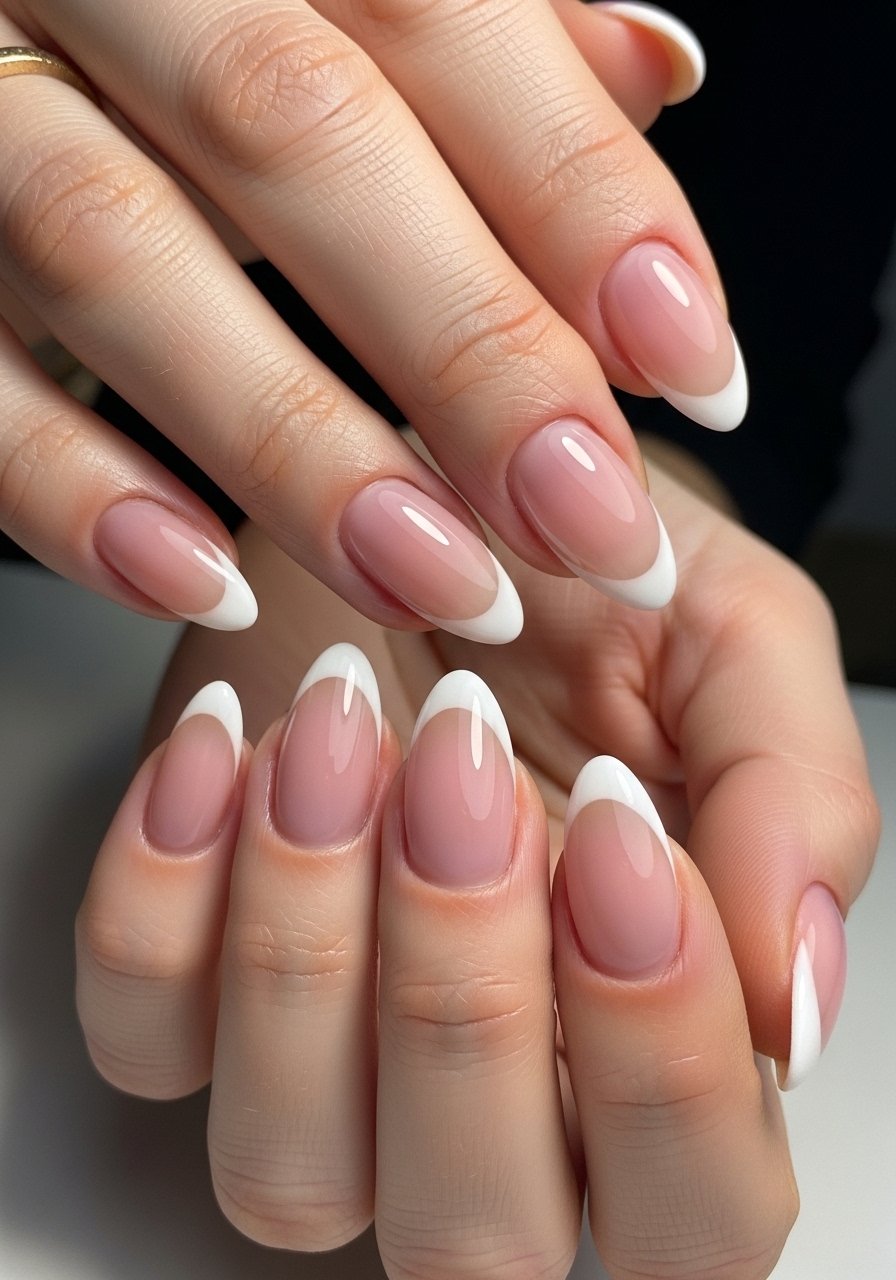
A slim, crisp French tip gives almond nails a polished edge. Use a 0.5 millimeter liner to paint the tip freehand or a narrow guide for steadiness. I often switch the white for soft pastels for a fresh twist. The look needs a steady hand but little time once you master the liner stroke. Recommended tools include fine liner brush and sheer pink polish. Great for daytime events and interviews because it reads tidy in photos and real life.
Mistake to Avoid: Using a thick white polish that blobs and hides the almond silhouette.
Style/Vibe: Clean French modern
Best For: Medium almond, professional settings
Skill: Intermediate
5. Glassy Jelly Almond
Jelly nails are glossy, see-through layers that look like colored glass on an almond shape. Build color in three thin layers, curing 45 to 60 seconds per layer for gel polish. For at-home gel, wipe tack between layers to avoid trapping uneven sheen. I like pairing jelly with a clear curved smile line for depth. Use translucent color gel and clear builder gel. It reads playful and is best on long almond, though a single layer works on medium length.
Mistake to Avoid: Applying one thick jelly coat that cures cloudy instead of glassy.
Style/Vibe: Playful glossy color
Best For: Long almond, weekend wear
Skill: Intermediate
6. Metallic Micro-French Accent
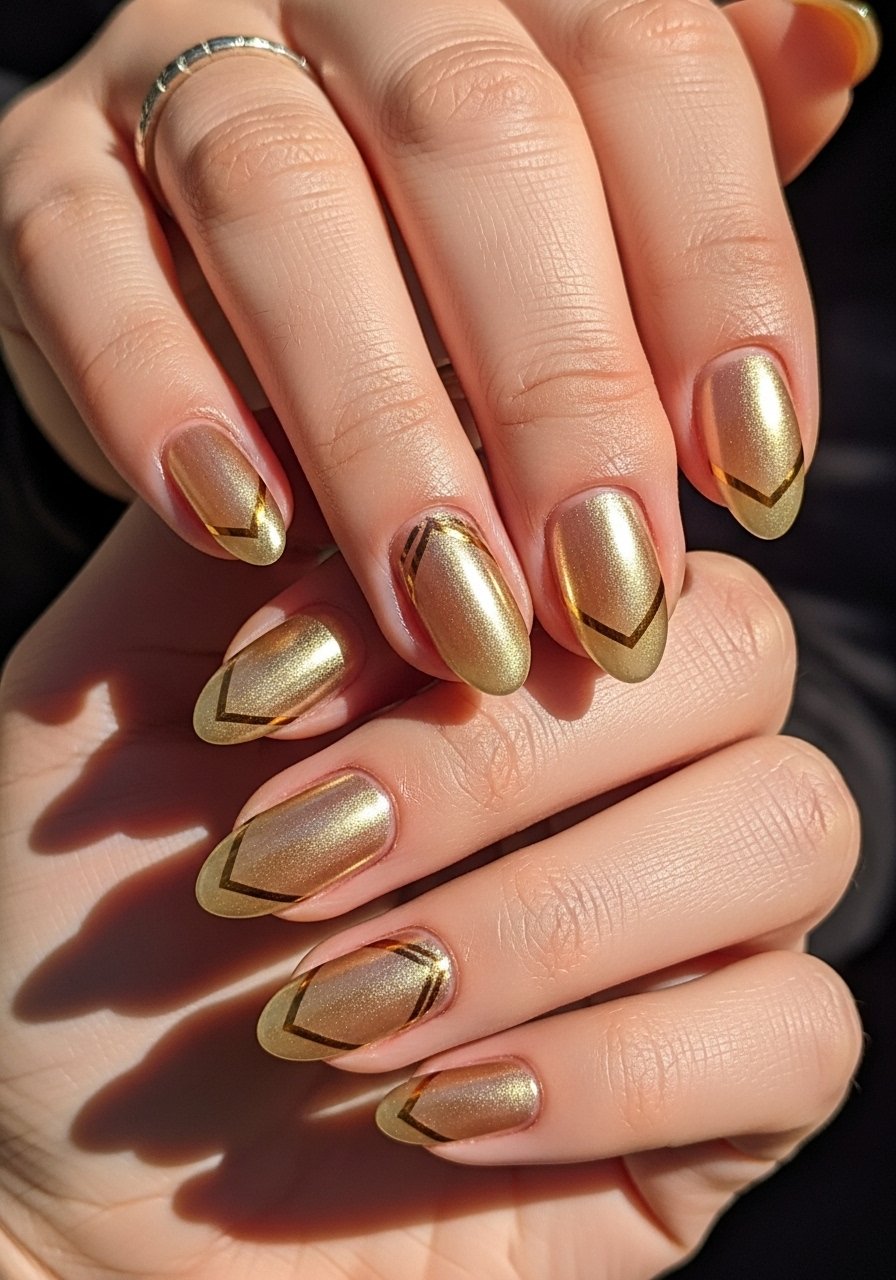
A micro-french placed just above the free edge gives almond nails a modern metallic edge without full chrome. Use a metallic foil or a fine metallic polish and draw a 1 to 1.5 millimeter line. It pairs well with neutral bases and elevates casual outfits. I reach for metallic polish and foil adhesive. This is a low-time, high-impact option that suits every skin tone and both gel and regular polish routines.
Mistake to Avoid: Dragging the brush loosely and making the metallic line uneven.
Style/Vibe: Subtle luxe
Best For: Medium almond, date nights and events
Skill: Beginner
7. Minimalist Line Art on Almond
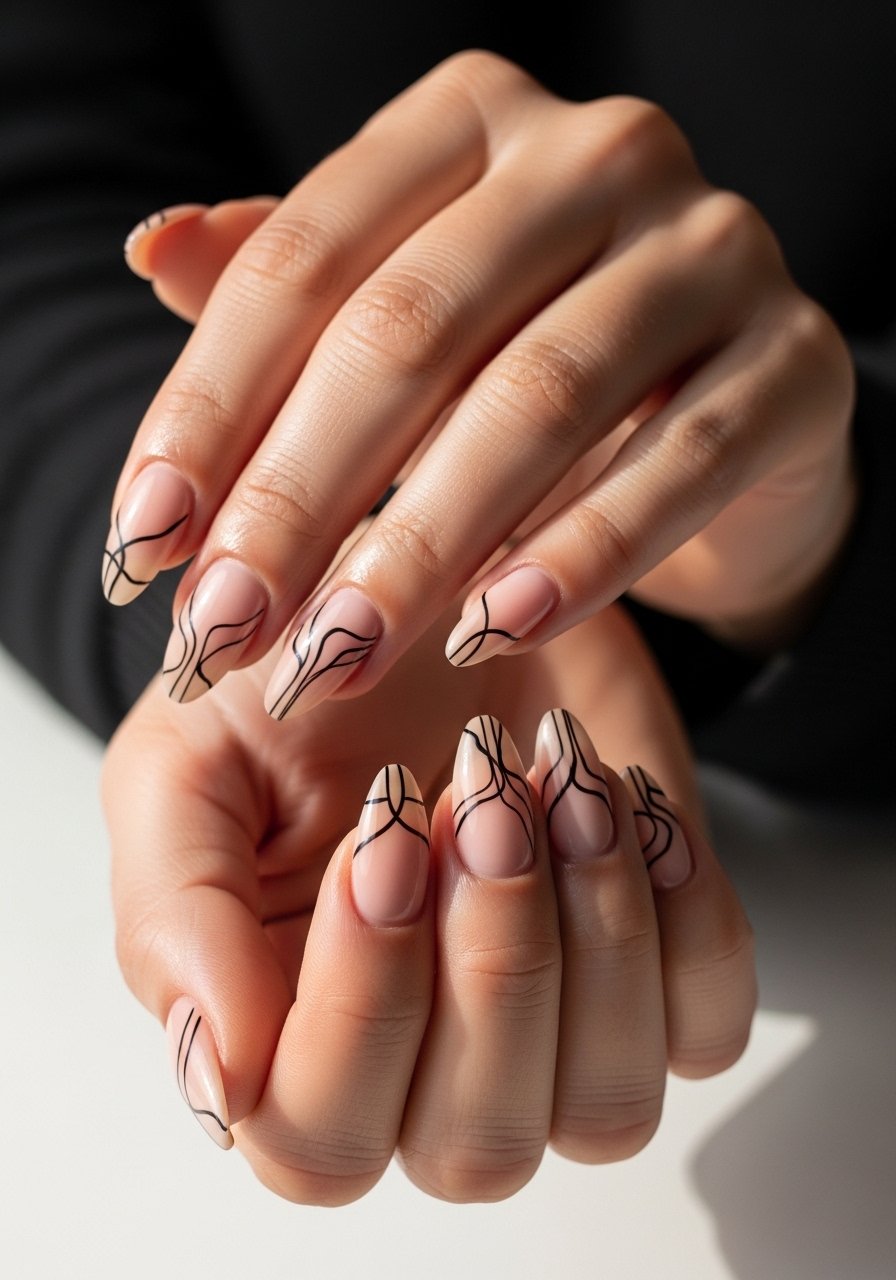
Tiny abstract lines and dots add personality without cluttering the almond silhouette. Use a single stroke technique, keeping lines between 0.5 and 2 centimeters to avoid overpowering the nail. I learned a steady wrist trick from a tech who works at a salon downtown, and now I practice on a plastic nail first. Use micro detail brush and long-wear black polish. This style is versatile across lengths and great for people who want art without bulk.
Mistake to Avoid: Overloading the design and losing the almond shape under busy patterns.
Style/Vibe: Clean minimalist art
Best For: Medium to long almond, creative workplaces
Skill: Intermediate
If any of these ideas have you ready to actually try something, here are the products doing most of the work.
Almond Nail Essentials List
Tools:
- fine liner brush (~$6-12), great for tips and line art
- micro detail brush (~$5-10), for tiny florals and negative space
- thin striping brush (~$4-8), essential for modern French lines
Polishes & Gels:
- matte top coat (~$8-15) for soft finishes
- translucent color gel (~$10-18) for jelly looks
- sheer nude polish (~$6-14) for gradients and bases
Prep & Extras:
- cuticle pusher and trimmer (~$7-15) to keep edges tidy
- nail buffer block (~$4-9) to smooth the nail bed before polish
- micro glitter mix (~$5-12) for subtle sparkle
8. Chrome Almond Ombre
Chrome ombre adds metallic drama while keeping the almond shape sleek. Use a sponge technique to fade chrome pigment from the tip inward, sealing with a thin no-wipe top coat. I do two passes of pigment, pressing lightly for even coverage. Try chrome pigment and no-wipe top coat. This is best on longer almond nails and takes a bit of practice, but photos better than you expect once you get the pressure right.
Mistake to Avoid: Rubbing pigment too hard and creating uneven shiny spots.
Style/Vibe: High-shine modern
Best For: Long almond, nights out
Skill: Intermediate
Style/Vibe: Chrome ombre
Best For: Long almond, glam events
Skill: Intermediate
9. Textured Sugar Finish Almond
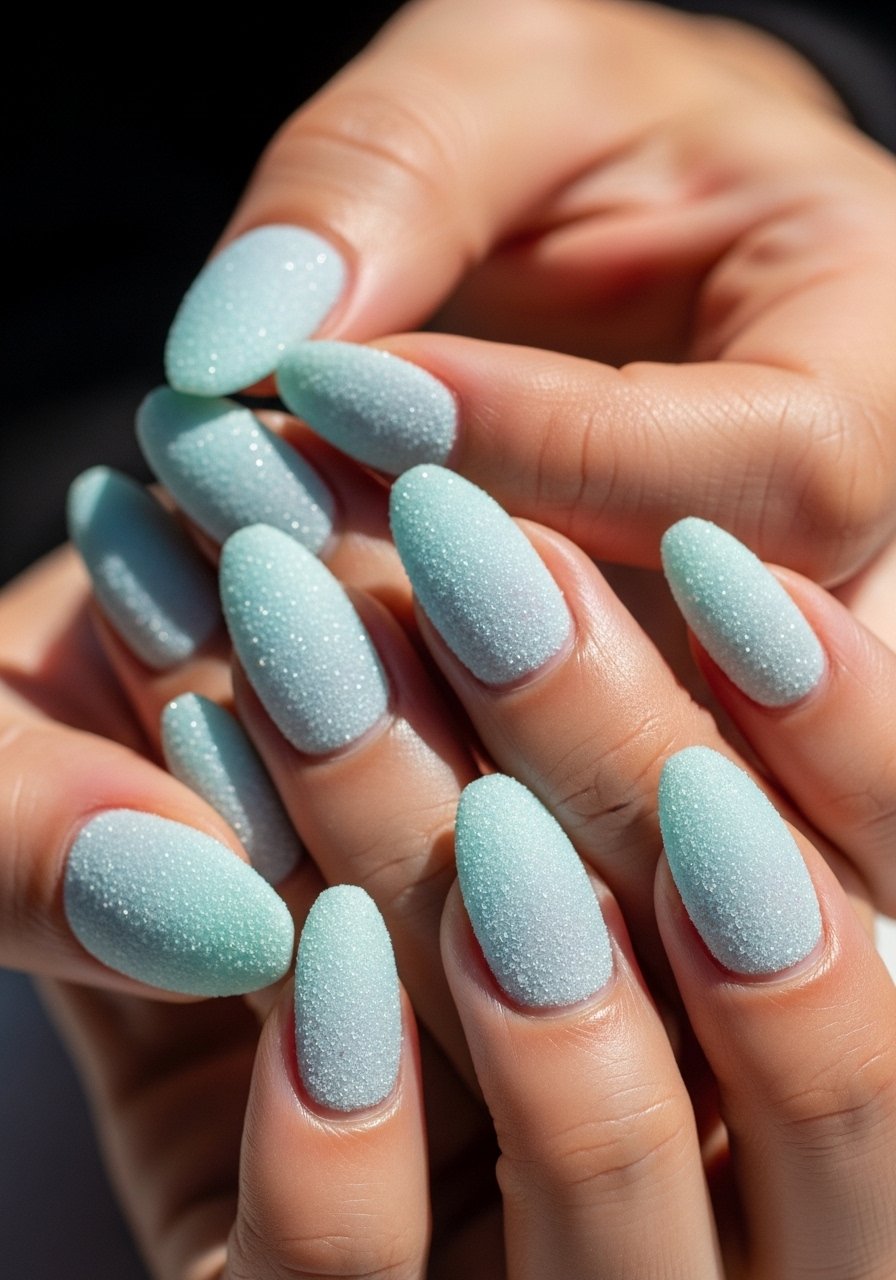
A sugar finish gives almond nails a soft, tactile surface that hides small chips. Apply a textured powder over a wet top coat, dusting off excess after a light cure. I find a 10 to 15 second initial cure keeps the top tacky enough for adhesion without melting the texture. Use texture powder and thin top coat. The result feels modern and is forgiving on medium lengths for people who type or cook a lot.
Mistake to Avoid: Over-curing before applying powder, which prevents it from sticking.
Style/Vibe: Tactile textured look
Best For: Medium almond, busy hands
Skill: Beginner
10. Short Almond Built for Typing
Short almond is the practical cousin of long almond, shaped with a small free edge and a soft point. File at a 45 degree angle and cap the edges by painting the tip, which strengthens against breakage. I prefer a layer of builder polish for added durability. Try builder gel polish and durable neutral polish. This is one of the gaps I kept missing in trends lists, and it suits people who want the almond look with minimal maintenance.
Mistake to Avoid: Leaving a long, thin free edge that snaps under pressure.
Style/Vibe: Practical polished almond
Best For: Short almond, office and parents
Skill: Beginner
11. Gel-to-Powder Soft Matte Hybrid
A hybrid that uses a gel base with a final dusting of acrylic powder gives a soft-mattified, pillow-like finish that lasts. Apply two thin gel layers, sprinkle a fine matte powder before full cure, then seal lightly. The depth signal here is to use a 10 second flash cure between layers so the powder seats, not clumps. I started doing this after seeing it in a salon and now use matte acrylic powder with low-heat gel lamp. This hybrid is great for people who want gel longevity with a cloth-like look.
Mistake to Avoid: Dumping powder onto a fully cured gel, which will not adhere.
Style/Vibe: Soft powdered matte
Best For: Medium to long almond, long-wear needed
Skill: Intermediate
12. Tiny Hand-Painted Florals
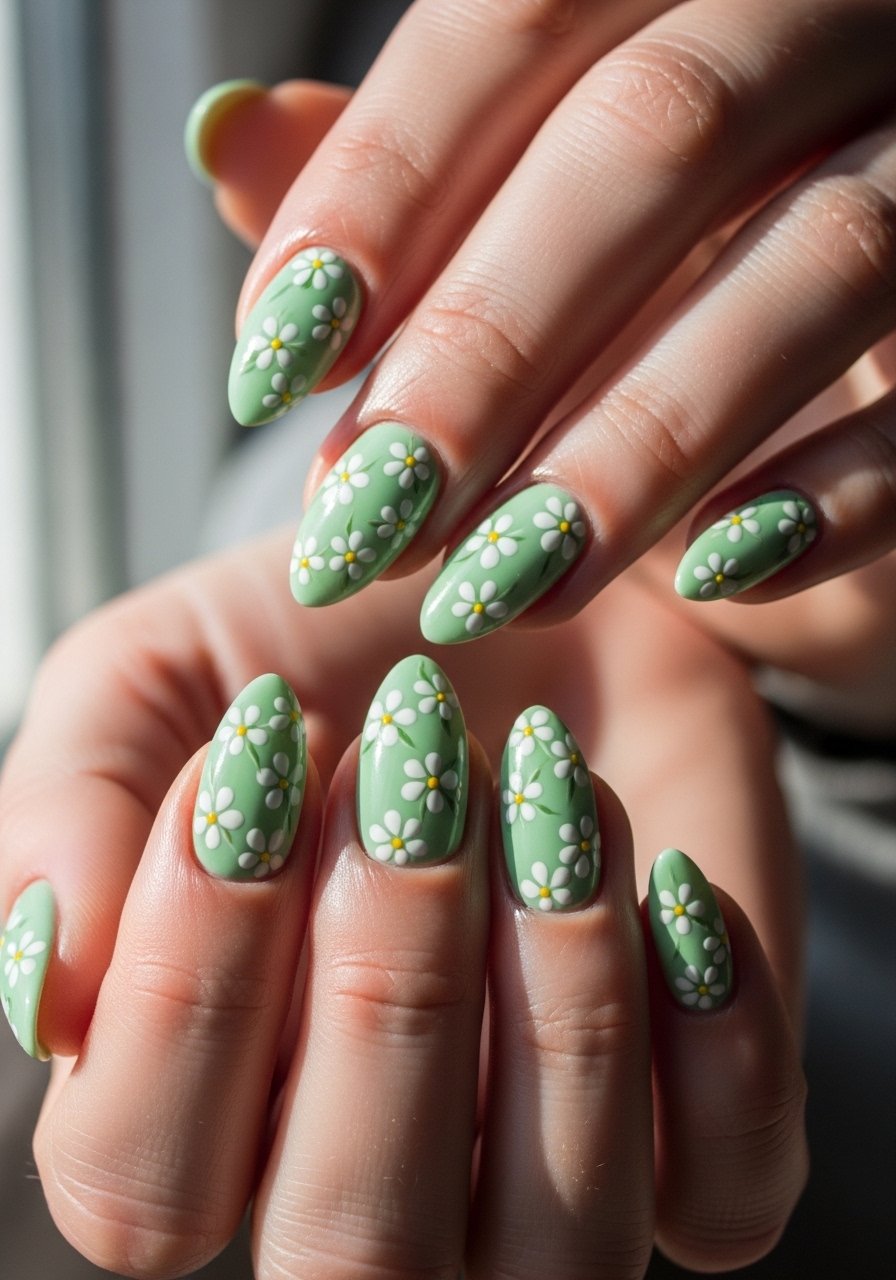
Small florals feel delicate on almond nails because the shape frames the artwork. Paint petals with a dotting tool and a 1 millimeter brush, keeping motifs under 0.8 centimeters so they read as accents. I do two florals per hand and leave most nails negative for balance. Use dotting tool set and fine paint polish. This is an advanced beginner move that photographs well and suits spring wardrobes.
Mistake to Avoid: Overcrowding nails with large blooms that make short almond look smaller.
Style/Vibe: Delicate hand-painted art
Best For: Medium almond, seasonal looks
Skill: Intermediate
13. Pearlescent Moon Almond
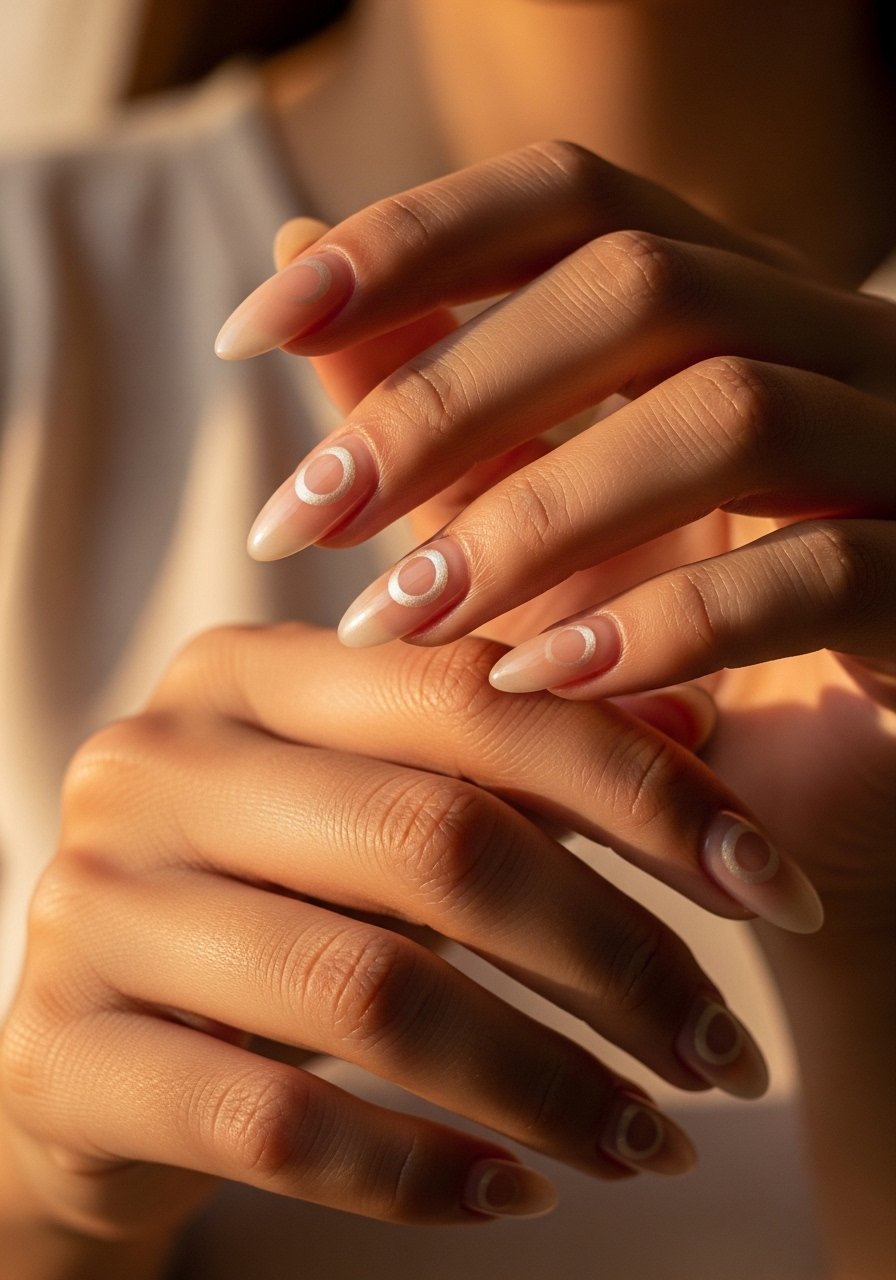
Pearlescent moons placed off-center bring a soft reflective detail that plays with the almond curve. Use a pearlescent pigment mixed with a clear gel to paint small moons that catch light differently than foil. I aim for moons about 2 to 3 millimeters wide and place them slightly toward the tip for visual lift. Try pearlescent pigment and clear gel medium. This works best on longer almond nails but a very small moon suits medium lengths too.
Mistake to Avoid: Making the moon too large, which flattens the almond silhouette.
Style/Vibe: Subtle pearlescent detail
Best For: Long almond, evening wear
Skill: Intermediate
Almond Mani Maintenance Moves
Thin coats beat heavy ones. Three thin layers of a quick-dry top coat look smoother and last longer than one gloopy layer.
Use cuticle oil pen daily. Nails that get a minute of oil every night stay flexible and break less often, especially with gel services.
If you are shaping at home, file in one direction with a 180 grit file for natural nails. A gentle 45 degree sweep creates the almond curve without thinning the sides.
Grab nail strengthener if you work with water a lot. Apply it as a base once a week to help nails keep a small free edge without splitting.
Rotate your colors seasonally, not every week. One carefully maintained almond mani lasts longer and looks cleaner than weekly quick fixes, and your hands recover between color changes.
