
I kept centering everything too high on my chest, then wondering why the piece curled oddly toward my collarbones when it healed, and it was months before someone in the shop told me to lower the anchor point two finger widths below the sternal notch. That tiny shift changed how a vertical piece reads on the body. After messing around in five shops and a few bad touchups, I learned to plan for clothing, aging, and how the chest moves with every breath.
These eleven ideas are not all loud chest plates or tiny symbols tucked away. They are practical ways to carry a spine-to-chest composition that heals well, reads in motion, and can be covered for work when needed. Most are doable in one or two sessions and fit budgets from modest shop visits to a splurge day with a specialty artist, and I learned what works across five shops I have visited.
1. Minimal Vertical Script
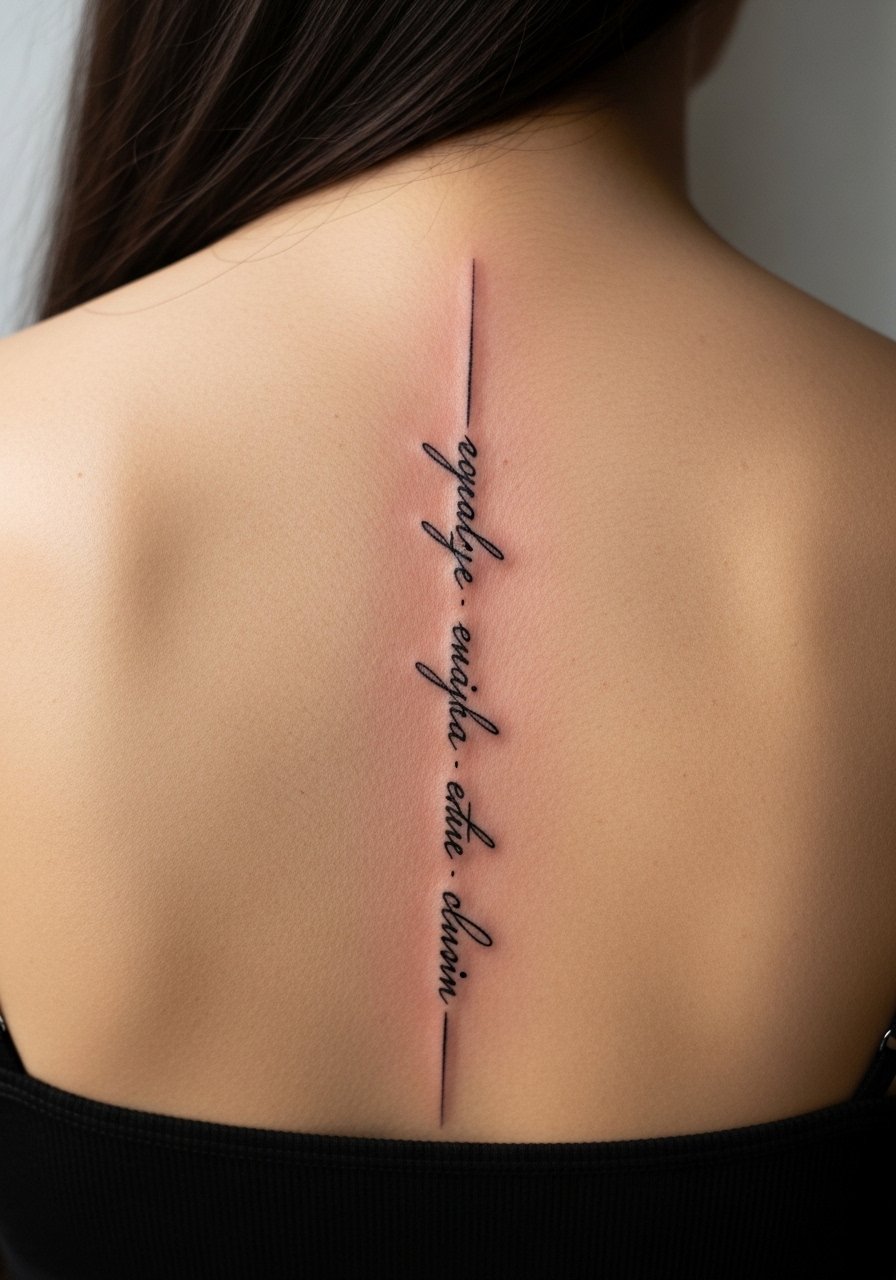
Start with a single line of text that follows the spine, small caps or narrow script, placed so the bottom word sits roughly two finger widths above the sternum body line. Visually it reads as a column, and the result feels quiet and intentional rather than loud. This suits someone who wants something coverable under a buttoned shirt and quick to tattoo. Budget wise expect a short session, around 1 to 2 hours, and insist on a 0.35 mm line weight for longevity. Aftercare like an unscented tattoo balm helps fine lines hold. Grab an unscented tattoo aftercare balm if you do this at home.
Style/Technique: Fine-line script
Pain Level: 5/10
Session Time: 1 to 2 hours
Best For: Coverable work-visible pieces, beginners
Mistake to Avoid: Placing the text too high so it rides onto the clavicle, which warps with shoulder movement.
2. Mirrored Geometric Anchors
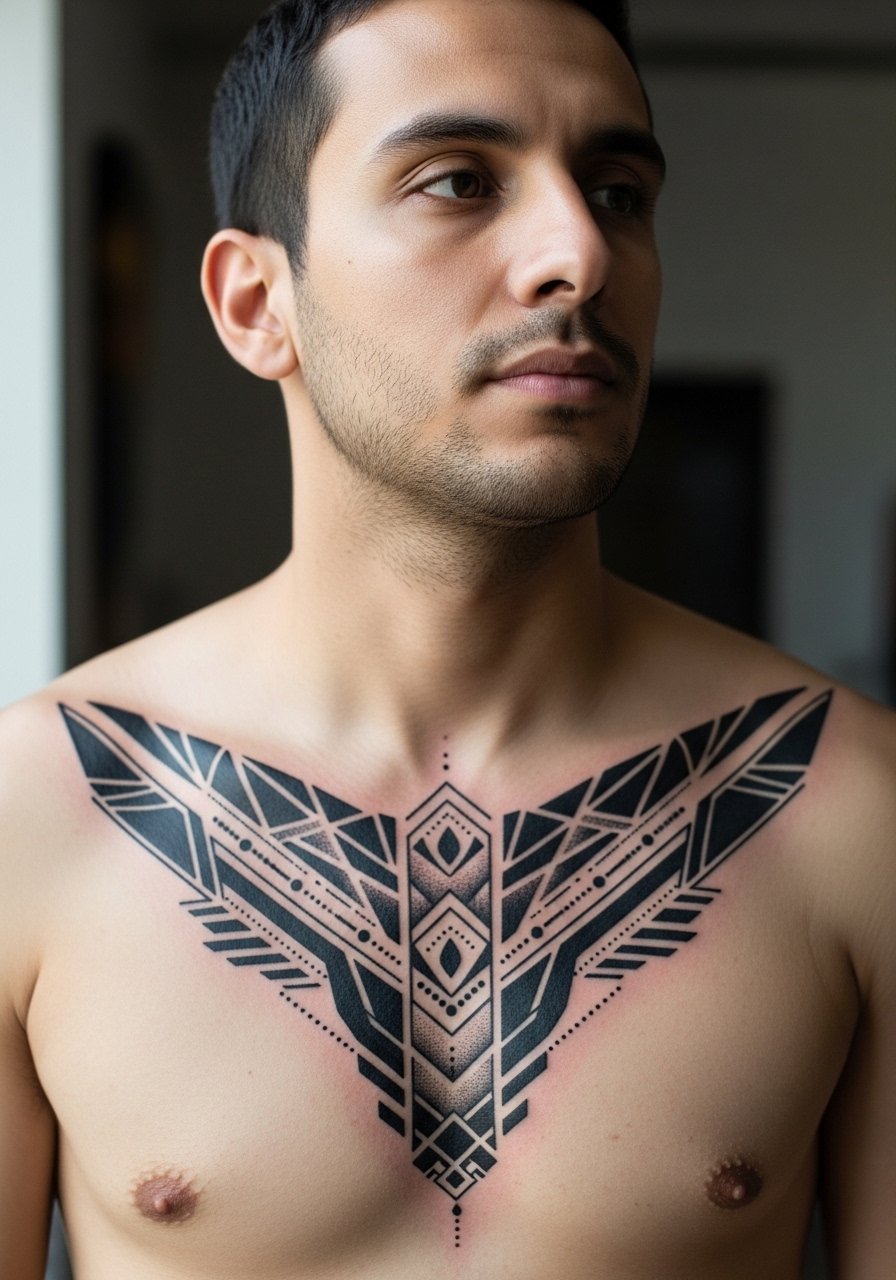
I liked this idea because geometry reads clean at distance and tight up close. Two mirrored shapes on either side of the sternum create a visual anchor that pulls the eye up the spine. It works well for men who want a bold but tidy aesthetic and pairs well with a single fine line down the center. Ask for 3 mm spacing between outer lines to avoid bleeding into one another as it heals. This design is medium difficulty and often two sessions. For tools, a blackwork-safe barrier bandage can reduce rubbing while healing. Try a tattoo aftercare soap for gentle cleansing.
Style/Technique: Geometric blackwork
Pain Level: 6/10
Session Time: 1.5 to 3 hours
Best For: Symmetry lovers, chest-forward styling
Mistake to Avoid: Letting lines sit too close to the sternum flex line, which blurs with movement.
3. Fine-Line Botanical Runner
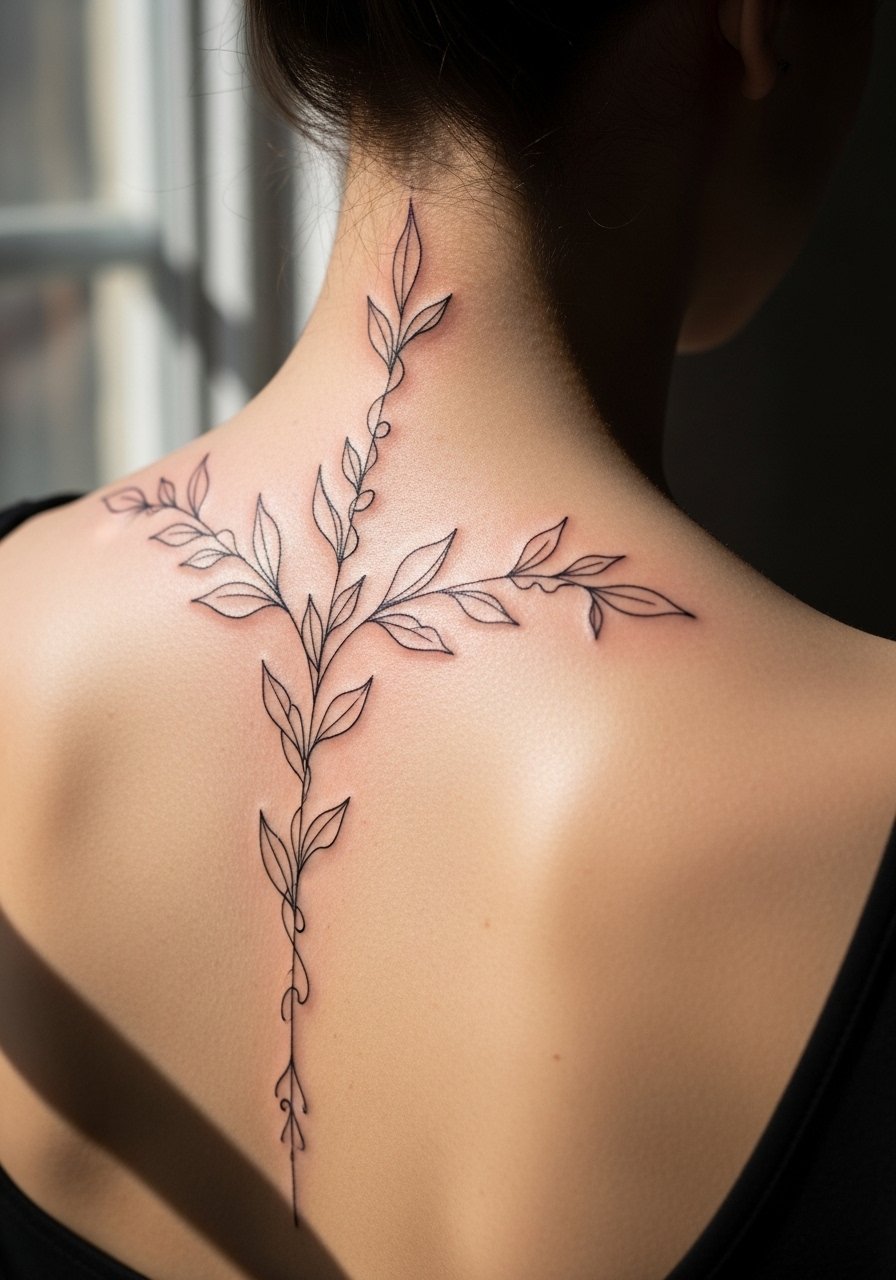
There is a softness to thin botanicals that balances the chest shape. Small leaves and a trailing stem that tapers as it reaches the sternum create movement that breathes with the body. Artists should use 0.4 mm max line weight and three soft dot-shading passes where depth is needed. This feels organic and suits someone who wants subtle coverage and a design that ages into the skin. It is beginner-friendly for time and budget, usually one longer session. Keep a mild, fragrance-free lotion on hand and a gentle fragrance-free moisturizer for aftercare.
Style/Technique: Fine-line botanical
Pain Level: 4/10
Session Time: 1 to 2 hours
Best For: Subtle coverage, first-timers
Mistake to Avoid: Asking for too heavy a fill, which removes the delicate, skin-like quality of the leaves.
4. Stacked Sigils With Negative Space
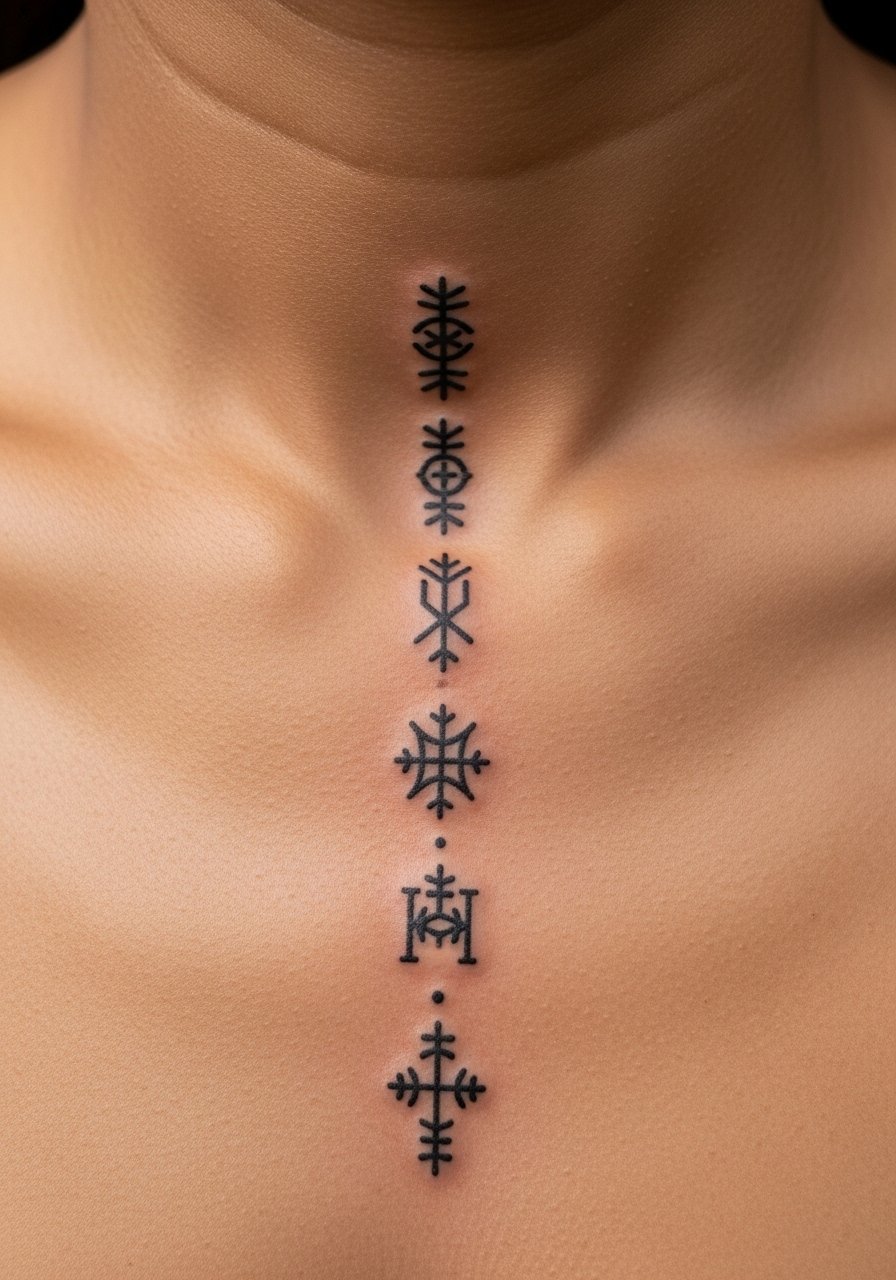
If you want meaning without one big image, stacked sigils or seals read like a totem down the chest. The negative space between icons is as important as the marks. I plan anchor points so each element sits roughly 1.2 centimeter apart, which preserves clarity over time. This style is ideal if you want to add pieces over multiple sessions. Expect several short sessions of 30 to 60 minutes each. For touchups, a compact tattoo healing kit and a sterile non-stick bandage help protect individual sigils while others finish settling.
Style/Technique: Symbol stack with negative space
Pain Level: 5/10
Session Time: 30 minutes to 1 hour per sigil
Best For: Add-on plans, modular designs
Mistake to Avoid: Crowding symbols so they lose definition as the skin settles.
5. Chest-To-Spine Mandala Anchor
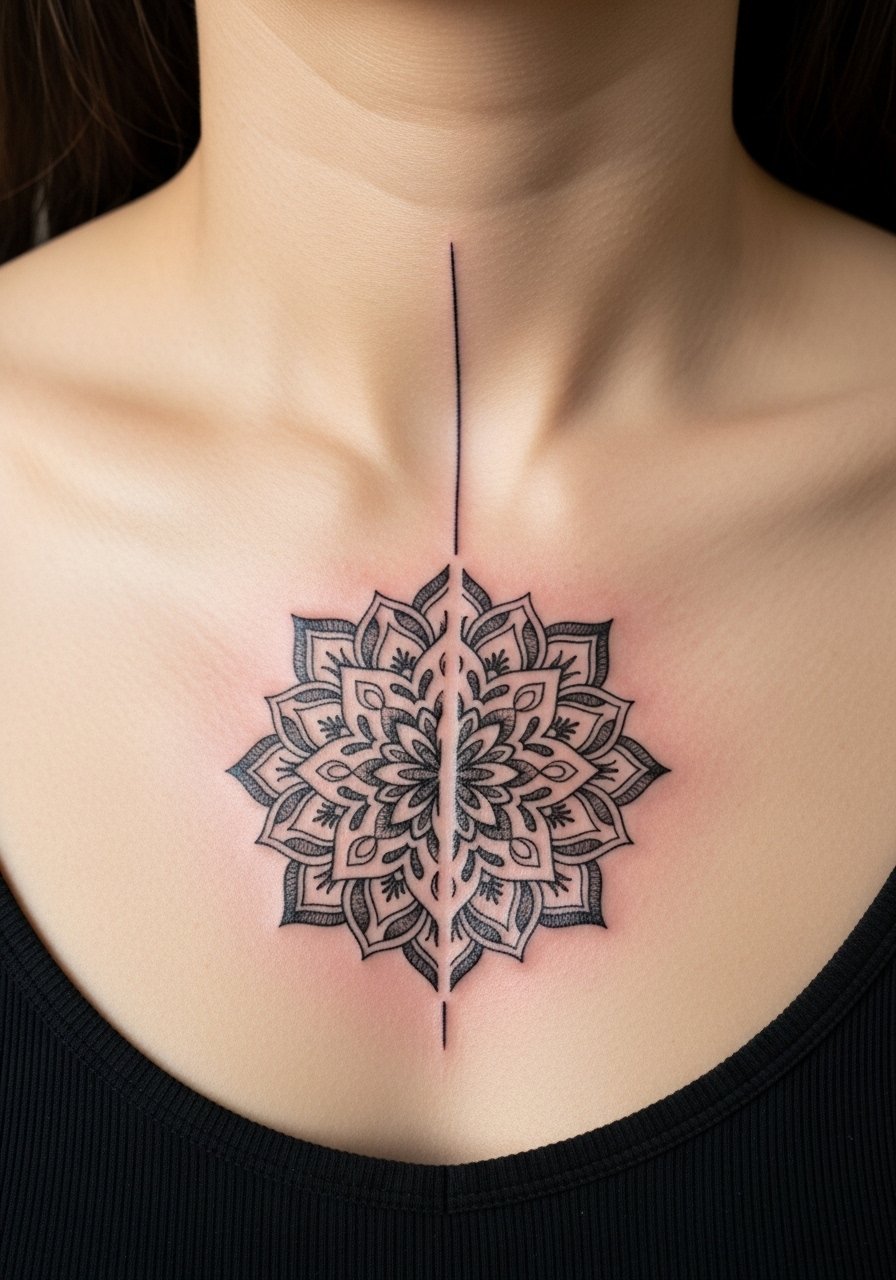
A compact mandala on the sternum with a delicate spine column above reads formal and meditative. The trick is keeping the central dotwork tight and moving outward with incremental 0.5 mm dot spacing for gradation. It creates a focal point on the chest while the spine line frames it. Best for someone who wants a statement that is still coverable. Plan for a 2 to 3 hour session and budget for precision work. Using a dotwork stencil paper at the shop will make the symmetry hold.
Style/Technique: Mandala with spine accent
Pain Level: 6/10
Session Time: 2 to 3 hours
Best For: Statement pieces that remain coverable
Mistake to Avoid: Skipping a precise stencil check which leads to off-center mandalas.
6. Blackwork Sacred Geometry Column
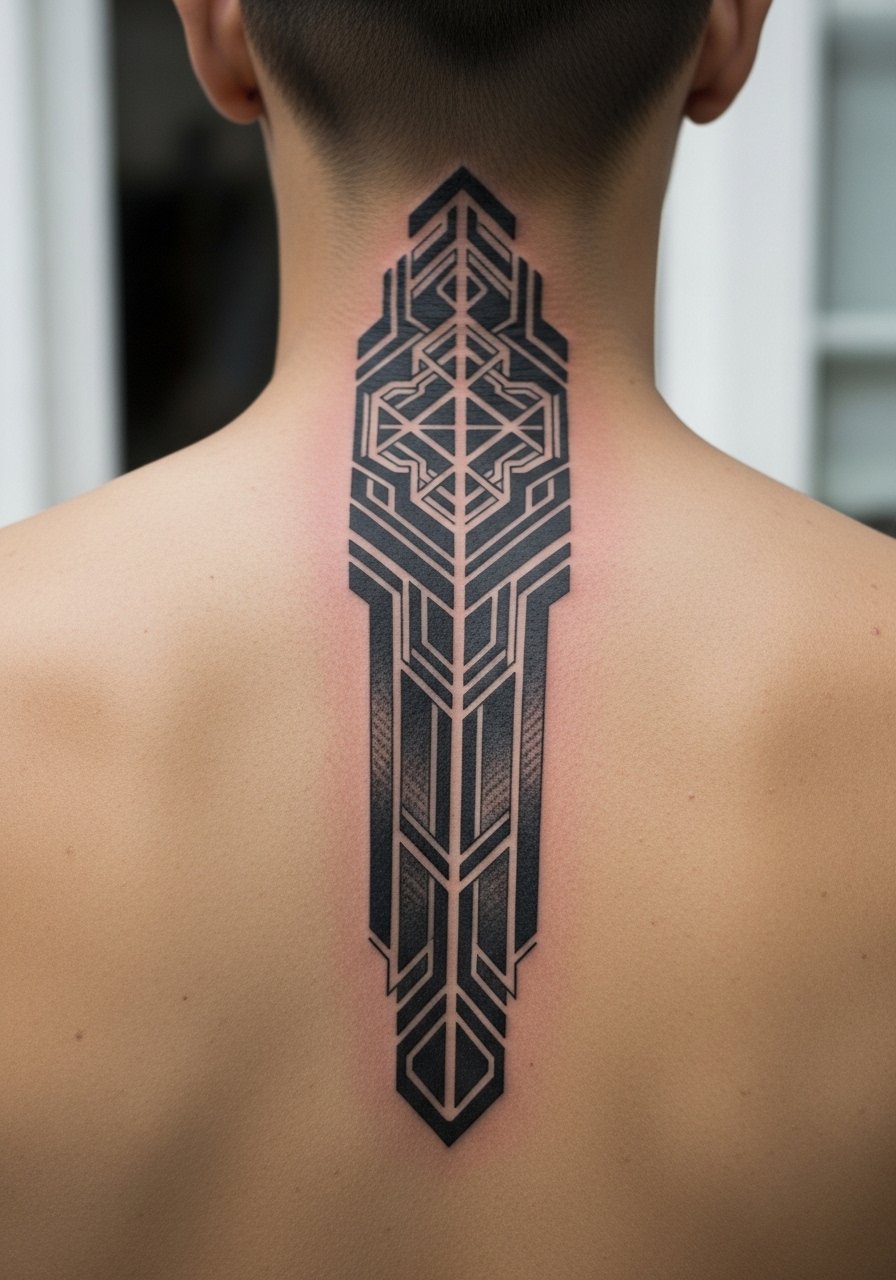
Dense blackwork holds up well on the chest if placed smartly. Sacred geometry columns use solid fills and negative cuts to remain readable from afar. Ask your artist to pace bold fills in one long pass rather than multiple overlapping passes to reduce trauma. This is a higher budget piece and often needs two sessions. It suits someone comfortable with more visible ink and who wants longevity over subtlety. Protect new fills with a breathable tattoo film for the first 48 hours.
Style/Technique: Solid blackwork geometry
Pain Level: 7/10
Session Time: 2 to 4 hours
Best For: Bold coverage, long-lasting graphic style
Mistake to Avoid: Asking for massive black fills in one session, which increases scarring risk.
7. Biomechanical Spine Seam
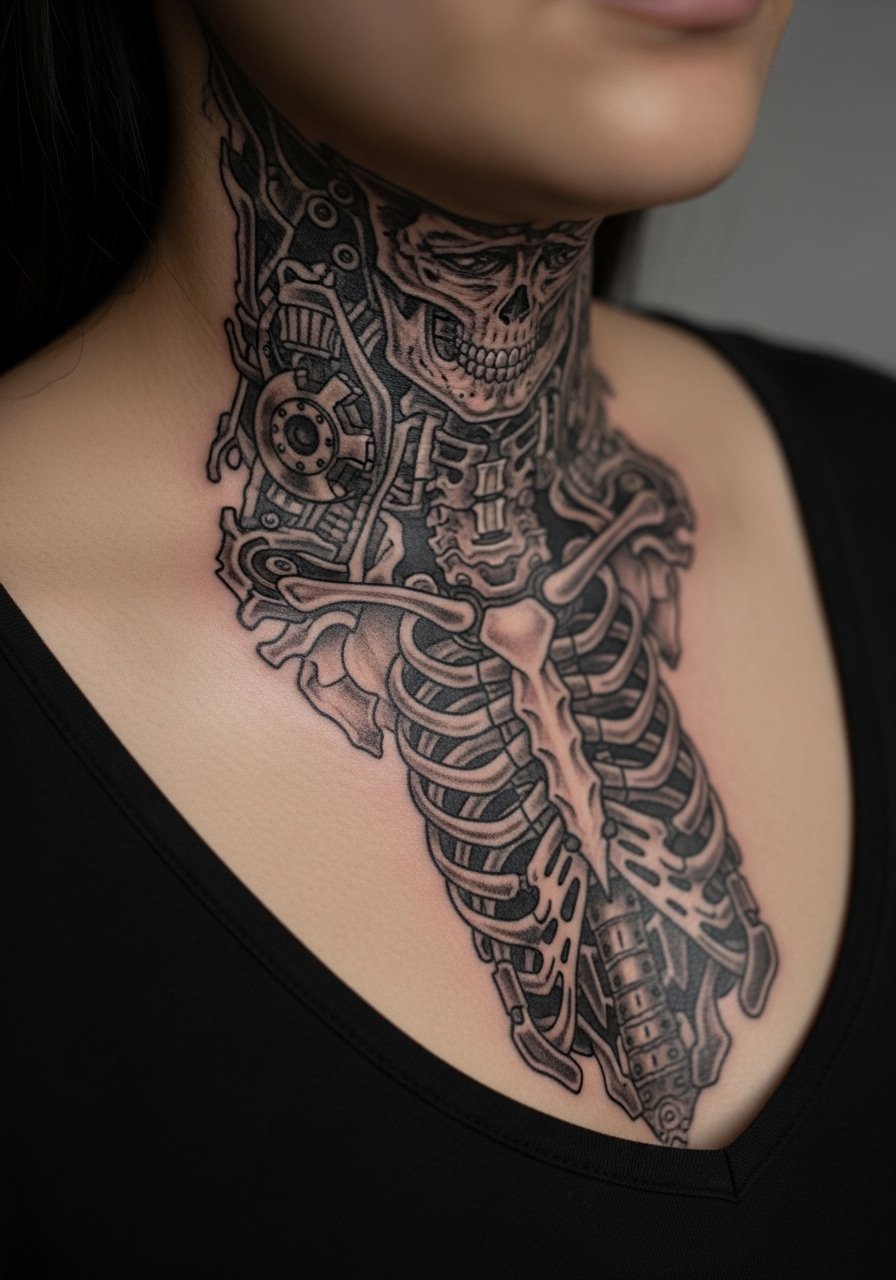
This is for the person who likes an industrial edge. Panels, seams, and mechanical rivets that hug the sternum create the illusion of structure under the skin. Line density matters here; request varied line weights and a 2 millimeter gap for hardware edges so the piece does not blur into a single dark mass as it heals. It usually takes longer and may need a touchup. Use a high-UV sunscreen after healing to protect heavy blackwork. Consider a tattoo-specific broad spectrum sunscreen once fully healed.
Style/Technique: Biomechanical realism
Pain Level: 7/10
Session Time: 2 to 4 hours
Best For: Edgy, mechanical aesthetics
Mistake to Avoid: Over-detailing tiny mechanical parts that will merge with time.
If any of these ideas have you ready to actually try something, here are the essentials I reach for when booking and healing spine-to-chest work.
Aftercare and Gear for Chest-Spine Ink
Aftercare:
- Honest, practical choice for daily care, unscented tattoo aftercare balm (~$10-20). Keeps fine lines from drying out.
- Tattoo aftercare soap (~$8-15). Gentle, fragrance-free cleansing.
- Breathable tattoo film (~$6-12). For the first 24 to 48 hours.
Shop Prep:
- Disposable razor (~$5-10). For precise, pre-session shaving.
- Sterile non-stick bandage (~$6-12). Protects sensitive chest spots while clothes rub.
- Tattoo-safe sunscreen (~$12-20). Use after healing to preserve blacks and fine lines.
8. Convertible Sternum Panel
I learned to design pieces that convert from a modest sternum panel into a longer spine piece if you add later. Start with a grounded, symmetrical base that sits at midline and leaves two clean margins for future connectors. This approach works for people who want a starter piece that can grow over time. The initial session is short, and adding the spine extension is a second session later. For planning, map connectors at 1.5 centimeter widths to maintain flow. A sterile non-stick bandage is perfect for protecting the original while you build.
Style/Technique: Modular sternum to spine
Pain Level: 5/10
Session Time: 45 minutes to 1.5 hours initially
Best For: Incremental builds, conservative workplaces
Mistake to Avoid: Starting with a base that is too wide, which makes future connectors awkward.
9. Heartbeat Line Into Chest Motif
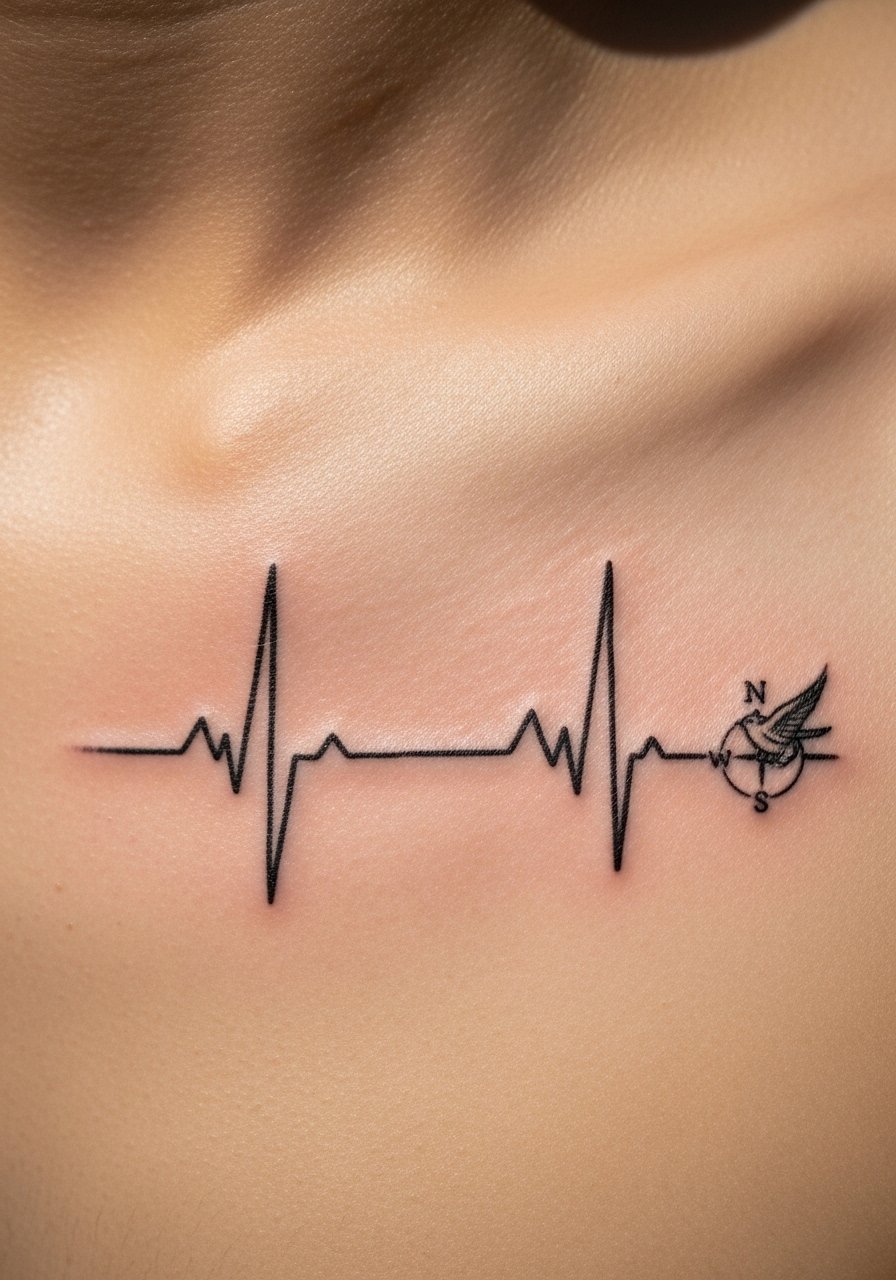
A heartbeat or EKG line that crosses the sternum then blooms into a small image creates narrative movement. Keep the EKG waveform simple and the transition point at least 2 centimeters away from major muscle flex lines to avoid distortion. This suits someone who wants a symbolic, readable piece and often fits a single session. Be mindful with medical motifs; avoid using real hospital codes or personal medical identifiers unless it is your own story. I recommend a fragrance-free moisturizer for the delicate central chest area after peeling subsides.
Style/Technique: Line work with small motif
Pain Level: 5/10
Session Time: 1 to 2 hours
Best For: Symbolic minimalists, quick sessions
Mistake to Avoid: Crowding the motif where the heartbeat ends, which reads messy from a distance.
10. Minimal Dotwork Column
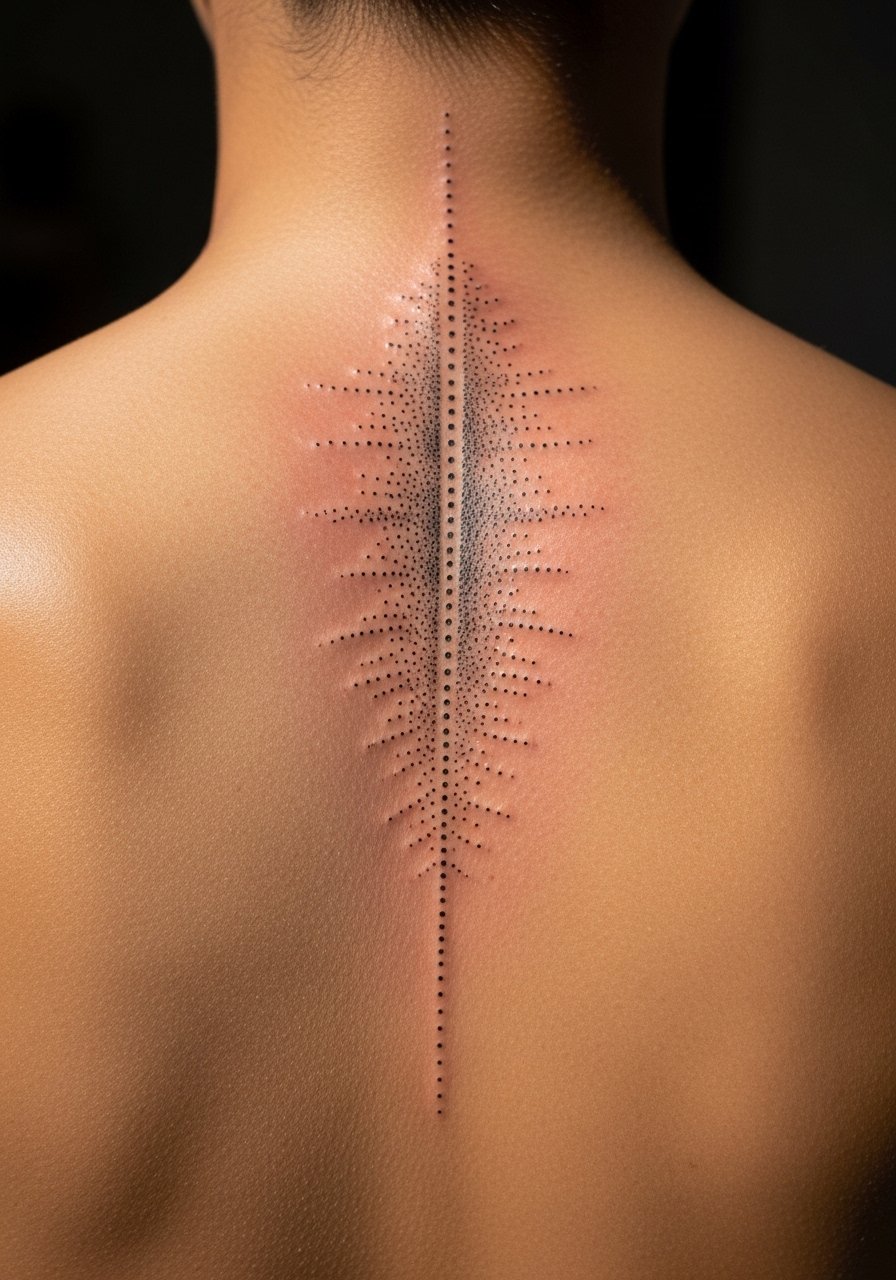
Dotwork ages gracefully because it disperses pigment in tiny points rather than blocks, which is forgiving if the skin stretches. Use a consistent dot spacing of 1.5 mm in shaded areas and softer spacing toward edges. This creates a smoky effect that keeps depth without heavy lines. It is a calm choice for someone who wants texture instead of hard outlines. Typically a two-hour session, and it pairs well with other fine-line elements. Keep the area moisturized with an unscented tattoo aftercare balm.
Style/Technique: Stippled dot shading
Pain Level: 4/10
Session Time: 1.5 to 2.5 hours
Best For: Texture seekers, subtle depth
Mistake to Avoid: Compressing dots too tightly, which turns dotwork into a solid blotch over time.
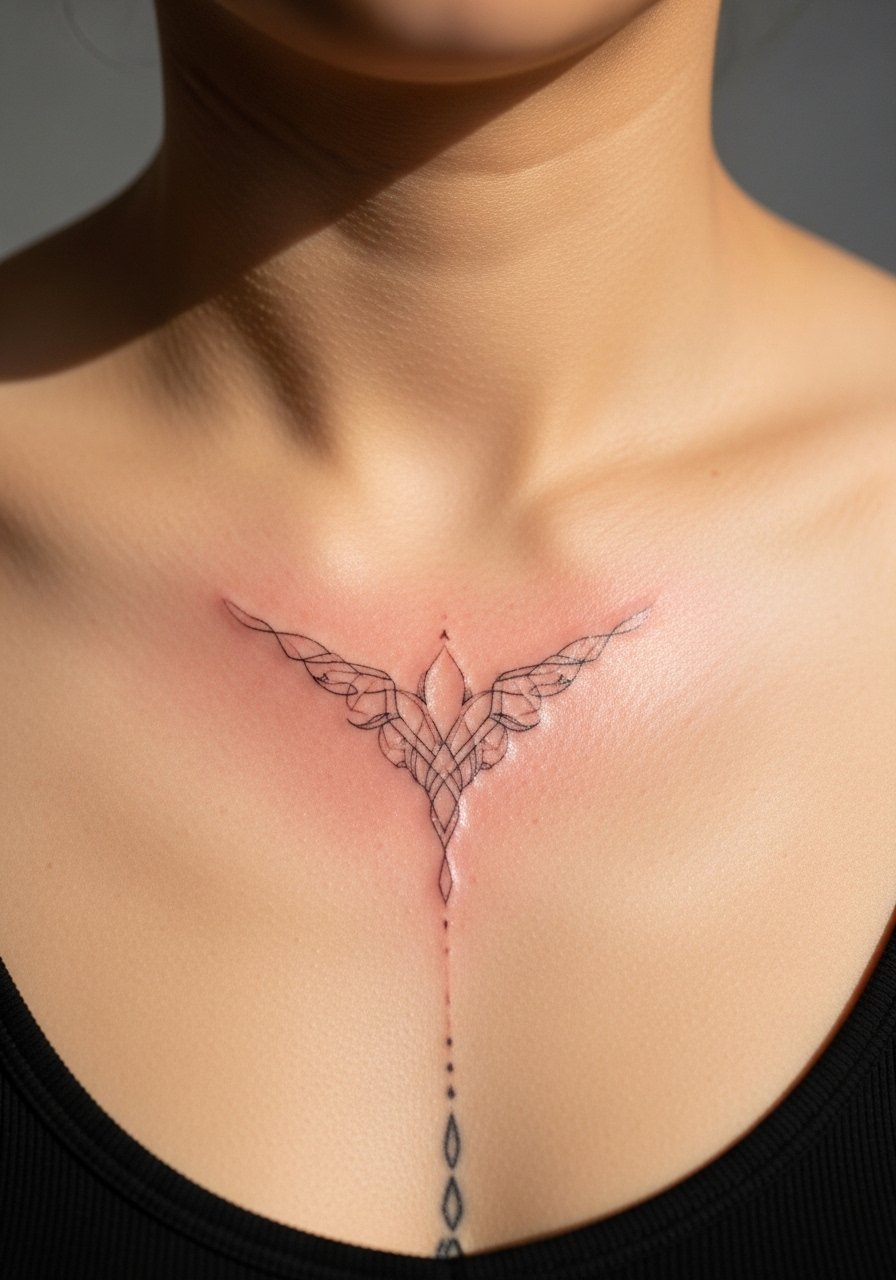
11. Two-Part Mirror Wings
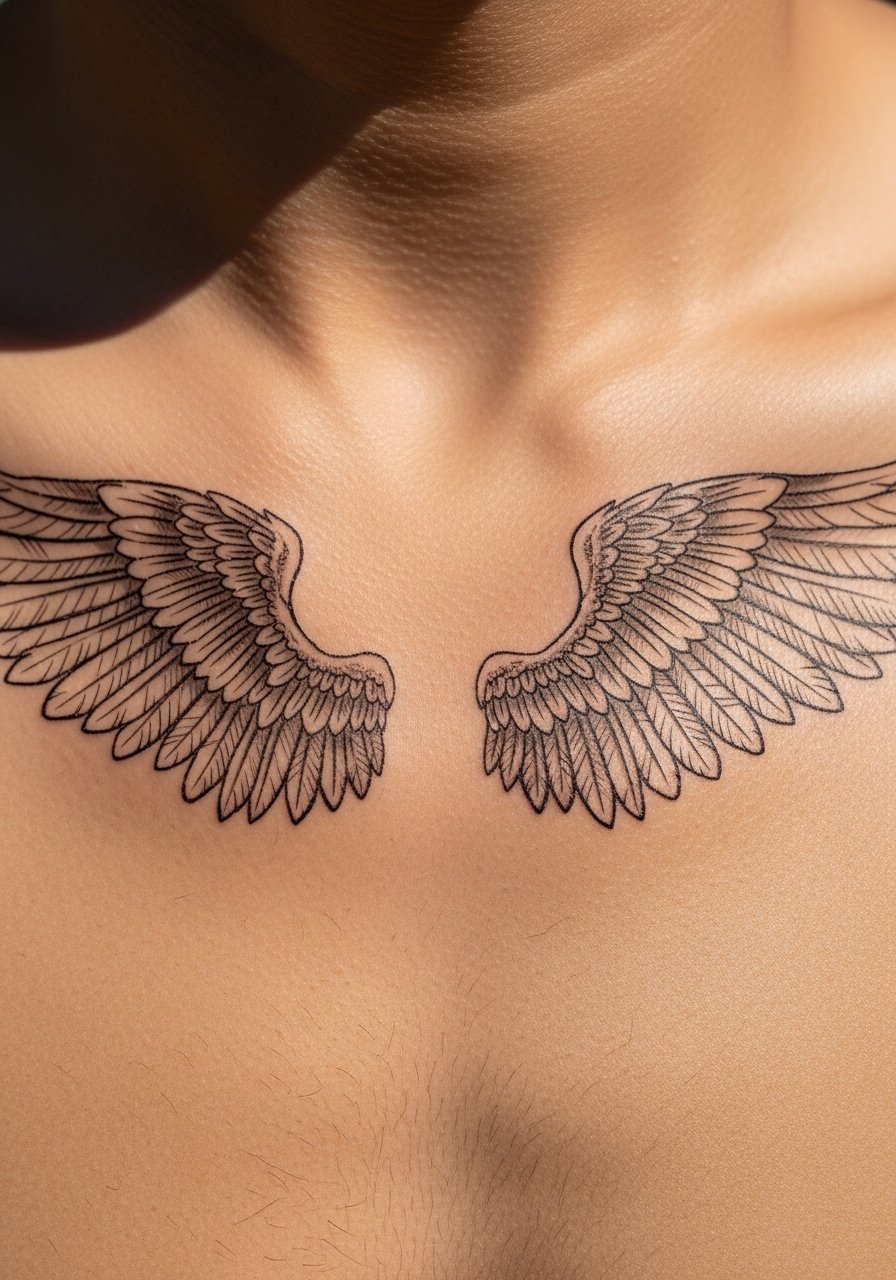
This gives the impression of wings without a single large back piece. Two mirrored half-wings starting at the upper chest and angling toward the spine create dynamic motion. Place the inner tips so they align with a vertical guide that sits two finger widths from the midline for balance. This style reads large but can be built in two sessions and is easy to cover with a shirt for work. For heavier lines at the wing edges, expect touchups in a year. A breathable tattoo film helps protect the inner chest during sleep.
Style/Technique: Mirrored ornamental wings
Pain Level: 6/10
Session Time: 2 to 3 hours
Best For: Bold chest pieces that still split into two sessions
Mistake to Avoid: Letting the inner wing tips sit too close to the sternum, which looks crowded when you move.
Healing Habits For Spine Chest Ink
Thin coats beat one thick coat every time. When you layer aftercare balm keep applications light and frequent. A thin film lets the skin breathe and reduces scabbing. I use an unscented tattoo aftercare balm and apply a pea-size amount twice a day.
Grab breathable tattoo film for the first night, around $6 to $12. It helps stop shirts from sticking to fresh chest pieces and keeps friction down.
Most people underestimate sun in winter. Use a tattoo-safe sunscreen after the healing window to keep blacks from fading faster.
Everyone thinks scar tissue looks the same. It does not. Ask the artist about needle passes and session pacing so you limit overworking the area, especially with heavy blackwork. A fragrance-free moisturizer is the simplest long-term guard.
