
I kept asking for the same blunt bob and wondering why my face still read round in photos, until one stylist cut two inches longer in the front and raked the ends with scissors. The camera finally agreed with what I felt in the mirror. Those small shape cues, like a 1/2 inch forward slope and a soft side part, are the exact changes that slim a round face without adding daily effort.
These looks are short, simple to style, and meant for anyone who hates a constant salon schedule. They work across four hair textures I have styled, from fine straight to thick curly. Most styles here take 5 to 15 minutes, use inexpensive tools, and include a heat-free option when possible. I mention exact cut notes you can show your stylist, and one product for each idea so you can try the look without guessing.
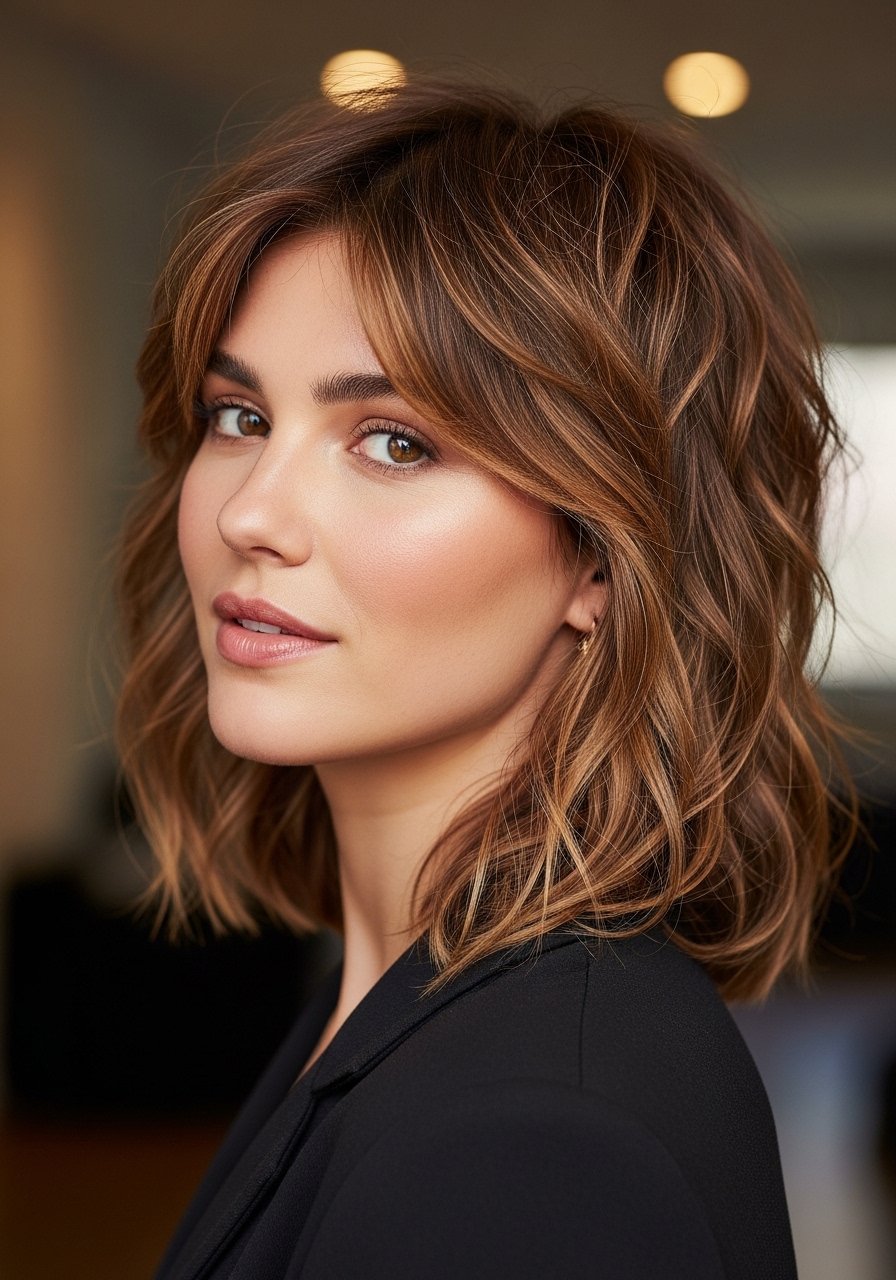
1. Forward-Angle Bob With Side Part
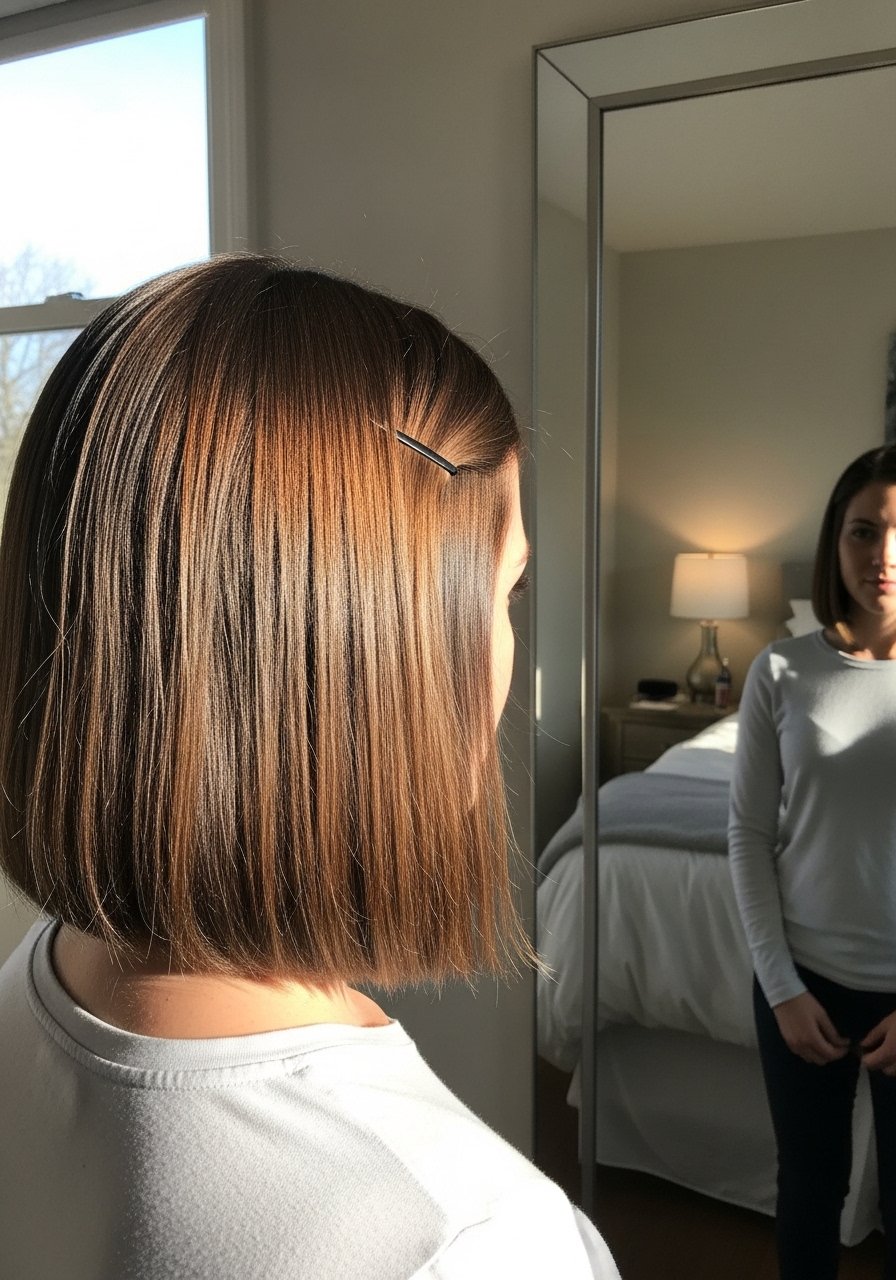
Start with the angle. A bob that is 1/2 inch longer at the front than the back creates a visual elongation, especially when paired with a side part that drops 1 to 1.5 inches off center. It reads polished but lived-in, and it suits fine to medium hair best because the weight helps the line sit. For styling, a 1-inch round brush plus a quick pass with a flat iron smooths the face-framing pieces. I like the ceramic 1-inch round brush for everyday use. Heat-free option: smooth with a damp set and clip the front 30 minutes to train the angle.
Mistake to Avoid: Asking for a blunt chin bob without specifying the forward angle, which makes the face look wider.
2. Asymmetrical Pixie With Long Fringe
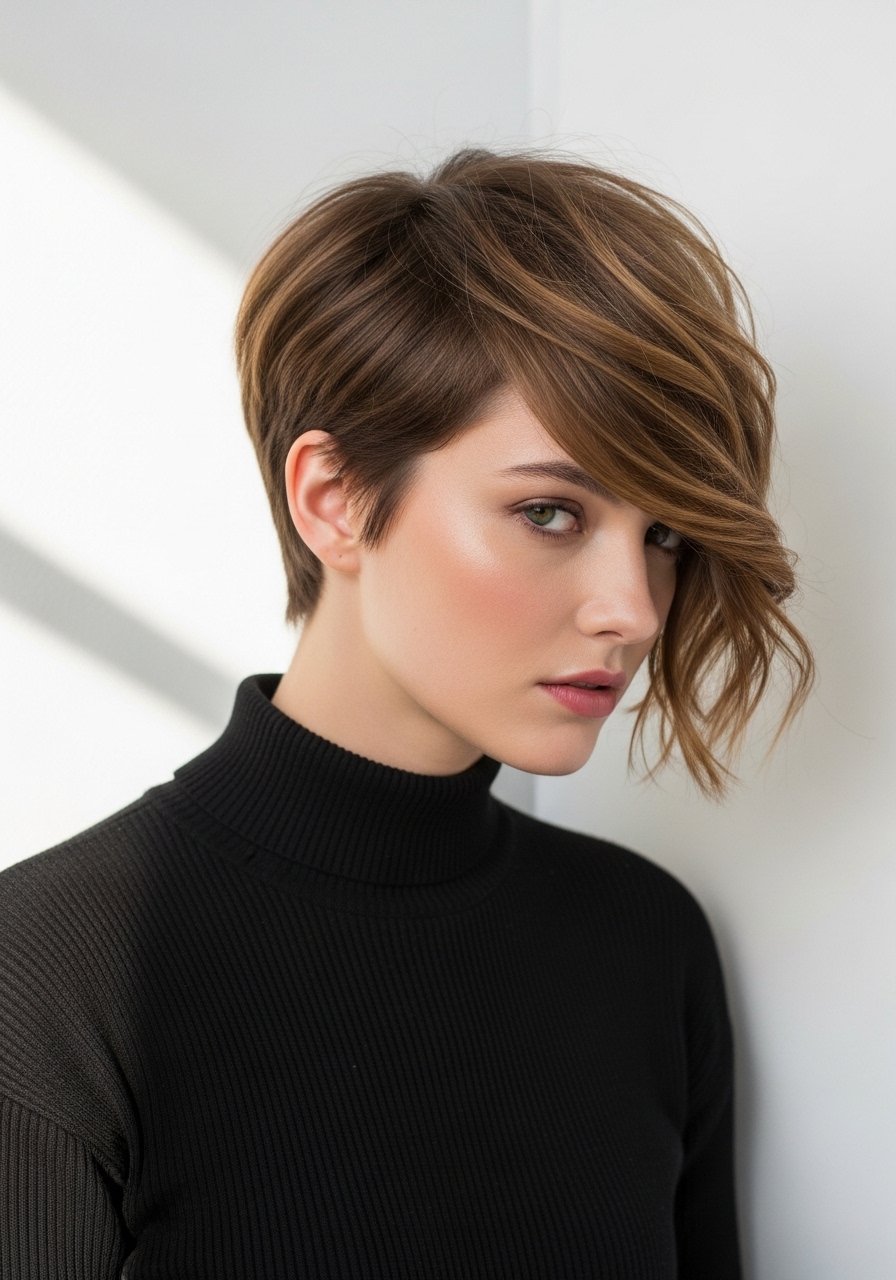
A side-swept fringe that lands just below eyebrow level creates a diagonal line across the face, which counters roundness. This pixie keeps length on one side to add asymmetry that the eye reads as slimming. It works well on wavy and straight hair, and for thick hair the stylist should remove bulk by point-cutting at a 45 degree angle, about 1/4 inch sections, to keep movement. I use a pea-sized amount of matte paste to define the fringe. Time investment is low, but maintenance trims every 6 to 8 weeks keep the shape clean.
Mistake to Avoid: Trimming the fringe too bluntly, which shortens the diagonal and flattens the slimming effect.
3. Textured Shag With Face-Framing Layers

Choppy layers near the cheekbones break the round silhouette. Ask for 1 to 2 inches of graduated face-framing layers that start at cheek height and feather out, which creates vertical shadowing. This style is forgiving on curly and wavy hair because the layers settle into natural movement. For product, scrunch a salt spray, I like the sea salt texture spray, then diffuse on low or air-dry. Budget friendly and great for second-day hair. Porosity note: if your hair is high porosity, use a light leave-in to keep frizz in check.
Mistake to Avoid: Cutting all layers the same length, which makes the cut sit boxy around the cheeks.
4. Ear-Tuck Lob With Soft Graduated Ends
This is my go-to for anyone who wants short without the full bob commitment. The key is leaving the front sections 1 to 2 inches longer than the back and softening the ends with 4 to 6 point cuts so they bend toward the jawline. Tucking one side behind the ear instantly exposes the cheekbone and creates an asymmetry that slims. Use a light serum on ends, like the weightless hair serum, and finger-style while damp. Works well for petite and average face sizes because it does not overwhelm frame.
Mistake to Avoid: Cutting the lob too even, which makes the jawline read wider in photos.
5. Blunt Bob With Internal Texturizing
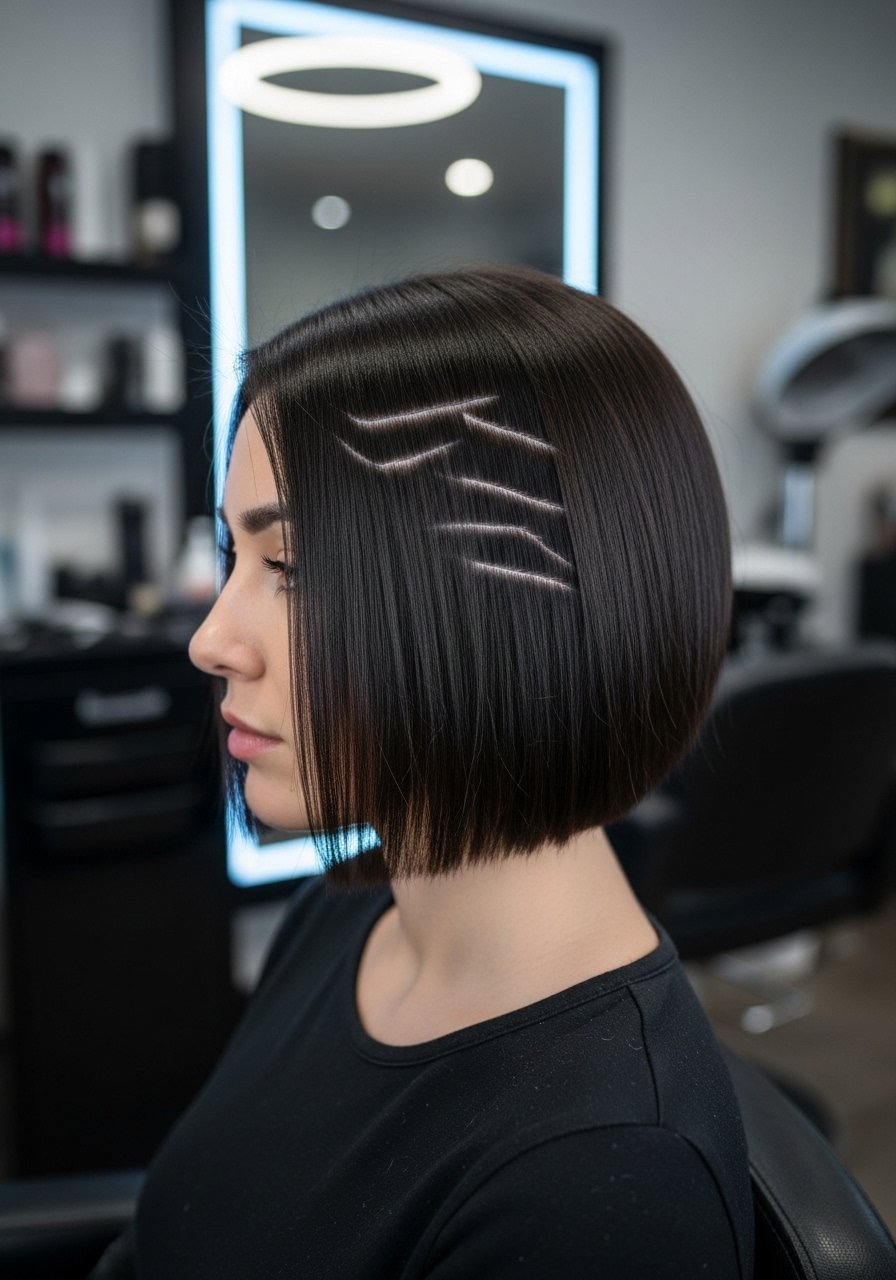
If you love the blunt look but worry about a round silhouette, ask for internal texturizing. The stylist removes 20 to 30 percent of weight from the interior with point-cutting so the perimeter reads solid while the inside lightens. That creates a crisp edge that does not balloon. For styling, a medium-hold cream like the smoothing styling cream tames bulk without stiffness. Best for straight to slightly wavy hair. Trim frequency is every 8 to 10 weeks to maintain the sharp line.
Mistake to Avoid: Requesting a full razor cut without specifying interior weight removal, which can make curls look too thin.
6. Curly Crop With Longer Front Pieces

Curly hair can read round if every curl sits at the same length. Keep a 1 to 2 inch length difference with longer front pieces to add vertical movement. Shape curls so they fall slightly forward and off the cheek, not directly to the side. A small handful of curl cream scrunched from ends to roots and a diffuser set on low saves hours. For coily textures, request twist-outs or finger coils to keep the front elongated. This cut is low effort but requires a stylist who understands curl shrinkage.
Mistake to Avoid: Cutting all curls to one line, which creates a circular halo effect around the face.
7. Soft Mullet With Face-Lengthening Layers
The word mullet scares people, but a soft version is one of the best tricks to lengthen a round face. Shortness at the crown gives lift, while the slightly longer face-length layers create downward lines. Ask your stylist for 1/2 inch of lift at the crown with graduated length that reaches the jaw or slightly below. For styling, a light mousse like volumizing mousse and a quick blow-dry with fingers lifts roots. Works great for thick hair and those who want an edgier look without high maintenance.
Mistake to Avoid: Requesting too much shortness at the sides, which widens the face.
If any of these looks have you ready to try something, here are the items I actually reach for to make them work.
Tools For Slimming Short Cuts
Essential Brushes and Tools:
- Ceramic 1-inch round brush (~$15-25). Good for smoothing front pieces and creating a subtle forward angle.
- Travel-sized diffuser (~$12-20). Saves time and protects curl definition.
- Lightweight blow dryer (~$30-60). One with multiple heat settings helps on short styles.
Styling Products:
- Sea salt texture spray (~$10-18). Adds grit without weight.
- Matte hair paste (~$8-15). Defines pixie pieces and control for fringes.
- Weightless hair serum (~$12-20). Smooths ends without flattening the cut.
- Microfiber hair towel (~$8-14). Reduces frizz and speeds styling.
8. Razor-Cut Edgy Bob With Soft Undercut

An undercut hidden at the nape removes bulk that otherwise pushes hair out at the sides. The visible perimeter stays blunt but the undercut removes 20 percent of underneath volume, which creates a sleeker silhouette. I ask for a 1-inch nape undercut that is blended into the rest so it does not show unless hair is lifted. Styling is quick with a straightener and a swipe of the smoothing styling cream to maintain polish. Best for medium to thick hair that needs weight control.
Mistake to Avoid: Making the undercut too wide, which can show when hair is pinned and break the intended look.
9. Curtain Bangs With Short Layered Cut

Curtain bangs that part slightly off center create two vertical lines that slim the cheeks. Keep the bangs longer at the sides, about cheekbone length, and feather them with 2 to 3 point cuts. This works on most textures but is especially flattering on fine hair because the bangs add an illusion of length. I trim at home between salon visits by removing a quarter inch from the bottom edge with hair scissors. A light hairspray like flexible hold hairspray tames flyaways without stiffness.
Mistake to Avoid: Cutting curtain bangs too short, which shortens the vertical line and makes the face appear rounder.
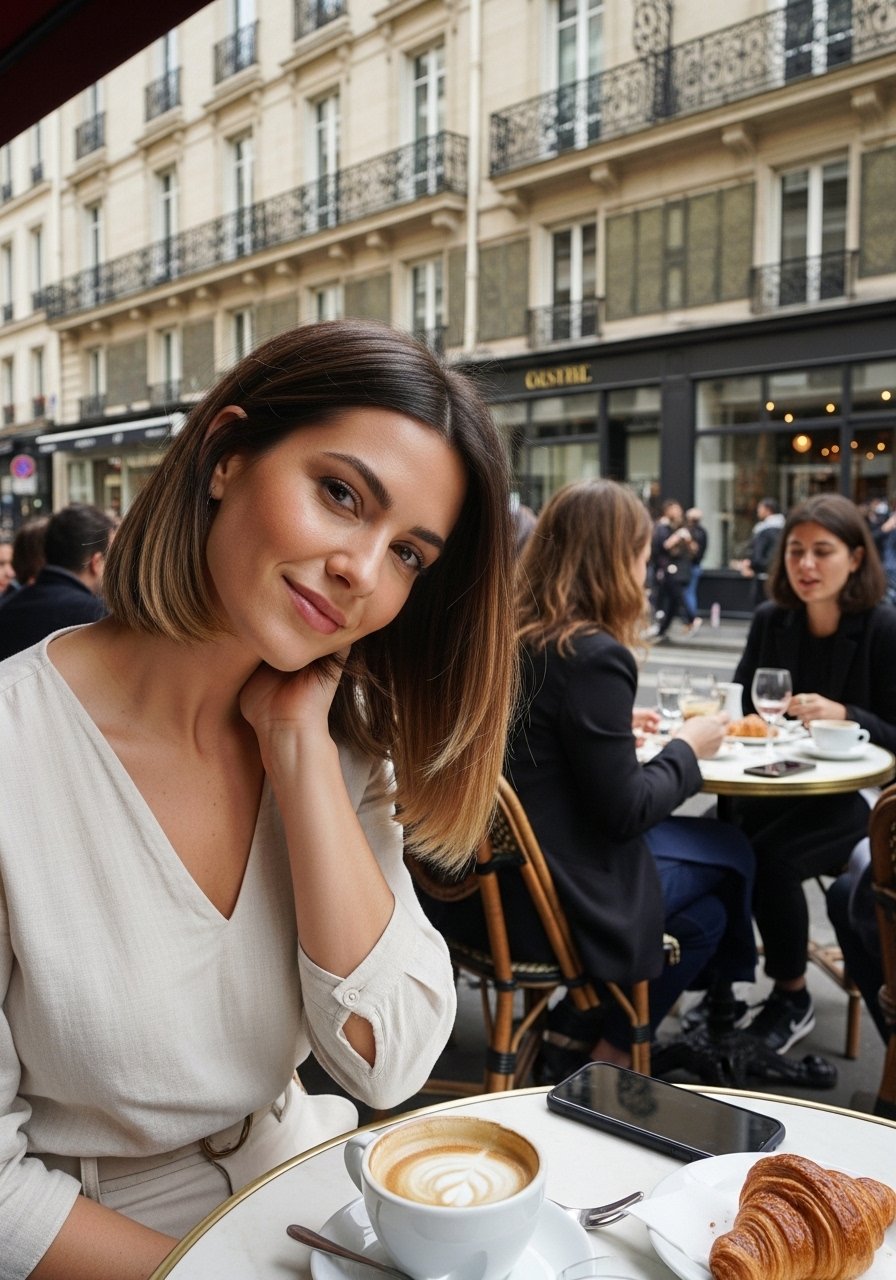
10. Side-Parted Lob With Subtle Highlights

Color can change perceived depth of the face. Place highlights starting two inches above the cheekbone and blend them inward toward the part, so the lighter tones create diagonal brightness along the face. Ask for low-contrast babylight placement rather than chunky foils. This visually lifts the face and pairs beautifully with a side part that sits 1 inch off center. Keep color maintenance low with a violet-tinged conditioner like color-safe purple conditioner to avoid brassiness.
Mistake to Avoid: Requesting high-contrast face-framing panels, which can widen the cheek area in photos.
11. Heat-Free S-Shaped Tuck With Bobby Pin Hold

If you want a zero-heat option that still lengthens, train an S-shaped tuck. Damp hair is molded with finger waves toward the chin and pinned discreetly behind the ear with 2 to 3 curved bobby pins placed in an X shape, which holds longer. The look reads polished because the front pieces curve down the face rather than sticking out. Use a firm-hold setting lotion and the curved bobby pins to secure. Perfect for those avoiding heat or who have fragile ends.
Mistake to Avoid: Using straight pins that slip, rather than curved pins placed in a cross for grip.
Short-Cut Slimming Tricks
Bold part moves first: A side part that is 1 to 1.5 inches off center slims the face more than a centered part. Grab a rat tail comb for precise parts.
Keep weight off the cheeks: Internal texturizing removes 20 to 30 percent of interior bulk without changing the perimeter. A texturizing spray helps show the layers.
Try short at-home trims: If you are comfortable, remove 1/4 inch from ends every 6 weeks to keep shape. Use hair scissors like the professional hair scissors.
Protect curls without heat: Plop curls in a microfiber towel for 15 minutes instead of rubbing. A microfiber hair towel reduces frizz and preserves shape.
Style with minimal product: Start with a pea-size of product, add more only where needed. A little matte paste goes a long way on short cuts.
