
I kept getting forearm tattoos that looked great in the studio photo and stuck out like a billboard the moment I wore a short-sleeve shirt. After a few coverups and a burned-through weekend of regret, I started planning placements the same way I plan outfits, thinking about sleeves, watches, and movement instead of just the draw of the flash.
These nine placements are for people who want forearm ink that stays private when you need it and readable when you want it. They range from quick single-session micro work to pieces that need patience. I learned most of these choices across five shops I have visited, and I picked options that work on different skin tones, budgets, and tolerance for pain.
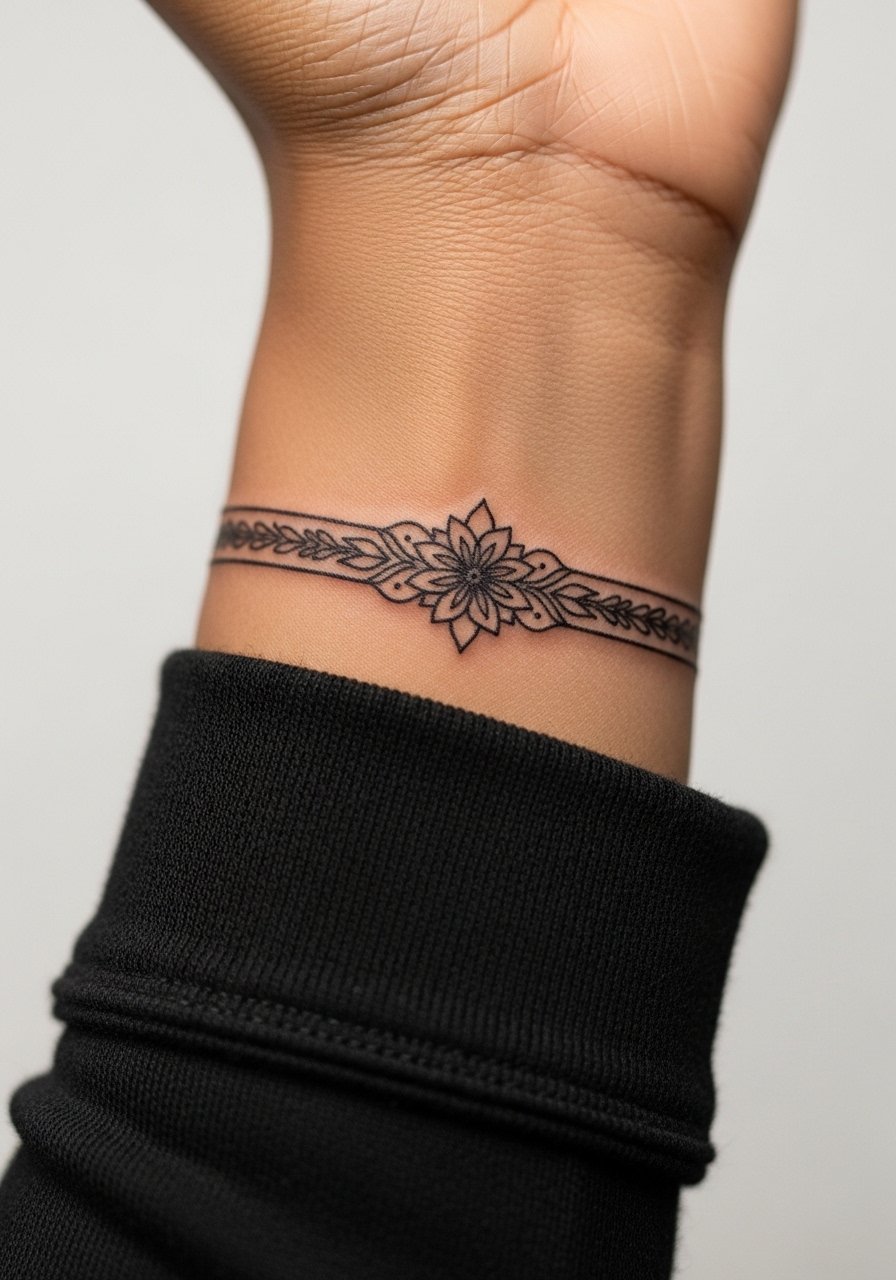
1. Inner Wrist Fold Tuck
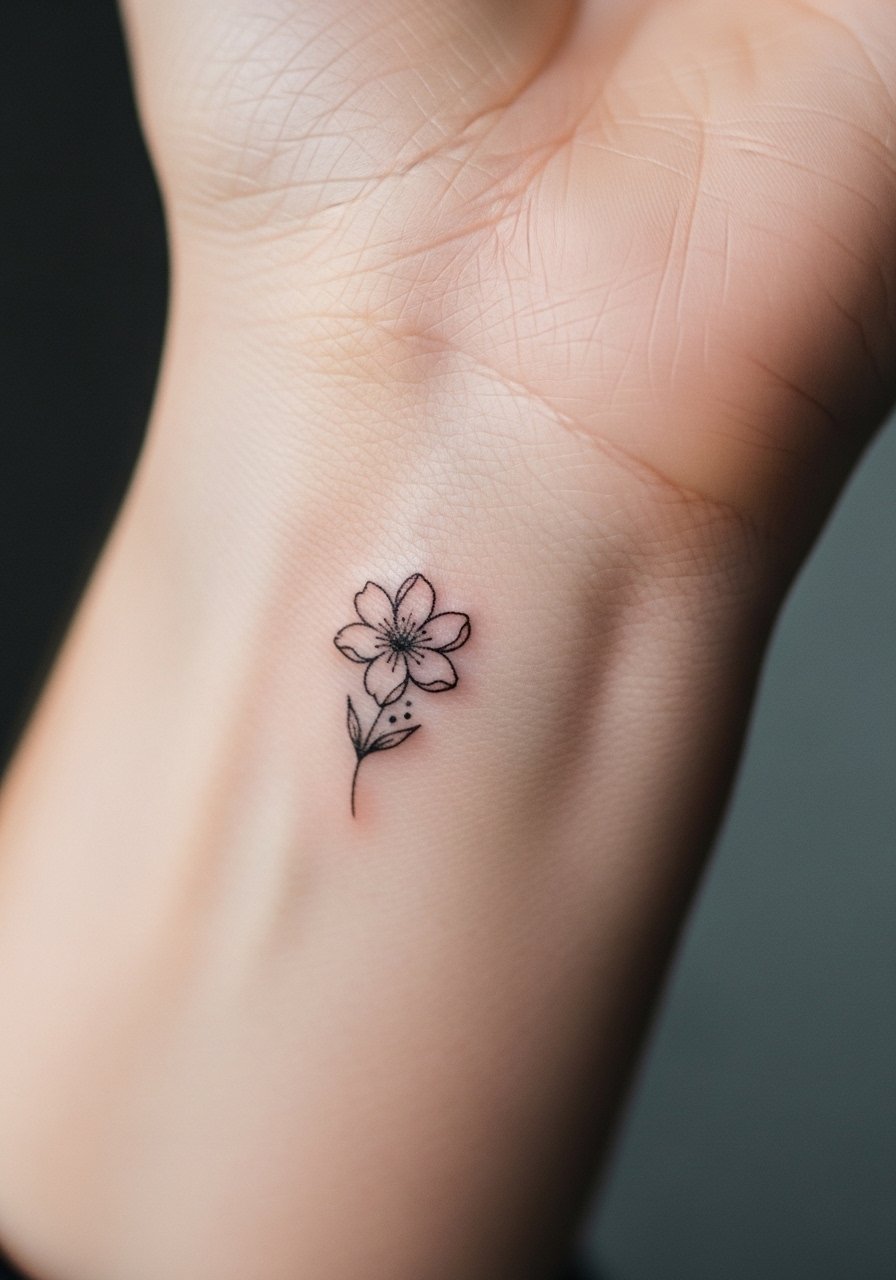
This placement sits just beneath the wrist crease so a watch, bracelet, or the natural bend of your hand hides it most of the day. Visually it reads intimate because the design is revealed only when you lift your arm. Best for micro scripts, tiny florals, or single-line icons, it usually fits inside a 2 to 3 centimeter space so artists can keep line weights fine. Budget is low for small pieces, and a skilled artist can finish a simple wrist tuck in 30 to 45 minutes. I like pairing this with a thin clear bandage for the first 24 hours, and I use a medical grade tattoo aftercare ointment for the first week.
Style/Technique: Micro line, fine-line
Pain Level: 3/10
Session Time: 30 to 45 minutes
Best For: Small symbolic pieces, anyone who wears bracelets
Mistake to Avoid: Placing the design too close to the crease so movement distorts the lines over time.
2. Radial Side Near the Hairline
This is the outer edge of the forearm that sits along the thumb-side hairline. It hides when your arms rest naturally, and it becomes visible when you turn your palm up. The trick is keeping the design narrow, about 1.5 to 2 centimeters wide, and angling it to follow the bone so it reads cleanly. It feels private but not secret, a good fit for someone who wants occasional show rather than full concealment. For aftercare, I recommend a gentle antibacterial soap and a transparent film dressing for the first few days to protect friction from sleeves.
Style/Technique: Single-line geometric
Pain Level: 4/10
Session Time: 20 to 40 minutes
Best For: Minimalists, sleeve wearers who want subtle reveal
Mistake to Avoid: Using dense shading on such a narrow spot which can blur after healing.
3. Under-Arm Near the Elbow Crook
Tucked where the forearm meets the crook of the elbow, this placement hides when your arm hangs and peeks out when it stretches. It is a slightly higher-pain area because of thin skin and movement, but a small design of 3 to 4 centimeters gives a private, almost secretive feel. I recommend an artist who keeps line work light and leaves open negative space so the tattoo ages gracefully. A good supply for healing is a fragrance-free tattoo soap and breathable bandage for sleep.
Style/Technique: Small botanical, negative space
Pain Level: 5/10
Session Time: 45 minutes to 1 hour
Best For: People who wear long sleeves often, those who prefer occasional reveal
Mistake to Avoid: Placing the tattoo directly in the crease where movement will break up crisp lines.
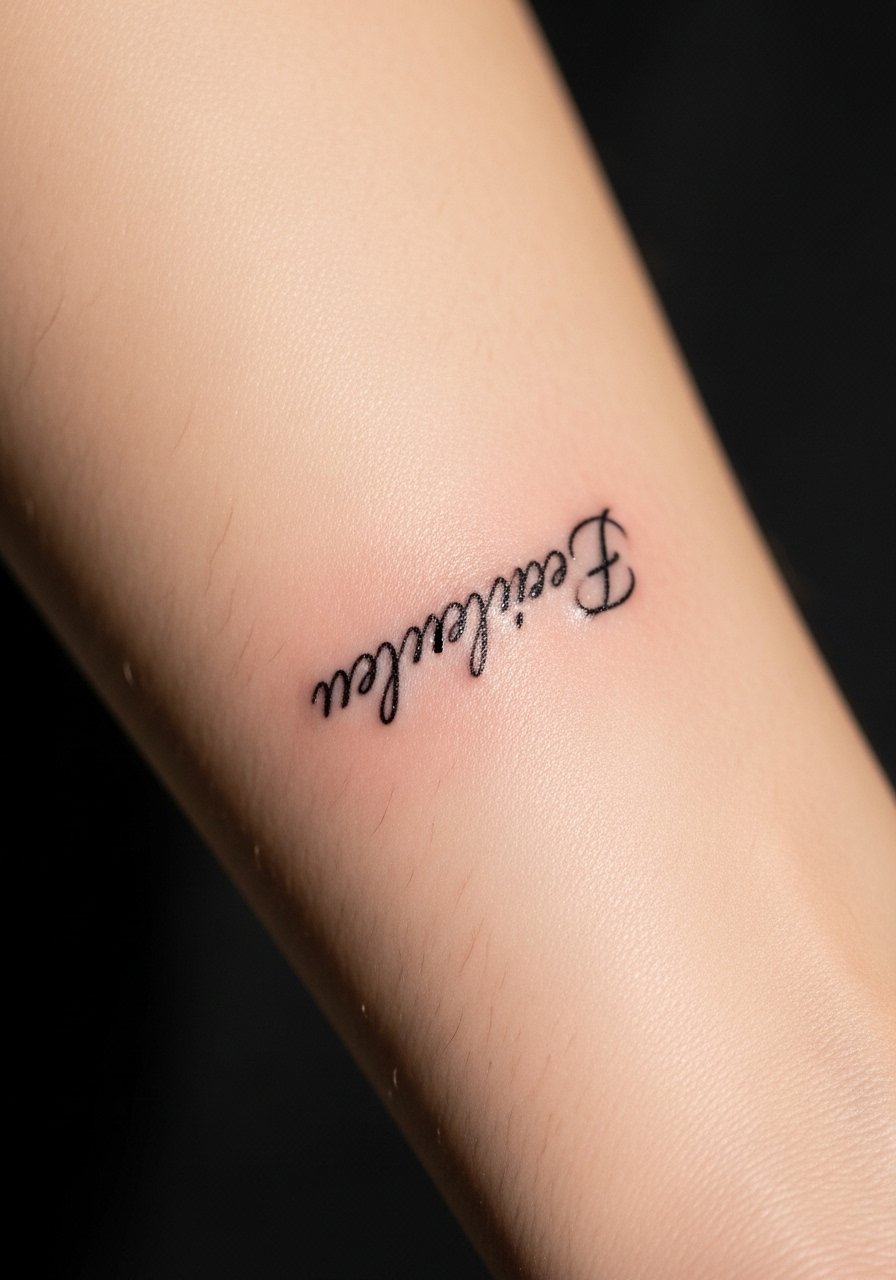
4. Ulna-Side Bracelet Hide

Place a narrow band or script along the ulna edge so a watch strap or bracelet covers it easily. The visual works because it follows natural anatomy and reads as a continuous line when exposed. It is very budget friendly for tiny bands or short words, and it can be completed in 20 to 40 minutes. For transfer accuracy try a tattoo stencil transfer paper so the lettering sits exactly where you want it rather than shifted by the skin curve.
Style/Technique: Script or thin band
Pain Level: 3/10
Session Time: 20 to 40 minutes
Best For: Bracelet wearers, people who want to hide tattoos under accessories
Mistake to Avoid: Ignoring wrist bone contours and forcing a straight stencil that will warp with movement.
5. Vein-Adjacent Micro Marks

This is a subtle strategy few artists push, placing micro marks near natural veins so they blend with skin texture. It reads as texture rather than imagery, which makes it very private while still meaningful to the wearer. Keep the dots under 3 millimeters and lines at single-needle scale so they age like beauty marks. This is a precise technique usually done in a single short session. Use a single-needle style aftercare balm and avoid heavy sunscreen the first month to preserve crispness.
Style/Technique: Micro dot and dash
Pain Level: 2/10
Session Time: 15 to 30 minutes
Best For: Fans of ultra-minimal ink, those who want near-invisibility
Mistake to Avoid: Asking for large dots that will blur into a smudge over time.
6. Reverse-Facing Owner-Only Design
Designs that read toward you instead of outward are a useful privacy trick. When your arm rests palms-down the piece is effectively hidden, but when you lift it for yourself it reads clearly. This placement works best with short phrases or numbers and a size of about 2 to 3 centimeters. It is a smart choice for someone who wants personal reminders without public display. Consider a numbing option if you are needle-shy, like a topical numbing cream discussed with your artist.
Style/Technique: Owner-facing script
Pain Level: 3/10
Session Time: 20 to 45 minutes
Best For: People who want private messages visible only to themselves
Mistake to Avoid: Picking long phrases that force small, illegible lettering when flipped.
7. Wraparound Wrist Edge
A tiny wrap that hugs the wrist edge hides under sleeves and looks intentional when revealed. Think a 1 to 2 centimeter band that is interrupted at the bone so it does not look like a bracelet tattoo when you want it private. It is slightly more complex than a single spot, so expect a 45 minute session for clean wrap alignment. For initial protection use a hypoallergenic adhesive bandage overnight.
Style/Technique: Thin wrap, interrupted band
Pain Level: 4/10
Session Time: 30 to 60 minutes
Best For: People who wear long sleeves and want a surprise reveal
Mistake to Avoid: Making the band too thick which turns it into visible cuffwork.
If any of these placements have you ready to act, here are the products I actually reach for when planning and healing hidden forearm tattoos.
Forearm Concealment Essentials
Aftercare & Protection:
- medical grade tattoo aftercare ointment (~$10-20), gentle and non-fragrant, my go-to for week one
- fragrance-free tattoo soap (~$8-15), for two-week cleansing
- transparent-film-dressing (~$12-18), protects from rubbing under sleeves
Prep & Studio Tools:
- tattoo-stencil-transfer-paper (~$7-12), keeps small scripts aligned
- topical-numbing-cream (~$20-30), if you and your artist agree to use it
Sun Care:
- broad-spectrum-tattoo-sunscreen (~$12-20), necessary after healing
Forearm Tattoo Shortcuts I Use
Use a thin clear dressing for the first 24 hours. It prevents sleeve friction and keeps scabs flat. I use transparent-film-dressing to sleep and switch to light ointment in the morning.
Grab tattoo-stencil-transfer-paper if you want exact placement. A clean stencil saves a bunch of back-and-forth in the chair, especially with tiny wrist tucks.
Most people over-apply aftercare ointment. A pea-size amount of medical grade tattoo aftercare ointment twice a day keeps things hydrated without clogging the pores.
If you need the tattoo to stay hidden for a day, wear a snug bracelet or watch over the spot. A thin cuff does more concealing than you expect and prevents sun exposure while healed, pair with broad-spectrum-tattoo-sunscreen when bare.
