
Pinterest showed a perfect rope braid that stayed tight all day, my try frizzed by noon and looked like a sad rope. I kept redoing the same step until I realized the pins and elastics mattered more than perfect tension, and that small habit fixed half my problems overnight. Here are the braid styles I actually wear now, the ones that survive school runs, meetings, and quick workouts.
These ideas are not salon-only looks. They are mostly heat-free, budget-friendly, and meant for people who want wearable styling, not runway prep. I learned them across four hair textures I have styled, and they work with thinner hair when you use texturizer or with thick hair when you reduce each section to 1/2 inch for manageability. Expect simple tools and 5 to 20 minutes per style depending on practice.
1. The Day-Proof Three-Strand With Hidden Elastic
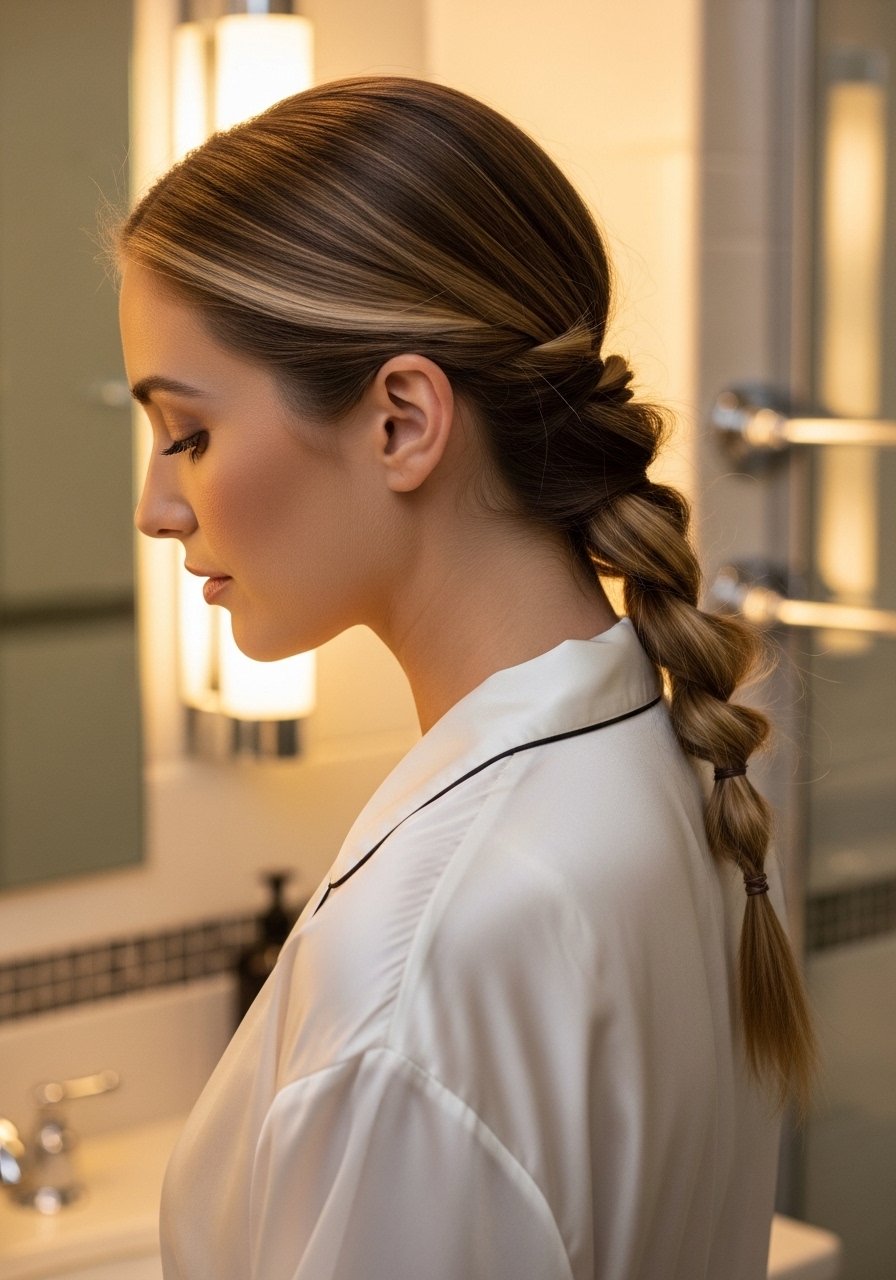
The classic three-strand is the fastest way to tidy hair and it holds best when you start with slightly damp hair or one light pump of texturizing spray for grip. What makes this version look intentional is the small final tuck. Leave a 2 inch tail, feed it back through the last loop, and pin the tail under for a clean finish. It feels casual and works for work or weekend, beginner friendly, and under five minutes once you practice the 1/2 inch section rule I use. Add a silk hair tie to prevent dents.
Mistake to Avoid: Pulling too hard on each pass, which thins the braid and causes gaps.
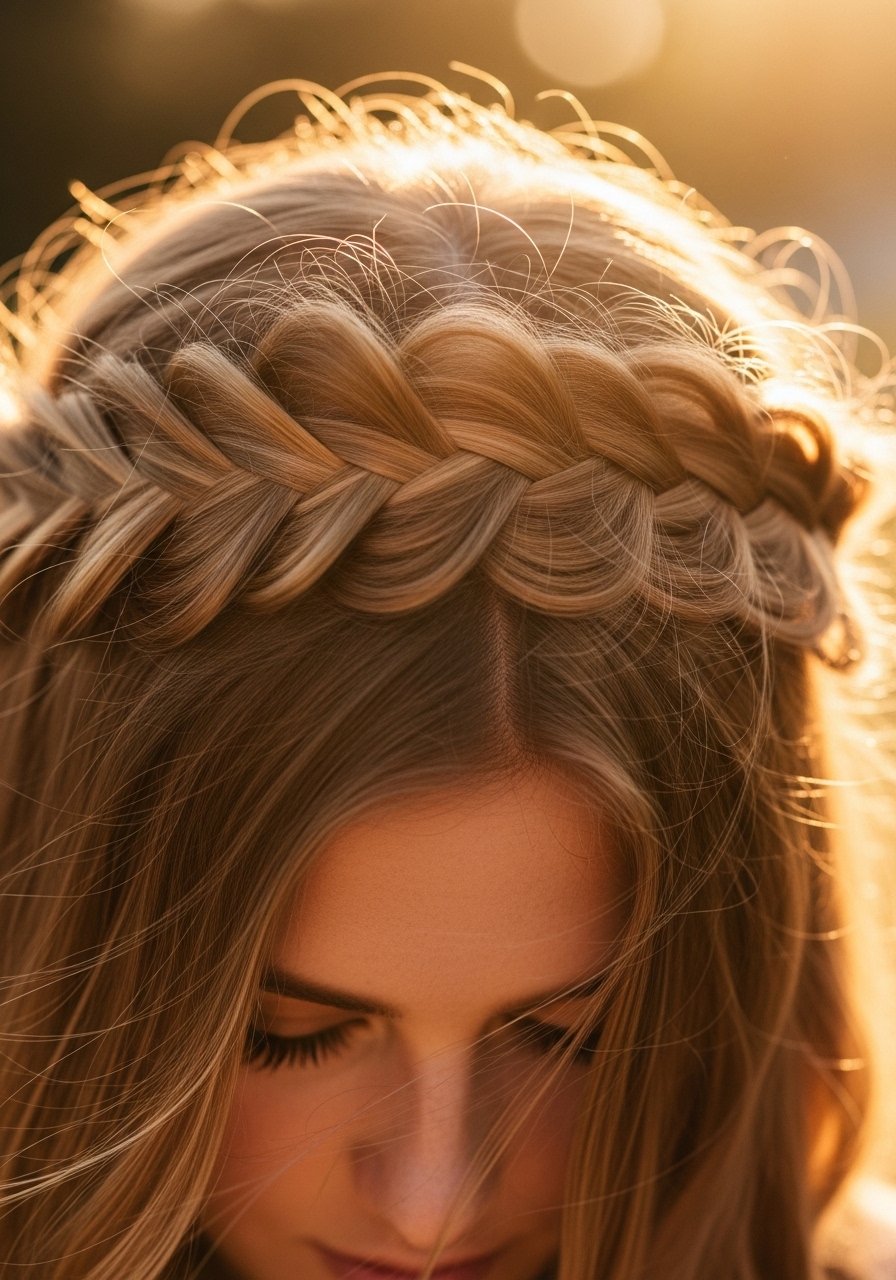
2. Dutch Crown Braid for a Polished Frame
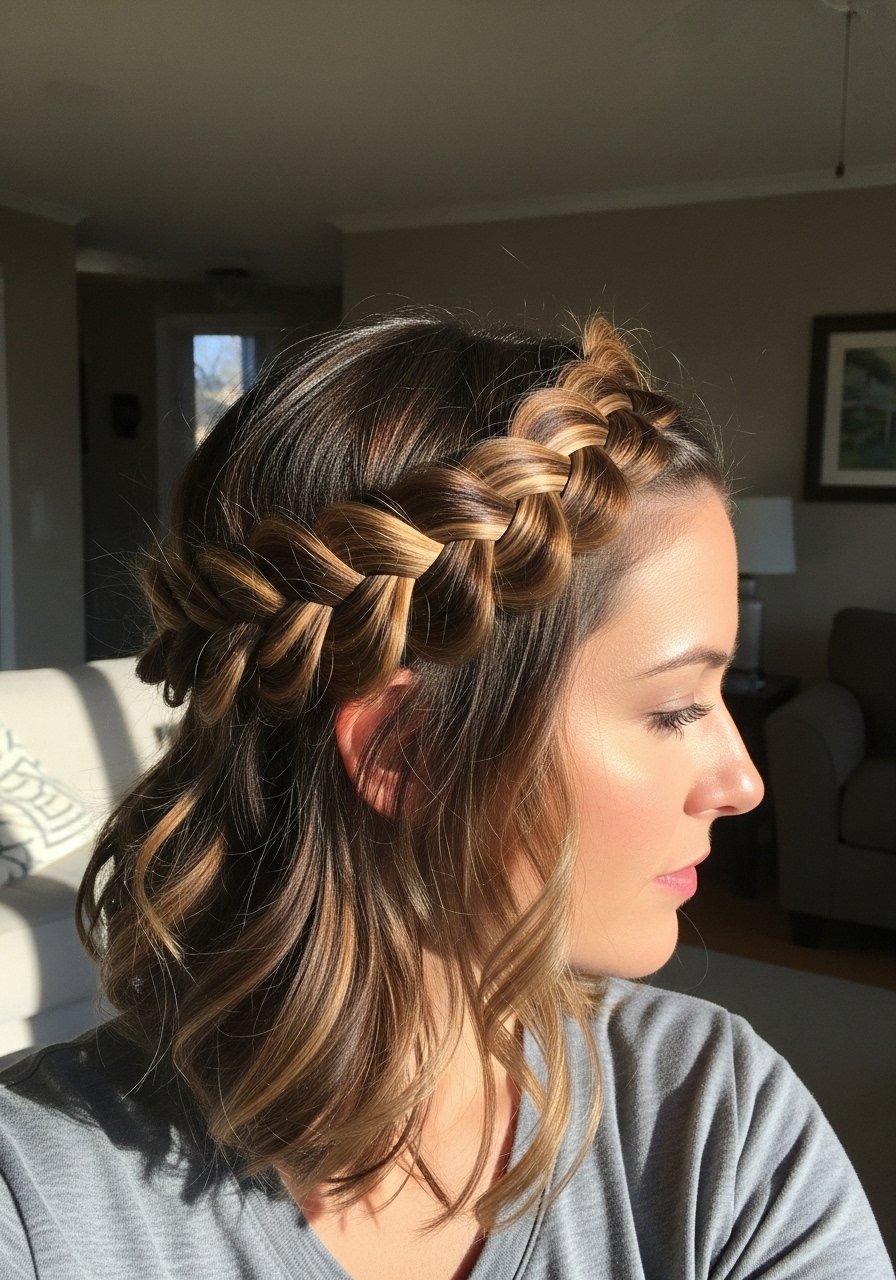
A Dutch crown braid lifts the face and reads polished without looking stiff, especially when you leave face-framing pieces. The trick is working with 1/2 inch subsections and adding hair only from the top and bottom consistently so the braid keeps even tension. This suits anyone who wants a coverable style for work-visible days. For fine hair, tease the crown gently with a boar bristle brush to create a base. Plan 10 to 20 minutes. Swap heavy pomade for a pea-size of lightweight cream paste to maintain hold without weight.
Mistake to Avoid: Adding uneven amounts of hair each pass, which makes the crown lopsided.
3. Fishtail Braid That Reads Effortless
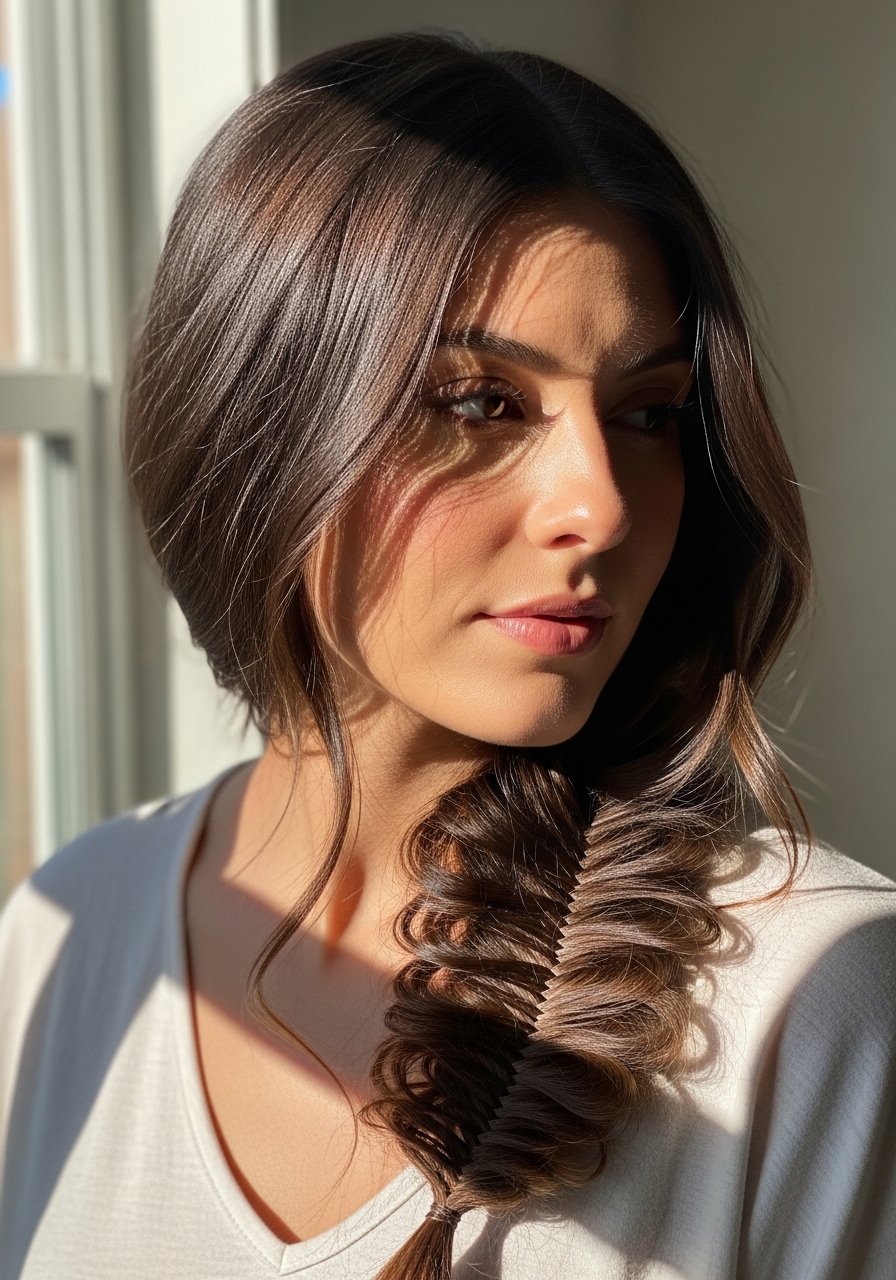
Fishtails look intricate but start with two even sections and take very small 1/4 inch outer pieces for each cross. That small-measurement detail is what creates the textured, woven effect. Use a drop of smoothing serum if you have frizz-prone hair. The result feels romantic and lived-in, great for dates or casual offices. It takes longer than a three-strand but the visual impact is higher. For volume, pancake the braid gently from the underside, widening each link by about 30 percent.
Mistake to Avoid: Using large outer strands, which makes the pattern disappear and look sloppy.
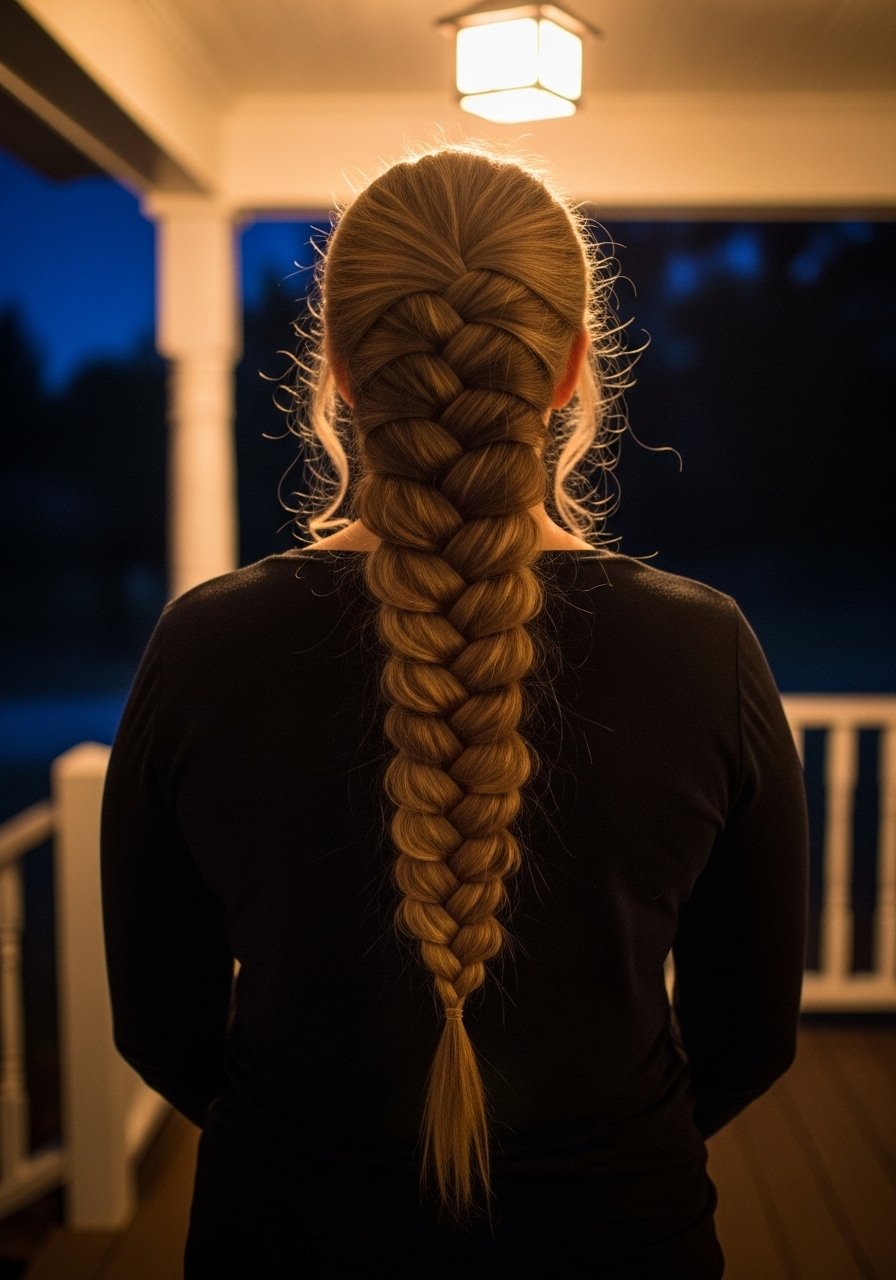
4. Rope Braid With Secure Finish
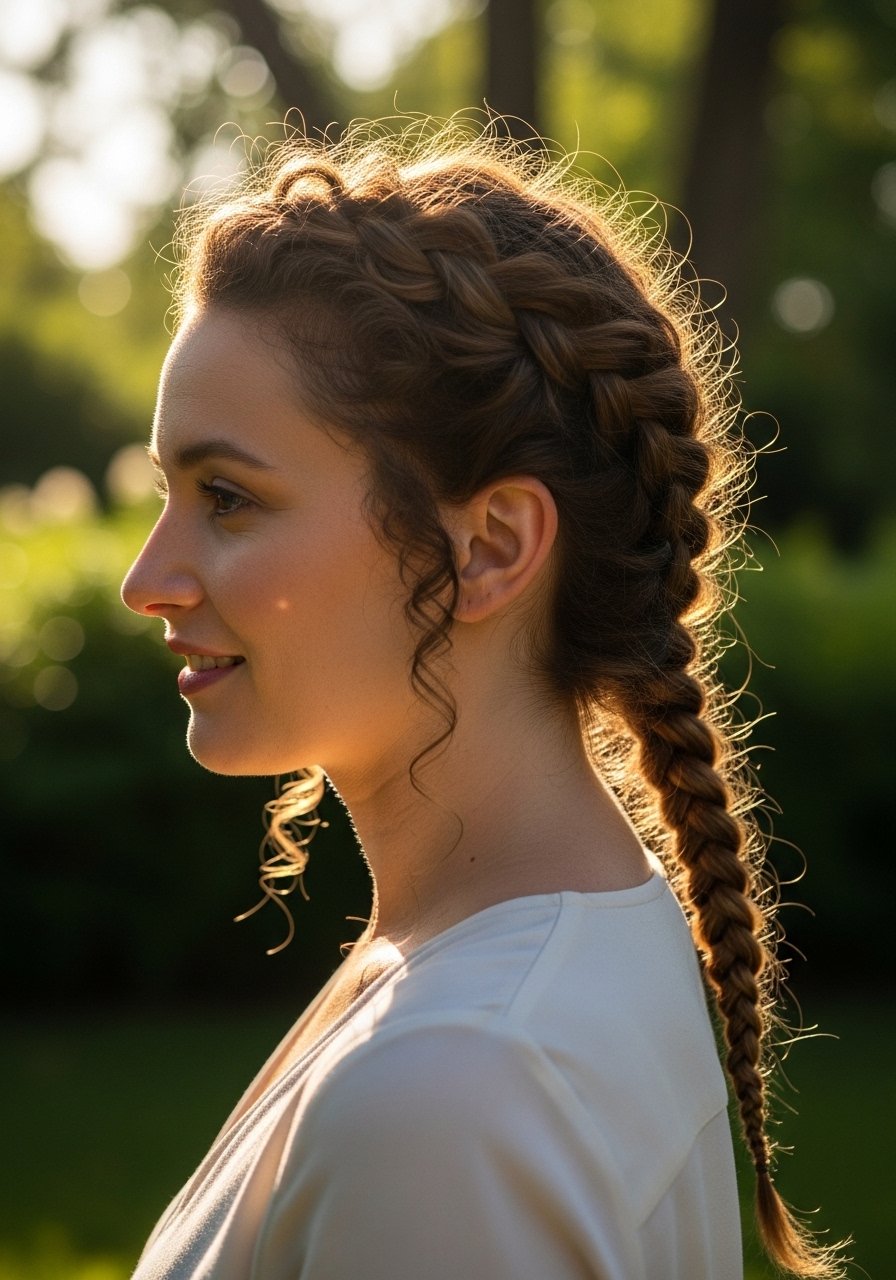
Rope braids are sturdy for workouts and wind because you twist two sections before wrapping them together. The specific detail is two full twists per pass before wrapping, which locks the texture. For coily or curly textures, smooth each section with a dime-sized amount of leave-in cream to keep frizz at bay. This style reads sporty and intentional, and it is a heat-free way to look pulled together. Secure with a small clear elastic then wrap a ribbon or a silk tie for a neat finish.
Mistake to Avoid: Not twisting enough before wrapping, which causes the rope to unravel quickly.
5. Milkmaid Braids For Casual Romance

Milkmaid braids feel like an easy upgrade for a brunch or festival. Braid two even three-strand braids, pin them across the crown with U-pins, and tug small sections out to soften. I use three pins per side, spaced about 1 inch apart, which keeps the shape without stabbing the scalp. This style suits medium- to long-length hair and takes under 15 minutes once you get the pin spacing right. Add lightweight hairspray or a few drops of shine spray for a finished look.
Mistake to Avoid: Using too few pins, which lets the braid slip by noon.
6. Pull-Through Braid for Big Volume
A pull-through gives the look of a complicated braid with no advanced braiding needed. Create small pony tails spaced 1.5 inches apart, clip each, then pull the sections through to create bubble-like loops. The exact spacing matters here, it controls how full or compact the braid looks. This is great for thick hair or anyone who wants instant volume without extensions. Use a couple of clear elastics and a lightweight dry shampoo to add grip. Finish with one quick mist of texturizer.
Mistake to Avoid: Making pony tails too far apart, which ruins the pull-through shape.
7. Braided Low Bun That Actually Stays
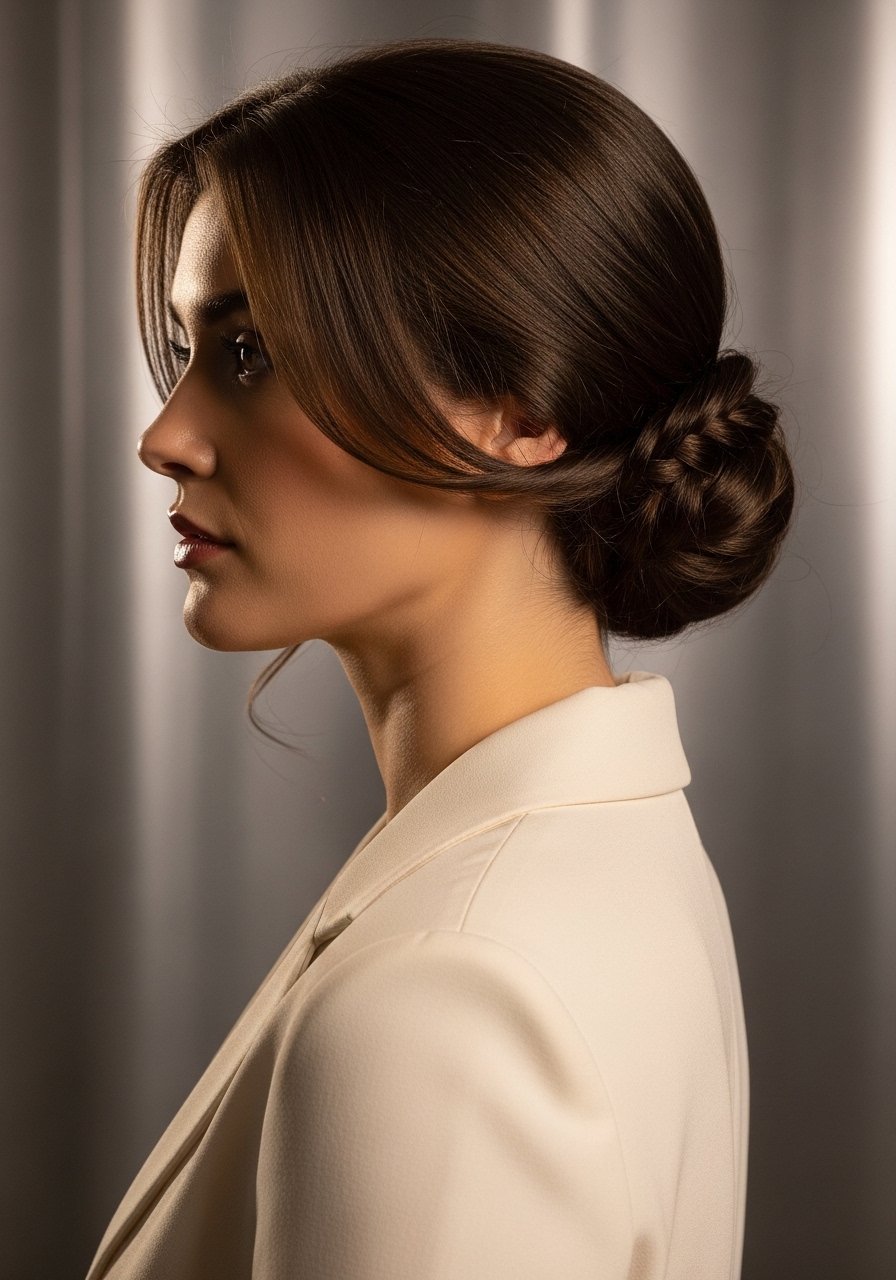
Combine a low three-strand braid with a wrapped bun for an evening-ready look. Braid the hair loosely, secure with an elastic, coil into a bun and tuck the tail under with bobby pins. I place three pins in a triangular pattern to lock the bun flat against the nape. This style is suitable for formal events and quick office polish. Use a pea-size of anti-frizz cream on the ends before braiding. Plan for 8 to 12 minutes.
Mistake to Avoid: Pinning only at the top of the bun, which lets the base fall out.
If any of these ideas have you ready to actually try something, here is everything worth picking up.
Braiding Basics Shopping List
Tools:
- Tail comb (~$6-12), for precise parting and 1/2 inch section work.
- Boar bristle brush (~$10-20), adds gentle lift at the crown.
Hold & Texture:
- Texturizing spray (~$8-18), the base for most braids.
- Dry shampoo (~$6-15), adds grip between washes.
Finishing & Fasteners:
- Clear hair elastics (~$5-8), multiples for pull-throughs and fishtails.
- U-pins and bobby pins (~$4-10), keep buns flat without bulk.
8. Mini Accent Braids Mixed Into Loose Hair

Tiny accent braids update loose hair without commitment. Braid baby-thin sections, secure with micro-elastics, and pull them slightly for texture. I space them about 2 inches apart and mix directions so they read organic. This is quick, under 10 minutes, and the braids help disguise second-day oil. For fine hair, spritz sea salt spray to create friction. These work for a relaxed weekend vibe or layered under a hat.
Mistake to Avoid: Making the braids too tight, which creates visible tension lines when you take them down.
9. Ribbon-Threaded Accent Braid

Threading a ribbon through a small braid is an instant style boost without new skills. Start with a 3 strand braid, weave a 1/4 inch silk ribbon in as you go, and tie it at the end. The detail is to leave the ribbon tails about 4 inches longer than the hair so they trail without slipping out. Use a narrow silk ribbon to avoid bulk. This works for weddings, concerts, or when you want a playful detail.
Mistake to Avoid: Using a ribbon that is too wide, which flattens the braid pattern.
10. Waterfall Braid for Side-Swept Interest

Waterfall braids add motion and look more complex than they are. Drop one strand each pass and pick up a new outer piece from the top. The small operational detail is to maintain three anchor strands at the top while letting the fourth fall, which keeps the pattern clean. This is ideal for date nights or framing a braid over a shoulder. Use a pinch of light hairspray to hold the fallen pieces without stiffness.
Mistake to Avoid: Letting the anchor strands twist, which turns the waterfall into a mess.
11. Halo Twist That Looks Like a Crown
The halo twist is a two-strand twist wrapped around the head and pinned. Split the hair into two, twist each away from the face and wrap them opposite ways around the crown. The important detail is keeping an even 3 inch width as you wrap so the crown sits level. This reads regal without trying too hard and is a simple swap for a formal updo. Finish with a few discreet pins and a spritz of finishing spray.
Mistake to Avoid: Wrapping uneven widths, which makes the halo sit crooked.
Braid Holding Tricks I Use
Thin coats beat one thick coat every time. Spritz light hairspray in short bursts, holding the can 8 to 10 inches away, and the style stays without crunchy residue.
Grab clear micro-elastics. Tiny elastics at the ends of accent braids disappear and prevent slippage better than larger ties.
Curly hair air-dries best when braided damp to set the pattern. A small pea of leave-in cream smoothed through each section keeps frizz down and defines the twist.
Everyone snags the wrong pins. Use long U-pins for buns and short bobby pins for flats. Assorted bobby and U-pins cost little and save a lot of redoing.
If you want braids to survive a full day, sleep on a silk pillowcase to reduce friction and frizz while you rest.
