
I kept booking tiny infinity pieces and then squinting at the mirror wondering why the lines blurred within weeks. It took one artist pointing out needle choice and placement to click for me. After that, I stopped chasing perfect tiny copies of a photo and started planning how the design would age on my skin, how visible it would be at work, and how simple changes would keep the shape crisp for years.
These ideas are for people who want small, delicate infinity tattoos that still read clearly over time, not for someone chasing a bold black logo. Expect modest session times, low pain, and mostly at-home aftercare. Most of these designs work for coverable placements and office-friendly visibility. Skill needs range from first-timer friendly to steady-handed line work that a pro should do, and the products linked are affordable and widely available.
1. Single-Needle Mini Infinity on the Inner Wrist
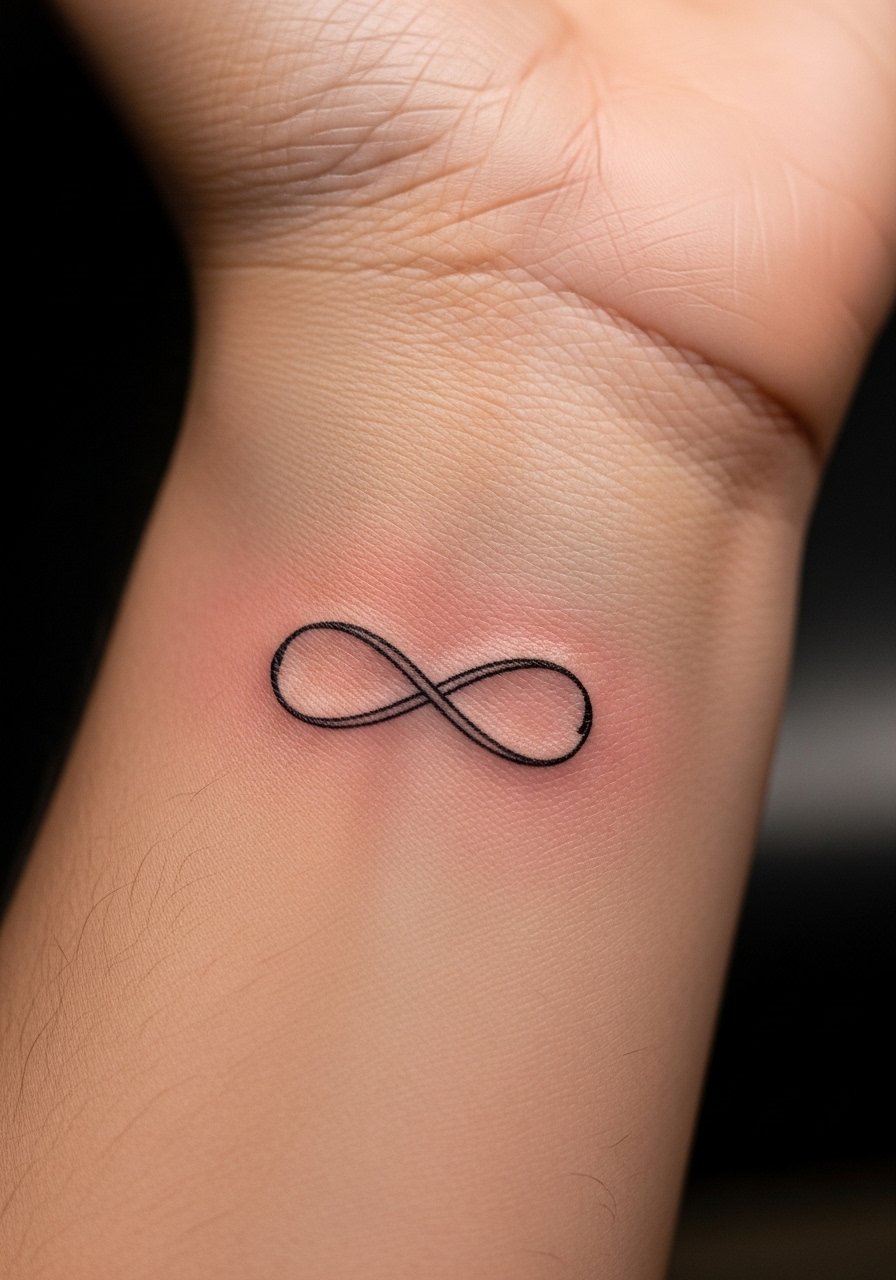
This is the classic tiny infinity rendered with a single-needle setup for hair-thin lines. It reads as delicate on contact and sits well on the inner wrist where the skin is flat and movement is moderate. Use a stencil sized to the wrist width and ask for a 1RL or 3RL needle for the lightest possible line. I recommend a scent-free healing balm like fragrance-free tattoo balm to keep the line from swelling too wide. Budget wise this is quick, often under an hour, and perfect for a first small piece.
Style/Technique: Single-needle fine line
Pain Level: 3/10
Session Time: 20 to 45 minutes
Best For: Inner wrist, visible at work, anyone new to tattoos
Mistake to Avoid: Asking for a thicker line to make it show up better, which fills in and loses the delicate infinity shape.
2. Tiny Infinity Behind the Ear for Subtle Edge
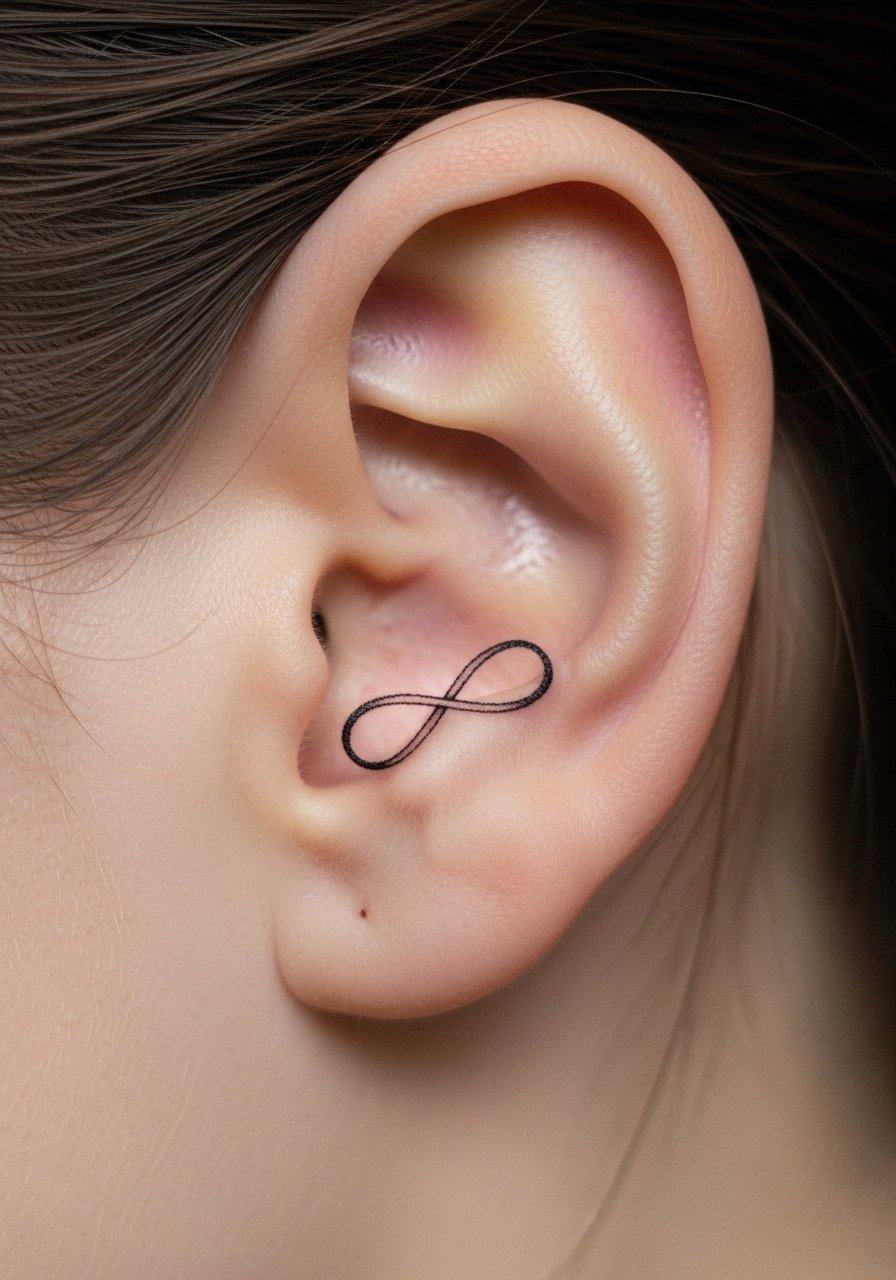
A behind-the-ear placement makes the symbol discreet and easy to cover with hair. The skin curves, so a small 3RL line works better than single-needle in this spot to avoid broken strokes. I ask my artist for a slightly shorter loop so the line does not migrate into hair follicles. For aftercare, a gentle antibacterial soap like unscented tattoo soap helps without over-stripping. This style feels minimal and private, good for someone who wants an intimate mark without a bold statement.
Style/Technique: Micro fine line
Pain Level: 2/10
Session Time: 15 to 30 minutes
Best For: Behind the ear, work-visible when hair is up, petite placements
Mistake to Avoid: Choosing a design too tall for the curve, which puckers during healing and blurs.
3. Infinity With a Single Dot Accent on the Ankle
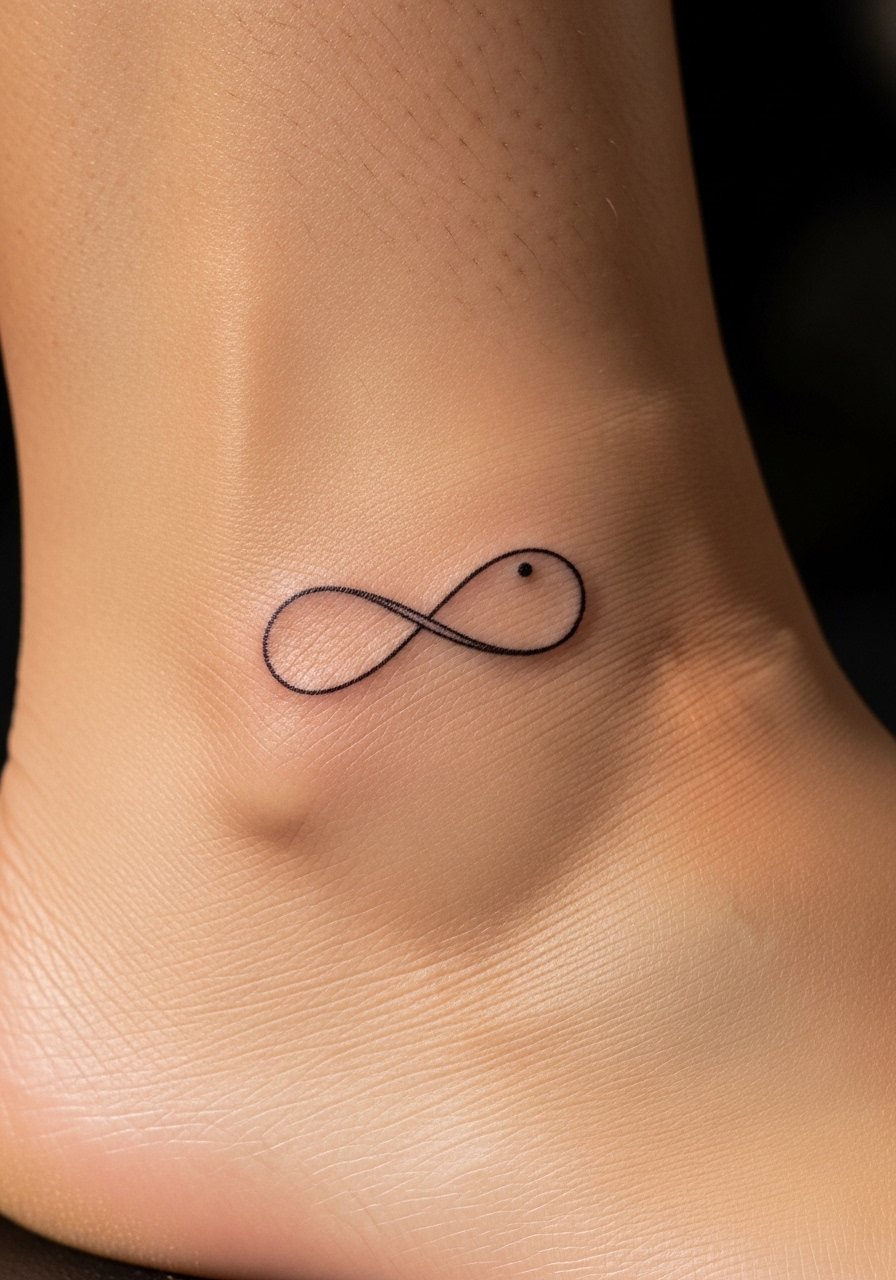
Adding a single, tiny dot anchors the infinity visually and ages differently from continuous lines. For this, request a 3RL for the dot and a 1RL for the loops if possible. The contrast creates a focal point so the eye reads the shape faster even as lines soften. Put it on the ankle where friction from socks is minimal. Pack a small tube of barrier ointment for the first few days to protect the ink from clothing. It is an easy, low-cost tweak that makes the design feel intentional.
Style/Technique: Fine line with point accent
Pain Level: 3/10
Session Time: 20 to 40 minutes
Best For: Outer ankle, seasonal visibility, those who like subtle anchors
Mistake to Avoid: Rubbing the spot with tight socks too soon, which drags ink and blurs the dot.
4. Tiny Infinity Wrapped Into a Scripted Name
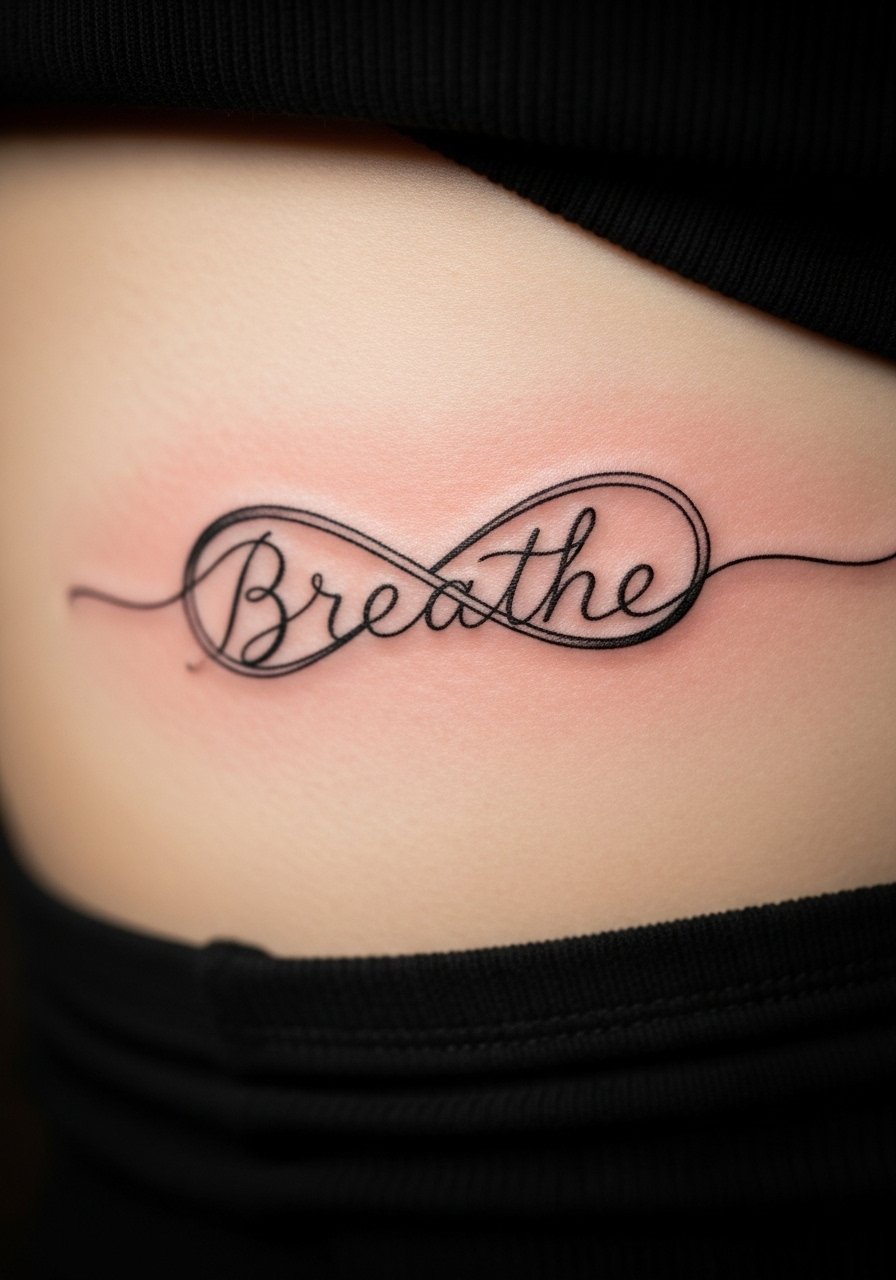
Weave the loop into a single flowing letter for a custom feel. This uses slightly varied line weights, so ask for a subtle 2RL for script flow and 1RL for the infinity connection point. The visual trick is keeping the infinity proportionate to surrounding letters so nothing reads cramped. On the ribs this looks delicate and private. For stencil work, bring a printed mockup scaled to your rib width. Use a microfiber compress and unscented healing balm during the first week to reduce scab volume and keep lines crisp.
Style/Technique: Script-integrated fine line
Pain Level: 4/10
Session Time: 30 to 60 minutes
Best For: Ribcage, coverable, those wanting personalization
Mistake to Avoid: Compressing the infinity into the wrong letter height, which makes the whole script uneven.
5. Infinity Made of Tiny Stars Along the Collarbone
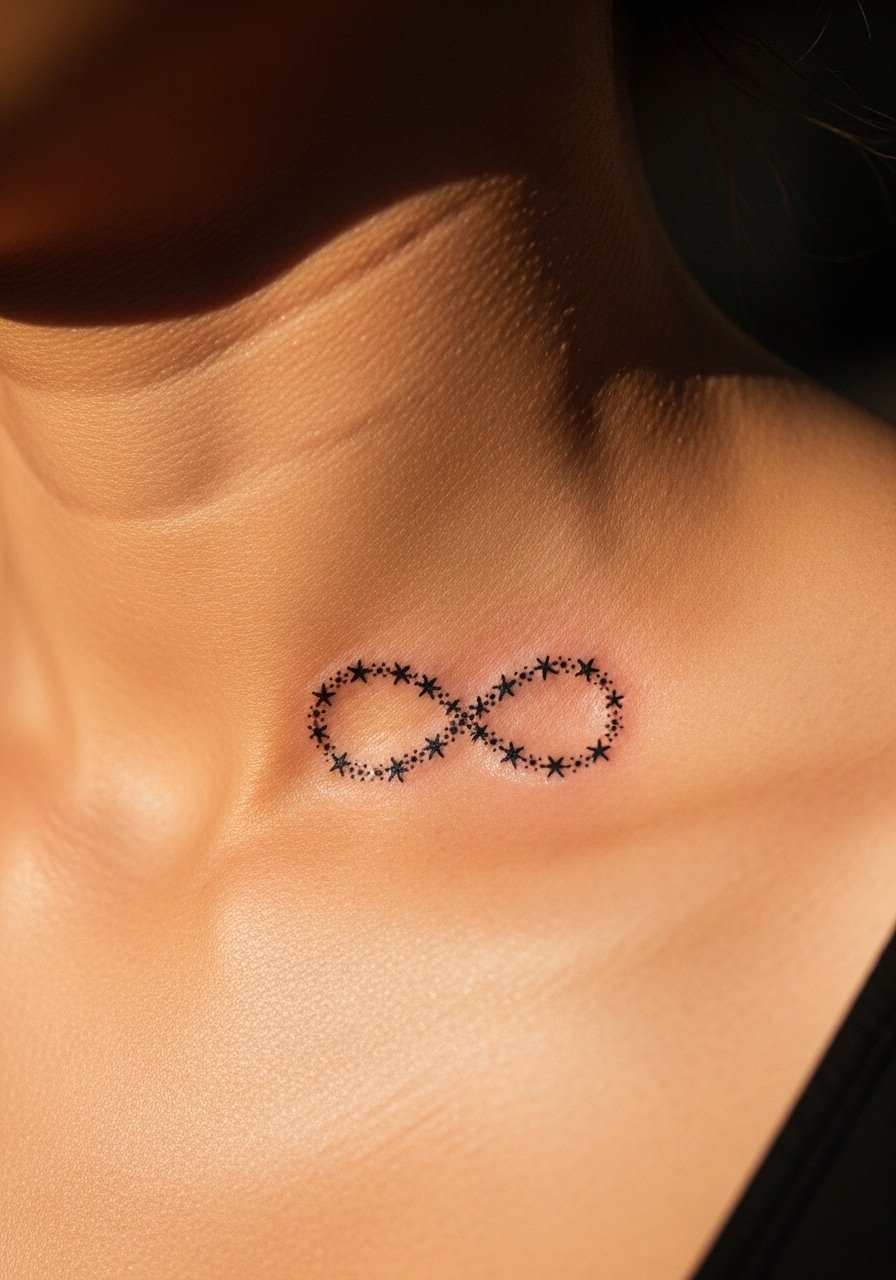
Rather than continuous line work, this version uses a stitched set of micro stars to form the infinity. Each micro star is a tiny single-puncture spot so the overall effect remains airy. This technique ages by losing some individual points but the silhouette stays readable if spacing is at least 0.5 mm between points. It reads elegant on the collarbone and photographs well. A gentle saline spray like tattoo saline spray makes cleaning between points easier during healing.
Style/Technique: Pointillist micro work
Pain Level: 3/10
Session Time: 30 to 50 minutes
Best For: Collarbone, photo-friendly, short-sleeve exposure
Mistake to Avoid: Crowding the points too close, which merges into a thin block as it heals.
6. Infinity With a Thin Watercolor Wash
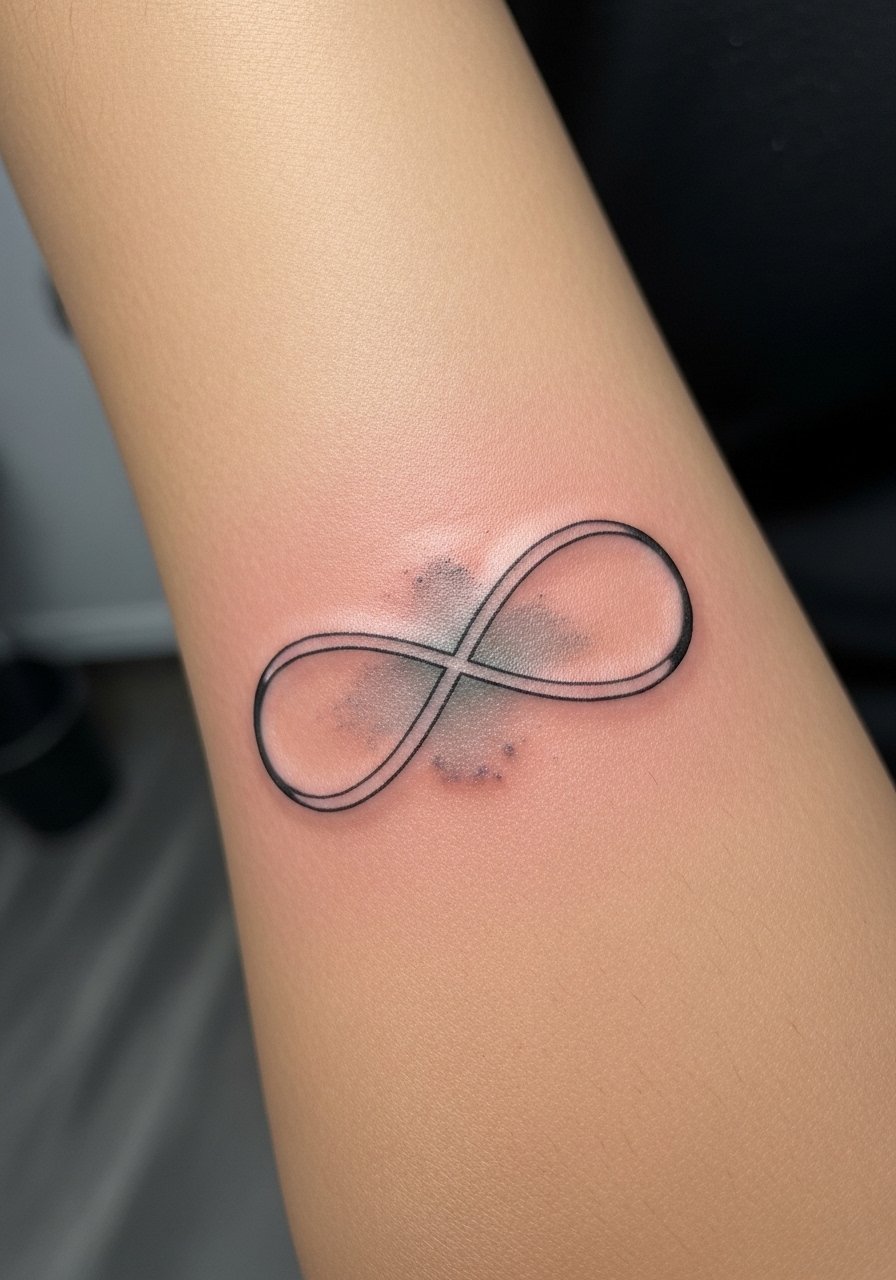
Keep the line work sharp by separating the wash from the line by at least 2 mm. Artists usually do the fine line first with a single-needle, then add a diluted pigment wash. That spacing prevents the wash from diffusing into the line. The result feels soft and personal while the infinity itself stays crisp. Aftercare should avoid heavy lotions on the pigment area for two weeks. I use a lightweight aftercare balm to hydrate without smothering.
Style/Technique: Fine line with pigment wash
Pain Level: 4/10
Session Time: 45 minutes to 1.5 hours
Best For: Forearm, visible artistic placement, those wanting subtle color
Mistake to Avoid: Letting the wash touch the line during application, which softens edges permanently.
7. Micro Geometric Infinity on the Finger
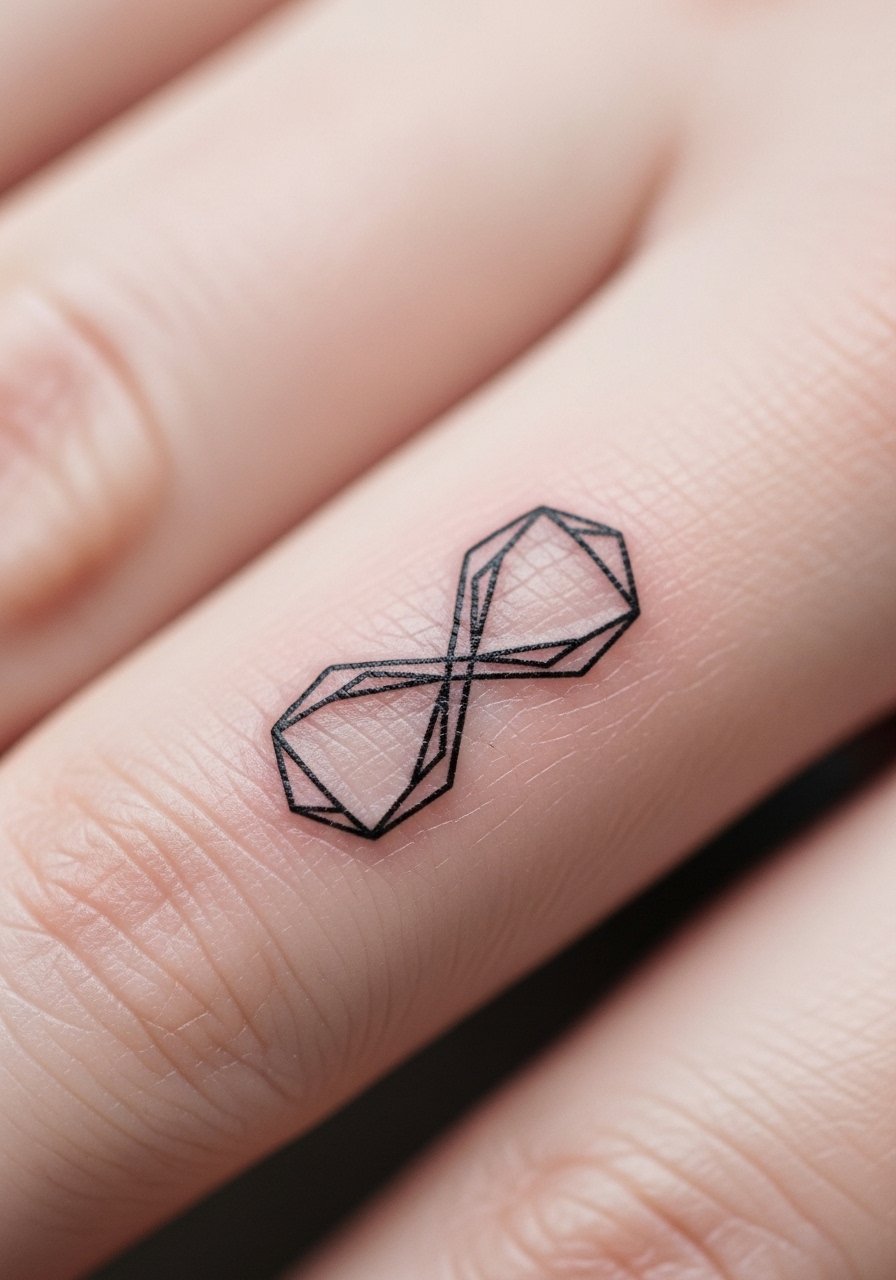
Finger work needs slightly bolder micro lines because skin on fingers regenerates faster and experiences constant use. Ask for a 3RL for longevity and keep the design under 10 mm across. Expect more frequent touch-ups for fingertip placements. A thin band of barrier cream like tattoo-specific ointment is handy when you are washing hands often. This style reads modern and pairs with rings, and it is a quick session if you accept potential fading and planned refreshes.
Style/Technique: Micro geometric line
Pain Level: 4/10
Session Time: 15 to 30 minutes
Best For: Finger side, visible with jewelry, those accepting touch-ups
Mistake to Avoid: Choosing a too-fine single-needle line on the finger, which disappears quickly.
If any of these ideas have you ready to actually try one, here are the tools and supplies worth picking up.
Small-Ink Essentials
Sanitation & Healing:
- unscented tattoo soap (~$8-15). Gentle daily cleanses without perfumes.
- fragrance-free tattoo balm (~$10-18). Lightweight hydration for the first two weeks.
- tattoo-specific ointment (~$6-12). For short-term edge protection.
Prep & Stencils:
- disposable single-use razor (~$5-10). Clean shave of the area before the session.
- stencil transfer paper (~$8-15). Helps artists apply precise tiny designs.
Extras:
- microfiber compress cloths (~$7-12). Soft for gentle blotting during healing.
- tattoo saline spray (~$9-14). Keeps healing areas clean without harsh rubbing.
8. Double Loop Infinity at the Nape
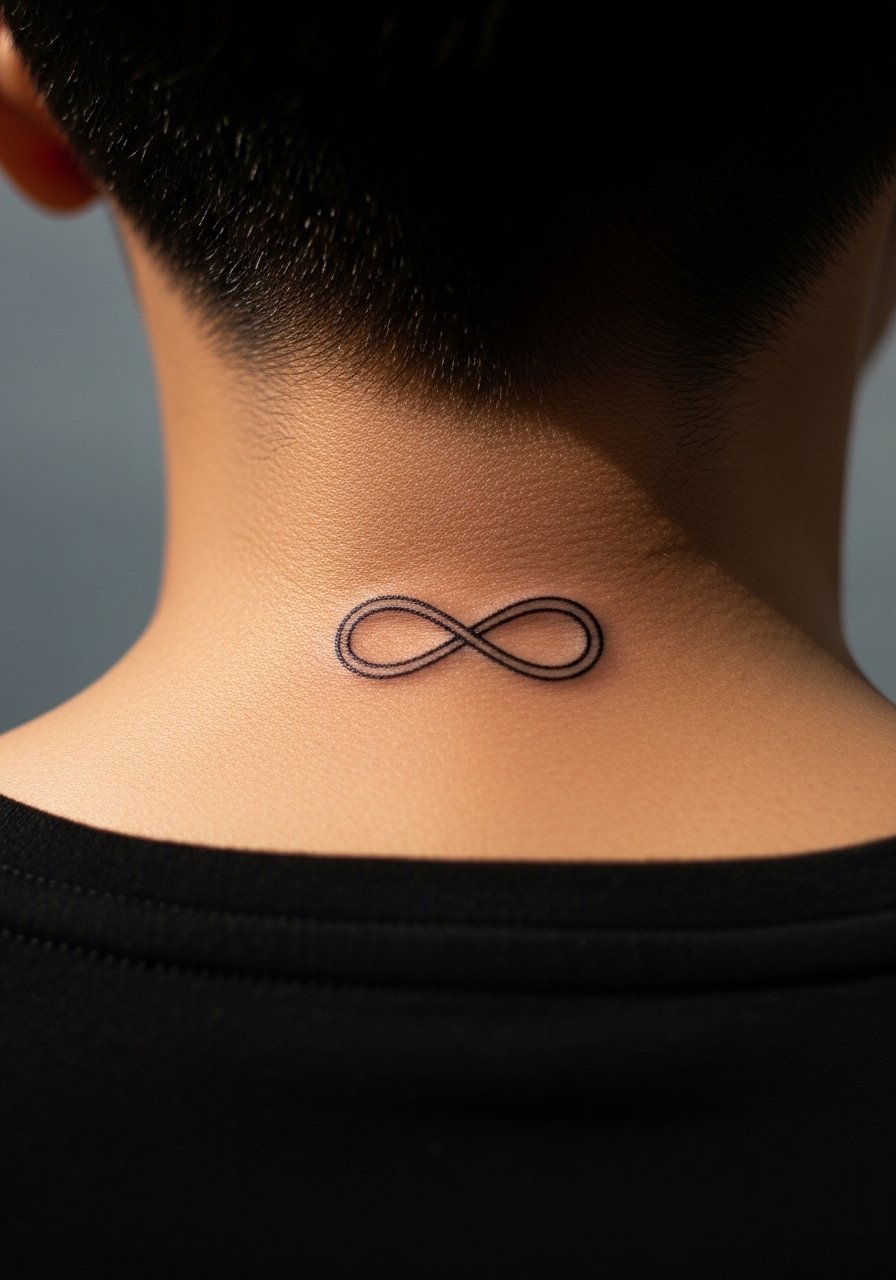
A double-loop adds a layered feel while keeping each loop thin. On the nape the tattoo hides easily with hair and heals under low friction. Request a consistent 1RL line and ask the artist to slightly space the loops so they do not merge as the skin settles. This placement benefits from a soft pillowcase and sleeping on your side less the first week. Pack a small jar of lightweight aftercare balm for overnight use.
Style/Technique: Layered fine loop work
Pain Level: 3/10
Session Time: 25 to 40 minutes
Best For: Nape, coverable, those who sleep on their back sometimes
Mistake to Avoid: Letting hair rub the area while fresh, which matts scabs and distorts the pattern.
9. Infinity Interlaced With a Tiny Heart on the Collarbone
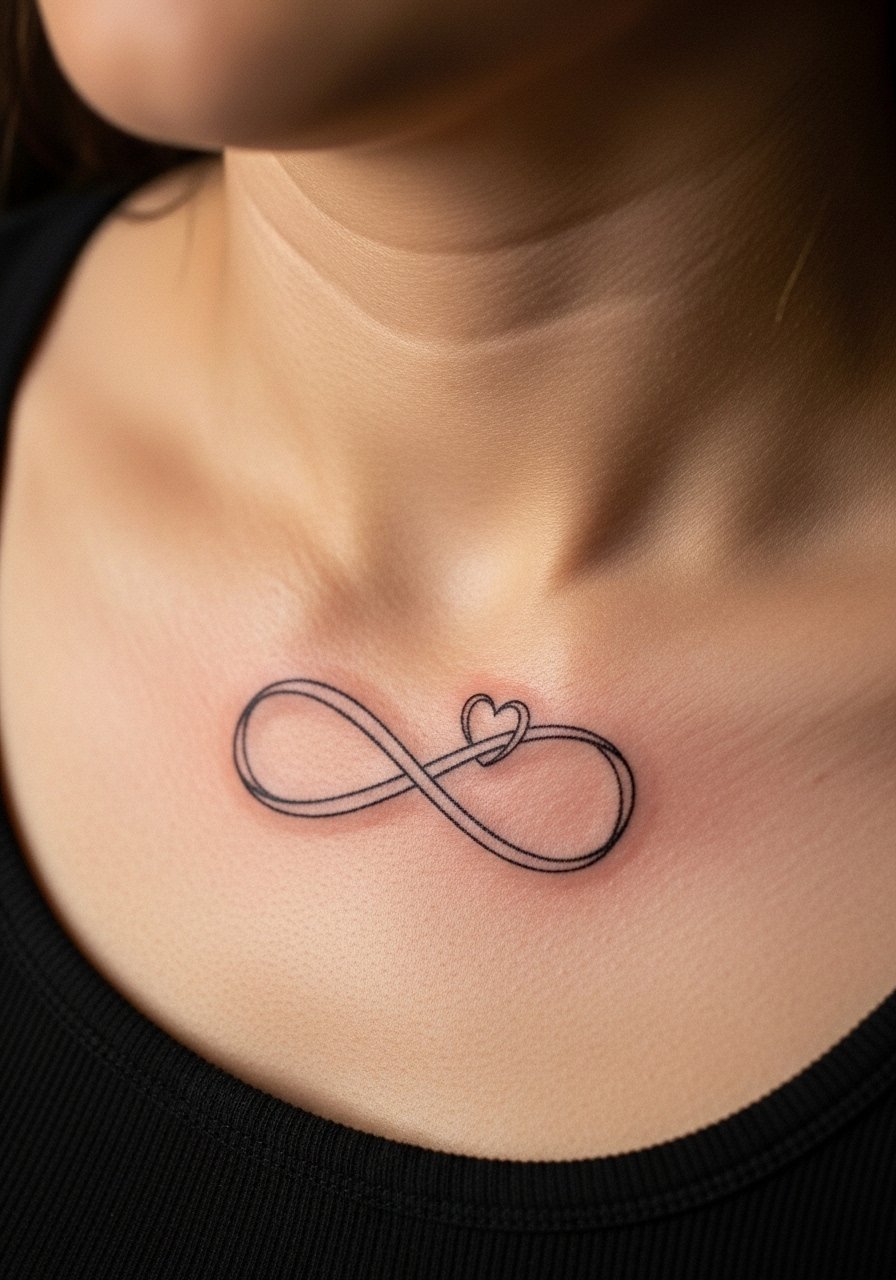
Weaving a micro heart into one loop adds emotional detail without clutter. Use single-needle for the heart outline and a matched 1RL for the infinity so the two elements age the same. Keep the heart no larger than 4 mm so it does not overpower the infinity shape. A printed stencil helps confirm scale at collarbone height. For initial healing, a thin layer of barrier ointment prevents clothing from sticking while scabs form.
Style/Technique: Symbol-interlaced fine line
Pain Level: 3/10
Session Time: 20 to 40 minutes
Best For: Upper collarbone, photo-friendly, sentimental placement
Mistake to Avoid: Scaling the heart too large, which shifts balance and makes the infinity look lopsided.
10. Negative-Space Infinity on the Forearm
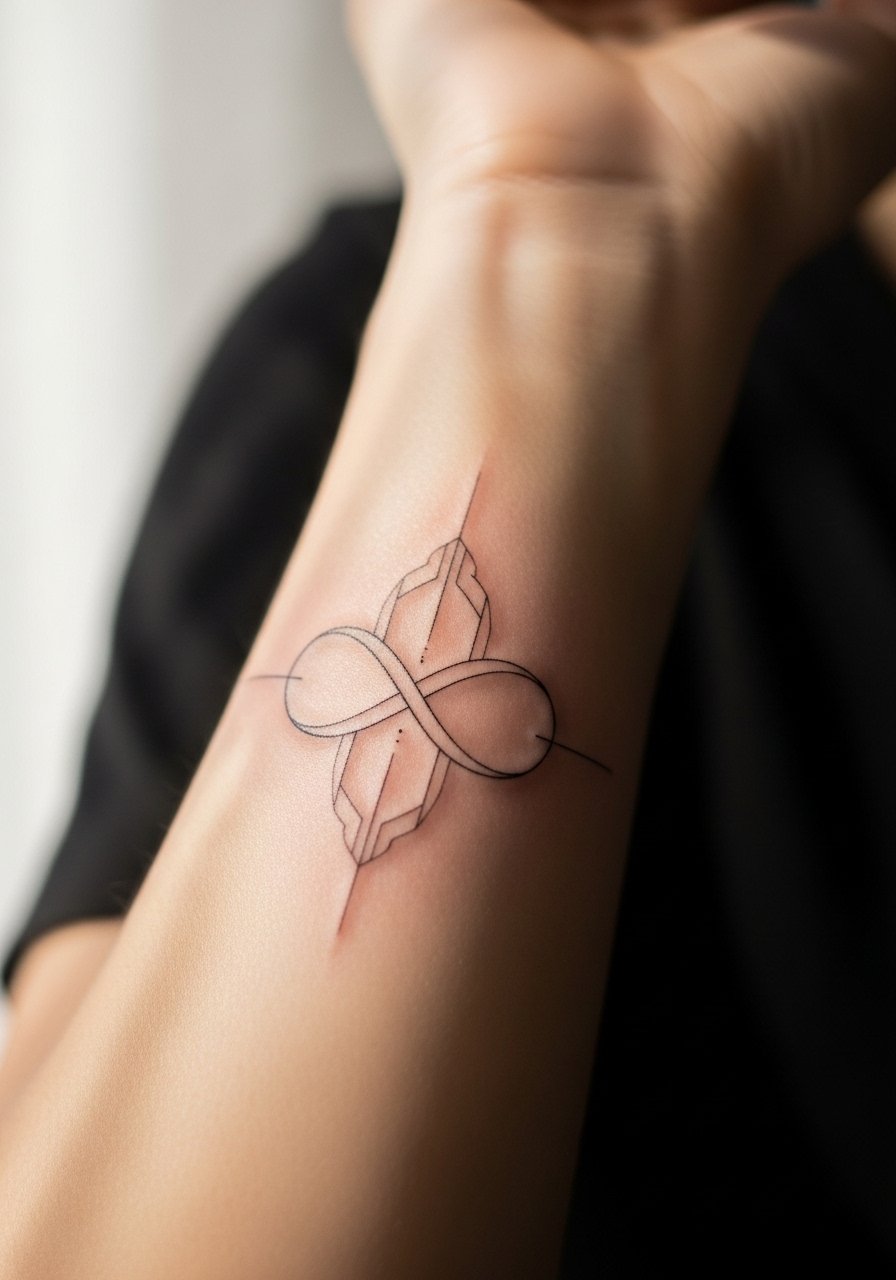
Instead of inked lines, this technique uses surrounding thin lines to leave the infinity in bare skin. It requires precise spacing and an experienced hand because the negative shape reads only if borders are clean. For durability, keep border lines at least 0.8 mm thick. Negative-space can look crisp for years because there is less ink to blur, but it can be more visible during early peeling. A gentle saline spray and the fragrance-free balm help keep edges defined.
Style/Technique: Negative-space fine line
Pain Level: 3/10
Session Time: 40 to 60 minutes
Best For: Inner forearm, artistic placements, those wanting subtle contrast
Mistake to Avoid: Making the border lines too thin, which causes the negative shape to disappear as the ink spreads slightly.
11. Infinity Formed by Tiny Scripted Dates Along the Rib
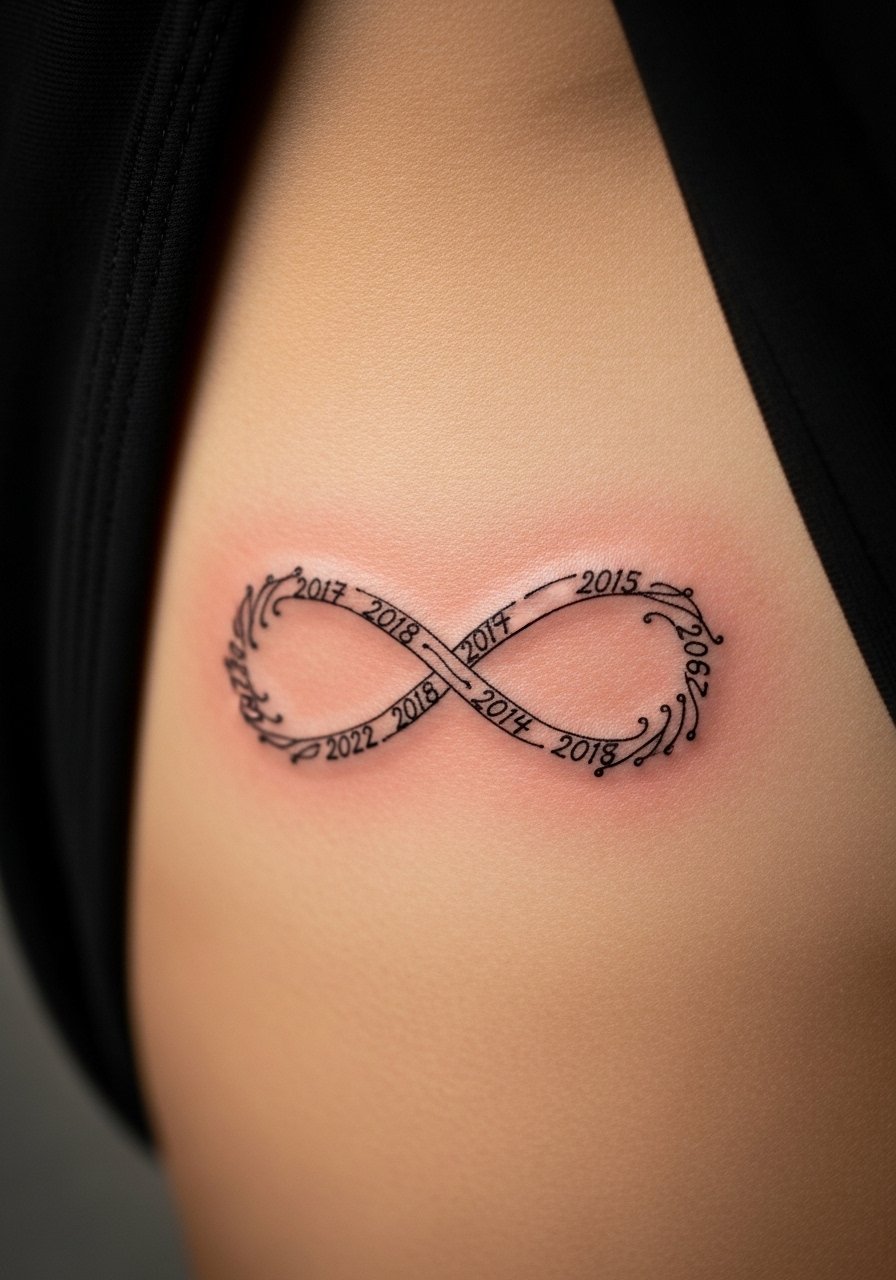
Use micro script numbers repeated along the loop to create a personal pattern. Each character should be no smaller than 1.5 mm tall and separated to avoid merging. This takes patience from both artist and client because movement on the ribs can stretch the stencil. Ask for a steady single-needle for the numbers and a light pass over the connecting lines only where needed. Keep a gentle pillow and soft clothing ready for healing. A small tube of unscented tattoo soap and balm will keep scabs minimal.
Style/Technique: Micro script loop
Pain Level: 5/10
Session Time: 45 minutes to 1.5 hours
Best For: Ribs, private placement, sentimental customization
Mistake to Avoid: Compressing dates too close together, which blurs into a single unreadable stroke.
Aftercare Habits That Actually Work
Thin layers prevent smothering. Apply a pea-sized amount of fragrance-free tattoo balm twice a day. Thick layers trap moisture and widen the lines.
Grab unscented tattoo soap for cleaning. Gentle, short washes and patting dry keep scabs small and lines sharper.
Cold showers shorten swelling. A brief cool rinse after a day of heat reduces inflammation. Use a clean microfiber cloth like microfiber compress cloths to gently blot.
Most artists I trust across five shops I have visited warn against exfoliating the area for at least a month. That advice saved two of my smallest pieces from needing early touch-ups.
