
I kept picking the tiniest poppy designs, then wondering why they blurred into a red smudge after a year. After a few touch-ups and a lot of questions in shop chairs, I learned small does not mean vague. Tiny poppies need scale, needle choice, and placement that respect how skin stretches and ages.
These nine ideas are for people who want discreet floral work that still reads as a poppy from a few feet away, not just up close. Expect options that are low-budget for a single quick session, some that need a steady-handed artist, and all of them designed to be coverable for work if you want. I learned most of this across five shops I have visited, and the notes below include real needle choices, session times, and exactly what to buy if you want to try one.
1. Single Fine-Line Poppy Behind The Ear
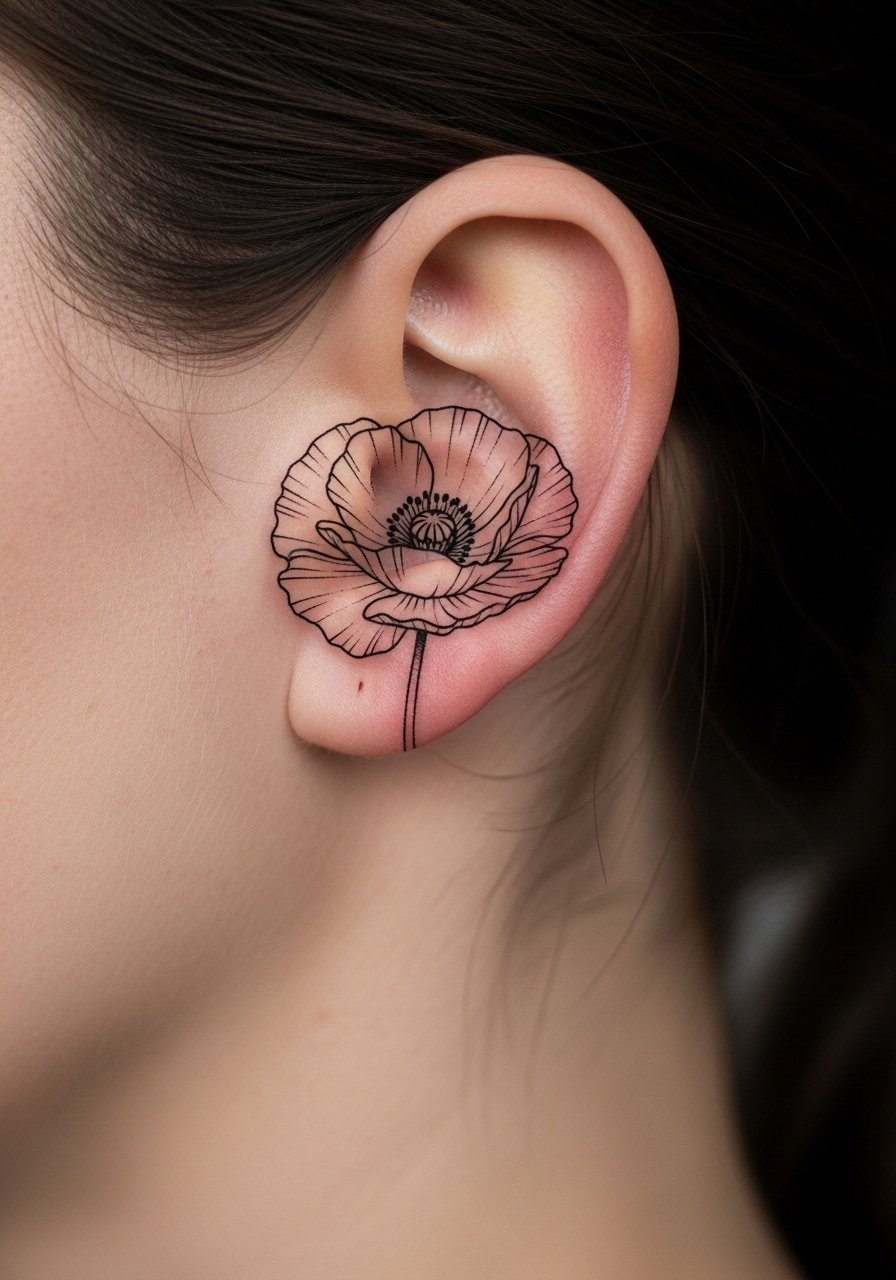
A one-stem poppy, drawn with a 3RL for the outline and a 3RS for tiny internal lines, reads delicate without becoming a blob. Visually it works because the thin stem gives negative space, letting the petal shape read even when the flower is small. This is a low-pain placement and perfect for someone who wants hidden art. Expect a 20 to 40 minute session, one needle pass for outline and a light wash afterwards. Bring a small aftercare balm like Hustle Butter to keep the scab soft while healing.
Style/Technique: Fine line
Pain Level: 3/10
Session Time: 20 to 40 minutes
Best For: Behind ear, coverable for work
Mistake to Avoid: Choosing a fill-heavy design for this placement, which will blur quickly.
2. Tiny Watercolor Poppy On The Wrist

A small watercolor poppy uses diluted color fills and minimal black line work so it looks painterly. The trick is to keep pigment area under about 1.5 inches and use low-saturation reds layered in two thin passes, not one heavy pack. That prevents ink pooling and excessive migration. This style fits creative people who want color but also want it subtle enough to layer with bracelets. Budget wise it is one short session plus a possible touch-up. For home care, a gentle scent-free moisturizer like tattoo aftercare balm helps colors settle without oversaturating.
Style/Technique: Watercolor wash with light lining
Pain Level: 4/10
Session Time: 30 to 60 minutes
Best For: Outer wrist, casual visibility
Mistake to Avoid: Asking the artist to pack dense pigment in one pass, which makes watercolor effects look muddy.
3. Microrealism Poppy On The Forearm
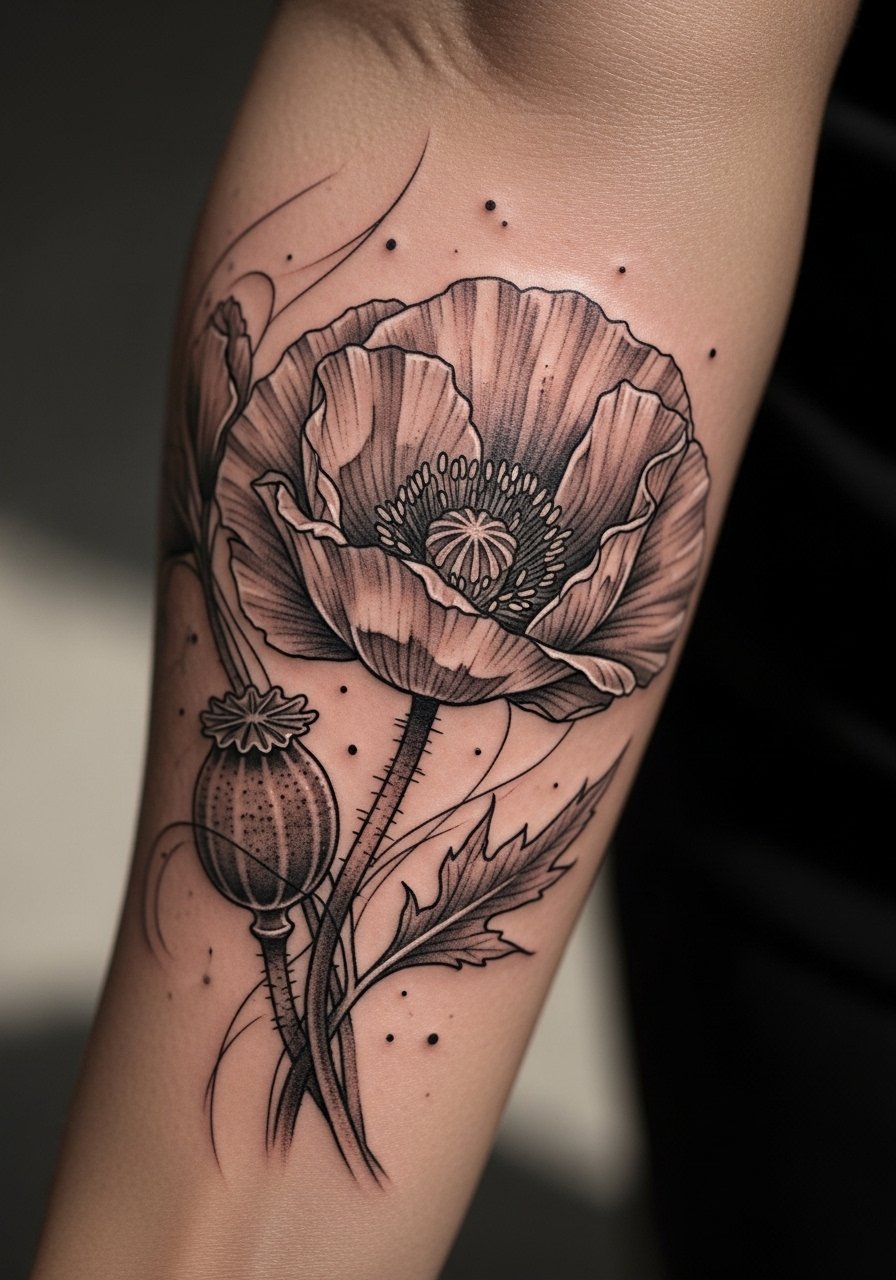
Microrealism is about tiny highlights and graduated shading, so artists favor 3RL outlines and 5M micro-shaders for texture. A tiny poppy like this uses pinpoint white ink dots to suggest light, spaced at roughly 1 to 1.5 millimeters. Visually it reads like a small jewel on the arm. This one suits people who rotate sleeves or want an arm piece that still reads intimate. It is more advanced for artists, so budget for a skilled tech and plan on 60 to 90 minutes. Pack a gentle antiseptic wipe and sterile non-stick pads for the walk home.
Style/Technique: Microrealism shading
Pain Level: 5/10
Session Time: 60 to 90 minutes
Best For: Forearm, visible but easy to cover
Mistake to Avoid: Asking for extra white highlights up front, which can raise risk of blowout if placed too densely.
4. Seed Pod Dotwork On The Finger
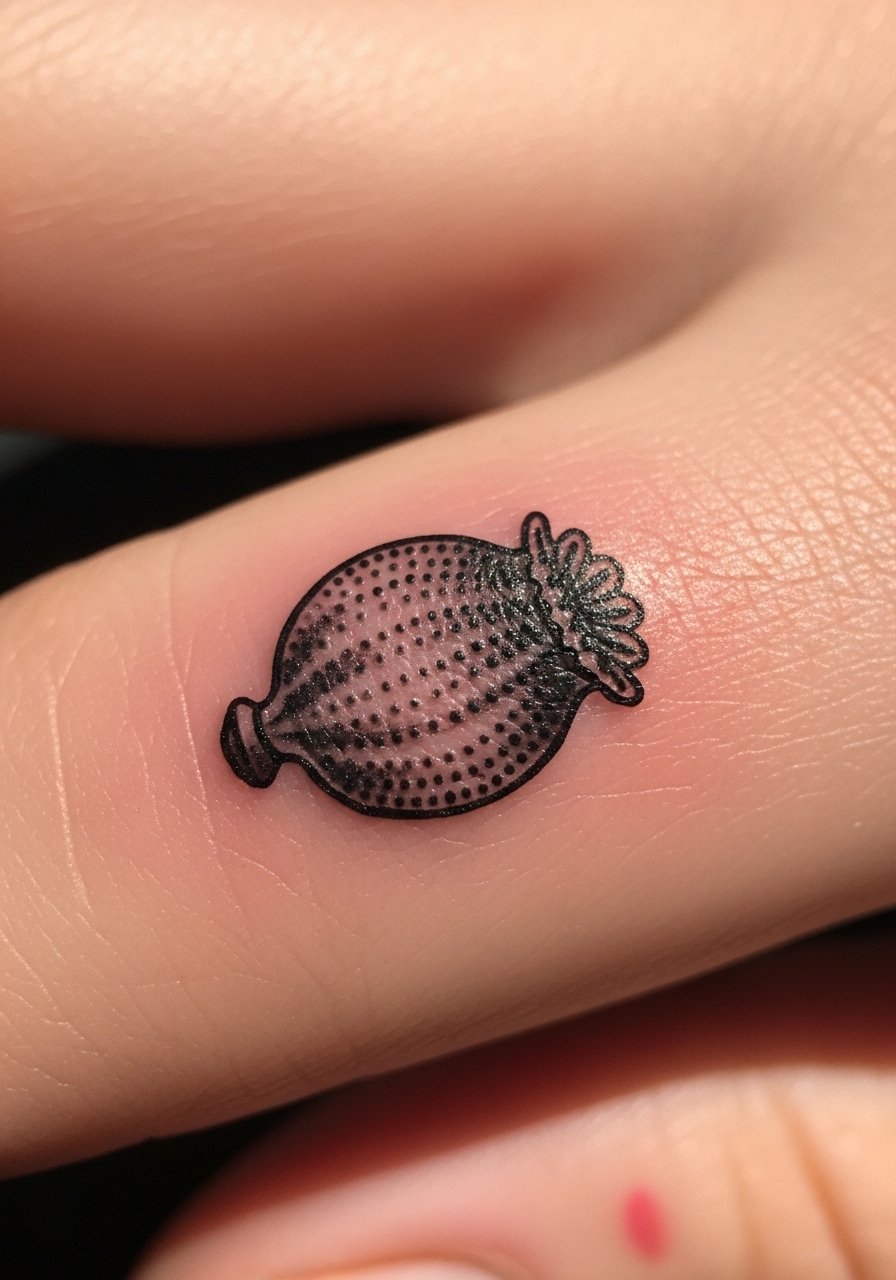
Tiny dotwork survives best on slower-moving skin, but a finger can work if you accept faster fading. Use tight single-needle dot clusters, with dot spacing at about 0.7 to 1 mm to suggest shading without full fill. This creates texture that ages into a gentle stipple rather than a dark patch. It is ideal for someone who prefers subtle finger art and does quick touch-ups. Home care includes frequent moisturizing and avoiding friction. I like recommending a small tube of scent-free healing ointment for the first five days.
Style/Technique: Dotwork stippling
Pain Level: 4/10
Session Time: 15 to 30 minutes
Best For: Finger side, ring alternative
Mistake to Avoid: Requesting full solid fill on a finger, which fades into a blob fast.
5. Black Silhouette Poppy Ankle Spot

A black silhouette is forgiving at tiny sizes because you are working with crisp edges, not delicate lines. Use a tight 7RL pack for a single-pass black fill and keep the flower no wider than 2 centimeters. The result is graphic and modern, wearing well with boots or sandals. This is low-maintenance and budget-friendly since it is usually a single short session with minimal touch-up. For aftercare, a breathable bandage for the first 24 hours and a basic healing lotion like Aquaphor work well.
Style/Technique: Blackwork silhouette
Pain Level: 3/10
Session Time: 20 to 40 minutes
Best For: Ankle, visible with footwear
Mistake to Avoid: Making the silhouette too detailed, which defeats the bold small shape.
6. Tiny Poppy Bud On The Collarbone

A bud uses a short vertical composition that flatters the collarbone line. For this, artists will often use a 3RL outline with a 5RS soft shade inside, keeping contrast low so the bud reads delicate. It feels intimate and suits people who want a chest piece that can be covered. Expect moderate pain because of bone proximity and a session of 30 to 45 minutes. Recommend a breathable top and loose shirts for the first week and a healing moisturizer like Hustle Butter to avoid tight fabric sticking.
Style/Technique: Fine line with soft shade
Pain Level: 6/10
Session Time: 30 to 45 minutes
Best For: Collarbone, coverable with shirts
Mistake to Avoid: Wearing tight necklaces or clothing over the area while it is still sealing.
7. Stacked Trio Of Mini Poppies On The Rib

Stacking three small poppies creates a narrative without needing size. Keep each flower about 1 to 1.2 centimeters and space them at a 2:1 vertical ratio so the eye reads a band rather than a blob. Use a mix of 3RL for outlines and 5M for soft interior shading. This layout suits people who want a subtle torso piece that can peek under a shirt. It costs more because ribs demand careful pacing and breathing breaks, expect 60 to 90 minutes. Bring soft clothing and aftercare essentials like sterile bandage tape.
Style/Technique: Clustered fine-line trio
Pain Level: 7/10
Session Time: 60 to 90 minutes
Best For: Ribcage, peekable under clothing
Mistake to Avoid: Asking for full black shadow on all three, which flattens the composition.
If you want to shop while you read, these are the items I actually recommend bringing to the appointment or keeping at home for healing.
Tiny Poppy Tattoo Kit
Basic Aftercare:
- Hustle Butter (~$10-20). A solid balm for the first week.
- Tattoo aftercare balm (~$8-15). Fragrance-free option.
Prep & Hygiene:
- Tattoo stencil transfer paper (~$8-12). For artists and touch-up prep.
- Sterile non-stick pads (~$6-10). For immediate care.
Comfort & Protection:
- Scent-free healing ointment (~$7-12). For scab-softening.
- Sterile bandage tape (~$5-9). Keeps clothing from rubbing new work.
8. Memorial Seed-Count Poppy On The Shoulder Blade
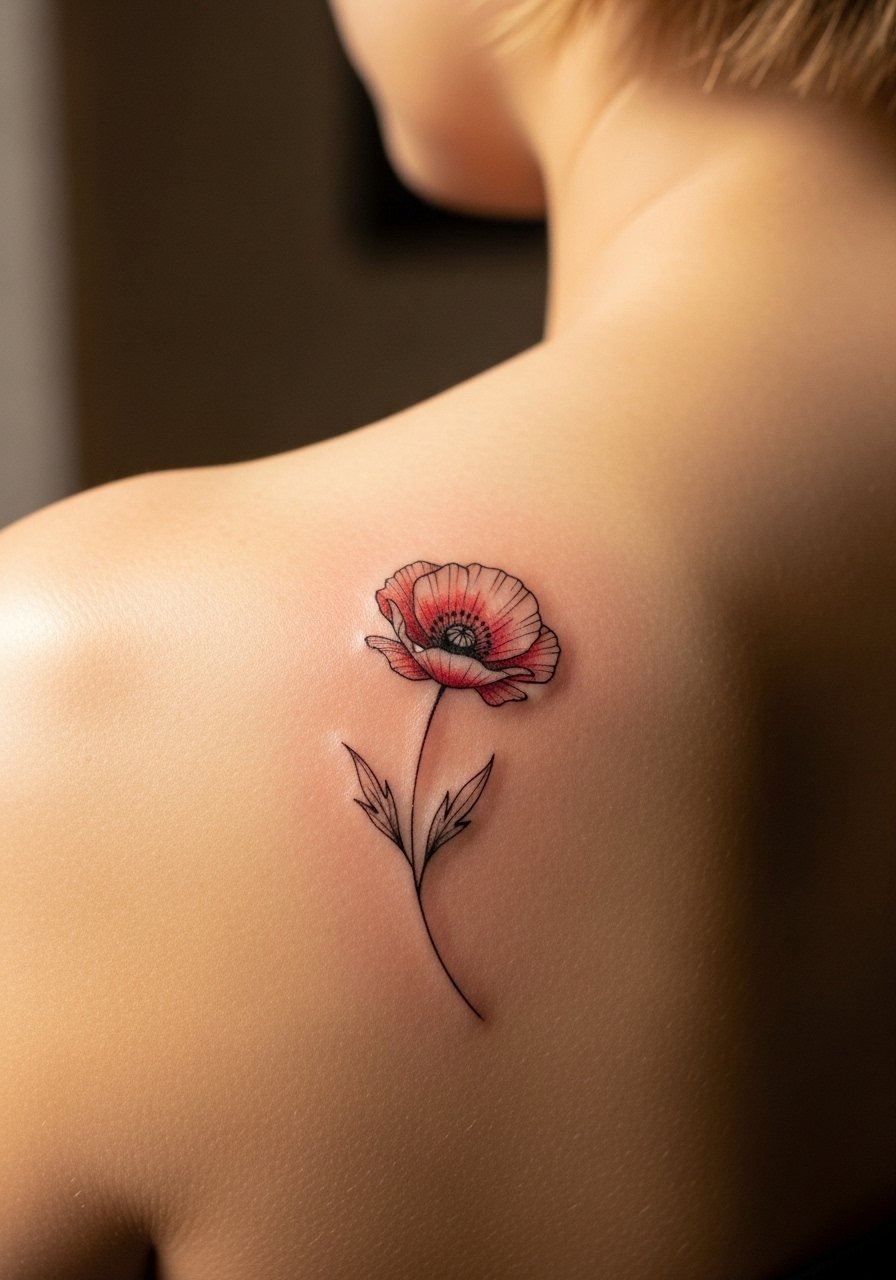
A memorial poppy can encode meaning by using a small number of seeds or petals. Keep the overall piece under about 1.5 inches and use tiny numeric dot clusters to represent dates or people. Because this references mourning, add a cultural-sensitivity note with your artist if you use symbolic elements from specific traditions. Use a 3RL outline, then sparse dotwork counts inside. It is low-visibility and good for people who want private significance. Healing is straightforward with gentle moisturizing and avoiding heavy backpacks for two weeks.
Style/Technique: Symbolic micro dotwork
Pain Level: 4/10
Session Time: 20 to 40 minutes
Best For: Shoulder blade, discreet memorial
Mistake to Avoid: Cramping too many symbolic elements into a very small area, which makes the meaning unreadable.
9. Wrist Poppy With Tiny Script Band
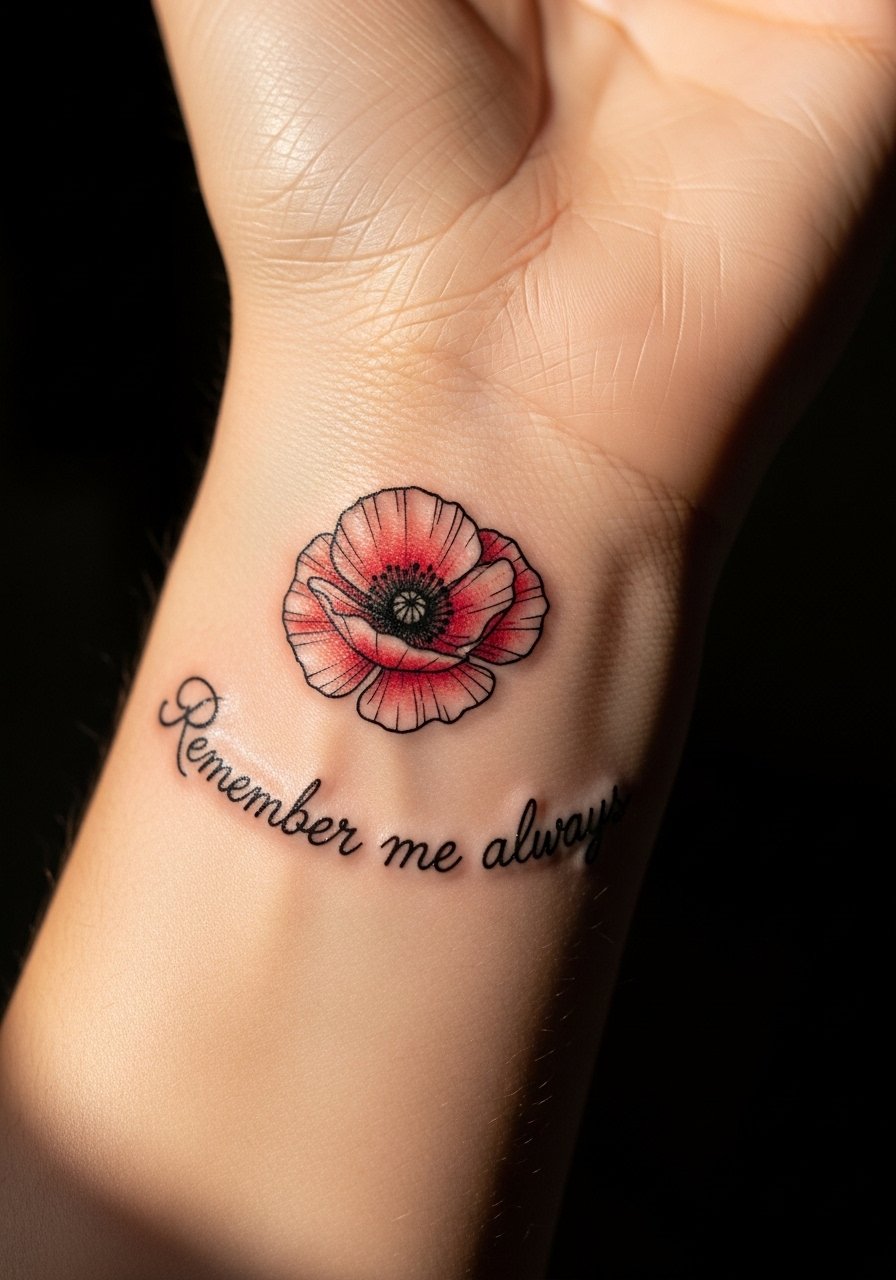
Combining a tiny poppy with a slivered script band makes the piece read like jewelry. Keep lettering at 1.5 mm stroke width and place the poppy off-center for balance. Use a 3RL for the script and a 5RS for petal texture. This suits everyone from minimalists to people who want a wearable statement that can pass in formal settings. Because text on the wrist sees sun and friction, pick an artist experienced in micro-script and budget for a future touch-up. Recommend carrying a small tube of Aquaphor for daily moisturizing.
Style/Technique: Micro-script with fine floral
Pain Level: 3/10
Session Time: 30 to 50 minutes
Best For: Wrist, looks like jewelry
Mistake to Avoid: Choosing overly thin script that will blur at small sizes.
Tiny Tattoo Care Moves
Thin layers of balm beat slathering. Apply a pea-sized amount of Hustle Butter two to three times a day. Too much product traps moisture and softens scabs.
Grab sterile non-stick pads for the first 48 hours. They stop fresh ink from sticking to shirts and reduce scab pulling.
If your artist recommends a stencil, accept it. Transfer paper keeps small placement accurate, especially on curved spots like ribs. A pack of tattoo stencil transfer paper costs under $15 and prevents placement regrets.
Most people worry about sun. Keep small work covered with sunscreen after it fully heals. I use a mineral SPF and reapply when the area sees direct sunlight; a small mineral sunscreen stick is travel friendly.
