
I kept redoing the same braid until lunch because it would loosen by noon. It took one small change, swapping a slicking gel for a cream styler and wrapping the elastic twice, for the whole look to hold. After that, braids went from a midday frustration to something I actually wanted to do before a quick errand.
These eleven braids are practical, cute, and mostly quick. They are meant for mornings when you have ten to twenty minutes, or evenings when you want an effortless second-day look. I tested versions across four hair textures I have styled, so you will find tweaks for fine, medium, and thick hair. Skill ranges from beginner to patient amateur, and the product picks are budget-friendly with a few splurges. If your hair tends to fall flat, look for the porosity note tucked into each idea.
1. Classic French Braid With Soft Face Framing

The French braid works because it hides most frizz inside the weave and creates a long vertical line that slims the face. For fine hair add 1 to 2 small backcombing sections at the crown before braiding for lift. Use a lightweight texturizing spray on damp or dry hair to give each section grip. I like to apply a pea-sized amount of cream styler along the outside of the braid to smooth flyaways without making the braid stiff. Try a lightweight texturizing spray in the middle of the braid step for extra hold.
Mistake to Avoid: Starting the braid on bone-dry, slippery hair without any texture product so the braid unravels quickly.
2. Dutch Crown Braid for That Off-Duty Hair Moment
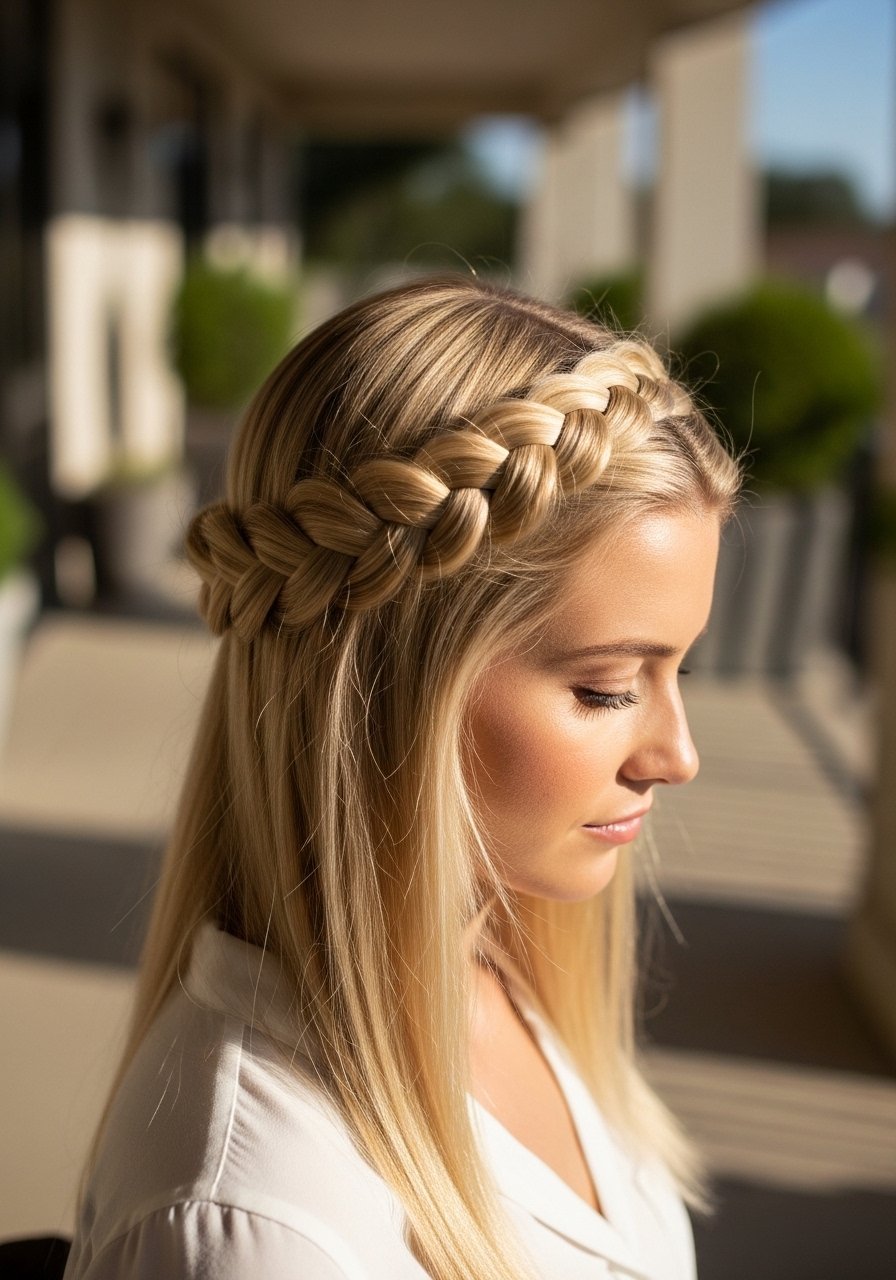
If you want the braid to look intentional but not polished, the Dutch crown sits higher and reads youthful. The trick that made this stick for me is, after each cross, pull the outer strand gently, about 1 centimeter, to widen the braid and keep it from flattening. For medium to thick hair try a small clear elastic at the end then pin the tail under the braid. Pair it with a satin scrunchie for comfort. My go-to for smoothing edges is a lightweight styling cream applied sparingly at the hairline.
Mistake to Avoid: Weaving too tightly at the start which makes the crown look coiled and puffy instead of relaxed.
3. Rope Braid Ponytail for Sleek Movement
A rope braid gives that modern, rope-like twist with minimal fuss. Split the ponytail into two equal sections and twist each section two turns away from your face before wrapping them around each other. The 2-turn rule keeps the braid springy rather than limp. Finish with a light-hold hairspray and wrap a small strand of hair around the elastic to hide it. For shine without stiffness, dab a silicone-free smoothing serum on the ends.
Mistake to Avoid: Twisting each section toward the same direction, which makes the braid unravel instead of locking.
4. Messy Fishtail With Ribbon for Date-Ready Texture

The fishtail works visually because smaller pieces create a woven, basketlike texture that looks complex without being tight. Pull every third crossover about 1.5 centimeters to open the weave and make it look lived-in. If your hair is fine, tease the mid-lengths slightly first for volume and then braid. Thread a velvet ribbon through the final three crossovers to add a soft, intentional accent. I add a few drops of dry oil treatment to ends to avoid frayed tips.
Mistake to Avoid: Over-brushing after braiding which turns the fishtail into a frizzy rope.
5. Pull-Through Braid for Full, Plaited Volume

Pull-through braids mimic a voluminous plait without needing long hair. The technique uses small clear elastics every 2 to 3 inches down the length. Create low ponytails, split them, and pull sections through the loops to build the braid. For thick hair, tighten each elastic just enough to hold but not pinch, so the braid reads soft and pillowy. This style is great when you want drama for an event but limited time. Use a little volumizing powder at the roots before you start.
Mistake to Avoid: Using the wrong elastic size which either digs in or lets the braid collapse.
6. Fishtail Halo With Tiny Barrettes for a Polished Edge

The halo fishtail lifts the face and keeps curls contained. Work with damp hair or mist curls lightly so strands are manageable. Section a 1-inch piece near the temple for the start and feed small outer pieces into the fishtail as you go. For stability, slip one bobby pin under the braid at the ear and another at the nape. Adding tiny barrettes at regular intervals gives the look a finished feel with minimal effort. For curls that hold, I press a pea-sized amount of curl defining cream into each curl before braiding.
Mistake to Avoid: Pinning only on top of the braid which creates pressure points and makes the style droop.
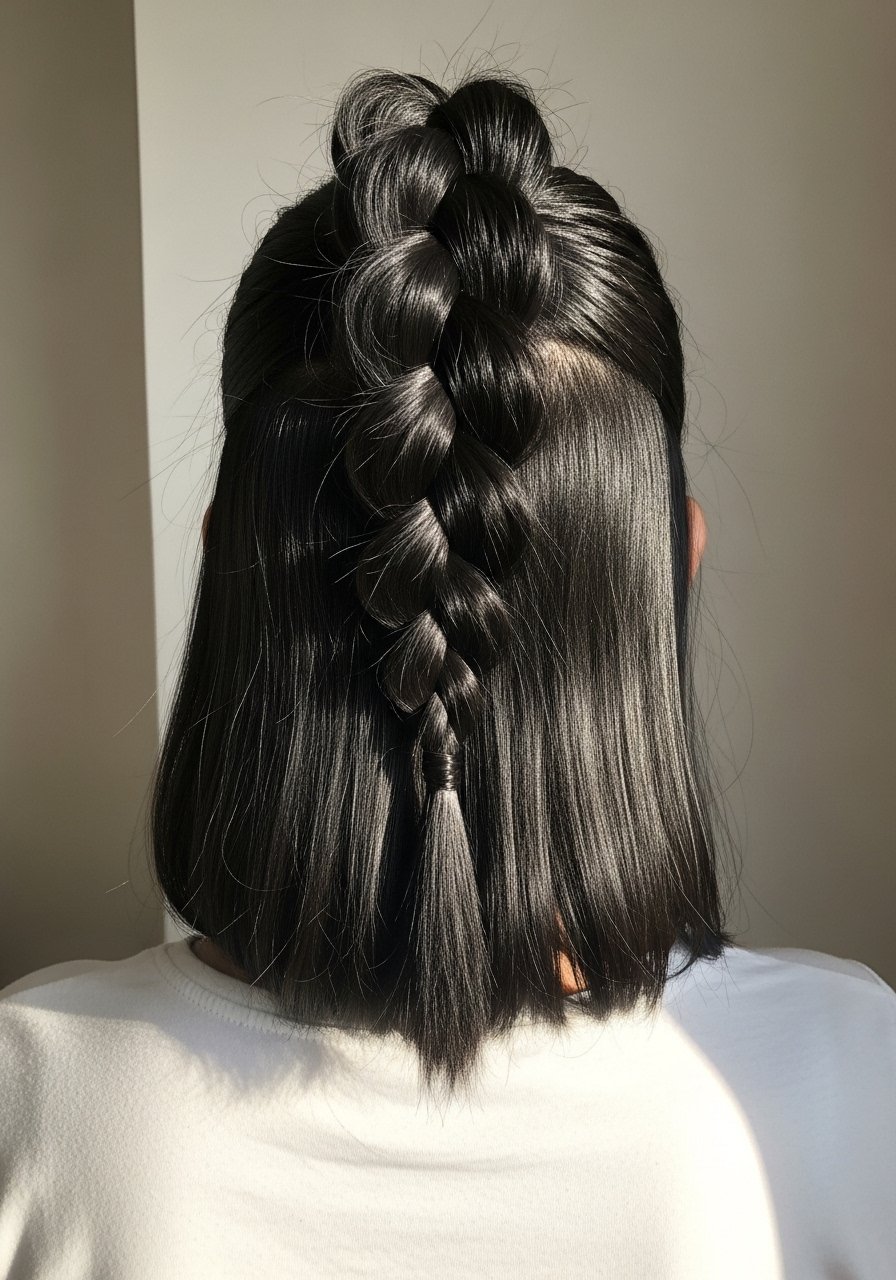
7. Bubble Braid That Reads Playful and Padded

Bubble braids give instant volume and are forgiving if you start late in the morning. Tie a ponytail, then add elastics every 3 to 4 inches and tug each section outward for round bubbles. For long hair you need one elastic per bubble. If your hair is thin, loop a small foam insert just under each elastic to fake fullness. Finish with a matte texturizer so each bubble holds its shape. I tuck a pack of clear elastics into my travel kit because you will lose one or two.
Mistake to Avoid: Skipping the outward tug which leaves the braid looking like a stretched tail instead of defined bubbles.
If any of these have you ready to try something, here are the products I reach for most.
Starter Kit For Cute Braids
Tools:
- Wide-tooth comb (~$6-12). Great for detangling before any braid.
- Paddle brush (~$10-18). Smooths hair for sleek braids.
- Pack of clear elastics (~$4-8). You will use these more than you expect.
Styling aids:
- Lightweight texturizing spray (~$8-20). Adds grip without crunch.
- Cream styler (~$10-22). Smooths flyaways and tames edges.
- Small bobby pin set (~$5-10). Different sizes, get two colors.
Extras:
- Velvet ribbon pack (~$6-15). Small detail that changes a braid.
- Volumizing powder (~$8-14). For instant root lift.
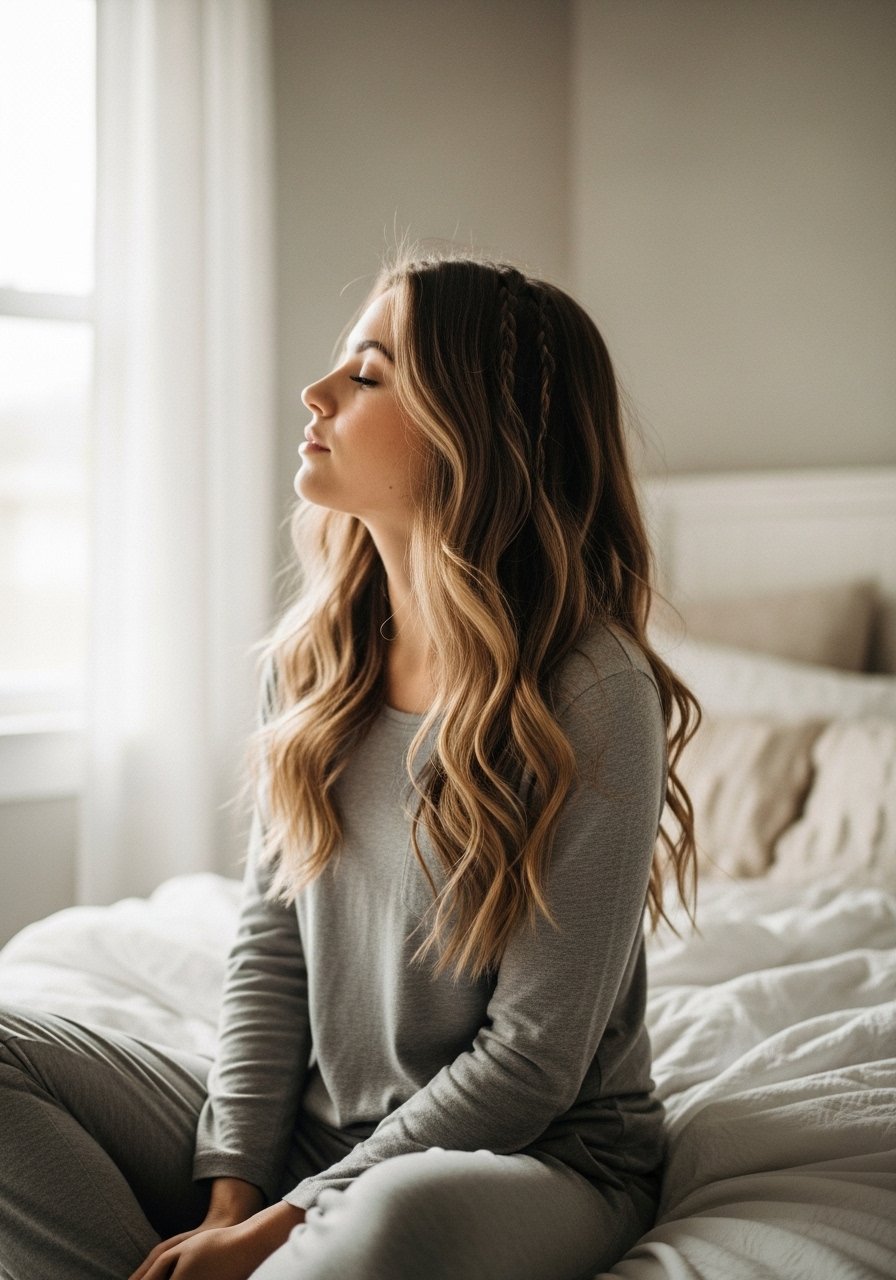
8. Lace Front Braid for Soft, Framed Looks

This small braid along the hairline keeps bangs in check and reads intentional without being heavy. Take 0.5- to 1-centimeter sections for each cross so the lace stitch looks delicate. It suits short bangs because you weave into them instead of over them. Use light product at the roots to avoid flattening. I often pair this with a low bun from idea 11 when I need an updo that still looks soft. Keep a mini rat-tail comb handy to section neatly.
Mistake to Avoid: Using too much product at the root which makes the braid look greasy rather than sculpted.
9. Two-Strand Boxer Braids With Bead Accents

Boxer braids are about staying power. Twist each two-strand section away from your face, then cross them over to secure. For a neat finish, keep each twist roughly one centimeter in diameter as you move down. Add beads or cuffs to the ends for a festival-ready twist. These are great for workouts, windy days, or when you want your hair completely out of your face. I thread beads on with a tiny crochet hook and seal with a dab of clear glue for hair accessories.
Mistake to Avoid: Leaving too much tail at the ends which causes beads to slide off or the braid to fray.
10. Braided Top Knot That Stays Put

If you want an updo that feels elevated but practical, start with a high ponytail and braid it all the way to the end. Wrap the braid around the base and secure with pins. For medium hair, wrap the elastic twice before braiding to create grip so the knot does not sag. Finish with a light mist of flexible hairspray. This look pairs with a strong brow and a simple earring to keep the vibe modern. Keep a small pack of strong hold bobby pins nearby.
Mistake to Avoid: Pinning the braid only on one side which makes the knot lean and slip by midday.
11. Heat-Free Braid-Out for Natural Waves
This braid-out gives second-day waves without heat. Start on damp hair, apply a cream styler from mid-lengths to ends, and braid loosely in three to four sections. Sleep with a silk pillowcase or a silk scarf to reduce friction. In the morning gently separate the plaits with fingers and add a few drops of dry oil to tame frizz. For the best balance, braid each section every 2 to 3 inches so you do not create too-tight ringlets. Store a silk hair scarf in your travel bag.
Mistake to Avoid: Rebraiding on dry hair which makes the waves frizzy and uneven.
Little Braid Habits That Actually Help
Start with slightly damp hair. Braids hold best when hair is not slick or bone-dry. Use a leave-in conditioner spray to give grip without weight.
Grab clear elastics to match most hair colors. They disappear visually and keep the braid tidy longer.
Pull each braid open gently after removing elastics, not before. That softening step is what makes hair look fuller and avoids the chunky braid look.
If your braids limp by noon, sprinkle a little texturizing powder at the roots and massage it in. It adds lift without stickiness.
Sleep on a silk pillowcase or with a silk scarf. It reduces friction so your braid holds shape and has less frizz in the morning.
