
I kept painting sample swatches on the wall and walking away, thinking something was wrong with the color. Weeks later I realized the problem was the glossy trim, the overhead bulb, and my giant fern casting a green tint. One small switch fixed it. After that I started pulling cheap materials into real room tests and learning what actually reads as calm or lively in real light.
After trying this in three rentals, these are hands-on, renter-friendly projects that mostly use inexpensive tools and a weekend of time. Expect easy fixes and a couple slightly messier projects. I wrote the list for people who want a coherent look without buying a whole new sofa. Most ideas work in small apartments, scale up for larger rooms, and note when a pet- or kid-safe swap exists.
1. Painted Accent Panels For Cheap Drama
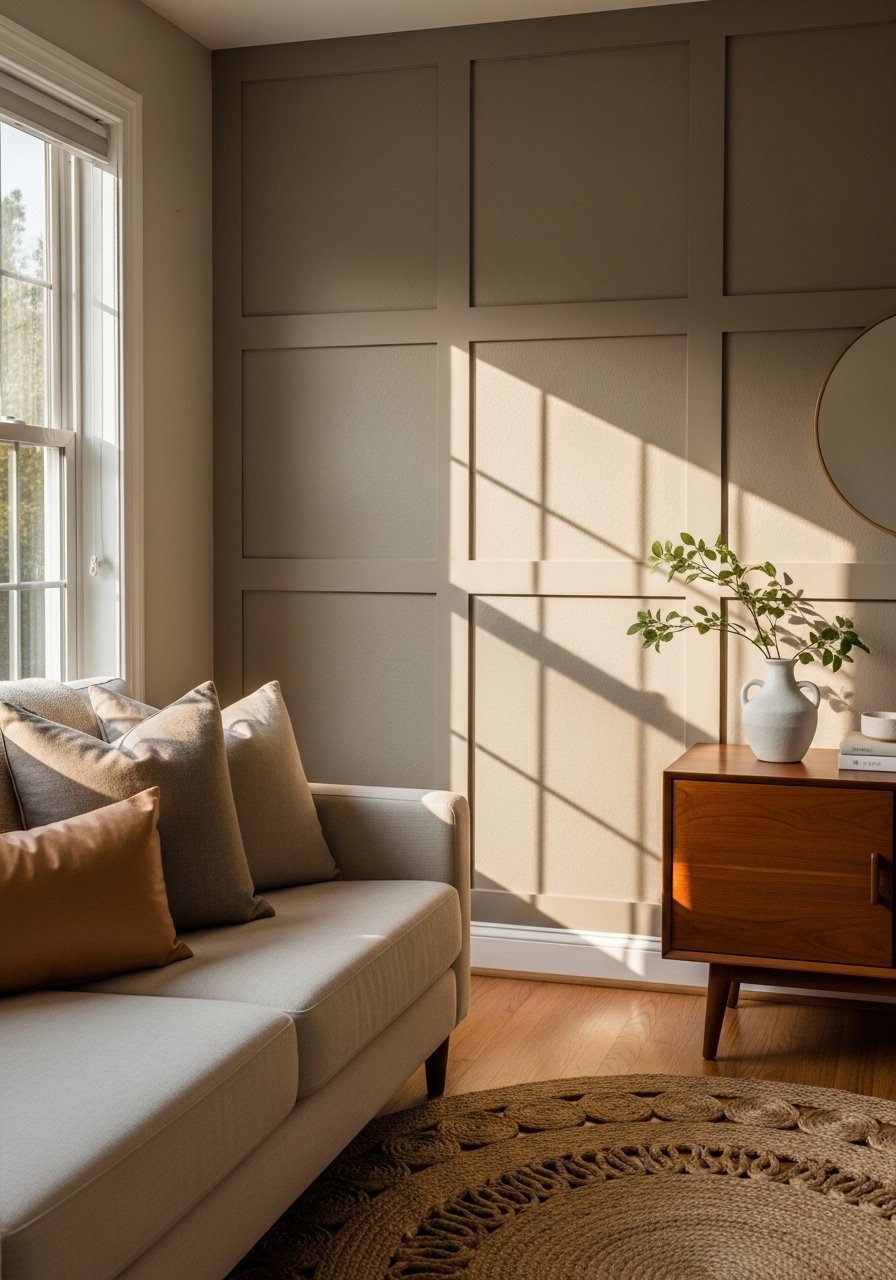
I cut simple plywood strips 18 inches wide and taped them off to make vertical panels. Two coats of matte paint at 4-by-6-foot scale give a gallery effect without expensive molding. The trick is to sand between coats with 220 grit and keep panel spacing at 1/8 inch so shadows read as intentional. This works for renters if you use removable Command picture-hanger mounts rated for 25 pounds. For tools, I used a mini paint roller set and a removable heavy-duty picture hook.
Mistake to Avoid: Painting too close to the trim edges and skipping the sanding between coats, which makes the panels look amateur.
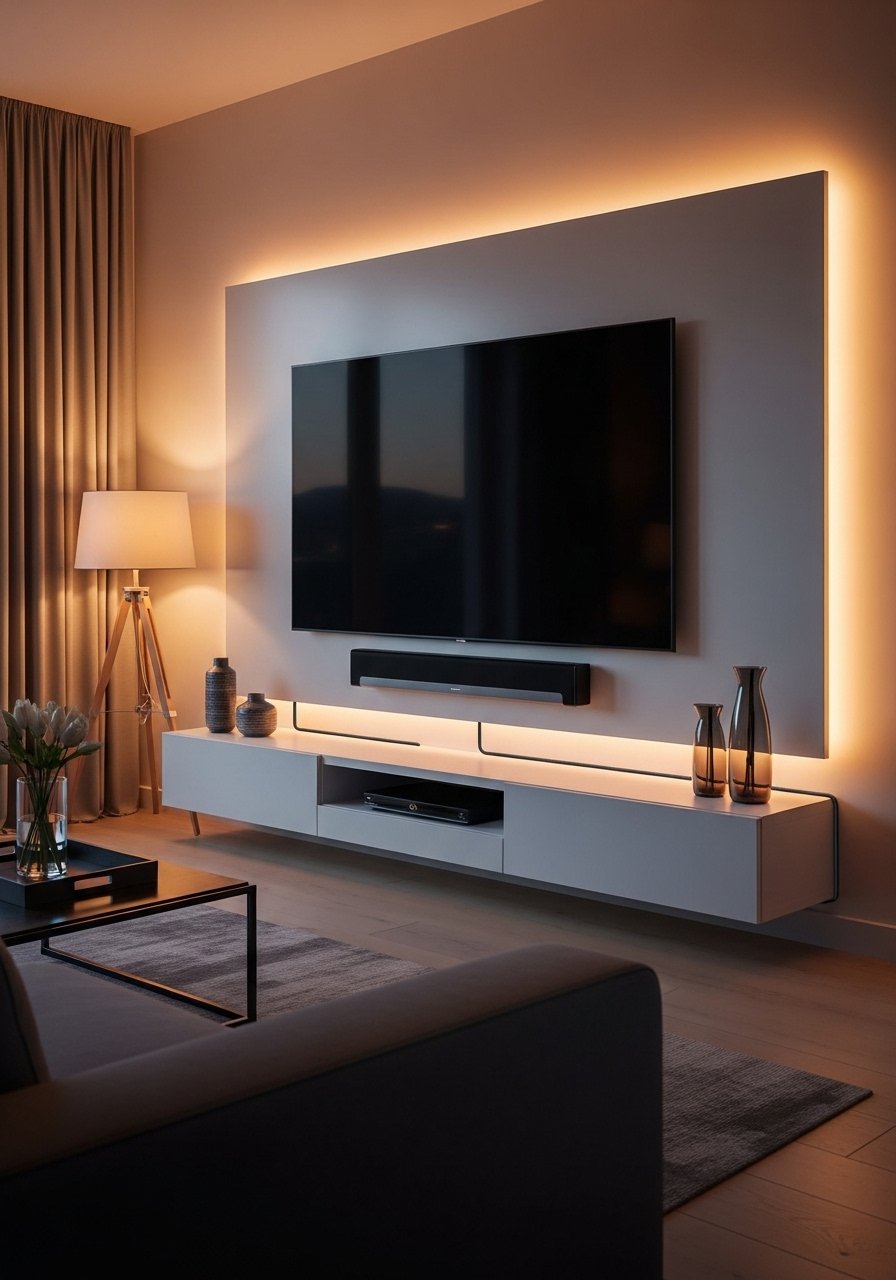
2. Floating Shelf With Hidden LED Undershelf Glow
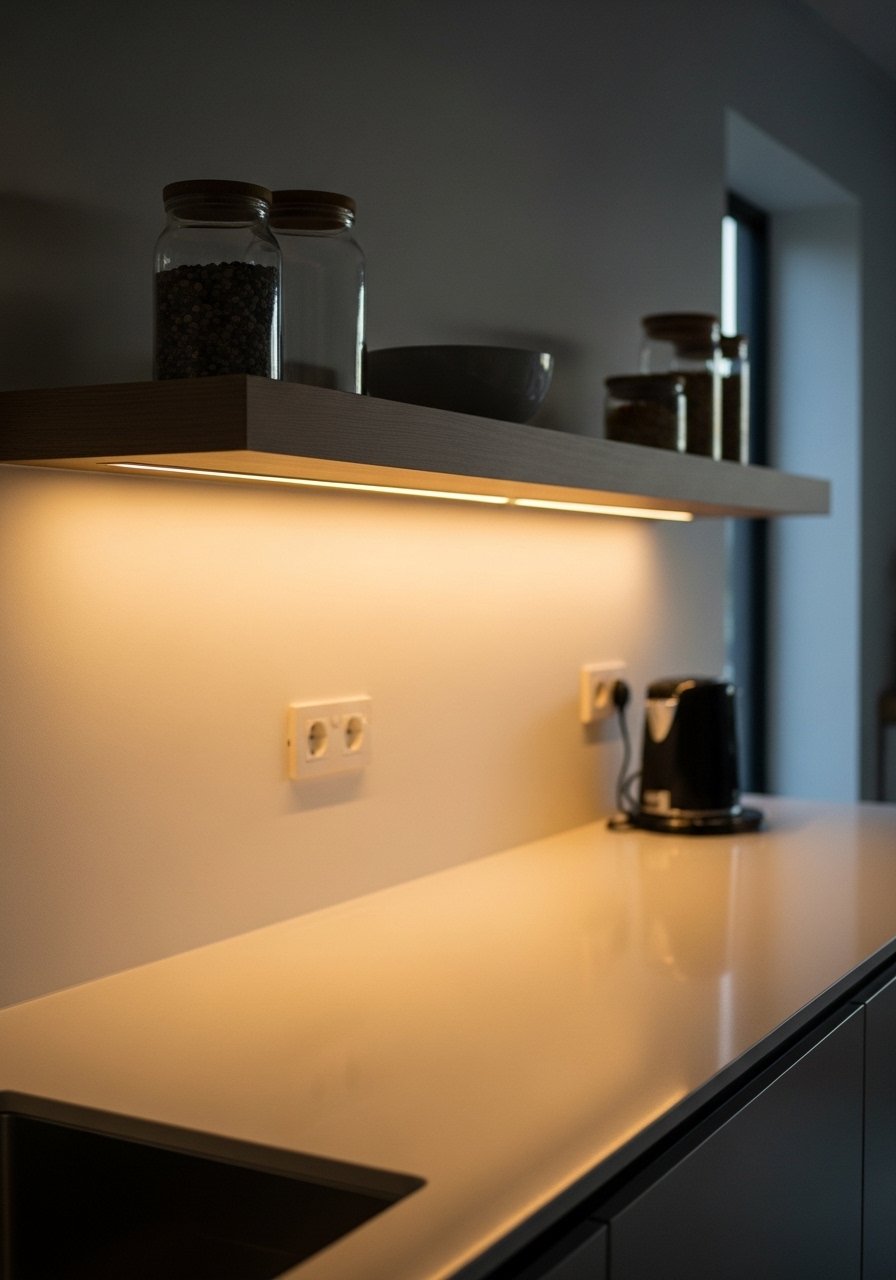
I built a 36-inch floating shelf and routed a 1/2-inch channel on the underside for an LED strip. Use a 12-volt LED tape rated for dimming, and stick it down with the adhesive backing. Cut the strip at the marked points and solder the connectors, or buy a plug-in kit if you hate wiring. Keep the strip 1/4 inch from the back edge so light washes the wall. I prefer a warm 2700K strip to read cozy in evening light. Grab a warm LED strip kit and floating shelf brackets.
Mistake to Avoid: Placing the LED too close to the edge so the light shows the strip instead of washing the wall.
3. Gallery Ledge From Salvaged Trim
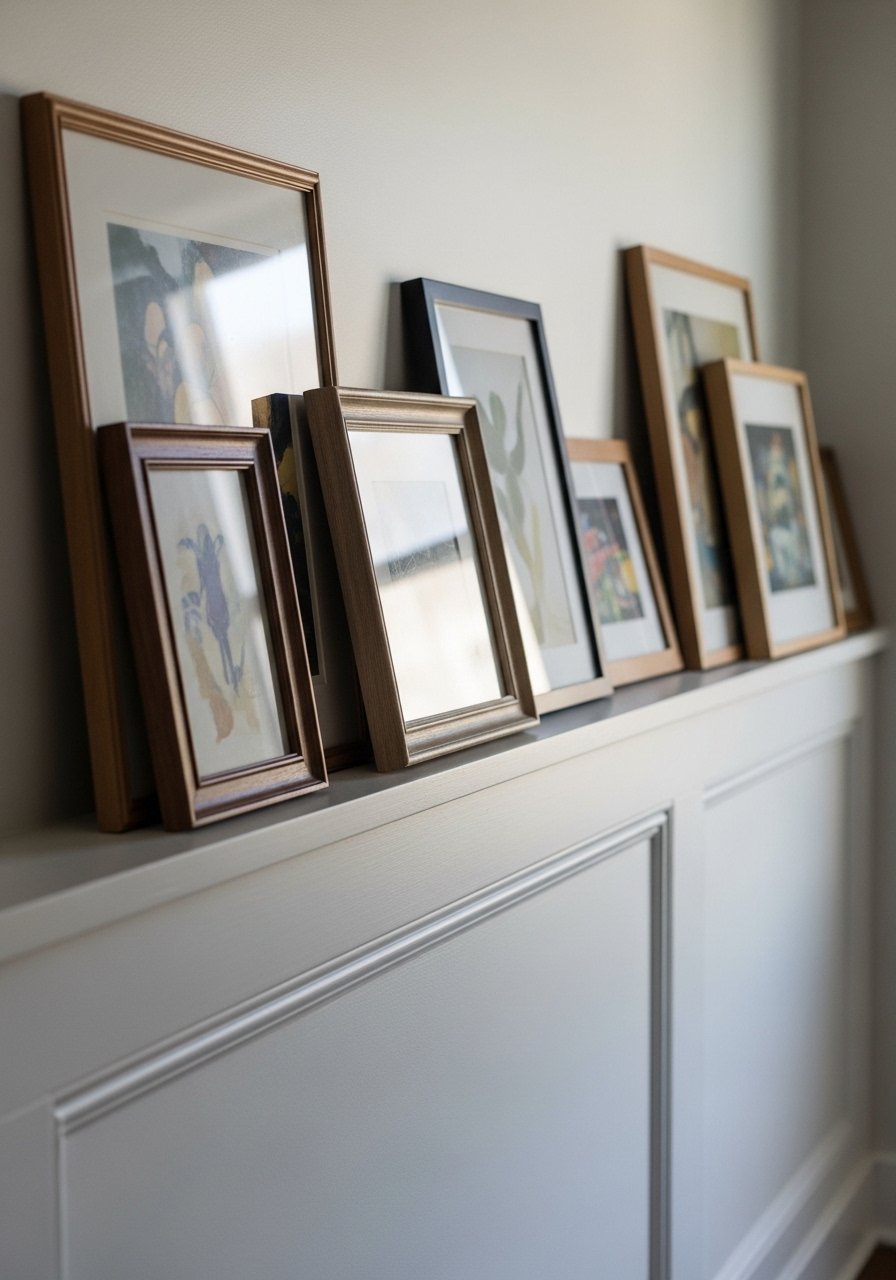
I turned leftover trim into a picture ledge: glue a 1.5-inch lip on a 1×4 backer and paint the whole thing in semi-gloss for easy cleaning. Drill three pilot holes and use wall anchors spaced every 16 inches for stability. Lean a mix of 11-by-14 and 8-by-10 frames for a casual layered look. For budget frames, I use black picture frames and one or two thrifted frames for texture.
Mistake to Avoid: Hanging frames flush to the wall instead of leaning them, which flattens the composition.
4. Thrifted Nightstand Makeover With Chalk Paint
I stopped over-sanding and started using a bonding chalk paint on everything. Two thin coats, a light scuff with 320 grit, and paste wax for protection. Swap brass knobs for ceramic ones to instantly change era cues. For durable finish, buff the wax with a soft cloth until it looks even. Try a bonding chalk paint and ceramic knobs.
Mistake to Avoid: Applying one thick coat hoping it will cover. Thin layers make a cleaner finish.
5. Rounded Macrame Plant Hangers That Don’t Sag
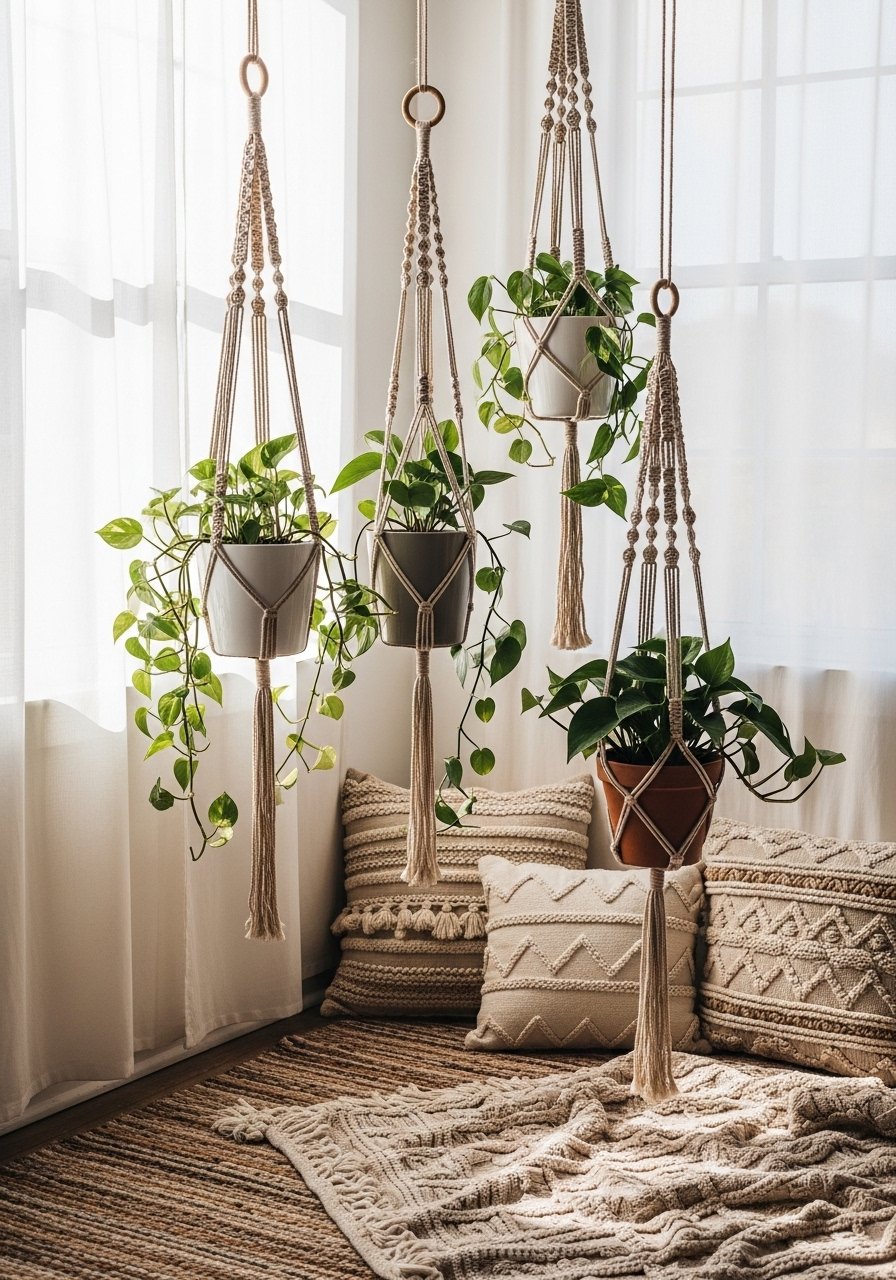
I relearned knot tension the hard way. Use 4 mm cotton cord and double up for medium pots, then tie a stopper knot 6 inches above the ring to prevent sag. Use a ceiling hook rated for 50 pounds and distribute weight with a spreader ring for heavier planters. For quick starts, try a cotton macrame cord and a heavy-duty ceiling hook.
Mistake to Avoid: Using single thin cord for large pots, which stretches and pulls the hanger out of shape.
6. Washable Fabric Headboard You Staple On
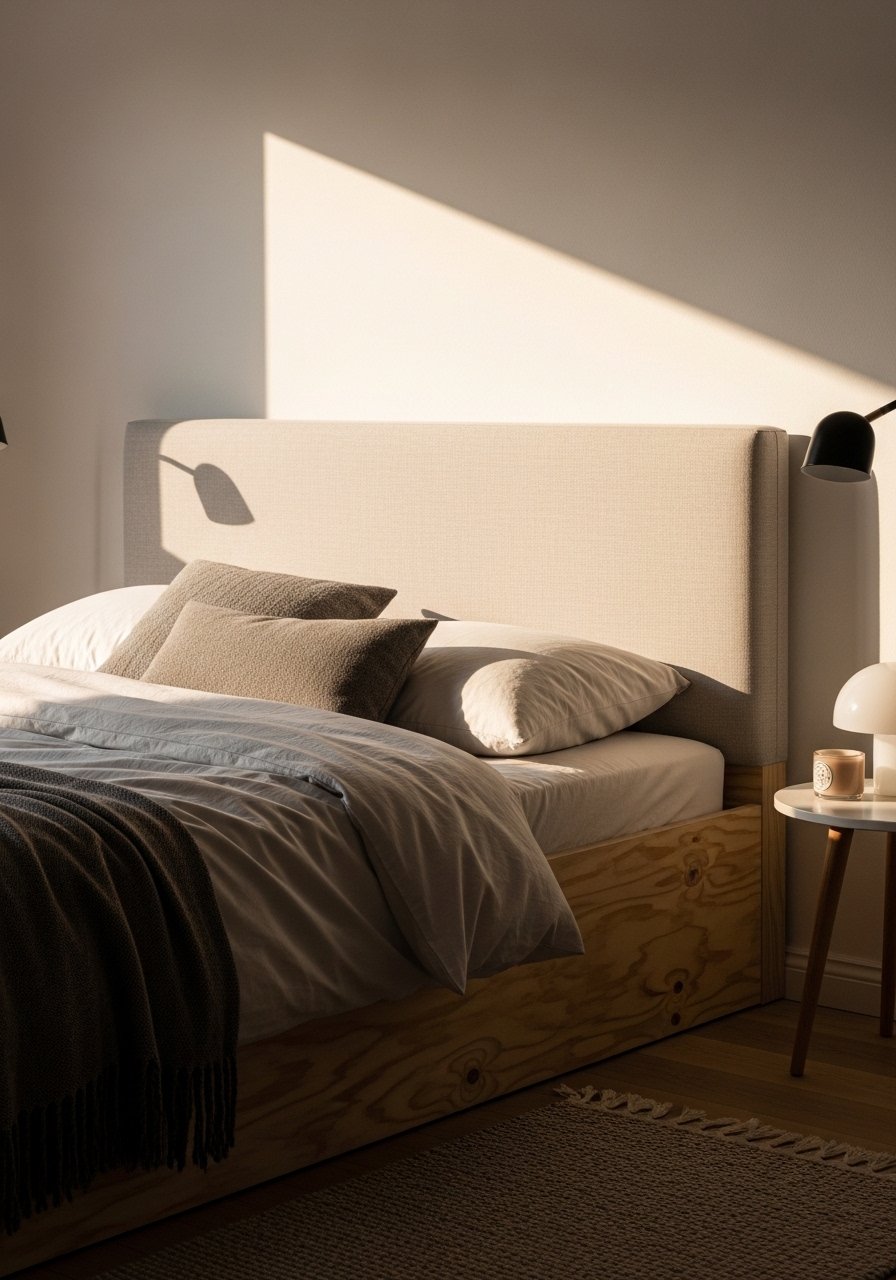
Measure the mattress width and cut a 48-by-28-inch plywood panel for a full look. Staple foam and batting, then the fabric, keeping 1 inch of stretch at each corner for neat corners. Hang with French cleats so you can remove it for laundry or to refresh fabric. I used an IKEA frame and recovered it with a heavyweight upholstery fabric and a velvet throw pillow to soften the look.
Mistake to Avoid: Using thin craft foam that flattens quickly instead of a denser foam layer.
7. Glass Bottle Pendants From Recycled Bottles
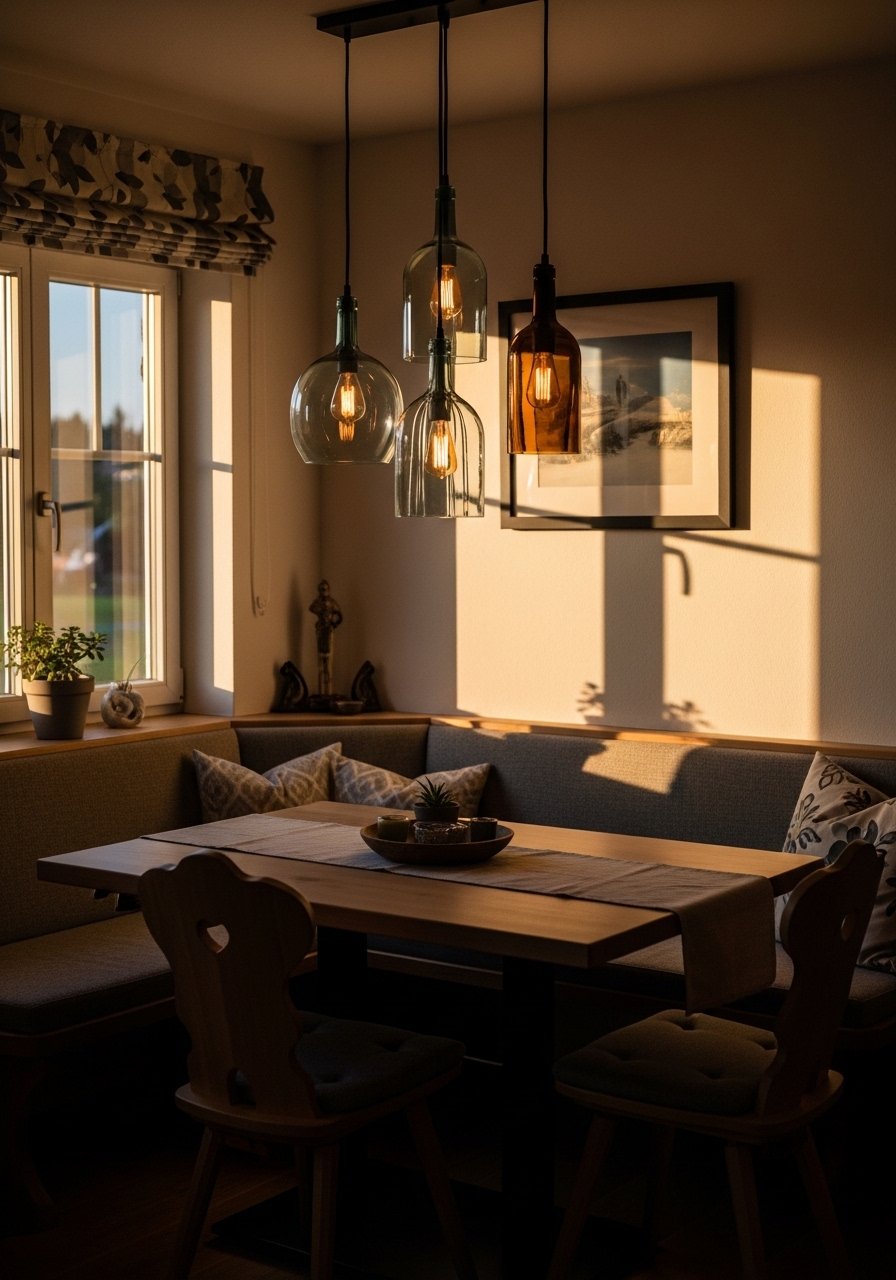
I drilled bottle necks with a 3/4-inch glass-bit and used a kit with a porcelain socket for safety. Rinse bottles, tape the drill line to prevent slipping, and drill slowly at 3000 rpm while keeping the glass wet. Use an inline dimmer for ambience. If wiring is not your thing, a battery lamp kit works for an instant pendant effect. Try a glass bottle drill bit kit and a pendant light cord kit.
Mistake to Avoid: Drilling dry or too fast, which causes cracking instead of a hole.
If any of these projects have you ready to shop, here is what I actually reach for when I start building.
Home Aesthetic Project Essentials
Tools:
- Cordless drill (~$60-120), reliable for holes and screws.
- Mini paint roller set (~$10-18), saves on masking and texture.
Materials & Finishes:
- Bonding chalk paint (~$15-30), low prep for furniture.
- Warm LED strip kit (~$20-35), for hidden light washes.
Hardware & Fasteners:
- Removable heavy-duty picture hook (~$8-15), renter-friendly mounting.
- Heavy-duty ceiling hook (~$6-12), for plant hangers.
Textiles & Plants:
- Upholstery fabric (~$20-40 per yard), for headboards or stretched art.
- Velvet throw pillow (~$15-30), changes mood with little cost.
- Black picture frames (~$20-50), for the gallery ledge.
8. Painted Drop-Cloth Rug With Simple Stripes
I wanted a washable-looking rug for under a coffee table and found a cotton drop cloth works great. Cut to size, hem the edges with a double fold, and use fabric paint stenciled in 6-inch stripes. Mix paint 3 parts paint to 1 part textile medium so the pigment flexes and washes without cracking. Air dry flat and seal with a diluted fabric medium. I used a cotton drop cloth and fabric paint.
Mistake to Avoid: Using straight acrylic without textile medium, which flakes after washing.
9. Low-Profile Cable Trim That Reads Like Molding
Cable raceways can look ugly if left obvious. I installed a 3/4-inch cable channel, then added a 1/4-inch trim strip over it and painted the whole assembly. The channels are rated for power cords and ethernet, and the trim makes them look intentional. Use adhesive-backed raceways for renters, then paint in two thin coats for a flush finish. Grab a paintable cable raceway kit and paintable trim strips.
Mistake to Avoid: Running multiple thick cords in a skinny channel so it bulges and looks sloppy.
10. Easy Cement Planters With Silicone Molds

Mix cement with water following the bag ratio, but add 1 part perlite or fine sand for lighter weight. Pour into silicone molds and tap to release air bubbles. Let cure 24 to 36 hours before demolding and dry for another week to fully harden. Seal the inside with a breathable concrete sealer if you plan to use soil directly. I buy a small-batch concrete mix and silicone planter molds.
Mistake to Avoid: Demolding too early, which causes edges to chip and lose shape.
11. Frosted Window Film For Patterned Privacy
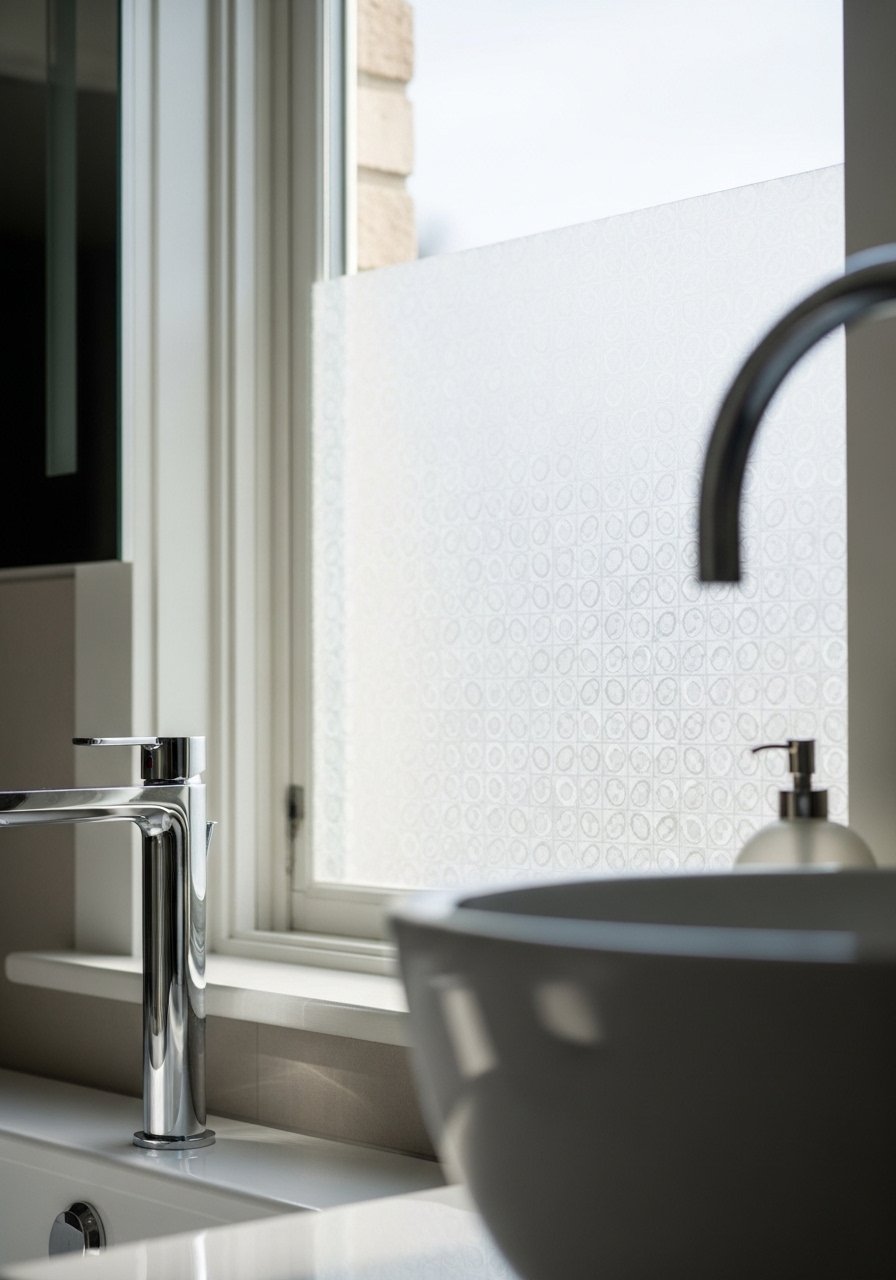
I used a patterned static-cling film for a small bathroom window. Cut it 1/8 inch oversize and squeegee from the center to the edges to prevent bubbles. The patterned films reduce glare while still passing light. For a layered look, pair an inner sheer curtain. Try a patterned frosted window film.
Mistake to Avoid: Cutting the film exact size and then stretching it, which creates wrinkles.
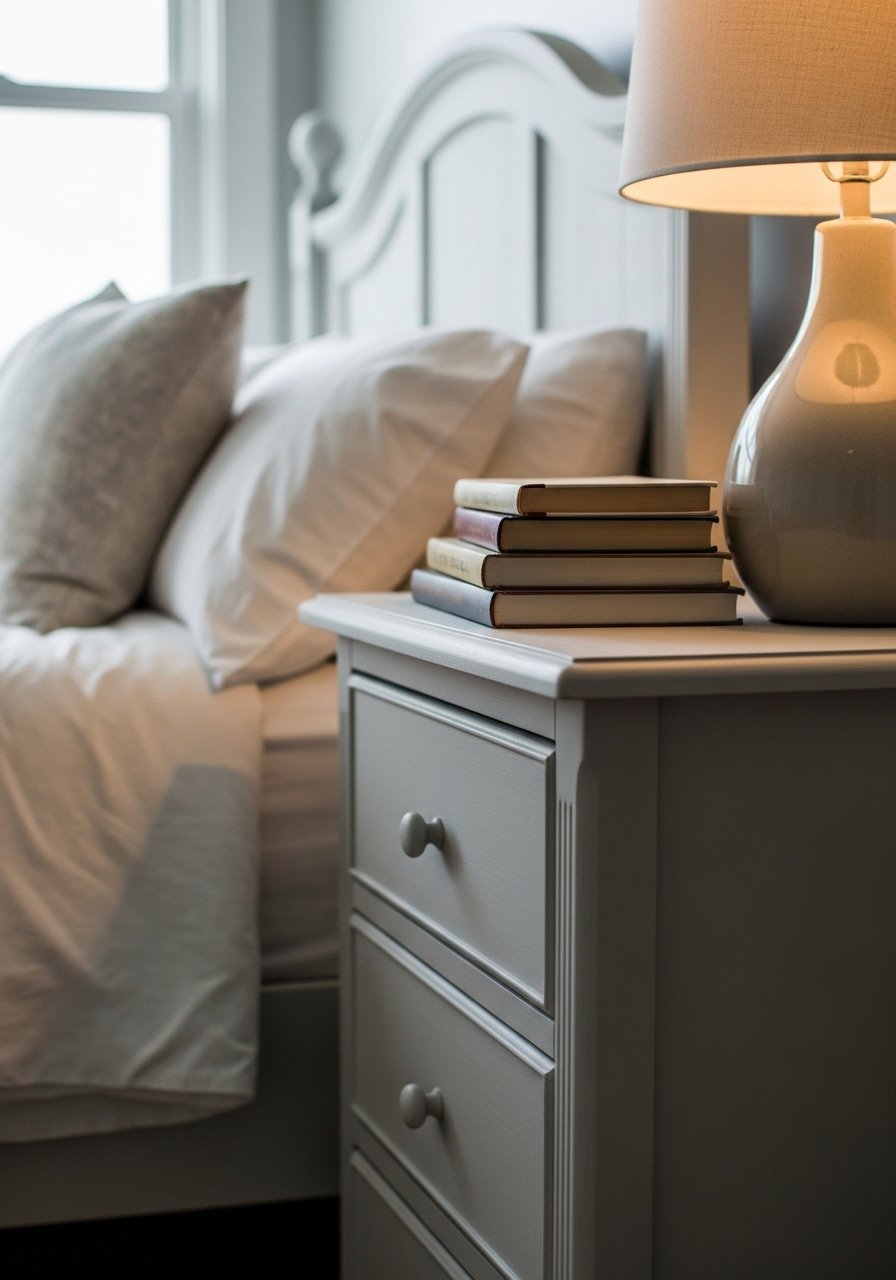
12. DIY Floating Nightstand Built From a Drawer
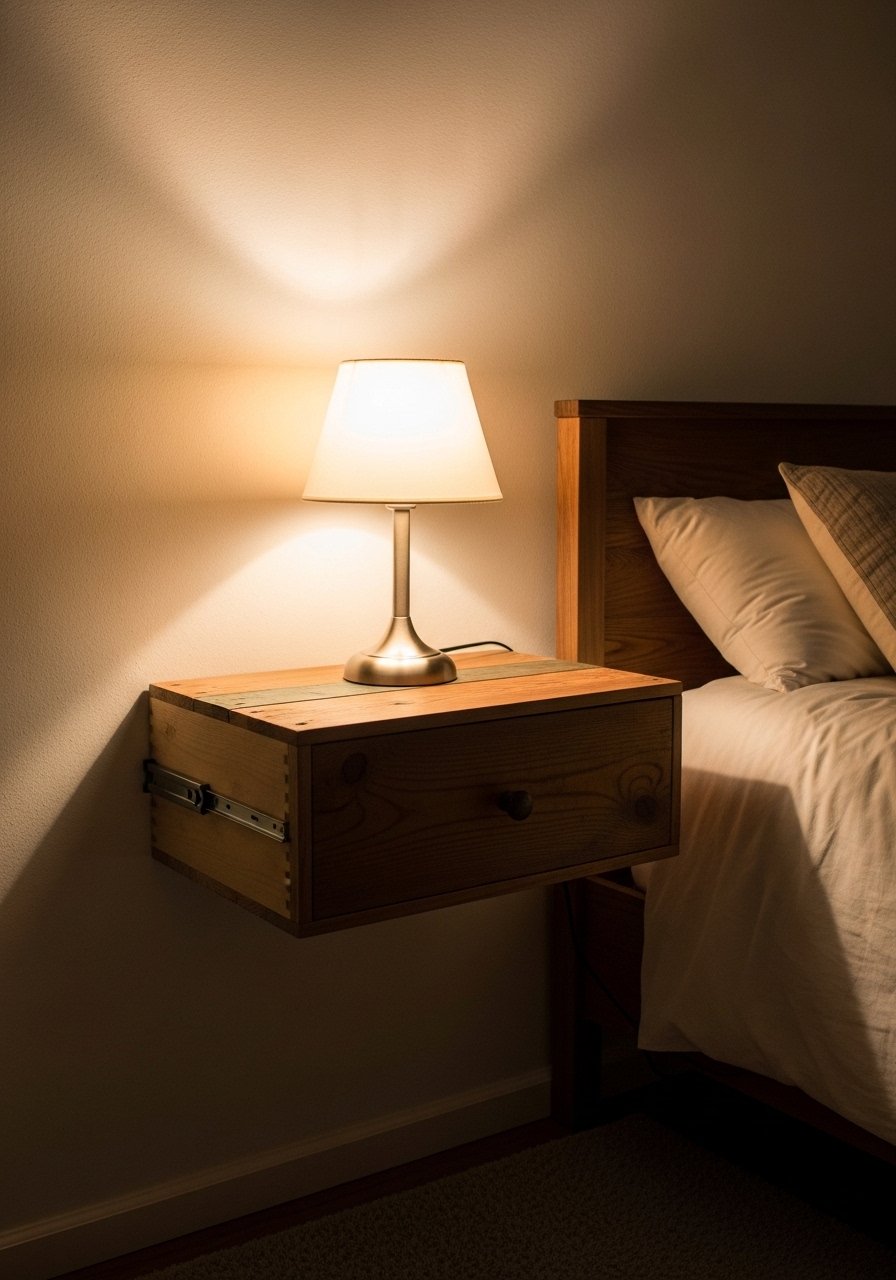
I salvaged an old dresser drawer, added a 1×3 cleat inside the back, and hung it on two French cleats so it looks like a floating box. Paint the inside a contrasting color to read like a deliberate shelf. Mount the cleat on a stud and use drywall anchors if you must. A small strip of rubber mat prevents mugs from sliding. Use a French cleat hanging kit and rubber non-slip mat.
Mistake to Avoid: Attaching the cleat only to drywall without finding a stud or using proper anchors.
13. Stretched Fabric Panels For Instant Wall Art
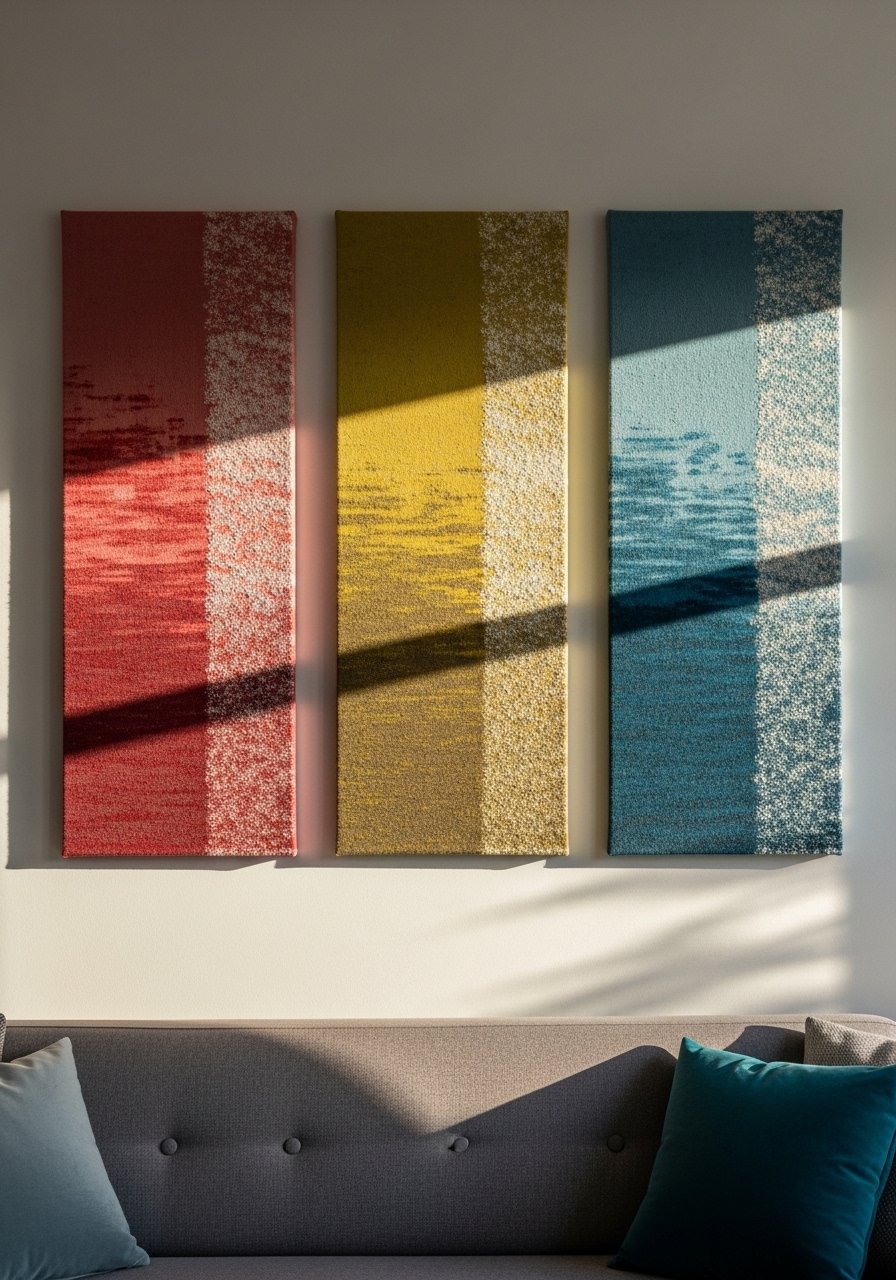
I stretched upholstery-grade fabric over 11-by-14 canvas frames and stapled the edges on the back. Use pattern placement when you work with stripes or motifs so repeats align. Group three panels horizontally with 2 inches between each for a neat triptych. This is fast, removable, and lets you swap fabrics seasonally. Try stretcher bars and upholstery fabric.
Mistake to Avoid: Stretching too tight so the fabric distorts the pattern, making the panels look wonky.
Small Habits That Keep DIY Projects Lasting
Fresh paint touch-ups are worth a small tub. Keep a labeled sample jar of each paint color used on trim or panels. It makes quick repairs seamless and preserves the original palette. Try a small paint sample kit.
Rotate plants weekly toward the light. If one side is greener, the whole display reads unbalanced. I use an inexpensive plant moisture meter to avoid overwatering.
If you have pets, anchor lightweight hanging pieces with a secondary leash point. A small safety tether kit costs little and prevents a pull-down disaster.
Keep one drawer with spare knobs, hooks, and quick-fix hardware. A multi-size screw and anchor pack lets you finish projects without a hardware-store run.
When in doubt, photograph your layout before you start drilling. It shows scale and helps avoid symmetric mistakes that look off in person. A simple tape measure with a magnetic end saves time and frustration.
