
I ruined my first cat eye mani by painting one thick stripe and expecting the magnet to do the rest. The polish pooled, the shimmer tugged into a crescent, and the whole thing looked lopsided. After a few more messes I learned to build the effect with thin layers, steady magnet technique, and a compact palette that actually works on short nails too.
These eleven ideas are for anyone who wants a wearable cat eye that survives day to day, whether you do gel at home or a salon tech finishes it. Most looks are beginner friendly, a few need an intermediate magnet technique, and the time ranges from a quick 20 minutes to a careful gel cure session. Budget notes are in each idea, and when I say a tool changed things I mean one small wand or pot did most of the work.
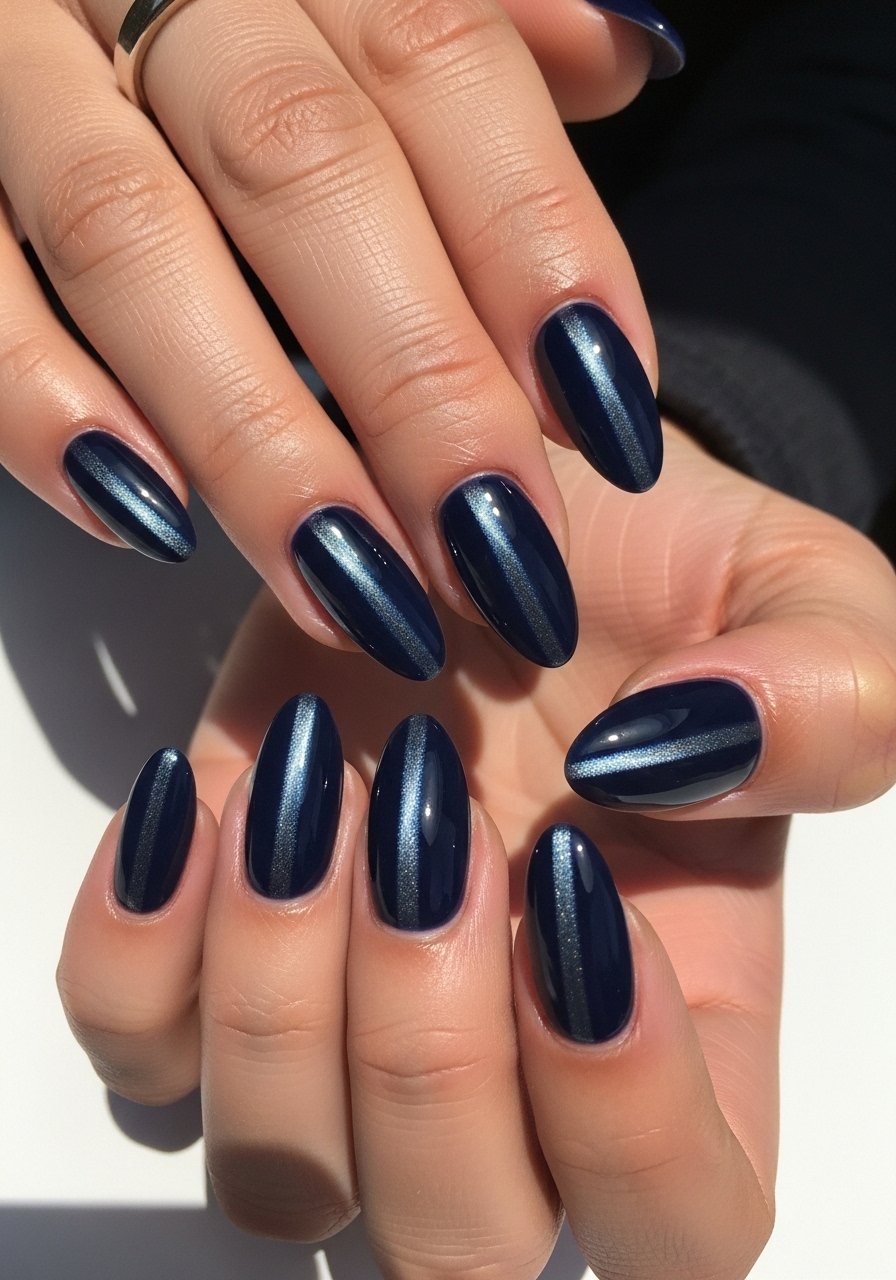
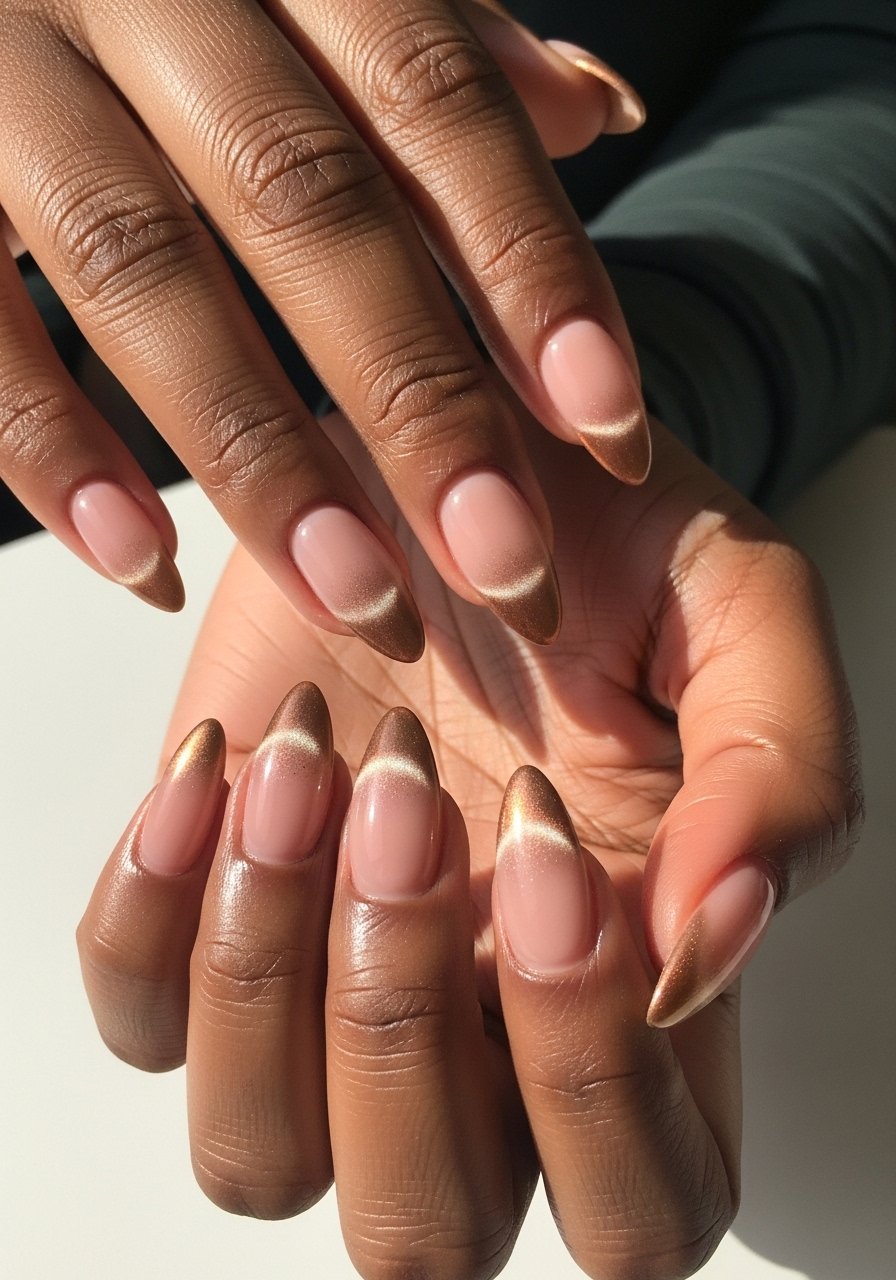
1. Classic Center Stripe Cat Eye
Style/Vibe: Classic Center Stripe
Best For: Medium to long nails / everyday wear
Skill: Beginner
The center stripe reads clean because you place the magnet over the wet polish and pull the shimmer into a crisp line. It works visually because the light-reflecting pigment gathers into a ridge, which gives a ledger-like shine down the nail. For gel, I do three thin coats, cure 60 seconds between each, and hold the magnet about 3 millimeters above the nail for 8 to 10 seconds. Try a budget-friendly magnetic nail polish for practice, then step up to a stronger magnet wand when you want sharper lines.
Mistake to Avoid: Painting a thick first coat and trying to move the pigment later.
2. Short Nail Cat Eye Accent
Style/Vibe: Subtle Side Flick
Best For: Short nails / office-friendly
Skill: Beginner
Short nails often get ignored in cat eye roundups. The trick is a narrow diagonal band instead of a long stripe, which gives the illusion of length. Apply two thin coats and magnet each nail separately for 6 to 8 seconds so the shimmer doesn't smear. A tech who works at a salon downtown showed me that skinnier lines read better on a short free edge. Use a thin brush to clean edges, and a quick-dry top coat to seal without dragging the effect.
Mistake to Avoid: Trying the full-length stripe on a short nail and ending up with a crowded look.
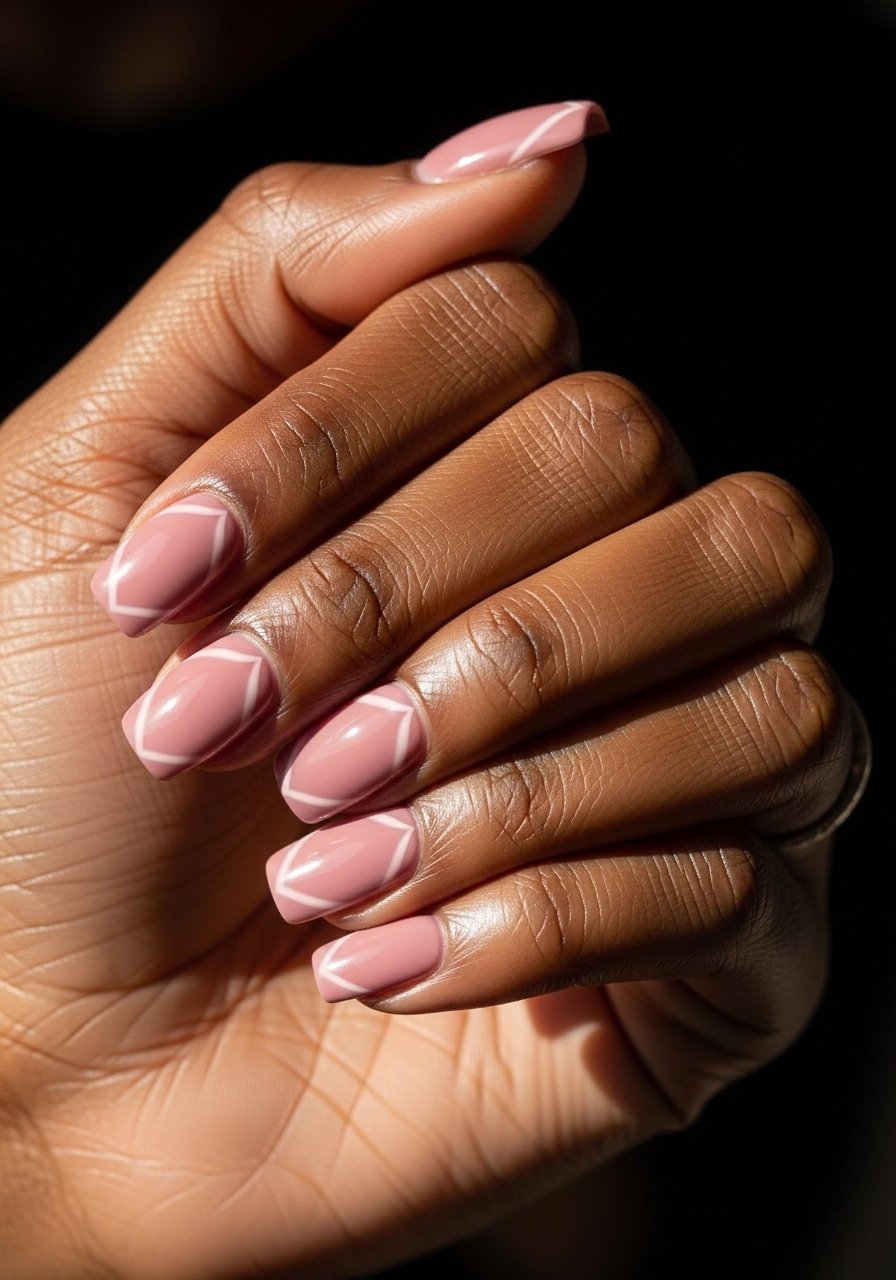
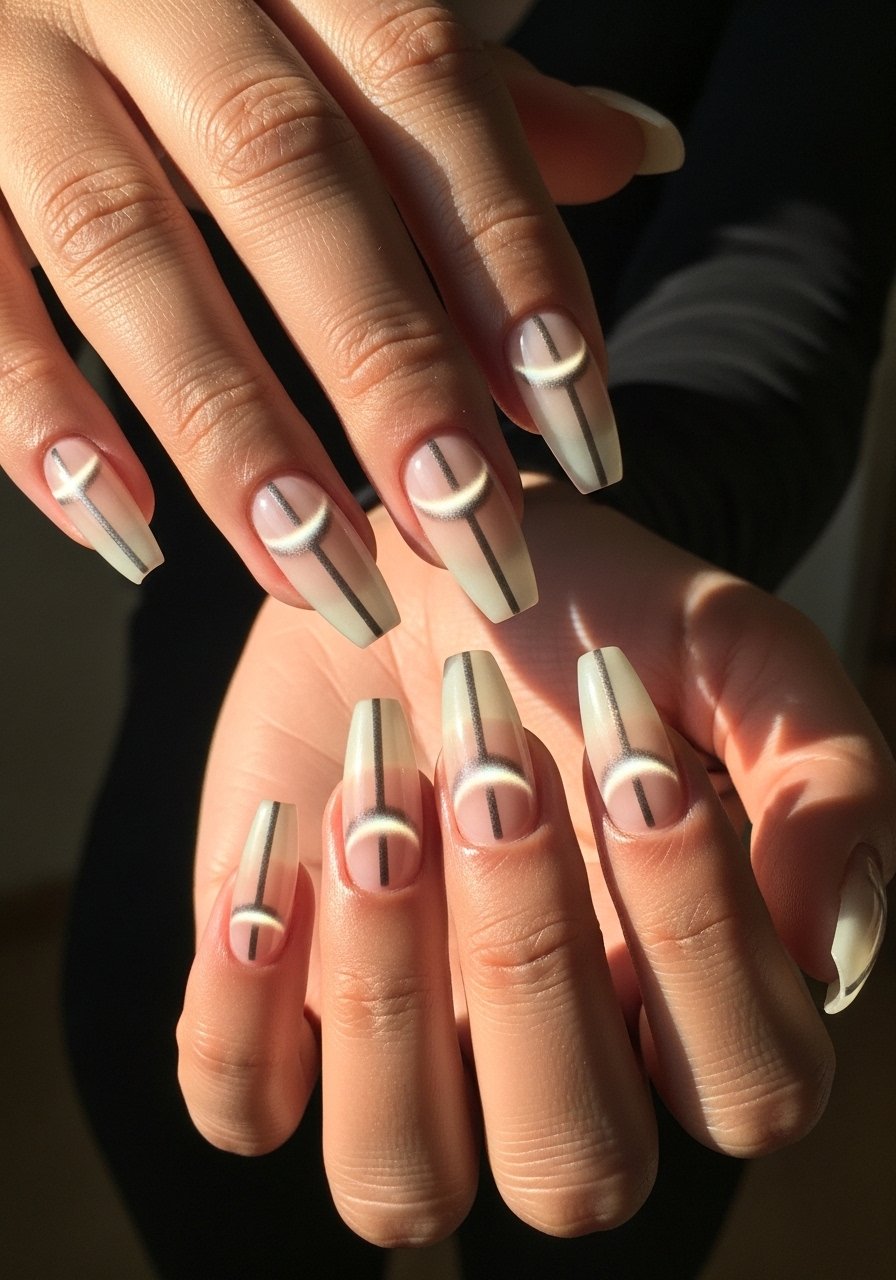
3. Negative Space Cat Eye
Style/Vibe: Clean Negative Space
Best For: Medium nails / minimalist outfits
Skill: Intermediate
This is one of those angles competitors often miss, but it is great for grown-out tips and people who want something modern. Leave a crescent bare at the cuticle, paint a thin cat eye band across the middle, and the contrast reads intentional. I use a thin striping brush to define the bare arc, then magnet the polish on the painted portion for 10 seconds. It feels lighter on the hand and saves polish. Try a metallic shade for the band and a sheer nude base to keep it low-cost.
Mistake to Avoid: Overfilling the negative space so the bare area looks accidental.
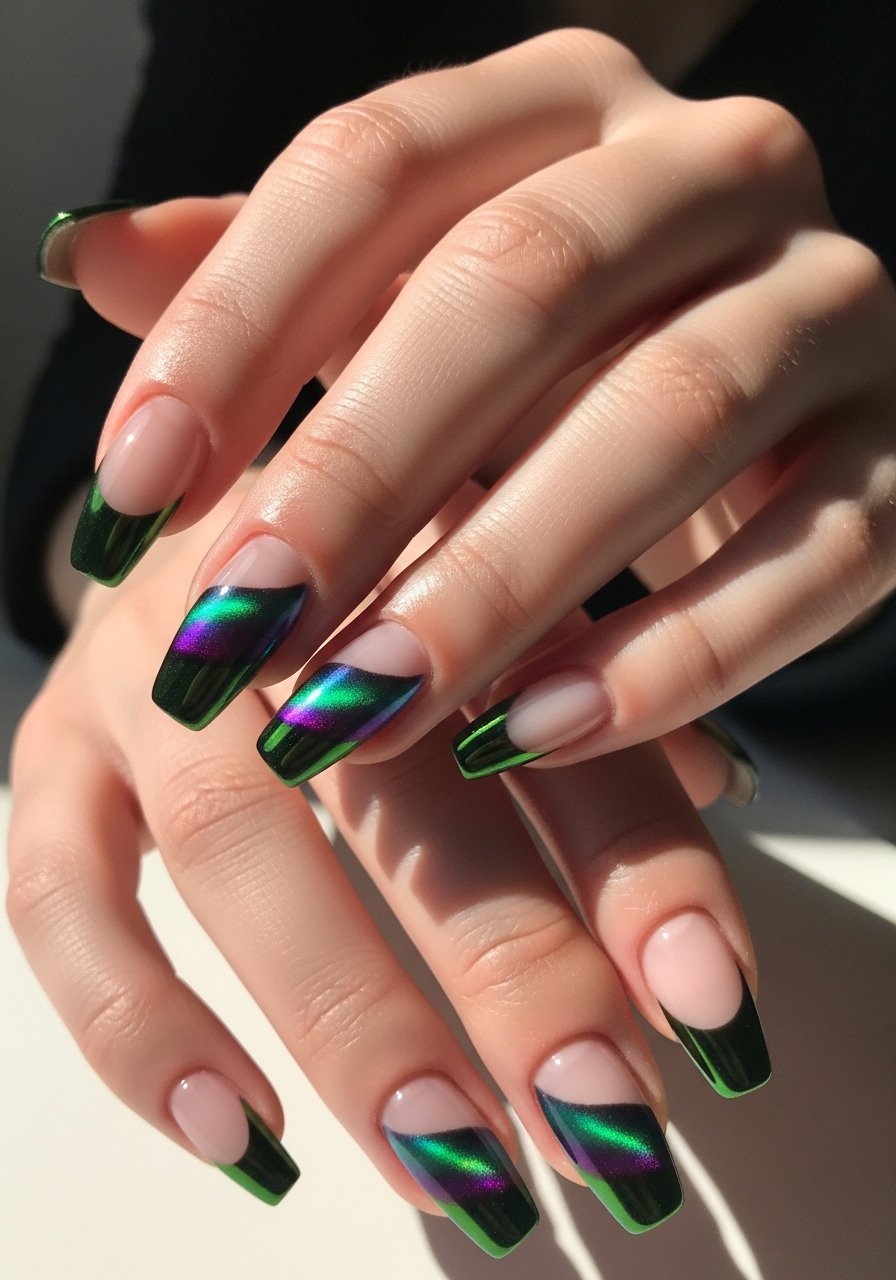
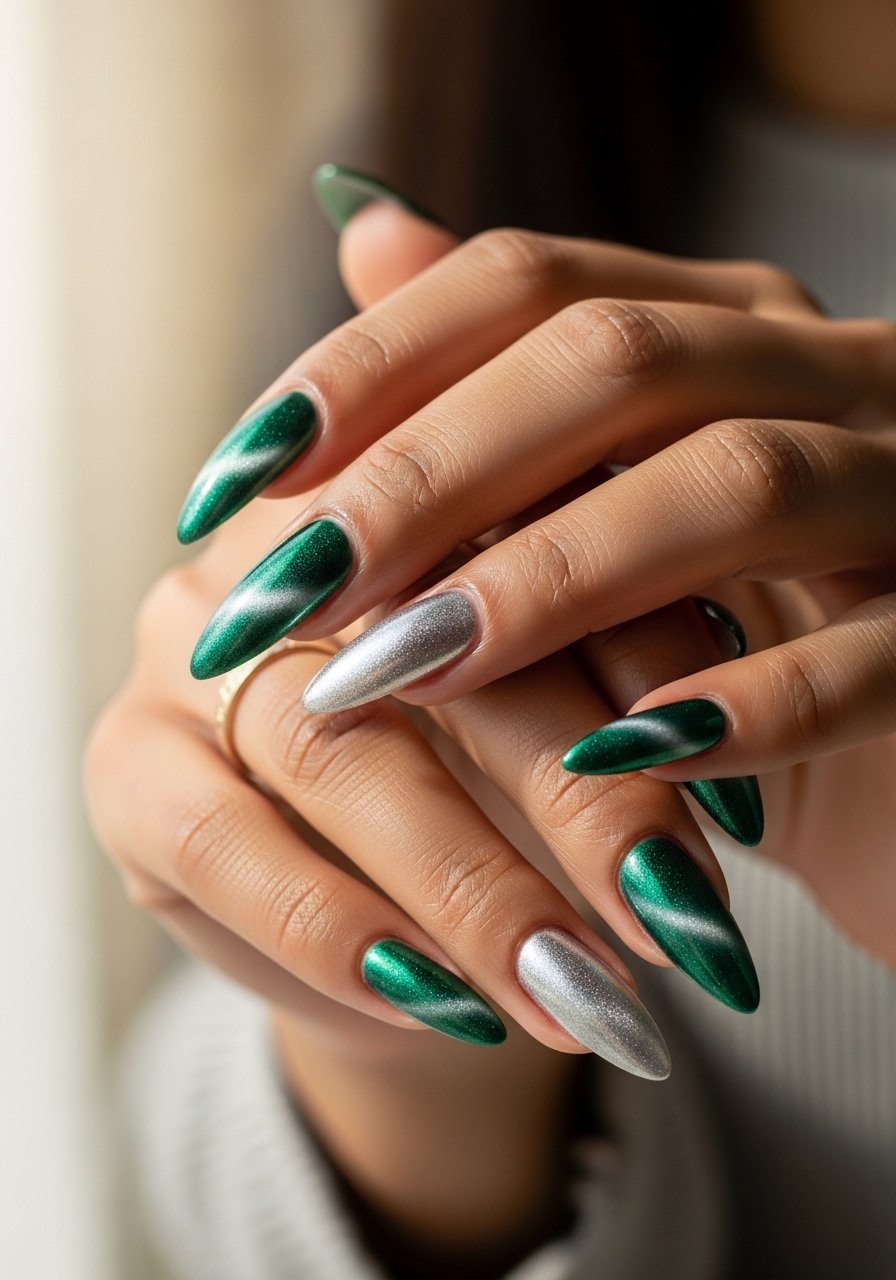
4. Two-Tone Diagonal Cat Eye
Style/Vibe: Two-Tone Split
Best For: Statement mani / nights out
Skill: Intermediate
Diagonal color blocking that meets a cat eye stripe amps mood without extra length. The two tones create depth because the magnet pulls pigment toward the junction line. Tape a clean diagonal, paint one side at a time, and remove tape before final cure to avoid lifting. I usually do two thin coats per side, cure, then magnet the bronze portion while the top coat is still slightly tacky so the pigment moves easily. Use a contrast color for impact and a firm LED lamp if you are using gel.
Mistake to Avoid: Removing tape too late and peeling polish off with it.
5. Chrome-Blend Cat Eye
Style/Vibe: Mirror-Edge Blend
Best For: Long nails / special occasions
Skill: Advanced
Mixing chrome powder over a magnetic base adds a reflector sheen that makes the cat eye read almost three-dimensional. Buff the surface lightly, apply a non-wipe top coat, cure, then rub chrome powder and finish with another top coat. Use the magnet under a thin magnetic layer first so the powder has something to catch. I use a soft eyeshadow applicator and a small amount of powder, patting rather than rubbing to keep the cat eye line sharp. Expect a few extra minutes for finishing.
Mistake to Avoid: Over-rubbing chrome powder and muddying the cat eye line.
6. Matte Cat Eye With Gloss Stripe
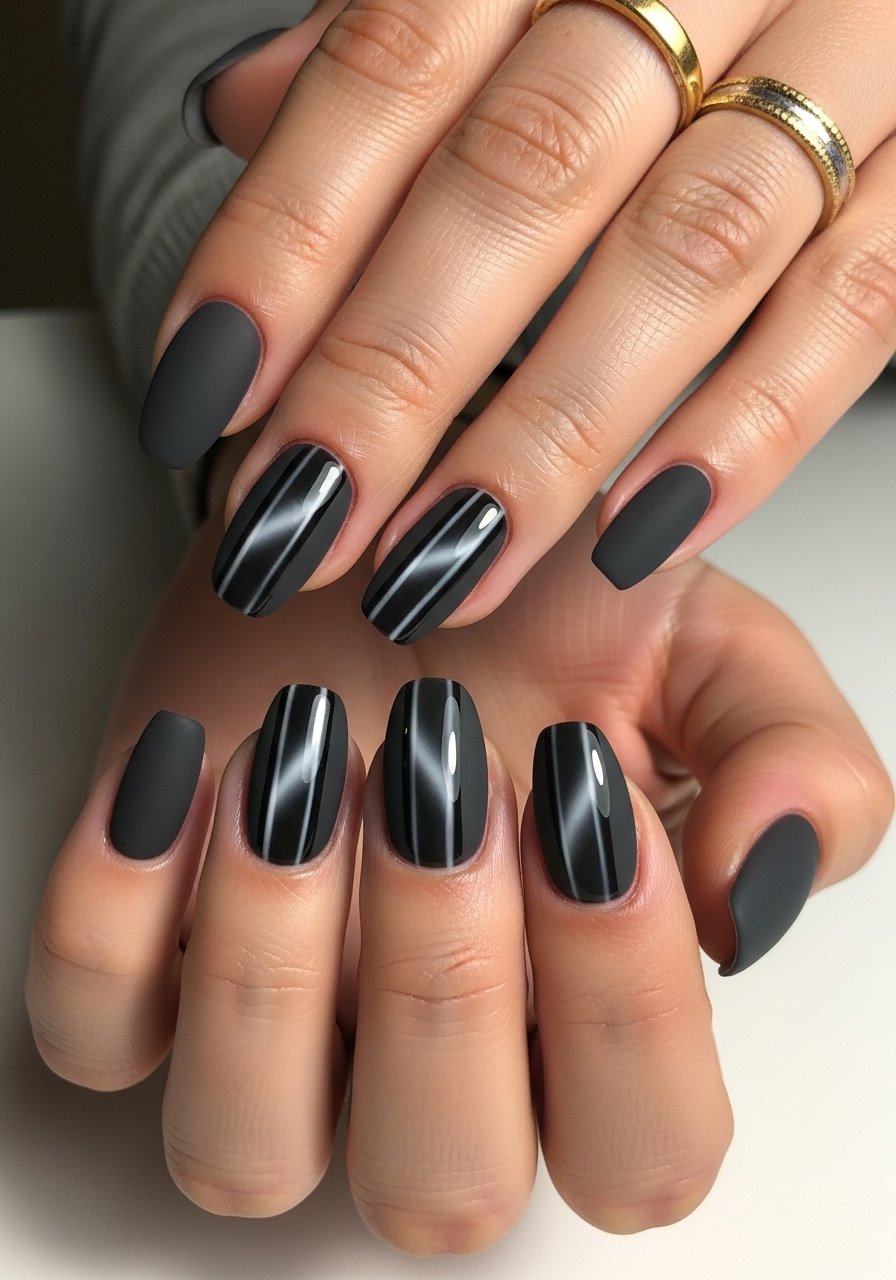
Style/Vibe: Matte Contrast
Best For: Work-appropriate / medium nails
Skill: Beginner
A matte finish paired with a glossy cat eye stripe looks grown-up because of the contrast in texture. Apply a matte top coat over your base, then carefully add a thin glossy cat eye stripe and cure only that stripe if using gel. The light breaks on the glossy band and gives a focal flash. This is quick and budget-friendly since it uses one color and two top coats. Use a small magnet for a tight line and a matte top coat you can trust.
Mistake to Avoid: Applying the matte coat too soon and losing the magnet pull.
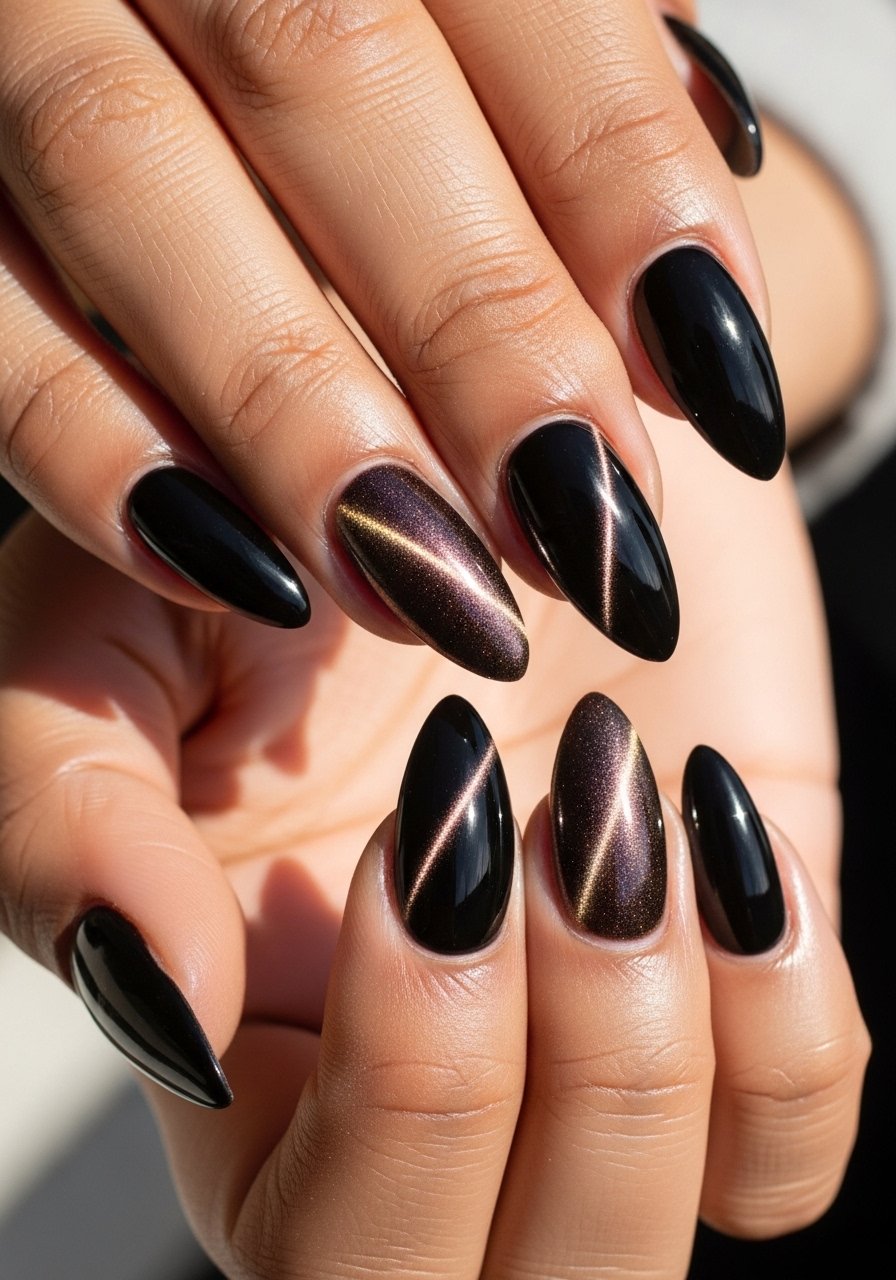
7. French Tip Cat Eye
Style/Vibe: Tip-Only French
Best For: Short to medium nails / bridal or office
Skill: Beginner
Replace the classic white tip with a narrow cat eye shimmer at the free edge for a refreshed French mani. It keeps the neat line of a French while adding movement when you turn your hand. Paint a sheer nude base, then use a thin striping brush to add the colored tip and magnet immediately for 6 to 8 seconds. It takes slightly more precision than a painted tip but far less magnet skill than a full-coverage cat eye. This one stretches salon looks at home.
Mistake to Avoid: Making the tip too thick so it reads clumsy instead of refined.
If any of these have you ready to actually try something, here are the products doing most of the work.
Magnetic Cat Eye Essentials
Polishes & Powders:
- Magnetic nail polish (~$8-18), an affordable starter option for testing lines.
- Chrome powder (~$6-15), for reflective accents.
Tools:
- Magnet wand set (~$10-22), several shapes are useful.
- Thin striping brushes (~$5-12), for negative space and tips.
Finishing & Care:
- Quick-dry top coat (~$6-15), prevents drag.
- Cuticle oil (~$4-12), keeps the manicure looking fresh longer.
8. Glitter-Edge Cat Eye
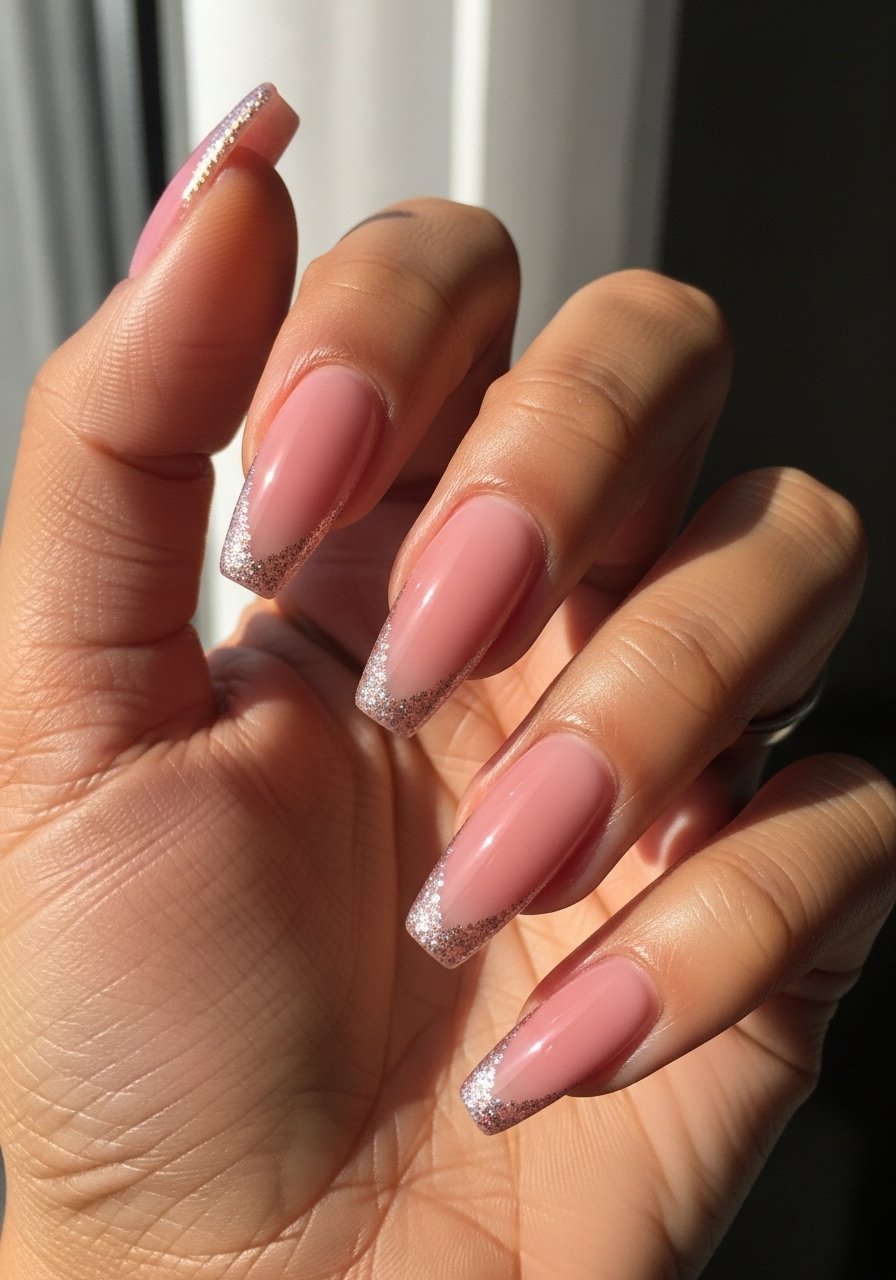
Style/Vibe: Glitter Edge
Best For: Long nails / parties
Skill: Intermediate
A glitter edge frames the cat eye without covering it, which creates a photographed-friendly flash. Paint the base, magnet the cat eye center, then apply a narrow glitter band along the free edge and seal. The glitter gives dimension because it reflects different light than the magnetic pigment. I use a micro applicator to place glitter precisely and a thin coat of top coat over the glitter so it smooths without burying the cat eye. This is moderately time-consuming but worth it for a special night.
Mistake to Avoid: Applying glitter too thickly and obscuring the cat eye shimmer.
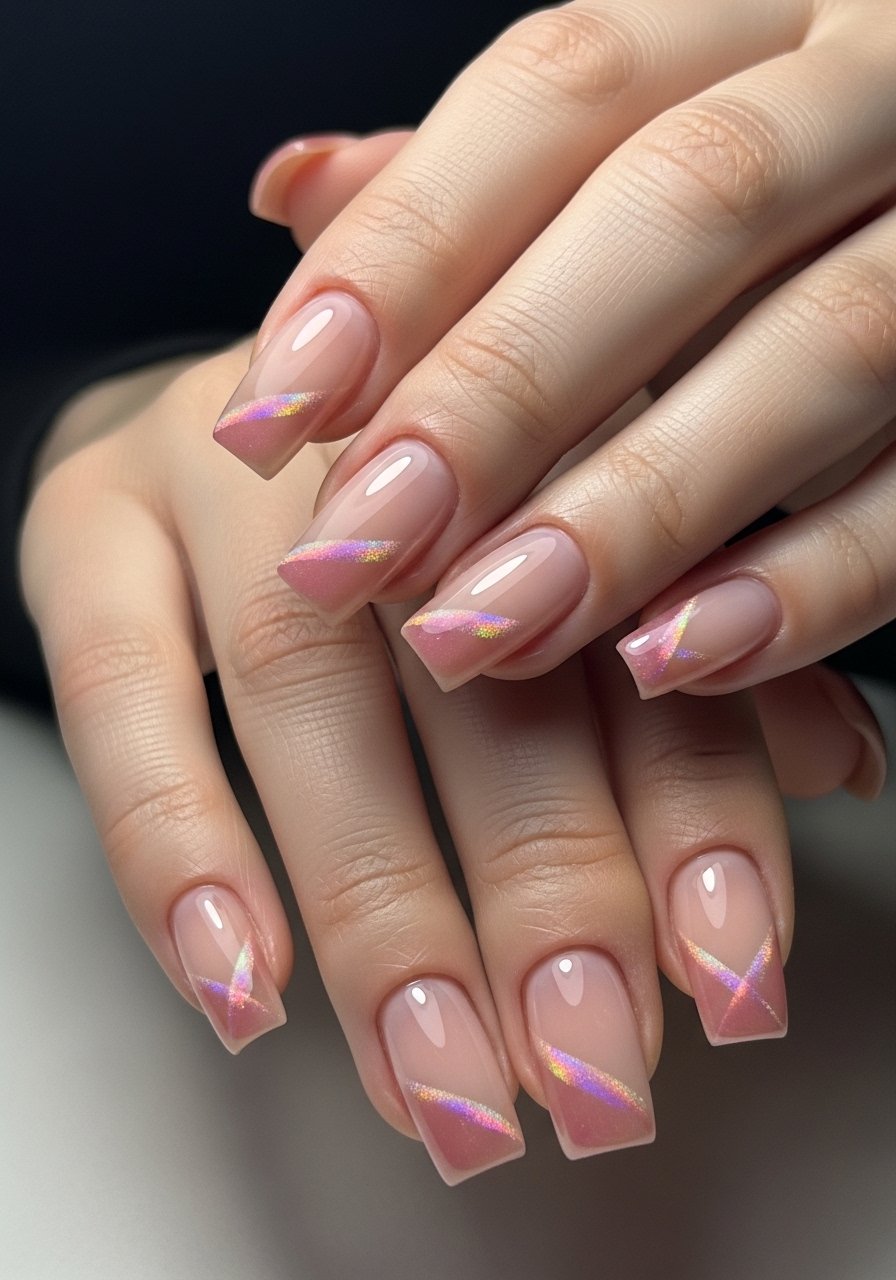
9. Ombre Cat Eye Fade
Style/Vibe: Soft Ombre Fade
Best For: Medium nails / everyday glam
Skill: Intermediate
Ombre gives a gentle depth boost and makes the cat eye line feel built in. Sponge a soft gradient, then apply a thin magnetic coat where you want the stripe. The magnet pulls pigment so the stripe follows the lighter-to-dark shift and appears natural. For best results do two gradient layers and one magnetic layer, curing each for 45 to 60 seconds with gel. This is slightly more advanced because blending requires timing, but it reads luxurious without a big price tag.
Mistake to Avoid: Sponging with thick polish and creating texture under the magnet.
10. Marble Plus Cat Eye
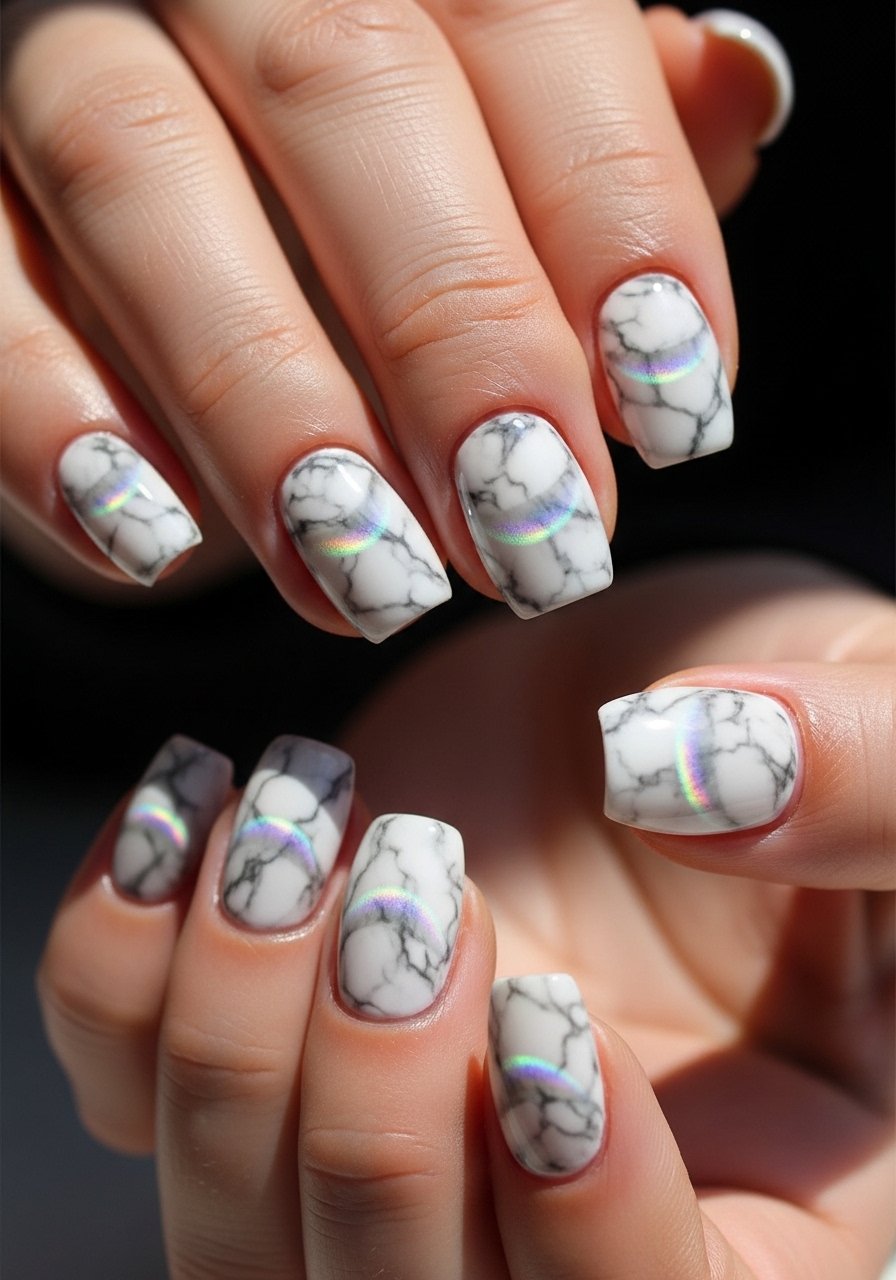
Style/Vibe: Marble Accent
Best For: Medium nails / creative looks
Skill: Advanced
Marble and cat eye together are unexpected. Create veins with a fine brush in thin polish, cure, then add a narrow magnetic stripe along a primary vein so the shimmer follows the natural line. It reads artistic because the magnet amplifies certain veins and keeps others soft. I usually thin my polish with one drop of nail thinner to get feathered veins. This takes care and patience but makes for a manicure that looks editorial.
Mistake to Avoid: Trying to magnet over uncured marbling and smudging the veins.
11. Builder-Gel Cat Eye for Strength
Style/Vibe: Reinforced Visuals
Best For: Weak natural nails / long-wear needs
Skill: Intermediate
If you need the look to last and your natural nails are thin, a builder-gel layer gives structure while still allowing a magnetic effect on top. Build a thin sculpting layer, cure fully, then paint a magnetic layer and magnet as usual. The depth signal here is to keep the builder-gel thickness under 0.5 millimeters so it does not blunt the shimmer. It feels more like a salon service but saves repeated fills and chipping. Use a firm LED lamp and a bonded base coat for best adhesion.
Mistake to Avoid: Applying builder-gel too thick and losing nail flexibility.
Cat Eye Mani Habits
Thin coats beat one thick coat every time. Three thin layers of magnetic nail polish look smoother and hold better than one gloopy layer.
Grab cuticle oil. A quick nightly rub keeps the skin tidy and stops polish edges from lifting after a few days.
If you are doing gel at home, cure each thin layer for the full recommended 60 seconds under an LED lamp. A compact LED lamp takes up little space and speeds the process.
Most people drag top coat over wet magnet lines. Instead, flash cure the magnet layer for 5 to 10 seconds, then finish with a full cure. Try a no-wipe gel top coat to keep the shimmer crisp.
